NC Forester Build

  • HTML tutorial

nc_forester

Rank I
Launch Member

Contributor II

271
Charlotte, NC, USA
First Name
Bryan
Last Name
Meyers
Member #

24931

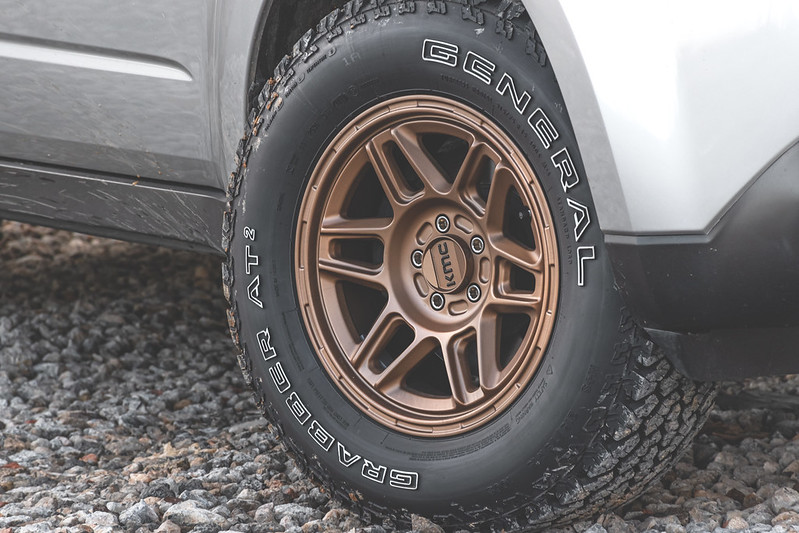
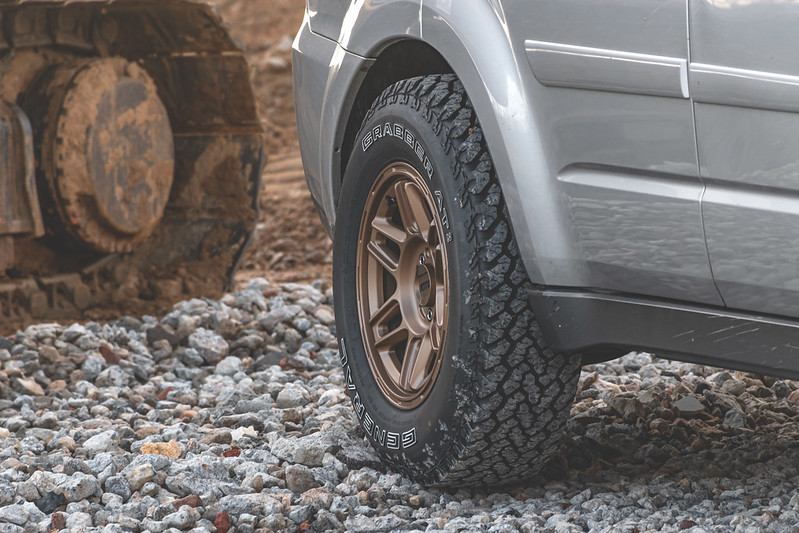
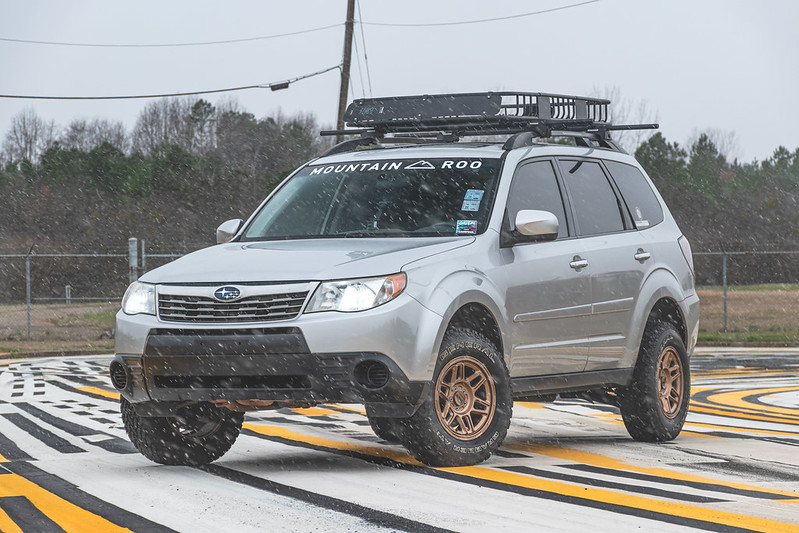
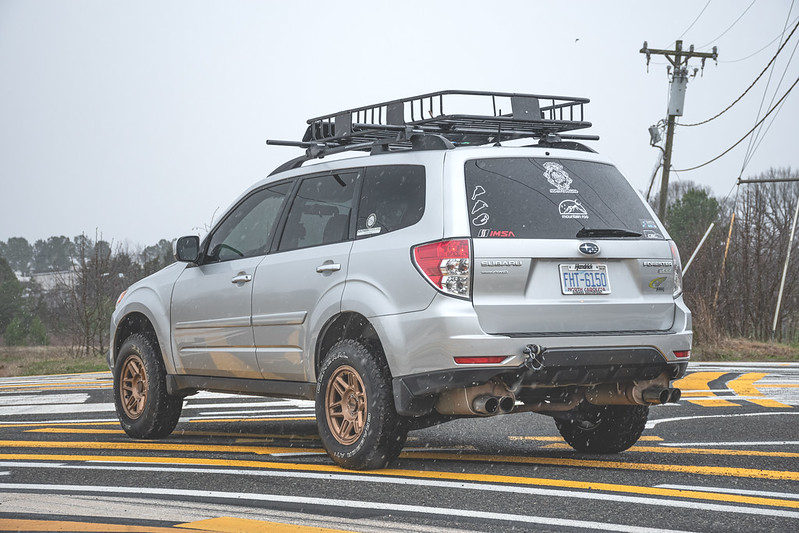
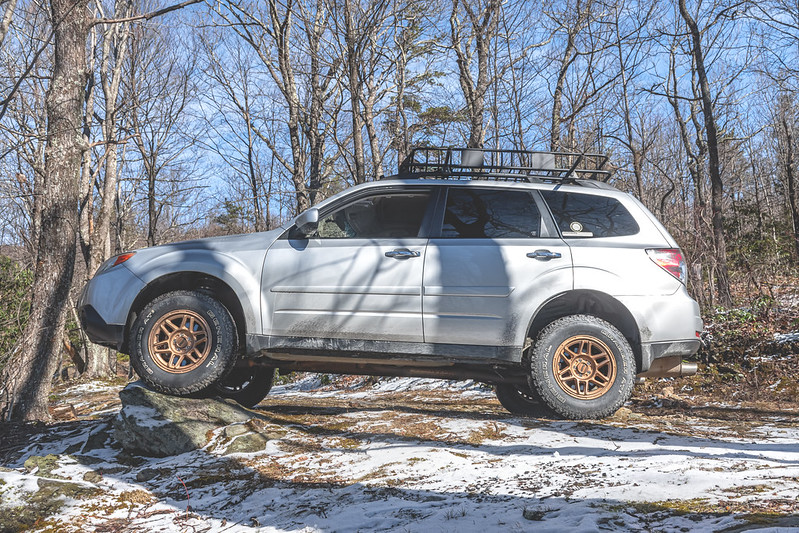
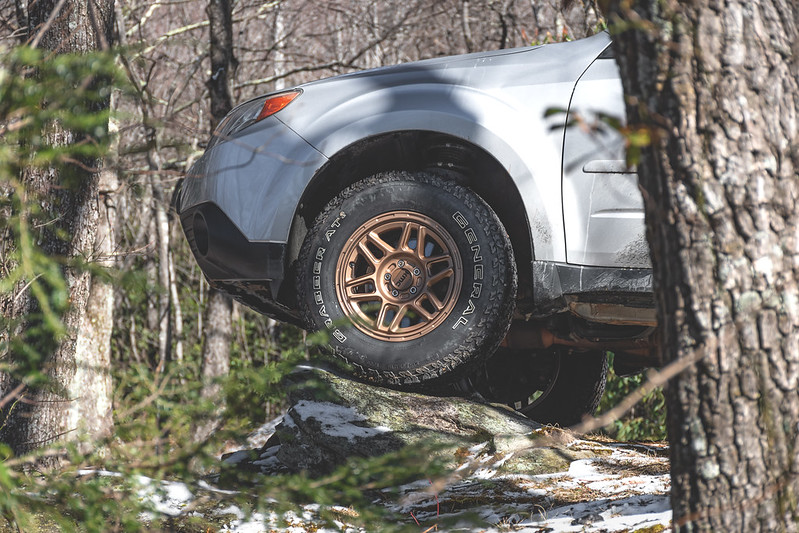
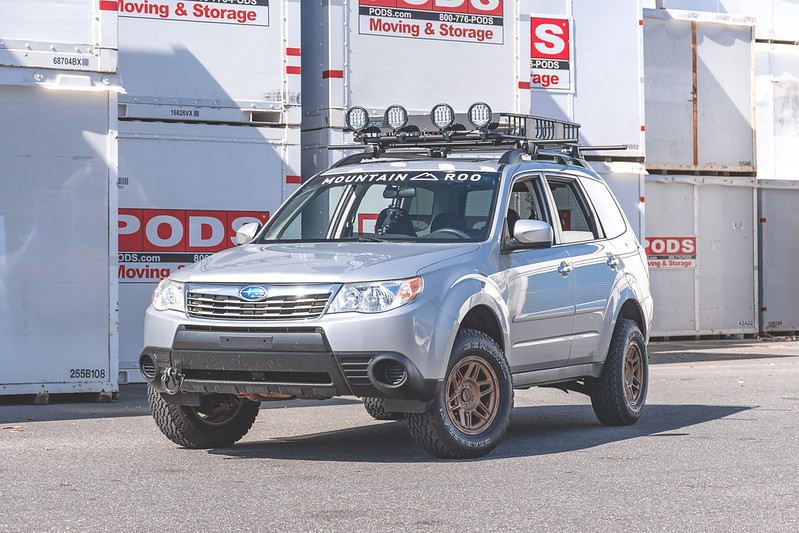
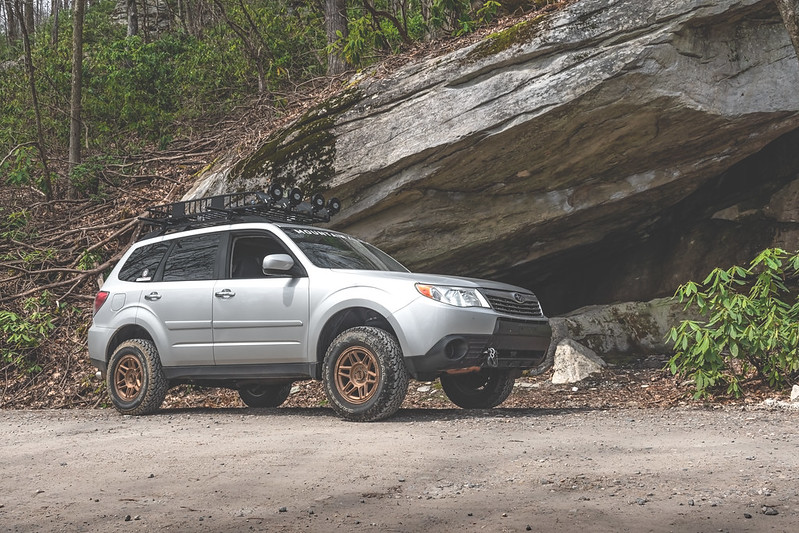
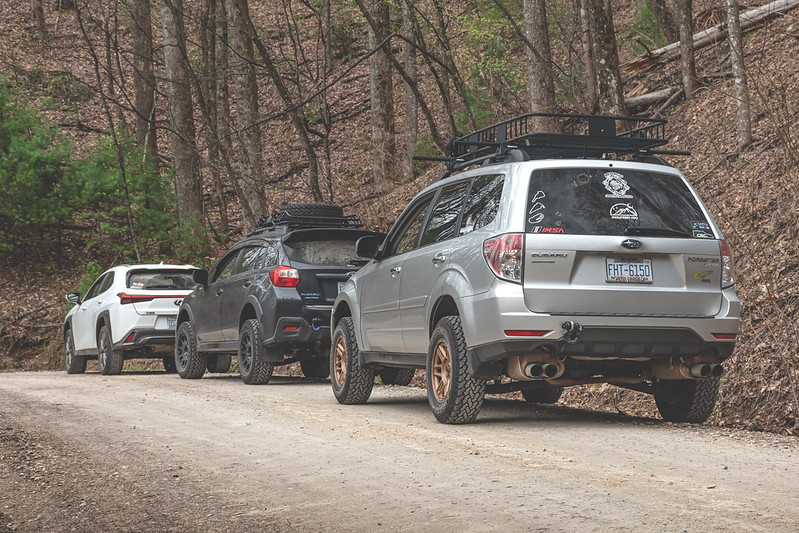
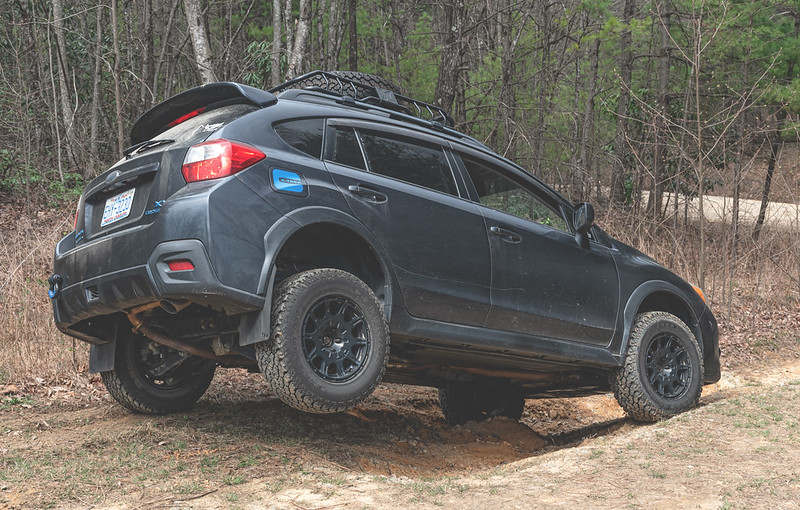
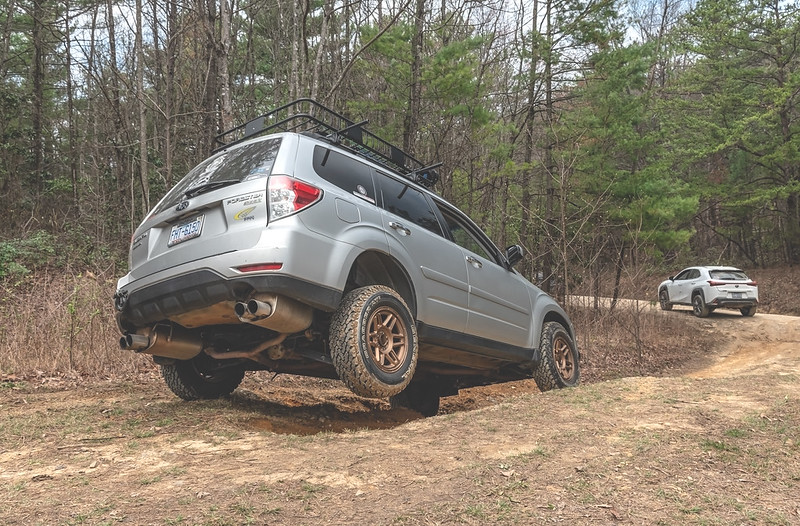
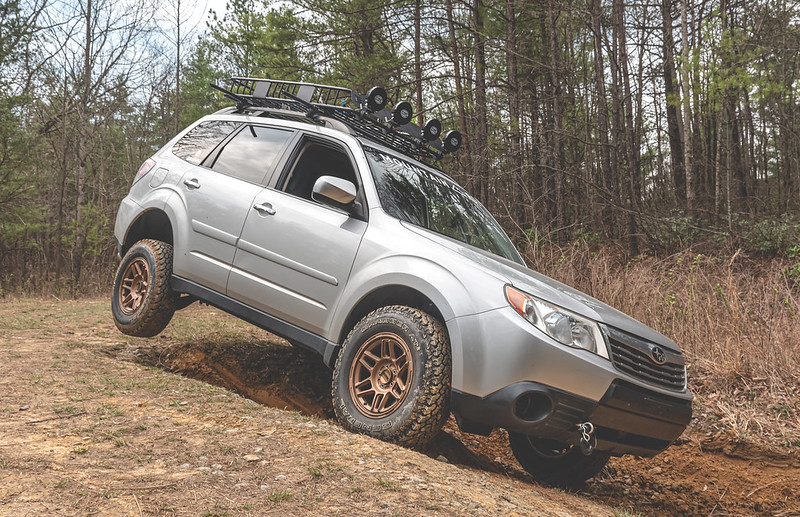
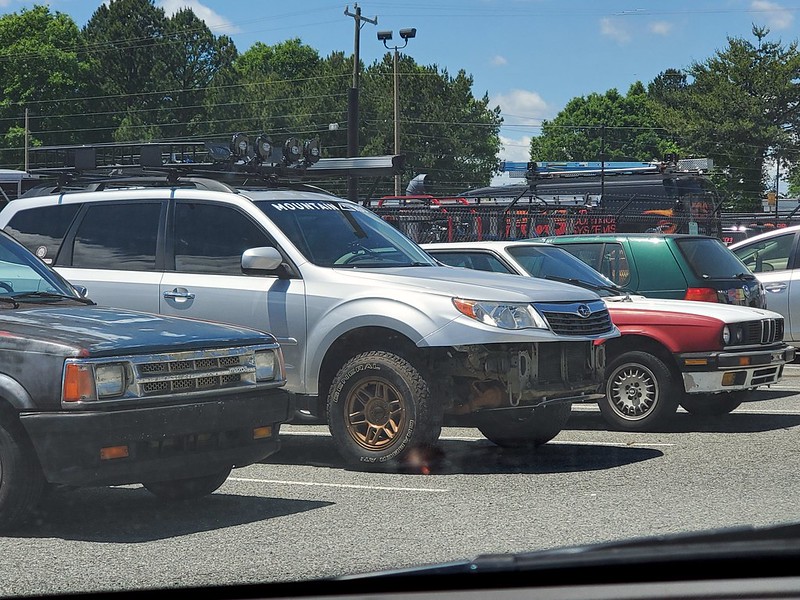
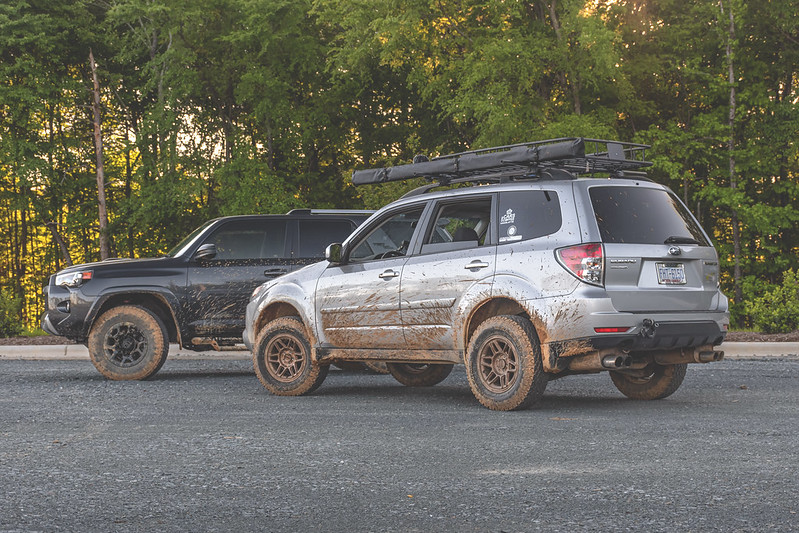
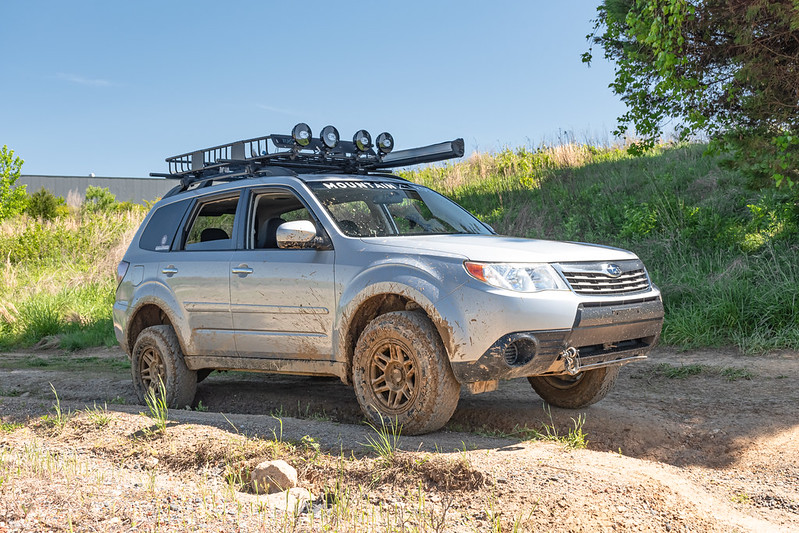
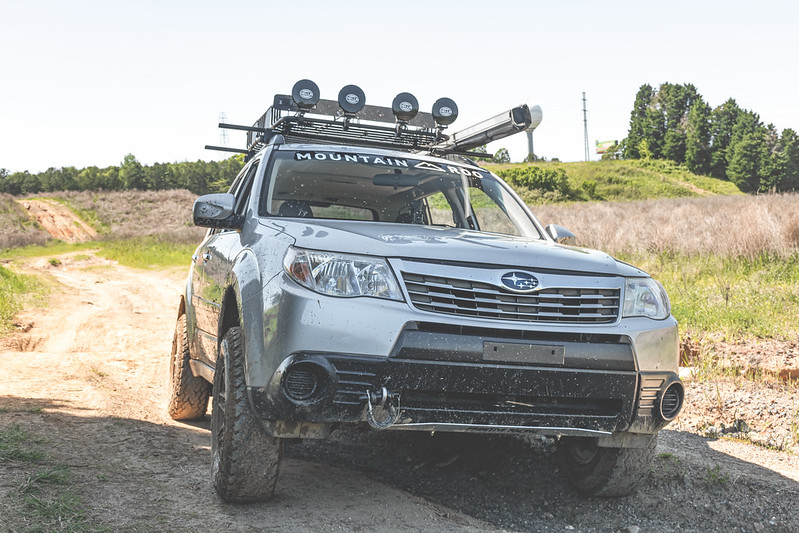
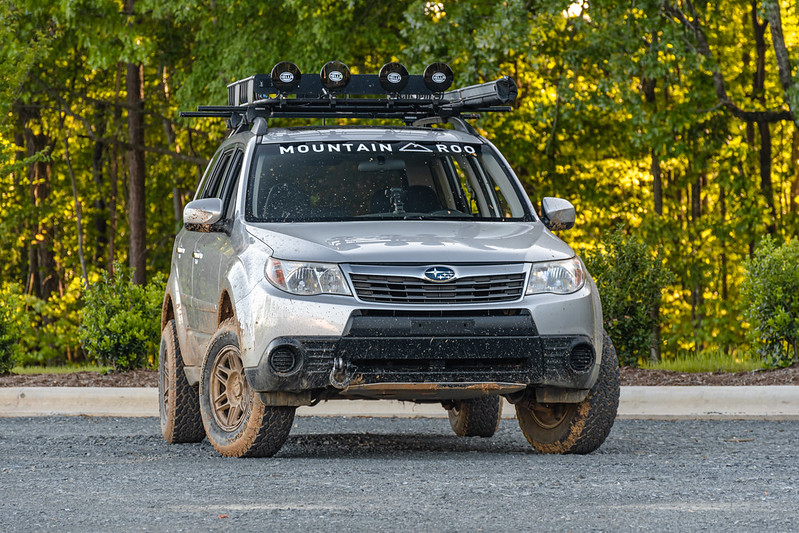
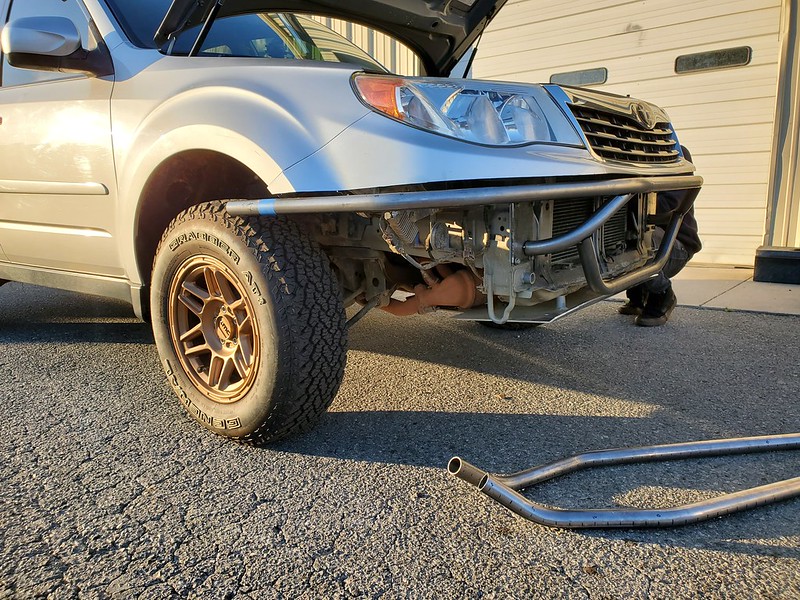
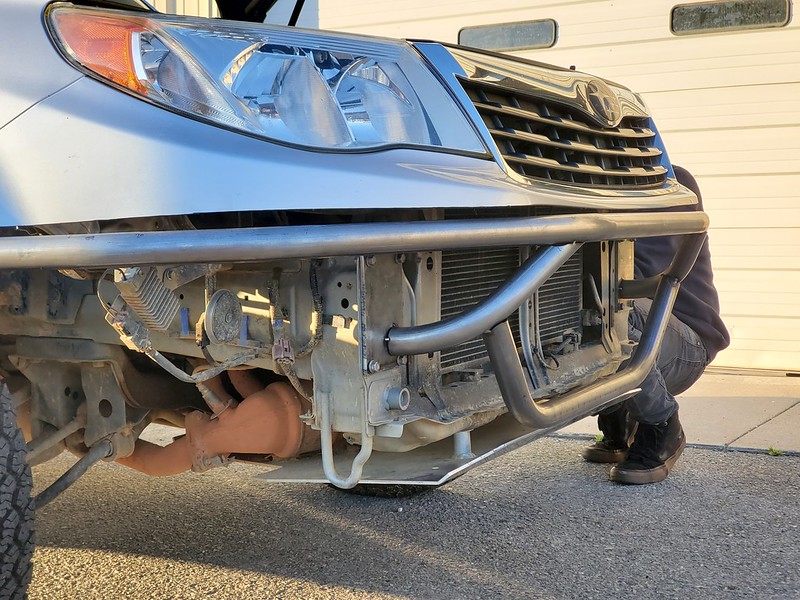
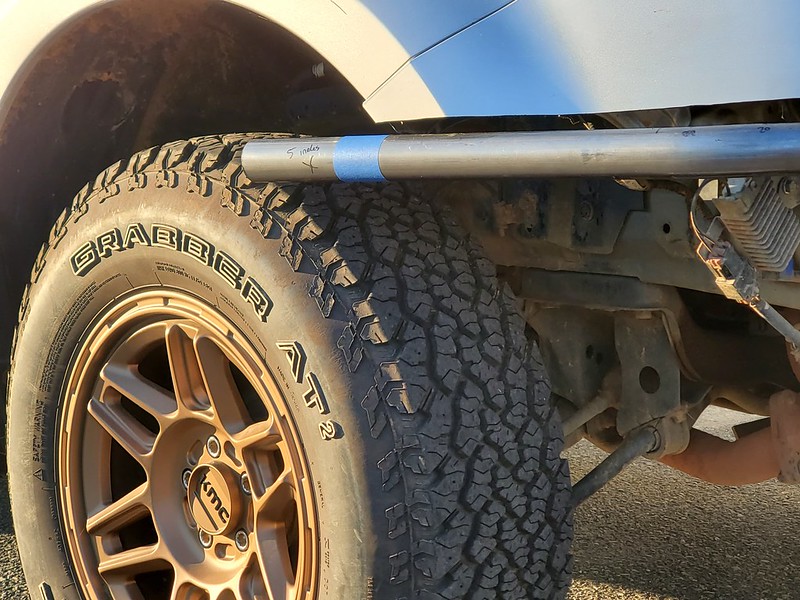
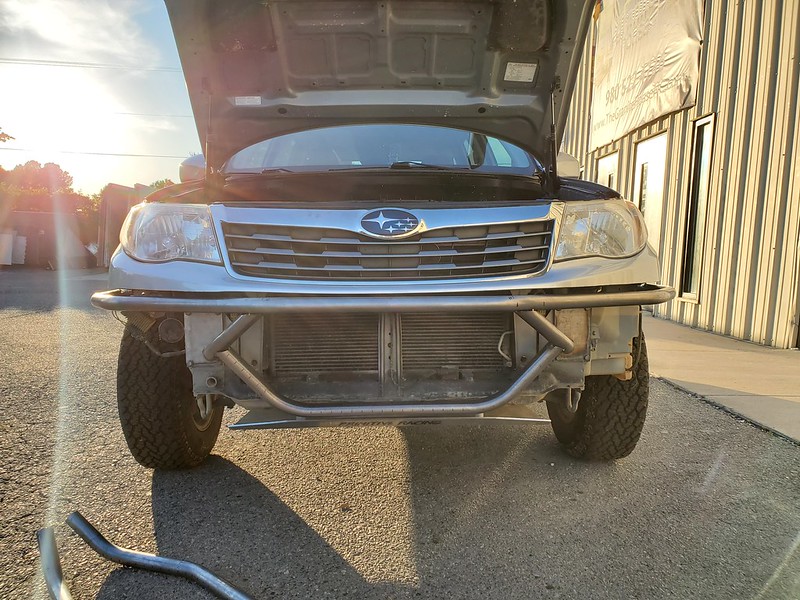
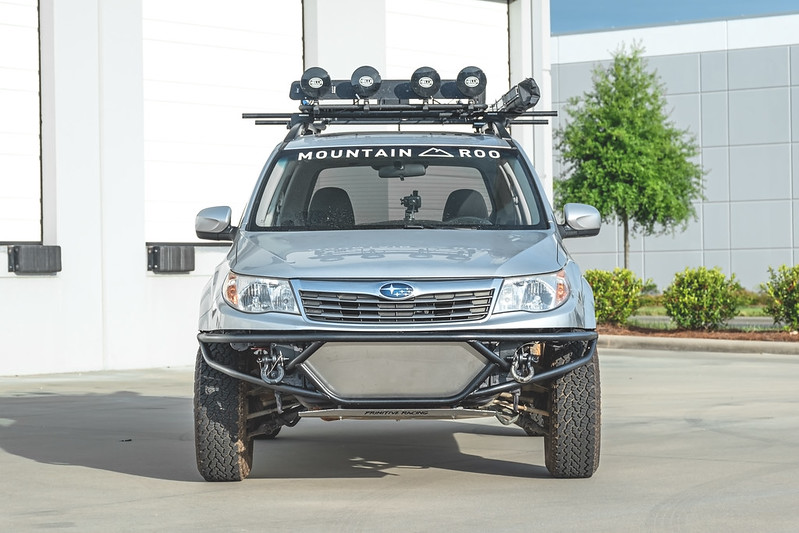
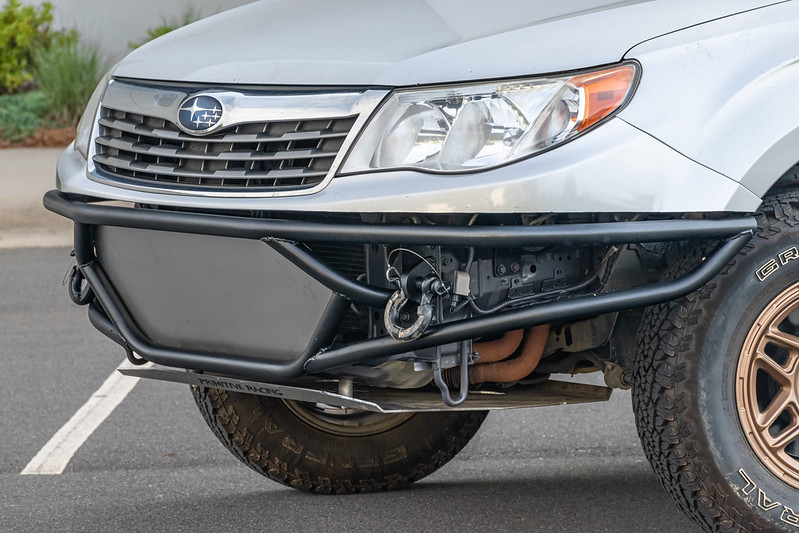
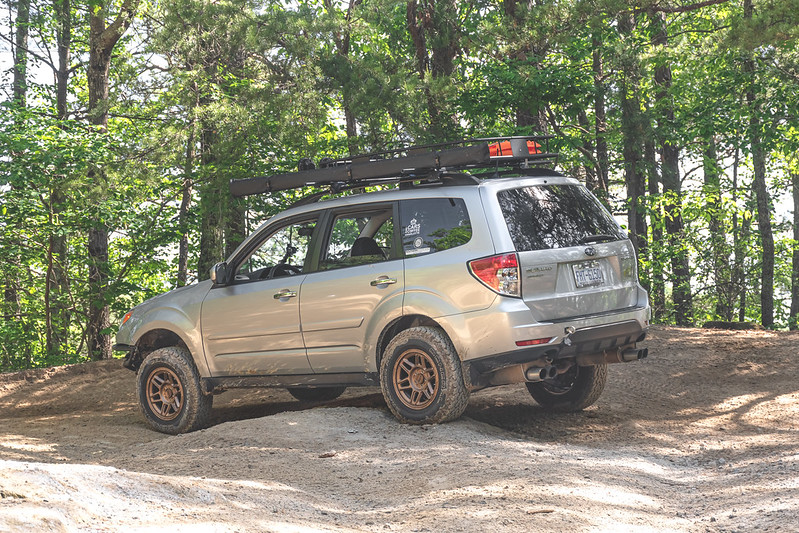
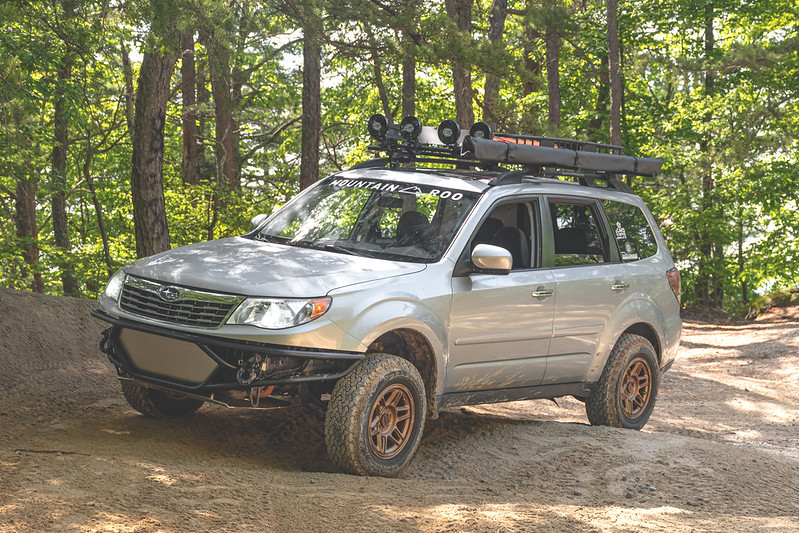
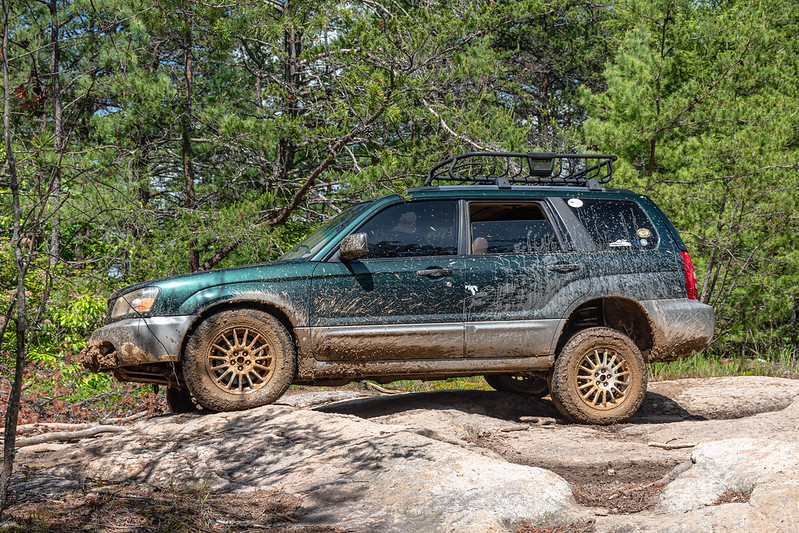
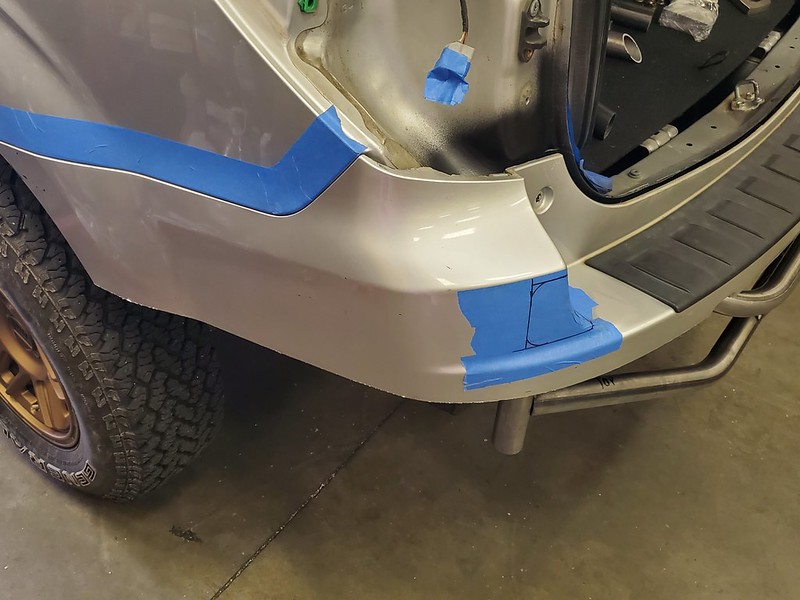
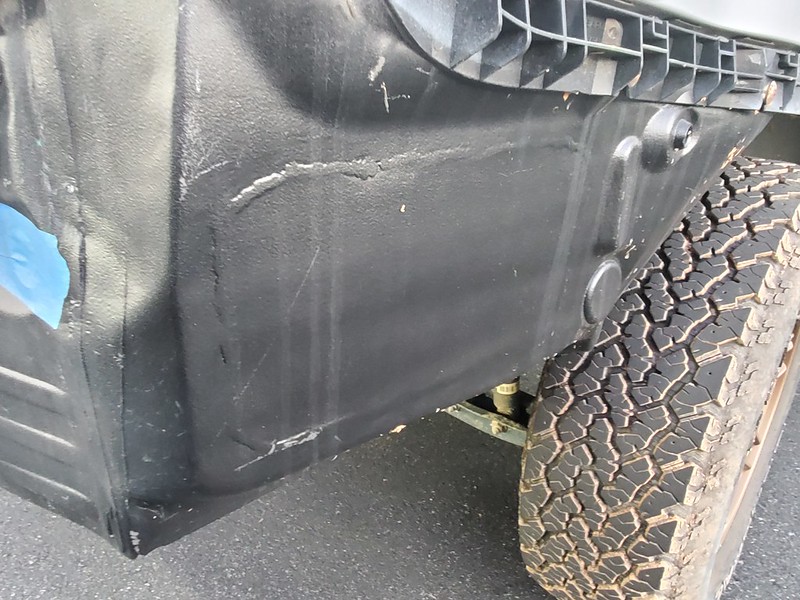
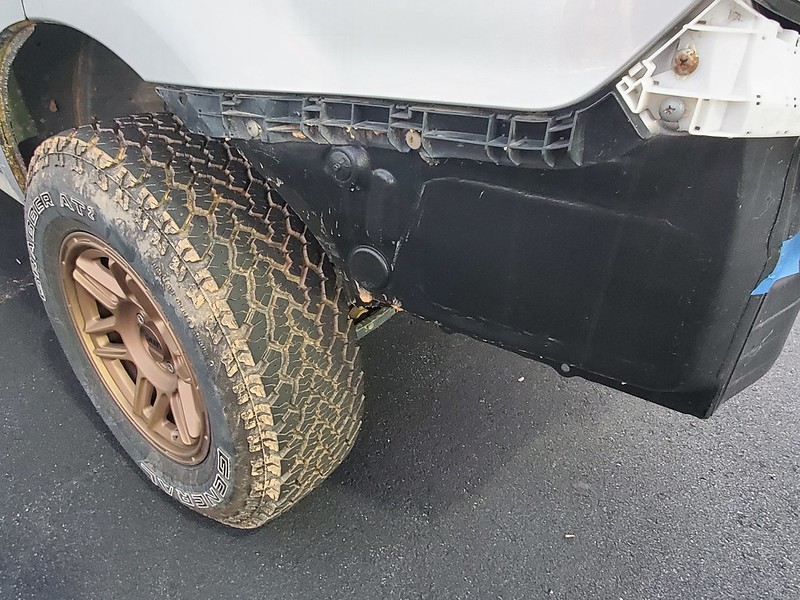
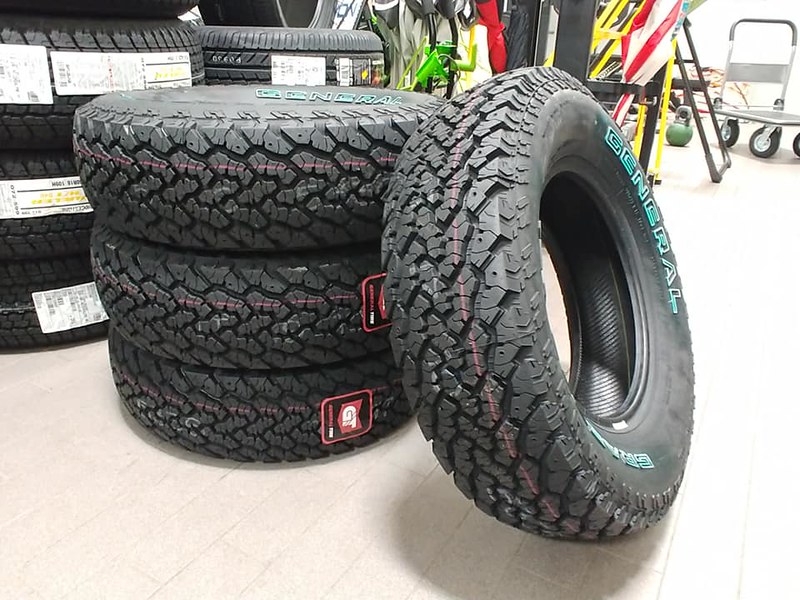
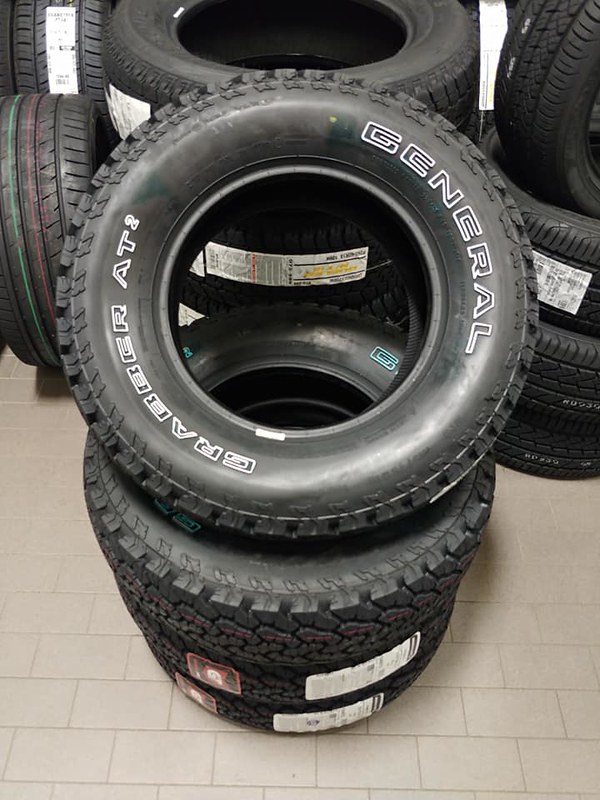
I ended up selling my Spacos and Coppers for a really good price which allowed me to purchase my new setup with no extra money. I wanted a more grippy tire but still needed it to be quiet enough for daily driving. After a lot of research I ended up going with the General Grabber AT2's. This time around I went with a narrower width of a 215 but increased the sidewall profile to a 75. I would also be stepping down from a 17" to a 15" wheel. The reasoning for going with a 215 instead of a 225 or even a 235 is because of rubbing issues. Plenty of other Forester people running this exact setup have no issues so I went the safe direction. Looking at it now, I could definitely go back to a 235 with a little massaging of the pinch welds and maybe a few cuts of plastic hear and there which may be coming soonish. I bought the tires through discount tire this time around and the price I paid was around $118 each.


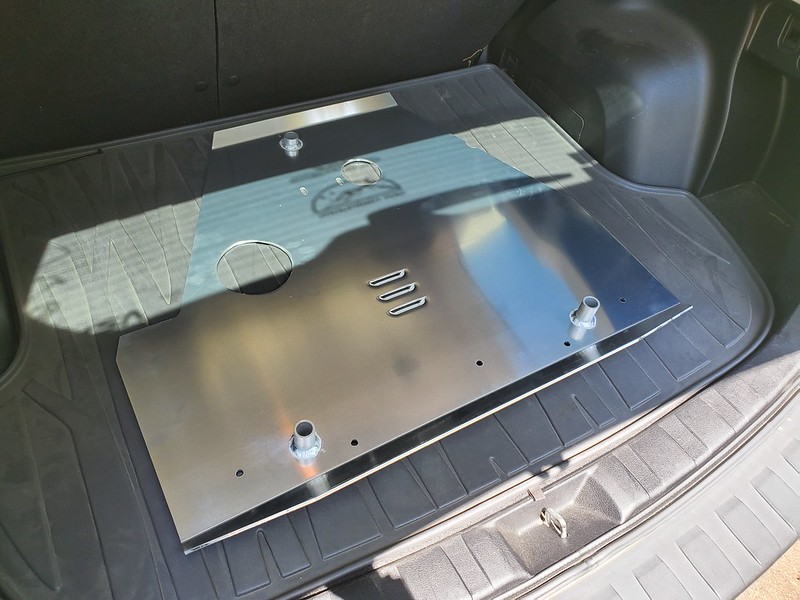
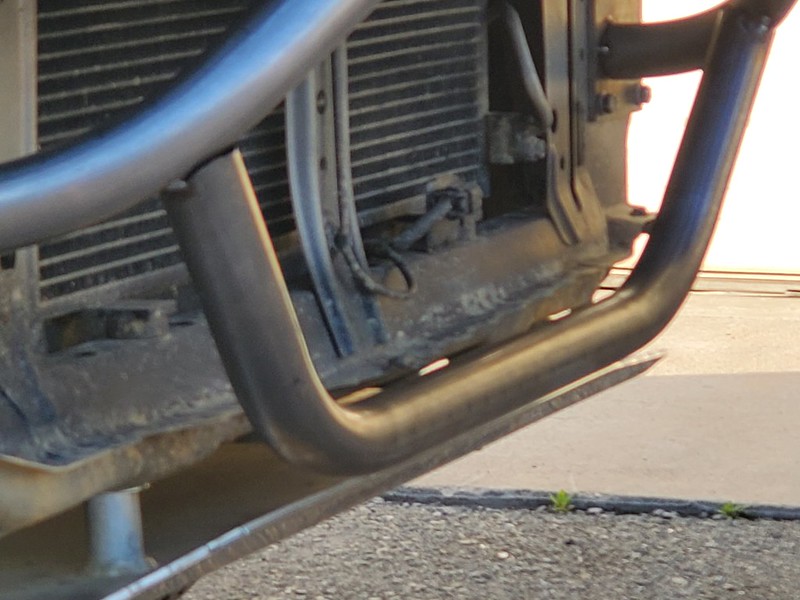
Untitled by BTM Graphix, on Flickr

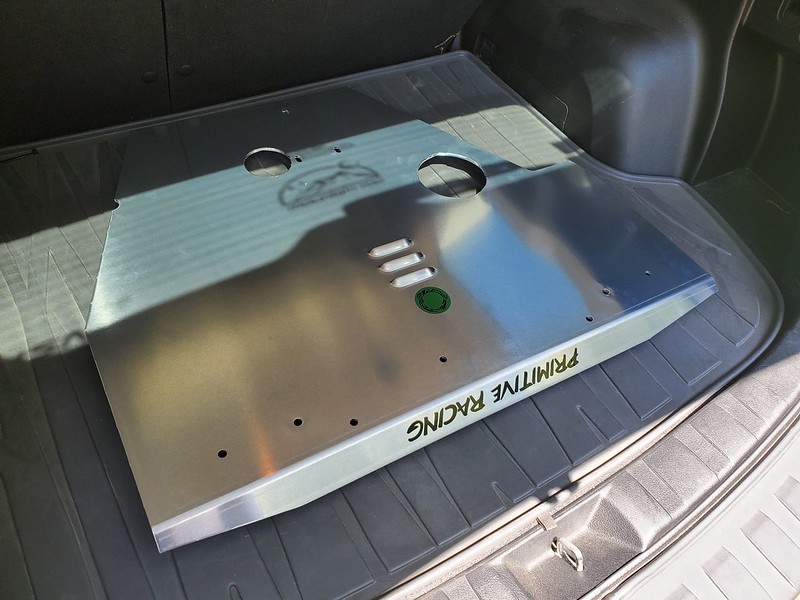
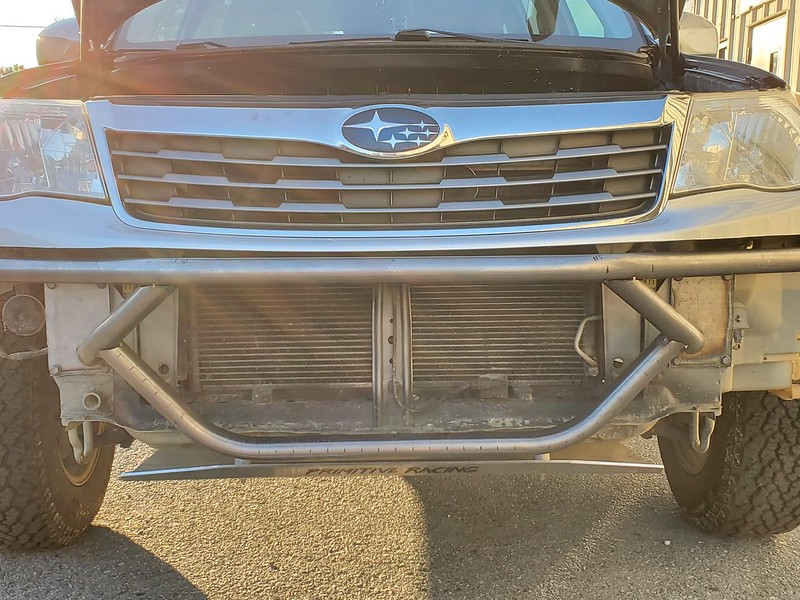
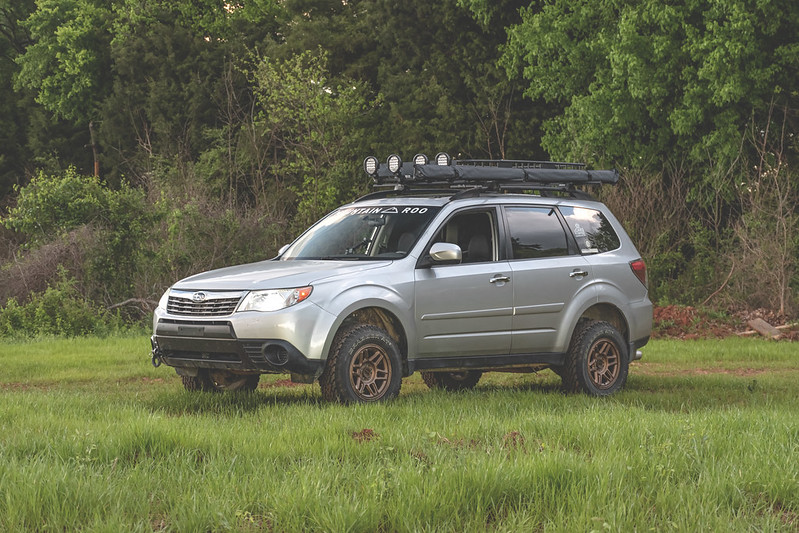
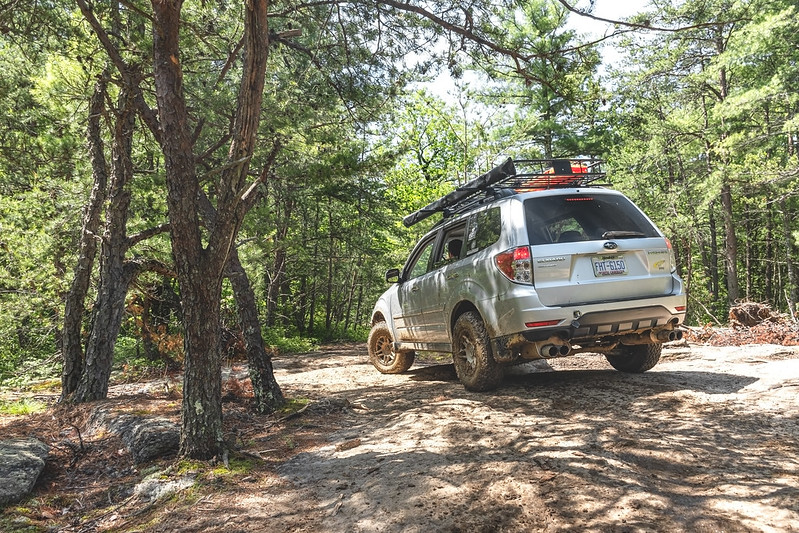
For wheels, I wanted something different that not a lot of people were running. I thought about and had added to my car the Relation Race Wheels 6 spokes but when I went to purchase them I had missed the cutoff for the discount pricing. I then looked at the Black Rhino Sandstorms. I had placed the order through a retailer on ebay but had received a message from them stating that these wheels would be on back order for at least 90 days. The retailer offered me a wholesale discount on a different set of wheels and so I went with the KMC KM716 Nomads. The nomads come in matte black and matte bronze and tbh I couldve went with either but the bronze stuck out to me more, not to mention that not many Subaru's were running this wheel. My biggest inspiration was TheTrailTrek on Instagram.
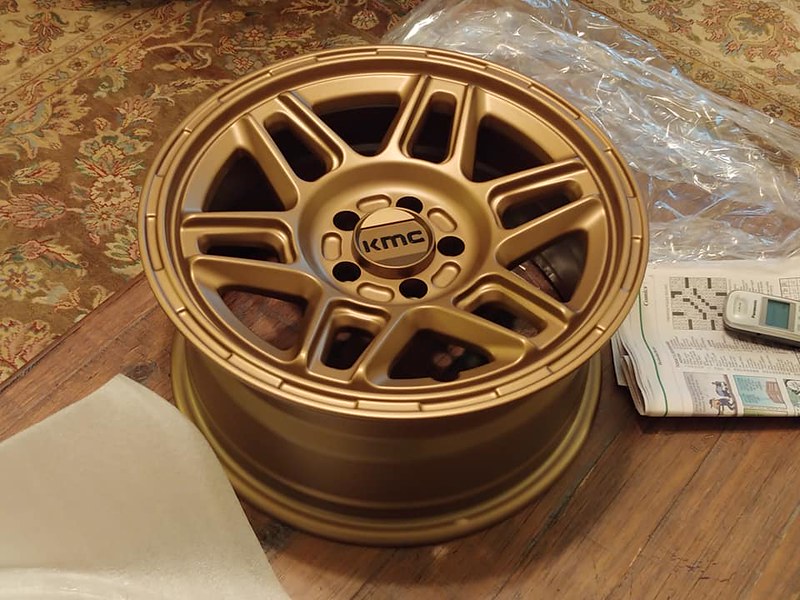
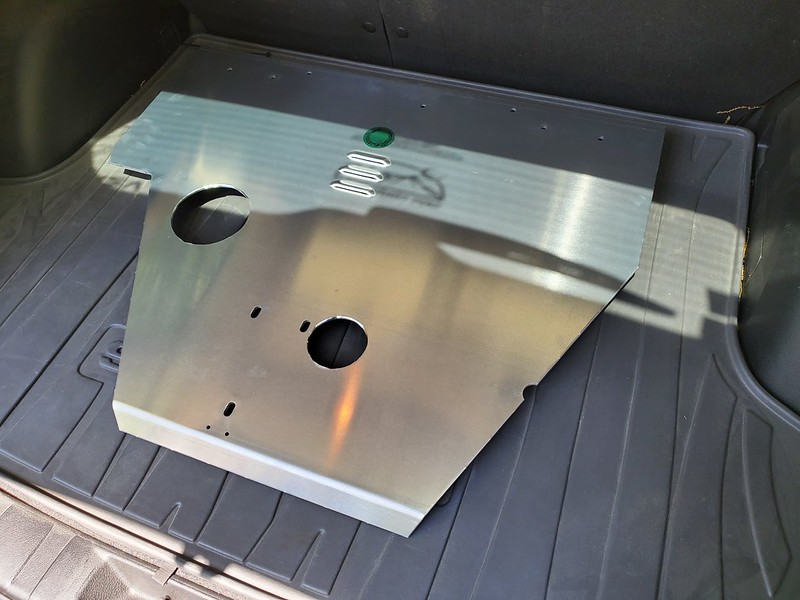
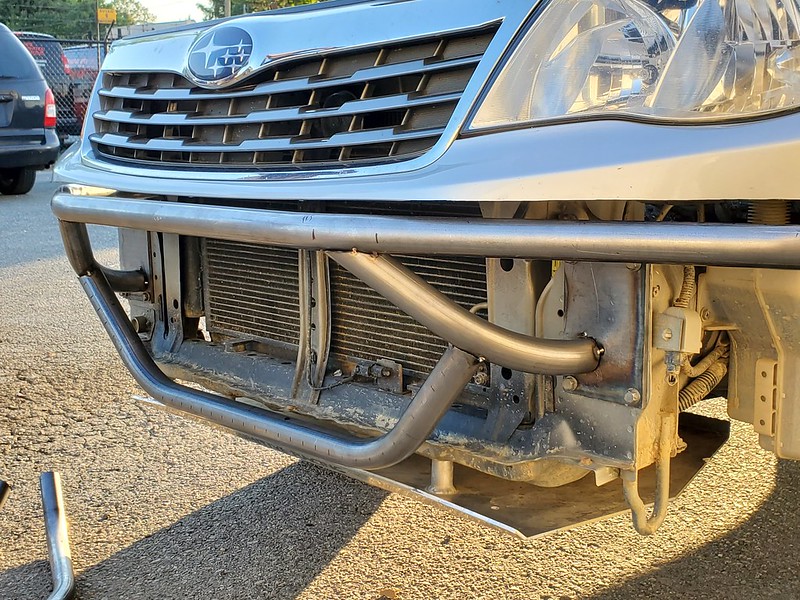
 

nc_forester

Rank I
Launch Member

Contributor II

271
Charlotte, NC, USA
First Name
Bryan
Last Name
Meyers
Member #

24931

Back in December I had placed an order for a 2" lift kit from Anderson Design Fab. They informed me that their kit would take a few weeks to make and that they too were on back order. One day I was just searching the classified on SubaruForester.org and found a guy down in GA selling his ADF kit for $200 less than retail. The kit had never been installed and ADF wouldnt take it back because the guy had waited too long to send it back. I jumped on that sale really quick, sent a deposit that night, and the guy shipped it out the next day.

The kit included a 2" front spacer, 2.5" rear spacer, 2" sub frame spacers, and the multi link spacer with keeps the rear tires centered, as well as all the hardware

 
  • Like
Reactions: Maverick9110E

nc_forester

Rank I
Launch Member

Contributor II

271
Charlotte, NC, USA
First Name
Bryan
Last Name
Meyers
Member #

24931

Took a spontaneous trip up Globe Road. The southern end starts near Lenoir, NC and goes all the way towards Grandfather Mountain. There are two different ways to go. Up southwest towards Grandfather or up southeast towards Blowing Rock, NC. The original path I had chosen was going North towards Grandfather Mountain, and then East toward Blowing Rock, stopping for pizza at Mellow Mushroom, and back down Globe Road back towards Lenior. That second part didnt happen and we drove more North towards Boone, NC to do more difficult trails...unfortunately the gates were closed. I made the drive with my old roommate Mike and my two photographer friends Mackeever and Brian. Mackeever is a Volvo enthusiast and she drover her lifted 1989 Volvo 740 GL that she's had her whole life.

We as a group minus Mike have done this road before but this was the first time with fresh snow and ice on the ground. There were plenty of pull-offs for camping and hiking and gave me an easy obstacle to drive up.


  • Like
Reactions: Gypsy049 and C&TFoz

nc_forester

Rank I
Launch Member

Contributor II

271
Charlotte, NC, USA
First Name
Bryan
Last Name
Meyers
Member #

24931

I do a lot of research and forum searching before I buy a product or do an install and lights has been on my to do list for a while. I must of read through just about every light manufacture, big to small, and I settled with the Hella Valuefit LEDs. There are next to zero reviews on this product and I dont know why. I ran halogen hellas on my old Xterra and they were fantastic, cheap, and did what I needed them to do. These Hellas were purchased through amazon and the kit includes 2 lights and all the hardware and wiring. I purchased 2 kits to mount to the roof basket up top. I am subscribed to a guy named Donald, known on youtube and instagram as Softroadingthewest and although he did not run these lights, he did however wiring and run the wire in what I thought would be an ideal way. It is not however. He ran his down the windshield rain channel which I guess would work with a thinner weather stripping around the wires but does not work with Hellas heavy duty wrap. Anyway, I had the lights wired up like that for a few weeks but now they are disconnected until I find a better solution. A video of the lights and output is on my IGTV at @nc_forester on instagram.

These are the mounts I got from Amazon for the lights and basket

Here are the Hellas


nc_forester

Rank I
Launch Member

Contributor II

271
Charlotte, NC, USA
First Name
Bryan
Last Name
Meyers
Member #

24931

3 weeks ago, before NC shut down more of the Forester Service roads myself, Lisa (lifted trek) and Matt (Lexus UX) took a trip to Table Rock Road near Lake James. Neither of us had been up or down that road and it was a nice easy trek. It headed north towards Hawksbill trailhead and a road known i nthe area as The Snake. From The Snake we headed down to Linville Falls and Old NC 105. Lisa has never been down this road and since it led to I-40 it was the most logical destination.


nc_forester

Rank I
Launch Member

Contributor II

271
Charlotte, NC, USA
First Name
Bryan
Last Name
Meyers
Member #

24931

2 weeks ago I finally ordered my skid plates. I ordered from a company called Primitive Racing, pretty much the only company out there making skids for the Subaru community. I was hoping to do plate front to back but upon calling them and speaking with a rep, the metal on the 5MT is apparently a lot thicker than on the automatic so a transmission skid plate was never made for my generation. Cool, saved me some money from having to get that. I ended up getting their 3/16" thick front and differential plates. The front features cutouts for the oil filter and oil pan nut. I have heard from other that the holes may snag on rock and stick, etc so I may make a DIY plug that can easily be taken off for maintenance.


nc_forester

Rank I
Launch Member

Contributor II

271
Charlotte, NC, USA
First Name
Bryan
Last Name
Meyers
Member #

24931

Update**

Ive dropped my car off at a shop to have a tubular bumper made. The plan is to get a front bumper, rear bumper with swing mount, and eventually sliders. Im pretty much going all-in with this build. The fabricator whose shop is located right down the street from my job near Huntersville, NC definitely knows his stuff. I chose to go with a tubular setup to save weight and it was something the fab guy knows really well since he does this kind of work for drift cars and other race cars. I got inspiration from the Stellar Built designs but told him to not make a direct copy and make any changes he thought it needs. So far Im pretty happy with his design and cant wait to get the final result.


nc_forester

Rank I
Launch Member

Contributor II

271
Charlotte, NC, USA
First Name
Bryan
Last Name
Meyers
Member #

24931

I also picked up a Walmart brand awning from my buddy Boston. This 8' awning was on his 4Runner and its nice for now. I would like to upgrade to a 270 degree batwing later down the road.


  • Like
Reactions: Gypsy049 and Baipin

nc_forester

Rank I
Launch Member

Contributor II

271
Charlotte, NC, USA
First Name
Bryan
Last Name
Meyers
Member #

24931

Just a few cell phone shot of the current bumper progress. The horns and other wires are gonna be hidden somewhere else and the airbox silencer and wiper reservoir have been removed. A new smaller wiper reservoir is being fabbed out of billet aluminum and relocated. Im hoping to have it use the OEM motors and wiring. The hole left over from the airbox silencer is being plugged with a pvc pipe cap and plastic welded shut.


nc_forester

Rank I
Launch Member

Contributor II

271
Charlotte, NC, USA
First Name
Bryan
Last Name
Meyers
Member #

24931

Well the hype is here! I picked my car back up Sunday and the front bumper looks great. Im super happy with the outcome and Melvin at TheRoseFactory on instagram killed it. Im going to enjoy the car now for a month and then it will go back to him to knock out the rear bumper build with dual swing mounts as well as some sliders.

The final Results:
- Complete tube frame with an aluminum plate in the center. We didnt put vents in the center and we're in the process of testing cooling. So far Ive driven the car 150 miles and the car isnt overheating but I still might add some air vents later. With the side of the bumper open there should be in theory enough air coming in for the radiator.
- Two shackles were mounted to a plate that bolted directly into the frame where the crash bar was mounted. This offered another recovery point just in case I need it down the road and I was able to keep my Smittybilt D rings.
- The stock air box silencer was completely removed and thrown away. A cap now sits in place to cover the hole and may or may not be painted.
- The stock wiper resevoir was removed but the motors were kept. Melvin was able to build and aluminum resevoir around the motors and it is bolted below on the frame.
- The horns, lose wiring, and other connectors were all relocated or moved slightly out of the way.
- Bumper was sprayed with black bed liner paint which is pretty durable.
- The original bumper cover was cut allowing the grill to still be in place and attached using the OEM bumper clips on the fenders.
- Fender liners werent completely removed and trimmed only where they wouldve been when attached to the front bumper.


nc_forester

Rank I
Launch Member

Contributor II

271
Charlotte, NC, USA
First Name
Bryan
Last Name
Meyers
Member #

24931

May 24th: Drove out to Brown Mountain OHV park near Linville, NC. Its an out and back trail rated easy for Jeeps and ATV's but I would rate it as moderate to a little difficult in some spots for a Subaru or AWD CUV. There were plenty of tricky sections, random fall-offs, mud, off-camber spots. The new bumper took a hard impact in some mud and the only damage was the center plate got pushed back a little bit but the overall bumper was not damaged.


nc_forester

Rank I
Launch Member

Contributor II

271
Charlotte, NC, USA
First Name
Bryan
Last Name
Meyers
Member #

24931

June 7th: Drove out to Rockingham Dragway for a car show. Literally wasted the entire day just trying to get into the place and will never attend another one. But I hung out with some friends I havent seen in a hot minute and got to show off the new setup along with Beefy the CRV


  • Like
Reactions: Gypsy049

nc_forester

Rank I
Launch Member

Contributor II

271
Charlotte, NC, USA
First Name
Bryan
Last Name
Meyers
Member #

24931

It certainly has been a while since Ive been on here but I have some progress to update.

On July 11th, I dropped the Forester off to the same guy who built the front bumper setup to do a rear swing mount and bumper. My initial thought was to do a double swing for a spare wheel and another one for some jerry cans. I scrapped that idea because it might be a little too complicated and or heavy. We went with a single swing with the spare set in the middle.

September


  • Like
Reactions: Gypsy049

nc_forester

Rank I
Launch Member

Contributor II

271
Charlotte, NC, USA
First Name
Bryan
Last Name
Meyers
Member #

24931

I wish I could take credit for still incorporating the rear bumper into the whole design but I cant. Its probably my favorite part about the whole thing. It's still very different from other subie builds who have gone this route. These first few photos are the start of the swing design.

October 7th


nc_forester

Rank I
Launch Member

Contributor II

271
Charlotte, NC, USA
First Name
Bryan
Last Name
Meyers
Member #

24931

Pressure vents were removed and welded shut to prevent dirt, mud, water, aniamls from getting inside. So far closing doors hasnt been a hassle.

October 11th