Influencer II
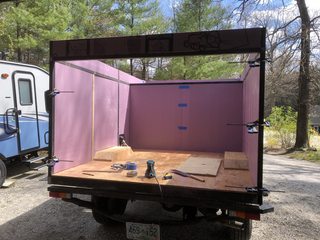
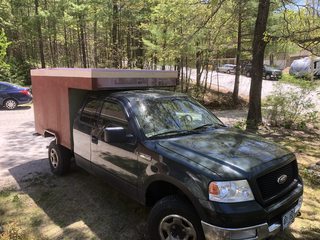
This has been my work truck/play truck for years. Just ran through body and frame rust, then mechanicals and all still looking good! Next step was investing a bit in suspension and added the Bilstien 5100's and new coils up front. I will add a AAL to the rear once the camper back is built. Oh ya, I'm building a frame up camper on the back once I pull the bed off. I'll be back on the 33" tires once there. Should put me 1.5" over stock for body and 1.5" over stock for axle. Not huge, but all I need for what I do!
A Little preview of where I'm headed

A Little preview of where I'm headed