Modular/Removable Kitchen/Storage Drawer System Build Thread

  • HTML tutorial

TwoRoadsOverland

Rank V
Launch Member

Enthusiast III

1,653
Glen Cove, NY, USA
First Name
Max
Last Name
Cheney
Member #

18548

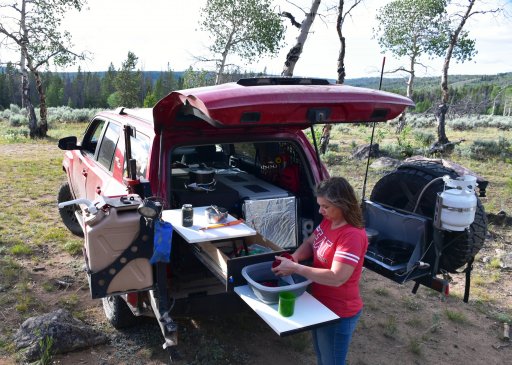
I'm sure you've all been there! You pack your vehicle up perfectly to go on that big trip. Everything has a place and you're certain you've packed everything. You hit the open road and after driving for hours you pull into the perfect campsite. After setting up camp all you need is that paracord to setup your awning. Wouldn't you know it, it's at the bottom of the bottom box in your trunk! Now you have two options: unpack the whole car and repack it neatly, or shove everything to the side to get the rope. I personally tend to go for the latter! There you are on day 1. Your perfect packing job has gone downhill. For the rest of your trip, it will never be the same.

This is the problem that I'm looking to solve. No matter how hard I try to stay organized, I always lose the battle and end up with a pile in the back. This makes it difficult to find gear when I need it and makes the entire experience less enjoyable. Below are some design parameters that I am trying to meet; in no particular order. Below that, I've written some secondary points and ideas that would be cool, but may be sacrificed to meet the primary parameters.

Primary Goals:
  • At least 2 burner cooktop
  • Some kind of dish/hand washing solution
  • Refrigeration of some kind
  • Plenty (arbitrary much?) of counter space
  • Room for dry food storage
  • Room for utensil and cooking equipment storage
  • On board water tank (possible grey water tank needed as well)
  • Able to see out the rear window
  • No airspace (in my smaller XJ, space is a premium)
Secondary Goals:
  • Limit drawer system to trunk area (I have other plans for the back seat)
  • Make the system removable while fully loaded
    • preferably with no tools
    • preferably by one person (I may need to hit the gym)
This is my starting point. Over the next few weeks, I hope to flesh this out into more of a plan and I look forward to any comments and feedback! I'm also hoping that having some kind of following may hold me more accountable to not let this project die and document it well! Sorry for the text heavy start, there will be plenty of pictures to come!

Max
 
  • Like
Reactions: mk-Zero

TwoRoadsOverland

Rank V
Launch Member

Enthusiast III

1,653
Glen Cove, NY, USA
First Name
Max
Last Name
Cheney
Member #

18548

I think a full kitchen in the back is WAAAAAAYYY too much work & engineering. I just built a shelf/drawer system for my '13 Xterra so I know how much work it takes. Consider a partial shelf system instead.
I'm sure the scope of this project is way bigger than I'm planning for, but that tends to be a habit of mine :). I'm an engineer so engineering is the fun part for me.

I do like the simplicity of your build. I've thought about doing something similar, but at the end of the day, if I have room to stack stuff; I will inevitably need something at the bottom. I think I'm going to use 80/20 so I should have a little more flexibility in changing my design if I'm running out of time (or steam).
 
  • Like
Reactions: bmwguru

PapaDave

Local Expert Northern ID and North East WA
Member

Protector II

8,868
Coeur d'Alene, ID, USA
First Name
Dave
Last Name
Addington
Member #

10123

Ham/GMRS Callsign
KN6BKH
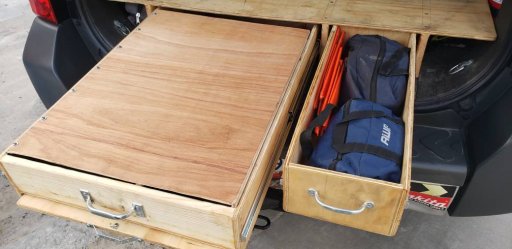
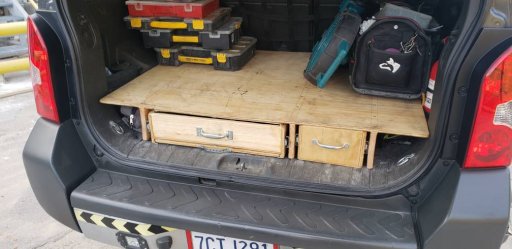
I’m looking to forward to seeing how you design your project! I have a Tacoma and this is how I tackled it. My fridge is not integrated into my drawer, but the drawer comes out when I’m not camping.

 
  • Like
Reactions: TwoRoadsOverland

bmwguru

Rank V
Launch Member

Influencer I

2,271
Indianapolis, IN, USA
First Name
Jim
Last Name
Pickrell
Member #

14032

I'm sure the scope of this project is way bigger than I'm planning for, but that tends to be a habit of mine :). I'm an engineer so engineering is the fun part for me.

I do like the simplicity of your build. I've thought about doing something similar, but at the end of the day, if I have room to stack stuff; I will inevitably need something at the bottom. I think I'm going to use 80/20 so I should have a little more flexibility in changing my design if I'm running out of time (or steam).
Take a long hard look at PapaDave's build above. Well worth the time.
 
  • Like
Reactions: PapaDave

TwoRoadsOverland

Rank V
Launch Member

Enthusiast III

1,653
Glen Cove, NY, USA
First Name
Max
Last Name
Cheney
Member #

18548

I’m looking to forward to seeing how you design your project! I have a Tacoma and this is how I tackled it. My fridge is not integrated into my drawer, but the drawer comes out when I’m not camping.

Thanks for the interest! Your build was really all I needed to be certain that 80/20 was the right material to use. And those quarter rounds are oh so pretty :hearteyes:. I probably shouldn't have started this thread on a Sunday knowing full well that I won't have time to work on it till next weekend, but fear not; more updates to come!


Take a long hard look at PapaDave's build above. Well worth the time.
Thanks for the heads up! I had been following that post for a while, but it wasn't until you said it that I realized that he was the one that commented :flushed:.
 

PapaDave

Local Expert Northern ID and North East WA
Member

Protector II

8,868
Coeur d'Alene, ID, USA
First Name
Dave
Last Name
Addington
Member #

10123

Ham/GMRS Callsign
KN6BKH
Thanks for the interest! Your build was really all I needed to be certain that 80/20 was the right material to use. And those quarter rounds are oh so pretty :hearteyes:. I probably shouldn't have started this thread on a Sunday knowing full well that I won't have time to work on it till next weekend, but fear not; more updates to come!


Thanks for the heads up! I had been following that post for a while, but it wasn't until you said it that I realized that he was the one that commented :flushed:.
Quarter rounds are AWESOME. However if you have to use squares as well think through how the two extrusions meet up, in one spot I had to fab a curve. Second is buy the tri corners from T Nutz as they are about half price and work great. 80/20 has a much wider selection and I had them make the cuts so they were exact. I think labor was $100 for something like 30 cut lengths of extrusions, which considering how much the aluminum is to begin with I figured it was a worthwhile cost as I didn’t want to ruin a section with a poor cut. But I tapped everything myself with a 1/4 -20 tap on my power drill. Pretty easy and saves money there.
 
  • Like
Reactions: bmwguru

TwoRoadsOverland

Rank V
Launch Member

Enthusiast III

1,653
Glen Cove, NY, USA
First Name
Max
Last Name
Cheney
Member #

18548

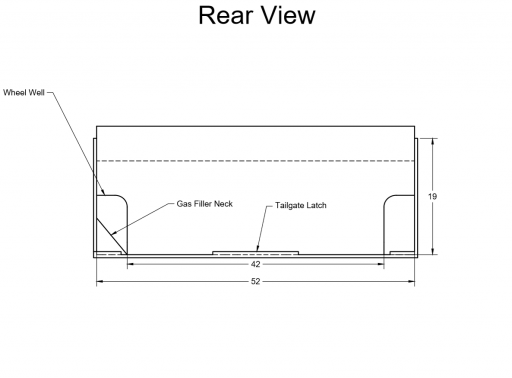
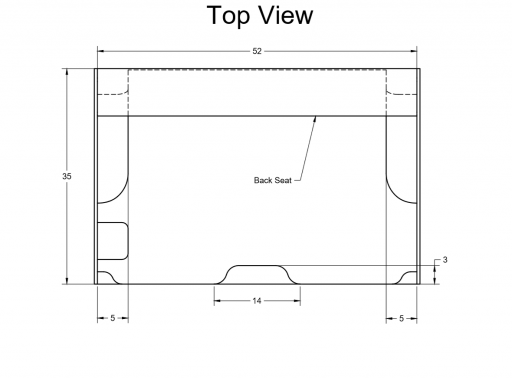
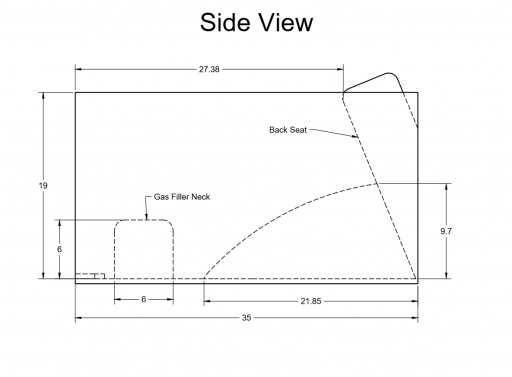
In an effort to keep this thread from becoming a week old without any updates, I went out and took some measurements of my trunk last night. This should give me an idea of what space I have to work with (a lot less than I thought :laughing:). I then used Fusion 360 to mock up the trunk. My plan is to print out about 12 of these so that I can use them as a template for brainstorming on paper with a pencil.

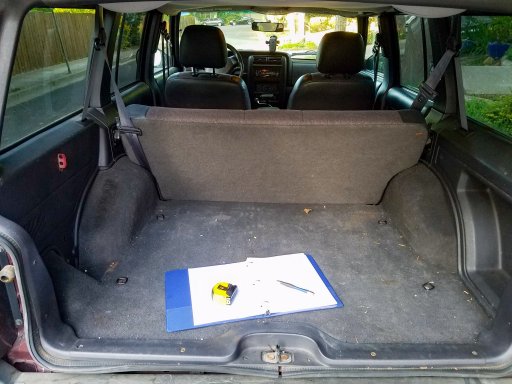
Just to give an idea of what I'm working with (please excuse the dirty carpet :grin:).
20190716_191223-2.jpg

Here are a rear, top and side view as I modeled them. It should be accurate to within an inch.

Rear View.PNG

Top View.PNG

Side View.PNG

I know this isn't much in the way of a design yet, but it should allow me to rapidly conceptualize some of my ideas and get them on paper. Once I do, I'll post some of them here!

Thanks for reading!
 
Last edited:

Rui

Rank 0

Contributor I

60
Portugal
First Name
Rui
Last Name
Serra
I am looking forward to see the result! I am also going to start the project for my LR Discovery and I need some inspiration ;)
 

PapaDave

Local Expert Northern ID and North East WA
Member

Protector II

8,868
Coeur d'Alene, ID, USA
First Name
Dave
Last Name
Addington
Member #

10123

Ham/GMRS Callsign
KN6BKH
I wish i
In an effort to keep this thread from becoming a week old without any updates, I went out and took some measurements of my trunk last night. This should give me an idea of what space I have to work with (a lot less than I thought :laughing:). I then used Fusion 360 to mock up the trunk. My plan is to print out about 12 of these so that I can use them as a template for brainstorming on paper with a pencil.

Just to give an idea of what I'm working with (please excuse the dirty carpet :grin:).
View attachment 108101

Here are a rear, top and side view as I modeled them. It should be accurate to within an inch.

View attachment 108098

View attachment 108100

View attachment 108099

I know this isn't much in the way of a design yet, but it should allow me to rapidly conceptualize some of my ideas and get them on paper. Once I do, I'll post some of them here!

Thanks for reading!
I wish I had CAD skills instead of my grid paper! Looks cool
 

TwoRoadsOverland

Rank V
Launch Member

Enthusiast III

1,653
Glen Cove, NY, USA
First Name
Max
Last Name
Cheney
Member #

18548

I wish I had CAD skills instead of my grid paper! Looks cool
It does come in handy quite often. Judging by the quality and type of work that you seem to be into, you'd probably benefit from learning it. I never took a class or anything. I use Autodesk Fusion 360 which is free for hobbyists if I'm not mistaken.
 
  • Like
Reactions: PapaDave

Jim SoG

Forums Manager
Staff member
Moderator
Member
Investor

Educator I

10,890
Reno, NV, USA
First Name
Jim
Last Name
Bro
Member #

12989

Service Branch
USAF DAV
What year is your project and are you leaving the back seat in? (looks it by the drawings). I am following this as I am going to do my 92 Cher.

Jim
 

TwoRoadsOverland

Rank V
Launch Member

Enthusiast III

1,653
Glen Cove, NY, USA
First Name
Max
Last Name
Cheney
Member #

18548

What year is your project and are you leaving the back seat in? (looks it by the drawings). I am following this as I am going to do my 92 Cher.

Jim
Hey Jim! It is a 2000 so I'm not sure if the "99 interior updates" made my trunk any different than your '92. I am planning on leaving the back seat alone for now. I may pull it out to allow for more storage while my brother and I do our extended trip in a few months, but that would be a separate storage system which wouldn't be dependent on the rear system being in place (or vice versa).

I guess I need to make some progress on this now that I have an audience :laughing:
 
  • Like
Reactions: Jim SoG

Wanderlost

Rank VI
Launch Member

Member III

3,316
Caledonia, Illinois
Member #

8490

You won't regret the hard work you'll put into designing and building what will eventually fulfill your needs for storage and work space!
Our kitchen has made our time camping so much better, easier, and faster. We produced a complete, detailed video on how we built out our system. If you're interested we'll provide a link. Or you can simply head over to our YouTube channel. It should be the featured one on our front page.

DSC_0037.JPG
 

Wanderlost

Rank VI
Launch Member

Member III

3,316
Caledonia, Illinois
Member #

8490

You've probably already thought of this, it's one of the most crucial elements: A good solid base for everything to bolt onto, particularly strong towards the front of the vehicle. When the drawers or fridge/cooler are pulled out there's an amplified amount of weight pulling up at the front attachment points. Just something to keep in mind.
I look forward to seeing what you come up with. We'll likely find elements from your build that'll work for us too.
 
  • Like
Reactions: TwoRoadsOverland

TwoRoadsOverland

Rank V
Launch Member

Enthusiast III

1,653
Glen Cove, NY, USA
First Name
Max
Last Name
Cheney
Member #

18548

Well, so much for keeping this thread from dying! I assure you, this project is not dead! That being said I have a few updates.

First off, due to a severe case of procrastination; I am now out of time to build the "dream solution" being that I leave on my trip in exactly 2 weeks. But I still need something. What this means, however, is that this "Gen. 1" will unfortunately not be made with 80/20. I think I'll be sticking with 1/2" - 3/4" marine grade plywood secured with pocket joints and glue :).

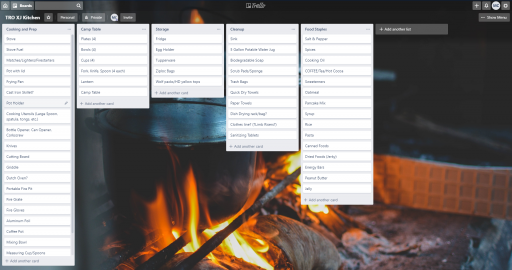
Over the past few months, I have made a very small bit of progress. I found that the Dometic CFX 75 that I originally wanted will not fit in my trunk (the curse of the micro trunk strikes again). Based on talking to some people at a show recently, it looks like I'll be going with the ARB 50qt (or a good cooler if I run out of money). I've also put together a list of items to stock the kitchen with (see image below).

I know this update is small, but I'm hoping to get the base plate in tomorrow and then have a CAD design by the end of the week with a build planned for next weekend. Sorry for the delay and thanks for following!

TRO XJ Kitchen.PNG
 

TwoRoadsOverland

Rank V
Launch Member

Enthusiast III

1,653
Glen Cove, NY, USA
First Name
Max
Last Name
Cheney
Member #

18548

Any updates?
Unfortunately not yet. Part of the delay comes in the fact that this trip back to New York is actually me moving back to NY. So I'm also moving out of my house here in Oregon. So I'm trying to clear out my house, pack, and prep my car for a 3-week trip, plus other things :laughing:.Fear not; I'm considering this drawer system an essential requirement for this trip, which begins on Tuesday or Wednesday next week. So, even if I have to pull an all-nighter to build this thing, there will be an update by then!

Sorry for the inconsistency!
 
  • Like
Reactions: CTO1Mike

M Rose

Local Expert
Mod Team
Member

Advocate III

5,584
Northeast Oregon, United States
First Name
Michael
Last Name
Rose
Member #

20990

Ham/GMRS Callsign
W7FSB
Service Branch
US ARMY Retired
What part of NY you moving to? I lived in the 1,000 island region for a few years. I kind of miss it at times. but not as much as I missed Eastern Oregon while I was traveling the world.
 
  • Like
Reactions: TwoRoadsOverland