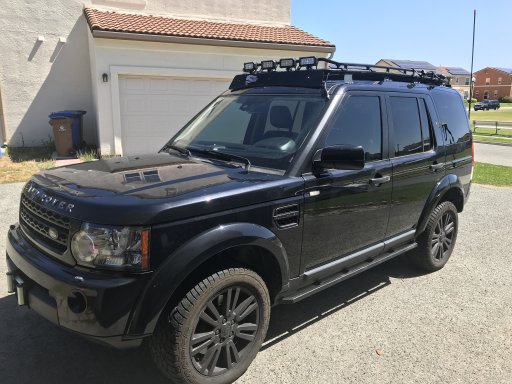
LR4 Proud Rhino vs Platinum Rock Sliders?

  • HTML tutorial

jazzy13

Rank IV
Launch Member

Enthusiast III

1,308
Newport, RI, USA
First Name
Jon
Last Name
Azbill
Member #

5870

Gotrovr

Rank III
Launch Member

Enthusiast III

646
Aptos, CA
Member #

5690

From the pictures it looks like a toss up, both claim frame to sill and compressor protection. Differences would be fit and finish that can only be discovered in the flesh.
 

jazzy13

Rank IV
Launch Member

Enthusiast III

1,308
Newport, RI, USA
First Name
Jon
Last Name
Azbill
Member #

5870

Just received word from Erik at Lucky 8 that the Platinum LR4 Rock Sliders are no longer available. So, Proud Rhino it is!
 

vytec

Rank 0

Traveler I

Just received word from Erik at Lucky 8 that the Platinum LR4 Rock Sliders are no longer available. So, Proud Rhino it is!
Did you end up getting these? If so any pics? How was the installation? Are they what you expected? I'm planning on getting sliders for my 2014 LR4 and saw these on Lucky8 as well and based on the description, they sound like a well made set with thought out installation effort and value.
 

jazzy13

Rank IV
Launch Member

Enthusiast III

1,308
Newport, RI, USA
First Name
Jon
Last Name
Azbill
Member #

5870

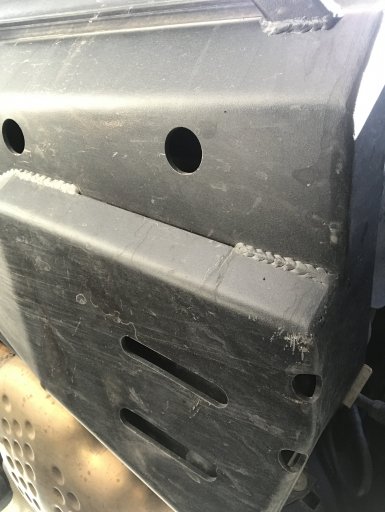
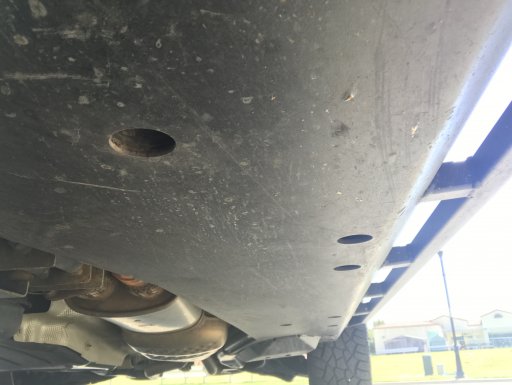
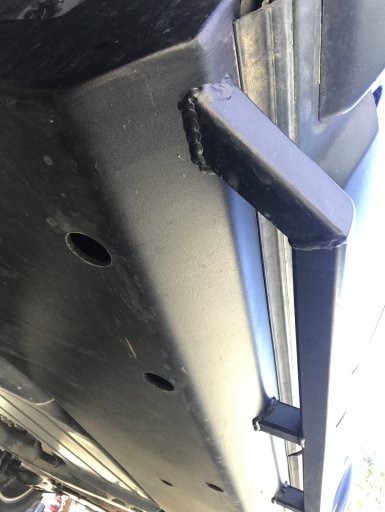
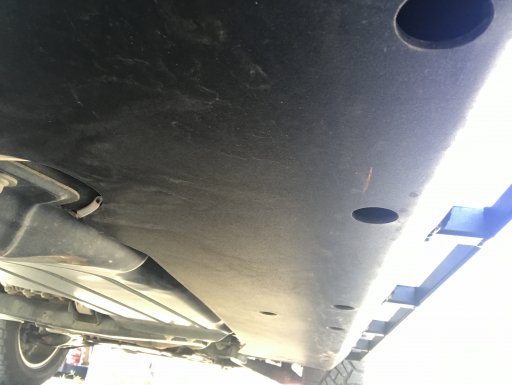
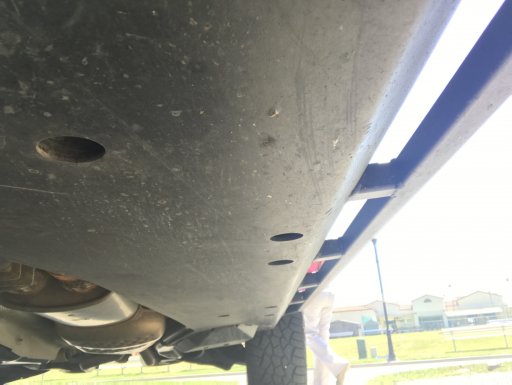
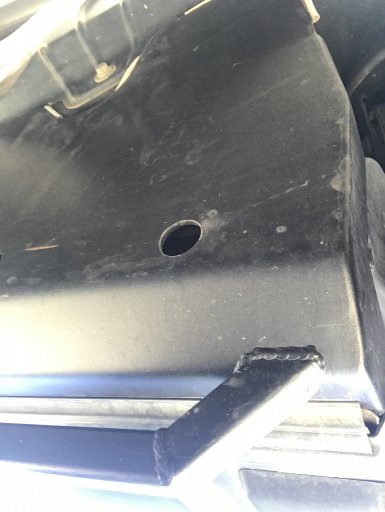
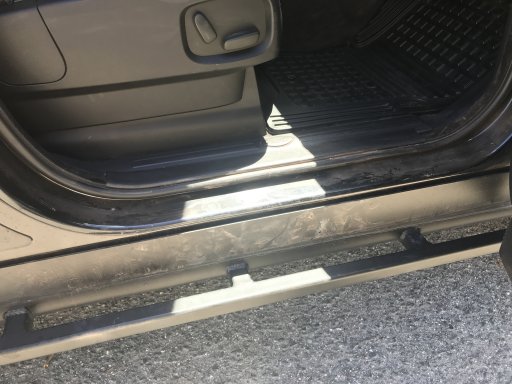
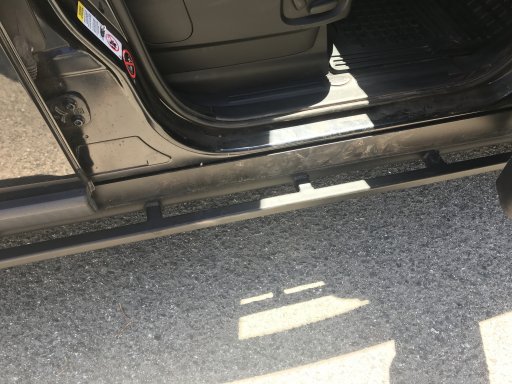
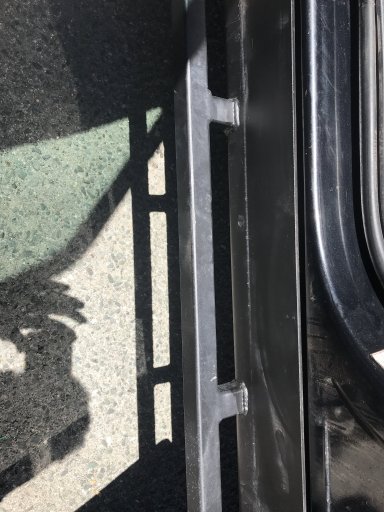
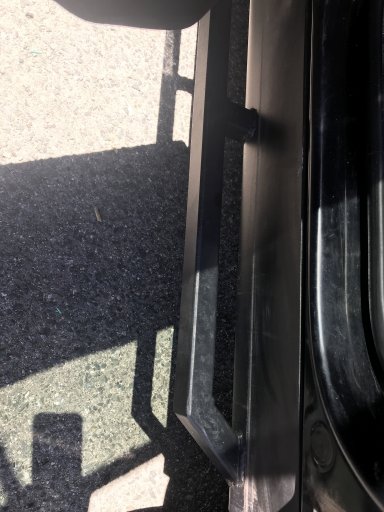
I ended up going with Tactical Rover 4x4 rock sliders because they covered my air compressor and it's original housing without any modifications. I have taken the sliders off and put them on with ease. I place an 8" piece of 2x4 wood on a jack and then slowly raise the sliders up, I had my 7 yr old son operate the jack while I balanced the sliders. Make sure the sliders are firmly pressed against the sill/vehicle as to avoid any space/gaps between sliders and vehicle to ensure bolts are as tight as possible (I raised sliders/jack to point of almost lifting vehicle). Before inserting bolts, align all holes on slider with vehicle...I learned this the hard way. Have a longer screwdriver on hand for aligning the longer bolts. Removing is similar process...raise jack with wood, then undo all bolts, then I had son slowly lower jack while I balanced the slidersIMG_2177.JPG IMG_2179.JPG IMG_2180.JPG IMG_2182.JPG IMG_2183.JPG IMG_2185.JPG IMG_2181.JPG
 
  • Like
Reactions: Sreese210

vytec

Rank 0

Traveler I

I ended up going with Tactical Rover 4x4 rock sliders because they covered my air compressor and it's original housing without any modifications. I have taken the sliders off and put them on with ease. I place an 8" piece of 2x4 wood on a jack and then slowly raise the sliders up, I had my 7 yr old son operate the jack while I balanced the sliders. Make sure the sliders are firmly pressed against the sill/vehicle as to avoid any space/gaps between sliders and vehicle to ensure bolts are as tight as possible (I raised sliders/jack to point of almost lifting vehicle). Before inserting bolts, align all holes on slider with vehicle...I learned this the hard way. Have a longer screwdriver on hand for aligning the longer bolts. Removing is similar process...raise jack with wood, then undo all bolts, then I had son slowly lower jack while I balanced the slidersView attachment 57775 View attachment 57776 View attachment 57777 View attachment 57778 View attachment 57779 View attachment 57780 View attachment 57781
Thanks!! Very helpful. Do they require you to remove the plastic sill plate that comes with the vehicle? You mention removing them. Are you not leaving them on full time? One last question, some folks say that the door doesn't seal properly with some sliders. something about the fit and the original plastic covers being different I believe. Any issues with these?
 

jazzy13

Rank IV
Launch Member

Enthusiast III

1,308
Newport, RI, USA
First Name
Jon
Last Name
Azbill
Member #

5870

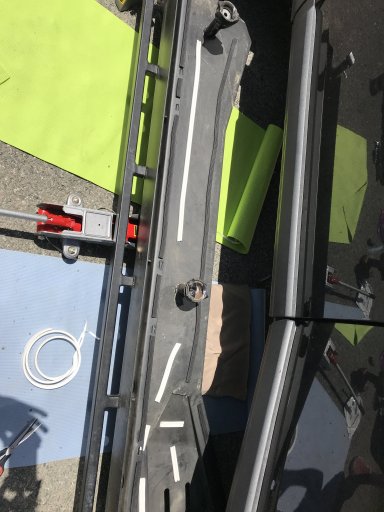
IMG_1772.JPG Yes, removed the plastic sill/rocker guards...I attached a link to the install directions from tactical rover, which provide better detail and are easy to follow. There is a small gap between the frame and the sliders. I've read about the concerns regarding water crossings...all water crossings I've completed with LR4 since install haven't reached up to my door, so I can't say what will happen in deep water. The way the sliders are built, the water should just pour out from the holes underneath the sliders (reference previous post pics). The portion of slider connecting sliders to frame is elevated over the base of sliders, so water and dirt don't get into bolt/nut/housing...hard to explain. I don't believe it will be an issue, but I will be looking for some water in the next few weeks and will update then. The first two pics are passenger side and the next two are driver's side. Lastly, Eric, the owner of tactical rover, and the Lucky 8 guys have been extremely helpful answering all my questions. One last thing, I purchased weather stripping from Home Depot and placed it on my sliders due to reading some people experience creaking noises when sliders rub against frame. I heard the same after about a month without stripping...since installing whether sliders touch frame, no issues (see attached photo)

Side note, I'm running the Proud Rhino SYA off road extension kit, which I installed the 2" spacers on top of my struts, with limiting straps and the proud rhino lift rods, so the Landy is 2.5" taller, which raises off road height as well...and I've absolutely loved it. Hardly had to use off road height in Moab last week, at least compared to usualIMG_2198.JPG IMG_2197.JPG IMG_2196.JPG IMG_2195.JPG . I have the extension kit to ensure I can always drive off the trails in case of catastrophic air fault, as well as to accommodate the bigger tires I've recently purchased...18" wheels will be here next week from Lucky8.

http://www.tacticalrovers.com/uploads/LR3_Rock_Slider_Installation.pdf
 
Last edited:
  • Like
Reactions: Sreese210

vytec

Rank 0

Traveler I

Very cool. Thanks for all the info. After doing the lift, did you see any strange tire wear? I've read that if you lift it, the camber is off and it will cause the tires to wear differently because the camber is tilted in.
 

jazzy13

Rank IV
Launch Member

Enthusiast III

1,308
Newport, RI, USA
First Name
Jon
Last Name
Azbill
Member #

5870

I did a lot of research prior to installing the extension kit and lift and the biggest/most common concern from the boards was the added stress on cv joints and the tire wear from being off camber. The lift is a recent install and I have only driven 2,500 miles since, but no noticeable uneven treadwear. For my situation, although the LR4 is my daily driver, I don't put a ton of miles on it daily. Most of my miles come from my 2-3 trips a month when I travel several hours to camp and hit the trails.

To be perfectly honest, thanks to people taking the time to make youtube videos and commenting on the boards I'm able to do all my own work on the LR4 and because of that some worn tires or replacing a cv joint is an acceptable risk. I rotate my tires fairly often and I love the look with the lift, my new tires will fit better, I prefer how it drives/feels on the trails, and the most important thing...it's my ride so I do what makes me happy.
 
  • Like
Reactions: Sreese210

vytec

Rank 0

Traveler I

Cool thanks. I may do the same. I agree YouTube is awesome. I do most of all the work myself as well and occasionally will create a video on my installs for folks. I may do one on the new rack, ladder and other misc items I'm about to install. The next big items will be the rock sliders and a hidden winch. That one is a bit intimidating for sure. Taking apart the entire front bumper and such. :)
 
  • Like
Reactions: Sreese210

jazzy13

Rank IV
Launch Member

Enthusiast III

1,308
Newport, RI, USA
First Name
Jon
Last Name
Azbill
Member #

5870

Good to hear, good luck! I purchased the Terrafirma hidden winch mount from Lucky8. Just FYI, a couple of notes from my install...use a shoestring to pull the two release levers up for each front light. Then, once you get the front bumper off (just a lot of different screws, not hard), remove the hard plastic housing and the black curved steel bumper attached to the frame. Once removed, you will see the four bolt-holes on the frame to connect the winch mount to.

Issue #1: the spacers provided were too big to allow the bumper to be put back on over the winch mount, I had to buy three 1/2" spacers and one 1/4" spacer (1/4" used on the clear fluid case on driver side...you don't have to move the fluid case, just add spacer to one of the bolts).

Issue #2: Hopefully you won't have to do this, but I had to cut/shave down the cross-pattern plastic on the inside of my bumper with a Dremel in order to get the bumper to fit back on over the center/protruding part of the winch mount. After holding the bumper up against the mount, I just eyeballed it and started cutting/sawing. Nobody sees in there anyway.

Issue #3: If using hawse fairlead, unless you connect the hawse fairlead directly to the winch mount, which most don't, ensure you get strong steel bolt with some type of hard casing (sorry, don't know technical terms) around the bolt when attaching the fairlead to bumper...this will come in handy if you have to winch at an angle...don't want the bolt to shift and your whole bumper to get pulled off. I should know, almost lost a bumper, so I switched to a roller fairlead, so much easier and surprisingly, I like the look. One day I'll get black rollers.
 
  • Like
Reactions: Sreese210

Sreese210

Rank IV
Launch Member

Enthusiast I

1,261
Seattle, Washington, USA
First Name
Shaun
Last Name
Reese
Member #

10281

Nice work (to both of you). trying to decide right now between the "PROUD RHINO SYA OFF ROAD EXTENSION KIT" or the "Toddco Suspension lift". I think I may go with PR, less expensive and the limiting straps are included. Any thoughts?
 

jazzy13

Rank IV
Launch Member

Enthusiast III

1,308
Newport, RI, USA
First Name
Jon
Last Name
Azbill
Member #

5870

Nice work (to both of you). trying to decide right now between the "PROUD RHINO SYA OFF ROAD EXTENSION KIT" or the "Toddco Suspension lift". I think I may go with PR, less expensive and the limiting straps are included. Any thoughts?
I have the PR SYA Off Road Extension Kit...bought it for off road capability and to fit my larger 275/65r18 KO2's. I like knowing that my bump stops are 2" higher so I can get off the trail, plus I like the way the lift looks (kit comes w/lift rods). I installed it about a year ago, hit the trails many a times since and have had no issues. I went through Lucky8. They were easy to work with and shipped fast.