Little Girl the 2007 Toyota FJ Cruiser

  • HTML tutorial

theBROFESSOR

Rank VI
Launch Member

Influencer II

4,226
Conway, Arkansas
Member #

8306

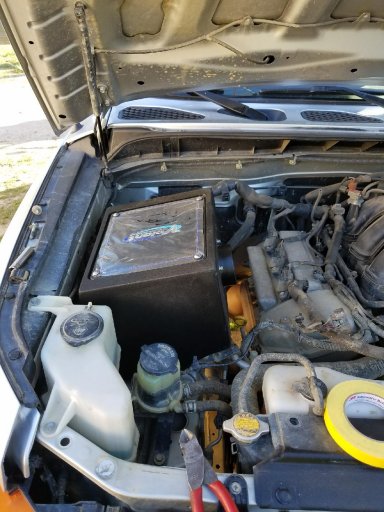
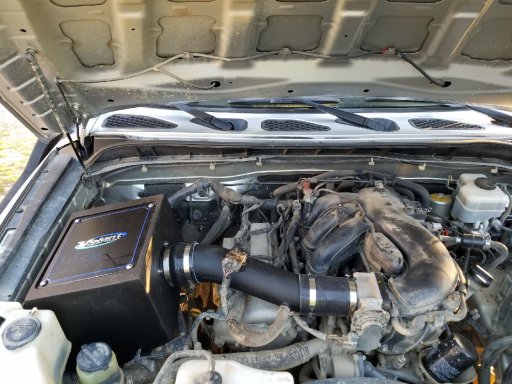
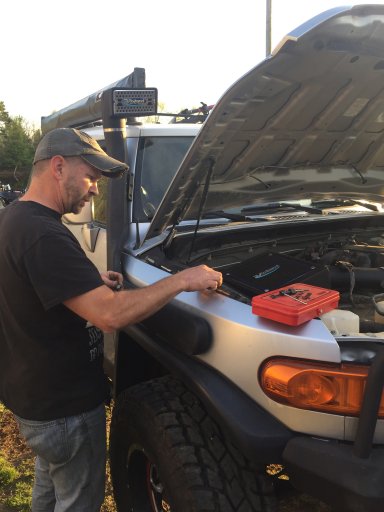
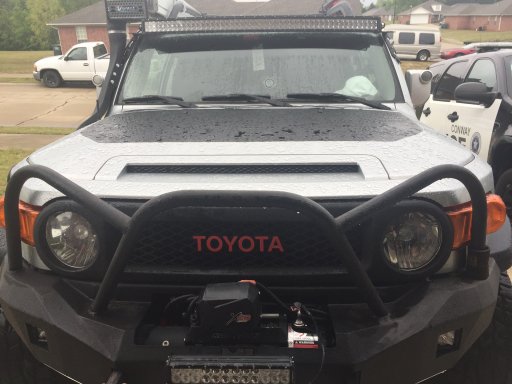
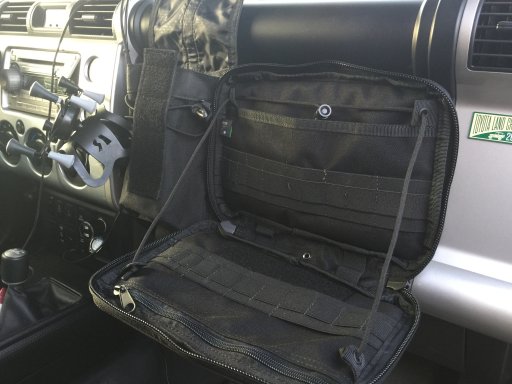
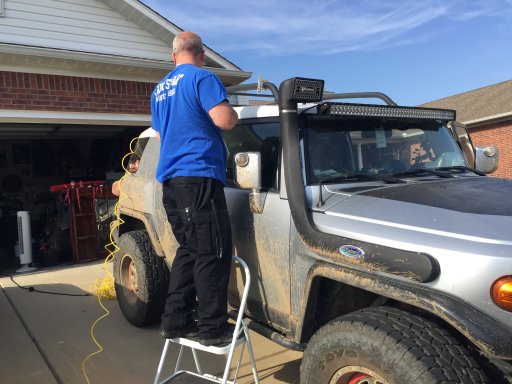
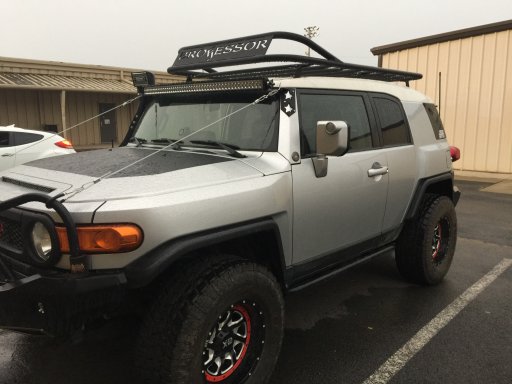
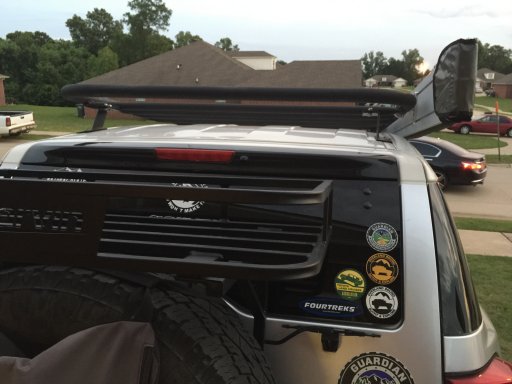
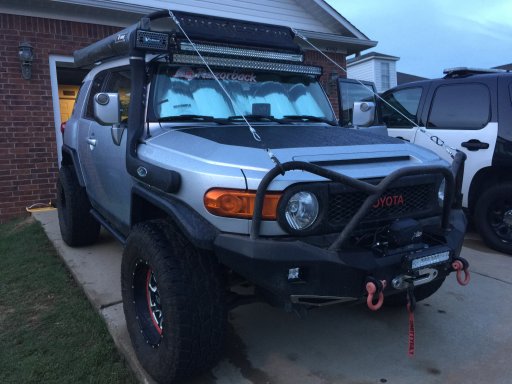
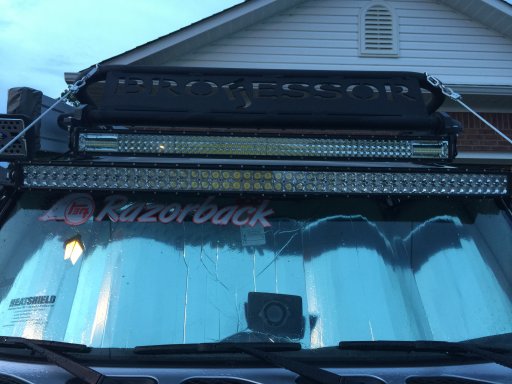
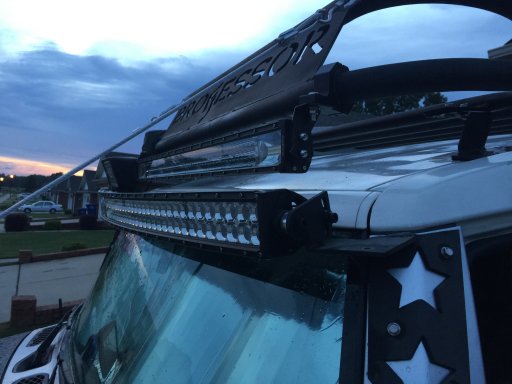
Since we have a long trip planned this summer to FJ Summit in Ouray Colorado, I thought brakes would be a good investment. When we installed my lift kit the mechanic who was helping me (actually doing most of the work) told me that my brakes were wore pretty good and my rotors were starting to crack. so I found some on Amazon that good good reviews and for a good price for all 4.

Brakes
FRONT 319 mm + REAR 312 mm Black Drilled/Slotted 6 Lug [4] Rotors + [8] Quiet Low Dust Ceramic Brake Pads

Price: $277.50 & FREE Shipping on Amazon

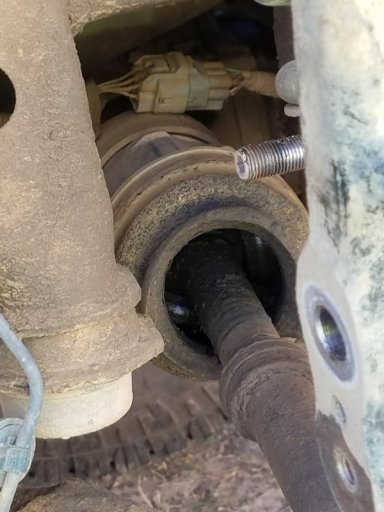
He also told me that my front axles were bad. The boots had been ripped and mud and grime had gotten into them and the were about to start clicking. So I looked around and found some surprisingly cheap. Also on Amazon with good ratings.

Axles

Pair New Front Left & Right CV Drive Axle Shaft Assembly For Toyota And Lexus - BuyAutoParts 90-900882D New
5.0 out of 5 stars

Price: $127.00 & FREE Shipping on Amazon

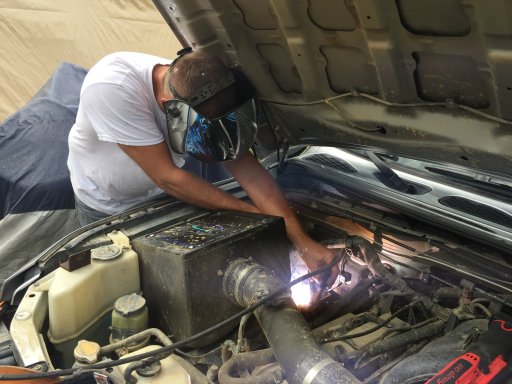
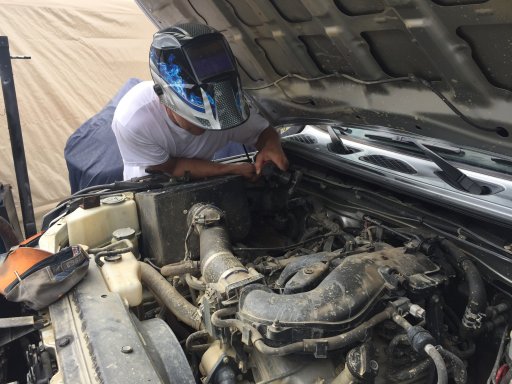
So I delivered the vehicle back to my same buddy and he did the work for me as that is a little past my skill in vehicle maintenance.
IMG_6868.JPG IMG_6869.JPG
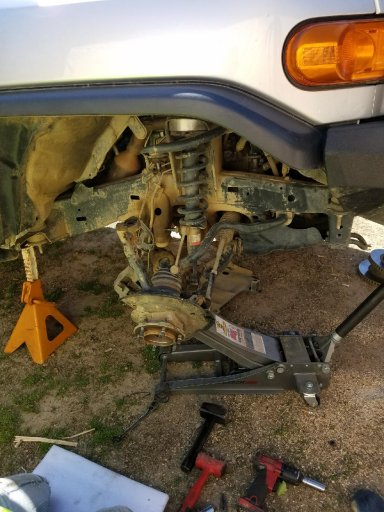
He is a motorcycle mechanic and this is really not something he looked forward to. But he said the brakes were really good and the axles were much heavier and better quality than what was on there to begin with so he was impressed and told me I had done well with my purchases. Glad to get this done before our trip this summer.

BROfessor Out
 
  • Like
Reactions: HappyOurOverlanding

theBROFESSOR

Rank VI
Launch Member

Influencer II

4,226
Conway, Arkansas
Member #

8306

Volant Cold Air Intake and Snorkel installed! Had a rough time with the seller on this. He stated that what he was selling on Ebay came with the cold air intake. When I received it of course it didn't. Then I had to haggle with him and get a partial refund while I ordered the cold air intake from another source. THEN to go with all of that. When I looked through the box that contained the snorkel that I received from the unnamed seller, it did not include any instructions, layouts for holes to be drilled or even the little rubber hose that connected the snorkel to the intake. So I contacted Volant. And let me tell you their customer service was AMAZING! I told them my problem and did my best to explain to them the parts I was missing. The guy there emailed me a parts list and told me to list all of the numbers I didn't receive. I did this and within a couple hours he told me all of my parts were in the mail. Awesome customer service.

So when all of that came in a buddy and I went to work pulling and replacing parts for the intake.
IMG_6859.JPG IMG_6866.JPG
And then cut and drilled holes for the snorkel. It was a chore and I was nervous but it is done and man does it look amazing. I love how it hugs the contours of the lines of the FJ. It is a great addition to the vehicle.
IMG_6863.JPG IMG_6847.JPG IMG_6848.JPG IMG_6862.JPG
IMG_6858.JPG IMG_6850.JPG All of the parts for this snorkel are top notch. So glad I went with a name brand company and didn't cut back by getting an Ebay Snorkel like I wanted to. Even though it was pricey, the outcome and performance will be worth it. I can tell a difference already in the power and performance that come with this. I have had to modify my light bar mount since it goes up the front pillars of the FJ but it will work just fine. That will be soon, hopefully next week as my project to complete.

Have a great week. BROfessor Out
 

theBROFESSOR

Rank VI
Launch Member

Influencer II

4,226
Conway, Arkansas
Member #

8306

NEED MORE LIGHT! lol. Well thats what I explained to my wife. Yes the little 15" light on the front does a good job but I love night riding and wanted more light. So I got on Amazon and picked out the 50" light bar that had the best reviews. Picked it up for about $120 with shipping. Pretty pleased with that. Came in all nice and neatly packed just liked everything from Amazon.
IMG_6843.JPG
Now to find the right mounts. I never have liked the FJ Cruiser style mounts that come off of the factory roof rack. I think they are cheap and just don't look good. So I began looking around at what I thought would look good and be very durable. I was inspired by the light mounts by DBCUSTOMZ and love that pillar style.
0001379_dbcustomz-2007-2014-fj-cruiser-led-curved-bar-pillar-aluminum-pillar-mounts.jpeg
But Good Lord $280...I'm on a budget here and I know some good welders at our local High School that love it when I send them some south Louisiana boudain lol...so I took the FJ by along with the light bar and they measure it all up. They got kinda expressive with their laser cutting machine and came up with a cool design. They said the stars were to represent law enforcement. I thought it was kinda cool.
IMG_6842.JPG
Well they had trouble with their machine and I had to wait about 2 weeks longer than I thought I would for these so in the mean time you can read the above post that I installed my Volant Snorkel. This kinda messed up how the light bar mounts would fit. So I took it all back to them to be tweaked a little. They ended up cutting them down a little to make them smaller where they would fit above the snorkel mount. I like the look. Plus not quite as flashy. lol. I need to put one more mounting bolt into the pillar but the light definitely is not going anywhere. It is very solid drilled right into the internal roll cage. lol.
IMG_6876.JPG
IMG_6877.JPG IMG_6875.JPG
Works great and man it puts out some LIGHT! All in all I have about $130 in the project as my buddy provided all the wiring into the other light for nothing. We worked about 3-1/2 hours in the pouring rain and about froze to death but its on and working and I love it.

BROfessor Out!
 

theBROFESSOR

Rank VI
Launch Member

Influencer II

4,226
Conway, Arkansas
Member #

8306

I am always looking around for storage ideas for the FJ since there is limited space. I was playing around on Ebay one day and spotted the Rigid Insert Panel MOLLE that you can mount directly in front of the passenger seat on the dash.

https://www.ebay.com/itm/Rigid-Insert-Panel-MOLLE-RIP-M-16-5in-x-6in-FJ-Cruiser-Front-Dash-Storage/162743972511?ssPageName=STRK:MEBIDX:IT&_trksid=p2057872.m2749.l2649

s-l1600.jpg
So I made the purchase. My vehicle is going to be used and I doubt ever sold in my lifetime so I am not afraid to drill holes to make it more useful. So it came in and I went to town. Went down to the local Ace Hardware Store and picked up some screws and spacers. I got 3/4" spacers to get it out a little bit from the dash and so I can get the MOLLE bags on and off with ease. Ordered up 2 MOLLE bags that I thought would be useful to me and my wife (since she is the one mostly sitting over there) that we could put keys, sunflower seeds, cell phones, etc in and would also look good. I nailed it.
IMG_7035.JPG IMG_7036.JPG IMG_7037.JPG
Even got a few patches on there for decoration. Very useful and helpful it will be for us. I am very pleased and very glad I was able to make use of this space that really was good for nothing.

BROfessor Out
 

theBROFESSOR

Rank VI
Launch Member

Influencer II

4,226
Conway, Arkansas
Member #

8306

I have looked around all over the place for the roof rack that I like. As the owner of a RV-5 Oztent, I need a lot of space up top to carry it along with a couple pelican cases, add a lightbar...maybe carry a couple kayaks...a rooftop tent may be in my future...I just don't know. I don't want to have to buy one now and then have to try and sell it and buy another. So I contacted Baja Rack and asked them if I could just buy the mounts for one of their racks. They stated that I could. $280 for the mounts and about 6 weeks later and I had them. So I took the stock roof rack (that I absolutely HATE) off. Not sure who came up with this style of rack where the whole front of the rack is completely worthless, but I guarantee you they never use the rack and are rich enough they don't have to. Its stylish yes...maybe but worthless if you are trying to haul anything.

so the roofrack is OFF!
IMG_7027.JPG
Poor little girl looks like she just got scalped! And the new mounts are on.

I have taken her to the local high school welding shop who does a ton of work for me and asked them to make me a roof rack with the same dimensions as the stock rack on the outside (1-3/4") so that all my mounts will still work. They will do lightweight square tubing for the crossmembers. They are making me a wind deflector in the front with BROFESSOR cut out of it and mounting another 50" lightbar (I know it's overkill but it'll look sweet and light up the world!). It will be longer and wider than any roofrack out there and with the large diameter outside rim it will give me a beefy look with a lip around the edge to keep stuff from sliding off. Only rail will come off the front of the wind deflector about 10" back and then angled down. Should be done next week. Pretty excited about this!

Can't wait to post updated and finished pics! Til then...BROfessor Out
 

Attachments

HappyOurOverlanding

Rank VI
Launch Member

Member III

3,402
Verdi Nevada
Member #

9206

Ham/GMRS Callsign
KI7RAM
Volant Cold Air Intake and Snorkel installed! Had a rough time with the seller on this. He stated that what he was selling on Ebay came with the cold air intake. When I received it of course it didn't. Then I had to haggle with him and get a partial refund while I ordered the cold air intake from another source. THEN to go with all of that. When I looked through the box that contained the snorkel that I received from the unnamed seller, it did not include any instructions, layouts for holes to be drilled or even the little rubber hose that connected the snorkel to the intake. So I contacted Volant. And let me tell you their customer service was AMAZING! I told them my problem and did my best to explain to them the parts I was missing. The guy there emailed me a parts list and told me to list all of the numbers I didn't receive. I did this and within a couple hours he told me all of my parts were in the mail. Awesome customer service.

So when all of that came in a buddy and I went to work pulling and replacing parts for the intake.
View attachment 54769 View attachment 54774
And then cut and drilled holes for the snorkel. It was a chore and I was nervous but it is done and man does it look amazing. I love how it hugs the contours of the lines of the FJ. It is a great addition to the vehicle.
View attachment 54768 View attachment 54767 View attachment 54771 View attachment 54772
View attachment 54770 View attachment 54773 All of the parts for this snorkel are top notch. So glad I went with a name brand company and didn't cut back by getting an Ebay Snorkel like I wanted to. Even though it was pricey, the outcome and performance will be worth it. I can tell a difference already in the power and performance that come with this. I have had to modify my light bar mount since it goes up the front pillars of the FJ but it will work just fine. That will be soon, hopefully next week as my project to complete.

Have a great week. BROfessor Out
Nice job Bro.

Sent from my SM-G960U using OB Talk mobile app
 

theBROFESSOR

Rank VI
Launch Member

Influencer II

4,226
Conway, Arkansas
Member #

8306

After installing my bull bar on my front bumper I was able to make me up some limb risers. I really wanted some of these because in Arkansas when the trees get their leaves, we get a ton of limbs in the trailways.

I watched @Michael's video of how to make your own and it looked pretty easy. Pretty sure I can accomplish this.

So I went down to the local Home Depot and picked up my supplies. All together about $25
IMG_7392.JPG
First, I made my little pieces to go around my bumper. I got coated wire, but really didn't want the wire to rub off the coating of my bumper. So I made these little pieces to go around my bumper which have a piece of rubber tubing that I had left over from my scuba mod to protect the coating.
IMG_7393.JPG
Then I drilled a hole in my light bar mount and began the mounting process. First was to install the long wire to my front bumper.

IMG_7399.JPG IMG_7395.JPG
Then attached it to the top light bar with the adjustable piece.
IMG_7398.JPGThen tighten it up.
No problem except there was a flaw in my design. Putting the piece around the bumper meant that I would have to attach the loop inside of the loops already made. I got the hammered on kind of loop connector. I should have got one set of the loop connector that is screwed together. There was no place to hammer on the vehicle and not create some damage. Needless to say I had to repaint a portion of my front bull bar. But its done and looks nice. I'm pleased with it.
IMG_7394.JPG
IMG_7400.JPG
Til next mod, BROfessor Out
 

theBROFESSOR

Rank VI
Launch Member

Influencer II

4,226
Conway, Arkansas
Member #

8306

I have hated my OEM roof rack since I got this rig. It was built for show and not for efficiency of use or whatever. Especially after purchasing my Oztent and really needing the space up top to carry it, I have been in the market for a new rack. Man are they pricey! Not really wanting to let go of $1k for some large piece of aluminum I talked to a buddy to see if he could help me out.

I removed the old rack and installed the mounting brackets that I ordered from Baja Rack. $265 was really worth it since if you don't get these right your roof will leak. Plus so many angles etc for the welder to figure out if you do them yourself. I was more than willing to sacrifice that much. So I took the old off..
IMG_7026.JPG
IMG_7027.JPG
Poor little girl looks like she was scalped.

Installed the new brackets...
IMG_7038.JPG Worked perfectly with no problems. Except that both front bottom nut-washer thingy's that the bolts go into fell down into the headliner. Had to remove headliner and reinstall. Wasn't as bad as what I thought it would be. Thank you YOUTUBE!

Took it to my buddy at the local welding shop (who did my front bumper also) and he worked me up a complete 1 off custom rack that I love!
IMG_7571.JPG IMG_7573.JPG IMG_7574.JPG
If the wind noise is too much from the cutout then we will fill it in with aluminum diamond plate or something like that. I hope it isn't too bad so I can put some LED's on the inside and make it light up. lol.

But anyway it is exactly what I wanted. Flat in the back with a little lip from the 1-3/4" large diameter outside...same as the original rack so I don't have to go and rebuy all of the mounts for the awning and high lift etc...

I will have to redo my limb risers now to protect the snorkel etc. But all in all I am very happy and now I have a complete front to back rack that is usable and saved me about $800 from purchasing one online. Plus nobody else has one. To me that is pretty cool.

BROfessor Out
 
  • Like
Reactions: HappyOurOverlanding

Phildirt

Rank IV
Launch Member

Advocate II

I have hated my OEM roof rack since I got this rig. It was built for show and not for efficiency of use or whatever. Especially after purchasing my Oztent and really needing the space up top to carry it, I have been in the market for a new rack. Man are they pricey! Not really wanting to let go of $1k for some large piece of aluminum I talked to a buddy to see if he could help me out.

I removed the old rack and installed the mounting brackets that I ordered from Baja Rack. $265 was really worth it since if you don't get these right your roof will leak. Plus so many angles etc for the welder to figure out if you do them yourself. I was more than willing to sacrifice that much. So I took the old off..
View attachment 56655
View attachment 56656
Poor little girl looks like she was scalped.

Installed the new brackets...
View attachment 56657 Worked perfectly with no problems. Except that both front bottom nut-washer thingy's that the bolts go into fell down into the headliner. Had to remove headliner and reinstall. Wasn't as bad as what I thought it would be. Thank you YOUTUBE!

Took it to my buddy at the local welding shop (who did my front bumper also) and he worked me up a complete 1 off custom rack that I love!
View attachment 56658 View attachment 56659 View attachment 56660
If the wind noise is too much from the cutout then we will fill it in with aluminum diamond plate or something like that. I hope it isn't too bad so I can put some LED's on the inside and make it light up. lol.

But anyway it is exactly what I wanted. Flat in the back with a little lip from the 1-3/4" large diameter outside...same as the original rack so I don't have to go and rebuy all of the mounts for the awning and high lift etc...

I will have to redo my limb risers now to protect the snorkel etc. But all in all I am very happy and now I have a complete front to back rack that is usable and saved me about $800 from purchasing one online. Plus nobody else has one. To me that is pretty cool.

BROfessor Out
Looks good. I'd look into using some carabiners or springs as disconnects on the brush cables. That way you don't have to keep them on all the time. I just snap mine in place when I need them. Also maybe some heat shrink tubing around the cable ends/hardware to keep them from rusting.

Lights inside that cutout would look cool, but some red aluminum or diamond plate to match the wheels would be neat too.
 
  • Like
Reactions: theBROFESSOR

theBROFESSOR

Rank VI
Launch Member

Influencer II

4,226
Conway, Arkansas
Member #

8306

Looks good. I'd look into using some carabiners or springs as disconnects on the brush cables. That way you don't have to keep them on all the time. I just snap mine in place when I need them. Also maybe some heat shrink tubing around the cable ends/hardware to keep them from rusting.

Lights inside that cutout would look cool, but some red aluminum or diamond plate to match the wheels would be neat too.
On the limb risers I actually bent the hook a little so I loosen them up and take them out. Then I switched from the press on cable clamps to ones that have two screws. But yeah I thought about putting caribiners on there to remove them more easily. Now that the roof rack is on I plan on moving the top of the risers up a little. So when I go to get longer cable I will probly add those. Thanks!

And yeah if I add the diamond plate aluminum to the back of the cutout I was thinking about painting it red to match. That would look good I think.
 

theBROFESSOR

Rank VI
Launch Member

Influencer II

4,226
Conway, Arkansas
Member #

8306

Had a little daylight left yesterday afternoon after work and my rat killing...love this time of year when we have lots of daylight...so I decided to move my limb risers to the top of my roof rack to protect my snorkel and also installed the Foxwing on the new roof rack. It is coming along!
IMG_7584.JPG IMG_7583.JPG IMG_7585.JPG
 

theBROFESSOR

Rank VI
Launch Member

Influencer II

4,226
Conway, Arkansas
Member #

8306

After I picked up my roof rack, I wasn't crazy about the space between the top of the vehicle and the rack. But I knew what I wanted to do...add more light. The wife and I love to do night rides and I had done some research on the lighting. The light bar I have now is direction light which means it points in a specific direction. It is great for pointing down the road. I wanted a bar with area lighting to light up the area around, just to give us a better view at night. So I found a cheap 42" bar and some clamps that mount around the roof rack. I love the setup and how it looks.
IMG_7596.JPG
Besides...you can't have too much light when traveling in the middle of nowhere at night. lol

BROfessor Out
 

Attachments

  • Like
Reactions: HappyOurOverlanding

theBROFESSOR

Rank VI
Launch Member

Influencer II

4,226
Conway, Arkansas
Member #

8306

Ordered my cables, isolator and picked up a deep cycle marine battery to complete my dual battery setup this past week. Wired it to a switch inside the cab to turn off and on to charge the battery. Getting ready to add my fridge, radios and extras so that it doesn't take away from my starting battery. works great!
 

Attachments

  • Like
Reactions: HappyOurOverlanding

Mike Q

Rank I
Launch Member

Traveler I

271
Buckeye, Arizona, United States
First Name
Mike
Last Name
Q
Member #

6705

  • Like
Reactions: theBROFESSOR

theBROFESSOR

Rank VI
Launch Member

Influencer II

4,226
Conway, Arkansas
Member #

8306

OrangeBoxx Fabrication Rear PSD and lower door PSD came in yesterday. Took today to install it. Design is amazing and more than I ever dreamed of. Easier to install than what I thought it would be. So functional and so amazing. I love it.
IMG_7817.JPG IMG_7828.JPG
 

Attachments

  • Like
Reactions: HappyOurOverlanding

HappyOurOverlanding

Rank VI
Launch Member

Member III

3,402
Verdi Nevada
Member #

9206

Ham/GMRS Callsign
KI7RAM
  • Like
Reactions: theBROFESSOR