If you build it... 2016 F-150 FX4

  • HTML tutorial

wbslngr

Rank III
Launch Member

Enthusiast III

646
Owasso, Oklahoma, USA
First Name
Larry
Last Name
Sang
Member #

19723

It's hard to contain my excitement. After years of saving money and thinking about where to focus the efforts of my desire to bring more adventure into my life, the parts are starting to trickle in for my truck. I would like to thank everyone on this forum for the avalanche of past of discussion that I have searched and poured over which ultimately instigated the final push for me to go all in. I've always enjoyed the outdoors, and before YouTube opened my eyes to the potential of exploring nearby Arkansas via a vehicle, I was ready to sink my efforts into a once a year backcountry hiking excursion deep into Glacier National Park or the Northern Boundary Waters. Those might still be on my list, but the idea of being able to satisfy the itch of forest solitude on a more regular basis by investing in my truck instead of all of the "ultralite" stuff for my back... well, at 45 years old that sounded like a better place to start. Couple that with losing a former employee and close friend to cancer last summer, and I simply feel more compelled than ever to stop waiting for that "someday".

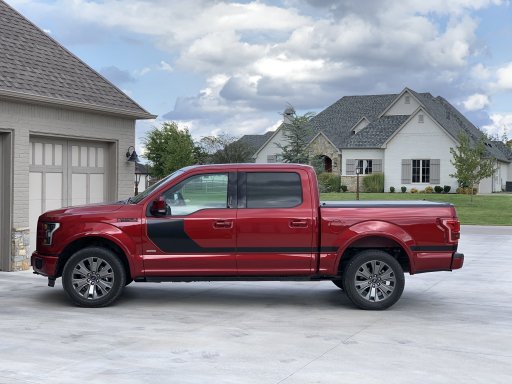
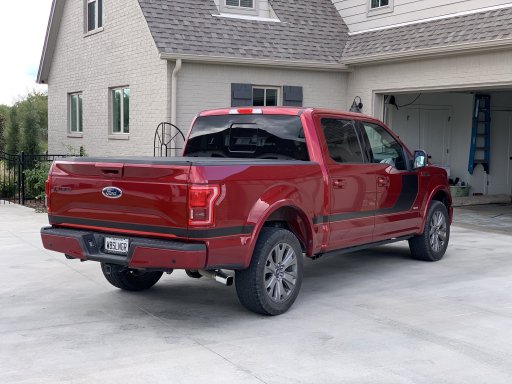
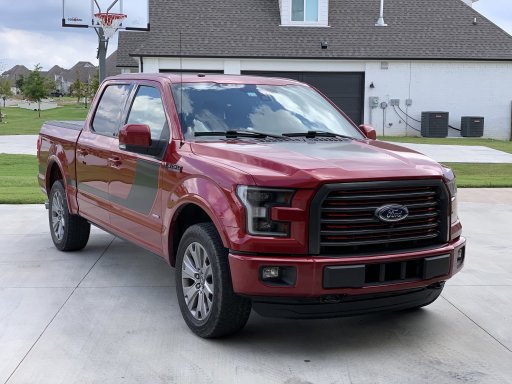
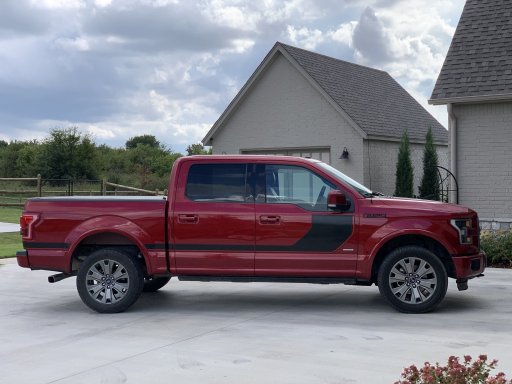
So here I am. As the title suggests I'm sticking with my full-size Ford FX4. It has 5 pre-existing upgrades...

1) A BAK Revolver X4 Bed Cover
2) AMP Research Auto Steps
3) SCT Tuner with a few MPT Custom Tunes Options for the 3.5L Ecoboost.
4) A "Catch Can" to protect the intake valves from excess gunk build up.
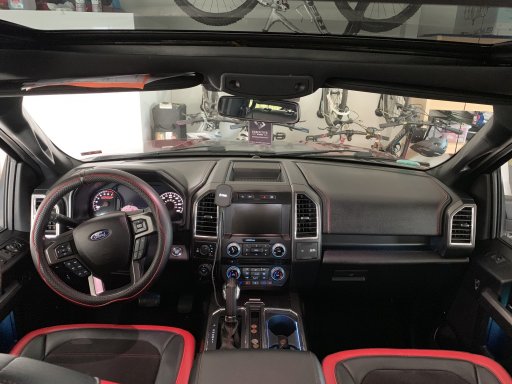
5) A stuffed Bing Bong.

Wait, a stuffed what?

I should preface this explanation by sharing that I have an amazing wife (Wonder Woman) and two awesome daughters, currently 14 and 11. Wonder Woman and I have been Disney fans our whole life and when you have kids, well it can intensify. I would not be offended by my family being called Disney Nerds, not even a little. Well, I'm also not ashamed to admit I've teared up watching a few Disney movies. The one that got me the most was "Inside Out". It's a clever movie, I highly recommend it for those that have not seen it... click here for a quick description of what the heck I am talking about. --> Who is Bing Bong? But, for those that may have seen it, you all know the scene where Bing Bong sacrifices himself to be "forever forgotten" in the memory dump so that Joy can succeed in getting out of the dump in order to ensure Riley's emotional well-being. After doing so, he exclaims "Take her to the moon for me" (reference to when he and Riley went to the moon in their imaginary play long ago) as he fades out of existence. So yeah, it was probably because my oldest was at that point, but I cried... a lot. And so Bing Bong moved to the top of my list of all-time best Disney characters.

I tell you that to tell you this... fast forward a month to my birthday and (knowing the story) the former employee and close friend that I previously mentioned gives me a little stuffed Bing Bong for my birthday... exactly three years later, she was gone. Cancer sucks.

So Bing Bong sits on my steering column, the most important upgrade I've made. A constant reminder to stop putting things off until tomorrow, but also to have fun, to be a big kid and play. My friend was really good at that, so I hope this build and the adventures it takes me (and hopefully my family) on serve to honour her.

IMG_2240.jpeg
 

wbslngr

Rank III
Launch Member

Enthusiast III

646
Owasso, Oklahoma, USA
First Name
Larry
Last Name
Sang
Member #

19723

After much thought, I decided to go with a Roof Top Tent for sleeping. I was debating between 23zero and CVT, and I ultimately pulled the trigger on the CVT Mt Ranier Hybrid after they offered a recent discount. It arrived yesterday and is currently at rest in the garage awaiting a rack to be installed upon.

I could not find an aftermarket rack that checked all the boxes... which were a) allow me to continue using my bed cover, b) sit below the cab height to reduce the tent profile on the highway, and c) have removable top rails so I can still use my truck to haul things as needed.

So, I decided to design one in sketchup, order some aluminum, and (luckily) take advantage of my friends shop to cut it up and weld it together.

The goal is to have everything done by next weekend so I can take off and test it out!

I designed it to allow me enough room to roll up my cover as needed. The front and back top braces will be removable to allow loading tall cargo when tent is not installed. And the tent support will drop-in (then secure with fasteners) and be semi-permanently attached to tent so that it can be quickly unfastened and lift off with the tent when I hoist it to ceiling in between outings.

Screen Shot 2019-09-26 at 9.14.42 AM.png
 

Brian Glendenning

Rank V
Launch Member

Enthusiast III

1,473
Socorro, NM
First Name
Brian
Last Name
Glendenning
Member #

22408

I have an F150 (Supercab 6.5' bed, XLT, 3.5EB, FX4), and my running boards are getting pretty beat up from coming down on rocks. Do you think the AMP Powersteps would survive coming down on rocks? (Obviously it's less likely since they are tucked out of the way, but it will probably happen from time to time).
 

wbslngr

Rank III
Launch Member

Enthusiast III

646
Owasso, Oklahoma, USA
First Name
Larry
Last Name
Sang
Member #

19723

I have an F150 (Supercab 6.5' bed, XLT, 3.5EB, FX4), and my running boards are getting pretty beat up from coming down on rocks. Do you think the AMP Powersteps would survive coming down on rocks? (Obviously it's less likely since they are tucked out of the way, but it will probably happen from time to time).
I am certain they would not survive coming down on rocks (extruded aluminum). In fact, I am planning on either building some custom rock sliders that will allow me to keep them, or replacing them entirely with an aftermarket set of sliders before I mess them up. I really like having the step so hopefully I’ll find a solution.
 

Brian Glendenning

Rank V
Launch Member

Enthusiast III

1,473
Socorro, NM
First Name
Brian
Last Name
Glendenning
Member #

22408

Report here on what you find - I am having no luck finding real sliders for my configuration. (Closest I have come is Lund with removable steps, but they are body mount not frame mount. Still - has to be better than my factory running boards).
 

Brian Glendenning

Rank V
Launch Member

Enthusiast III

1,473
Socorro, NM
First Name
Brian
Last Name
Glendenning
Member #

22408

That looks fantastic.

If I have it right those tires are just under 33". My understanding is that Raptor size (315/70/R17 = 34.4") will fit if you have at least a level. I'm currently running stock size (just under 32"), but think I will need more for a trip I want to take next year (to the Maze). Do you have any comments about whether it looks like you could indeed have gone a bit bigger without major surgery?
 

wbslngr

Rank III
Launch Member

Enthusiast III

646
Owasso, Oklahoma, USA
First Name
Larry
Last Name
Sang
Member #

19723

Not sure about the bigger tires. These were recommended by the guys at MEO to ensure that I wouldn’t have any issues. Based on the room I have with these 285-70/17 Nitto Ridge Grapplers, I’m guessing you’d be alright with a lift under normal driving. I have not added any lift to rear and the the ICON’s can provide up to 2.5” of lift up front to level it out. Probably worst case scenario is you may have to cut the crash bar and maybe make some adjustments to clear at full lock with some articulation. I just wanted to avoid any of that.
 
Last edited:

Big Blue

Rank IV
Launch Member

Traveler III

1,240
San Gabriel, CA, USA
First Name
Jeff
Last Name
Old
Member #

20327

Ham/GMRS Callsign
GMRS: WRJK336; HAM:
Your truck looks way more aggressive with the new wheels/tires. Do you know what offset your wheels are?

Keep the updates coming. I enjoy seeing the progress.
 
Last edited:
  • Like
Reactions: wbslngr

wbslngr

Rank III
Launch Member

Enthusiast III

646
Owasso, Oklahoma, USA
First Name
Larry
Last Name
Sang
Member #

19723

Got the bulk of the rack together. Gonna bolt it up and mount tent tomorrow so I can drive over and check out Rendezvous Friday morning. I’ll work on the details and finishing it up next week. My buddy really helped me get it together quickly and use his shop. He also volunteered to test it out, lol. IMG_2306.jpgIMG_2315.jpg

One thing I wanted to add is that if anyone else is thinking of doing a similar rack so you can use a bed cover like this... it is necessary to remove the plastic trim that tops the sides of the bed and trim just the part that is on the inside to make room. Here is a before and after for reference...

IMG_2287.jpeg
IMG_2288.jpeg
IMG_2289.jpeg
 
Last edited:

wbslngr

Rank III
Launch Member

Enthusiast III

646
Owasso, Oklahoma, USA
First Name
Larry
Last Name
Sang
Member #

19723

Update... First up FRONT BUMPER. It was a little bit of a struggle in the beginning... lots of wasted time, which I hate, but I've learned a bit that hopefully will help some of you if considering the same route. I'll just get this out of the way... turns out that (on a 2016 anyhow) you CANNOT use a Xeon 10s Winch on an Ecoboost with ADD Stealth Fighter Bumper (Hidden Winch Version) EVEN if you install a Full Race Intercooler. Based on what information was out there... For the front I was sold a "kit" that included the Full Race Intercooler, ADD Stealth Fighter Winch Bumper, Xeon 10s Winch, and Rigid 40" Light Bar.

I got to the part where you install the ADD Winch Bracket and realized right away that we had clearance issues with the Intercooler Plumbing. Then I realized that even if I dog-eared the Mount Plate to clear the Intercooler Pipes, the stock wastegate with this Full Race Kit turned into the space where the Winch would mount. Then I realized after careful measurements and a dive into Sketchup, that even if we got a new downpipe and aftermarket BOV, AND tweaked the plumbing to get it all the way up and out in the space, that winch was still not going to fit. Unfortunately, the only solution would have been to get a smaller winch and try to engineer a remote mechanical free spool lever because the Xeon is the only winch with a remote triggered clutch (required because there is zero access to the winch once everything is full installed.

Here are the photos. I'll try to caption to explain all the wasted time figuring out it was not going to work... lol. Below is the first step after getting the old out and the new intercooler mounted up.

IMG_4173.jpeg

Problem #1... notice the ADD Winch Mount Bracket Contacting the Intercooler Plumbing.

IMG_4181.jpeg

This contact happens with an additional 1-1/2" still to go on cinching it up to the frame...

IMG_4182.jpeg

Here, with the Winch Bracket removed, you can see that even if I dog-eared the bracket, the stock Blow Off Valve is turned right into the space where the winch should be...

IMG_4176.jpeg


Here is a view from below the truck looking up with the bracket partially installed... you can clearly see how little space is left....

IMG_4192.jpeg

Here you can see that with a tape measure on it, there is barely 21" between the intercooler pipes, never mind the blow off valve. After some precise measurements... I translated everything to a drawing showing how much space you have (the gray shadow is the outline of the Xeon 10 winch, which is 24-1/4" wide)...

82649008_202362437573446_5718619658928521216_n.png


The reason I chose the ADD Stealth Fighter was mostly because it was the only winch bumper that did not stick out so far that I would not be able to pull my truck into my garage (a storm shelter sits in front of my truck in the garage). I also just really like the look.

After a day of thinking about it, I decided to return the Xeon 10 Winch and Full Race Intercooler and swap out the parts to make the ADD Stealth Fighter the non-hidden winch version. Instead, I would go with a rear hidden winch using the Road Armor Stealth Bumper. I'll post that next.
 
  • Like
Reactions: Brian Glendenning

wbslngr

Rank III
Launch Member

Enthusiast III

646
Owasso, Oklahoma, USA
First Name
Larry
Last Name
Sang
Member #

19723

Another strange issue I ran into on the front of the truck was when I went to wire up the 40" rigid light bar. It came with a harness and relay, so I figured for now I would just wire it up to the battery using the relay and use power from the fog light harness (deleted when I installed the bumper) to trigger the relay (just using the stock fog switch to turn light bar on and off then). Well, that did not work. Anytime fog light switch was engaged, the relay would just buzz. I thought it might just be a faulty relay, but when I did some research... I kept finding other strange issues that people had with the CANBUS system in these modern trucks... so I don't think it was the relay. After I found this aftermarket part for replacing the stock fogs with LED's and read the description, I was convinced that it must just be the system causing the Relay to go wacky and thereby not output the correct voltage (because it was intermittently opening/closing at hight rate). Frustrated, I decided to just order a Switch-Pros and get that installed since it was something I thought I might do later IF I added more lights. Now I guess I'm obligated to do so, lol. Here is an image describing what happened for any of you considering using a relay to power something from a stock switch. I doubt you would have this issue from auxillary switch bank included with some trucks, however.
83162598_1605103262980490_2531019296910344192_n.jpeg
 
Last edited:

wbslngr

Rank III
Launch Member

Enthusiast III

646
Owasso, Oklahoma, USA
First Name
Larry
Last Name
Sang
Member #

19723

So, now that I had a Switch Pros and New Winch (Warn 9.5XP) and Rear Bumper on the way (also ordered the Swarfworks Sunglass Holder Mount)... I decided to go ahead and order some 1/0 welding cable and get the battery take-off run going to the back of the truck at the same time. I ordered the cable, a high-amp cutoff switch, loom and some clamps to hang it (that cable is heavy). I already had some underground rated wire to extend SwitchPros wiring to various places in the vehicle for future use. I also took advantage of having the "ammo cans" on the Decked Bed Drawer system and installed some terminal points in there for convenience and protection from the weather. I mounted the Switch Pro's unit on top of the Fuse Box Lid. The lid is angled toward the firewall already, so I'm not concerned really with having it mounted in a horizontal flat position. There was just no place to mount in the bay vertically. For extra precaution, once I had everything wired up and loomed (soldered and heat shrunk everything), I added some rubber waterproofing tape to the harness just to prevent any potential for whatever to make it's way into the harness.

Here is where I mounted it...

IMG_4267.jpeg

Here is everything wired up and power and ground extension (with cut off) running from battery towards the back of the truck...

IMG_4275.jpeg

Switch Pros leads and Ground getting ready to be loomed (you can see the already loomed Power hanging on the truck in the background)...

IMG_4271.jpeg

Because the cables were so heavy... I decided to use RivNuts added to the body to hold actual stainless bolts with Rubber Covered Clamps...

IMG_4281.jpeg
IMG_4283.jpeg

I went up into the bed near the cab and ran them the rest of the way in the small void next to the Decked Box...

IMG_4284.jpeg
Then into the Ammo Can at the rear near the tailgate (you can also see the future SwitchPros wires there, the Ammo Can makes a nice junction box)...
IMG_4282.jpeg

Here is the SwitchPros mounted in the Swarfworks Sunglass Holder Mount (I have not installed label covers yet). The mount is a 3D printed part. I would highly recommend it as it's the best option at the moment, but for the price I expected the fitment into the area to be much cleaner (notice the borders on the 2nd pic)...

IMG_4286.jpeg
IMG_4277.jpeg

In the end, I'm glad I went ahead and got the SwitchPros installed. It has 8 switches, (4) 20AMP and (4) 35AMP. I chose to run wires as follows:

20AMP
1 - Future (Under Hood)
2 - Baja Designs S2 in Rear Bumper
3 - Future (Passenger Foot Well)
4 - Future (Rear Ammo Can)

35AMP
5 - Future (Rear Ammo Can)
6 - Future (Rear Ammo Can)
7 - 40” Rigid Radiance Bar Front Bumper
8 - Future (Under Hood)
 
Last edited:

wbslngr

Rank III
Launch Member

Enthusiast III

646
Owasso, Oklahoma, USA
First Name
Larry
Last Name
Sang
Member #

19723

Once the rear bumper arrived I got to work getting the Baja Designs Lights and Winch mounted up. The lights were a perfect fit. However, I ran into an issue with the Warn Fairlead as it did not clear the bottom mounting bolts for the winch and therefore did not line up correctly where Road Armor made mount holes for the Fairlead...

IMG_4301.jpeg

Not a huge problem... I just went to a bench grinder and removed material from the back of the fairlead until it would slip over the bolt from the winch mount...

IMG_4305.jpeg
IMG_4306.jpegIMG_4309.jpeg

Next up was figuring out the license plate. One thing about this bumper is that the license plate area is recessed into the bumper. This is good, except that none of the fairlead mounted license plate holders will work because of the lip at the top of the recess. I ended up buying this one (which was waaay more than I wanted to spend) because the reviews stated the material and hinge were top notch...

83990275_591037501479099_6334714863360671744_n.png


My idea was to just forget the fairlead bracket and mount directly to the bumper. I was able to do so by reversing the hinge. It just required putting a couple of rivnuts into the bumper and shave off some extra ABS on the hinge so I could mount flush upside down...

IMG_4315.jpegIMG_4316.jpeg

IMG_4317.jpeg
IMG_4318.jpeg


But once I installed the plate holder, it hung lower than I wanted...

IMG_4320.jpeg


So I cut off the tab, flipped it over and tapped two holes to move it up which put it perfectly where I wanted it...

IMG_4321.jpeg

Finally, because the plate lights in the bumper would have been behind the plate at this point, I wired up a plate frame with an LED light included and mounted the plate...

IMG_4322.jpeg
IMG_4323.jpeg
 

wbslngr

Rank III
Launch Member

Enthusiast III

646
Owasso, Oklahoma, USA
First Name
Larry
Last Name
Sang
Member #

19723

The last issue with the rear bumper was that the control box for the Warn 9.5XP set right on top, pointing the port for plugging in the wired or wireless controller right towards the spare tire. With the spare installed, there was not enough room to plug in!!! That was fine, really, because I did not like the idea of having to reach under and plug in the controller... so I made some new longer cables, opened the control box and connected them up so I could locate it on the bottom corner of the decked box. Much more convenient!!!

IMG_4377.jpeg
IMG_4459.jpegIMG_4462.jpeg
IMG_4464.jpeg
IMG_4461.jpeg
IMG_4460.jpeg
 

Attachments