Here is my teardrop build.
- Thread starter Todd & Meg
- Start date
You are using an out of date browser. It may not display this or other websites correctly.
You should upgrade or use an alternative browser.
You should upgrade or use an alternative browser.

I have some more I can update soon. Had a shoulder/ neck injury that has set me back. Once I can sit through an MRI (tried twice now and the pain is to much) we can figure out where the problem is. But I am planing on getting something done on the camper this weekend.
Todd
Todd

Influencer II

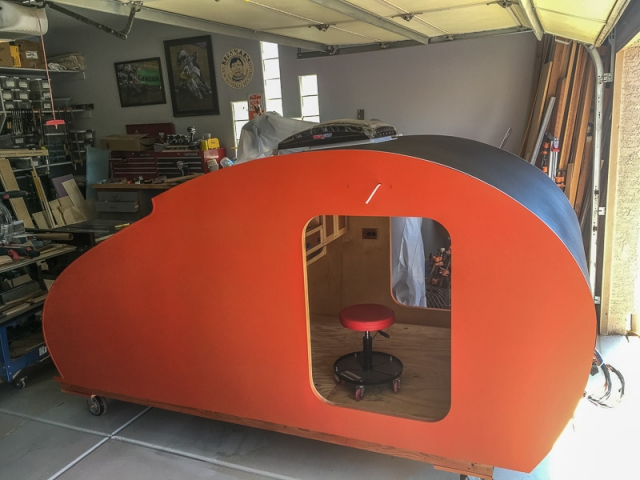
I jumped the gun a little with the last photo of the frame, I skinned the outside with .040 aluminum.


This was probably one of the worst job on the whole build. Hot little pieces of hot aluminum flying everywhere. And the aluminum would melt on the router bit, I even went out and got a router with variable speed to slow it down to make less heat. The CFO even asked if I needed another router.
CFO...You have four routers already why do you need another?
Me... It's a safety issue, lower speed would cut better with not as many hot pieces of aluminum.
CFO... If it's going to help get it.
ME (to my self)... She thinks I only have four routers? That's cute!


The same time I was putting the skins on I was working on the hatch. I have seen a lot of builds where people struggle with the hatch. I had no problems with mine.
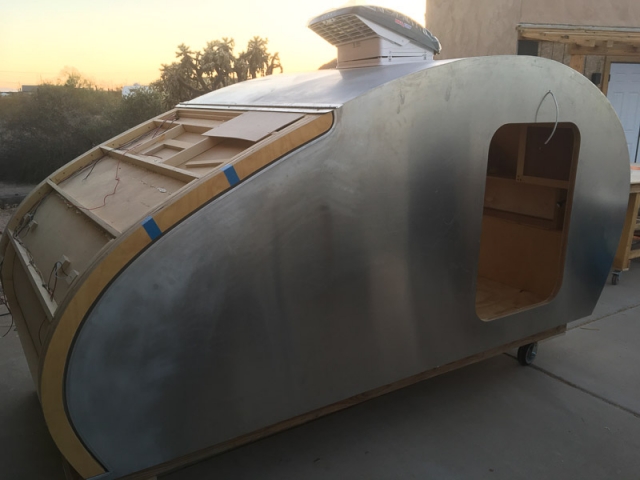
If you are wondering why the roof fan is sometimes sideways and sometime right I just have it up there temporary to get air while working inside the cabin.
This was probably one of the worst job on the whole build. Hot little pieces of hot aluminum flying everywhere. And the aluminum would melt on the router bit, I even went out and got a router with variable speed to slow it down to make less heat. The CFO even asked if I needed another router.
CFO...You have four routers already why do you need another?
Me... It's a safety issue, lower speed would cut better with not as many hot pieces of aluminum.
CFO... If it's going to help get it.
ME (to my self)... She thinks I only have four routers? That's cute!
The same time I was putting the skins on I was working on the hatch. I have seen a lot of builds where people struggle with the hatch. I had no problems with mine.
If you are wondering why the roof fan is sometimes sideways and sometime right I just have it up there temporary to get air while working inside the cabin.
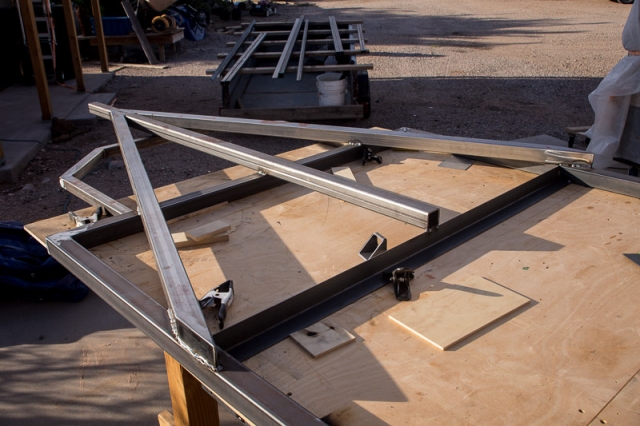
The next step was the frame. Most people start their build with the frame, but because I knew when I started the build I was going to have the foot sugary I wanted to have the cabin started hoping there would be easy things for me to do while I recover. Which did work out. But the thing that didn't work out was I was starting the frame in June. Not the best plan.
I built the frame on the same table I started the cabin on that I knew was flat. And it kept me from working on the floor. My knees are not happy with me when I work on the floor.
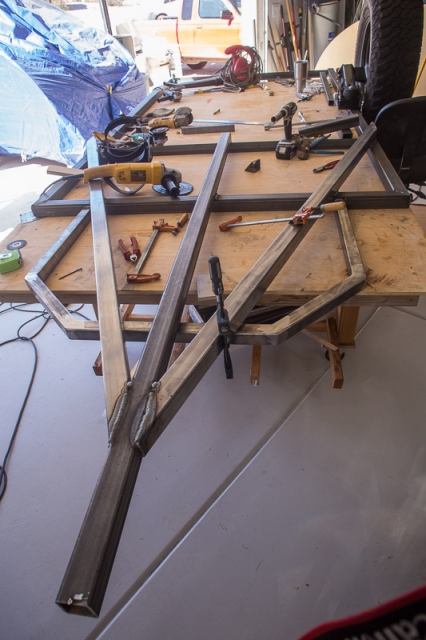
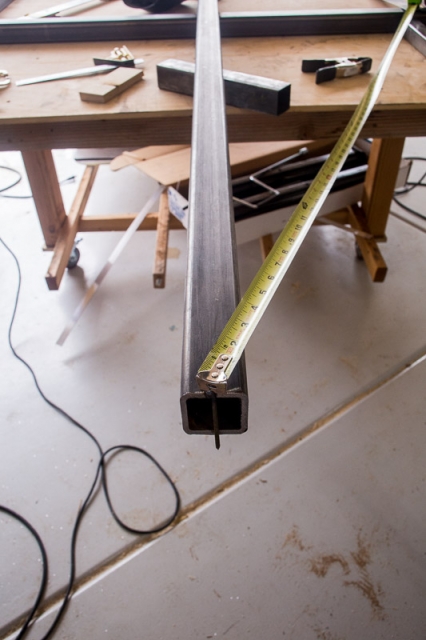
As you can see way over built. I used 2X2X1/8 tube. With a piece of 2X2X3/16 for the tongue.
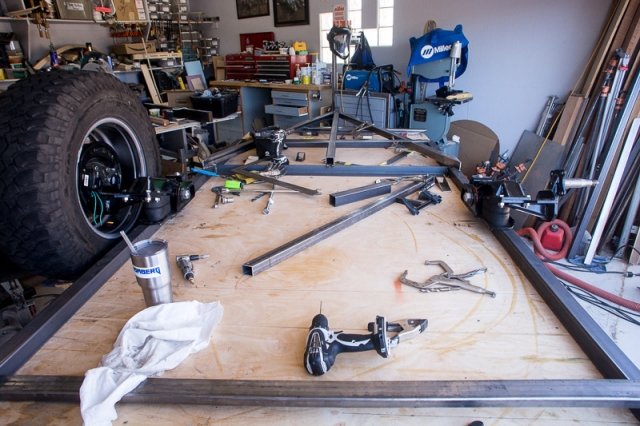


I went with the Timbren Axles. 2000# Heavy Duty with 4" lift. So far I like them but they are heavy and pricy.

This is why I didn't want to be working on the frame in the summer. It's tough getting home from work and going into the garage to weld or grind. I'll admit I'm more of a grinder than a welded. LOL

I built the frame on the same table I started the cabin on that I knew was flat. And it kept me from working on the floor. My knees are not happy with me when I work on the floor.
As you can see way over built. I used 2X2X1/8 tube. With a piece of 2X2X3/16 for the tongue.
I went with the Timbren Axles. 2000# Heavy Duty with 4" lift. So far I like them but they are heavy and pricy.
This is why I didn't want to be working on the frame in the summer. It's tough getting home from work and going into the garage to weld or grind. I'll admit I'm more of a grinder than a welded. LOL
Last edited:
I lost a bunch of pictures on the frame build. All the ones with the fenders, which is probably good because I'm not sure I'm happy with them. When I started building I wanted the same wheels and tires that we had on the Jeep. We still have the stock Rubicon wheels with a 33X10.5 tire. My plan was to stick with the stock rims which I like and go to a 35X12.5 tire. So that is what I built for. The problem was I couldn't find the rims for a reasonable price, It was crazy what people wanted for them. Then I got thinking I would just go with 34X10.5 tire on the Jeep instead of 35's. So not having a clue what I wanted I found some stock Wrangler wheels with the stock mud terrain tires that still had some life. There is all kinds of problems putting car wheels on a trailer and if anyone wants to know ask and I can go into details. But at least I have some wheels that will work to finish the build and a few trips.
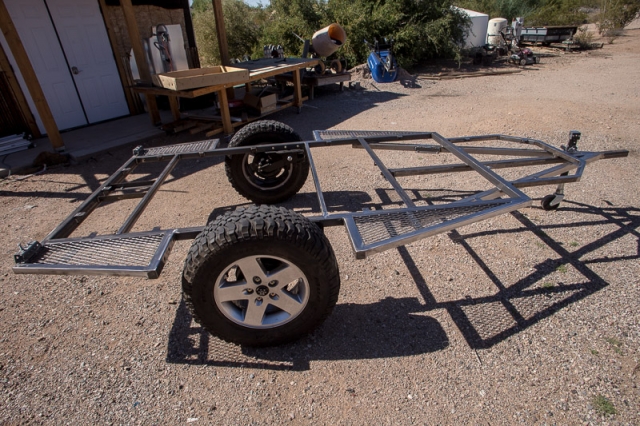
The fenders mount to the frame not the cabin. I have seen where people rip the fenders off and do a lot of damage to the camper walls. I also wanted nerf bars for protection. Problem is add protection is added weight. Ugh!
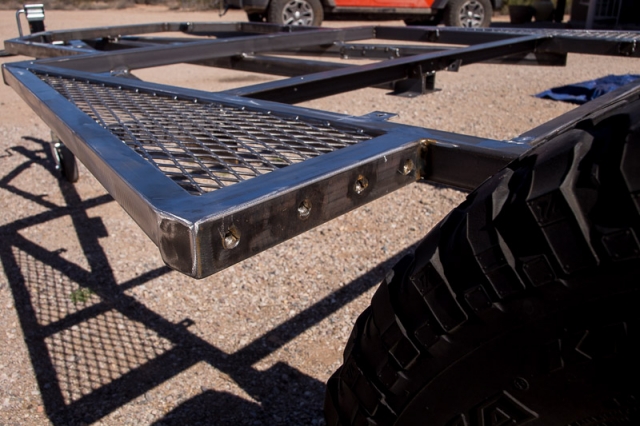
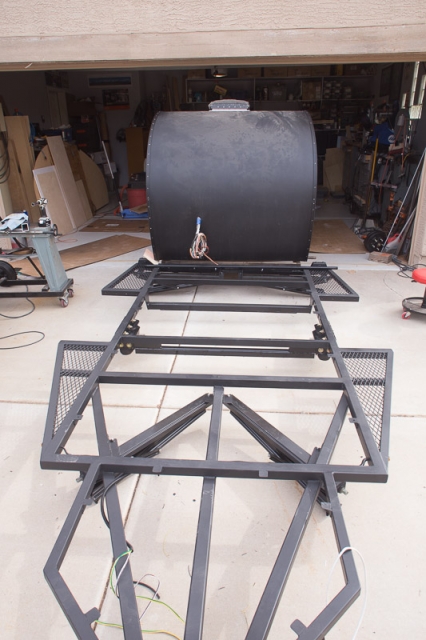
One of the other things I struggled with was how to haul water. We live in the desert and so extra water is always good and I also wanted a shower since we hardly ever camp in campgrounds with showers. So the best place for water storage is between tha axles. While I looked for a tank I didn't want the frame to get rust while sitting so a few coats of POR 15 top coated with Raptor Liner. But I left the part I would still need to weld clear.

I came up this this for the tank. The aluminum will be a skid plate to protect the tank. This will be added on as an upgrade at a later date.


Finished frame less axles, stabilizer jacks installed.

The fenders mount to the frame not the cabin. I have seen where people rip the fenders off and do a lot of damage to the camper walls. I also wanted nerf bars for protection. Problem is add protection is added weight. Ugh!
One of the other things I struggled with was how to haul water. We live in the desert and so extra water is always good and I also wanted a shower since we hardly ever camp in campgrounds with showers. So the best place for water storage is between tha axles. While I looked for a tank I didn't want the frame to get rust while sitting so a few coats of POR 15 top coated with Raptor Liner. But I left the part I would still need to weld clear.
I came up this this for the tank. The aluminum will be a skid plate to protect the tank. This will be added on as an upgrade at a later date.
Finished frame less axles, stabilizer jacks installed.

Looking good...love teardrop trailersI lost a bunch of pictures on the frame build. All the ones with the fenders, which is probably good because I'm not sure I'm happy with them. When I started building I wanted the same wheels and tires that we had on the Jeep. We still have the stock Rubicon wheels with a 33X10.5 tire. My plan was to stick with the stock rims which I like and go to a 35X12.5 tire. So that is what I built for. The problem was I couldn't find the rims for a reasonable price, It was crazy what people wanted for them. Then I got thinking I would just go with 34X10.5 tire on the Jeep instead of 35's. So not having a clue what I wanted I found some stock Wrangler wheels with the stock mud terrain tires that still had some life. There is all kinds of problems putting car wheels on a trailer and if anyone wants to know ask and I can go into details. But at least I have some wheels that will work to finish the build and a few trips.
The fenders mount to the frame not the cabin. I have seen where people rip the fenders off and do a lot of damage to the camper walls. I also wanted nerf bars for protection. Problem is add protection is added weight. Ugh!
One of the other things I struggled with was how to haul water. We live in the desert and so extra water is always good and I also wanted a shower since we hardly ever camp in campgrounds with showers. So the best place for water storage is between tha axles. While I looked for a tank I didn't want the frame to get rust while sitting so a few coats of POR 15 top coated with Raptor Liner. But I left the part I would still need to weld clear.
I came up this this for the tank. The aluminum will be a skid plate to protect the tank. This will be added on as an upgrade at a later date.
Finished frame less axles, stabilizer jacks installed.

I got a Cortisone shot in my shoulder and can actually get some time working on the teardrop again. But It's a rainy Sunday, I was planing on spraying some Raptor Liner today but not sure that will happen. So will try to get caught up on the build thread.
Next up was paint. I was going to stray with some auto paint and then decided to us the Raptor Liner since it went on easy and looked great on the frame.
First up was acid etch primer. I was planing on spraying this Saturday for a few weeks and it rains. If I recall this was the first measurable rain we had in over 200 days. We needed the rain but not on my day to spray. Had to go to plan B. It did help lower the temperature a bit.

Quick flash off, two coats later and Bedliner on the roof, wait 1 hour and second coat.


The get set to spray the walls. Got two coats on too. Finished all in one day.

Next was to get it on back on the frame. I had it on the frame once already and had all the mounting holes pre drilled and this time it was less than 10 minutes to do with my wife's help.
I lowered the frame to the same hight as the dolly I had the cabin on and used 3/4" black pipe for rollers. and just rolled it on adjusting the frame height so it wouldn't go to fast.

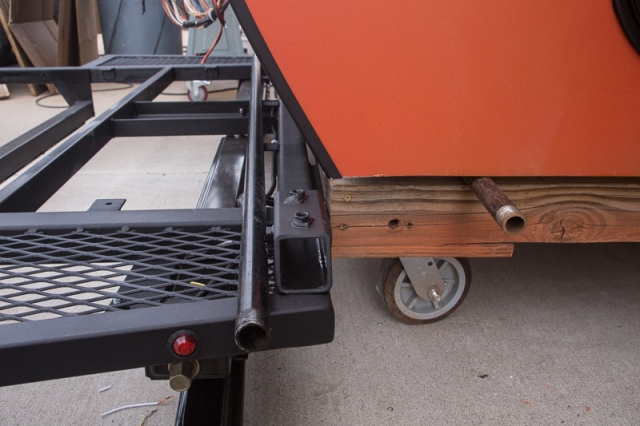
When it was on I used the jacks to raise it to get the axle and wheels back on. Note doors came it too. I was planing on building my doors because two doors are around $700. But when you buy all the parts needed and and factor in the time I couldn't justify building them. I have a total of about 20 minutes messing with doors.


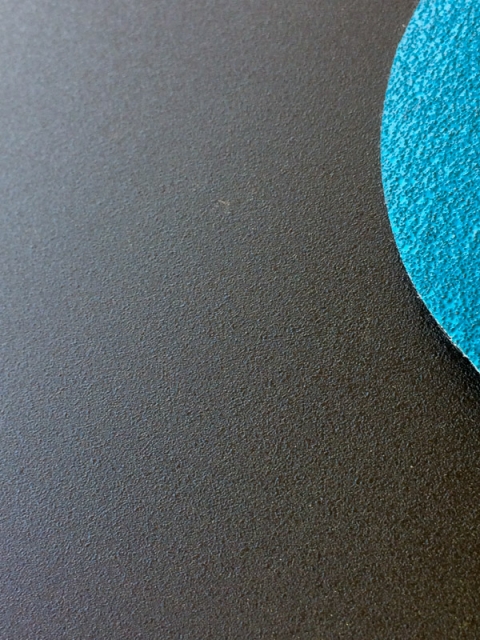
Here is a close up of the texture of the Raptor Liner. The blue disc is a 80 sanding disc. This is what I was after I didn't want the course look you see on some Bedliners.

Had to get an idea what it will look like behind the Jeep.

I have a few more picture to get me up to where I am now.
Thanks for the kind words and for following along.
Todd
Next up was paint. I was going to stray with some auto paint and then decided to us the Raptor Liner since it went on easy and looked great on the frame.
First up was acid etch primer. I was planing on spraying this Saturday for a few weeks and it rains. If I recall this was the first measurable rain we had in over 200 days. We needed the rain but not on my day to spray. Had to go to plan B. It did help lower the temperature a bit.
Quick flash off, two coats later and Bedliner on the roof, wait 1 hour and second coat.
The get set to spray the walls. Got two coats on too. Finished all in one day.
Next was to get it on back on the frame. I had it on the frame once already and had all the mounting holes pre drilled and this time it was less than 10 minutes to do with my wife's help.
I lowered the frame to the same hight as the dolly I had the cabin on and used 3/4" black pipe for rollers. and just rolled it on adjusting the frame height so it wouldn't go to fast.
When it was on I used the jacks to raise it to get the axle and wheels back on. Note doors came it too. I was planing on building my doors because two doors are around $700. But when you buy all the parts needed and and factor in the time I couldn't justify building them. I have a total of about 20 minutes messing with doors.
Here is a close up of the texture of the Raptor Liner. The blue disc is a 80 sanding disc. This is what I was after I didn't want the course look you see on some Bedliners.
Had to get an idea what it will look like behind the Jeep.
I have a few more picture to get me up to where I am now.
Thanks for the kind words and for following along.
Todd
Great colors.....looks amazing.I got a Cortisone shot in my shoulder and can actually get some time working on the teardrop again. But It's a rainy Sunday, I was planing on spraying some Raptor Liner today but not sure that will happen. So will try to get caught up on the build thread.
Next up was paint. I was going to stray with some auto paint and then decided to us the Raptor Liner since it went on easy and looked great on the frame.
First up was acid etch primer. I was planing on spraying this Saturday for a few weeks and it rains. If I recall this was the first measurable rain we had in over 200 days. We needed the rain but not on my day to spray. Had to go to plan B. It did help lower the temperature a bit.
Quick flash off, two coats later and Bedliner on the roof, wait 1 hour and second coat.
The get set to spray the walls. Got two coats on too. Finished all in one day.
Next was to get it on back on the frame. I had it on the frame once already and had all the mounting holes pre drilled and this time it was less than 10 minutes to do with my wife's help.
I lowered the frame to the same hight as the dolly I had the cabin on and used 3/4" black pipe for rollers. and just rolled it on adjusting the frame height so it wouldn't go to fast.
When it was on I used the jacks to raise it to get the axle and wheels back on. Note doors came it too. I was planing on building my doors because two doors are around $700. But when you buy all the parts needed and and factor in the time I couldn't justify building them. I have a total of about 20 minutes messing with doors.
Here is a close up of the texture of the Raptor Liner. The blue disc is a 80 sanding disc. This is what I was after I didn't want the course look you see on some Bedliners.
Had to get an idea what it will look like behind the Jeep.
I have a few more picture to get me up to where I am now.
Thanks for the kind words and for following along.
Todd
Well done.
At first I couldn't imagine why you would do a black roof, particularly given the temps in your locale, but seeing it behind the Jeep I see why.
Good luck with your own body. Having collected my share of chronic aches/pains over the years I sympathize with you.
At first I couldn't imagine why you would do a black roof, particularly given the temps in your locale, but seeing it behind the Jeep I see why.
Good luck with your own body. Having collected my share of chronic aches/pains over the years I sympathize with you.

Off-Road Ranger I
- 2,876
- First Name
- Todd
- Last Name
- Hoffmaster
- Member #
4284
- Ham/GMRS Callsign
- KJ7CRJ
- Service Branch
- Air Force
That is a great looking trailer. I am wondering why you did not go with more usb outlets in the cabin part of the trailer? Love the Raptor liner - what psi did you use to get the texture that you wanted?
Well done.
At first I couldn't imagine why you would do a black roof, particularly given the temps in your locale, but seeing it behind the Jeep I see why.
Good luck with your own body. Having collected my share of chronic aches/pains over the years I sympathize with you.
When I moved out here I was surprised by how many black or dark cars there are here. I was talking to a co-worker about it and he has a buddy that sold cars at a huge dealer. They took a laser thermometer and took reading in a ton of cars. They found the amount of glass and interior color (dark) had more to do with the inside heat than the color of the car.
I hope that it's true. But even in the middle of summer a 2 hour drive can get you to the mountains with nice night temps.
I wish someone would have told me when I was younger that I'll be paying with aches and pains for doing fun/dumb stuff when I get older. Then I wish I would have listen to them. LOL.
Todd
That is a great looking trailer. I am wondering why you did not go with more usb outlets in the cabin part of the trailer? Love the Raptor liner - what psi did you use to get the texture that you wanted?
Hey sorry to read about the loss of a family member. Always a tough time.
There are six total in the cabin. Two by the slide out shelf and two each side in the for cabinets just behind the reading lights. Computer, cameras, and drone batteries will probably be charged while we drive using the built in inverter.
I used a HF HVLP spray gun with the pressure in the 45-50PSI range. And held the gun 18"-24" away.
Todd
I wish someone would have told me when I was younger that I'll be paying with aches and pains for doing fun/dumb stuff when I get older. Then I wish I would have listen to them. LOL.
Todd
Yeah, but who would want to live without having fun?
I regard foods like donuts and bacon as health food. They are good for the soul. They give me a reason to keep on living.
If I tried to live a "healthy life" I would want to die.
That's no way to live.
Slowly getting back to work on the camper. Still not sure what the shoulder problem is but the pain is not as bad. So time to tress on.
The next big step is to get the tongue box done. The battery and a lot of the electrical will be housed there.
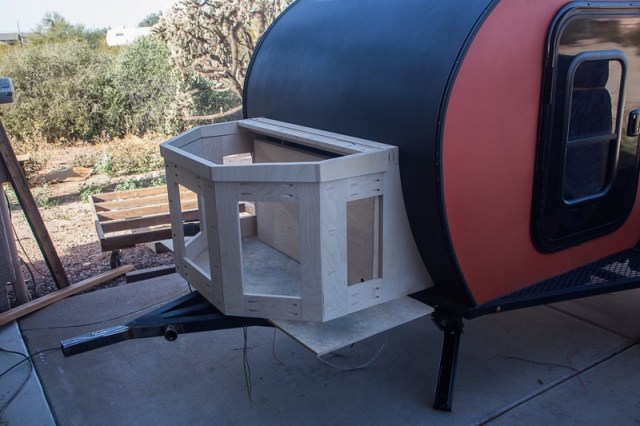
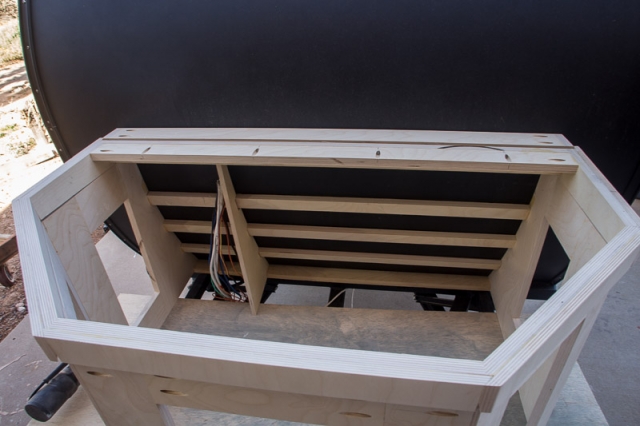
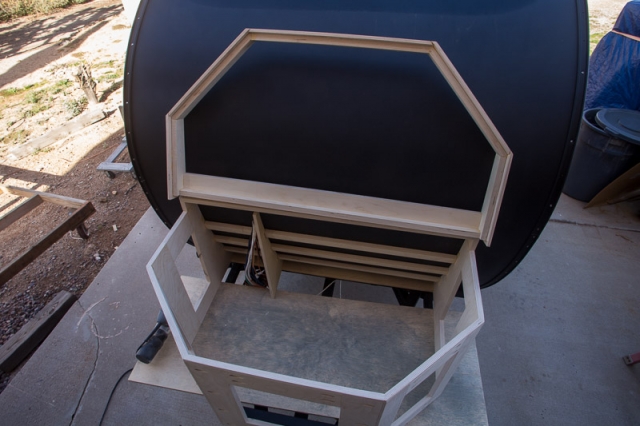
I'm going to try something different with the tongue box, 1/4" plywood, 3 coats of epoxy, then the bedliner, no aluminum skin. I want to see how well it holds up. I might be building a new tongue in the future if it doesn't hold up.


I don't have any pictures but I got the box mounted, but the weather hasn't been good to stray the bedliner, so I'll have to do a lot of masking when I can spray. But this way I was able to get started on getting the last of the electrical hooked up. Battery will be here this week, in the mean time I'll start laying out the galley. I haven't decided yet if I'm going to put in a sink and water now or what and add that later in a year or two. We are getting the itch to get out and camp.
Todd
The next big step is to get the tongue box done. The battery and a lot of the electrical will be housed there.
I'm going to try something different with the tongue box, 1/4" plywood, 3 coats of epoxy, then the bedliner, no aluminum skin. I want to see how well it holds up. I might be building a new tongue in the future if it doesn't hold up.
I don't have any pictures but I got the box mounted, but the weather hasn't been good to stray the bedliner, so I'll have to do a lot of masking when I can spray. But this way I was able to get started on getting the last of the electrical hooked up. Battery will be here this week, in the mean time I'll start laying out the galley. I haven't decided yet if I'm going to put in a sink and water now or what and add that later in a year or two. We are getting the itch to get out and camp.
Todd
This was a big step, getting a title and plates. There are things I would do different next time but it went smooth and had no problems. It was 50 miles round trip and it pulled great.


Member I

Member III
- 2,827
- First Name
- Tom
- Last Name
- Houston
- Member #
8300
- Ham/GMRS Callsign
- WØNUT Extra
