Advocate II
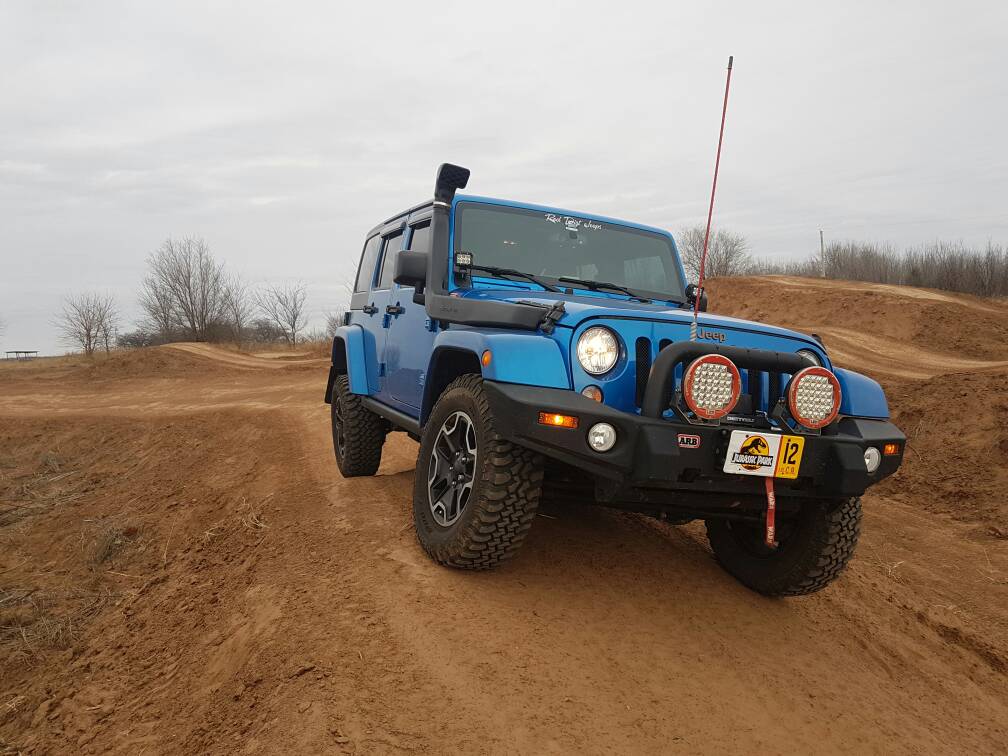
Today was the day that I can never turn back! Haha This project wasn't bad at all. Took roughly 3.5hrs and zero beer surprisingly. Lots of coffee though because the night before I did all the fluids on the Jeep. So here we go the snorkel install for the 2008 Jeep Wrangler Unlimited. (Be safe since you are using power tools. I do not have any responsibility of damage to your vehicle or yourself. This is a tips for the install I did and wanted to elaborate on the instructions that AEV made. (Which were excellent) Sorry for saying that but just a bit of cya for myself. )
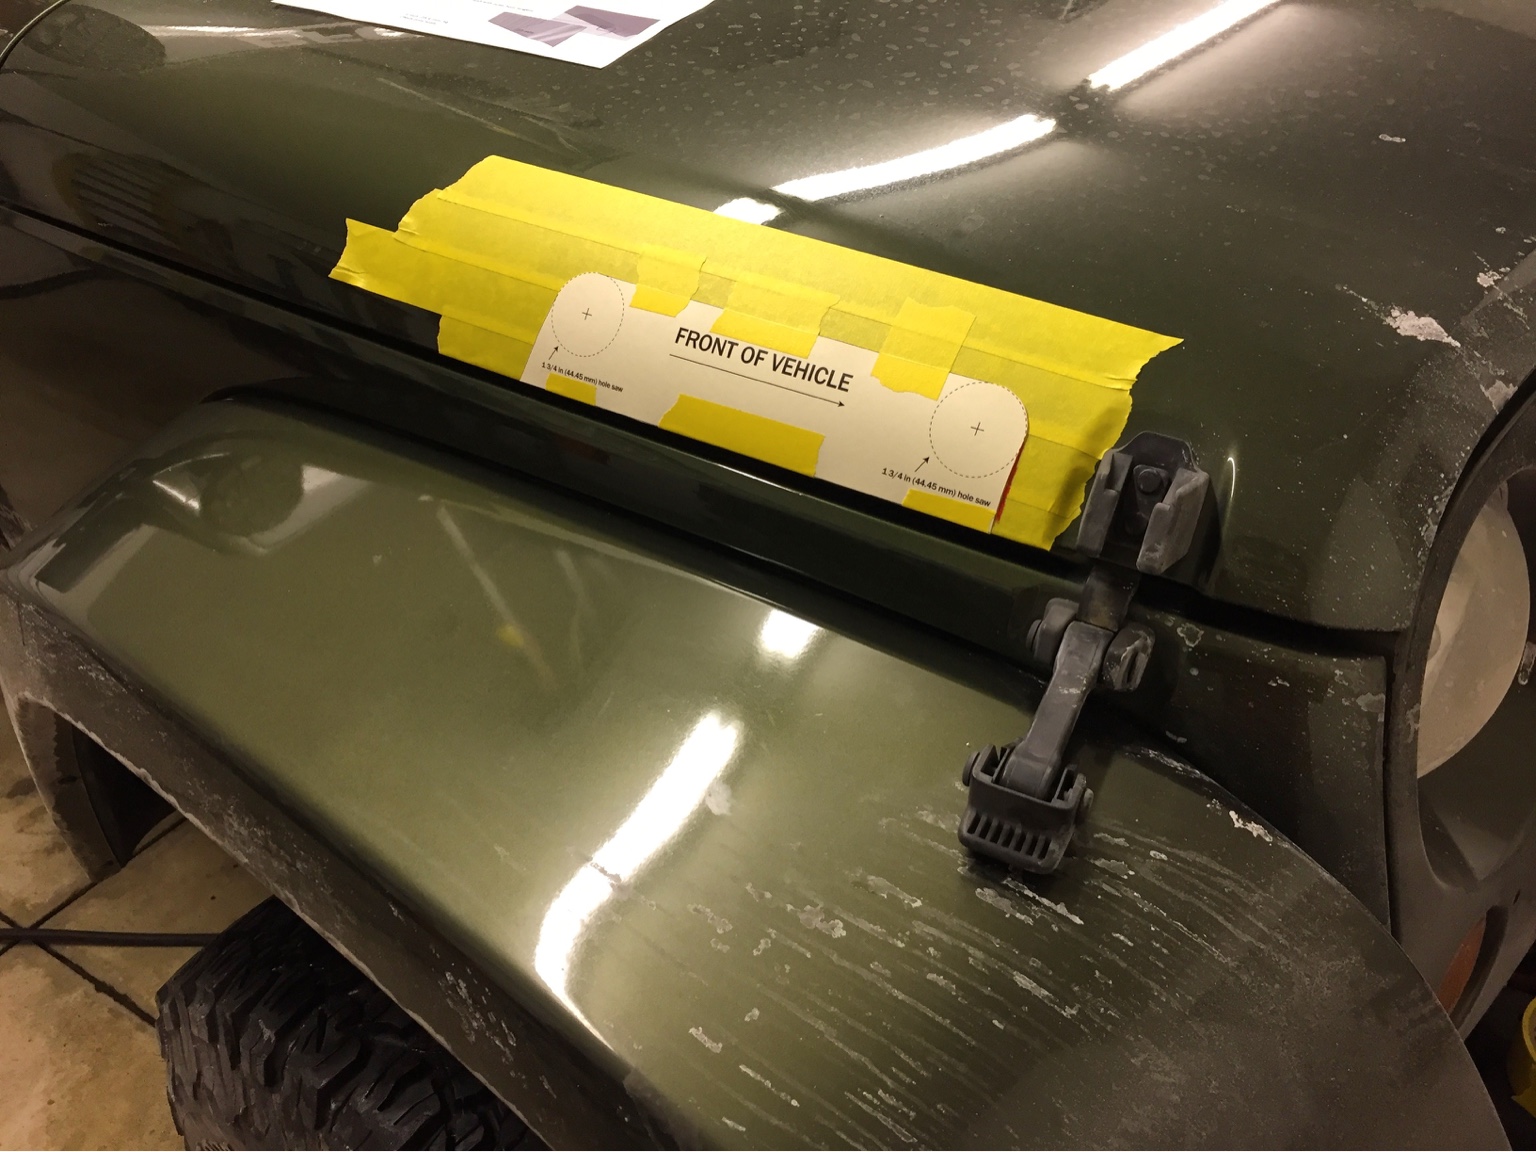
1) Lay tape out over the side of the intake. I like doing this because it allows for a cleaner cut and you can follow a path easier. Also you can draw right on the tape.
2) Follow the instructions that come with the kit. But put the template flush with the bottom of the hood. Then move it 23mm to the left of the radius where the hood latch is. Tape it into place.
3) With a punch mark the center of the hole saw holes. This will help the drill bit to get started and not wander.
4) Outline the template with a marker/pencil/wax pencil. Then remove the template but keep the tape behind.
5) Prop the hood up about 6". I used a plastic bucket which allowed a decent working height.
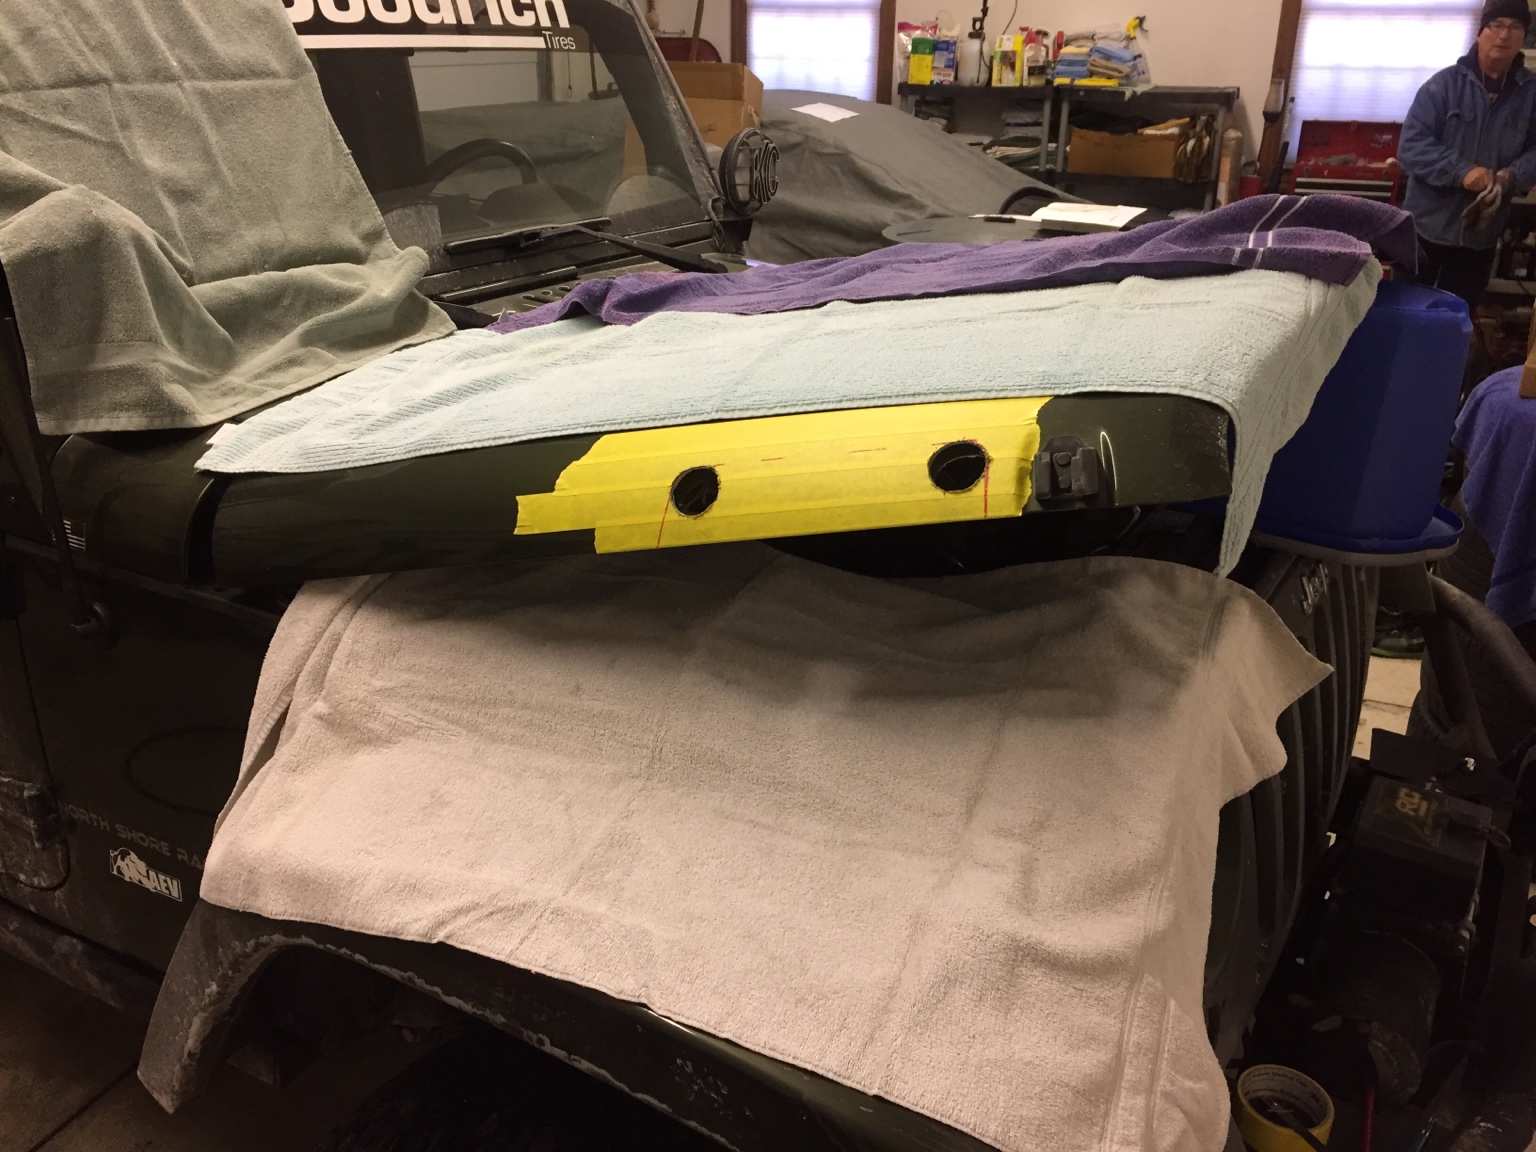
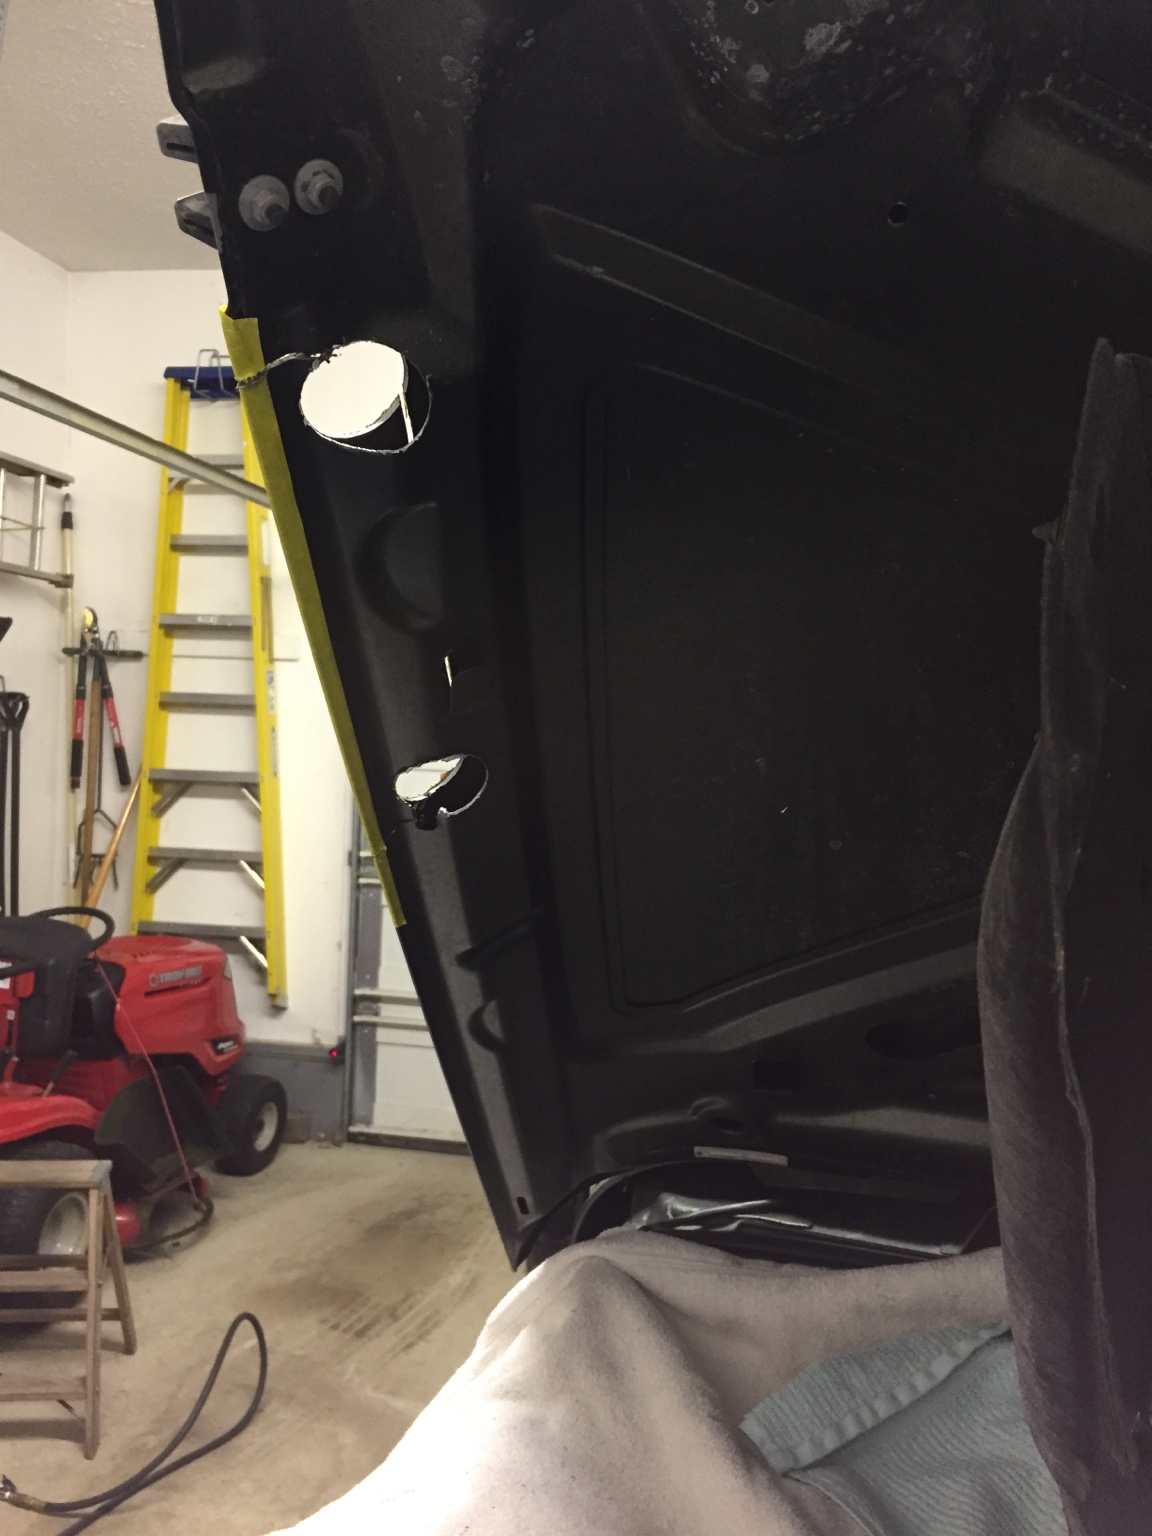
6) Start with a smaller bit and go through the whole hood. Then get your 1 3/4" hole saw and drill through the whole hood.

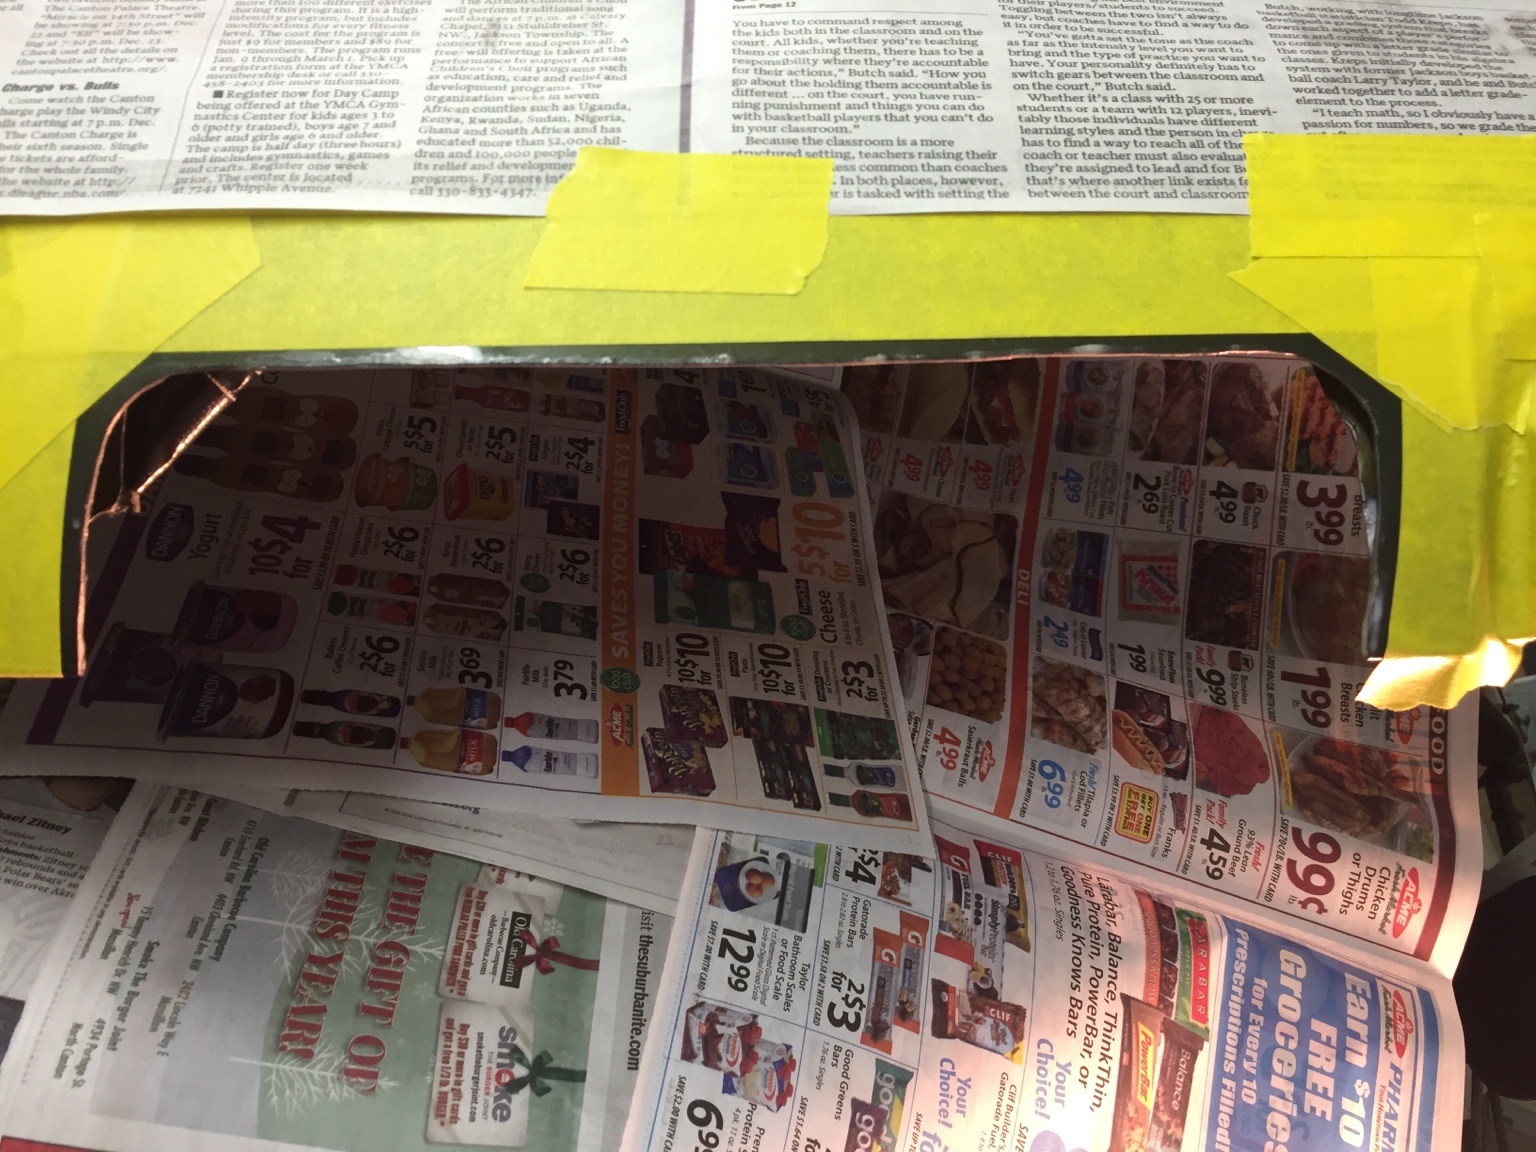
7) Time to get your grinder out. Follow the inside of the line you drew. Last thing you want to do is cut off more than is needed. Better to have too much material left over than too little. Cut through the left and right side first. Then cut through the top layer on the horizontal cut. But leave the bottom layer.

8) Open the hood the rest of the way and prop with the standard hood prop. You will have to pull back the fire blanket. Mark a line a 1/8" away from the radius in the hood on the inside. You will see I used tape to mark it.

9) Get the cutting wheel and go to town. Pull out the piece and throw it away. Or keep it to show your buddies that you did something cool. Hahaha


10) Do some test fits and see if you need to grind away any more material. Take your time since you have to live with a hole you cut. I measured many times.

11) Take a file and smooth out all the burs you just made. This will make the finished product look so much better.
12) Remove the tape and get some rust treatment stuff to paint it on all the bare metal showing. Even inside the hood and between the sheet metal. You definitely don't want rust.
13) Tape the outside of the hole leaving a 1/4" gap of paint showing. You want to leave this here so you can paint it. Rough up the paint with fine grit sand paper or scotch pad. Both on the inside, outside, and in between.

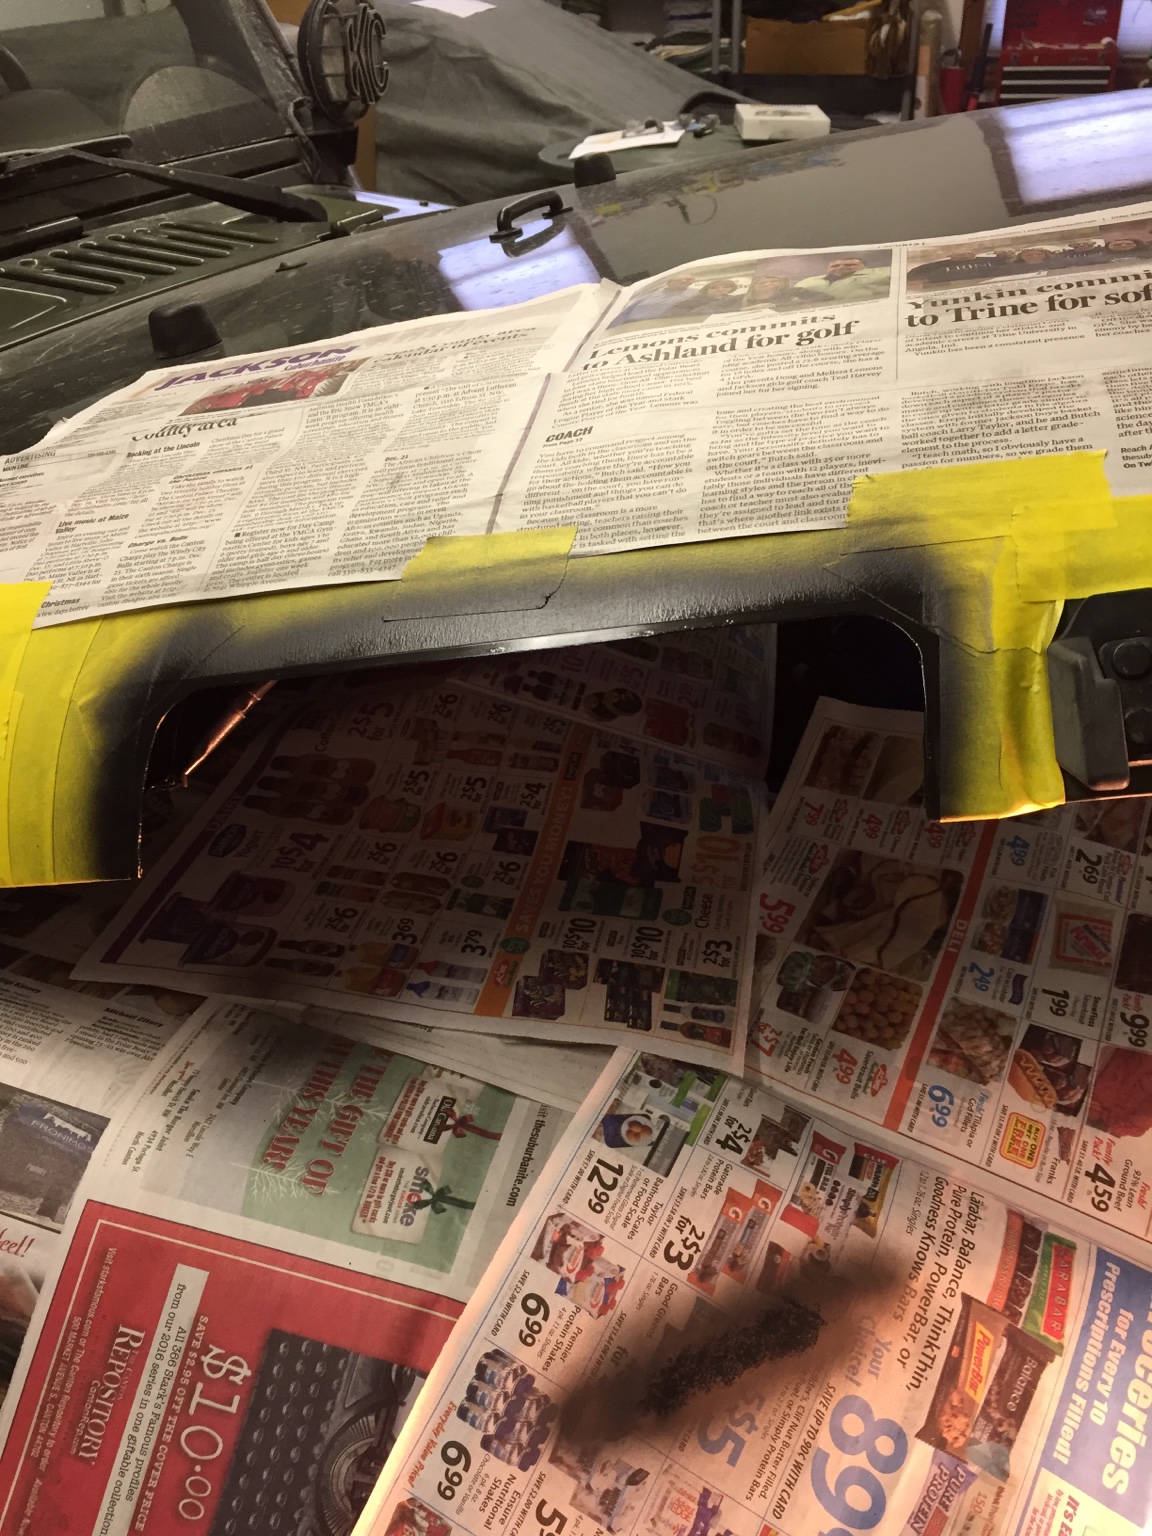

14) I used flat black enamel paint because it would match the green pretty well and hide any reflection when I put on the surround. I sprayed the inside of the hood where I cut. Between the sheet metal and on the outside. Put about 2-3 coats on. Again you don't want to start rust.
15) Let it dry for a while and keep the tape on!! You can use the tape to set up the surround.
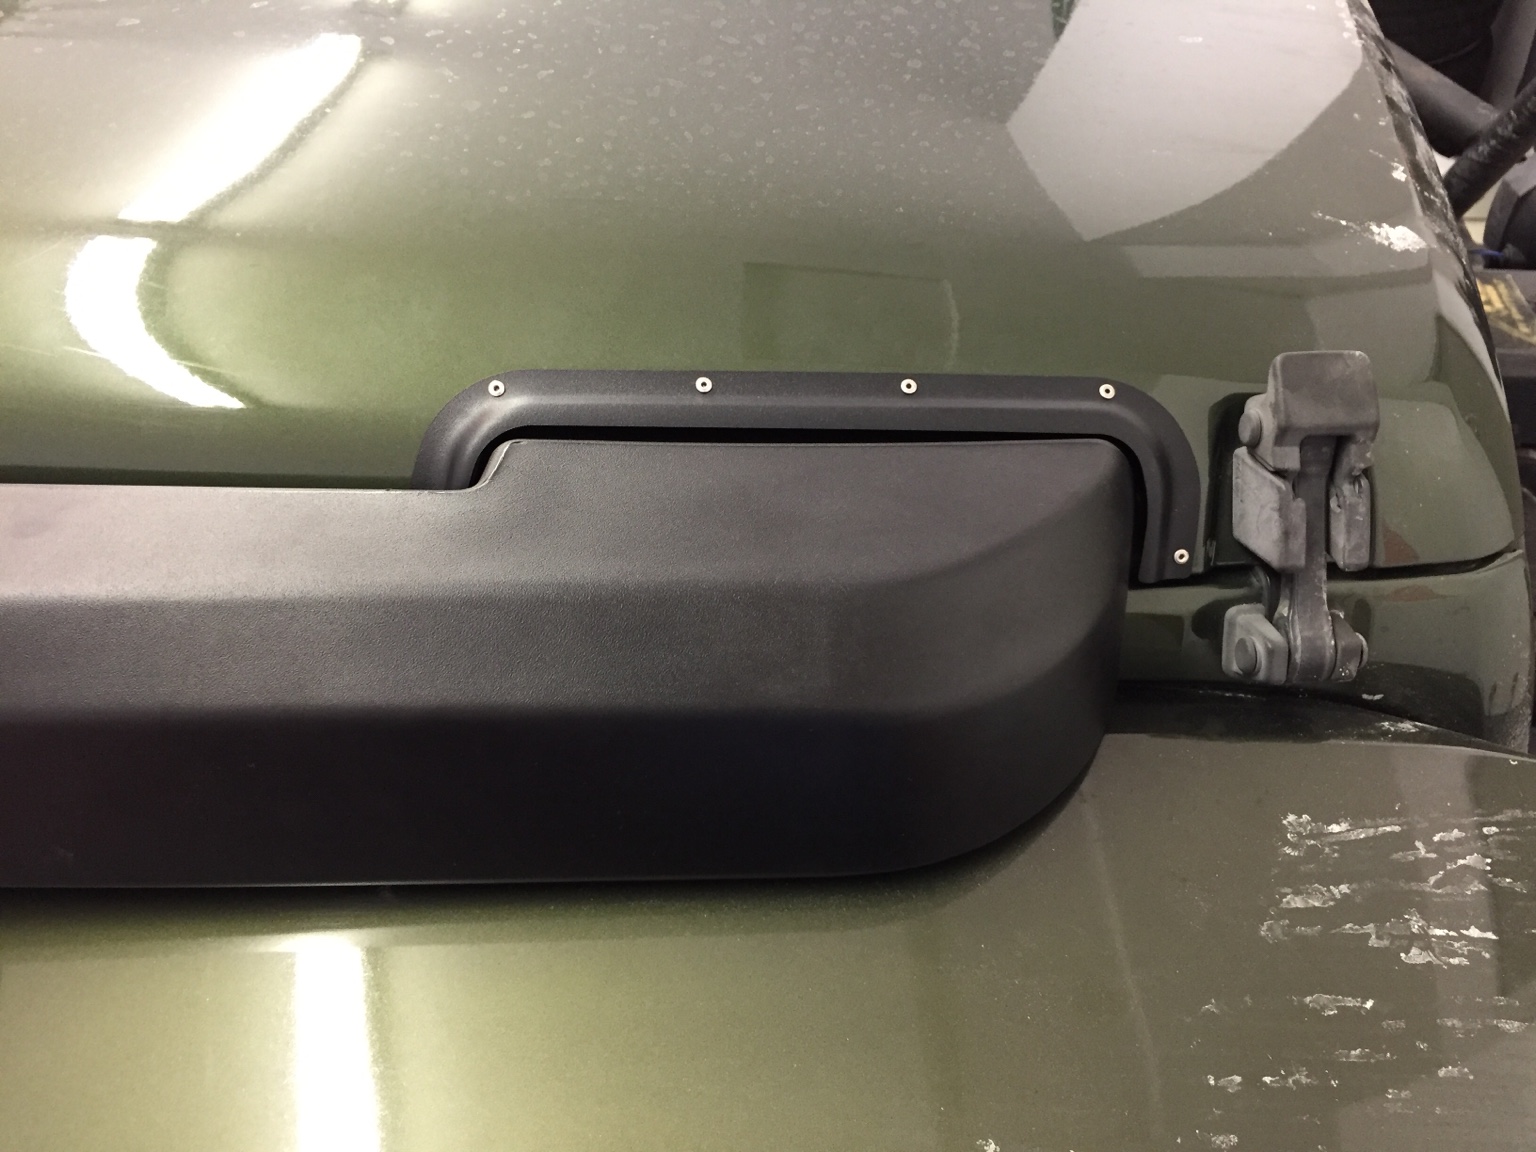
16) Get the surround and put rolled tape on the back. Stick it on and shut the hood. If it doesn't look even on either side. Open the hood and move it till it does. Make sure the bottom of the surround is flush with the bottom of the hood.
17) Get a metallic sharpie and mark the holes for the rivets. Use the punch and mark your holes.
18) Prop the hood again and use an 1/8" drill bit and cut all the holes.


19) Keep the tape on and spray a few coats of black on the holes so they are not bare metal.
20) Remove the tape and get the rivets. Install your surround and install the rivets.


21) Install all other things you need to such as air box, bolts, and any other hoses.
22) Shut the hood and enjoy what you did!!

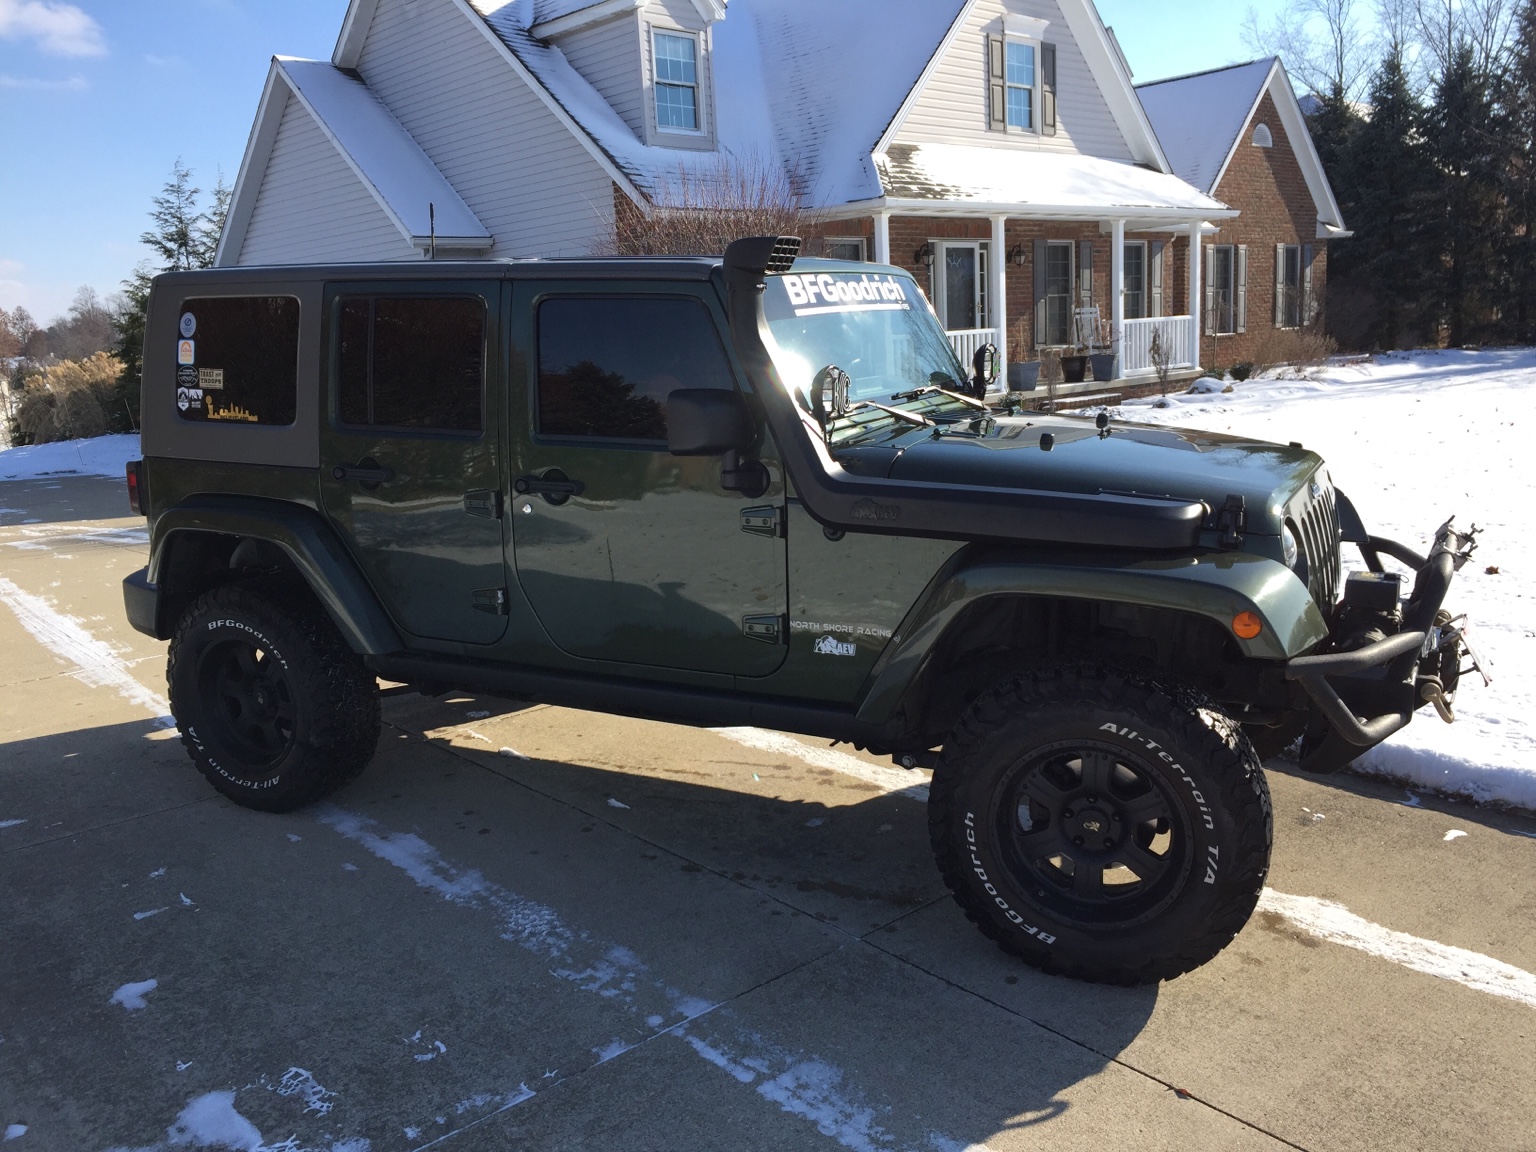
Tips) Get clear silicone or black and put it around where the snorkel goes into the air box. This will not allow water to sneak in. Also allow for more time than you expected. I allotted 4 hours so I could take my time. Other than that enjoy what you are doing and be relaxed!
1) Lay tape out over the side of the intake. I like doing this because it allows for a cleaner cut and you can follow a path easier. Also you can draw right on the tape.
2) Follow the instructions that come with the kit. But put the template flush with the bottom of the hood. Then move it 23mm to the left of the radius where the hood latch is. Tape it into place.
3) With a punch mark the center of the hole saw holes. This will help the drill bit to get started and not wander.
4) Outline the template with a marker/pencil/wax pencil. Then remove the template but keep the tape behind.
5) Prop the hood up about 6". I used a plastic bucket which allowed a decent working height.
6) Start with a smaller bit and go through the whole hood. Then get your 1 3/4" hole saw and drill through the whole hood.
7) Time to get your grinder out. Follow the inside of the line you drew. Last thing you want to do is cut off more than is needed. Better to have too much material left over than too little. Cut through the left and right side first. Then cut through the top layer on the horizontal cut. But leave the bottom layer.
8) Open the hood the rest of the way and prop with the standard hood prop. You will have to pull back the fire blanket. Mark a line a 1/8" away from the radius in the hood on the inside. You will see I used tape to mark it.
9) Get the cutting wheel and go to town. Pull out the piece and throw it away. Or keep it to show your buddies that you did something cool. Hahaha
10) Do some test fits and see if you need to grind away any more material. Take your time since you have to live with a hole you cut. I measured many times.
11) Take a file and smooth out all the burs you just made. This will make the finished product look so much better.
12) Remove the tape and get some rust treatment stuff to paint it on all the bare metal showing. Even inside the hood and between the sheet metal. You definitely don't want rust.
13) Tape the outside of the hole leaving a 1/4" gap of paint showing. You want to leave this here so you can paint it. Rough up the paint with fine grit sand paper or scotch pad. Both on the inside, outside, and in between.
14) I used flat black enamel paint because it would match the green pretty well and hide any reflection when I put on the surround. I sprayed the inside of the hood where I cut. Between the sheet metal and on the outside. Put about 2-3 coats on. Again you don't want to start rust.
15) Let it dry for a while and keep the tape on!! You can use the tape to set up the surround.
16) Get the surround and put rolled tape on the back. Stick it on and shut the hood. If it doesn't look even on either side. Open the hood and move it till it does. Make sure the bottom of the surround is flush with the bottom of the hood.
17) Get a metallic sharpie and mark the holes for the rivets. Use the punch and mark your holes.
18) Prop the hood again and use an 1/8" drill bit and cut all the holes.
19) Keep the tape on and spray a few coats of black on the holes so they are not bare metal.
20) Remove the tape and get the rivets. Install your surround and install the rivets.
21) Install all other things you need to such as air box, bolts, and any other hoses.
22) Shut the hood and enjoy what you did!!
Tips) Get clear silicone or black and put it around where the snorkel goes into the air box. This will not allow water to sneak in. Also allow for more time than you expected. I allotted 4 hours so I could take my time. Other than that enjoy what you are doing and be relaxed!