A new hope.

  • HTML tutorial

Matthew Reed

Rank IV
Launch Member

Enthusiast III

1,308
Georgia
First Name
Matthew
Last Name
Reed
Member #

22957

Today’s project: Installing my new GMRS radio. Pretty simple install, I hid the wiring behind the dash and under the center console but I didn’t hard wire anything. Haven’t really gotten a chance to use it yet and honestly have no idea what I’m doing with it. I really need to find a user manual and dig into it. Haven’t got my license yet so for now it’s just there to look at and tinker with. Planning on getting my license before my next big trip and probably gonna pick up a couple Handhelds to toss to my friends. Later this week I have an attachment for my Ram Mount bar to hold the handset coming in. For now I guess it’s just gonna hang out in the little cubby hole down there.
 

Attachments

  • Like
Reactions: SLO Rob

Matthew Reed

Rank IV
Launch Member

Enthusiast III

1,308
Georgia
First Name
Matthew
Last Name
Reed
Member #

22957

Not quite done yet, but today I finished installing my front lift springs and I got my body lift installed! Also added one of the more important mods, my OB Emblem
What size wheels are you running? I bought my truck used and it had a level on the front, which sits a little higher then the rear but I think I just may remove the spacers and put a 3 inch lift on it. I want to be able to clear 35's. Im running Cooper Discoverer ATP's LT275/65R20's at the moment(came on it).
Right now I’m running the stock tires. 265/75R16’s. Now that my body and suspension lift are in I’m going to go up to a 33” tire. My understanding is that with Frontiers to go to a 35 requires a lot of cutting regardless of your lift. I’d rather not cut up my truck just yet so for now 33’s will be it for me. Between the tires and suspension I should end up with a couple extra inches of ground clearance which is desperately needed.
 

Matthew Reed

Rank IV
Launch Member

Enthusiast III

1,308
Georgia
First Name
Matthew
Last Name
Reed
Member #

22957

Today’s project was building out a platform in the back of the cab for my dogs. I’ve had the rear seats removed for about the last year and haven’t missed them at all. Gave me a lot more room for the dogs but I lost some storage space and because of the weird bump in the back of the truck I didn’t really gain that much space for the dogs. In addition to that, the stock subwoofer sits down under the rear seat and I had to remove it every time I wanted to bring the dogs anywhere

The goal for this project was to maximize the space back there as well as gain some useful storage. I used a bunch of leftover plywood and hardware so cost was free! Added a moving blanket from harbor freight (freebie coupon) and voila. Now the dogs have a ton of room and I retained my storage space. I attached it to the truck by using the factory studs that originally held the seats in. I’ll have a video coming soon that breaks it down a little more.
 

Attachments

Last edited:
  • Like
Reactions: mcgyver0302

Matthew Reed

Rank IV
Launch Member

Enthusiast III

1,308
Georgia
First Name
Matthew
Last Name
Reed
Member #

22957

Another update! Started working on my new drawer system for the bed. Currently, I have two 18” drawers that fit between the wheel wells. They are about 4 feet long. Then on either side i had two big cubby holes that I stored a bunch of random gear in. I learned a lot building that system but now it’s time to version 2.0. On one side I’m going to have a single large drawer and on the other side I’m going to have a slide out for my cooler and stove. The ones I could find online were ridiculously expensive so I’ll be making my own. Picture down below of what I have so far.
 

Attachments

Matthew Reed

Rank IV
Launch Member

Enthusiast III

1,308
Georgia
First Name
Matthew
Last Name
Reed
Member #

22957

Got my 300 lb drawer slides in today so hopefully I’ll be making some real progress on the drawer system this weekend. Also going to try my luck building a new roof rack.
 

Matthew Reed

Rank IV
Launch Member

Enthusiast III

1,308
Georgia
First Name
Matthew
Last Name
Reed
Member #

22957

Finished bolting in my cooler/stove slide out today and started painting my new roof rack. May have gone a little overboard building this thing, but it is sturdy! I used superstrut to build it. Runs the entire length of my camper shell and on the sides it overhangs by a few inches. I wanted it to hang out a little bit so that my awning can mount further out. The awning room from ARB that I use works best when it can go straight down from where the awning mounts. The way it was mounted previously kept it a little too close to the side of the truck so hopefully this will fix it. Trying to figure out no what to put in behind the cooler slide. It’s a pretty big space (15x29) and I was hoping to put a water tank or something in there since it will be a hard spot to access when the truck is loaded up. My old setup had tools stored in a similar spot but they were a huge pain to get out when I needed them. A water tank that I wouldn’t need to access often would be good but I can’t find anything I like that will fit.
 

Attachments

Last edited:

Matthew Reed

Rank IV
Launch Member

Enthusiast III

1,308
Georgia
First Name
Matthew
Last Name
Reed
Member #

22957

Got everything buttoned up today. Roof rack mounted on the truck with my awning and hi lift jack. Obligatory picture of me standing on it. This rack is pretty solid and I’m actually really impressed with what I was able to accomplish. I have roof rails coming for the cab and when they arrive I may make an identical rack for over the cab that I can mount some lights on the front of. Also came up with an easy paper towel holder using some 550 cord.

Next project is to finish the bed up. I’m going to add a long drawer that goes the length of the bed next to the cooler slide out. It’s main purpose will be to hold cooking gear and dry foods. Still need to figure out what’s going to go behind the cooler.
 

Attachments

  • Like
Reactions: mcgyver0302

Matthew Reed

Rank IV
Launch Member

Enthusiast III

1,308
Georgia
First Name
Matthew
Last Name
Reed
Member #

22957

A little more progress on the drawer system today. Made hopefully the last run to the hardware store and picked up all my plywood. The center drawer is 25.5” wide and around 57” long and 6” tall. Should give me plenty of room for gear. On the right side is going to be an additional 6”x6”x26” drawer. Not sure what I’ll be keeping in there but it’s always nice to have extra space!

I really should have bought a table saw before I started all of this. After the work was done for the day I went for a walk a spotted a deer. It was a nice break from all the work I’ve been putting in on the truck and around the house. On the way home we checked out some dirt roads that have gotten pretty battered from the rain the last few days and the new suspension handled it pretty well. Still need to put my rear add a leafs in.
 

Attachments

mcgyver0302

Rank II
Member

Enthusiast I

434
Brea, CA, USA
First Name
Barry
Last Name
Payne
Member #

22613

Ham/GMRS Callsign
KM6GVX
Say hello to my new overland build!

My Cherokee has been growing more and more unreliable and it has gotten to the point where it spends far more time in the garage than it does out on the road. It was an awesome project and I had a lot of fun with it but unfortunately the time has come to move on.

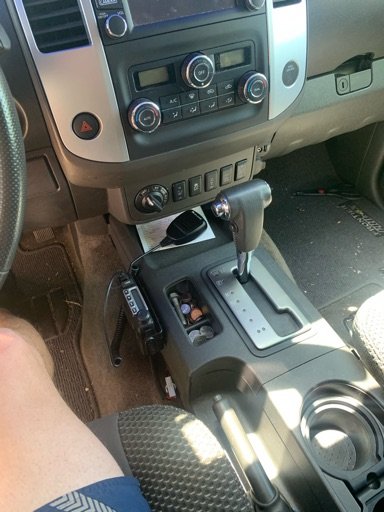
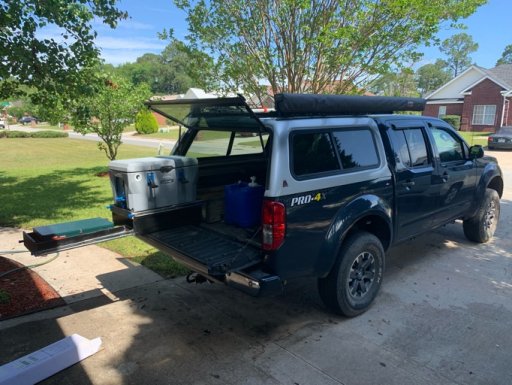
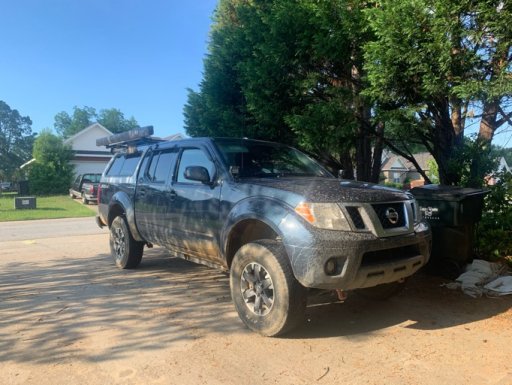
Last week I purchased a 2018 Nissan Frontier Pro-4x. I searched for about a month to find exactly what I wanted and the waiting paid off. I ended up skipping the luxury package as I felt I didn’t need the leather seats or sunroof and I would’ve had to pay $4-5k more. The cloth seats in the Frontier are pretty comfortable and hold you in nicely. I can always upgrade to leather down the road if I want to. The real struggle for me was finding one in the color I wanted. Lots of frontiers came in silver, white, and gray. Any of the colors you would think are desirable are pretty hard to come by but I did eventually find one 2 hours away in arctic blue and I jumped on it! For those unfamiliar the Pro-4x is 4wd and comes with a factory E locker in the rear and bilstein suspension.

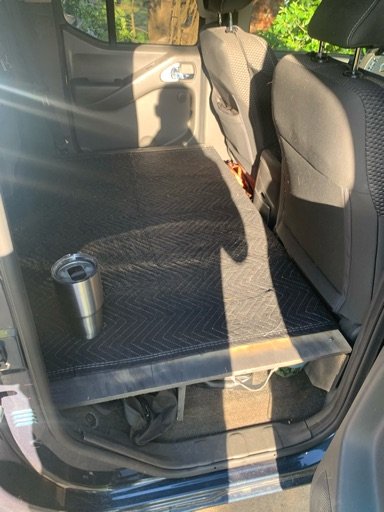
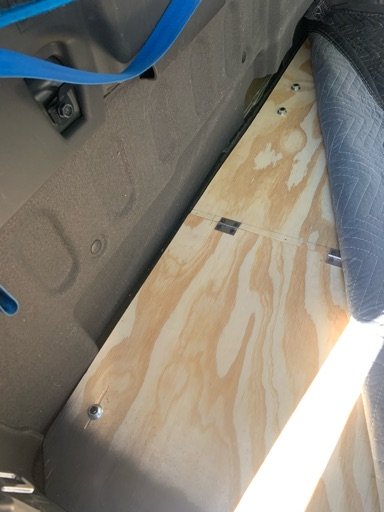
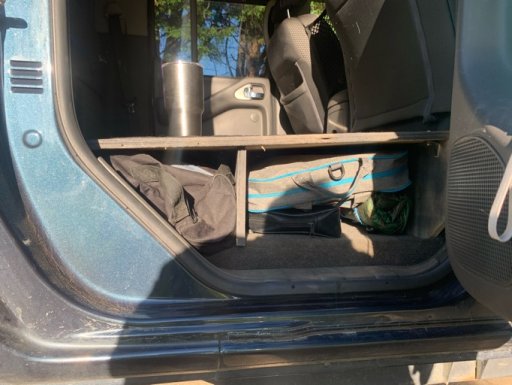
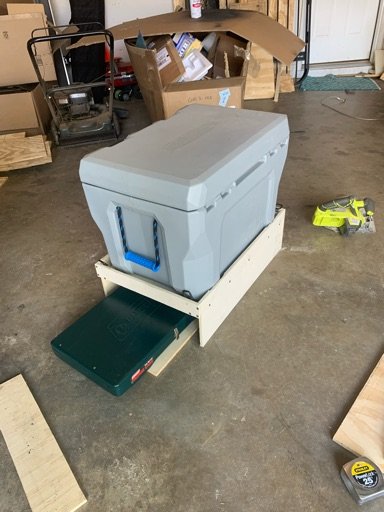
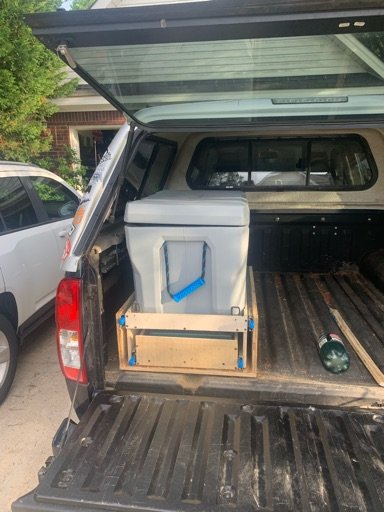
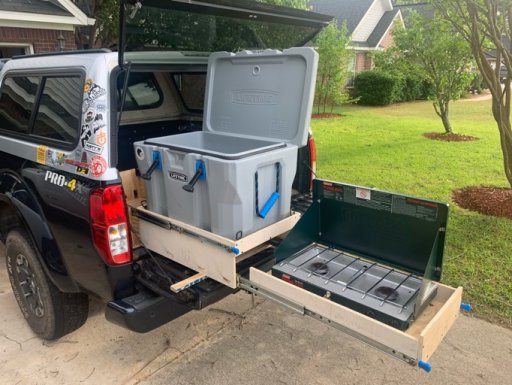
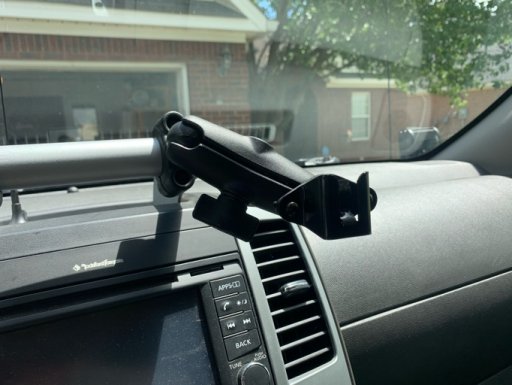
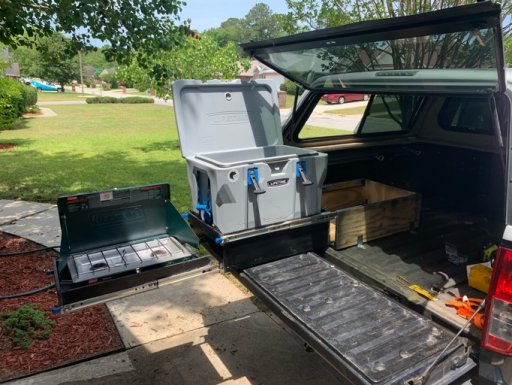
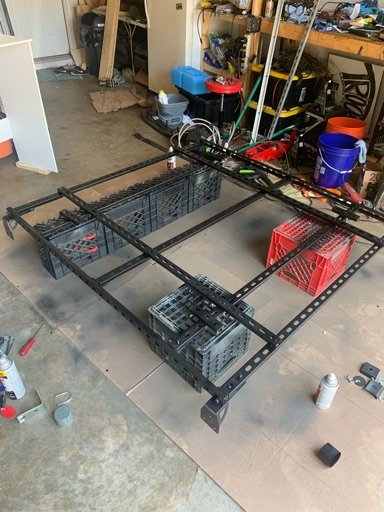
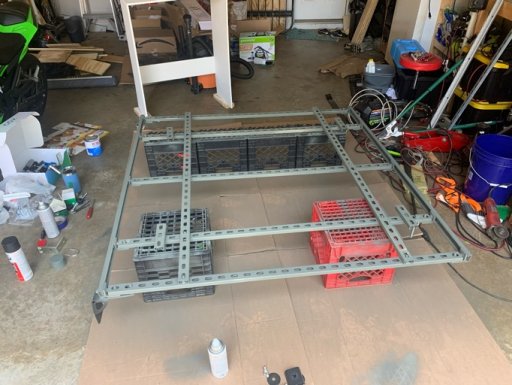
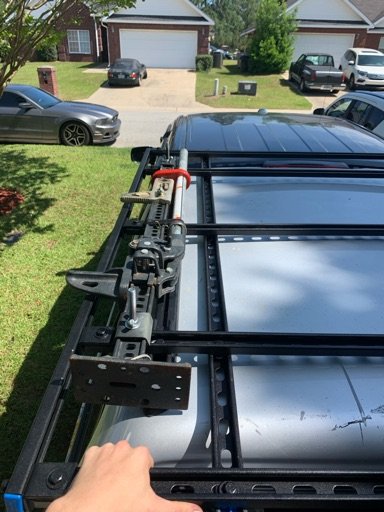
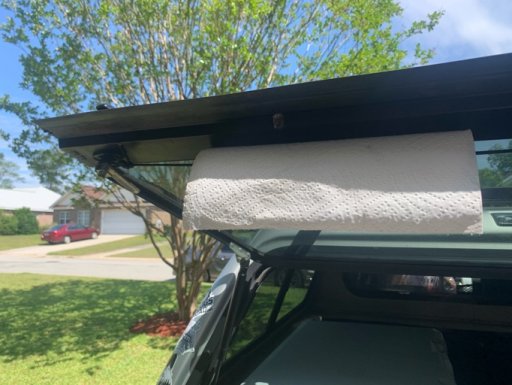
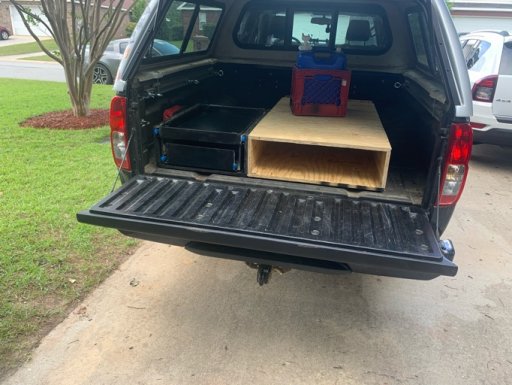
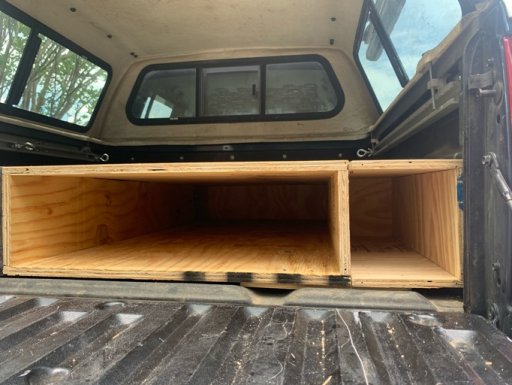
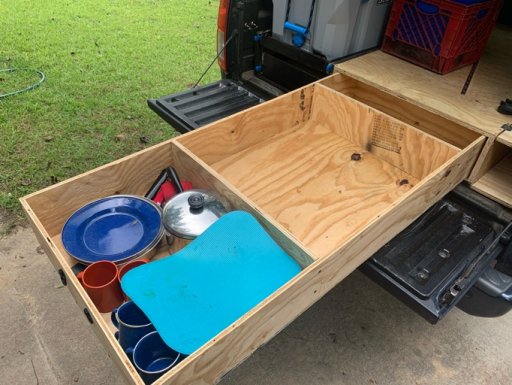
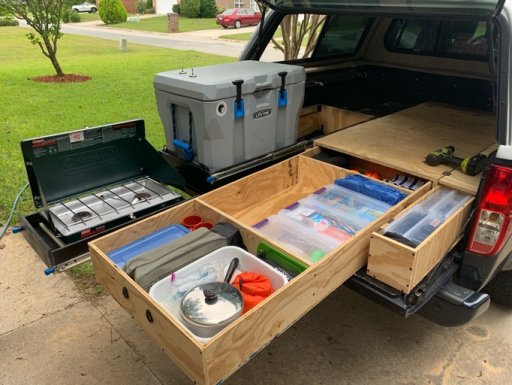
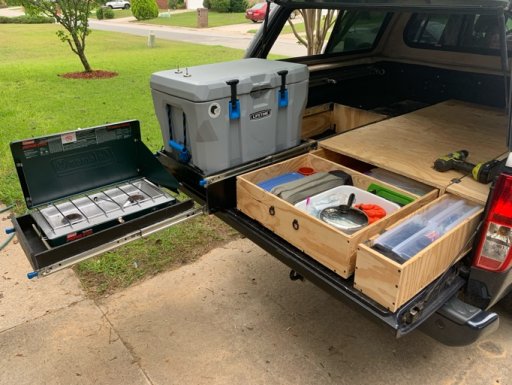
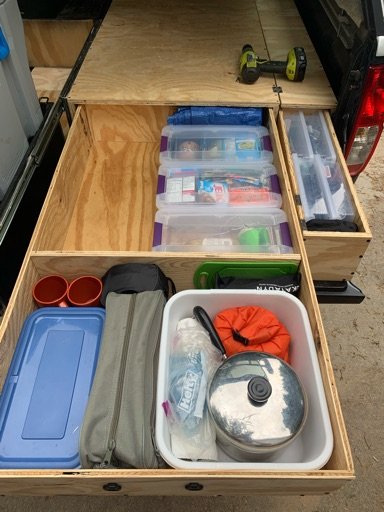
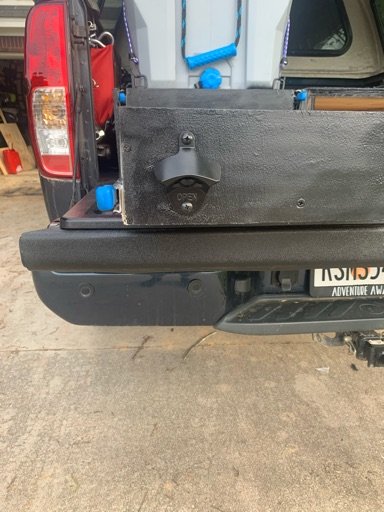
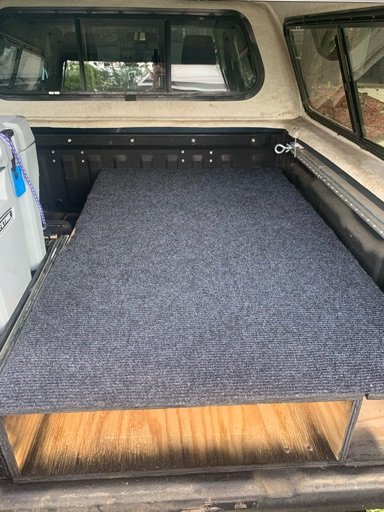
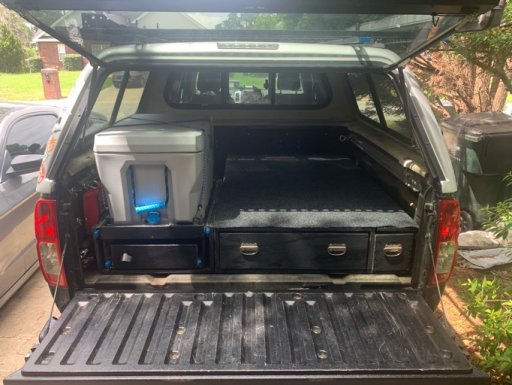
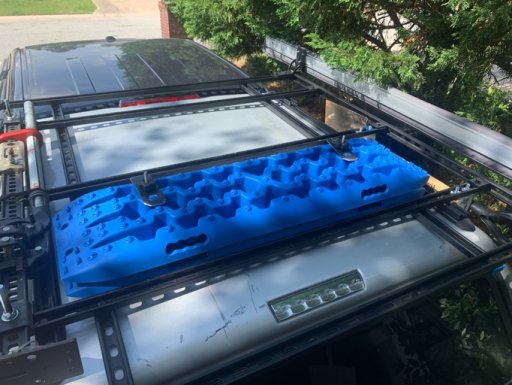
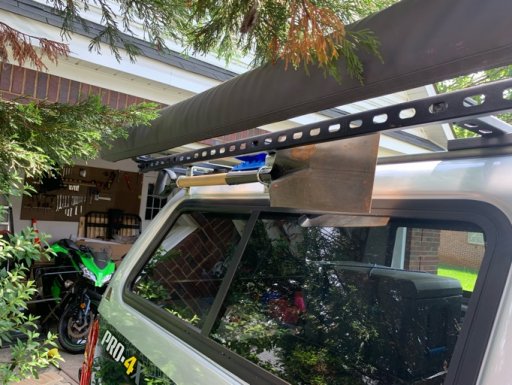
The mods have already begun. I mounted my hi lift jack in the bed and added a tonneau cover I picked up used for $40. It’ll work for now but eventually I will be upgrading to a hard camper shell. Unfortunately the bed is too short to make sleeping in it impossible, but with a hard shell I can mount my ARB awning and room to camp like I did in the Cherokee. Pics incoming!
Ahhh, that new car smell! Always nice to see some diversity in the vehicles on these forums. I have come from Tacoma and 4Runner forums. They all have great information specific for those vehicles, so this is something new for me where there are many different types of vehicles from all over the world, and many different types of builds. Can't wait to see what you do with this one!
 

Matthew Reed

Rank IV
Launch Member

Enthusiast III

1,308
Georgia
First Name
Matthew
Last Name
Reed
Member #

22957

More progress today! Some of the cuts of wood are a little weird as I was trying to avoid going and buying a whole extra sheet. Got the big drawer all finished up minus some dividers and framed out the little drawer
 

Attachments

Matthew Reed

Rank IV
Launch Member

Enthusiast III

1,308
Georgia
First Name
Matthew
Last Name
Reed
Member #

22957

Are you sick of my daily updates yet?

Today I finished up the final assembly on the drawers and started figuring out where things will be living inside them. First picture is everything pulled out. The second one is in “cooking mode”. With the drawers pulled out to the tailgate I can still access anything I would need while cooking-utensils, spices, etc. Last picture is an overview of everything. I wanted to be able to remove anything without removing more than 1 other item and I think I did pretty well. Clear storage containers are a huge help but I think I need to pick up a couple more. The big open space in the middle of the big drawer will be where my groceries go. I don’t see myself using more space than that. The storage containers in the middle have an assortment of some basic foods I like to keep on hand while camping just in case. It’s also nice to know that if I wanna take off Friday after work I don’t necessarily need to go grocery shopping, I can just take off with what’s in the drawers. Next up I need to sand down all the edges and maybe add some paint. I’ll probably take it on at least one trip before I paint in case there’s anything I want to change up.
 

Attachments

  • Like
Reactions: Stomper4x4

Matthew Reed

Rank IV
Launch Member

Enthusiast III

1,308
Georgia
First Name
Matthew
Last Name
Reed
Member #

22957

Man, going all out!! Its looking fantastic so far!!
Thanks! I had a 4 month vacation in the Middle East to plan out the whole thing! Nothing but free time to think of all the things I wished I had on my rig. Still need to add an onboard water system and fuel for my stove.
 

Matthew Reed

Rank IV
Launch Member

Enthusiast III

1,308
Georgia
First Name
Matthew
Last Name
Reed
Member #

22957

Time for the daily update. Carpeted the top of the drawer system and added a very important beverage opener! Also painted the drawer faces and added handles to help pull them out.
 

Attachments

Matthew Reed

Rank IV
Launch Member

Enthusiast III

1,308
Georgia
First Name
Matthew
Last Name
Reed
Member #

22957

Drawer fronts painted! Since I’ve got just about everything on my list done now minus my gas and water setups I think I may do a walk around video tomorrow with the whole camp setup.
 

Attachments

Matthew Reed

Rank IV
Launch Member

Enthusiast III

1,308
Georgia
First Name
Matthew
Last Name
Reed
Member #

22957

Sun came out for a little so this afternoon I decided to mount my traction boards and shovel to the roof rack. Hopefully they don’t see much use! Everything is mounted pretty low profile so I’m actually seeing a lot less wind noise with this setup than my old rack. Definitely glad I built my own rack.
 

Attachments

Matthew Reed

Rank IV
Launch Member

Enthusiast III

1,308
Georgia
First Name
Matthew
Last Name
Reed
Member #

22957

Went on a short adventure this weekend to celebrate my promotion! Just explored a few new service roads local to me. Still no camping :( maybe I’ll get to test my new setup in a couple weeks.
 

Attachments

Matthew Reed

Rank IV
Launch Member

Enthusiast III

1,308
Georgia
First Name
Matthew
Last Name
Reed
Member #

22957

Ordered some parts this morning for my electric setup in the bed. 4 fuse distribution block, water pump, heavy gauge wire and ring terminals, vinyl tubing for the water pump, and a couple big in line fuse holders. I’m only going to have maybe 60 amps worth of stuff back there (if everything runs at once) but the wiring should support around 100. I’m adding some lighting to the rear hatch, water pump for drinking/cleaning water, and possibly putting my inverter back there was well.

The big question I’m running into now is on board air. Right now I’m leaning towards a dual compressor setup but the price tag is making me question my decisions. Not sure if I want to spend the money on something like the ARB twin or go the powertank route. I know there are some DIY power tanks out there that are pretty reasonable on cost so I may look into that. Powertank would have the benefits of running air tools and not being another load on the electrical system. Negative of course is I’d have to refill it. Any thoughts?
 
Last edited: