1999 Toyota Tacoma SR5 4WD Build (Lil' Bertha)

  • HTML tutorial

skircr115

Rank III
Launch Member

Enthusiast I

874
Culpeper, VA, USA
First Name
Trevor
Last Name
Cassity
Member #

6297

So, it's been a long time coming, almost two years since I have joined OB and said I was going to start this. Things have been a bit of a roller coaster and lots of major and minor life changes delayed my plan to write most of this out as I went.

But without further ado, I suppose it is time to catch up to where I am now and plans for the future. Feel free to comment, ask questions, and check out my Instagram (@skircr115) for pics of food and travels by trains, planes, and automobiles! (Proof that it doesn't matter what you drive )

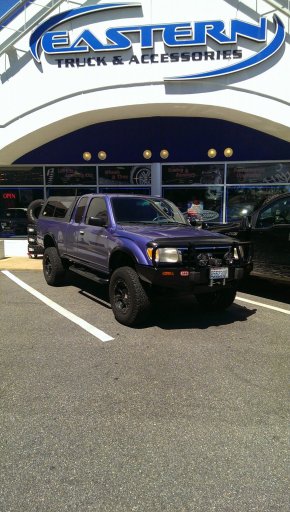
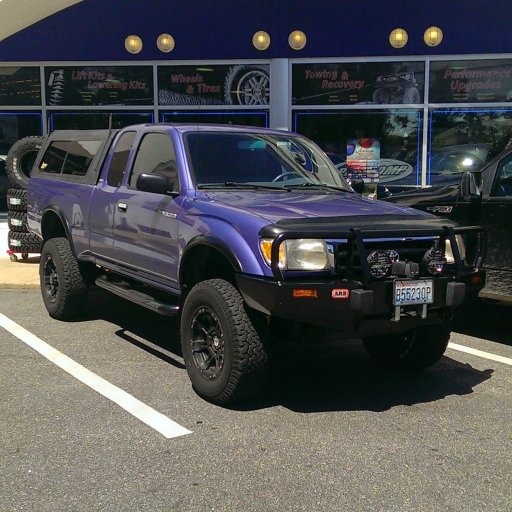
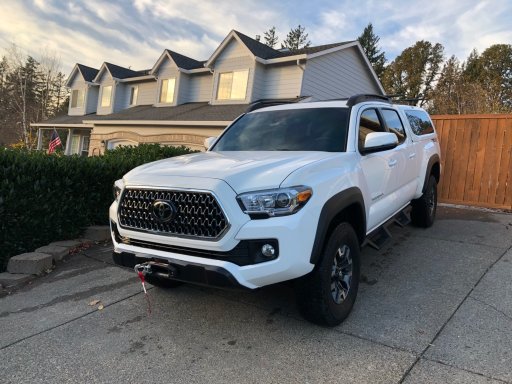
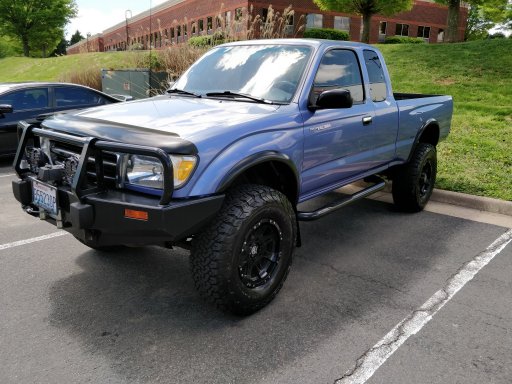
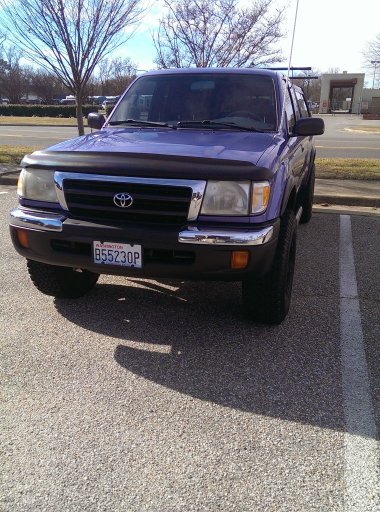
I got this 1999 Toyota Tacoma SR5 2.7L 4WD XtraCab back in 2010 and it was stock as could be, with the exception of some aftermarket chrome wheels which made the truck look lavender and a set of PIAA halogen fog lights. Needless to say, it was not a good look in my opinion. So, the first thing that got replaced was those wheels with a set of Raceline Raptor wheels and Ohtsu AT4000 tires. After that, I had Bushwacker fender flares, aftermarket automatic door locks, bolt-on running boards, and a Cobra 29 LX LCD CB Radio put in.

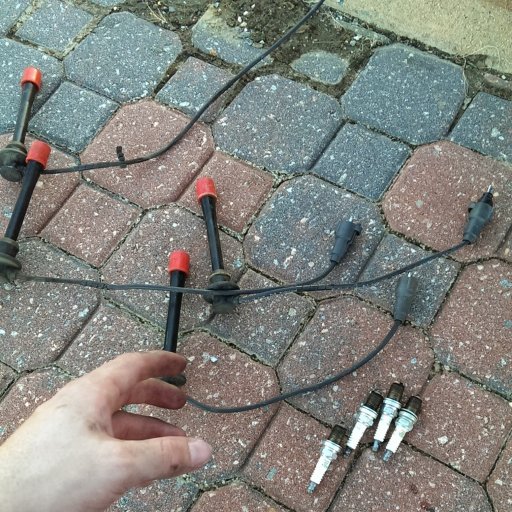
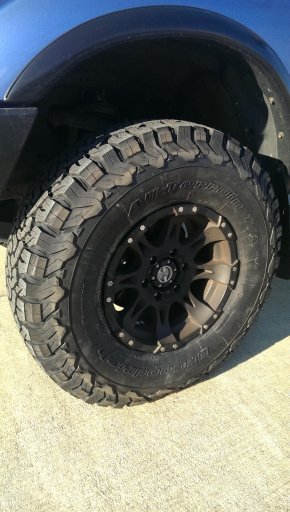
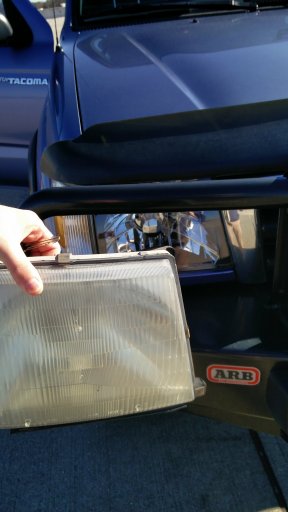
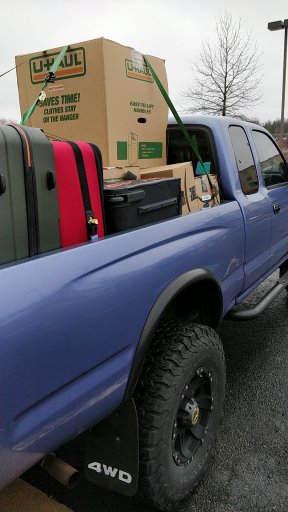
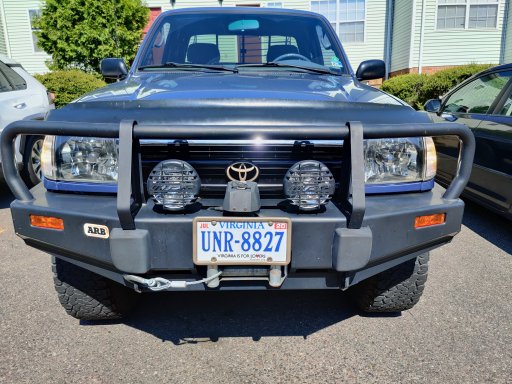
Pass by a few years, I joined the Air Force and was away from the truck for just about 8 months. Upon my graduation from technical training, I came back home to pick up the truck so I could drive it 3500 miles to my first (and to be my only) duty station. My father decided to surprise me with a set of BF Goodrich KO's that helped the truck both in the looks and performance department. I know that was a bit of word vomit history, so here's a photo of it just after I removed the PIAA lights. They had burnt three of the four bulbs out and wouldn't you know it that the screws holding the case were stripped, so access wasn't really possible .

IMG_20140120_123853.jpg

Stay tuned, because the continuation of Lil' Bertha's build is literally happening as fast as I can type it!
 
Last edited:

skircr115

Rank III
Launch Member

Enthusiast I

874
Culpeper, VA, USA
First Name
Trevor
Last Name
Cassity
Member #

6297

The next upgrades didn't happen until 2014, mostly due to not making a whole lot of money. The military gives great benefits but depending on what you do the private sector can certainly pay a whole lot more. For my birthday I decided to gift myself and my truck with its new facelift and legs. Unfortunately (or maybe fortunately, idk) I didn't have the time, space, or extra vehicle to do the OME suspension or ARB Bumper and winch myself so I had it completed by the great folks out at Eastern Truck & Accessories in VA Beach.

They installed an OME Nitro Heavy Suspension kit with the Dakar leaf pack (I was running a heavier canopy at the time), ARB Deluxe Bull Bar Bumper, IPF Driving Lights, and a Smittybilt XRC 9,500 Winch. After riding to/from work with a friend for about two weeks it was time to go pick Lil' Bertha up from the guys out at ETA.
IMAG0200.jpgIMAG0202.jpg
 

Attachments

Last edited:

skircr115

Rank III
Launch Member

Enthusiast I

874
Culpeper, VA, USA
First Name
Trevor
Last Name
Cassity
Member #

6297

The suspension upgrade couldn't have been better timed. My previous stock suspension, specifically the struts, was pretty much shot. At around 120,000 miles that really wasn't a surprise to me. But then I got to thinking, I do regular oil changes every 5,000 miles, but how often do I look at other parts of the truck that maybe are lesser seen? She'd been running a little rough, not too bad, but not peak performance either. Those who've seen me drive on road can attest to me pushing the truck like it's an F1 car at times (I don't speed, but I do take corners #aggressively and accelerate with all 177~ lbs. of torque and 150 hp the 3RZ-FE can produce).

I went on a discovery to find what might be causing it and after some *cough* many hours of research and looking at the factory manual and maintenance interval review I had found it. Spark plugs. My poor, precious truck needed a new spark to light the fire in her belly. A quick trip to the auto parts store later, I was ready to begin... once the engine temp cooled down of course. IMG_20140926_182553.jpg


If you've read or even scrolled this far I suppose it's time for a glamour shot, so here it is. Stay tuned for more after I get some food for snacking.
IMAG0225.jpg

NOTE: Some of these posts may sound frivolous or unnecessary, but I figure it's worth noting some of the more menial details. Hey, who knows, maybe you'll think "darn, I haven't cleaned or looked at that for ages either." Now's the perfect time while the majority of us are dealing with COVID-19 quarantines or "stay at home" orders to do some of the small things.
 
Last edited:

skircr115

Rank III
Launch Member

Enthusiast I

874
Culpeper, VA, USA
First Name
Trevor
Last Name
Cassity
Member #

6297

After some nearly 50,000 miles on the BF Goodrich KO's that my father had gifted to me, it was time for them to be replaced. They had seen a lot of road wear and weather had gotten the best of the side walls. However, I did much appreciate their performance over that time and bought another set of them, this time the KO2's. They didn't have the same size available at the time I bought the new ones, at least not for a reasonable price, almost $300/tire (mounted and balanced) already felt pretty rough. All I asked is that they didn't rub, at least with the exception of being under full steer. With that being said 265/70's turned into 285/75's and Bertha got just a bit beefier. MPG decreased (again) but honestly, I still to this day get better gas mileage than the new mid-sized trucks. I do notice issues with more rub in 4WD than 2WD, but I normally don't crank the steering wheel in 4WD so it doesn't bother me as much as it probably should. I haven't installed wheel spacers as I want the tires to fit with the body line as much as possible.

BF Goodrich KO2's 285/75r16:
IMAG0367.jpg

*Also attached is the difference from the stock tires put on by the factory for comparison.
 

Attachments

Last edited:
  • Like
Reactions: Camp_Llama

skircr115

Rank III
Launch Member

Enthusiast I

874
Culpeper, VA, USA
First Name
Trevor
Last Name
Cassity
Member #

6297

I stopped by Starbucks one frigid day on my way to work to have the realization my center console was in the dishwasher and the boot having its cover cleaned. Shifting, holding a drink, and getting out your wallet to provide ID to the guards can prove to be difficult.
IMG_20141114_065044.jpg
 
Last edited:

skircr115

Rank III
Launch Member

Enthusiast I

874
Culpeper, VA, USA
First Name
Trevor
Last Name
Cassity
Member #

6297

After 17 years of weather abuse, my headlights had started getting pretty dull, and seeing at night became pretty difficult. While I was searching for replacements I had planned to keep an OEM look to them as I was not a fan of many of the aftermarket headlights. Once I found these though, it was a done deal. It updated the truck's front end look to be reminiscent of the LC's not found in the US market. They were a quick install, with the most difficult part being adjusting them so I don't blind people as I'm driving down the road.
IMG_20161203_095851.jpgIMG_20161203_100020.jpg
 

skircr115

Rank III
Launch Member

Enthusiast I

874
Culpeper, VA, USA
First Name
Trevor
Last Name
Cassity
Member #

6297

You may also notice I swapped CB whips out, from my old white Firestick to a new black Firestick. The previous one decided to give "good game" high fives a full team of concrete cross-members in a parking garage and split. ✋
IMG_20170323_153624.jpg
 

skircr115

Rank III
Launch Member

Enthusiast I

874
Culpeper, VA, USA
First Name
Trevor
Last Name
Cassity
Member #

6297

Prior to this, I had an aftermarket stereo from my previous vehicles that had kind of traveled with me, car to car. My dad happened to get a Kenwood DNX5120 out of another vehicle and sent it my way. After ordering a wire harness adapter from Crutchfield and connecting everything together, I had a new sound system that took up 2-DIN instead of 1 and gave me basic GPS just in case I got lost without cell service. It also allows me to binge some DVD's or hook up a game console should I feel the need.

I routed the GPS antenna around and above my steering wheel, behind the left kick panel, and up to the left corner of my dash. There's nothing sticking it there, but over 3 years it hasn't moved from the spot and gets solid reception. All in all, it has cleaned up the dash and prevents me from putting clutter in the "pocket' that was there before, which would fly out if I cornered or accelerated too roughly.
IMG_20170326_114011.jpgIMG_20170326_122516.jpg
 

skircr115

Rank III
Launch Member

Enthusiast I

874
Culpeper, VA, USA
First Name
Trevor
Last Name
Cassity
Member #

6297

If you've made it this far, guess what, here's a sneak peek at the next rig I may be buying from my father some time this year. I'm not sure what I will do with my current truck once I christen the new one in, but I'll certainly keep all of you posted!
IMG_6555.jpg
 
  • Like
Reactions: SJ.Overland

skircr115

Rank III
Launch Member

Enthusiast I

874
Culpeper, VA, USA
First Name
Trevor
Last Name
Cassity
Member #

6297

Well, it would seem after some time that my automatic door locks had decided to fail on the passenger side, or so I thought. After pulling off the door panel and opening up the moisture barrier I found a much simpler answer to why it wasn't working. The screw that holds the aftermarket actuator bar to the factory lock had come loose and so the actuator bar detached. A little Locktite and tightening it back up did the trick to repair it. The picture doesn't really show that so I'm sorry . But if you look closely you can see I'm never too prepared with my mapping capabilities. My passenger side door pocket is filled with maps of the 5 closest states to me. Because, #youneverknow.
IMG_20181120_102742.jpg
 

skircr115

Rank III
Launch Member

Enthusiast I

874
Culpeper, VA, USA
First Name
Trevor
Last Name
Cassity
Member #

6297

At 180,000+ miles my catalytic converter finally decided to call it a day. My engine light came on and my diagnostic tool was able to get the error code. P0420, Catalyst System Efficiency Below Threshold. I was hoping it'd be an oxygen sensor but tested those to Factory Repair Manual specifications and they came through with flying colors. I had every intention of replacing this, as it was a bolt-on operation (of which Toyota, much like Jeep, is known for with pretty much everything) however my bolts were fused on with rust and even a breaker bar couldn't do the trick. So off to a muffler shop it went and for 1/5th of the price the dealership quoted me they torched off the bolts and using my part even installed it for me. All in all, not a bad deal.
IMG_20181123_142324.jpg
 

skircr115

Rank III
Launch Member

Enthusiast I

874
Culpeper, VA, USA
First Name
Trevor
Last Name
Cassity
Member #

6297

With the military chapter of my life coming to a close at the end of 2018, I found a job in the DC area and had to move. One more post and we'll be caught up to April 2020. Lots of things changed between 2018 and 2020, some of which are solemn and I'm still working with or managing now. But check out the next post for some future looks at works in progress.
IMG_20190106_132246.jpgIMG_20190310_114047_01.jpg

Also, I decided CB radio wasn't really functional and a bit underwhelming honestly. So, I removed it. Now passengers have more legroom and all the wiring has been pulled out. I plan to get my HAM license here in the future and have some more tech goodies that are in the works for more advanced communications. All of which will be covered in this thread, or maybe the next vehicle build depending on their timeframe.
IMG_20190420_130259.jpg
 

skircr115

Rank III
Launch Member

Enthusiast I

874
Culpeper, VA, USA
First Name
Trevor
Last Name
Cassity
Member #

6297

October 2019, the radiator leaked. It was leaking from cracks in the upper plastic assembly and initially as a workaround to keep me going (I was traveling overseas A LOT at the time and the airport is 60+ miles each way) I had put some JB Weld to hold the cracks. Needless to say, it did not hold for too long and when I was able to get the new radiator it was time to put it in. Removal and installation was a pretty simple affair, with the biggest pain being draining the fluid without antifreeze pouring all over my apartment complex's parking lot (a big no-no). But I successfully did it in about 4 hours, plus a few to get the air out of the system fully. All new antifreeze and radiator in, I also took the opportunity to replace the windshield washer fluid reservoir as you can see the old one had broken down and was full of plastic bits making the filling and using of the system a bit of a gamble.
IMG_20191017_183055_01.jpgIMG_20191016_160600.jpg

Projects in the works:
  • After removing the grille a multitude of times, four of the seven 20-year-old clips that hold it have broken. I've ordered new ones and with that am taking the opportunity to clean the grille, refinish some paint on it, and repaint the emblem and license plate frames to match each other.
  • After removing the door panel to fix the lock, well, I lost a trim clip. I received that today so that'll go in. (No big deal, not gonna post about it)
  • I ordered two different inclinometers. One from a Hilux Surf out of Saudi Arabia, one from an LC Prado out of Russia. I've decided I like the look of the LC Prado one and will be retrofitting that into the existing wiring to make it as clean and "OEM-like" as possible. If anyone is looking to buy the Hilux Surf one, I will have it for sale here shortly.
    • I've ordered the ambient temp sensor, the OEM connector for the female side, and am ordering the OEM connector for the harness that comes from the inclinometer.
    • I've also fabricated some 3D printed angle supports to help internal components match the dashboard line of the Tacoma as the Prado had a flat dash for this.
    • I've done all the electrical testing to ensure everything functions properly and will be building a wiring diagram should anyone else feel inclined to install.
    • Still need to final fit everything and may need to have a new back cover 3D printed for it, but that will come in another post.
  • Got a Pulse Protect (for flashing third brake light) from my dad a few weeks ago so I may be updating the hi-mount stoplight to an LED one and installing that, but looking at everything it involves, well we'll see.

Like what you've seen or interested in what the future holds? Like, watch, and comment below or DM me with any questions you may have! Stay tuned for an update here in the next day or so!
 
Last edited:

skircr115

Rank III
Launch Member

Enthusiast I

874
Culpeper, VA, USA
First Name
Trevor
Last Name
Cassity
Member #

6297

The repainted grille, new clips, and repainted emblem & license plate frames are back on. The grille was painted with rattle can automotive paint and clear coated for durability, then I took some polishing compound to it to blend any missed paint spots. I also took the time to use polishing compound on the chrome surround. I decided not to paint this part to help blend the rest of the chrome elements (rear bumper, decals) with the vehicle. The emblem and license plate frames were painted with Rustoleum's version of Plastidip, primarily as a precaution in case I didn't like the outcome.

It happened to be a bit of a tight fit getting the grille clipped back onto all the support clips. I presume this is just due to age and since the majority of the old clips were broke for so long it flexed the grille a little bit. Regardless, I did get all of them in with a bit of palm pressure at each clip.

IMG_20200507_095725.jpgIMG_20200507_095749.jpg
IMG_20200507_101038.jpg
 
  • Like
Reactions: Boort