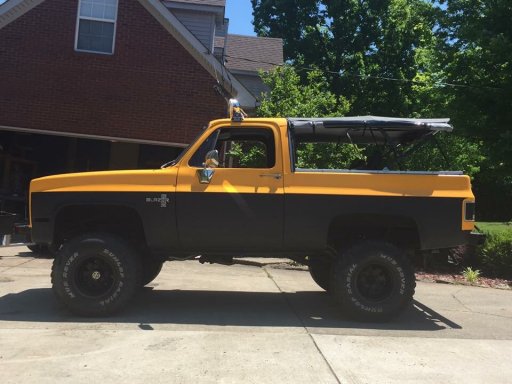
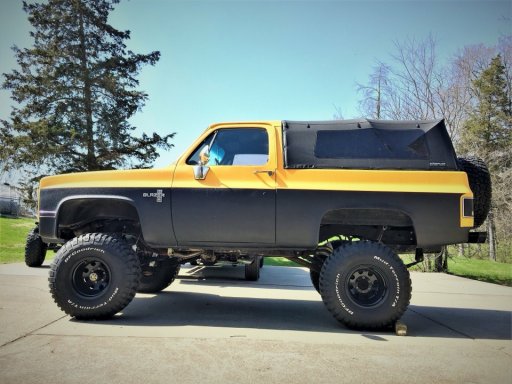
1982 k5 build.....

  • HTML tutorial

lucky_strike

Rank III

Contributor I

Hey all. Well my build actually started 3 years ago. I wanted to make a point that i have turned every bolt on this truck by myself. I grabbed the bumpers. I diagnosed electrical issues. I installed the lift. I pulled and rebuilt the engine solo. And a lot of this stuff i had to learn as i went. Anyone can do it. Do get intimidated. But since I just found this forum I figured I would do a build sheet.

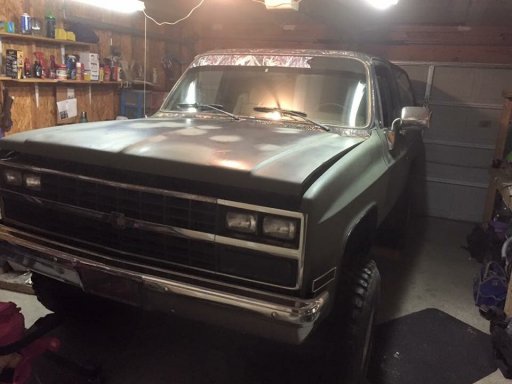
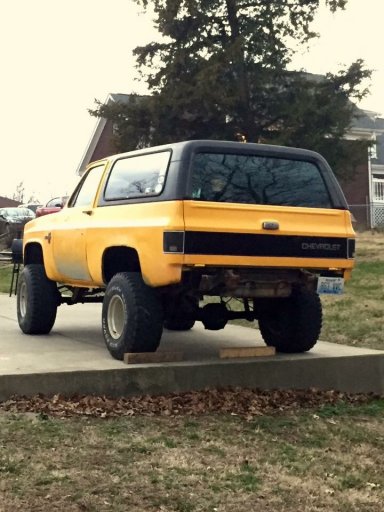
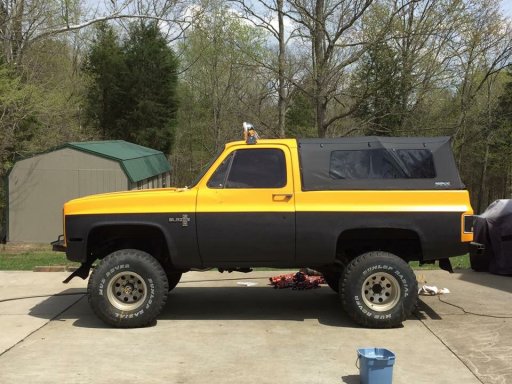
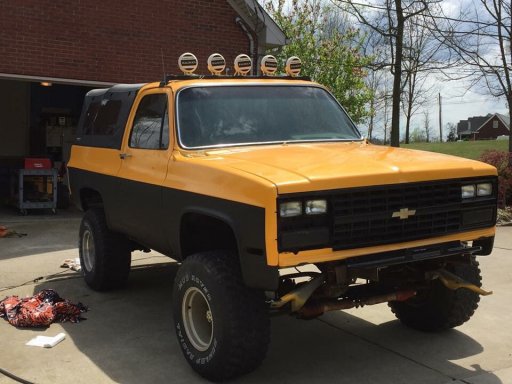
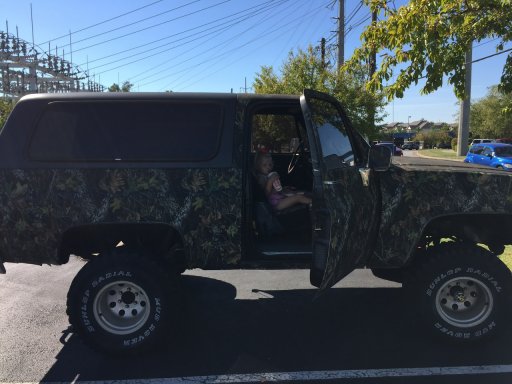
I’ll start with a before and after pic. I started with a 1982 ragged out and clapped out k5. It had a blown engine, a 1989 front clip, a horrible wiring mess (they even used speaker wire as 12v hot wires). It had a 1979 dash. The gauges didn’t. The heat and ac were inoperable. A crappy 4” rough country kit. You name it had to be replaced or repaired. Where to start was the biggest question. I guess getting the brick running would be first in the agenda.

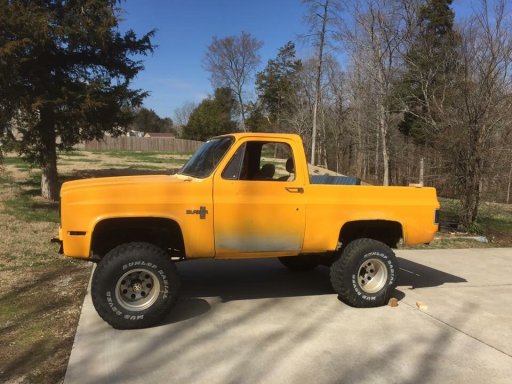
Here is a pic of the first day I brought it home.
IMG_2940.JPG

IMG_2950.JPG

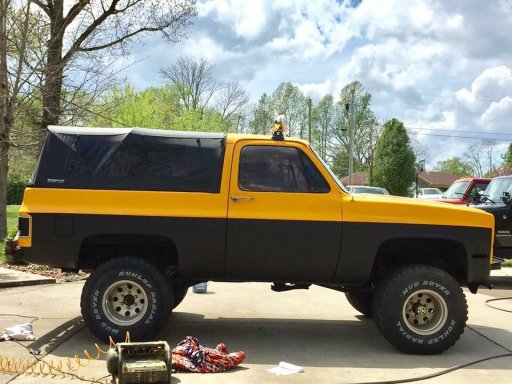
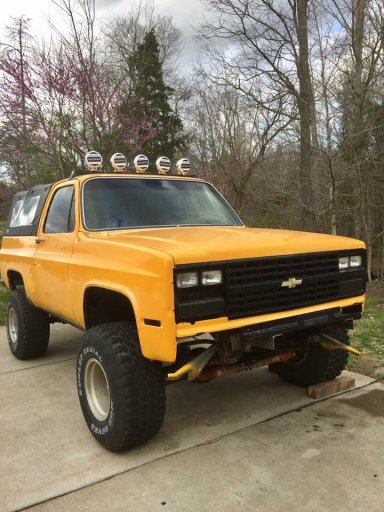
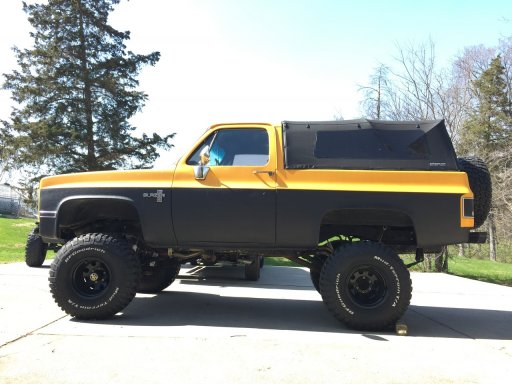
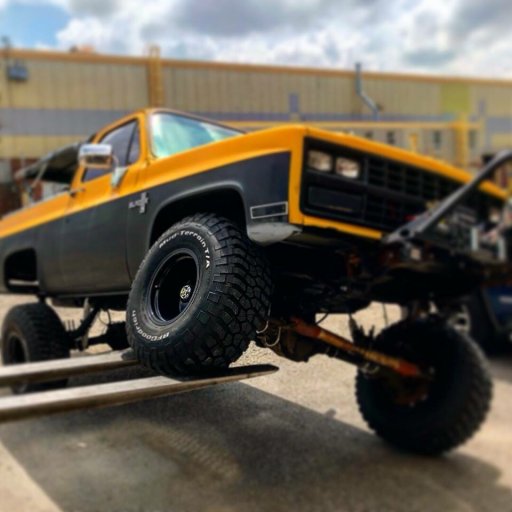
This second pic is of this past fall. Visually It has since gotten new steel rims. A 14 bolt FF axle. And 3/4 ton 10 bolt front axle.

IMG_0598.JPG

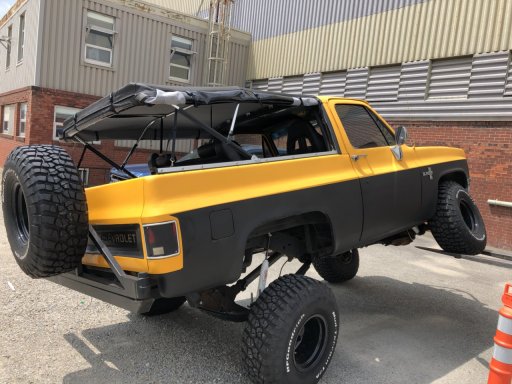
She still had more flex in her but I had to stop there to prevent the front drive shaft from slipping out.

IMG_0558.JPG

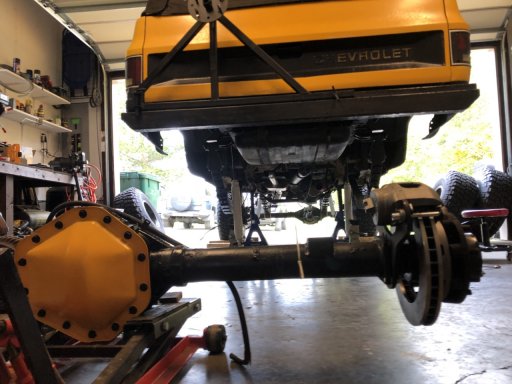
A nice shot of the 14 bolt FF with rear disk conversion being installed.

IMG_1777.JPG
 

Rusty burbin

Rank V
Launch Member

Member III

2,741
Hesperia, CA 92345, USA
First Name
Jonah
Last Name
Gregg
Member #

4084

Hey all. Well my build actually started 3 years ago. I wanted to make a point that i have turned every bolt on this truck by myself. I grabbed the bumpers. I diagnosed electrical issues. I installed the lift. I pulled and rebuilt the engine solo. And a lot of this stuff i had to learn as i went. Anyone can do it. Do get intimidated. But since I just found this forum I figured I would do a build sheet.

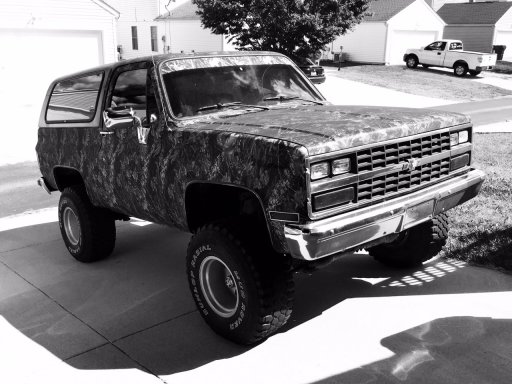
I’ll start with a before and after pic. I started with a 1982 ragged out and clapped out k5. It had a blown engine, a 1989 front clip, a horrible wiring mess (they even used speaker wire as 12v hot wires). It had a 1979 dash. The gauges didn’t. The heat and ac were inoperable. A crappy 4” rough country kit. You name it had to be replaced or repaired. Where to start was the biggest question. I guess getting the brick running would be first in the agenda.

Here is a pic of the first day I brought it home.
View attachment 88425

View attachment 88428

This second pic is of this past fall. Visually It has since gotten new steel rims. A 14 bolt FF axle. And 3/4 ton 10 bolt front axle.
View attachment 88426

She still had more flex in her but I had to stop there to prevent the front drive shaft from slipping out.
View attachment 88427

A nice shot of the 14 bolt FF with rear disk conversion being installed.
View attachment 88429
That's awesome man! My story is similar in that I turned every bolt myself etc. etc. I really dig old Detroit iron! I'll be watching this build!

I have a build thread 70 K20 Suburban if you're interested.
 
  • Like
Reactions: lucky_strike

lucky_strike

Rank III

Contributor I

Well where to start. ... the nice thing about the square body Years is there are roughly 30 years of different trucks and cars that parts are direct bolt swaps. Gear box’s. Transmissions. Engines. Axles. It’s almost like building a lego.

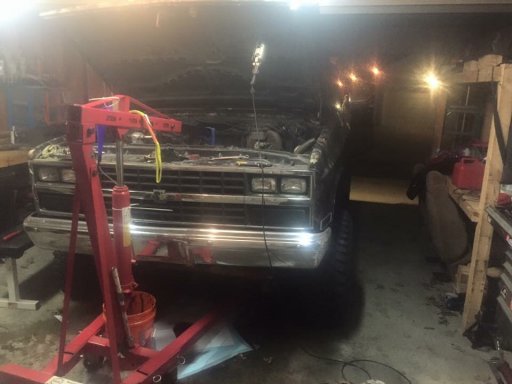
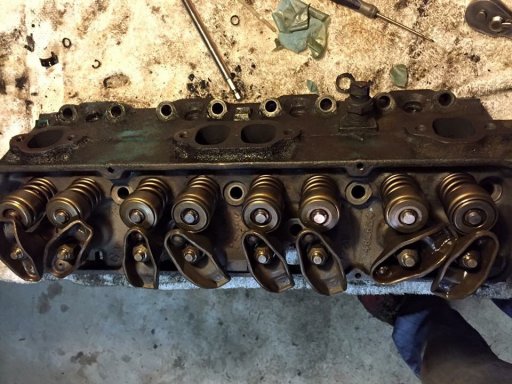
First thing I had to do was source a cheap 350. The 355 that was in it was shot. The rings were completely blown and boring a 355 was not an option.

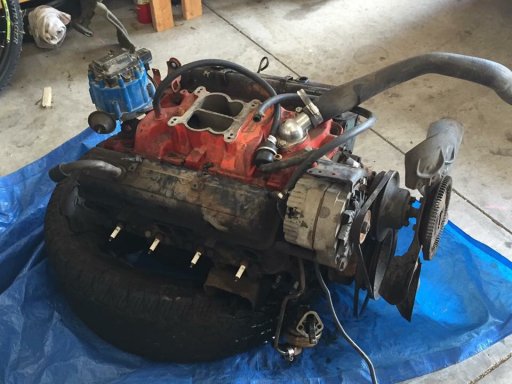
I located a worn out 350 4 bolt main out of a 78 camaro.

Let the rebuild of that begin. Taking an engine out of a lifted k5 is never a really fun event lol. Especially in my at the time town house sized garage

IMG_3320.jpg

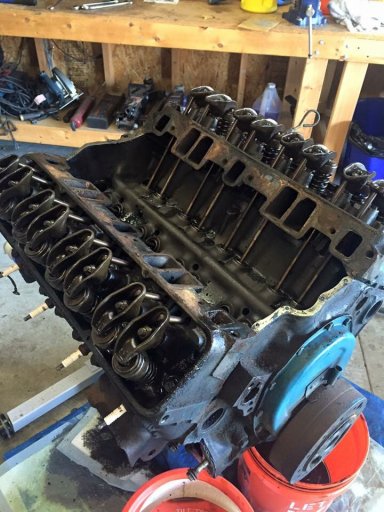
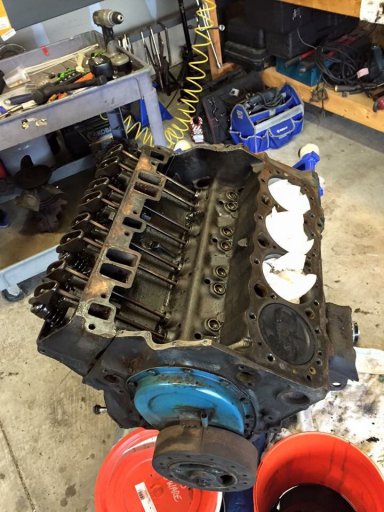
I ordered a complete gasket set. A cam. Rods. Lifters and rockers. The idea was to get good torque and decent horsepower. I wanted reliable. And the sm465 manual trans and soon to be 3:73 gears would provide enough low end ass to get turn the 35” tires.

IMG_3327.jpg

IMG_3324.jpg

IMG_3323.jpg

It was a very pleasant surprise to find the previous owner had put a set of heads on from a 305 v8. The 305 heads offer much more air flow capacity than the 350 heads. I was going to put on vortex heads....but since these were already available I decided it would be plenty.

IMG_3322.jpg
 

lucky_strike

Rank III

Contributor I

With the truck finally up and running strong it was time to move onto something a bit more “fun”

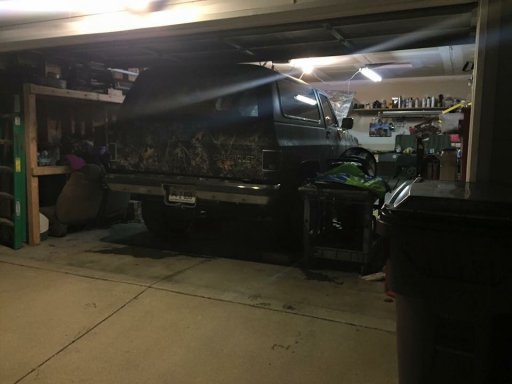
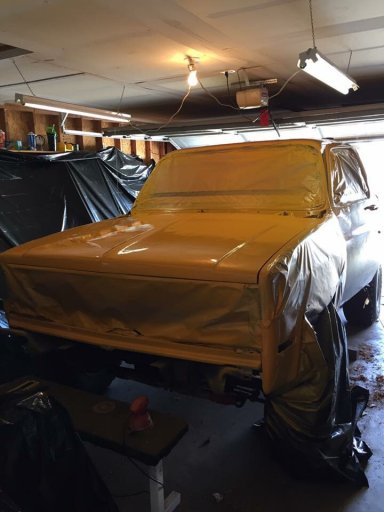
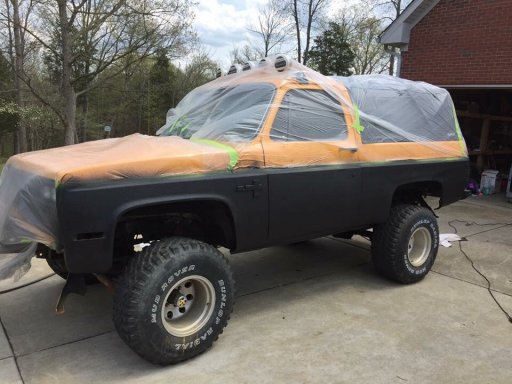
Next up is ripping off the camo wrap. I’m not a fan of camo so I wasn’t to sad to it go. Besides I was really curious to see how much bondo the 37 year old truck had.
IMG_3317.jpg

IMG_3316.jpg

IMG_3319.jpg

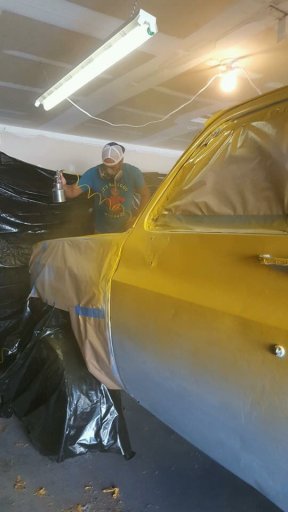
Now over my time on earth I have gotten pretty good at turning wrenches. But painting was new to me. Very new. As a matter of fact this would be the first time I tried it.
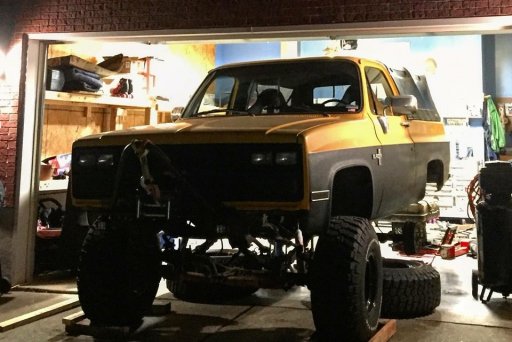
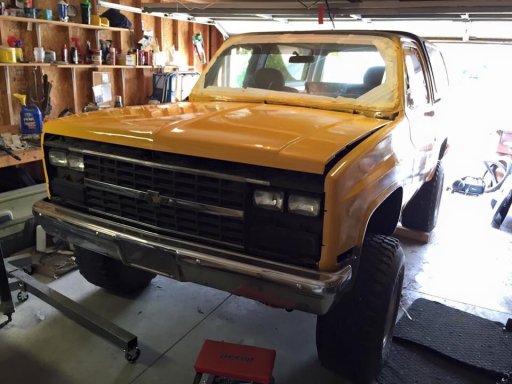
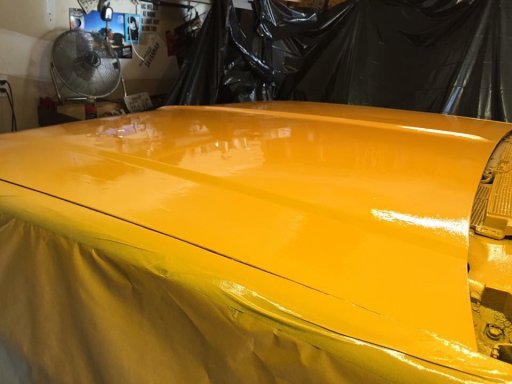
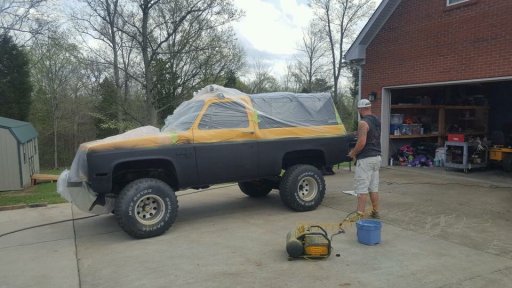
After lots of YouTube academy, I decided on the tractor supply paint Job. I have a total of 200$ into this paint. Is it perfect??? Hell no. But I don’t care if it gets scratched. And the goal of this build is to use it in the woods over landing.

So a small compressor, a gallon of TSC school bus yellow, some thinner and some hardener ,....this is what we got.

IMG_3312.jpg

IMG_4088.jpg

IMG_3315.jpg

IMG_1743.jpg

Later on in the build i would be raptor lining the bottom half of the truck. I knew this before I started painting it yellow so that why the bottom is not painted yet.

IMG_3243.jpg

This is also the point when my girlfriend and I would buy a new house together. The building stopped for a couple months but then picked up again with a new faster pace.
 

lucky_strike

Rank III

Contributor I

it doesn't look like much at this point. in fact it still needs soooooo much work it was hard to stay focused. things I still wanted to do at this point

soft topper
front and rear axle swap
3:73 gears
new tires and wheels
new suspension (all of it)
front and rear bumper builds
dash replacement
get the gauges working
get good seat in it (front and rear)
rear disk conversion
raptor line outside bottom
and so much more

the list seemed to just grow and grow the further I dug into it. the rats nest of a wiring mess I needed to untangle was going to be weeks worth of work...it was actually so bad I ended up bypassing most of the factory wiring and ripping out the factory gauges all together. you wouldn't believe the amount of speaker wire the previous owner used as constant 12 volt sources, ignition 12 volt source....just everywhere. I have never seen anything like it.

but the wiring would wait until I figured out what direction to take it in...repair the harness, order a new harness, or build my own. did I want to keep the factory gauges? that would basically mean rebuilding them which can be time consuming and expensive....

I would refocus my attention on other parts of the truck until I figured that out. in the mean time I had some raptor liner laying around and I wanted to try my hand at it. I also had found a used soft topper I wanted to install and bring my rims to work to get powder coated. I also bought some BFG mud terrains at the jamboree so of course I had that itch to get them on the truck as fast as possible

View attachment 91101

View attachment 91102

View attachment 91103

View attachment 91104

Before the raptor liner
View attachment 91110

And after
View attachment 91108

I would say this is the point when I started getting really excited about the truck again. It was finally taking shape and starting to look like what I had pictured in my mind.


strange...I'm not sure why my pictures are all of the sudden not showing up. sorry...ill try and correct the issue
 
Last edited:

lucky_strike

Rank III

Contributor I

IMG_3247.jpg

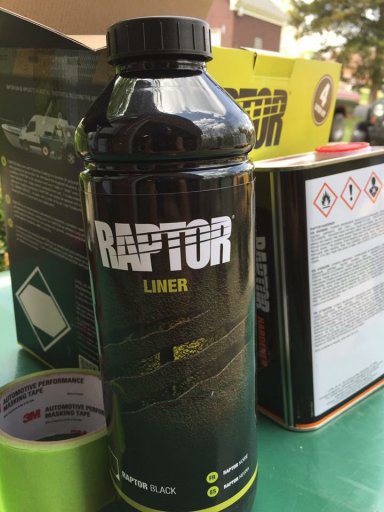
This is the product I used. its about 200$ I think if I remember right. and that includes the UPOL gun

here is one of the last taken shots of the truck before the raptor liner
IMG_3242.jpg

this stuff lays on like butter. if I would have known how easy it was to spray (even on a windy day) I would have skipped painting and done the whole truck in raptor liner
IMG_3249.jpg

IMG_3248.jpg

and of course at this point I had managed to find time to install the soft topper....it was here I really started falling in love with this particular build
IMG_3254.jpg

IMG_3252.jpg

before....

IMG_3255.jpg

after...which do yall prefer?

IMG_3251.jpg
 

lucky_strike

Rank III

Contributor I

the next thing on the list was fixing the suspension issues and get some new rubber on it. suspension is always a get what you pay for scenario. I have had a dozen trucks with a dozen different lift kit brands in the past. the problem I have always incountered on the cheaper lifts was mostly ride quality, but also overall fitment. not so much do there parts fit...they usually do. what I mean by fitment is do there kits change any other geometry of the truck when its lifted. when you lift a truck the axles move in towards each other and pinion angles change. your lower end kits usually do not provide anything to correct this.

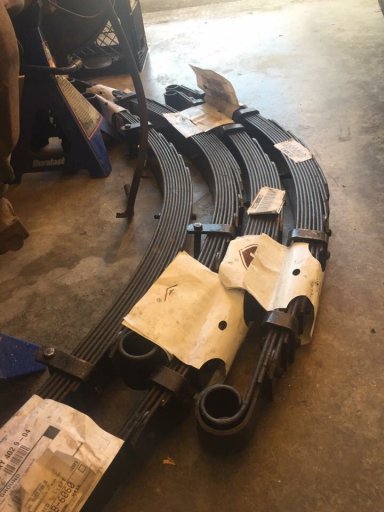
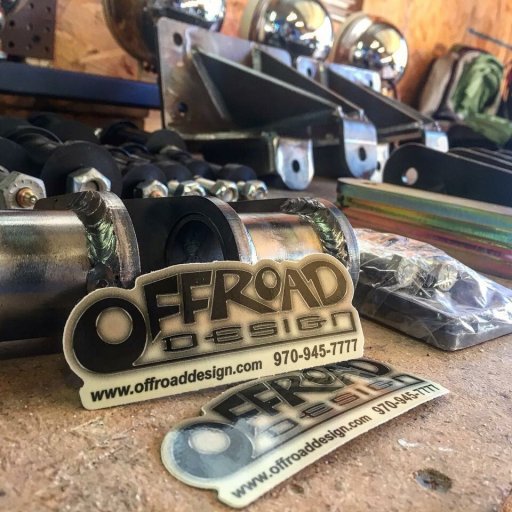
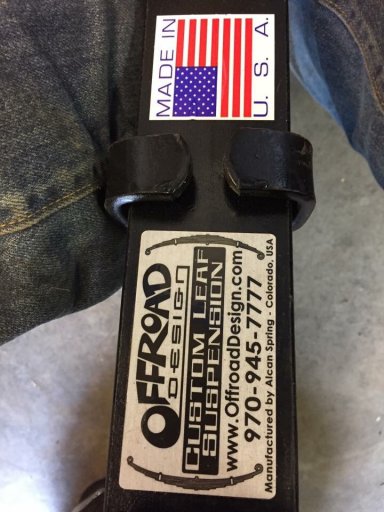
I also looked at what I'm going to be doing with the truck, as this would determine the cost I could justify. I made a call to Offroad Designs and talked to owner Stephen Watson. what a solid company ! this guy knows everything about squares and I felt totally comfortable taking his recommendations. I wanted simple, I didn't want to cut on the frame, I didn't want to negatively effect the trucks road manners, and I wanted flex. his answer was using his custom built springs.

These springs are built specifically for your truck. and wow.....the difference it made on the truck was unbelievable ! it rides better than my 2011 Silverado. it handles great on road and eats off road. the flex is amazing, especially for a leaf sprung truck.

the package included 6" ORD custom front springs, 3" custom ORD rear springs, 3" shackle flip, sway bar quick disconnects, stainless steel braided front and rear extended brake lines, long travel shocks, pitman arm, greasable leaf spring hardware, easy inch axle offset plates, and they moved the centering pin on the front leafs forwards 2", that would move the axle forward 2 ".
 

lucky_strike

Rank III

Contributor I

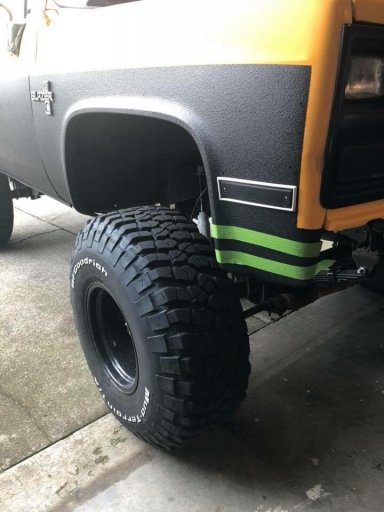
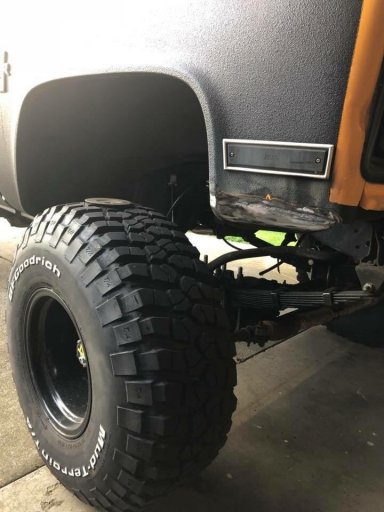
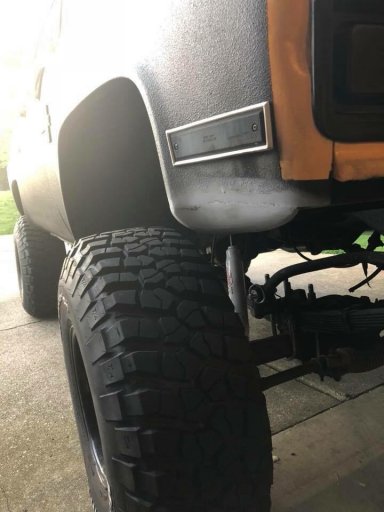
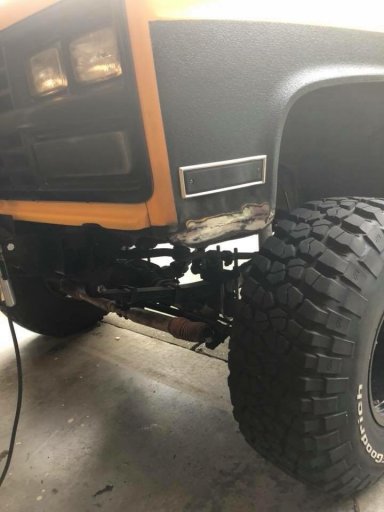
it was also time to make room for the extra flex :). I didn't want the truck to look cut up so I figured I would try something a little different. I cut the bottom inch off the fenders, then cut 3" more off. then I took that bottom inch and welded back onto the truck....I think it turned out pretty slick. also by this time I had powder coated the rims at work and picked up a set of 35" BFG mud terrains.

IMG_3291.jpg


IMG_3292.jpg


IMG_3294.jpg

IMG_3293.jpg


IMG_3295.jpg

IMG_3281.jpg

you would think this would be a good time to do an axle swap....but I really like doing one mod at a time. that way it makes it easier to pin point something if there is a problem. plus I didn't have the money yet lol.
 

lucky_strike

Rank III

Contributor I

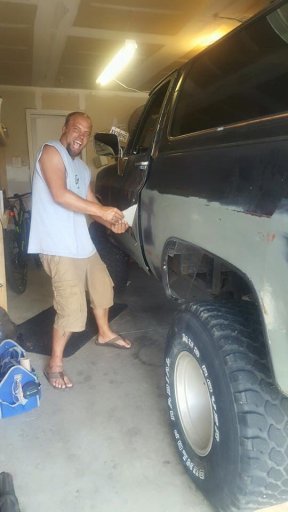
heres a pic of me finishing up the lift. it would be another month before I could drive it however. I needed a longer cardon driveshaft with high angle u joints and yokes. I would hit up High angle driveline out of California for this. also a great company to work with.

IMG_3280.jpg

heres a pic of the Old stance with blown out 4” lift

IMG_3276.jpg

New stance with new suspension :)

IMG_3282.jpg
 

lucky_strike

Rank III

Contributor I

next major project would be axle swapping. I sourced a 14 bolt FF rear end with 3:73 gears already in it. major score at 150$. and with the gear ratio I wanted also. finding a 8 lug 10 bolt front out of a 3/4 ton was proving more difficult than I though. I didn't have the 1600$ for a dana 60 either so that was out of the question. I found a guy who collected squares 100 miles away and he said he had one for 100$. so I made the drive to go get it. I was kinda bummed out that he said there was 3:08 gears in it. that means I would have to re gear. ugh....oh well. I needed the axle.

the heavens must have shined down on me. when I went to rebuild the front axle I counted the sprockets...and low and behold there were indeed 3:73's. sweet !!!!

with the axle on the ground, I decided the 14 bolt would get a rear disk conversion. so I hit up lug nut 4x4. it was very affordable and I highly recommend them.

with the axles rebuilt, all I had to do now was source out wheels. this was actually challenging. the problem is that I had brand new 35's mounted on 15" rims. the 14 bolt was never offered with 15" rims because the front 3/4 ton axles brakes are too big for 15's. so not many manufacturers made 8 lug 15" rims. with a little grinding on the caliper you can make 15" rims fit though. and I was willing to do that so I didn't have to buy new tires. I finally found some Jegs. 15"x10" with a 3 1/2" backspacing. PERFECT and only 50$ a rim.

pics to come.....
 
  • Like
Reactions: Rusty burbin

Dilldog

Rank V
Launch Member
Investor

Influencer I

2,358
Spokane, WA.
First Name
Dillon
Last Name
Wilke
Member #

20298

Ham/GMRS Callsign
KJ7LVO/ WRQL275
Service Branch
USAF
Seriously awesome, builds like this bring back lots of memories for me. When I was active duty back in 05 I helped a buddy of mine build a 78 K10. We did 6" springs, built a 383, overhauled a 465, 203 range box and 205, doubled it twin sticked it, installed cutting brakes, rebuilt the 14FF and installed a detroit, rebuilt a D60 and installed a lockright, did high steer, rear discs, hydro assist, on board air. It took the two of us a little under a year to build it. Along with all that I did customer custom bumpers and body armor for him (I have a TON of fab experience, and I was air craft sheetmetal, so naturally I did all the tin work, lol). It was a lot of fun and one of the best times of my life quite frankly. Unfortunately I suffer from a short attention span when it comes to projects and have just never been able to do my own big build.
The coolest part of doing cutting brakes (one electric line lock on each rear brake) and having a twin sticked 205 was the ability to litterally pivot the truck on one tire. For a tight left, just press the brakes, engage the left line lock, kick out the rear axle and kick in the front, crank the wheel and gas it, it was always fun to see a full sized pickup negotiate tight trails better than the Jeeps, lol.
 

Rusty burbin

Rank V
Launch Member

Member III

2,741
Hesperia, CA 92345, USA
First Name
Jonah
Last Name
Gregg
Member #

4084

Seriously awesome, builds like this bring back lots of memories for me. When I was active duty back in 05 I helped a buddy of mine build a 78 K10. We did 6" springs, built a 383, overhauled a 465, 203 range box and 205, doubled it twin sticked it, installed cutting brakes, rebuilt the 14FF and installed a detroit, rebuilt a D60 and installed a lockright, did high steer, rear discs, hydro assist, on board air. It took the two of us a little under a year to build it. Along with all that I did customer custom bumpers and body armor for him (I have a TON of fab experience, and I was air craft sheetmetal, so naturally I did all the tin work, lol). It was a lot of fun and one of the best times of my life quite frankly. Unfortunately I suffer from a short attention span when it comes to projects and have just never been able to do my own big build.
The coolest part of doing cutting brakes (one electric line lock on each rear brake) and having a twin sticked 205 was the ability to litterally pivot the truck on one tire. For a tight left, just press the brakes, engage the left line lock, kick out the rear axle and kick in the front, crank the wheel and gas it, it was always fun to see a full sized pickup negotiate tight trails better than the Jeeps, lol.
That sounds like a killer build. I built a 203/205 twin stick dub and have 2 line locks in my 70 suburban. It turns on post!

I love to see and hear about all these knucklehead builds! [emoji2]
 

Rusty burbin

Rank V
Launch Member

Member III

2,741
Hesperia, CA 92345, USA
First Name
Jonah
Last Name
Gregg
Member #

4084

next major project would be axle swapping. I sourced a 14 bolt FF rear end with 3:73 gears already in it. major score at 150$. and with the gear ratio I wanted also. finding a 8 lug 10 bolt front out of a 3/4 ton was proving more difficult than I though. I didn't have the 1600$ for a dana 60 either so that was out of the question. I found a guy who collected squares 100 miles away and he said he had one for 100$. so I made the drive to go get it. I was kinda bummed out that he said there was 3:08 gears in it. that means I would have to re gear. ugh....oh well. I needed the axle.

the heavens must have shined down on me. when I went to rebuild the front axle I counted the sprockets...and low and behold there were indeed 3:73's. sweet !!!!

with the axle on the ground, I decided the 14 bolt would get a rear disk conversion. so I hit up lug nut 4x4. it was very affordable and I highly recommend them.

with the axles rebuilt, all I had to do now was source out wheels. this was actually challenging. the problem is that I had brand new 35's mounted on 15" rims. the 14 bolt was never offered with 15" rims because the front 3/4 ton axles brakes are too big for 15's. so not many manufacturers made 8 lug 15" rims. with a little grinding on the caliper you can make 15" rims fit though. and I was willing to do that so I didn't have to buy new tires. I finally found some Jegs. 15"x10" with a 3 1/2" backspacing. PERFECT and only 50$ a rim.

pics to come.....
Sounds awesome man! I'll be watching out for those pics!