Member II
Member II


Hmmmmm. this looks exactly like my Ranger's shackle! The thing is, off the top of my mind, it doesn't kick out 1 inch, which seems kind of far. Can you kick out each side 1/2" and allow it to center better?Thanks for the kind words about the build everyone.
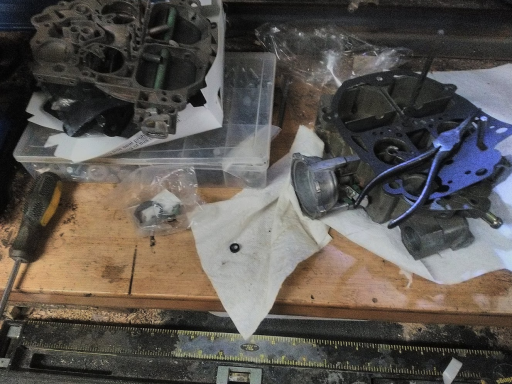
Running into one of my first hurdles here...
View attachment 206739
View attachment 206740
View attachment 206741
I am trying to keep the existing spring hanger (orange) because for lack of a better word it's skookum as hell... and also because I could not fit one for 3" wide springs (note the downward curve in the red frame section.
Basically:
- The spring hanger is made for 2" springs
- I need to use 3" springs with the Dana 60 (or I could somehow adapt 2" wide springs to 3" wide perches on the axle).
- The center-to-center distance between OEM bus springs is 32.75"-33" approx with the 2" springs. The D60 center-to-center distance is 32". Therefore if I bend one shackle 1 inch outwards, and keep the other straight, it will both fit a 3" spring and fit within the OEM 2" spring hanger (see pic above.
- The issue I foresee is that the hanger center is 1/2" outwards of the spring center, which would exert a bending moment upon the bent S-shaped shackle on the left as the spring compresses. Maybe it's negligible?
- To fix this, I could add a plate between the shackles and weld them together into a single rigid member.
however, if both shackles act together as a single rigid member, that would still transfer load to the inward bushing more than it would the outer I suspect. Though I'm thinking the effect there may be negligible and at worst I need to replace bushings more often. So what.
- Are bushings that might wear out earlier the worst problem here? Or is there some bigger issue I'm missing that makes my design potentially unsafe?
Would appreciate some input here!
Hmmmmm. this looks exactly like my Ranger's shackle! The thing is, off the top of my mind, it doesn't kick out 1 inch, which seems kind of far. Can you kick out each side 1/2" and allow it to center better?

Advocate I
Oh yeah. that makes sense. I didn't think about the geometry of what you had vs. what you were trying to mate it to being different.Ah cool! That makes two like this I've seen then; the Ranger shackle and a Nissan one... so I guess there's nothing inherently wrong with the design. Moving the spring centers inward 1/2" on each side allows it to mate up with the spring hangers that are 1/2" outward of the Dana 60 spring center-line on each side. I'm not sure if I explained that well but I think you know what I mean? Current springs are at 33" apart, D60 ones are at 32".
The alternative (bending both shackles outwards and keeping the spring center in line with the shackle center, will mean I have to fit 32" center-to-center springs in 33" center-to-center hangers currently on the truck. I'm not sure if that's better or worse than what I'm proposing with the "asymmetrical" shackle design above? For what it's worth; I can easily remove the rearward hanger for the front axle springs and fab up something custom for the new 3" springs. So that can at least be 32" center to center.
It’s likely there’s more to this than I’m seeing, but I would be inclined to use spacers on both sides of the hanger and keep the shackle plates straight.


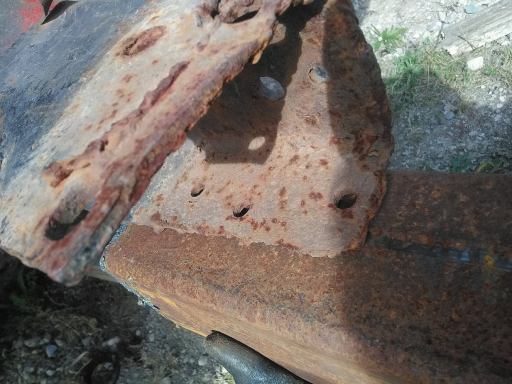
 Only a handful of rust holes to patch up, which is nice!


 gofile.io


Influencer I
20298
So my two cents on this. Move the shackles to the rear and run the longer spring. With a front shackle you will get a terrible ride and less effective spring function. To put it simply, when you hit a bump the shackle is effectively moving toward the bump, rather than away from it. Moving away from the bump is a more natural movement and allows the spring to work much better. Next the longer spring, will allow for more movement in the front end further improving ride but also improving articulation, also if both sets of springs are GMs the 57s will have a higher load rating. As far as re configuring the mounts, I would cut off the rusted frame sections and build an extension, this will also provide plenty of room for a winch without the need for a huge bumper that will more negatively impact approach angles.


Member III


Influencer I
20298
For the frame modification research a Z channel cut. When I was helping with building old school hot rods we did this to a few 'Mercs. Short story is you cut the frame in a Z shape so when you weld in the new sections the joint is not in shear. The other option is to sleeve the frame. When I did the 4 link on my old Wagoneer and turned it into a truggy I chopped the frame and used some rectangular steel that slid over the existing frame, welded the seams and did a few plug welds as well, again, no shear loading on the weld. As far as the steering box goes, here I must admit ignorance, though what you say makes sense. However I would say with the added stress of a larger axle/ tire and some off road I would go to a crossover steering set up. This will also lessen the load on the frame section you plan on modifying. Just grab a 2wd square body chevy pickup steering box so the pitman arm goes the right way.
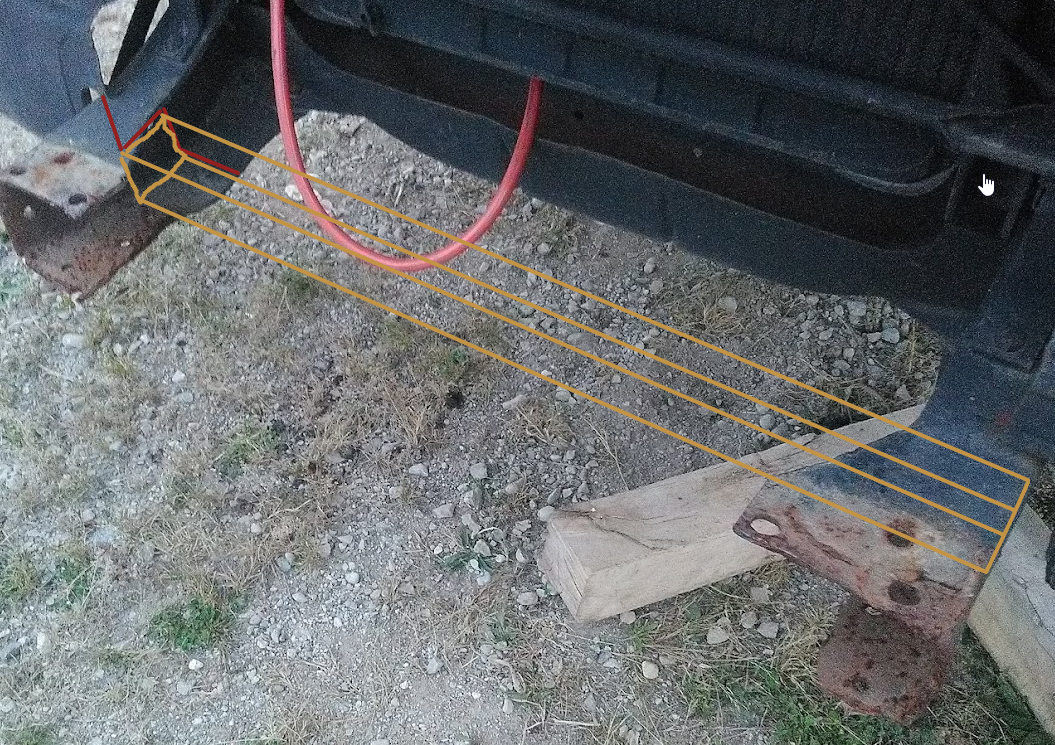 Since drawing the above, I'm thinking I'll extend the yellow 3x3x34" crossmember inwards towards the red hose, and double its width to 3x6x34", so it rests in compression under more of the frame. Basically, extending it right up to where the frame slopes upwards sharply. That'll allow the front hangers to rest completely in compression relative to the remaining frame section. Finally, I'll add fish plates to the side of the new crossmember and up the frame. This will make for an excellent winch mounting point too.
Influencer II
In case of the 48V, you can normally split out 24V for the winch, should be quite easy.Ah yeah, good idea with the frame notching to keep it out of complete shear loading. That's giving me some ideas... Sleeving just won't be possible (with my skills and tools anyways) for the oddball curves on the front of the frame. But, I think something like this would work nicely:
Everything forward of the red line will be cut off. I have no idea why it was butchered like it was, but jeeze... awful weld beads on the inside corner of the frame, and it was run so hot there are holes melted all the way through!
Far as winches go, I'd like some input on that one. I will have a 48V 14kWh battery bank. Anyone know of any 48V winches? Alternatively, I could run a 48V hydraulic pump, or a pump off of the NP205 or SM465's PTO.
Influencer I
20298