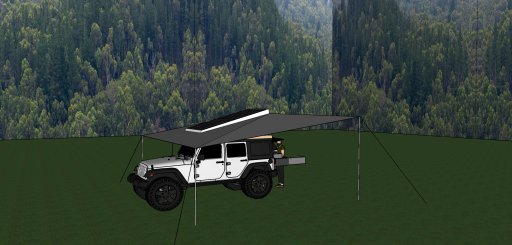
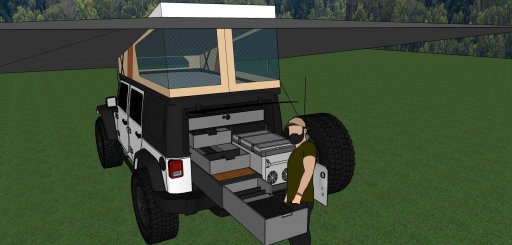
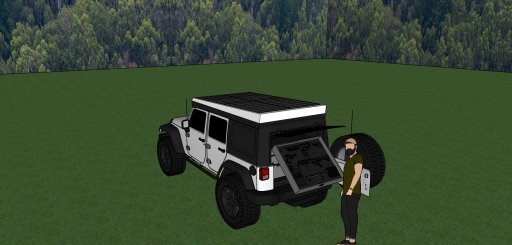
Very cool - great scale drawing. If you haven't tried Sketchup Make (the free version) you can do this in 3d and rotate it, flip it, do it as line drawing or solid, etc. Very helpful in figuring dimensions, features, problem areas, etc.
My main reason for replying, though, is about your uprights and raising/lowering the rack.
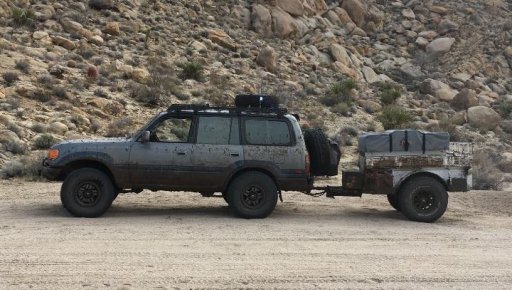
I have a large Pioneer Platform Tray for rack, supported by four uprights that adjust to three positions, supported by gas assisted struts. The struts are designed to support, I think, around 300-350 lbs, maybe more. Which means that one person with a little gumption, can raise and lower the rack with RTT, awning, and a bit of cargo by themselves. I do it all the time.
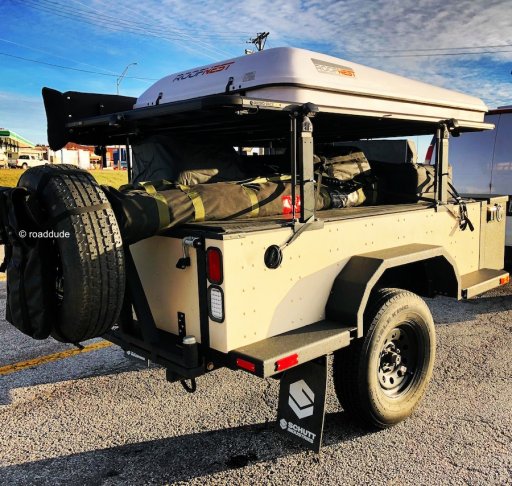
Here are three pics that best show the struts and the uprights. All struts and uprights are mounted to the top edge of the trailer wall. As mentioned in other posts about caps and RTTs on pickup beds, your trailer walls will need to be either strong enough to support the weight, or be able to directly transfer the weight to the trailer frame.
Each upright has an outer sleeve and a sliding inner bar that rises. All four inner bars have three holes at identical intervals. Each strut has an push-button indent pin (on a cable so you don't lose it) that goes through the sleeve into whichever hole in the bar you desire. Travel with the rack low as possible, of course, to keep the center of gravity low as possible. Remove all four pins then push the rack up assisted by the four gas struts. I'm short, old, and nowhere near as strong as I used to be, but do it by myself all the time.
It's a bit more of a struggle to pull the rack back down, because the gas struts want to stay up and extended, but I can do that every time, too. Trick is to get your load balanced to help the struts compress. It's a bitch to compress those suckers when the rack is completely empty, but it can still be done by yourself.
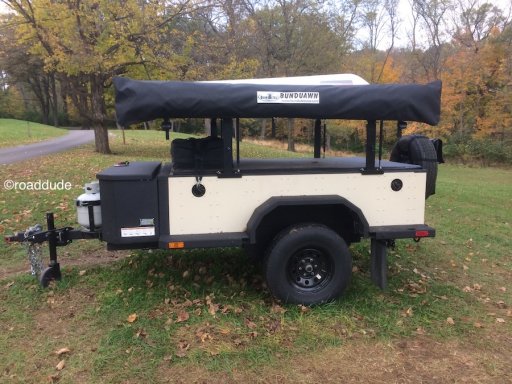
Empty rack, lowest position:
View attachment 52238
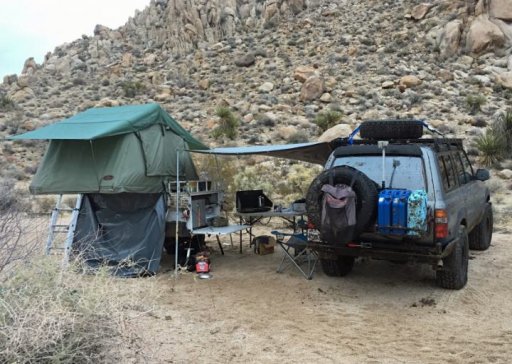
Typically loaded rack, lowest position:
View attachment 52239
Loaded rack, awning side, almost no cargo on trailer cover, lowest position:
View attachment 52236
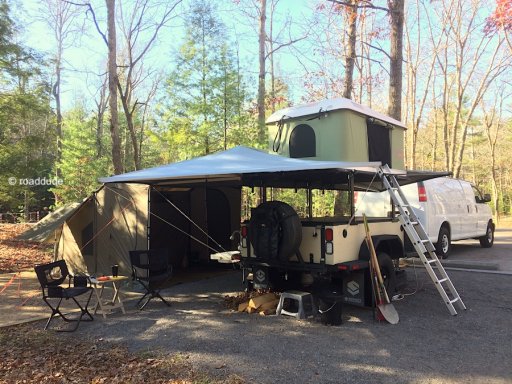
Typically loaded rack, raised, second position:
View attachment 52240
Let me know if you want more details or closer images and I'll try to get that together in the next few days.
.
.