I would say most of the people here are far more advanced at Overland travel and camping than me but I thought I would share this in case people hadn't seen it. I have been building fires a long time and only recently learned about this method. It is by far my preferred method as it allows for a long and steady burn. I get consistent 2-2.5 hour burns before having to add wood, stoke it, etc.
Pros of this method are:
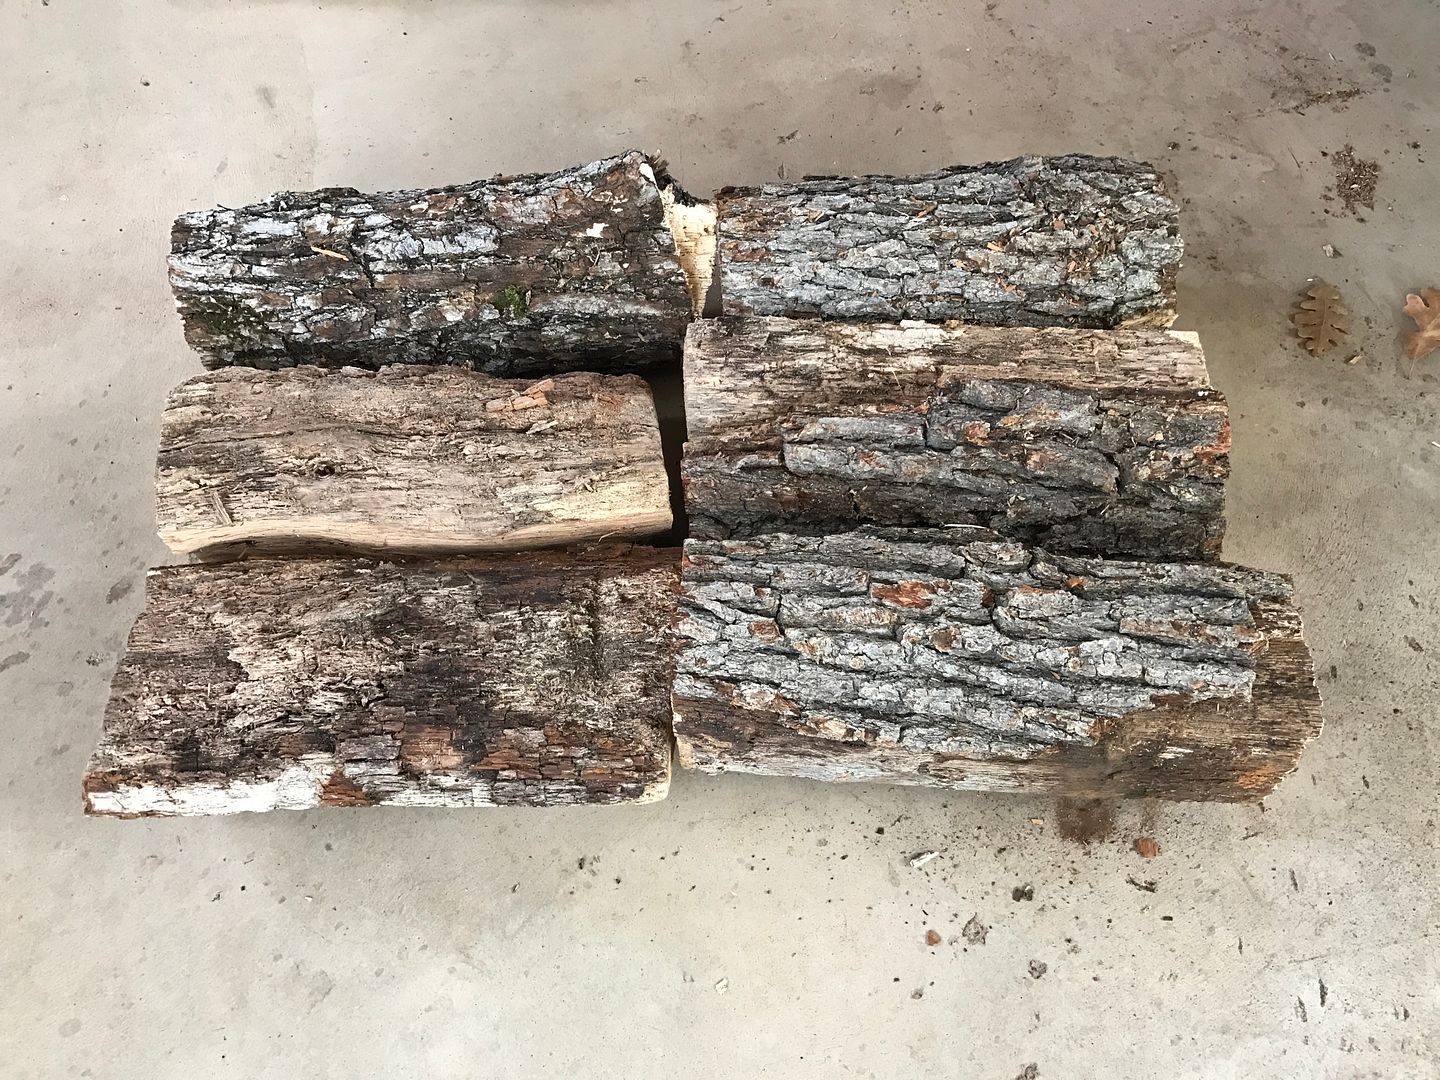
First, you want to lay down a layer of tight packed hard woods. I'm using oak in this demonstration. I apologize for the quality of the wood this is the last of my first woodpile. :D
Next lay down a layer of medium logs the opposite way. You can use hardwoods for a longer slower burn or softer woods for a faster but hotter burn. I went with aspen in the demo.
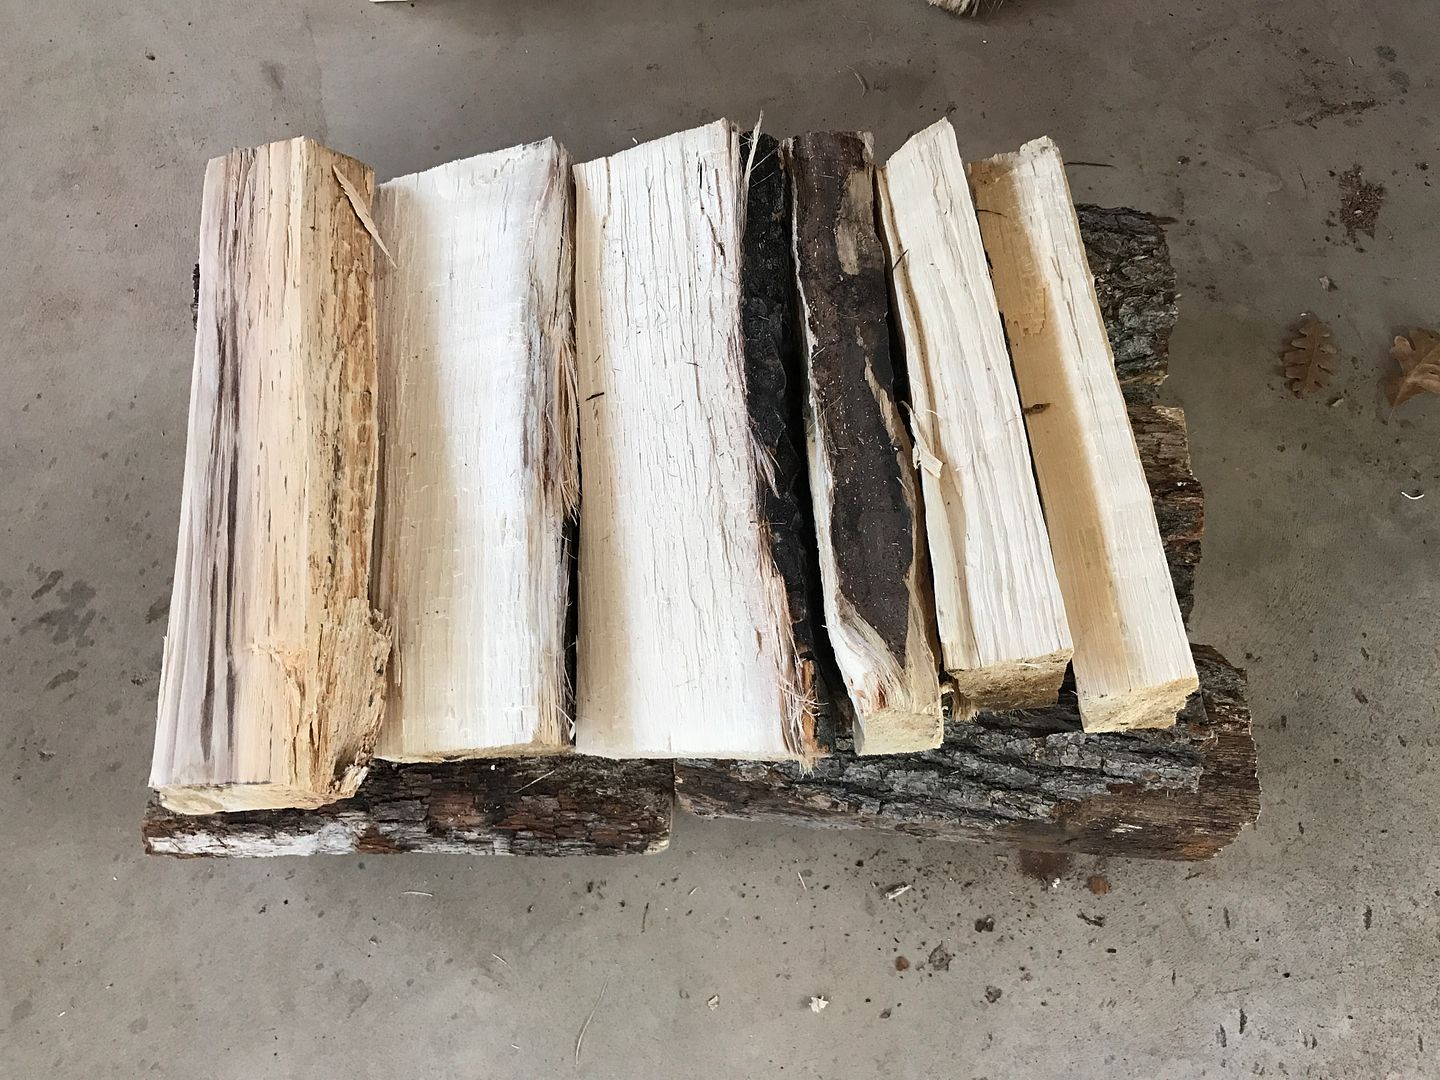
The next layer is an even smaller (but larger than kindling) layer of softwoods. Again Aspen was used. I found staggering them as shown helps to insure they catch on fire quickly as it exposes the ends to direct heat and flame of the top layer. It also gives you a place to tuck a few fire starters if the wood is wet or it's windy. ;) Once this fire gets going it does pretty well with semi-wet wood. I have not tried it in extreme winds but normal wind also does fine.

Finally you want to add a layer of your kindling of choice. I use dry bark and husk from the Aspen as well as sticks and twigs as well. I normally add a little more kindling than this but you get the idea. You want to cover the top of it with the driest most flammable stuff you can find.
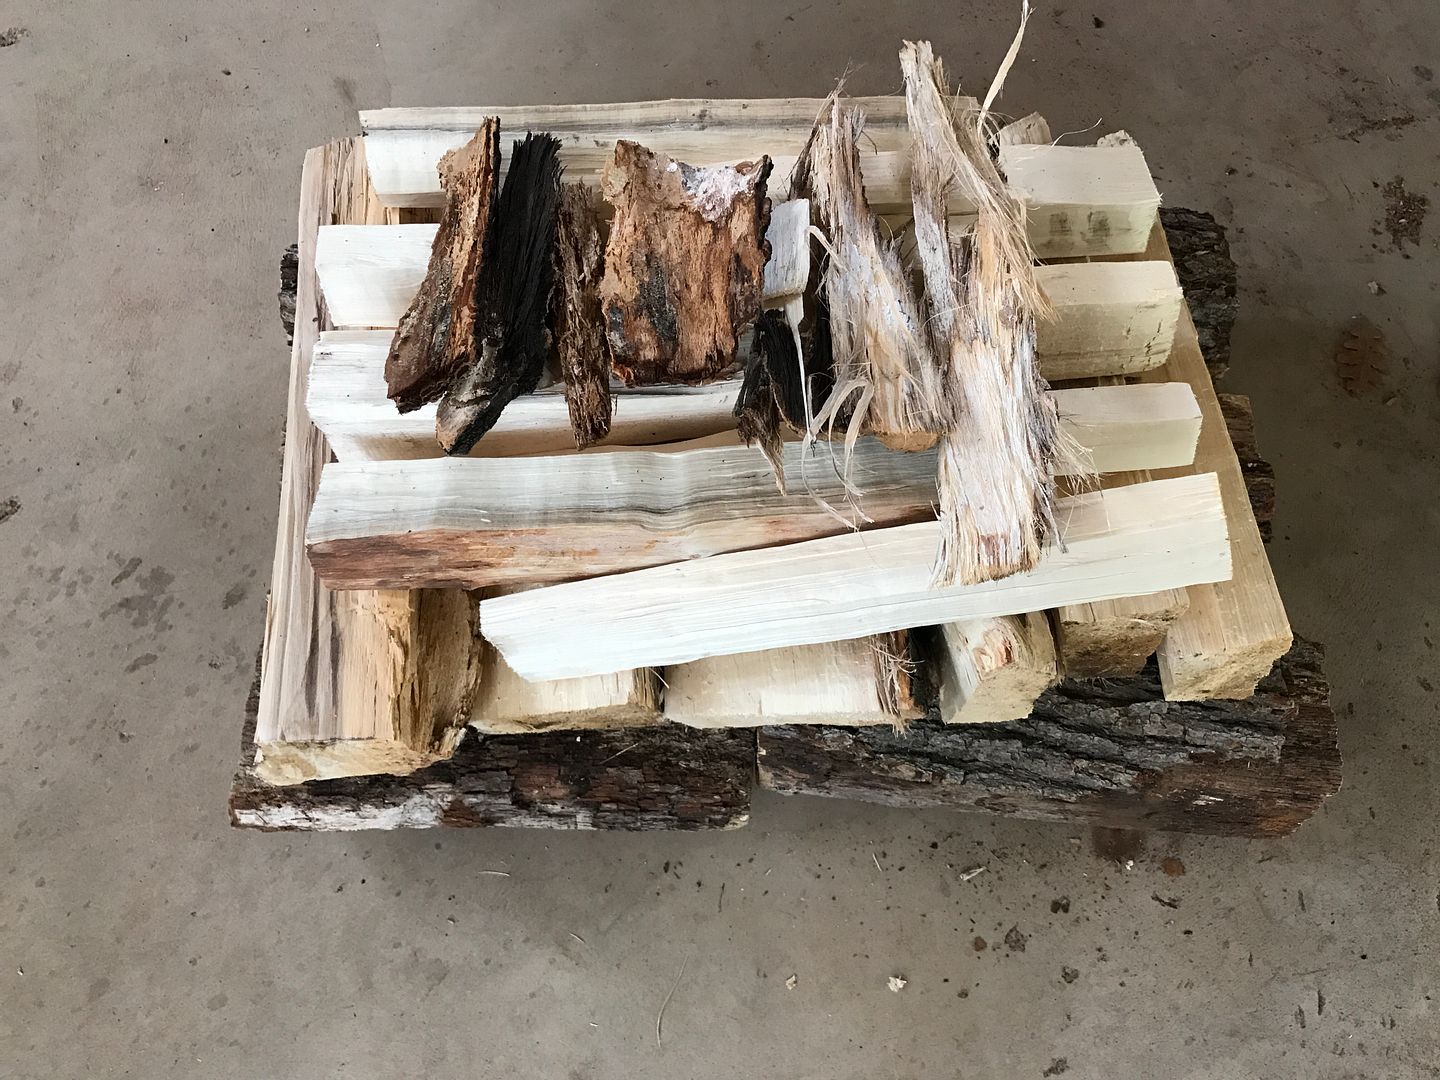
I have found the best results as shown above. I try to pack logs tight side by side but allow for air flow through the sides as seen below.
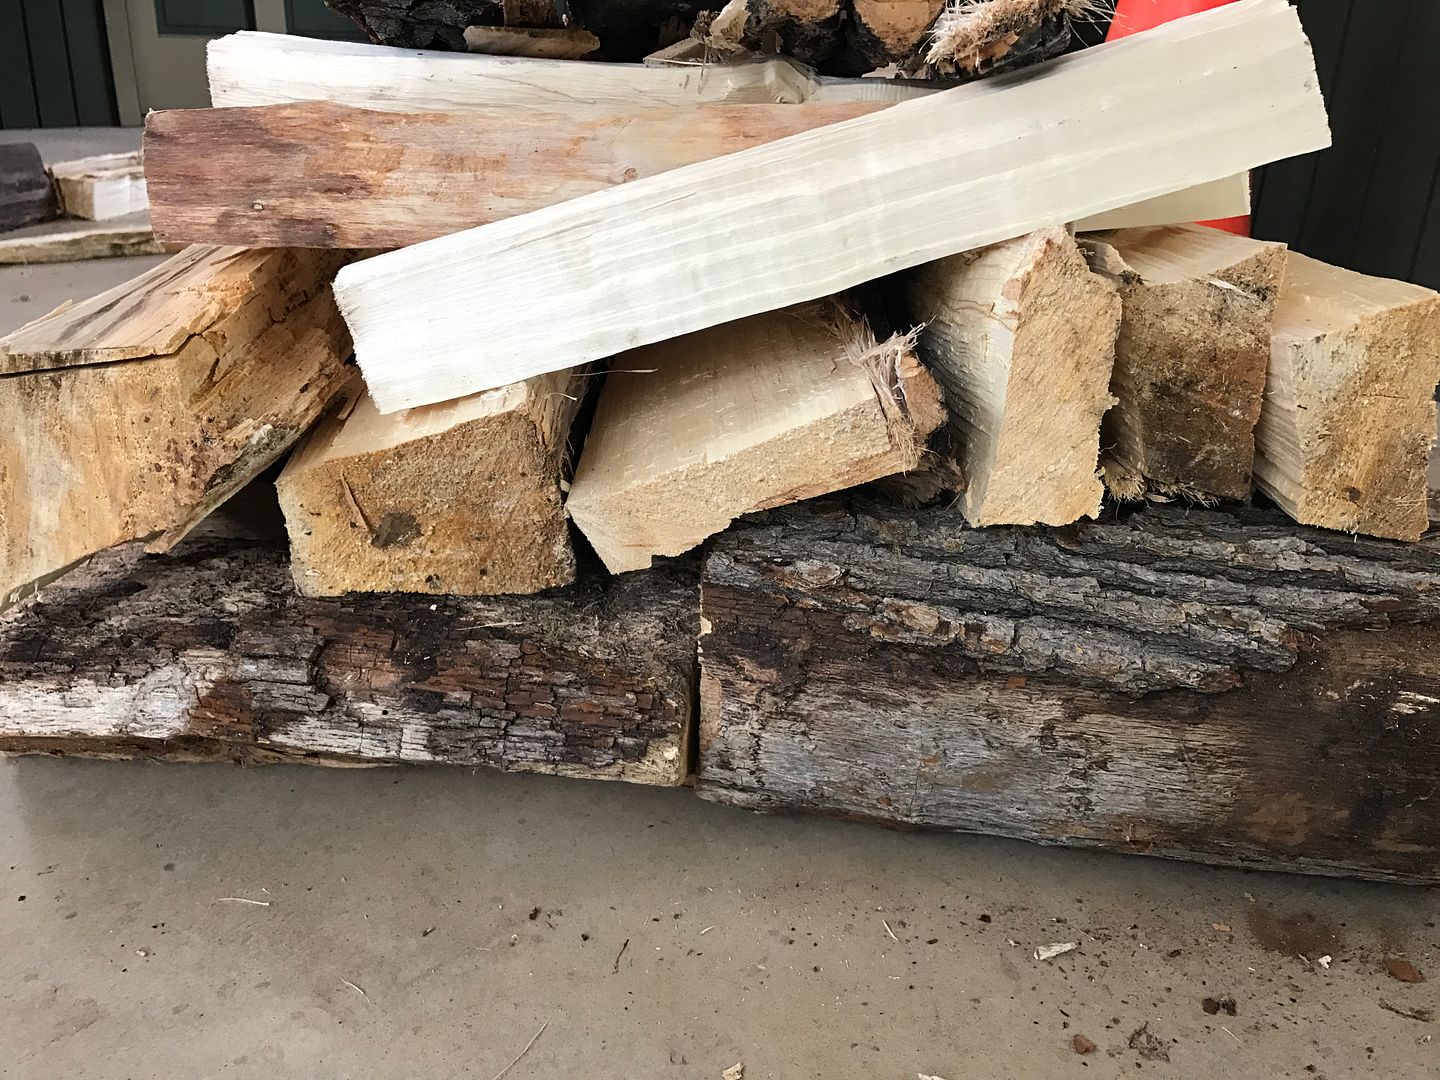
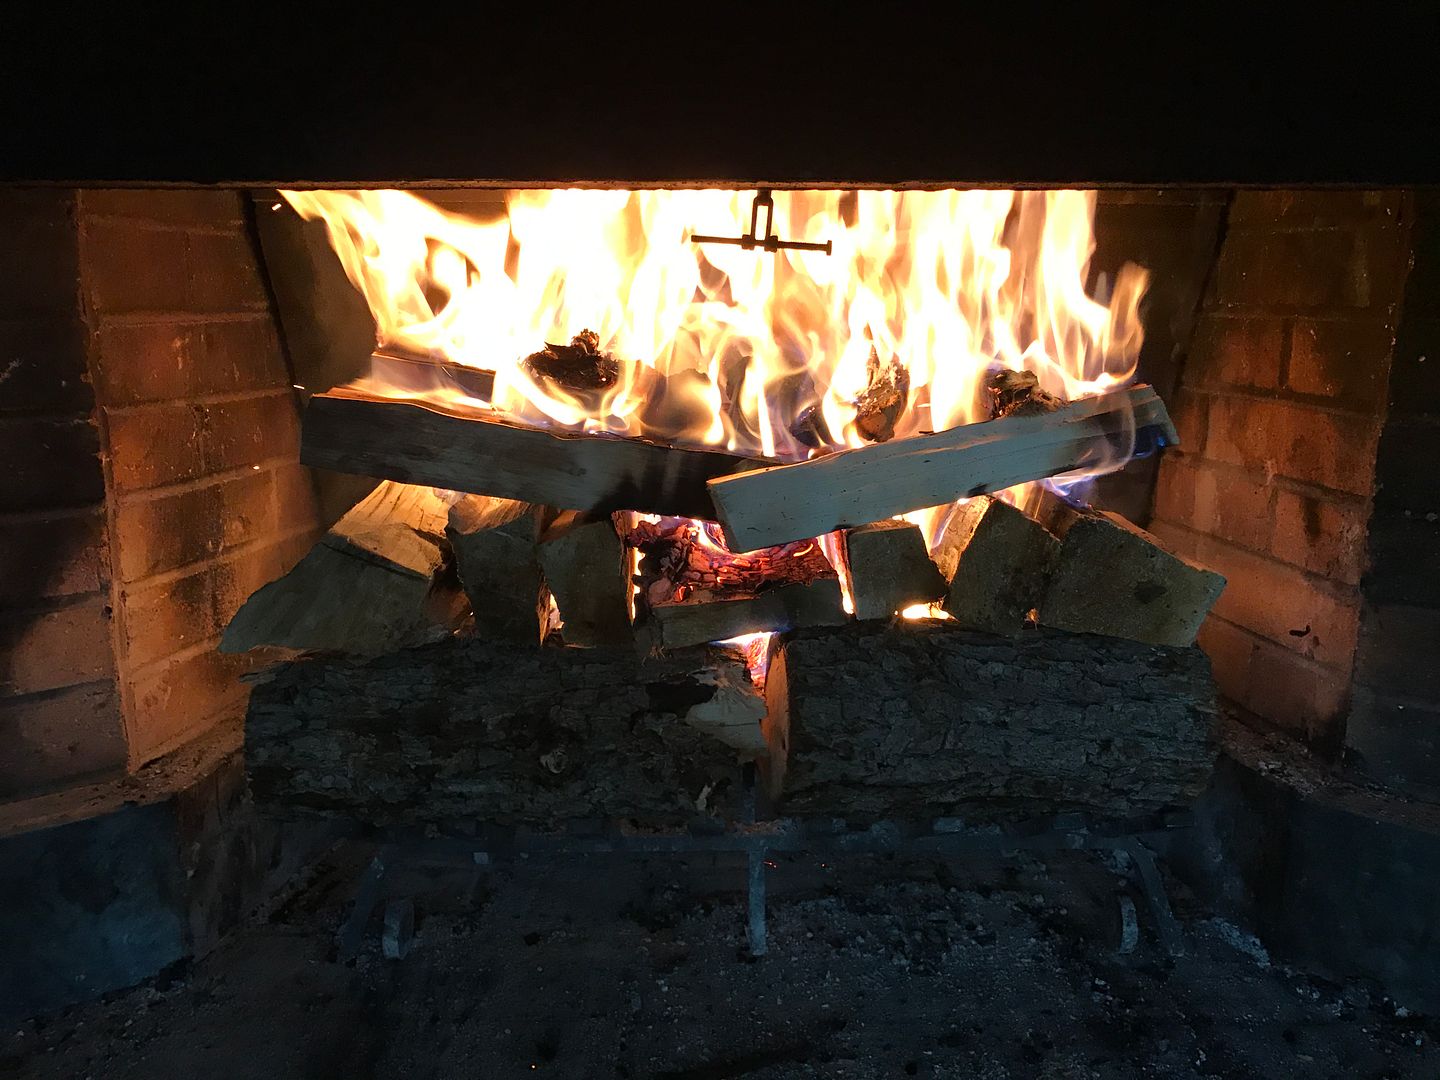
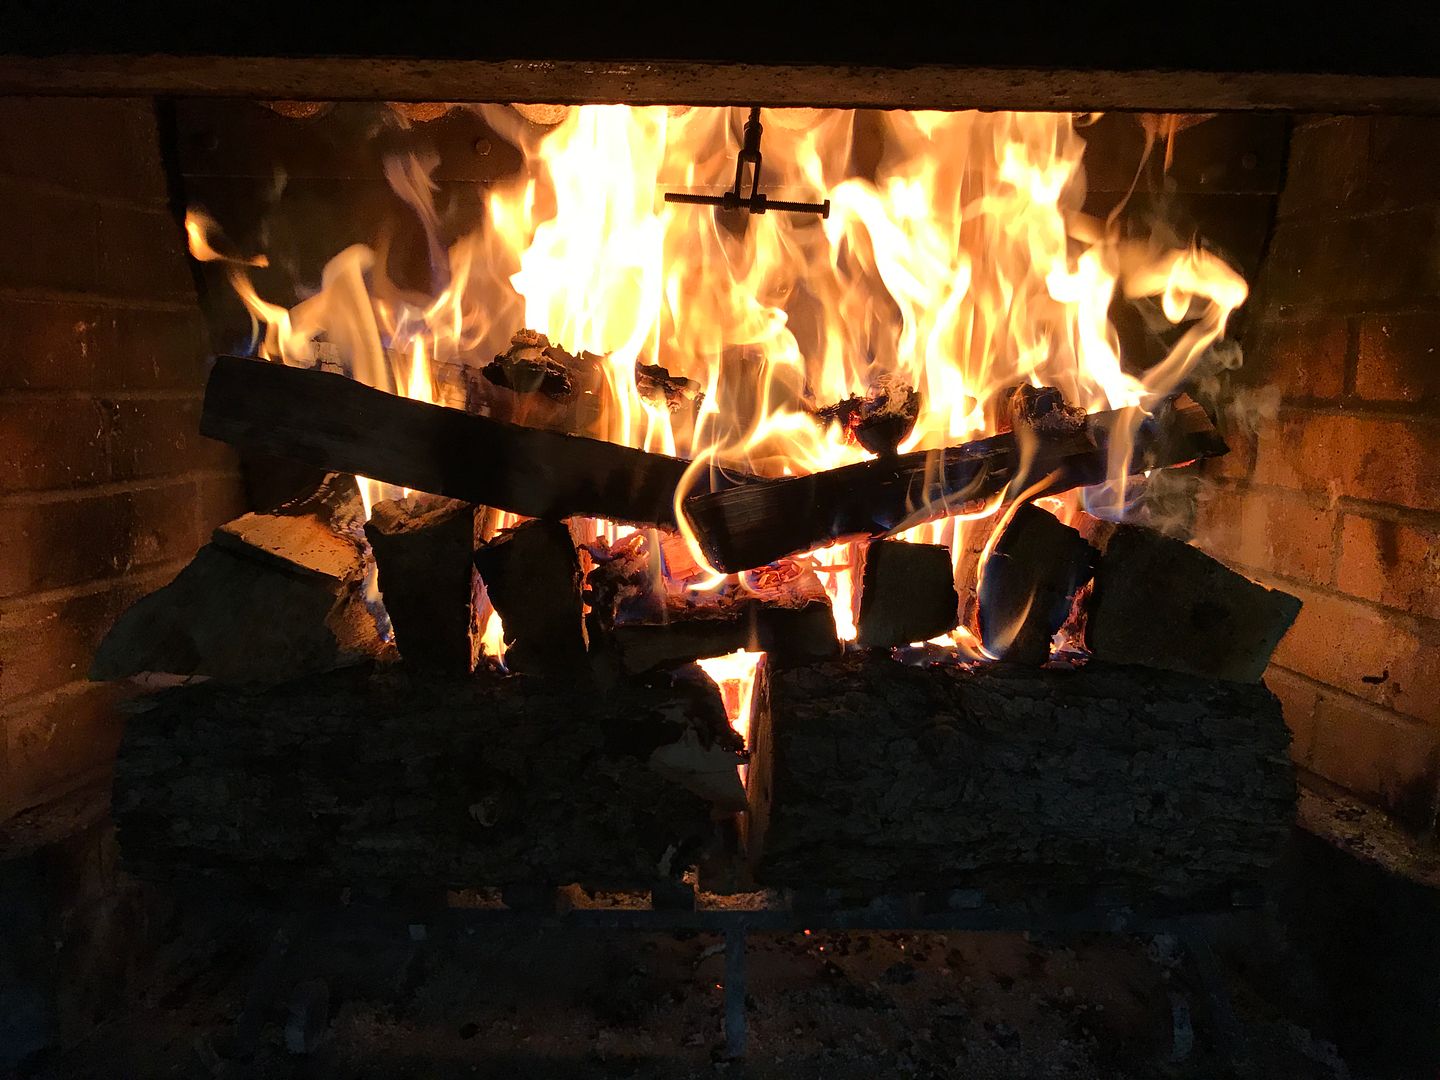
You light the top kindling in several places and if you have built it correctly it should burn for 2 hours plus before having to add logs. The idea is that the embers fall down and slowly ignite the bigger logs. I can vouch that it works well! The reason you try to push the logs together especially on the bottom is to catch embers and not let them fall through. If you have a grate it works a little better at making a bigger fire, faster, but will burn fine on the ground too!
That's how you build an upside down fire. I know it's not rocket science but it has greatly improved my love of campfires / fireplace fires. As the one who is in charge of keeping them going that initial 2.5 hour window is real nice relaxation. I should add that a hardwood second layer is needed to go 2.5 hours. As it's built in the picture it would probably burn 1.5-2 hours.
Mason
P.S. If I remember I'll take some pics and upload them once it's lit tonight. I built it in my breezeway for pics!
Pros of this method are:
- Long time between having to interact with fire by adding wood or stoking etc.
- Easy to build.
- A good amount of heat depending on the lumber you chose.
- Slow to start. Heat doesn't come for a while until larger logs catch on fire.
- Hard to start in HIGH wind. There are ways around it, read below.
- Wood must be pretty dry. Again there are ways around it below.
First, you want to lay down a layer of tight packed hard woods. I'm using oak in this demonstration. I apologize for the quality of the wood this is the last of my first woodpile. :D
Next lay down a layer of medium logs the opposite way. You can use hardwoods for a longer slower burn or softer woods for a faster but hotter burn. I went with aspen in the demo.
The next layer is an even smaller (but larger than kindling) layer of softwoods. Again Aspen was used. I found staggering them as shown helps to insure they catch on fire quickly as it exposes the ends to direct heat and flame of the top layer. It also gives you a place to tuck a few fire starters if the wood is wet or it's windy. ;) Once this fire gets going it does pretty well with semi-wet wood. I have not tried it in extreme winds but normal wind also does fine.
Finally you want to add a layer of your kindling of choice. I use dry bark and husk from the Aspen as well as sticks and twigs as well. I normally add a little more kindling than this but you get the idea. You want to cover the top of it with the driest most flammable stuff you can find.
I have found the best results as shown above. I try to pack logs tight side by side but allow for air flow through the sides as seen below.
You light the top kindling in several places and if you have built it correctly it should burn for 2 hours plus before having to add logs. The idea is that the embers fall down and slowly ignite the bigger logs. I can vouch that it works well! The reason you try to push the logs together especially on the bottom is to catch embers and not let them fall through. If you have a grate it works a little better at making a bigger fire, faster, but will burn fine on the ground too!
That's how you build an upside down fire. I know it's not rocket science but it has greatly improved my love of campfires / fireplace fires. As the one who is in charge of keeping them going that initial 2.5 hour window is real nice relaxation. I should add that a hardwood second layer is needed to go 2.5 hours. As it's built in the picture it would probably burn 1.5-2 hours.
Mason
P.S. If I remember I'll take some pics and upload them once it's lit tonight. I built it in my breezeway for pics!
Last edited: