

This is just another Tacoma build thread to help me document my build, share as much knowledge as I can offer, and to help spark inspiration to further the build. The Tacoma was the gateway to overlanding for my wife and I. Although most of what we have done so far is along the lines of the weekend warrior overlander, we do have plans for more long term trips in the future. Until then, we will continue to outfit the truck to allow us to continue to push our adventures further.
The AdventureQuist 2017 Toyota Tacoma TRD Off-Road
- Thread starter AdventureQuist
- Start date
-
Guest, we are migrating the site today. There may be interruption of service.
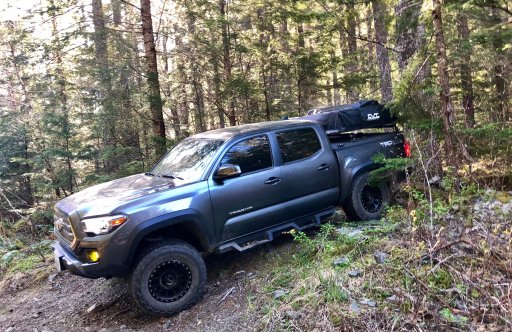
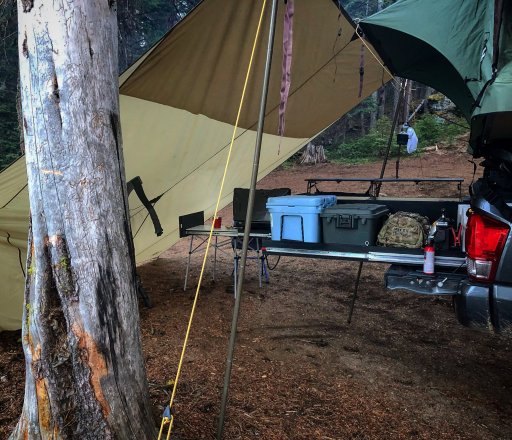
Our first night in our new roof top tent. We opted for the CVT Mt. Shasta Pioneer Series tent. Although ground tents can be made comfortable and are usually more compact, there is something to be said about getting off the ground. The diamondback cover coupled with the vantech racks that I bolted through the cover supports the weight of the tent wonderfully.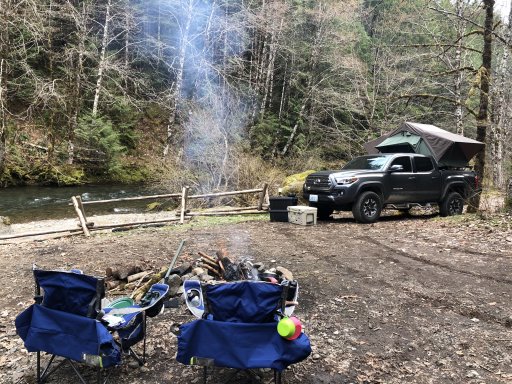

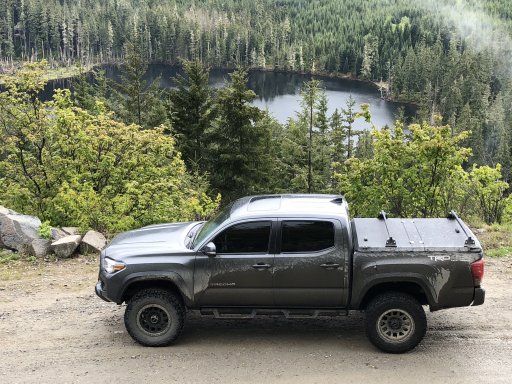
We upgraded our suspension and wheels to accommodate larger tires. For shocks we went with Bilstein 5100s all around, which is really only a slight upgrade over the stock Bilsteins. The springs are still original, however I plan to upgrade the leafs with the OME Dakar packs to handle the added weight of our camping gear/tent. I went with black Method 309s (17" x 8.5" with 0 offset). The tires are 285 70R 17 BF Goodrich KO2s and I love them on and off road.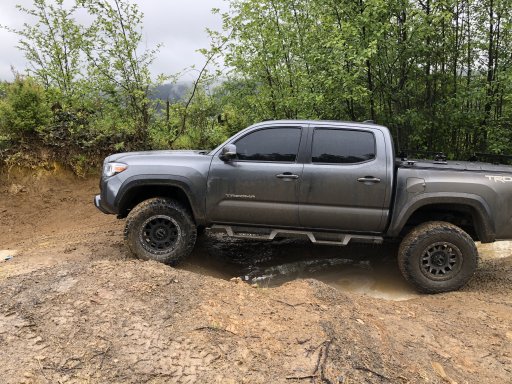
Been looking for a system to help us increase our efficiency at camp. We had been using the Plano Sportsman Trunks (which actually fit the bed of the tacoma perfect if that is something that you are considering) but I was tired of loading and unloading the bins from the bed while at camp. I wanted to try and find a drawer system that would compliment the Diamondback cover, but I wasn't able to find something that suited my needs. I decided that the next best thing would be to build it myself. I will continue to post as the build progresses. I anticipate it to take awhile given that I will only be working on it on the weekends.
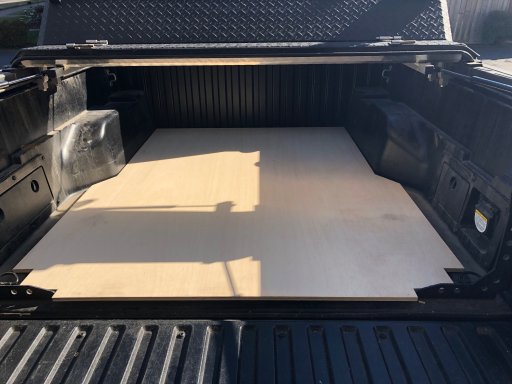
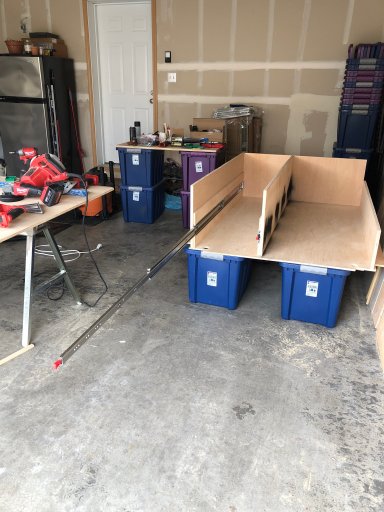
I started by cutting the base platform. I chose to cut it out of a single sheet of sanded 1/2" plywood rather than 3/4". I figured that it was safe to go with 1/2" here and it would be a good place to save some weight.
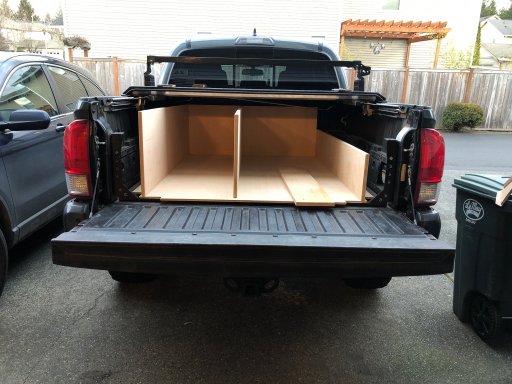
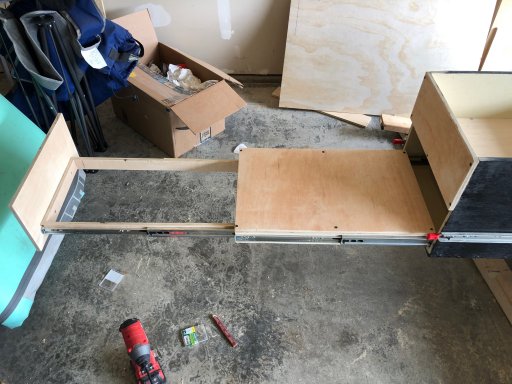
Next I build the walls. I build them out of 3/4" plywood because they would have the slides mounted to them and would be load bearing. I attached everything with both wood glue and used 1 1/2" contractor screws every two inches. I couldn't decide between drawers or a bed slide, so I decided to do both. The left side will be the drawer system and the right side will be the bed slide.
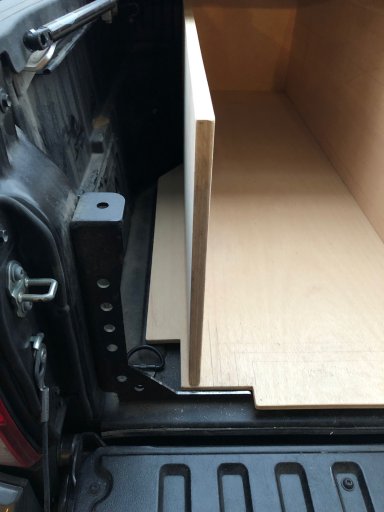
I had to cut down my Cali Raised bed stiffeners so that the drawer/slide would clear them when opening.
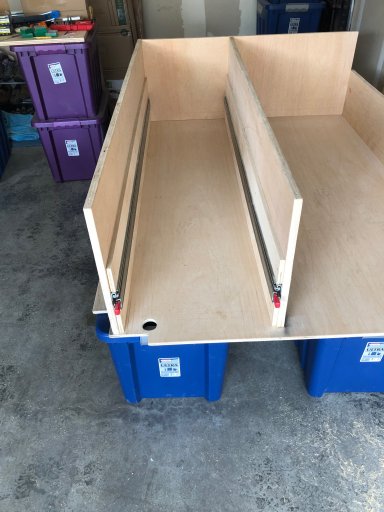
Since the drawer slides were so expensive, I only ordered one set at a time. I wanted to make sure that I was happy with the quality before ordering the set for the bed-slide half of the system. I ordered 56" slides from cabinetparts.com that lock in, lockout half way, and lockout at full extension. I was concerned with using screws to mount the slides since they would be bearing so much weight, so I opted to bolt them. I started with using Philips head 1/4" bolts, a washer, lock washer, and nut on the drawer side. Unfortunately I found out that T Nuts existed after those slides were already mounted. I will be using T Nuts (and loctite) to mount the second set of slides and to mount the drawers to the slides.
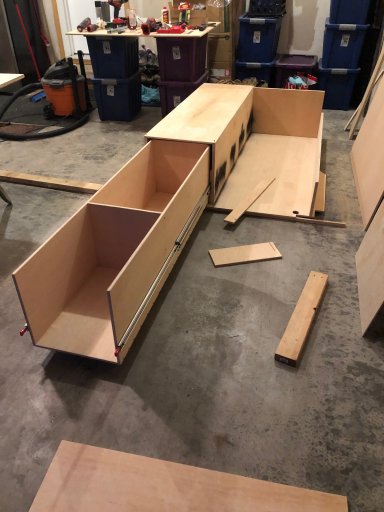
Next I built the main drawer. I used 1/2"plywood. I used the same 1 1/2" contractor screws and wood glue as before. In hindsight I would have used shorted screws because they were a bit wide for the 1/2" plywood. It did bulge in some areas where I didn't get my predrilled hole in the exact center of the wood. I mounted the drawer to the slides using 1/4" Philips head bolts, T Nuts, and loctite.
Got the base, walls, and drawers painted. After letting that dry for a few days, I remounted the drawer and mounted my second set of slides to the right side of the system for the bed-slide. I also added 4 turnbuckles which will be used to secure the system to the anchor points in the bed. I didn't want to use bolts or anything permeant. These will allow me to slide the system out when not in use.
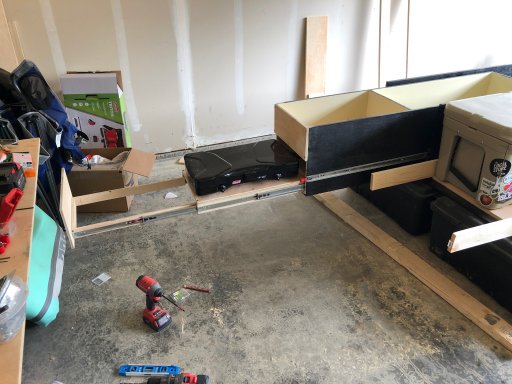
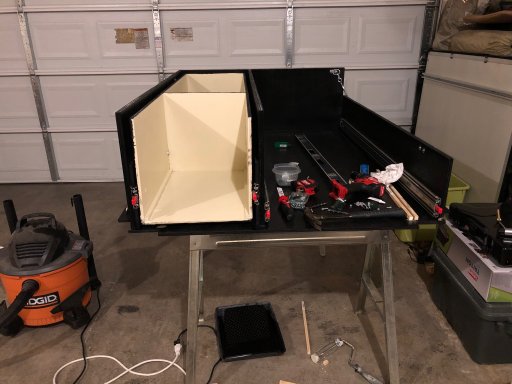
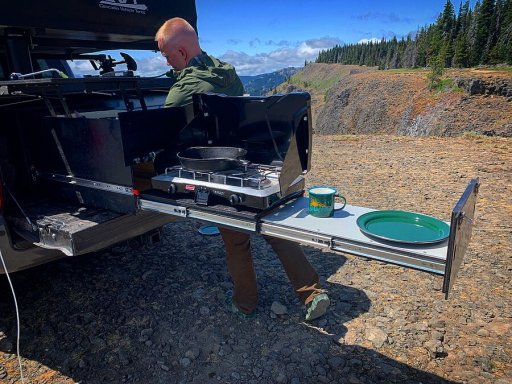
Added the slides for the cooking surface. The first slide will hold the cook stove and the second will have a cutting board mounted to it for food prep. I plan to glue magnets beneath the cook stove (after painting the wood) to hold it in place.
Mocked up how the bed-slide half will be. The next step is going to be building the tray. I am going to used 3/4" plywood for its construction to help prevent flex.
I started by cutting the base platform. I chose to cut it out of a single sheet of sanded 1/2" plywood rather than 3/4". I figured that it was safe to go with 1/2" here and it would be a good place to save some weight.
Next I build the walls. I build them out of 3/4" plywood because they would have the slides mounted to them and would be load bearing. I attached everything with both wood glue and used 1 1/2" contractor screws every two inches. I couldn't decide between drawers or a bed slide, so I decided to do both. The left side will be the drawer system and the right side will be the bed slide.
I had to cut down my Cali Raised bed stiffeners so that the drawer/slide would clear them when opening.
Since the drawer slides were so expensive, I only ordered one set at a time. I wanted to make sure that I was happy with the quality before ordering the set for the bed-slide half of the system. I ordered 56" slides from cabinetparts.com that lock in, lockout half way, and lockout at full extension. I was concerned with using screws to mount the slides since they would be bearing so much weight, so I opted to bolt them. I started with using Philips head 1/4" bolts, a washer, lock washer, and nut on the drawer side. Unfortunately I found out that T Nuts existed after those slides were already mounted. I will be using T Nuts (and loctite) to mount the second set of slides and to mount the drawers to the slides.
Next I built the main drawer. I used 1/2"plywood. I used the same 1 1/2" contractor screws and wood glue as before. In hindsight I would have used shorted screws because they were a bit wide for the 1/2" plywood. It did bulge in some areas where I didn't get my predrilled hole in the exact center of the wood. I mounted the drawer to the slides using 1/4" Philips head bolts, T Nuts, and loctite.
Got the base, walls, and drawers painted. After letting that dry for a few days, I remounted the drawer and mounted my second set of slides to the right side of the system for the bed-slide. I also added 4 turnbuckles which will be used to secure the system to the anchor points in the bed. I didn't want to use bolts or anything permeant. These will allow me to slide the system out when not in use.
Added the slides for the cooking surface. The first slide will hold the cook stove and the second will have a cutting board mounted to it for food prep. I plan to glue magnets beneath the cook stove (after painting the wood) to hold it in place.
Mocked up how the bed-slide half will be. The next step is going to be building the tray. I am going to used 3/4" plywood for its construction to help prevent flex.

The project has been finished for awhile now and we have had it in the truck for a few months. It is pretty heavy and I actually upgraded the leaf pack to a set of OME Dakar mediums to relevel the truck. It seems to be handling the weight fine so far.
I am sure that there are lighter materials out there.
I am sure that there are lighter materials out there.
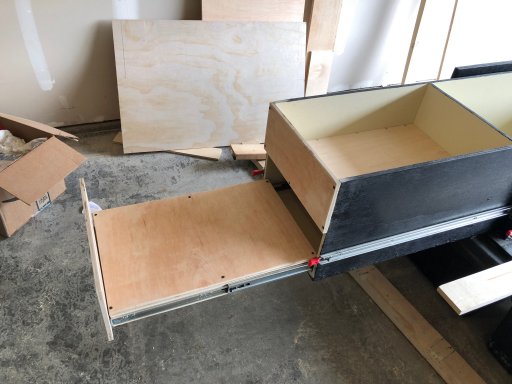
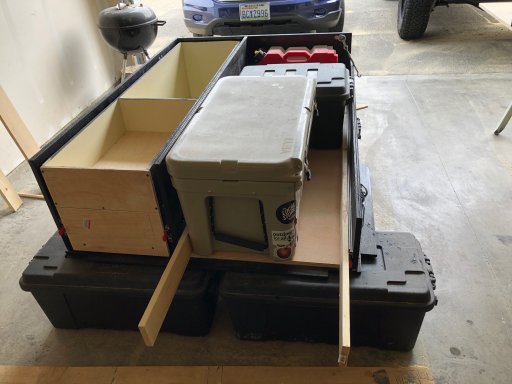
I installed the bed slide tray (on the right side) The same way that I installed the drawer. The only difference was that I used T Nuts with the bolts, which provided a much cleaner finish when compared to the standard nuts that I used on the drawer side. The bed slide was built to fit the 56 qt Plano Molding boxes as well as a 35 qt yeti cooler.
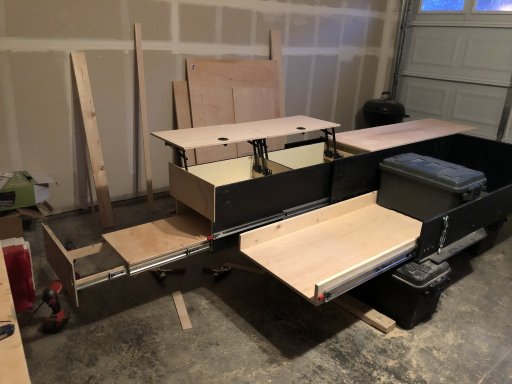
After the bed slide was done, I moved back to the drawer side and installed the coffee table hinges on both compartments. I went with those hinges because they offer flat space both open and closed, which is very handy when camping. They secure nicely with compression latches.
I added four turnbuckles to (one to each corner) which would be used to secure the system to the bed using the factory anchor points.
Finally, I had to disassemble everything not painted, to paint it. I don’t think that I mentioned it before, but I opted for a black and beige oil based paint by rustoleum to increase water repellency. Everything was painted black except for the inside of the drawer, which was painted beige. This allows for better illumination and contrast when trying to find things in the dark.

After the paint dried, I reassembled the system and added a few finishing touches. I lined the bottom edges and the lip of the bed slide with angled aluminum to protect the edges. I also added pull handles made of simple eye bolts and some old climbing rope.

The final step was to slide the system into the bed and secure the turnbuckles to the bed anchor points. I am not going to lie, it’s heavy. Roughly 150 pounds. But it’s really pretty easy to slide in and out of the bed with two people. You may also note that the furthest out slide on the drawer slide is not complete. We were still waiting on the custom cut cutting board to arrive.
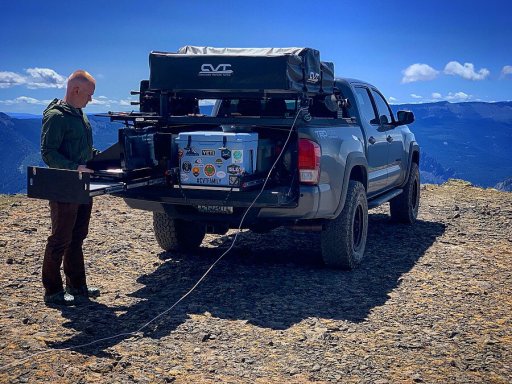
The drawers have been complete for awhile now and we have used them on every trip that we have been on this spring/summer/fall. We have come to really love how easy they make getting the things we need and they keep us organized.
The system is quite heavy and when you add the roof top tent into the mix, I’m sure we are at or over weight. We upgraded the leaf springs to the OME Dakar medium weight packs and the truck handles the weight just fine. We will need to add a leaf, essentially making it the heavy weight springs, if/when we add a spare tire carrier. But for now the truck does fine and rides level. I have noticed that I hit the bump stops when we hit a bump on the trail with any speed. All things to consider when thinking of building something like this. If I did it again, I would have gone with one of those T-Slot aluminum frame builds to save on weight.
In all, we are very pleased with how the drawer system turned out. They make our lives on the trail a little bit easier and increase our efficiency at camp.
