Stealth Overlanding Rig

  • HTML tutorial

Moebius01

Rank V
Member

Advocate I

1,515
TN, USA
First Name
Jason
Last Name
Jowers
Member #

28732

I've been debating where to ask this question, but as the buildout is my ultimate goal, figure I'll start here. Long winded intro/explanation follows, if it's boring, skip a paragraph to get to the questions. :)

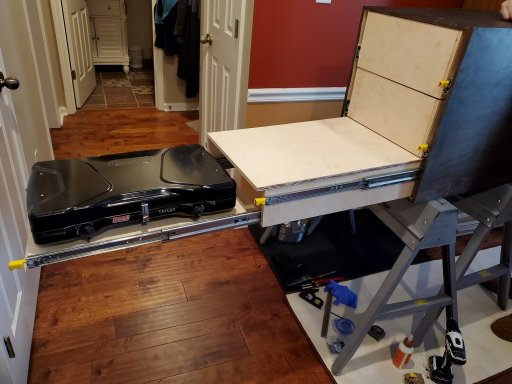
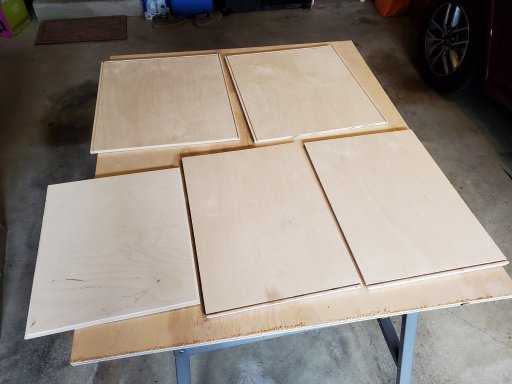
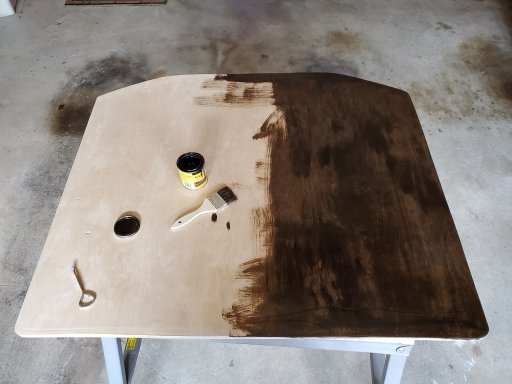
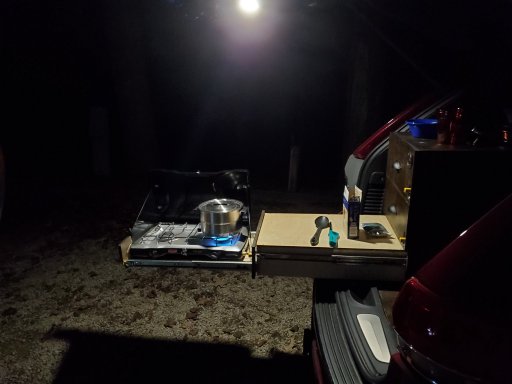
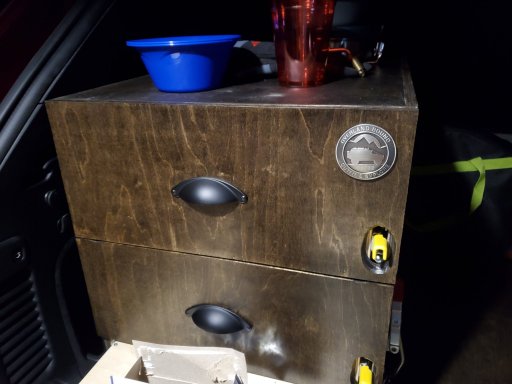
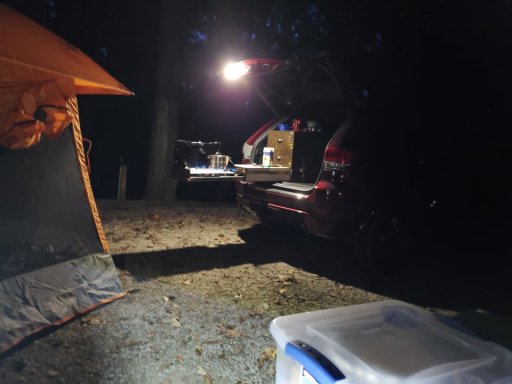
As the wife and I are just dipping our toes into the proverbial overlanding pool, we didn't look to create a full-time rig. For the first bit, I imagine it won't be a ton of trips. Plus, given we live in west TN where there's not a ton of overlanding opportunities nearby, I really wanted something that would be good on the road trip portions as well. I'm not planning on any major rock crawling, or insane trails, but do hope to get to some of the cool places out west that are beyond just a dirt road. To that end, I have a shiny new Jeep WK2 Overland in the garage. We went with the Overland as neither of us really liked the Trailhawk interior (just a thing), so I took the OL and added the equipment to build it out like a Trailhawk instead. I shall call her my Overhawk. Where the stealth part comes in is, since this is also a daily driver and road trip vehicle, I want to keep it looking as stock as possible when not being used for overlanding. I'm working on a design for an easy to remove drawer system, and planning to use Chief for most of the addon armor as you can keep pretty stock looks with it. Which brings me to the first question in what will ultimately be a long, slow, build.

We've decided to head to Overland Expo East in October, and doing the driving experience just so I can get a taste of offroading beyond just gravel roads. Right now, the Jeep is completely stock, so the only skid plating is the OEM, and I didn't add rock rails to the build. As it looks like Chief might actually start having product to ship again in August, I'm trying to decide what would be a good first addition. My current decision is between the lower guard and sump plate (doing both) or rock rails. If you were starting from scratch, which would you do first?
 

MMc

Rank V

Influencer II

1,749
San Dimas, Ca.
First Name
Mike
Last Name
McMullen
Member #

18647

Welcome to the Campfire! I am not a Jeep guy, I gave up camping small years ago. I would not drawer it at all, I think they look great but area waste of space. I run a cook box that holds more and is smaller. If you add a rack you can put a table holder under the rack as a slide in pretty easily. I find a box, stove are and table are far more versatile. Don't start spending a bunch of money until you know you like the whole process and life style.
Everything is a trade off in overloading, the reason I love something is the reason you hate it.
 

Moebius01

Rank V
Member

Advocate I

1,515
TN, USA
First Name
Jason
Last Name
Jowers
Member #

28732

well, it doesn't sound like you are going to be going too wild out there, so why get the plate or rails? i do a little bit of offroad and i just went with a level kit to raise the body up enough to get a little bigger tire under it and that extra clearance has been plenty and i like the look of the bigger tire in addition to the added height. i have a stock tundra and was bottoming out on a jeep trail in sedona right after i bought the truck. i leveled it and went up 2 tire sizes and i now clear pretty much anything i would want to drive over. just a thought....
I'm hoping I'll eventually get to the point where I'd need a bit beyond stock. And with the WK2, it seems that sump cover is a big miss in the OEM plating if you bottom. Looking at some of the driving course videos from the Expos, seems they have a few spots where either rails or a front guard would be a good idea.
 
  • Like
Reactions: grubworm

Brewbud

Rank V
Member

Member III

2,268
SoCal
Member #

17493

Sump protection first if you are going to be in an area there is any chance of damaging that oil pan. That makes for a bad day for you and the trail. Rock rails are nice but it is better to damage body panels than the heartbeat of your ride.
 

Moebius01

Rank V
Member

Advocate I

1,515
TN, USA
First Name
Jason
Last Name
Jowers
Member #

28732

I was having the same basic thought, so I ordered the sump and lower guard from Chief. Of course they're still not shipping until late August, but will hopefully get here in time to put in before the east expo. I guess I can say my build thread has officially begun. :)
 
  • Like
Reactions: Ddawg and Brewbud

Moebius01

Rank V
Member

Advocate I

1,515
TN, USA
First Name
Jason
Last Name
Jowers
Member #

28732

Since I have some time to kill before the Chief parts get in, I started on some of the interior pieces. First thing was an "on demand" replacement for the spare tire cover. After getting inspired by a few builds I found floating around the interwebs, I've cut a 3/4" plywood piece to fit where the cover is, which will then anchor to the tie downs (once I add the strength to them), and I can then add anchor points for whatever gear I need. Early stage will likely be some manner of chuck box and a cooler, but will hopefully evolve into a removable drawer system and a fridge slide. I figure I can anchor a drawer cube down with aircraft style rails, so that if worst case I need to get to the spare, I can just unhook and pull out the drawer (and cooler/fridge), then lift the panel for access. I'd love to put a gas strut system in where I could just lift the whole thing intact, but still trying to avoid any permanent mods.
 
  • Like
Reactions: DugzKine

DugzKine

Rank IV
Launch Member

Enthusiast III

1,116
Las Vegas, NV, USA
First Name
Daniel
Last Name
Macaalay
Member #

23593

Since I have some time to kill before the Chief parts get in, I started on some of the interior pieces. First thing was an "on demand" replacement for the spare tire cover. After getting inspired by a few builds I found floating around the interwebs, I've cut a 3/4" plywood piece to fit where the cover is, which will then anchor to the tie downs (once I add the strength to them), and I can then add anchor points for whatever gear I need. Early stage will likely be some manner of chuck box and a cooler, but will hopefully evolve into a removable drawer system and a fridge slide. I figure I can anchor a drawer cube down with aircraft style rails, so that if worst case I need to get to the spare, I can just unhook and pull out the drawer (and cooler/fridge), then lift the panel for access. I'd love to put a gas strut system in where I could just lift the whole thing intact, but still trying to avoid any permanent mods.
Sounds like the start of an awesome build. Kindly load us up with pics because I’d love to see the progress.
 

Moebius01

Rank V
Member

Advocate I

1,515
TN, USA
First Name
Jason
Last Name
Jowers
Member #

28732

Finally started getting enough time while waiting on the Chief Armor to work on the the removable drawer system. Got the plywood plate that replaces the spare tire cover shaped and sanded. I was debating on painting it, coating with raptor liner or something like, or something else. Decided for my first attempt to stain it a dark wood (pretty close to the woodgrain of the trim in the Dark Sienna interior on the jeep) and give it a few coats of polycrylic. We'll have to see if it just scratches too easily or the like.

I didn't think I was going to be able to get a drawer done in my first attempt, but fortune smiled and I'm about 95% complete with it. Just need to put a final coating on the nested drawer that I'll use to put a cutting board on and the inside section for the cookstove and build some drawer faces. As it happened, when I designed the drawer, I ended up reducing the height by 2" from my original plan. At 24" high, it fit, but only just as it was getting uncomfortably close to the liftgate glass. It did close, but the gap really didn't have me feeling comfy, especially as this will be anchored and not bolted down. So I went to 22" high. Unfortunately, in doing that, I failed to account for the drawer depths and the fact that the drawer slide, even resting against the bottom, still meant the tray holding the cookstove was about 3/4" up. With reducing the size, that actually made it not fit, so I got a little crafty and used angle brackets to drop to wear the cookstove support was as close to the bottom as possible. The downside is the knobs are a wee bit inconvenient as you have to reach over the drawer slide a bit, but not enough to make it unusable. I might even add a second board that I could just slide in when in use and remove when I need to close up.

Not in a position to drop the coin on a fridge and power system for it just yet, so I'll be using a Lifetime 55 quart to start. I was thinking of building a slide for it, but I don't want to accidentally limit myself, so I'll wait until I either am positive what fridge, or actually get it.

Not too many pics yet, but did snap a few while building the platform and drawer cube. I'll add a few once I get the anchors in place and faces on the drawers.
 

Attachments

LRdisco1

Rank III

Enthusiast II

509
Louisville, Jefferson County, Kentucky, United States
First Name
Brandon
Last Name
Doyle
Member #

28798

Service Branch
Firefighter
Finally started getting enough time while waiting on the Chief Armor to work on the the removable drawer system. Got the plywood plate that replaces the spare tire cover shaped and sanded. I was debating on painting it, coating with raptor liner or something like, or something else. Decided for my first attempt to stain it a dark wood (pretty close to the woodgrain of the trim in the Dark Sienna interior on the jeep) and give it a few coats of polycrylic. We'll have to see if it just scratches too easily or the like.

I didn't think I was going to be able to get a drawer done in my first attempt, but fortune smiled and I'm about 95% complete with it. Just need to put a final coating on the nested drawer that I'll use to put a cutting board on and the inside section for the cookstove and build some drawer faces. As it happened, when I designed the drawer, I ended up reducing the height by 2" from my original plan. At 24" high, it fit, but only just as it was getting uncomfortably close to the liftgate glass. It did close, but the gap really didn't have me feeling comfy, especially as this will be anchored and not bolted down. So I went to 22" high. Unfortunately, in doing that, I failed to account for the drawer depths and the fact that the drawer slide, even resting against the bottom, still meant the tray holding the cookstove was about 3/4" up. With reducing the size, that actually made it not fit, so I got a little crafty and used angle brackets to drop to wear the cookstove support was as close to the bottom as possible. The downside is the knobs are a wee bit inconvenient as you have to reach over the drawer slide a bit, but not enough to make it unusable. I might even add a second board that I could just slide in when in use and remove when I need to close up.

Not in a position to drop the coin on a fridge and power system for it just yet, so I'll be using a Lifetime 55 quart to start. I was thinking of building a slide for it, but I don't want to accidentally limit myself, so I'll wait until I either am positive what fridge, or actually get it.

Not too many pics yet, but did snap a few while building the platform and drawer cube. I'll add a few once I get the anchors in place and faces on the drawers.
Very nice. Looks super good and functional.
 

Moebius01

Rank V
Member

Advocate I

1,515
TN, USA
First Name
Jason
Last Name
Jowers
Member #

28732

After a few off and on weeks, and finally some lovely packages arriving, we're getting ready for a shakedown run, just to make sure we've got everything good for the primitive camping aspect. The deck and drawer cube are done, barring putting in the tie down strengthener kit from Chief (because some designer at Jeep thought a single m5 screw into a piece of plastic was a sufficient tie down point in a vehicle built with "off-road" dna) which will be installed next week. However, I did have time to get the lower front guard and sump protection plates installed.

Pictures will come after the trip.
 
  • Like
Reactions: GLOCKer

Moebius01

Rank V
Member

Advocate I

1,515
TN, USA
First Name
Jason
Last Name
Jowers
Member #

28732

So our first shakedown run is in the books, and with a few lessons learned, I will say that phase 1 of my build is "nearly" complete. The drawer cube is done, including my first idea of anchoring it to the deck I built. Overall, worked pretty good. I may consider building a little support leg for when the cookstove is extended as that's a pretty decent load extending 48 inches out. It held up just fine, but... The last piece of phase 1 to really resolve is how I'm going to anchor the deck to the Jeep itself. I'm envisioning something that looks like a sliding bolt that I could just slide under the tie down points in the jeep. I did a quick test this weekend using a piece of wood I had and it worked ok, but I think if I can create a strong enough anchor point on the deck (I just used a single tie down loop, so there was some movement), it will fit the bill.

In the meantime, a couple pics of the drawer in play... and yes I found a place to mount the OB emblem. The Wagan magnetic lantern works perfectly to light everything.

By day, Sandy is just your average mall crawler. But when adventure beckons, she sheds the soccer mom persona and lets her inner overlander come to the surface.
 

Attachments

Moebius01

Rank V
Member

Advocate I

1,515
TN, USA
First Name
Jason
Last Name
Jowers
Member #

28732

Oh yes, as to lessons learned. Aside from the usual stuff about packing and all, one PSA because it bears repeating. First the backstory: With the size of my drawer cube, the cookstove just barely fits (I'm talking about 1/4" clearance when the drawer is closed, and as you can see not much room on either side. I was struggling with a way to fit the propane canister (not sure if I'll switch to a larger take later, but not yet). Coleman has adapters for a larger tank, but nothing that just replaces the 1lb regulator piece with a hose instead of the solid metal tube that comes with. I tried ordering a version of this from Stansport, which on Amazon had mixed comments about does and doesn't fit a Coleman. Well, in my first test at home, I thought it fit. Screwed in, attached the tank and lit a flame. What I didn't realize at the time is that the threads are different, so it didn't have a clean seal. You can probably guess where this is going.

Sure enough, we get to camp, I get a pot of water boiling for what we're cooking for dinner (wife had a childhood craving of hot dogs in mac & cheese). Everything was going fine as you can see in the picture, until about 90 seconds before the boiling time was up. As I'm standing there, flames started coming out of the point where the regulator hose screws into the cooktop. Now, to my own credit, I didn't panic. I tried to blow out the flame a couple times, then my brain processed that as long as the fuel is still coming, that's not going to do anything, so I walked around and unscrewed the propane tank and that immediately killed the flame up. Crisis averted. HOWEVER, those drawers are made of wood, not to mention the carpeting in the back of the Jeep cargo area. Had I not been standing there at the time, that could have become VERY BAD VERY FAST.

Now, for 50 points, anyone want to take a guess at the piece of equipment that was on my overland build list that I haven't yet acquired??? PSA time, boys and girls.
 

static

Rank III
Member

Enthusiast III

646
SF Bay Area, CA
First Name
Kris
Last Name
Pruden
Member #

30008

Now, for 50 points, anyone want to take a guess at the piece of equipment that was on my overland build list that I haven't yet acquired??? PSA time, boys and girls.
Does it rhyme with wire relinquisher? ;)

I’m glad it worked out ok. That sounds like a scary moment for sure!

Kris
 
  • Like
Reactions: 64Trvlr

Moebius01

Rank V
Member

Advocate I

1,515
TN, USA
First Name
Jason
Last Name
Jowers
Member #

28732

Does it rhyme with wire relinquisher? ;)

I’m glad it worked out ok. That sounds like a scary moment for sure!

Kris
Give the man a cigar!

Needless to say, the wife was envisioning how to explain the loss of the Jeep in the insurance claim, not to mention me & everything in the tent that was only a few feet away from going up in flames.
 

Moebius01

Rank V
Member

Advocate I

1,515
TN, USA
First Name
Jason
Last Name
Jowers
Member #

28732

The closest thing yet to a "real" trip is in the books, and I must say things turned out exactly as I had hoped. We did the driving experience at Overland Expo East, which included some good rocks for bouncy bouncy, as well as the main course had a 15 degree bank and one place where I was about 24 degrees off camber. The drawer cube did not budge during any of it. Right now, I'm just using 2 latching J-hooks (one on back panel and one right side panel near the front) to anchor to the aircraft rail, but that seems to have been solid enough. I may add a third hook, but the problem I'm facing is not enough gap on the left side to open and close the hook.

As for anchoring the deck piece, I'm still looking for the best solution for that. In the short term, I've added a gate latch to the back left which is the part that manages to tilt up when the cook stove drawer is fully extended and loaded. I just slide the latch under the rear tie down and that keeps it in place. I'd love to find a turnbuckle screw I could use to anchor to each tie down, but they don't seem to make them short enough for what I'd need.

As for the "stealth" part of things, that worked to plan as well. Takes about 15 minutes to convert. Put the custom deck in, slide the drawer cube in and lock the hooks, pull out the OEM mats and put in the Husky Liner mats, slip on the seat covers (actually waited till we got on site for comfort over 11 hour drive), and pull off the front fascia.

Next up, after the first of the year will be Chief rock rails and hopefully roof rack. I was originally thinking of going with the bare bones rails from Chief to keep more of the factory look, but we happened to bump into Brad from Prodigal Overland on the way out, so my wife got a chance to look at the version of the rails with side steps, which she seems to like, so may be doing that instead. Gotta admit, the extra protection the step part adds is nice.