Enthusiast III
My motto has long been why buy when you can build it.
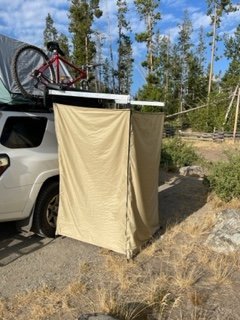
After I first saw a video on the Quick-en-Suite, I KNEW this was the perfect solution for our needs. then I saw the price....
So I did some digging around and found some DIY versions. So I watch some videos, and picked up a set of fairly basic plans, that where crude but did fill in some gaps. mixed it all together and came up with a slightly modified design, that is a bit more compact.
Started by putting the finger brake kit to use, and bent up some brackets for the arms.
View attachment 166550
The original drawing showed 2 different length brackets, but I later discovered I could make them both the shorter length making the folded unit more compact and uniform looking
View attachment 166551
The trick was to notch the Right arm where the left front pivot bolt interfered.
View attachment 166547
This also means that that left front pivot bolt had to "float the arm" so it would nest properly.
View attachment 166548
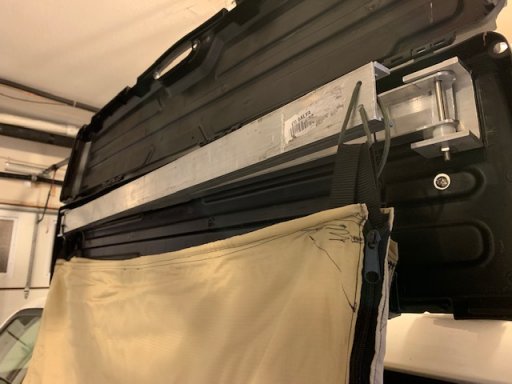
You can see the gap between the top of the C channel and the 1" tube. this lets the pivot pin and arms fold into the right arm.
View attachment 166546
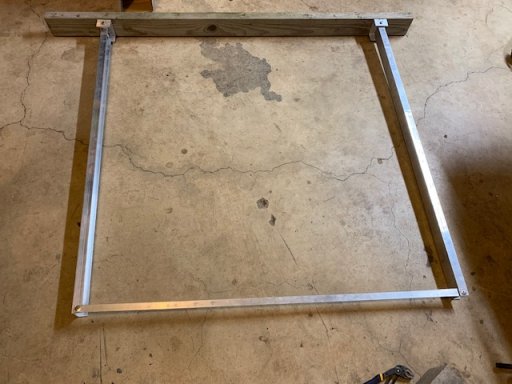
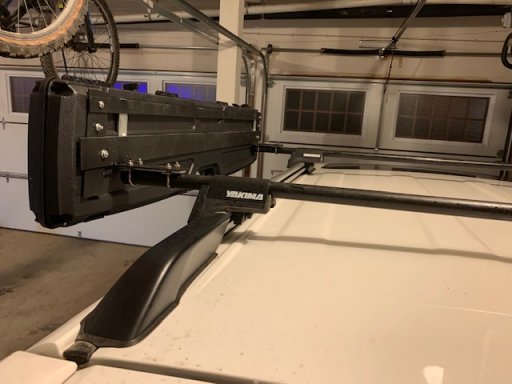
Testing out the frame movement
View attachment 166555
View attachment 166545
The arm brackets are drilled and tapped to mount to the back plate. and I added a piece of round tube to the open channel for the pivot bolt to go through
View attachment 166549
After I first saw a video on the Quick-en-Suite, I KNEW this was the perfect solution for our needs. then I saw the price....
So I did some digging around and found some DIY versions. So I watch some videos, and picked up a set of fairly basic plans, that where crude but did fill in some gaps. mixed it all together and came up with a slightly modified design, that is a bit more compact.
Started by putting the finger brake kit to use, and bent up some brackets for the arms.
View attachment 166550
The original drawing showed 2 different length brackets, but I later discovered I could make them both the shorter length making the folded unit more compact and uniform looking
View attachment 166551
The trick was to notch the Right arm where the left front pivot bolt interfered.
View attachment 166547
This also means that that left front pivot bolt had to "float the arm" so it would nest properly.
View attachment 166548
You can see the gap between the top of the C channel and the 1" tube. this lets the pivot pin and arms fold into the right arm.
View attachment 166546
Testing out the frame movement
View attachment 166555
View attachment 166545
The arm brackets are drilled and tapped to mount to the back plate. and I added a piece of round tube to the open channel for the pivot bolt to go through
View attachment 166549