"Rosie" Our Intrepid JKU

  • HTML tutorial

Henrik Strand

Rank I
Launch Member

Contributor I

233
Exeter, New Hampshire
Member #

3955

My overlanding fleet has gone through a constant evolution over the past several years. What began as a few ideas and inspiration from reading all the articles on Expedition Portal, I acquired a 1991 Nissan Pathfinder, with the hopes of building it into a formidable rig. Well.....turns out that wasn't the most reliable vehicle to have (cough cough stalling out while driving). I needed a new rig, so what could possibly be better to build than a Land Rover Discovery....the only discovering I truly accomplished with that Series II was new leaks in the sunroof and 2x4 board in the door to support the window mechanism, to name a few. Now, don't get me wrong, I loved the Discovery, I just picked the wrong series and didn't have the time to essentially rebuild and restore an entire vehicle to get it to spec.

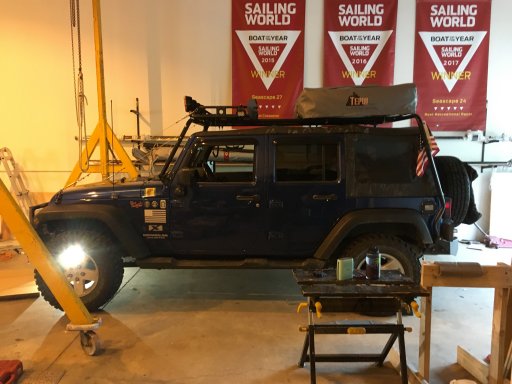
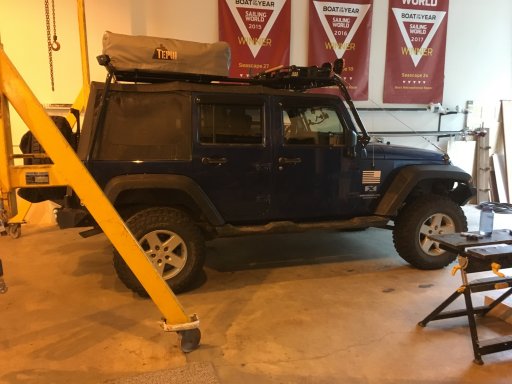
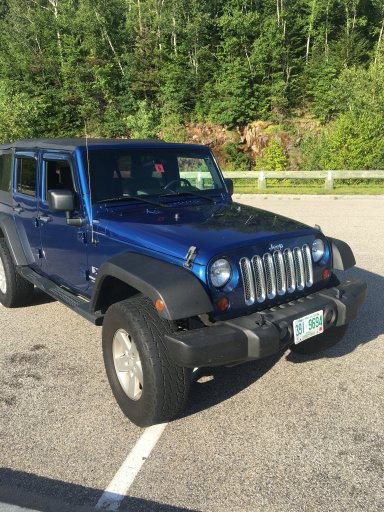
Then came the Jeep. Her blue shimmering in the sun, and lift standing tall and proud called out to us. This was it, this is the rig to transport us across the country and where few have driven. She was a 2009 Jeep Wrangler Unlimted, with a 3.8L V6, within a few days she was sitting in our driveway, waiting to hit the dirt roads. But no rig can be complete without a fitting name, and soon "Rosie" was aptly named. When I bought her, she was mostly stock, save for a 2.5 inch Skyjacker lift kit. Like a kid with a Lego set, the build began, and within a few months of buying her a roof rack, Tepui RTT, LED spot and flood lights were installed. We attended Vermont Overland Rally for the first time, and got to really test out how capable she was, which ultimately also fueled the need for a few "must haves...."
IMG_1642.jpg
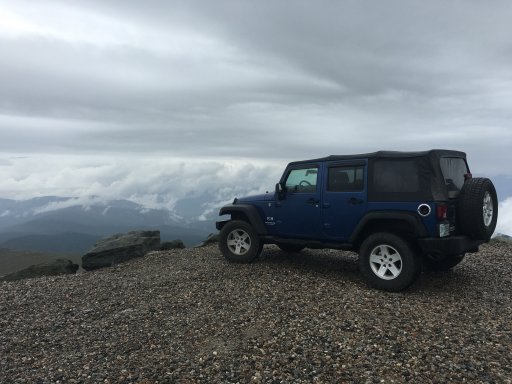
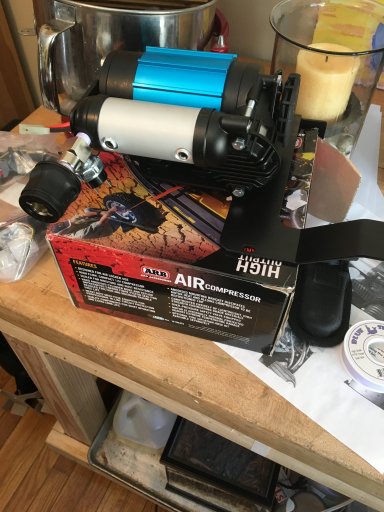
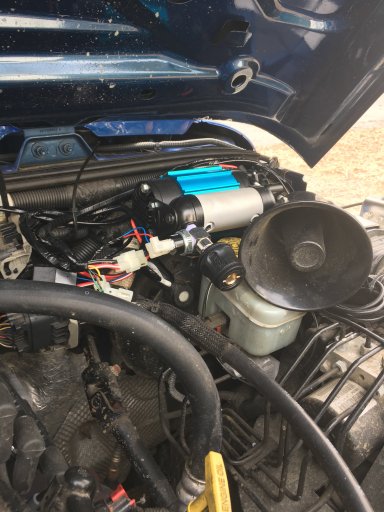
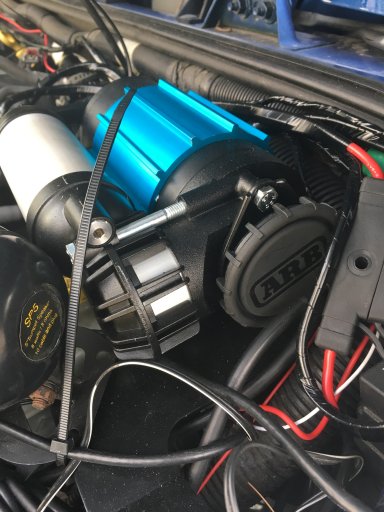
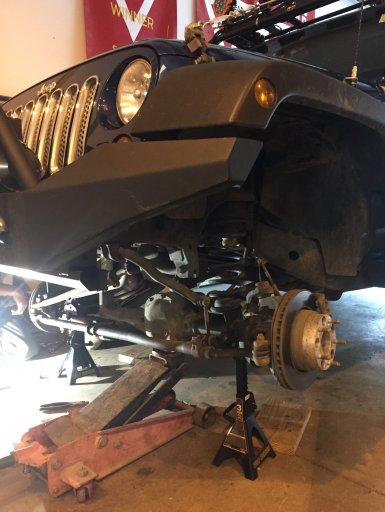
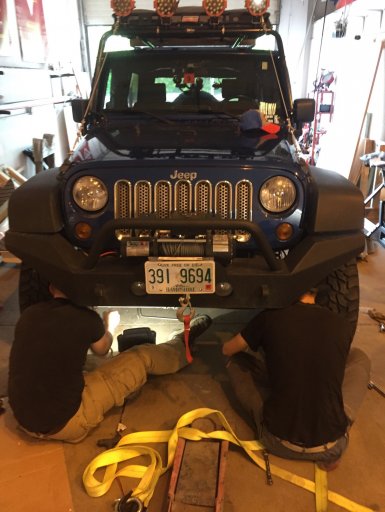
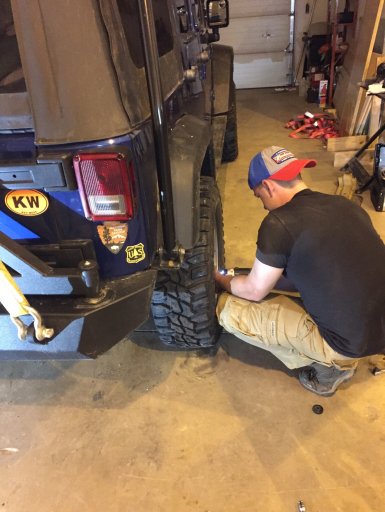
Now, nearing the end of what I plan to do on the exterior and for recovery equipment, Rosie has a new full width steel bumper, Rugged Ridge 8500 lb winch, Barricade rear bumper with tire carrier, and soon to be installed ARB air compressor and scene lighting.
IMG_7183.JPG
I may not be the most experienced, but by trying to do most of the work myself I'm hoping to learn more about the Jeep and overlanding. I'm looking forward to sharing my progress, frustrations and adventures and reading about everyone else's overlanding adventures!
 

Attachments

Last edited:

Henrik Strand

Rank I
Launch Member

Contributor I

233
Exeter, New Hampshire
Member #

3955

So the mods are coming along well, there is a stack of boxes about waist high, just waiting to be mounted onto Rosie. But then, it all came to a screeching halt, when she coughed up a P0300 code about two weeks ago. Like a light switch over night, she went from driving well to limp mode...ok, it was time to concede that I had to take her to a mechanic. Well, after some investigating, and only being able to find the vague P0300 code, the most reasonable step was a full tune up and throttle body cleaning. Swell. So that helped, but something was still a bit off, just a slight vibration here and there. So maybe it was a dash of bad gas from a sketchy gas station. Solution-Sea Foam, the miracle drug of engines, and full tank of premium gas. Well that worked for about two days, and here I am, back to square one with engine vibration, P0300 codes galore, and a substantial power loss. Next on the list to replace the coil pack, and work from there...so fingers crossed the problems ends there and we can finally hit the trails again. If anyone has any suggestions as well to what I can look into it would be greatly appreciated! I will update once I know how the new coil pack goes.
 

Henrik Strand

Rank I
Launch Member

Contributor I

233
Exeter, New Hampshire
Member #

3955

The detail is in the coil pack. Got a new coil pack popped in, a 10 minute fix, for a two week problem. After doing some highway testing and town driving, and different ranges of speed, it would appear that Rosie is ready to roll and hit the road once again! Plus on the bright side, at least she has a full tune up and brand new shiny coil pack. Now what to do next?
 
  • Like
Reactions: Sean S

Sean S

Rank V
Launch Member

Pathfinder I

2,268
California, USA
First Name
Sean
Last Name
S
The detail is in the coil pack. Got a new coil pack popped in, a 10 minute fix, for a two week problem. After doing some highway testing and town driving, and different ranges of speed, it would appear that Rosie is ready to roll and hit the road once again! Plus on the bright side, at least she has a full tune up and brand new shiny coil pack. Now what to do next?
I am delighted to read that Rosie is back up and running. I would hate to have this happen to my jeep. Don't tell the wife but the jeep is now part of the family! And just like the wife, it Just Empties Every Pocket!:tonguewink:
 
  • Like
Reactions: Henrik Strand

Henrik Strand

Rank I
Launch Member

Contributor I

233
Exeter, New Hampshire
Member #

3955

So, now that my misfire fiasco was finally sorted out, I was able to take some time to finally install my ARB air compressor! After sitting in my room for weeks, I finally had a bout of good weather and was bale to break out the wrenches and pop it in. I ordered the ARB CKMA12 High Output model, mainly because my purpose is to use for bring up my tires while on the trail. I was torn about the location, whether to mount it inside on my shelf, or under the hood, but I ended up going for an underhand mount, manufactured by EVO Customs.
Before mounting in the car, there is some assembly required, but nothing too major. The actual mounting of the unit though, that was another story. Lets just say that there is not exactly a lot of space to work with, and make sure you have the compressor aligned perfectly on the bracket before mounting. The bracket I got, mounts above the brake master cylinder, and attaches to the two bolts from the power steering unit. One word of advice though, the bolts that come with the compressor need to be trimmed, as the back two interfere with the cylinder, making it unable to sit flush. After maybe one or two sour words, and some pleading with the mechanical gods, I finally was able to get the unit bolted and secured in.
Once I was finally able to get the bolts all tightened in, and the unit flush in the engine bay, I wired it up into the battery. The compressor comes complete with a full wiring loom, and everything is all set up. The instructions were straightforward and wiring was very easy.
After about 1.5 hours of tinkering, I finally had it all hooked up and ready to go! Now we can air up on the trail, and not have to play a game of gas station air pump roulette. Plus if in the future I install air lockers, the compressor is already set up and ready to go. Haven't had a chance to use it in the field yet, but I did successfully air up in the driveway, but I will let you guys know how field tests go once we get out on the trails!
IMG_3689.JPG
IMG_3786.JPG IMG_3789.JPG
 
  • Like
Reactions: dj_mccomas

Henrik Strand

Rank I
Launch Member

Contributor I

233
Exeter, New Hampshire
Member #

3955

Hello everyone! It has been way too long since I have posted last, but there has just been so much happening, between some overland trips, working, and moving up north to Maine to got to school. So now, were do I begin, I feel like so much has happened with the build that it is difficult to start. I suppose I'll go ahead and start chronologically since my air compressor install.

One of the most needed upgrades was the suspension. This was quickly becoming apparent with all the weight we carry on expedition, and the numerous times we hit the bumpstops for the front shocks on small ruts. I debated for weeks, researched and had reviews, trying to find which kit I wanted would work best. I knew I did not want to go taller than 2.5 inches, and needed something with the capability to handle all the weight of the overlanding equipment, bumpers and winch. So finally, I may as well invest a little more on a better kit, and pulled the trigger on ARB's Old Man Emu 2.5" Lift, with heavy duty springs. From all my research, OME looked to be one of the top notch kits out there, and seemed to suit our needs perfectly. Excitedly I ordered the kit, and received it much faster than expected via Quadratec.

IMG_4307.jpg

Staring at my brand new shiny yellow shocks, I decided I'm gonna do the instal myself, and maybe learn something new. With a garage secured that I could use for the day, I began a healthy treatment of PB blaster on the shock mounts of the old Skyjackers a week before it was go time.

Finally we set to work, and right off the bat broke the bolts holding the transmission skid plate on, oh well, they say to lighten the loads off roading right?! Now came the real fun, we removed the front wheels, disconnected the sway bar links, and detached the bolt holden the track bar in place. Slowly we raised the front of Rosie up, and like magic the front axle drooped low enough that we were able tot remove the shocks. With some fighting, we finally were able to get the bolts on the shock mounts loose from the bottom, and due to rust, were able to break the nuts off the top of the strut. Once the shocks were out, the axle dropped even lower and we were able to gently pull the stock springs out.

IMG_4325.jpg

IMG_4340.jpg
Time for the shiny new springs and those lovely yellow shocks! With some adjusting, we go the new springs popped in and seated without issue, little did we realize though the most difficult part of the install was going to be reattaching the lower shock mount. The rubber bushing on the bottom of the OME shocks is made of a very dense and durable rubber, which proved to be incredibly difficult to get back into the mounts. With many choice words, some blood, sweat, and maybe a few tears, we finally got the shocks into their new homes, and reattached the sway bar links, track bar and the wheels. Time for the rear.

IMG_4302.jpg

Much the same to the front end, we got all the old components out, for the most part. While removing the lower shock bolt we heard the dreaded sound we'd avoided all day of a bolt snapping. Luckily though, we got replacements for the bolts, which had been worn down smooth by a worn bushing on the shock.

IMG_4317.jpg
With everything reattached, and almost 9 hours of work in so far, it was time to test drive! The first corner we took we all grimaced as we heard something metallic go skidding off across the parking lot, which turned out to be an old washer from the old shock we forgot to pick up. Good. We hit the road, went a few miles, turned back around and then were stricken with the dreaded death wobble. Queue the scary organ music. We limped back to the garage, wary not to break anything, we set to work and with a little hunting, we fond the track bar had not been tightened down as much as it should have. With a few more wrench turns, the play in the track bar disappeared. Round two for road trials, no more death wobble and no more problems!

Before
IMG_4297.jpg
After
IMG_4315.jpg

All said and done, we spent 10 hours working on Rosie and getting the new kit in, and learned more than we hoped to about the mechanics of the rig. We also were able to gain closer to 3 inches of lift, rather than the 2.5 due to the heavy duty springs. I do recommend getting an adjustable track bar, and extended sway bar links, and doing the entire install at once, as your front axle will be offset slightly with the added lift.

Trail wise, I could not be happier with my purchase! The ride quality on rough and bumpy gravel backroads has been superb, and it is very comfortable now. We have yet to hit the bumpstops, even on pretty major jolts, and the added clearance underneath has been amazing to have. The OME kit has defiantly helped with offroad performance and comfort, and has made on-road driving more comfortable. My MPGs have taken a slight hit, but that is the nature of the beast when lifting a vehicle. If you're looking for anew suspension kit, I would definitely highly consider Old Man Emu as your choice, but if your planning on installing it yourself, plan on spending a good day on it, and make sure you bring some beer to thank who ever willingly helps you with the task!