Raijū - 2002 Dodge Ram Van 3500

  • HTML tutorial

Razorwalker

Rank IV
Launch Member

Traveler III

1,210
Franklin, NC, USA
First Name
Patrick
Last Name
Lynch
Member #

17457

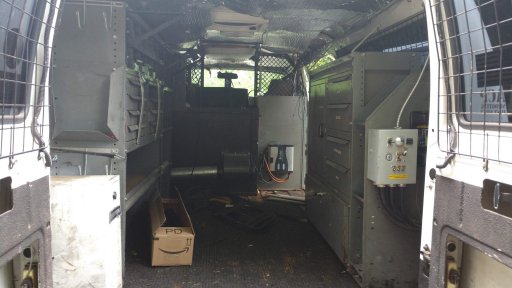
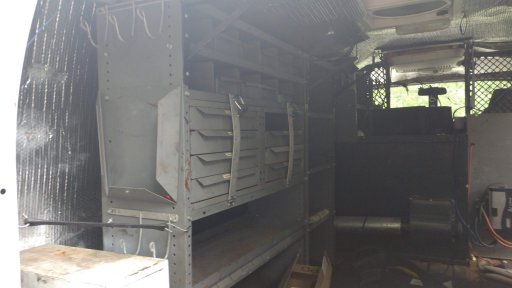
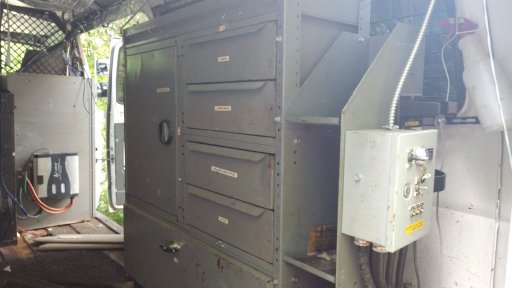
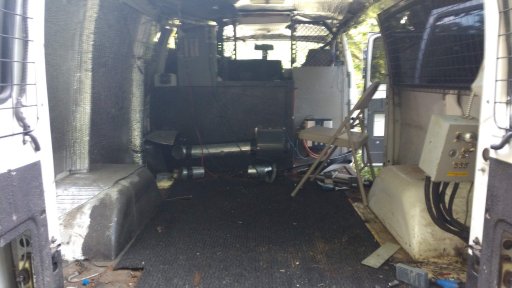
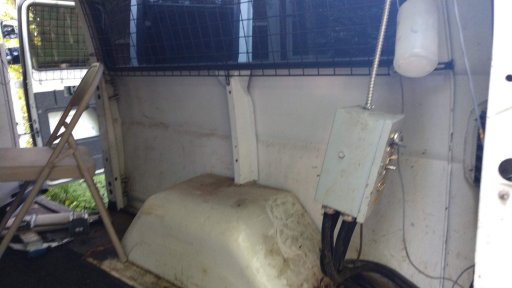
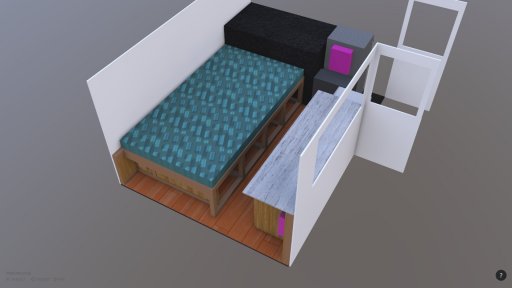
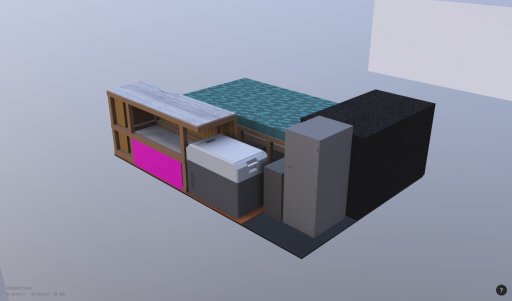
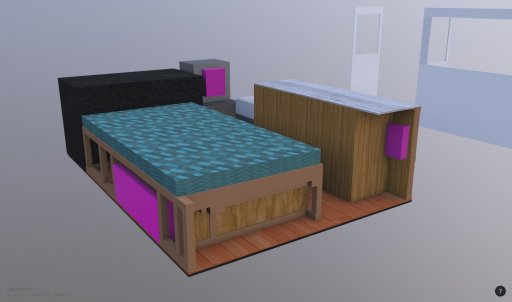
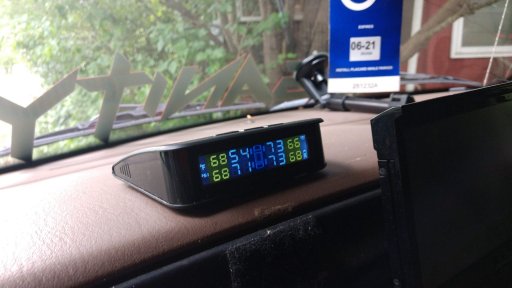
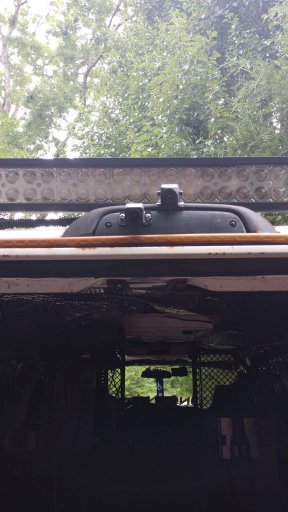
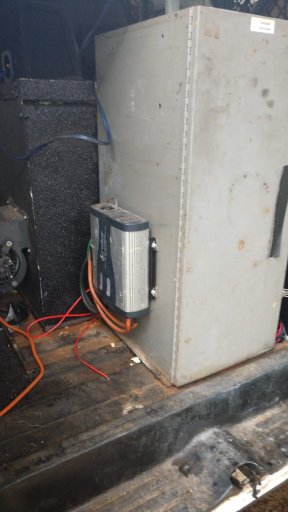
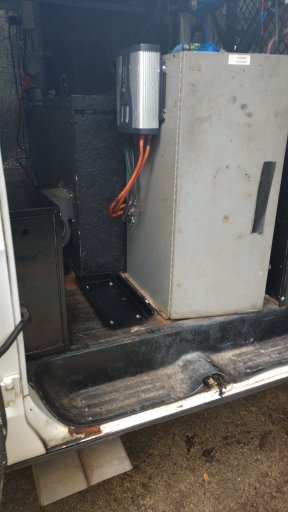
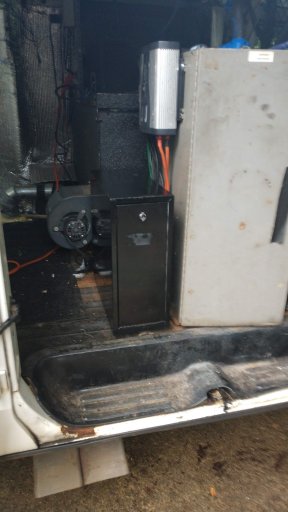
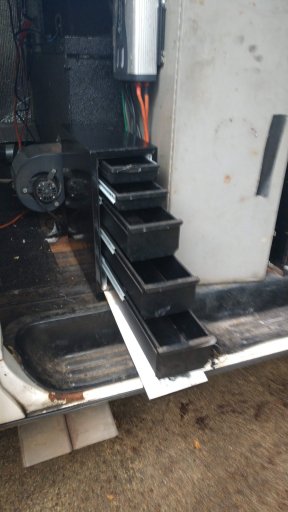
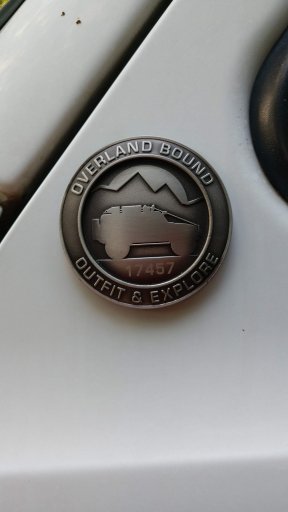
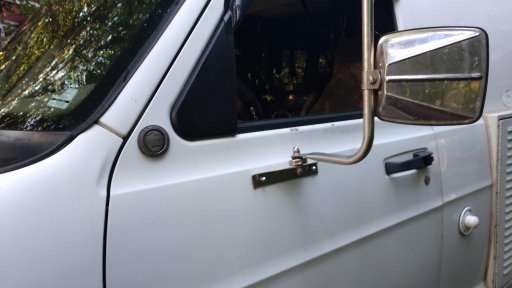
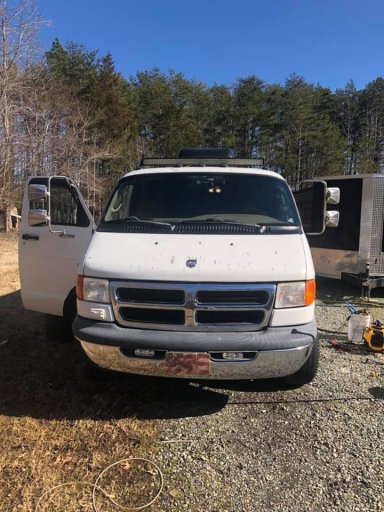
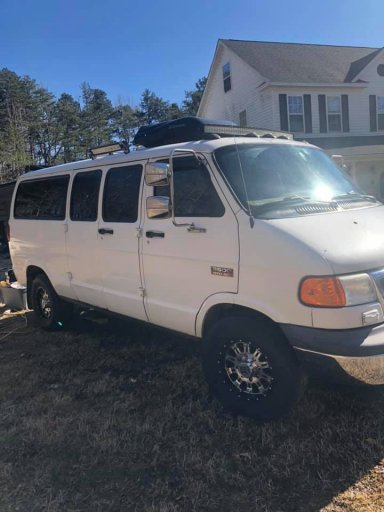
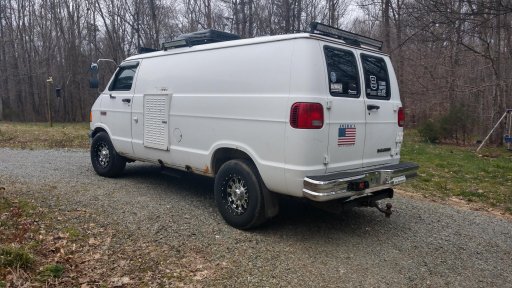
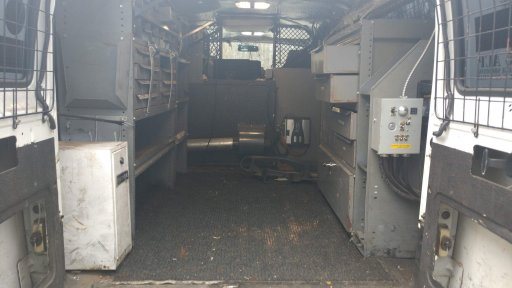
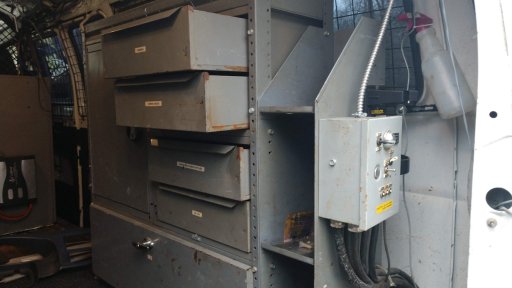
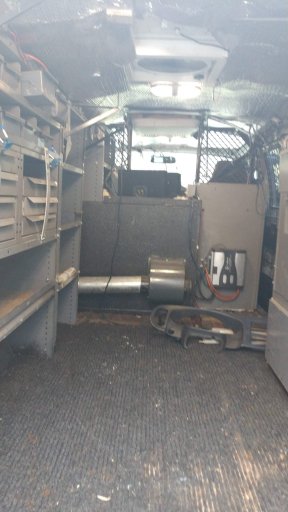
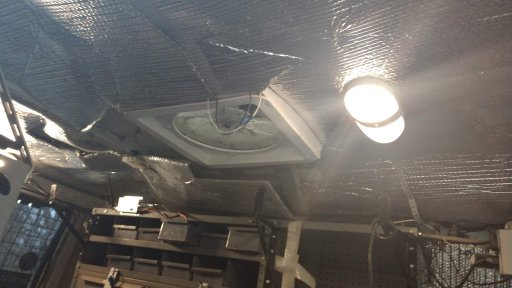
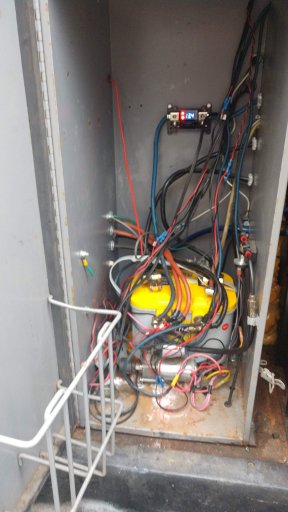
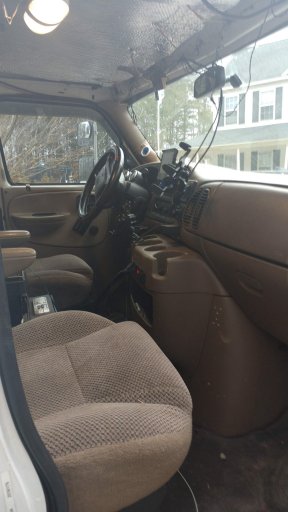
Hello fellow Overlanders! Been a while since I've posted. Been super busy getting my van. Just picked it up on Monday and will be building it out over the next few months. Hoping to hit the road full time by the first of August, so look for me out and about! A little about my van: It is a 2002 Dodge Ram Van 3500 that started life out as a Verizon Cell Tower Repair van. Currently, it has a ton of features that are already built in that will help me out on the road. 5500 Watt Onan generator, 240 Amp Alternator, 2 Blue Top Ultima Deep Cycle Batteries, 2 100 watt Solar panels, 35,500 BTU Dometic AC unit, MaxxFan, 2500 Watt Continuous/5000 Watt Peak Inverter, LED Light bars all around, and a bunch more. The first two pics are today, when I added the badge and the others are from my original post a few months ago when I first join and went to look at it. Needs some work cosmetically and some deletions, but mechanically (SO far, Mechanic giving it a complete check next week to make sure) it is sound. Has the 5.9 liter V8 in it, geared for towing and hauling, not speed. Air bags on the rear, electrical outlets on the outside GFI protected, and more. Will update this tread as I build it out. Any suggestions and tips are always appreciated. I plan on adding a bed, counter with sink, hand-pump faucet, frig, some storage areas and more.

As to the name: I named her Raiju, named after the Japanese Mythical creature of lighting. With all that power, thought it was appropriate :)

Raijū ("thunder animal" or "thunder beast") is a legendary creature from Japanese mythology.
Mythology
Its body is composed of lightning and with the form of a white and blue wolf (or even a wolf wrapped in lightning) being the most common, although it can be represented with other forms such as tanukis, foxes, weasels or cats. It may also fly about as a ball of lightning (in fact, the creature may be an attempt to explain the phenomenon of lightning, such as ball lightning). Its cry sounds like thunder.
Raiju is the companion of the Raijin, the Shinto god of lightning. While the beast is generally calm and harmless, during thunderstorms it becomes agitated, and leaps about in trees, fields, and even buildings (trees that have been struck by lightning are said to have been scratched by Raiju's claws).
Another of Raiju's peculiar behaviors is sleeping in human navels. This prompts the Raijin to shoot lightning arrows at Raiju to wake the creature up, and thus harms the person in whose belly the demon is resting. Superstitious people therefore often sleep on their stomachs during bad weather, but other legends say that Raiju will only hide in the navels of people who sleep outdoors.
 

Attachments

Razorwalker

Rank IV
Launch Member

Traveler III

1,210
Franklin, NC, USA
First Name
Patrick
Last Name
Lynch
Member #

17457

So, managed to get out the utility shelving in the back. Here are some before and after pics.

997079970899709997109971199712

As I'm still helping my brother with his house, that is all I'm doing for now on the back. Once I get done hauling stuff for him, then I'll get the back cleaned, walls in, ceiling, & then the floor. I got some thin, tongue & groove laminated hard wood flooring donated to the cause. Gonna use that as the floor of the van. Still undecided as what to use on the walls and ceiling. Want to keep the weight down as much as possible. Anyone have any suggestions or what did you use?
 

303JETSET

Rank IV
Launch Member

Contributor III

1,402
Denver, CO, USA
First Name
James
Last Name
Totten
Member #

12343

I had one of these for work that I dreamed of turning into an overland rig. Sadly, times got tough when my back went out and my wife's car needed work so had to sell it. Can't wait to see more updates.
 

Razorwalker

Rank IV
Launch Member

Traveler III

1,210
Franklin, NC, USA
First Name
Patrick
Last Name
Lynch
Member #

17457

I had one of these for work that I dreamed of turning into an overland rig. Sadly, times got tough when my back went out and my wife's car needed work so had to sell it. Can't wait to see more updates.
Thanks. Yeah, it'll be slow going for the first few weeks. I'm chomping at the bit though, lol, wish it was done and on the road already. My original plan was to be at the Expo last weekend, but life had other plans :) Some things will be added after I hit the road, like a roof rack, bigger solar panels, gonna delete the spare from underneath, make a custom battery box that will winch up with the factory tire winch so I can delete that big grey box in the front. That is the current battery box. Mount two spares on the back doors with Jerry can holders/shovel/highjack/maxtracks. Wanna also mount two tanks underneath, one for grey water and one for fresh/ Probably around 30ish gallons each. Also want to add a shore power outlet that ties into the power grid, so if I end up at a campsite with power, I can plug in and charge the batteries as well as have on-board power. There is already an AC to DC converter/charger installed on top the generator box. Generator has 1250 hours, but was supposedly maintained (no reason yet not to trust the seller, everything he said about the van has been 100% so far) so should last a while, but it runs off the van's tank, so want to use that as little as possible. Surprisingly quite for a Commercial Onan and not a RV one.

Got lots of plans. This will not be a weekend warrior vehicle. This is gonna be my home for the foreseeable future, so wanna make it good :)
 

Razorwalker

Rank IV
Launch Member

Traveler III

1,210
Franklin, NC, USA
First Name
Patrick
Last Name
Lynch
Member #

17457

Update on the build. While I've not been able to do any physical work on the van, I have been working on designing my build. Here are some pics of what I have come up with for the roof rack and interior. I'll describe each picture:
102331

OK, first up is a 80% competed design for the inside of the van. The walls & doors outer dimensions are actuate, but not the window placements. Mainly there for comparison. On the left side is the bed and storage underneath. The big black box is the generator box, the larger grey one is the battery box and the smaller one is a tool box. None are movable, so had to design around them. The front pink box is the inverter and the one in the back is the generator controls. Both are also unmovable unless I had weeks and another $400 to rewire the van. Across from the bed is the countertop. Looks like marble, but not using that, just picked that pattern to distinguish from the other wood in the build.

102332

Here is a view from the side doors. Gonna have my fridge/cooler tucked in right there so I can access it from inside or out.

102333

Here is the side view with the faux walls and doors removed. The large pink boxes are the wheel wells. I know that not everything lines up, not that great at 3D model making, lol.

102334

Back to the rear view with walls and doors removed.

102335

And finally, an exploded view with the counter doors off and the mattress raised up to see the storage underneath. I designed the bed to hold two folding leg, 6 foot tables underneath. Also, a small storage area up against the wall and bed. Now, on to the roof rack.

102337

OK, so here is the roof rack that I have designed. Ignore the colors until the last two pics. These colors are just to differentiate the different areas. More details on the next pics

102338

Front view

102339

OK, now we get into the details of the design. The Blue areas are general storage for tarps, shovel, highlift jack and a detachable ladder to hook on the rack for accessing the top of it. The smaller pink box is the MaxxFan and the larger one is my Domectic AC unit. Both are not movable, so built around them. I mainly use the MaxxFan for sucking out hot air/fumes/etc, so I left a hole there so that is can fully open up and operate. Mind you, there will be 3 to 4 inches from the roof of the van to the bottom of the rack. The rack will be about 6 to 7 inches tall, with an overall height off the gutters to 12 inches. The Green area will be for a collapsible water tank that will hold between 20 to 30 gallons of water for cleaning dishes and taking showers. Being on the roof, the sun thru the day should keep it hot, so I'll have hot water :) The 2 long tubes are for holding EMT conduit to build a modular canopy system. Can build it from 10x10, 10x20, 10x20x10 (L shape) or any combination I can think of. The larger 4 tubes in the from will have caps on both ends, but one end will be removable and will be for storage. Camp chair, clothes, recovery gear, ropes, etc. Anything that I can store up there that the heat will not hurt. And of course, there are the two access doors on the rear.

102340

Here is an exploded view showing all the support structure for the rack. Probably overkill, but would rather have too much than not enough. All of the framing will be of 1"x1" square aluminum tubing. Hoping to do the flat surfaces in Aluminum as well, but not sure if I'll have enough $ to get it. May end up using SurePly. Not trying to make it weatherproof. Just secure. Rough estimate is that fully built and loaded with gear & water, should be around 500 lbs. My van's gutters are SUPPOSED to be rated for 800 lbs with a 6 leg roof rack. I have 10 and hoping to keep it around 500 lbs. or less.

102342

And here is what it should look like completed. I'll have enough real estate on top to mount four 200 watt solar panels.

102343

And a bottom view.


So, the interior will 99% sure resemble the designs above. The roof rack, that is the tricky one for me as it will be EXPENSIVE to build. Especially if I have to have someone else do the welding. IF I can get one of my friends to let me borrow an electric aluminum welder, then I can get it built for ROUGHLY $300 to $400. So, that is my update for now. Should be getting started on the interior next week or the week after. Found a few leaks I need to seal up and a hole in the floor that needs patching and then I can get to building. :) So, sound off, them me what you think and anyone that has hauled large loads using gutter mounted racks, what has your limit been and experience. Thanks :)
 

Attachments

Last edited:

Razorwalker

Rank IV
Launch Member

Traveler III

1,210
Franklin, NC, USA
First Name
Patrick
Last Name
Lynch
Member #

17457

So, got some actual work done on Raiju today.

102872

Got the roof LED Bar hooked up and working. Also picked up a 24" LED bar for $10. Brand new from local pawn shop. Installed it on the bumper and until I get my rocker switch panel, I temp wired it into the driving lights. They are dual purpose Fog/Driving lights and on a separate switch. I can still use the fogs without turning on the Bar. LED Headlight conversion was done prior to me purchasing the van, but looks good. Below is a pic I just took at night:

102873

...And that's with my camera auto adjusting for the bright light, lol. Got some other work done, but no pics. Will get some tomorrow.
 
  • Like
Reactions: RoarinRow

Razorwalker

Rank IV
Launch Member

Traveler III

1,210
Franklin, NC, USA
First Name
Patrick
Last Name
Lynch
Member #

17457

OK, here is some pics from the other work I did yesterday followed by the relocation of the inverter higher up on the battery box and the installation of the toolbox underneath.

103024

Dashcam Rearview Mirror installed, iRadar underneath and a spare smartphone I use for the radar detector. Some of the wiring you see is temporary until I get ready to install a headliner, then it will be permanent.

103025

Installed a tablet mount and a 7" Samsung tablet for using with Torque. If you don't have Torque, I highly recommend it. It is a ECU monitoring app for either Android or iOS and it connects to the ODB II port via Bluetooth and allows real-time monitoring of everything your ECU will output. VERY handy if you get a Check Engine light or want to see what your real time MPG is. The app is about $7 on Play Store (not sure how much on Apple Store), the Bluetooth ODB II module is anywhere from $15 to $100, depending on how much you want to spend on one. I only paid $15 for mine from eBay 8 years ago. Been good so far. And then any smartphone or tablet will run it. The Pioneer head unit has a backup cam linked to it, so I just leave it out like that all the time.

103031

Got my mounts for my iPad (navigation. Use Gaia, Google Maps & Waze. Not all at once, lol) & for my other Samsung tablet which I use exclusively for music. Got thousands of songs on there, just hit random and repeat. Everything is setup for voice control, so no having to look away from the road to change songs, change destinations or to look something up. Also don't have to touch anything, can keep both hands on the wheel. The smaller mount in the forefront is for my primary phone and it's setup for VC & is Bluetoothed to the Pioneer head unit. And, of course the must have, Windex to keep the windows clean, lol.

103036

My Tire Pressure Monitoring System. The sensors screw onto the valve stems. Best $40 I ever spend. Solar powered as well.

103037

My two cameras. The higher up one is the backup cam linked to the Pioneer Head Unit and the other is part of the Dashcam system. It shows rearview on the mirror 24/7 and also records. So, I get both front 1080p recording and rear 720p recording. Also has GPS, Crash Sensor, and Parking Monitor on it. Snagged that for about $120 off of Amazon. And now one to today's work....

103038

This is what I started with. That is my battery box with a Cobra 2,500 Watt Continuous & 5,000 watt Peak Inverter. it was in the way for my build plan, so it had to move.

103039

Here it is in it's new home. Took me a while to get it unhooked, and moved up top. That is the base plate for the tool box.

103040

Here is the box in place. The wires are pushing it out a little. Gonna pick up an L bracket to straighten it out.

103041

And the box with the drawers out.

That is all I've gotten done so far, but more coming. :)
 
  • Like
Reactions: RoarinRow