my trailer build

  • HTML tutorial

scott17818

Rank IV

Influencer II

1,104
Midcoast Maine
First Name
Scott
Last Name
Charlton
THIS IS A WORKING BUILD, so be patient please... I found this trailer on FB marketplace in November for $350 took 2.5 hrs of driving to get to it, but it followed me home. trying to keep this build within a good budget I plan to keep adding features, and items as I go.
it is an old 2002 Police Radar Trailer max weight is rated at 1500lbs with a Torsion axle

here is the trailer as I brought it home... it towed great behind the tacoma at times didnt even feel like much was back there. I dfinitly will have to get bigger tires on the trailer to level out the tow...
316036964_10159242771587794_3921544996107992445_n.jpg315745669_10159242771677794_3922385457865601420_n.jpg316237403_10159242771372794_4127973541094660167_n.jpg

it does have an odd ball hitch I have never seen before... but it makes it SUPER easy to add a lock n' roll hitch in the future if I want... just pop the pinn out and slide the new reciever in..
317321290_10159258932887794_2848218187998575939_n.jpg

the trailer even came with some tools, lots of nails, and electrical conduit pieces and parts (I think a plumber/electrician/handyman was using it for storing and transporting tools, parts and equipment.... the trailer was recovered and towed away, posted in the paper as recovered, but no-one claimed it.. they posted it online.. so I went and bought it... registering trailers under 3000 lbs no title is required.. just a bill of sale...

316258019_10159242771062794_1956723538377934375_n.jpg316102286_10159242770552794_6943983951606330474_n.jpg316416918_10159242771047794_1372395461292209401_n.jpg315447934_10159242771122794_857330199427188872_n.jpg316426999_10159242771732794_2863467456360086757_n.jpg

I was a bit scared of driving around a trailer with police markings just spray painted over.... so I pullsed out the heat gun, a putty knife, and some goof off, and got to work... I then sprayed over it with white spray paint that was in the trailer.... not too bad for now...

317316325_10159258932627794_708319335542010990_n.jpg317319483_10159258932817794_6256438606045138838_n.jpg317546670_10159258932447794_7327635565898569928_n.jpg317591496_10159258932357794_5880241999511110349_n.jpg

This week as winter melts away and the weather got nicer I got back into working on the trailer on my days off work.. so I scraped the remaining reflective tape off the back, took some measurements for my ideas and ordered some parts..

*12 x 24" door to go on the drivers side towards the front
* 30x x 24" hatch to replace the rear glass window
* butyl rubber tape (for installing the doors)
*7 pin wiring harness/junction box
* new 5" brake/indicator LED lamps (flush gasket style)
* weather proof self-soldering wiring connectors
*1/4" wire loom

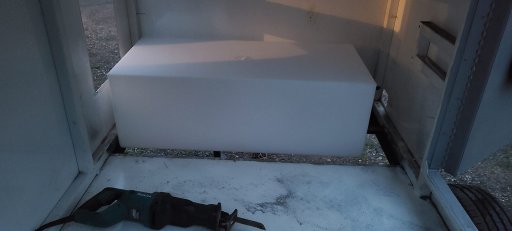
I plan to dry fit the doors, and make the cuts into the trailer... this will open up space to work on the floor as the expanded steel floor/vent will be replaced with solid sheet metal, as well as the battery trays will be cut out, and the floor leveled... I am still looking for a flat-ish water tank to fit under the floor and be suspended above the axle, but below the floor. the brackets inside will be removed, and repainted, and add some interior lighting, and a tray table off the drivers side rear.

still more plans to come... doors showed up today along with the other parts
 

smritte

Rank V
Launch Member

Member III

2,827
Ontario California
First Name
Scott
Last Name
SMR
Member #

8846

Ham/GMRS Callsign
KO6BI
it does have an odd ball hitch I have never seen before... but it makes it SUPER easy to add a lock n' roll hitch in the future if I want... just pop the pinn out and slide the new reciever in..
All my trailer builds get that. I use to swap around hitch's until I went with a multi axis. I still use a receiver front just because.
 

scott17818

Rank IV

Influencer II

1,104
Midcoast Maine
First Name
Scott
Last Name
Charlton
All my trailer builds get that. I use to swap around hitch's until I went with a multi axis. I still use a receiver front just because.
I was more or less referring to the oddball style of the ball lock system.. it has a hood that slides over the ball section that has to sit parallel to the hitch body before you can slide the locking mech forward, and you can double secure it with a pin... just never seen a trailer hitch like it... just seems overly complicated
 

scott17818

Rank IV

Influencer II

1,104
Midcoast Maine
First Name
Scott
Last Name
Charlton
working on the design of the rack for the RTT, and I plan to design in a way to permanently undermount my 2 100watt solar panels. I found this video. and plan to do something similar, however mine will mount underneatht he rack/RTT still looking at an option to make them easily removeable so if I cannot park the trailer in the sun, or it is a HOT day I can park in the shade, and run 40-50ft of cable to the panels propped on a rock, or something. My idea on this is that the trailer will default charge off the alternator in my truck via the 7pin 12v supply vi a low AMP DC/DC charger, and when I am at camp I can either leave the truck connected, or I can deploy the Solar panels to keep the batteries in the trailer topped up.
 
Last edited:

smritte

Rank V
Launch Member

Member III

2,827
Ontario California
First Name
Scott
Last Name
SMR
Member #

8846

Ham/GMRS Callsign
KO6BI
I was more or less referring to the oddball style of the ball lock system
Those are the heavier version of a ball mount. I don't remember what the tow rating was but it was considerably higher then the ones without.
 

scott17818

Rank IV

Influencer II

1,104
Midcoast Maine
First Name
Scott
Last Name
Charlton
Did a little work on it this last sunday.. meant to do some more as i took the entire weekend off work.. but caught a nasty cold/flu on Monday and still has not let up much... but here is what I did... cleaned up some of the wiring, and screws that I could remove (others will have to be ground off with a grinder. I removed the fenders, and removed the round 4 pin connector from the trailer frame )plan is to run 4gauge cable for dc to dc charger.and an Anderson plug to the truck near the 7pin connector..
20230430_132404.jpg

There are still several brackets inside the trailer I need to grind off the frame, and the bottom of the trailer needs some items ground off, and treated with rust converter. But nothing horrible.. the front battery tray will be removed and replaced as well as the expanded steel "vent".. most all the rust is surface rust. So once cleaned up, primed and painted should be fine... I also removed the rear window glass..

I took the opportunity to try and fit up one of my jeep wheels 15x8 with a 32x11.5 mud king radial... it fit ok.. but the bolt pattern is wrong.. it appears to be a 5x4.5 not 5x5.5 like I originally believed... so I am looking for some 6x139mm or 6x5.5 hubs, although need to remove one of the factory ones to confirm bearing/shaft size.
20230430_133321.jpg

Hoping to get a new grinder and cutoff disc's Monday night, and do some more demolition, and start the rust prevention/repairing the floor. Mark out the new doors locations. Been doing research on a decent battery setup to be able to run my iceco vl65dz, lights, a water pump, and charge 12v items for a few days on 200w of solar.. planning to start with 100Ah Lifepo4 with the ability to expand up to 400Ah.. between 50a dc to dc, and the 200watts of solar I should do well..
 
  • Like
Reactions: KonzaLander

scott17818

Rank IV

Influencer II

1,104
Midcoast Maine
First Name
Scott
Last Name
Charlton
here is what I have so far to get working on...

1- 30x24" top hinge hatch to replace the rear glass (I will need to find/source longer hydraulics as these only open about 90degrees and may become an issue...
1- 12x24" side hinge door for the drivers side to access the front of the trailer
1- 7-pin trailer harness
wiring bits - self soldering waterproof butt connectors, and 1/4 loom
new black marker light grommets
new flush mount brake/turn signal lights w/ reverse
roll of Dicor Butyl tape for the doors
and an LED license plate light

I plan to do a bunch of rust restoring and a few mods before adding most of this stuff, so the pile will only get bigger.

20230430_192006_2 .jpg
 

scott17818

Rank IV

Influencer II

1,104
Midcoast Maine
First Name
Scott
Last Name
Charlton
Little progress today... got rhe grinder out, and some rust fixed....
IMG_20230503_073815_(1600_x_2560_pixel).jpg
IMG_20230503_073942_(1600_x_2560_pixel).jpg
I left that front panel as it's being removed wire wheel on the grinder made quick work of the surface rust..

Unfortunately I found out that the 8-258 dexter hubs on the torsion axle cannot be swapped my only real option is an adapter for $100(or so)... otherwise the options get expensive... (timbren axle-less suspension with 4" lift and brakes.. which can be done for about $1400-1800.. was really hoping to hold off on that expense.... so for now I may just get adapters and run my TRD OR rims and tires..
IMG_20230503_073958_(1600_x_2560_pixel).jpg
 

scott17818

Rank IV

Influencer II

1,104
Midcoast Maine
First Name
Scott
Last Name
Charlton
more updates... I ordered more parts to the puzzle...

Steel picked up:
*1/8" thick piece of sheet metal to repair the floor

rack:
* 3 -10ft sticks of .125 wall 1x1" square tubing
* 2 -10ft sticks of 1.5" angle iron
* 1 - 10ft stick of 1.75" angle iron (corner reinforcements, and will be welded to the rack)


*Class A Customs 40 gallon fresh water poly tank (no baffles) 39.5 x 13x18"
*Vevor 45PSI 12v water pump with strainer filter
*locking filler port
*PAINT (STONE GREY rattle can for easy touch ups...)
*wheel adapters (I will be getting the TRD OR wheels onthe trailer.. to make carrying a spare easier)

still torn on the 12v system looking at a weize 100Ah LIpo4 battery and a Wagan 25A dc to dc..

*looking for a 36-42" WIDE tongue/UNDERBODY box, THIS IS WHERE THE BATTERY, AND MAJORITY OF THE 12v SYSTEM WILL BE,

HERE IS A PIC OF THE PROGRESS SO FAR 1 coat of paint.. the crease will be a 12x24" door towards the front and I'll see about getting the crease out, but aluminum is finnicky... no horribly worried about it.. been busy with work... so not as much progress as I had hoped..
350791092_632637385439313_6950231754268934121_n.jpg
 

scott17818

Rank IV

Influencer II

1,104
Midcoast Maine
First Name
Scott
Last Name
Charlton
did a little more work... tore everything out of the trailer... and I cut the openings for the new doors.
351313760_1426335544858135_7729612634481085769_n.jpg

351336689_2254562398072371_308316639589494128_n.jpg

for now they are just set in.. have to complete the painting.. and I am not very satisfied with the rattle can paint job.. thinking raptor liner....

I did get my 40 gallon water tank.. so I threw it in after cutting the door openings to see how it looked and what space I had to work with... I also did some calculations on the weight... with a full water tank... we are talking 330lbs or so.. its making me rethink how the trailer will act with a 3/4 full or half full tank... thats 150lbs of side to side momentum, and may cause me trouble down the road.. I may need to swap down to a set of tanks in the 15-20 gallon range and make a valved system to feed the pump..
351310706_641955364119269_4326170542301154490_n.jpg

I then thought about just lowering the COG of the water tank, and figured out that for the price of a piece of 1/8" angle iron I can drop the floor nearly 3 inches in the front... so i cut out and ground out the crossmember in prep for this.. I will add support under the floor by welding on a piece of angle iron (probably the piece I cut off, once I clean it up)..

352180836_261992616500313_6811060351168965039_n (1).jpg

then I got together teh parts for the wheel conversion... and I got my old Tacoma rims and tires on the trailer... it looks great.. so i hooked it up to the tacoma to see the ride height.. and completely empty this is how it sits...
349106185_943233060248064_2132539650706049771_n (1).jpg

the trailer sits a little high... but it is empty (not a thing in it, and the torsion suspension should drop a little.. it does make me wonder about that factory rear door... it may need to be deleted so I can add some fenders to this thing.. and when I add the taller tires...

I have ordered:

*RENOGY DC to DC dual input charger 50A
*RENOGY BT2 module
*Weize 100Ah LIFEPO4 Battery
*a 36" UNDERBODY TOOL BOX (DOOR opens to the front) (I plan to mount some fuel jerry cans on top of it (up to 3)).
*2 stabilizing jacks 2000lb rated.
 

Attachments

KonzaLander

Rank VI
Member

Traveler II

3,402
Junction City, Kansas, USA
Member #

15814

Ham/GMRS Callsign
KE0EBF
Nice progress report!

I would encourage you to explore fender options for the trailer. Not only will fenders (and possibly mud flaps) keep your trailer cleaner and easier to use during a trip, they will help keep your trailer legal (or at least paint a smaller target on you) on the road in most states.
 

MidOH

Rank IV

Off-Road Ranger I

1,298
Mid Ohio
First Name
John
Last Name
Clark
Ham/GMRS Callsign
YourHighness
Bolt the fenders on, over the door. Then simply cut a line in the fender so it opens with the door.
 
  • Like
Reactions: Sparksalot

scott17818

Rank IV

Influencer II

1,104
Midcoast Maine
First Name
Scott
Last Name
Charlton
Nice progress report!

I would encourage you to explore fender options for the trailer. Not only will fenders (and possibly mud flaps) keep your trailer cleaner and easier to use during a trip, they will help keep your trailer legal (or at least paint a smaller target on you) on the road in most states.
It is in the works.. I want to build the rack first.. and the plan is to leave enough spacing for a 285/75/17 sized tire currently on the tacoma are 285/70/17 general grabber AT/X on method MR305NV 17x9 0 offset rims. I want to match tires/rims for less spares to carry.
 

AggieOE

Rank IV
Member

Advocate II

1,003
Pearland, Texas, USA
First Name
Nathan
Last Name
NWK
Member #

30025

Looks great! Love DIY builds.
Here are some of the water tanks I'm considering:

They have some options that are low-pro. I'm thinking the same thing as you about the added mass of a 1/2 tank of water sloshing around. 150-pounds or so of water going side to side isn't the most enjoyable concept.
 

RVA Land Shark

Rank IV
Member

Explorer I

1,007
RVA
First Name
Alan
Last Name
Harris
Member #

29866

I was more or less referring to the oddball style of the ball lock system.. it has a hood that slides over the ball section that has to sit parallel to the hitch body before you can slide the locking mech forward, and you can double secure it with a pin... just never seen a trailer hitch like it... just seems overly complicated
I was never a real fan of those. Had a few on some old work trailers back in the 90's.
 

RVA Land Shark

Rank IV
Member

Explorer I

1,007
RVA
First Name
Alan
Last Name
Harris
Member #

29866

did a little more work... tore everything out of the trailer... and I cut the openings for the new doors.
View attachment 259585

View attachment 259586

for now they are just set in.. have to complete the painting.. and I am not very satisfied with the rattle can paint job.. thinking raptor liner....

I did get my 40 gallon water tank.. so I threw it in after cutting the door openings to see how it looked and what space I had to work with... I also did some calculations on the weight... with a full water tank... we are talking 330lbs or so.. its making me rethink how the trailer will act with a 3/4 full or half full tank... thats 150lbs of side to side momentum, and may cause me trouble down the road.. I may need to swap down to a set of tanks in the 15-20 gallon range and make a valved system to feed the pump..
View attachment 259587

I then thought about just lowering the COG of the water tank, and figured out that for the price of a piece of 1/8" angle iron I can drop the floor nearly 3 inches in the front... so i cut out and ground out the crossmember in prep for this.. I will add support under the floor by welding on a piece of angle iron (probably the piece I cut off, once I clean it up)..

View attachment 259589

then I got together teh parts for the wheel conversion... and I got my old Tacoma rims and tires on the trailer... it looks great.. so i hooked it up to the tacoma to see the ride height.. and completely empty this is how it sits...
View attachment 259590

the trailer sits a little high... but it is empty (not a thing in it, and the torsion suspension should drop a little.. it does make me wonder about that factory rear door... it may need to be deleted so I can add some fenders to this thing.. and when I add the taller tires...

I have ordered:

*RENOGY DC to DC dual input charger 50A
*RENOGY BT2 module
*Weize 100Ah LIFEPO4 Battery
*a 36" UNDERBODY TOOL BOX (DOOR opens to the front) (I plan to mount some fuel jerry cans on top of it (up to 3)).
*2 stabilizing jacks 2000lb rated.
Looking good! That was a nice find and is shaping up super nice
 
  • Like
Reactions: scott17818

scott17818

Rank IV

Influencer II

1,104
Midcoast Maine
First Name
Scott
Last Name
Charlton
Weize Battery and the 2 rear Curt 2000lb 15" movement trailer jacks showed up today.. I ordered 2 more weld rings so I can weld them on somewhere to store the jacks when not parked. still waiting on the storage box, and renogy dc to dc mppt charger.