my project

  • HTML tutorial

ArkansasDon

Rank V
Launch Member

Member I

9 1\2 month build, 6 months of research

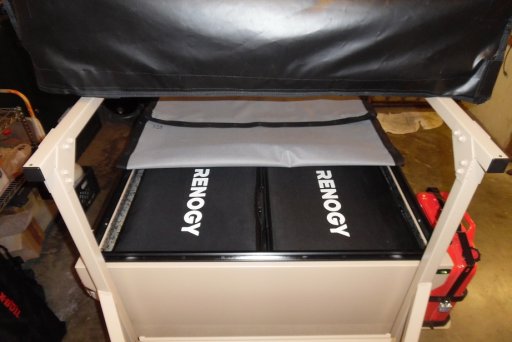
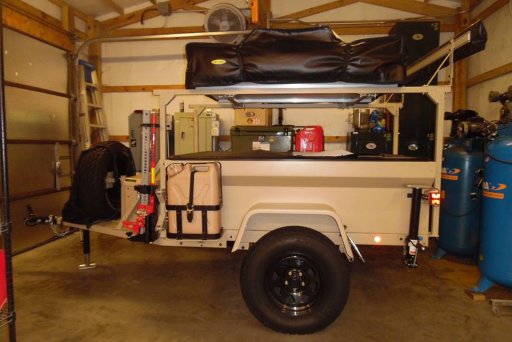
Solar: Renogy, 2 100watt portable suit case panels w\ branch connector to run both parallel or single panel, Renogy 30 amp Wanderer Charge Controller w\ Battery Temperature Sensor, 20ft 10 awg cable
Battery: VMax Tank 125ah AGM Battery
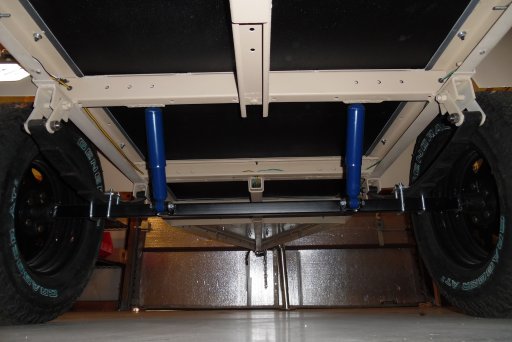
Suspension: Smooth Ride 3 leaf springs 1450lb. capacity w\ Monroe Shock & 2000lb axle
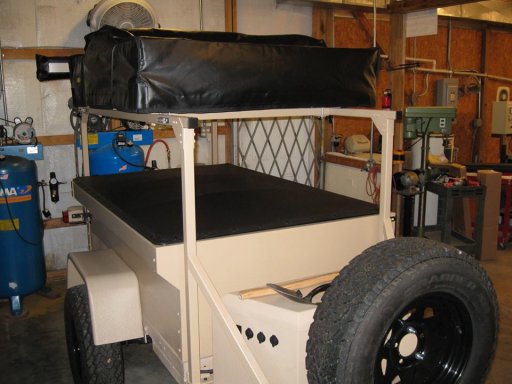
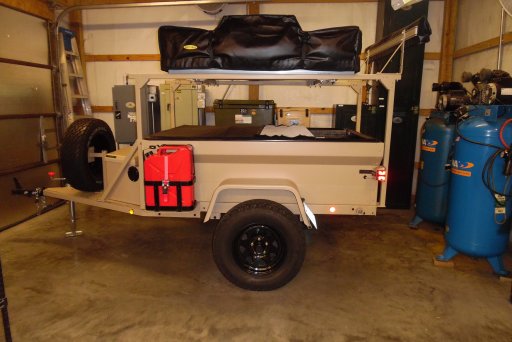
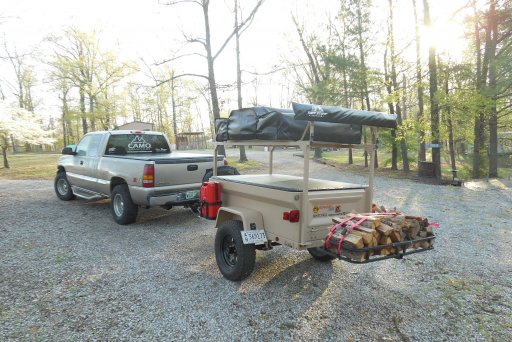
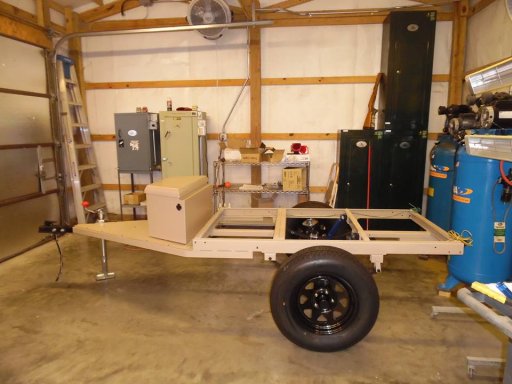
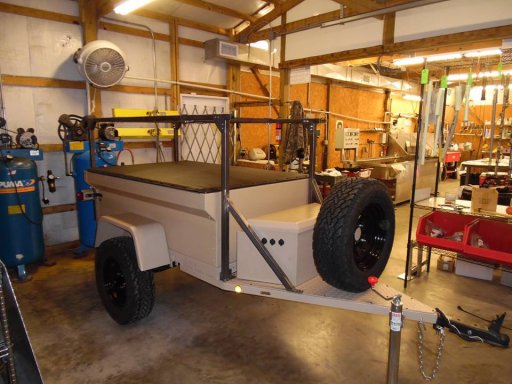
Tires & Wheels: General Grabber AT II & US Wheels 15"x 8" 4.5" on 5 lug (I media blasted & had powder coated satin black)
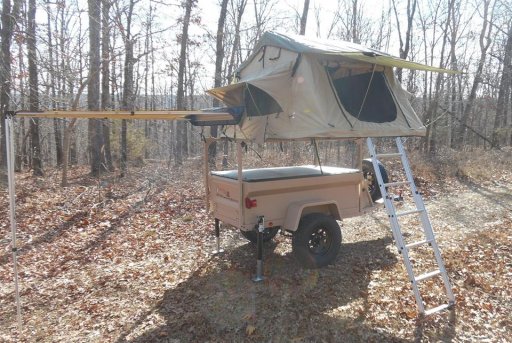
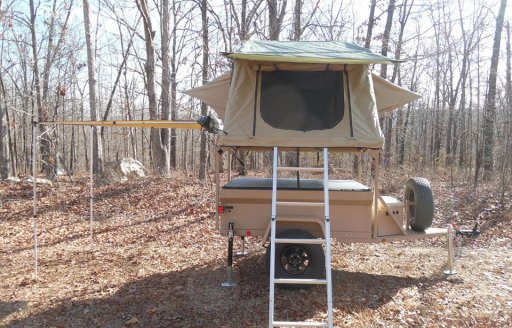
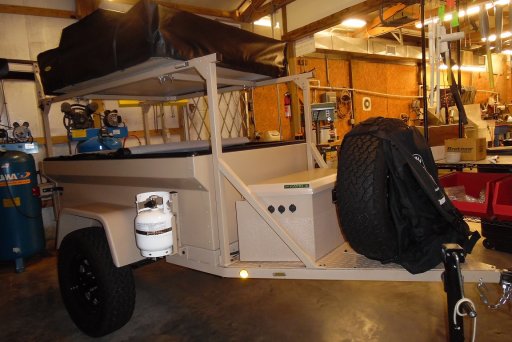
Tent: Smittybilt 2783 RTT w\ Exped Duo 10 Queen Size extra long extra wide self inflating mattress w\ CVT Anti Condensation Matt & Compact Camping Concept Shoe Hammock
Awning: Tuff Stuff 4x4 4.5ft x 6ft w\ Tuff Stuff 4x4 Sun Shade Wall
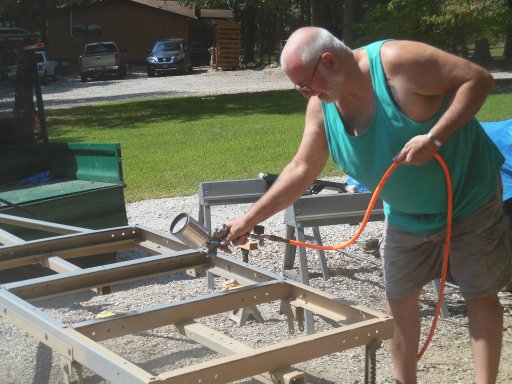
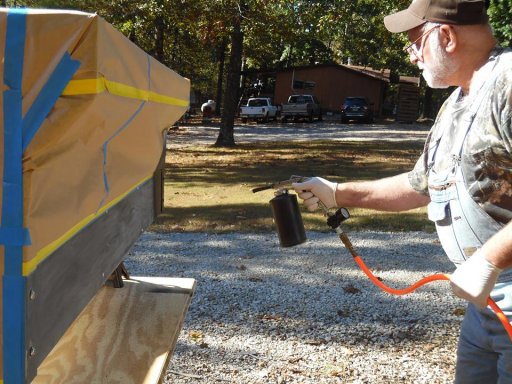
Paint: PPG Automotive, DP Epoxy Primer, Omni Base matched to Cerakote Coyote Tan, Concept Gloss w\flattener added.
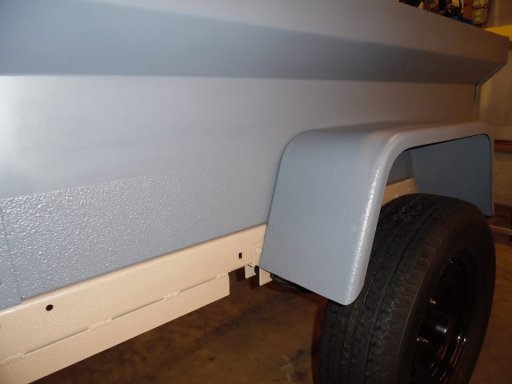
Bedliner: Defender Pro, orange peel texture 10" up on the exterior tub, tongue box & face of fenders, heavy texture inside the bed & tailgate. (all sprayed)

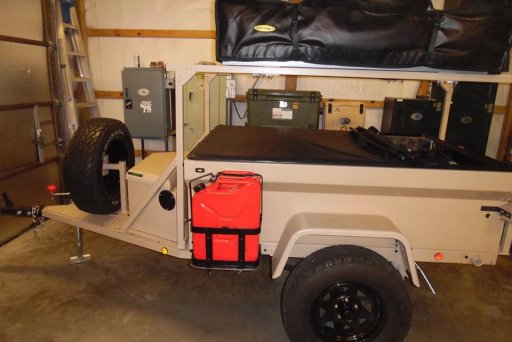
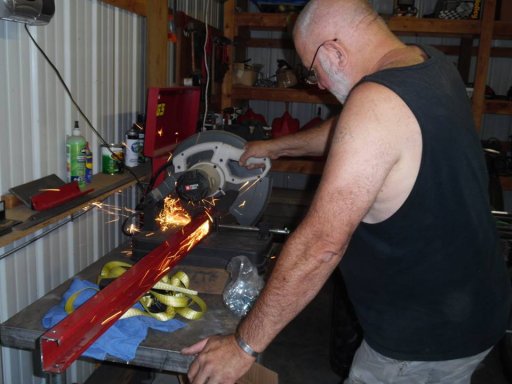
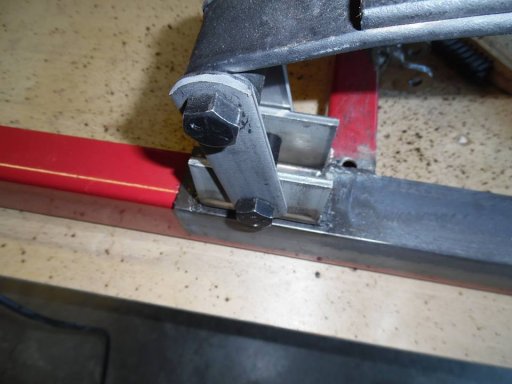
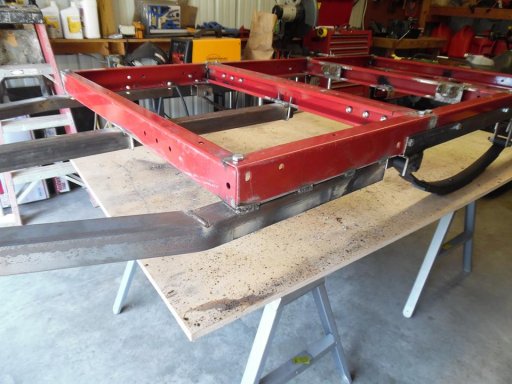
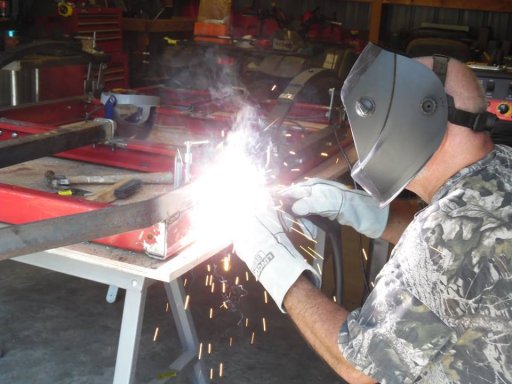
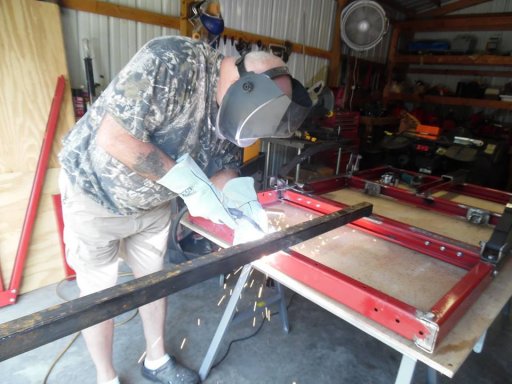
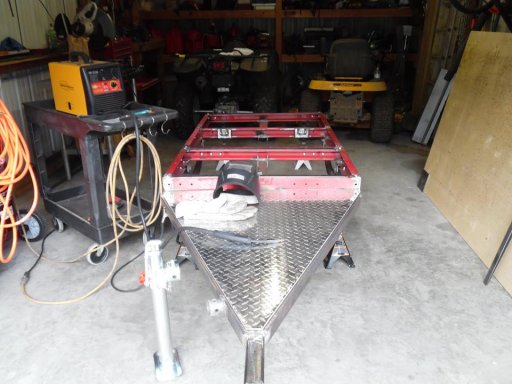
Frame: modified reinforced Harbor Freight Super Duty w\custom fabricated tongue & spare tire mount. (all welded)
Body: Dinoot M Series M416 tub kit w\ CJ Jeep style tailgate w\hidden tailgate latches
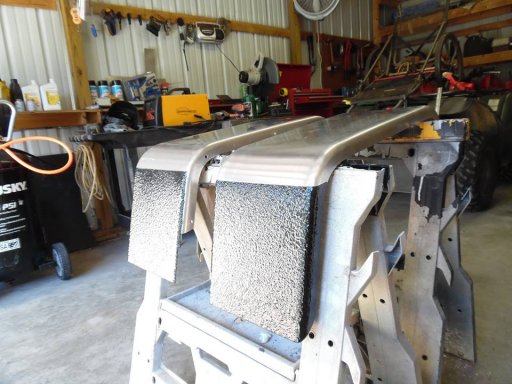
Fenders: Jeep Style Aluminum length: 36" height: 18 1/4" width: 10" cut to size & scribed to fit, Defender Pro Bedliner sprayed on the faces.
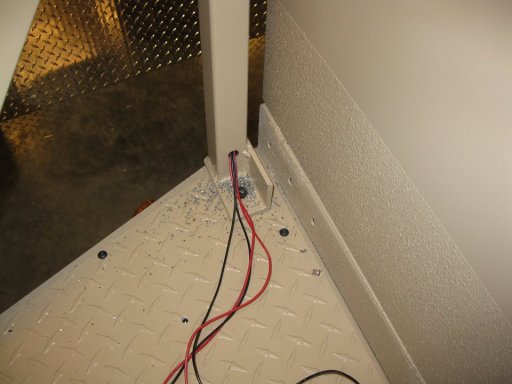
Bed Floor: 3\16" Smooth Aluminum sand blasted w\ Defender Pro Bedliner sprayed inside, exterior underneath Automotive Undercoater sprayed
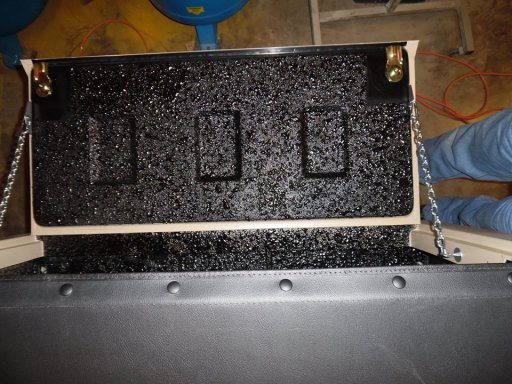
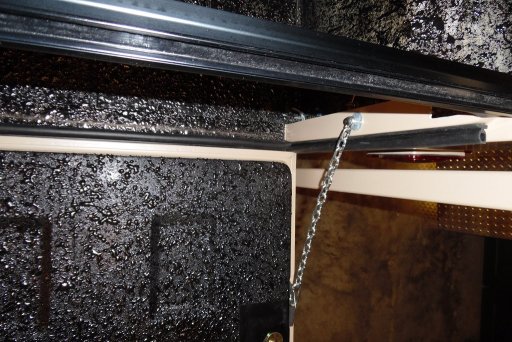
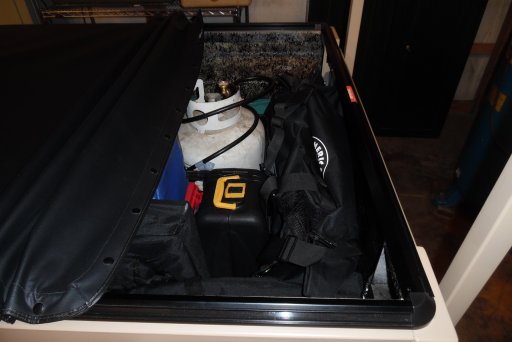
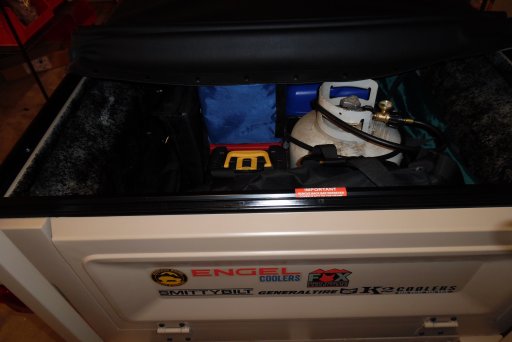
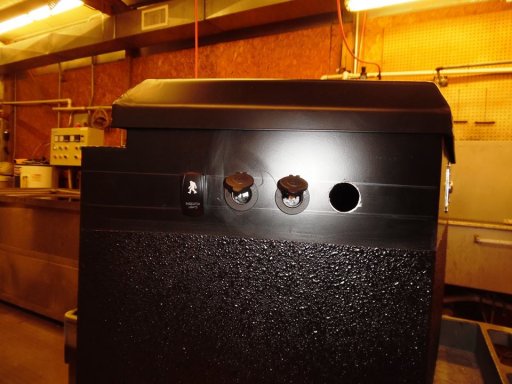
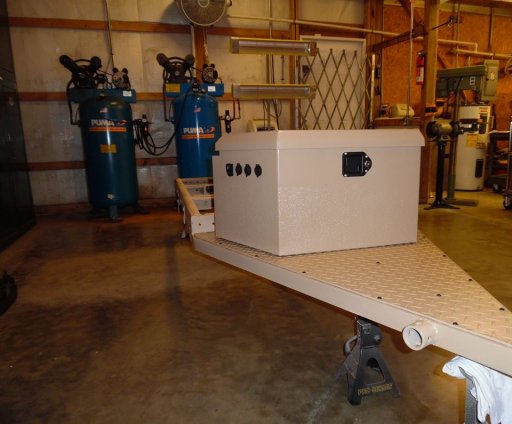
Tongue Box: Harbor Freight 2-3/4 cu. ft, 3 12v. outlets & 1 12v. rocker switch, Pro Defender Bebliner sprayed up 10" & painted to match trailer. Houses all electrical & solar system.
Heating: Proplex Heat Source H2000 Tent Furnace
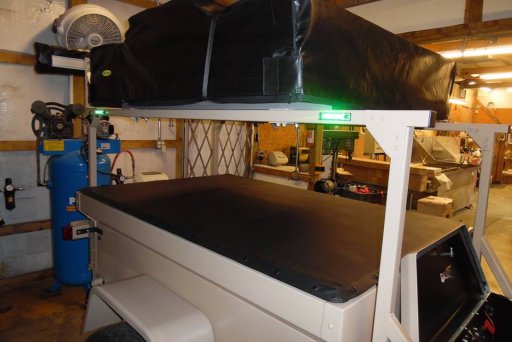
Tent Rack: Compact Camping Concept "No Weld" Gusset's w\ 1 1\2" thick wall tubing, bolted & welded
Jacks: Pro Series Round 2000lb Pipe Mount Swivel Jack w/ Footplate side crank
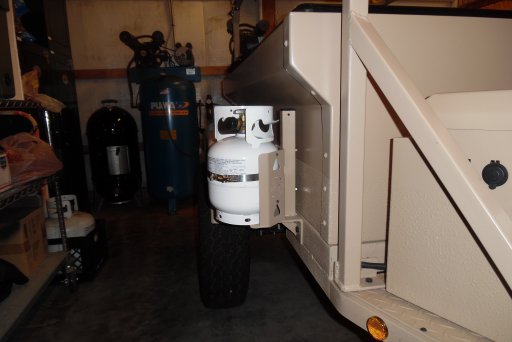
Propane Bottle Mount: AT Overland Equipment 5lb Propane Cylinder Bracket painted to match the trailer.
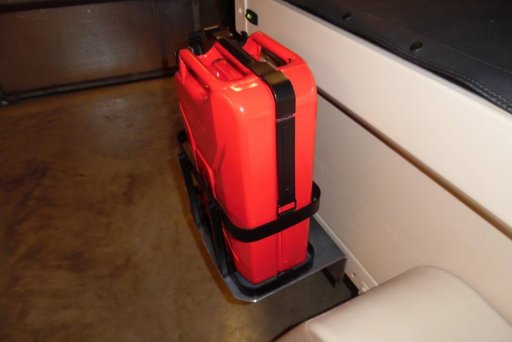
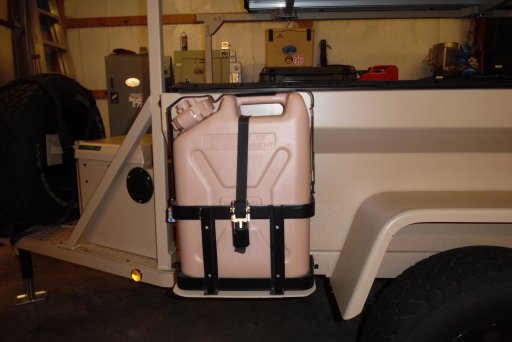
Extra fuel Storage: fabricated plate w\ bracing for Smittybilt Jerry Can Mount & Scepter 5gal Jeep Can
Charging System: Noco Genius 10 amp Single Bank On Board Battery Charger
Tonneau Cover: Downey Products.
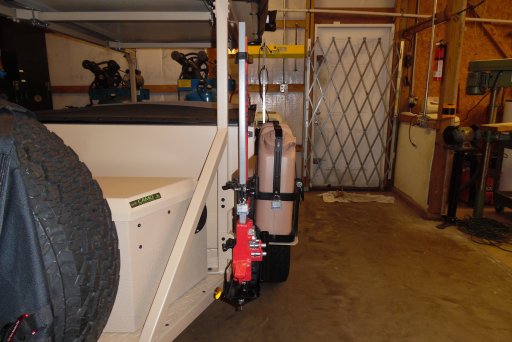
Rugged Ridge Hi-Lift Jack Mount w\ 42" Bulldog Hi-Lift Jack
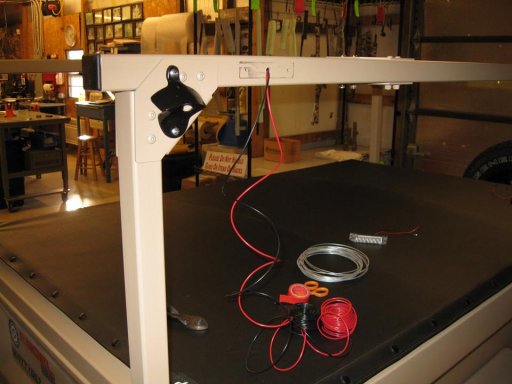
19430086_1385120104870193_955280375175327500_n.jpg 20429791_1414998801882323_7236358639908411708_n.jpg 20707985_1426372244078312_5831481685945354683_n.jpg 20768216_1426371960745007_3592208098114506799_n.jpg 20840874_1426370547411815_8705854559607205789_n.jpg 21105810_1437429419639261_7640287389761502578_n.jpg 20883018_1430472490334954_4434804747508452832_n.jpg 21617677_1448894648492738_6589318571596197910_n.jpg 22519389_1477340815648121_8835948354725130193_n.jpg 22491919_1477341815648021_1399776805032884334_n.jpg 21728558_1453621148020088_4220005453727126525_n.jpg 22449922_1478145195567683_3276396735336054654_n.jpg 23658610_1507131426002393_9140171294979058484_n.jpg 24059081_1515274518521417_5448240562572156780_n.jpg 24058833_1515275765187959_5348731648077999556_n.jpg
 
Last edited:

ArkansasDon

Rank V
Launch Member

Member I

the interior of the bed & interior of the tailgate & sprayed with the same exact 2 stage bedliner only I wanted a heavier texture. This was by me adjusting the gun regulator @ lower air pressure which the bedliner comes out in a bulker form. The underneath of the bed floor I sprayed a automotive under-coater prior before I installed the bed floor to the tub. The bed floor is 3\16" aluminum smooth plate which I media blasted before I applied the bedliner on top & under-coater underneath it.
Each part on this build was built, prepped, primed & finished prior before that assembly stage. It take much longer to do this but it is a very thoroughly coated which will give me a long lasting durable finish.
23231281_1491165900932279_5550270133031071210_n.jpg 006.JPG 005.JPG 013.JPG 002.JPG
 
Last edited:

ArkansasDon

Rank V
Launch Member

Member I

015.JPG
@ArkansasDon nice trailer build, well done! I especially like the color! :sunglasses::sunglasses:

What brand of 2-stage texture coat did you spray on?


Have fun with that, I'm sure enjoying mine.


Dan.
I used Defender Pro, a epoxy kevlar enforced truck bedliner . 1:1 ratio with product & activator. This stuff sticks like iron once cured to what ever you apply it to (metal, wood or fiberglass). Spray application is & always the best method. You can coat over it by prepping the surface (once cured 5 day to a week) & prime with automotive primer (epoxy I used) then top coat with single stage solvent basecoat. The color was match off of Cerakotes Coyote Tan.
I media blasted the frame ( I used TP Tools Skat Fast Cut media) to remove the original red baked on enamel finish from the Harbor freight frame & to remove the mil scale from the metal (tongue area) & excess slag from welding. I masked off the frame except the face & the underside were I applied (Sprayed) the bedliner on. Once dry, I prepped the areas by dulling it with course scotch brite pads & a degreaser. I sprayed on PPG's DP Epoxy Automotive Primer (2 coats), then followed by 2 coats of PPG's base paint matched to Cerakote's Coyote Tan & 2 coats by spray with Satin Matte Clear finish . I wanted a automotive quality finish that will last me for years of use.
The frame has 6 lbs of #30 welding wire & the original Harbor Freight bolts. She aint coming a part no time soon.
Thanks
 
Last edited:
  • Like
Reactions: VCeXpedition

Dayle Fields

Rank IV
Launch Member

Enthusiast III

1,308
Poland, Indiana
Member #

10511

the interior of the bed & interior of the tailgate & sprayed a 2 stage bedliner with a heavier texture. The underneath of the bed floor I sprayed a automotive under-coater prior before I installed the bed floor to the tub. The bed floor is 3\16" aluminum plate which I sand blasted before I applied the bedliner & under-coater. View attachment 46491 View attachment 46492 View attachment 46493 View attachment 46494
Really nicely done great job looks great!

Sent from my SM-N950U using OB Talk mobile app
 

ArkansasDon

Rank V
Launch Member

Member I

the trailer pulls nicely. Loaded with gear it has 24 3\4" ground clearance from the bottom of the frame rails, 14" of axle clearance.
It holds all of our camping gear nicely: 2 totes (19"x16"x18") 1 tote is kitchen gear, 2nd tote miscellaneous gear (hygiene, fire starter kit, first aid kit, 12v fan, therma-cell w\ pads & fuel, lantern w\fuel & etc.), 2 100 watt Renogy suit case solar panels, small 16"x 16" x 20" folding aluminum table, Camp Chef Everest stove in soft case, Coleman Oven "collapsible" in soft case, three 6 gal Reliance Aqua-Tainer Water Containers, Zodi Hot Shower System, 2 Camp Chef Mountain Series Mesa Tables 40", 2 folding camp chairs, propane lantern in hard case, Ozark 2 Room Shower\Toliet Privacy Shelter, 2 Pro Series 2000lb 30" stabilizer jacks, Ironman Bush Bush Toilet "collapsible" in bag, set of wheel chocks, trappers ax, small shovel, bow saw, RV leveling blocks w\bag, 3 rubber mats, Fire Defender Campfire Blanket w\bag, & my trasharoo strapped to my spare tire.

Their other stuff that I do not have listed in the trailer that we use during certain times of the year camping, like late fall early spring our Proplex H2000 tent furnace, summer time the 12v. Endless Breeze Fan.
Gear we haul in the back of my 2000 GMC truck: food box, dry box, Engel MR040 40qt Frid\freez, K2 Cooler, firewood, change of clothes.
022.JPG 021.JPG
 
Last edited:
  • Like
Reactions: Biker Eagle

ArkansasDon

Rank V
Launch Member

Member I

waiting on parts for one of my business equipment which has me at a stand still in production at this time.
So I thought I would fabricate a Jerry Can bracket that will hold extra 5gal. can of fuel to have on hand while camping in the deep back country.
I made this from 3\16" plate I bent in a right angle. Drilled the hole for the mounting to the trailer frame rails & the actual jerry can holder. I media blasted to remove the mil-scale & give a tooth for the PPG DP Epoxy Automotive Primer to adhere, 2 coats. I followed with 2 coats of base color (the same color) matched to Cerakotes Coyote Tan which is the same color the trailer is followed by 2 coats of Satin Matte Clear.
The bolts holding this mount I fabricated to the trailer frame rails I media blasted & sprayed Cerakote C- Series moly in Matte Black finish that will match the rest of the black colored accents.
Now its a waiting game for the curing so I can attach this to the overland trailer.
28166507_1592193917496143_8917787597477222543_n.jpg 28055761_1592194207496114_6770116186548577685_n.jpg 28056594_1592194294162772_2577092321834205287_n.jpg 28058615_1592194187496116_4656425416475207645_n.jpg 27972964_1592194940829374_7987504217183095365_n.jpg 28166930_1592194710829397_5696578673151015945_n.jpg 28279249_1592194847496050_2121505813717339747_n.jpg 28055752_1592194930829375_6799697314590478037_n.jpg 27972444_1592195037496031_3677017462902082784_n.jpg
 
  • Like
Reactions: Road

Road

Not into ranks, titles or points.
Launch Member

Advocate III

3,379
On the road in North America
First Name
Road
Last Name
Dude
Member #

6589

waiting on parts for one of my business equipment which has me at a stand still in production at this time.
So I thought I would fabricate a Jerry Can bracket that will hold extra 5gal. can of fuel to have on hand while camping in the deep back country.
I made this from 3\16" plate I bent in a right angle. Drilled the hole for the mounting to the trailer frame rails & the actual jerry can holder. I media blasted to remove the mil-scale & give a tooth for the PPG DP Epoxy Automotive Primer to adhere, 2 coats. I followed with 2 coats of base color (the same color) matched to Cerakotes Coyote Tan which is the same color the trailer is followed by 2 coats of Satin Matte Clear.
The bolts holding this mount I fabricated to the trailer frame rails I media blasted & sprayed Cerakote C- Series moly in Matte Black finish that will match the rest of the black colored accents.
Now its a waiting game for the curing so I can attach this to the overland trailer.
Hey buddy - always good to see what you're cooking up in your shop! I'm envious of the space you have and being able to work indoors. Hard to find anything like that around here that isn't cost prohibitive. Next time I come down that way I'll give you a heads up and perhaps we can all head out for a few nights somewhere.
 
  • Like
Reactions: ArkansasDon

ArkansasDon

Rank V
Launch Member

Member I

Photo 1 & 2 I added 5 gal propane bottle & a AT Overland mount. I fabricated the bracket that is attached to the frame (not the tub). I painted it to match the rest of the trailer.

3rd photo I had to re-fab a new upper mount for the Smittybilt Jerry Can holder so it can fit Scepter Can. I re-painted it & added a ratchet style strap too.
Photo 4 & 5 I added Rugged Ridge Hi-lift Jack Mount for my 42" Bulldog Hi- Lift Jack.
001.JPG 005.JPG 010.JPG 011.JPG 45767214_1924210364294495_1882812537561415680_n.jpg
 

Captain Chaos

Rank VI
Launch Member

Traveler III

3,402
No
First Name
No
Last Name
No
Do you have any pictures of your heater? I’m planning on building some kind of heat set up for the new trailer. I haven’t decided between propane and diesel yet.
 

ArkansasDon

Rank V
Launch Member

Member I

here's the link
http://store.adventuretrailers.com/copy-of-portable-furnace-heatsource-hs2000/
2 3\4" duct hose I use
https://hhclassic.com/ag-1159160.1159161.1159129.1159162.1165440-1958-impala-all-impala-or-caprice-or-bel-air-or-del-ray-or-biscayne-2-3-4-ac-heater-duct-hose-6-feet-long-plastic.html

if your going to install this heat system in the teardrop you might want to look at this
http://store.adventuretrailers.com/furnace-heatsource-hs2000/

I like the propane vs. the fuel\diesel furnaces for the reason my stove & shower system is propane, one fuel for many uses.
 
Last edited: