M1010 "MemphisBelle"

  • HTML tutorial

M1010Engineer

Rank II

Enthusiast II

IMG_0826.JPG Follow me on instagram @stang5479


I bought this CUCV M1010 out of Ellaville, Georgia in September of 2017. She mostly sat around while I hunted the 2017-18 season.


For those unfamiliar...

The CUCV was:

5/4 ton

6.2 Detroit Diesel

TH400

4.56 gears

Dana 60 Front

14 Bolt Corporate Rear


This one had 2900 miles on the ODO.


IMG_0905.JPG IMG_0826.JPG IMG_0854.JPG
 

M1010Engineer

Rank II

Enthusiast II

First things she needed was a little love under the hood.
Passenger head cover was leaking so I pulled all the upper engine parts and diesel lines off to fix that.
Upper alternator/DUVAC was not working. I installed a 12V alternator and deleted the DUVAC.
While i was at it I cleaned up the engine bay a little and sprayed some fresh paint.

After the alternator install, I know longer have to leave her on the charger to equalize the dual batteries.
At this point I started putting some miles on her around town.

IMG_1664.JPG
 

Attachments

  • Like
Reactions: Russell Peters

M1010Engineer

Rank II

Enthusiast II

I couldn't stand the sight of the white. Everywhere i looked under the hood or behind the door panels was the CARC 383 taunting me.

So after much research, I finally decided on the Behr Premius Plus Ultra in Federal Standard 34094(CARC 383 equivalent). I rolled it on! I also did the roof rack(a non standard item) in the equivalent black). I'm super impressed with the overall results and I only have about $80 invested. IMG_1736.JPG IMG_1731.JPG IMG_1548.JPG IMG_1554.JPG IMG_1658.JPG
 

M1010Engineer

Rank II

Enthusiast II

We decided on a name at this point...Memphis Belle. I was leaning towards WWII bombers or pinups. She's a heavyweight bomber of off-road vehicles and my wife is my Memphis belle...so it stuck.

Next up was to set a plan for the interior of the box. The current ambulance setup was not conducive to storage. None of my totes, even the smallest, would fit inside the boxes due to their narrow opening. They also rattled quite a bit.

Our plan was something more fitting to our needs and lighter if possible.

Step 1...Demo!

Litters and lids accounted for 160 lbs(80 per side).

Padding(litter and wall) added up to 36lbs.

 
  • Like
Reactions: Russell Peters

M1010Engineer

Rank II

Enthusiast II

We then removed the A/C. The AC box and lines totaled 135 lbs not including the compressor.

Removing this AC and not putting another AC unit in its place took some thought. I had considered a household window unit but the electrical demands(and related weight and cost) didn't seem reasonable. After some thought and study of #vanlife, we decided on a Maxxair fan. We will mount it in the same place as the AC. I am still working on the method to adapt the 14"x14" fan to the 22"x13" hole as well as ensure its able to be used while driving and protected from the weather(leak) and trail(limbs love the M1010).


IMG_0143.JPG
 
  • Like
Reactions: Russell Peters

M1010Engineer

Rank II

Enthusiast II

Next up was a change of color. My wife ensured me white was the way to go. This is the same paint we used on the outside except for the color. The paint is extremely tough and should put up with the abuse. We kept just enough of the ambulance parts(focus lights, grab straps, rifle mounts) to maintain the character of the original.

IMG_0793.jpg
 
  • Like
Reactions: Russell Peters

M1010Engineer

Rank II

Enthusiast II

We thought long and hard about how to build the box.
Plans include....
- Expandable bed with under storage and slideout kitchen.
- A closet space ahead of the bed to hang clothes and house the house battery and solar control system and other electronic components.
- On the opposite side, a cabinet space and countertop for cooking/working. While most cooking will be done outside on the slideout. We will have a backup option for Stealth camping or extreme weather. The fridge space will also be inside this cabinet with a flip up countertop section.
- Rear right will be a bench with storage underneath, likely the onboard water access. The tank might also be mounted in this space if not under the frame.IMG_0001.JPG
 

Attachments

  • Like
Reactions: Russell Peters

M1010Engineer

Rank II

Enthusiast II

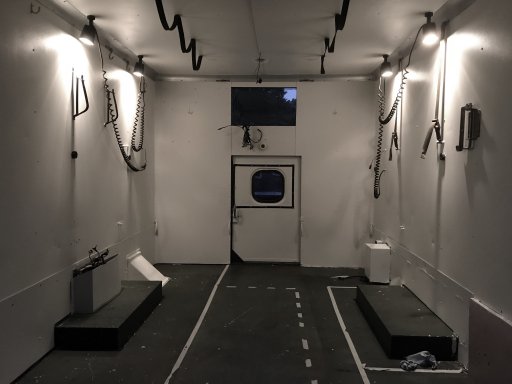
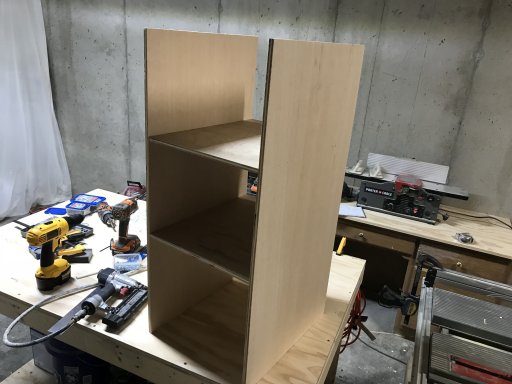
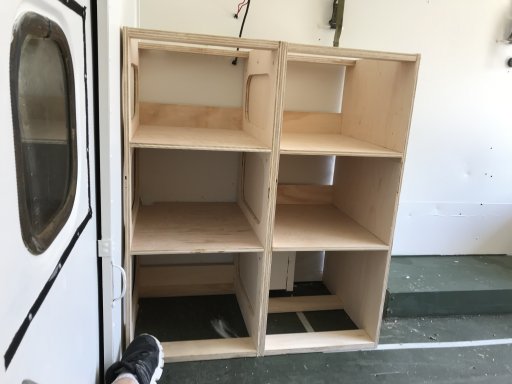
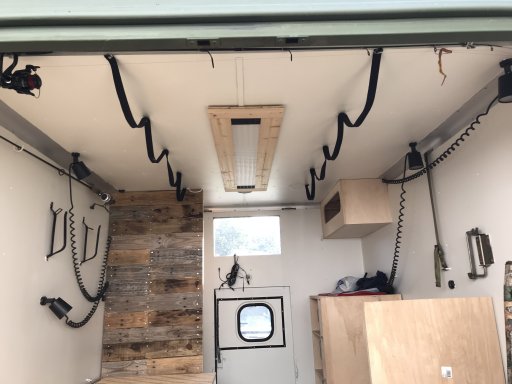
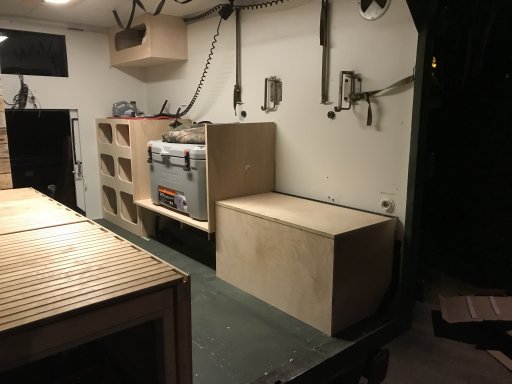
Next came some carpentry...
This is not where my skill set lies and nor did I have the tools for it. I bought a cheap miter box and saw and a Kregs pocket hole jig and clamp.
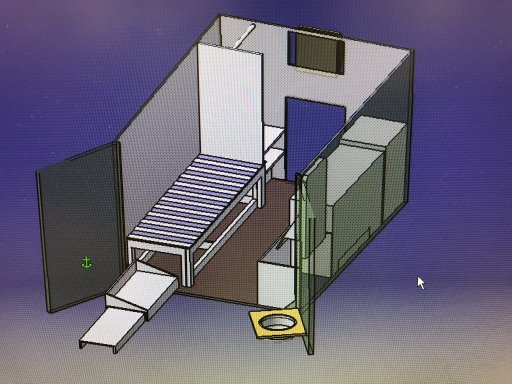
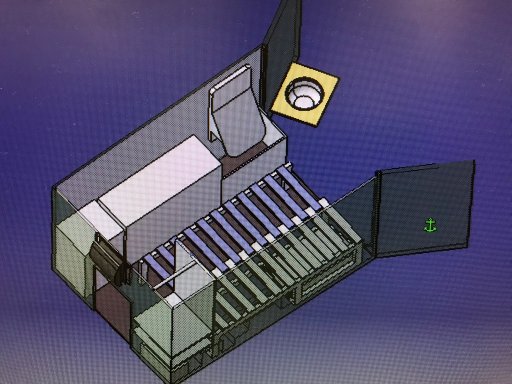
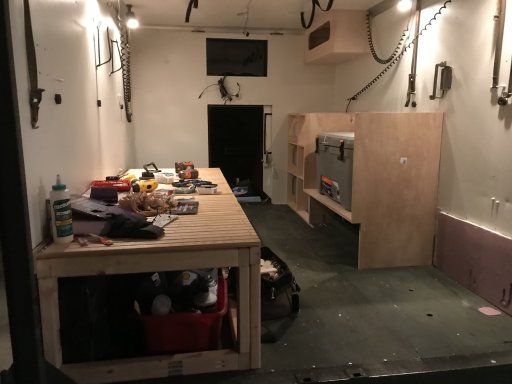
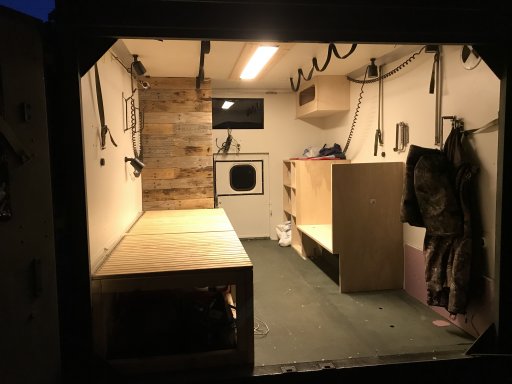
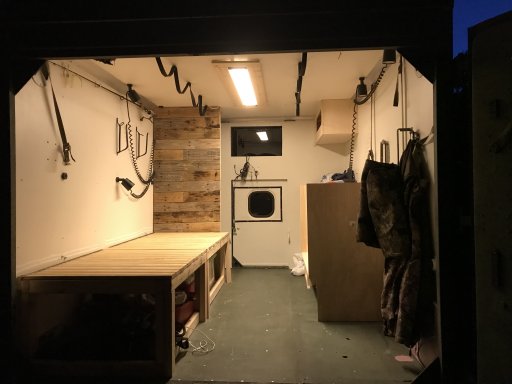
From there we started work on the bed. My phone died so I lost the build time lapse but here is a quick clip of the working product. I took my wife and I the better part of one full weekend day and a couple of week nights to finish.

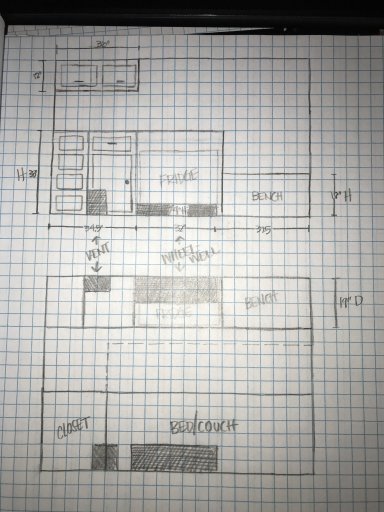
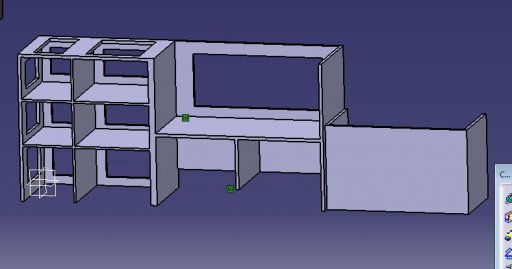
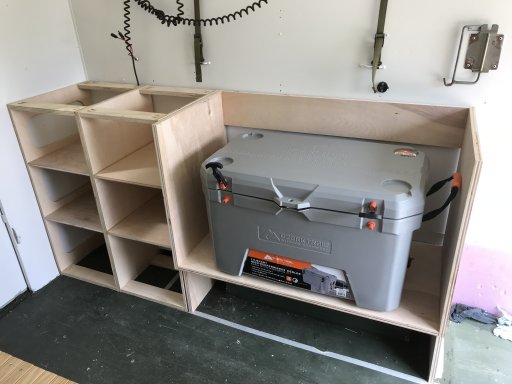
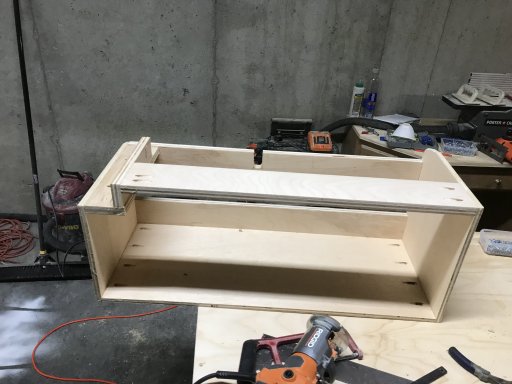
We used 2x3 for the frame. The bed storage is divided in two spaces. The front section will be for storage.
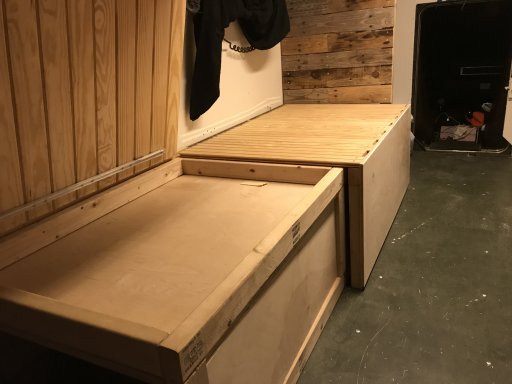
The other(rearmost) will house a slideout kitchen(camp stove and cooking work surface) and just below the hinged lid a shallow tool box area for regular hand tools. We used tongue and groove for the bed sliding mechanism and lid..the result is more stable sliding/hinging performance then the standard slideout bed designs that most use. Its 28" wide and expands to 50". I'm a mechanical engineer, and I really wanted to make this build lighter, faster, stronger, but alas our scales failed and we neglected to get a weight. I will say it seems to be less than the 80lb piece it replaces. I could hold the 2x3 frame(no lid or tongue and groove) up in one fully extended arm. I have since priced balsa, carbon fiber tubing, etc and all seem unrealistic for a low budget build.

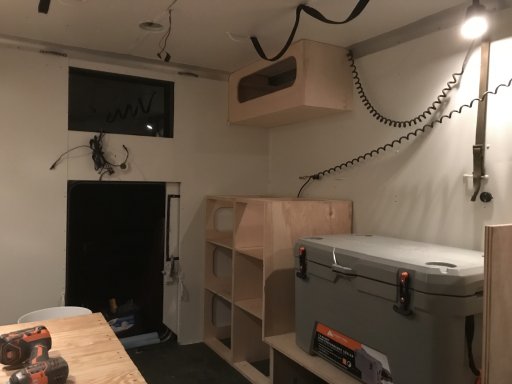
I am honestly quite happy with the way it turned out. We still have the slideout to build and we'll add a fascia and some skins on the box to enclose it.

 
  • Like
Reactions: Russell Peters

M1010Engineer

Rank II

Enthusiast II

After one last session of 3D modeling we came up with the basic image below. I spent the next Saturday(June 30) with my brother who is a really great carpenter on the side. We were able to knock out the right side cabinetry save for the front trim fascia and the countertop. It was about a 13 hour day and I am very happy with the amount of progress and quality. IMG_0031.JPG IMG_0049.JPG IMG_0072.JPG
 

Attachments

  • Like
Reactions: Russell Peters

M1010Engineer

Rank II

Enthusiast II

I was off this past week for July 4th shutdown. I was able to get the closet wall done using a 2x3 frame(narrow side for space saving) and some pallet wood I had from when the shingle for my roof were delivered last spring. I used a little fire to add additional color and character to the wood...smelled good too.


And now we're up to date. Next up to work on is to get the fan mounting figured out, counter tops, flooring. The list goes on and on.
 
  • Like
Reactions: Russell Peters

M1010Engineer

Rank II

Enthusiast II

No progress as of late. Been mid 90’s and we’ve been doing all the normal life stuff(kids, yard work, etc). I’ve also been out scouting and preparing for hunting season. I’m hoping to have a little more progress before October 15 to make the space more usable during hunting season and comfortable for overnight camping/hunting trips. Also plan to have some new tires by then.
 

ZRex

Rank VII
Launch Member

Explorer I

5,830
Elizabethton, TN
First Name
Mike
Last Name
Klepp
Member #

15512

I've got a couple friends with CUCVs and I've always had a soft spot for them. Personally I'd really like a deuce. [emoji48]

Keep up the good work! Killer progress and designs, I'm jealous!
 

M1010Engineer

Rank II

Enthusiast II

So summer got hot, and with the truck being daily driven I didn’t get too much done. But last Saturday I hung out with the brothers again and we got a lot done.

Added a chest on the rear right. This will be storage for now. I suspect I’ll hide my water tank and plumbing in this area as I have outer(right quarter) access for showers.

We added the face to the storage cabinets near the right side front.

We skinned the bed storage spaces. We also added the skins to the folding lids on the bed. Because of the skin locations I have a small space(2.5inch) between the outer and inner skin. I can hang tools or an AR-15 in this space.

In the rear bed storage space, I will have a slide out cooking area. So in the upper space I add floor for what will be a shallow tool box.

Hope you guys like. 143125DB-F76F-479A-ACED-8E0DA31C81A2.jpeg 30C6F165-FCD1-421C-B0B2-80DBAF96229A.jpeg EBA99967-6C65-4463-B83B-800D5A69DA99.jpeg 2F3FD74F-81F4-4838-977F-ABFDF04A35EE.jpeg K
 
  • Like
Reactions: RootedWanderers