LuX450 Build: 97 LX450 (FZJ80 Cruiser)

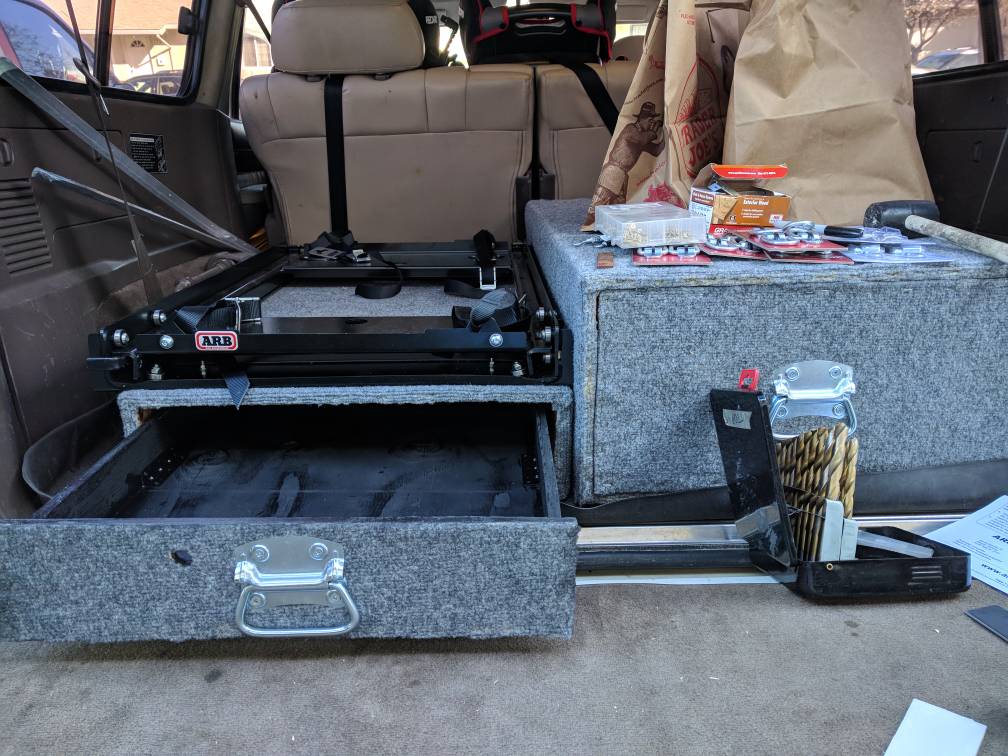
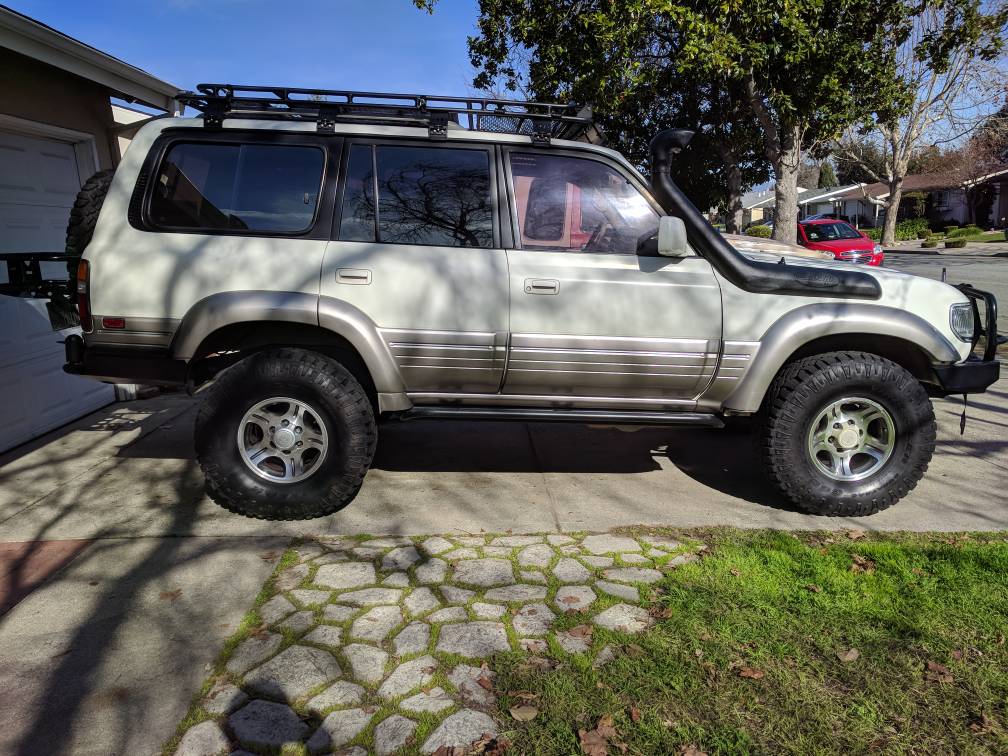
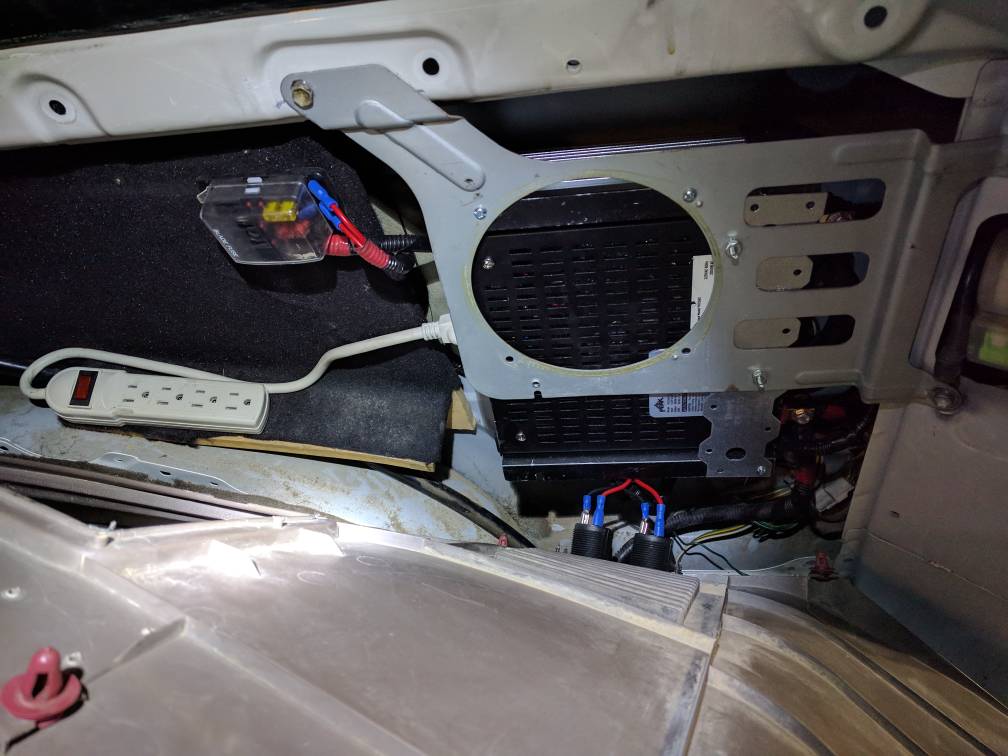
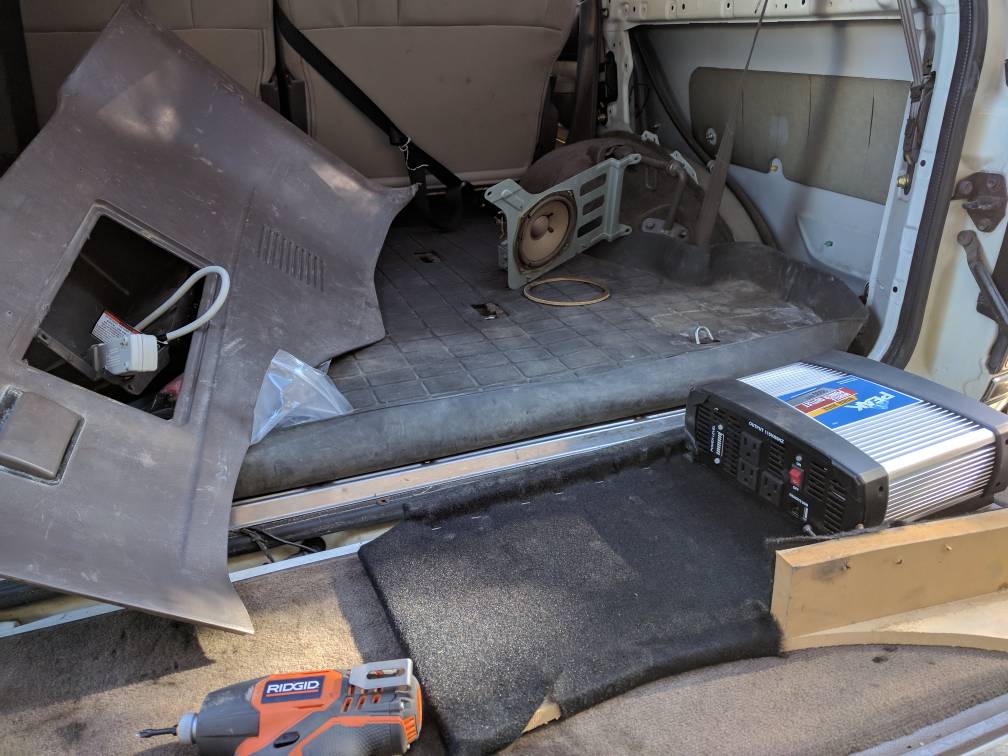
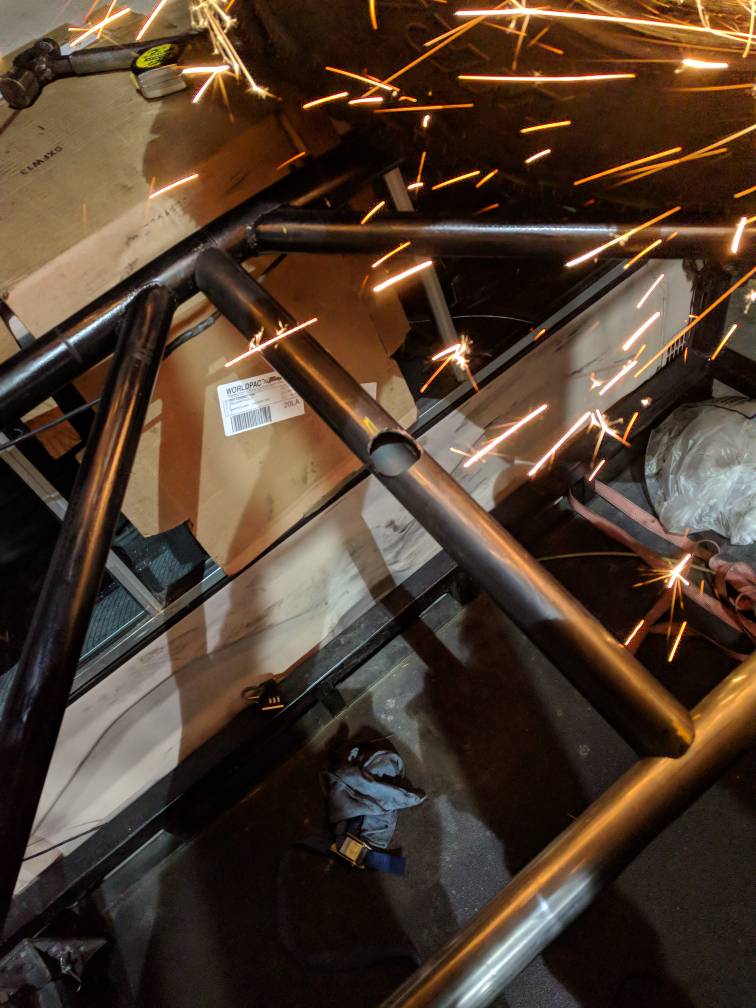
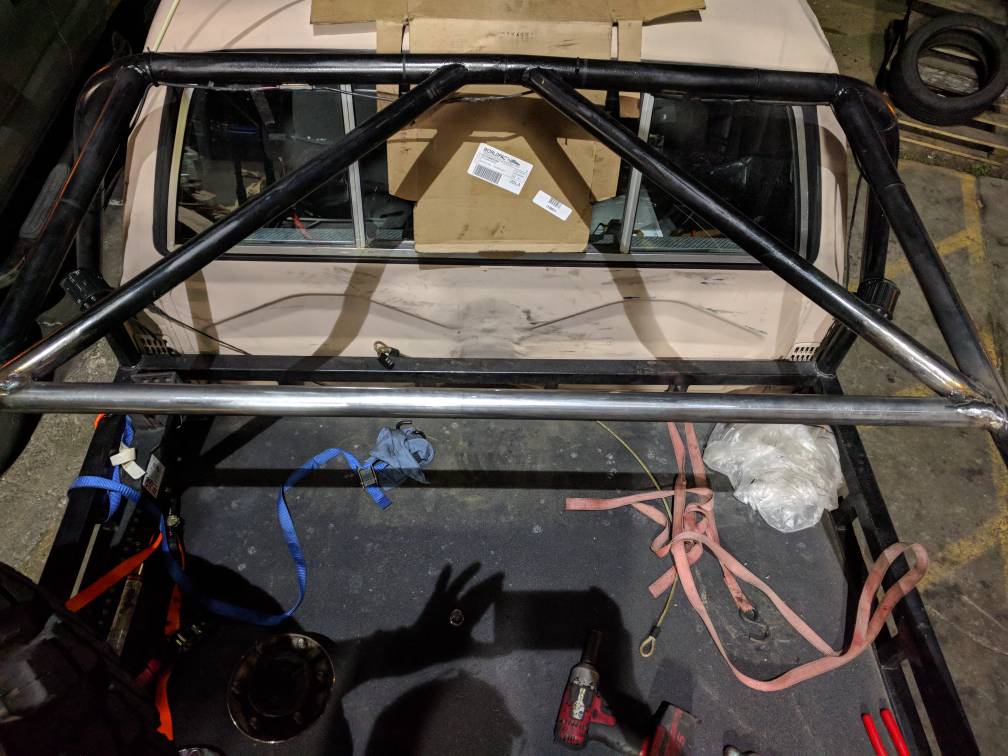
Remove old lx450 console, sub, brackets and amp. You want to see bare floor.
09555e1d5a185f2f55e7028c5351c4c5.jpg
60cd745460993fd62c6dea912150057c.jpg


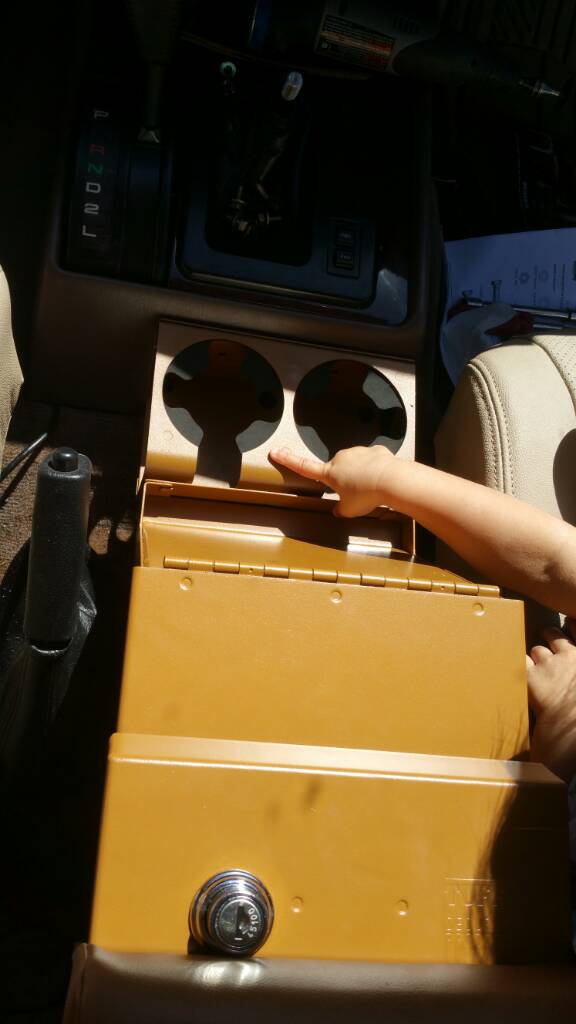
Enlarge shifter dash cup holder area with dremel cutoff wheel. Test fit
61006c14078fb868c37b93a7c0f21189.jpg


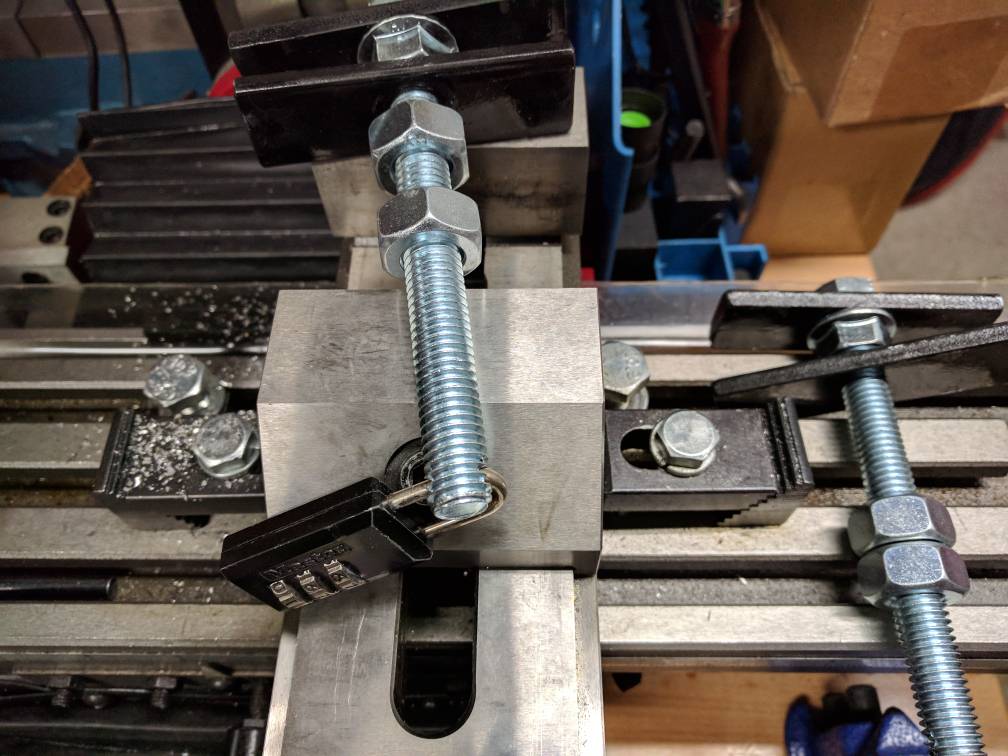
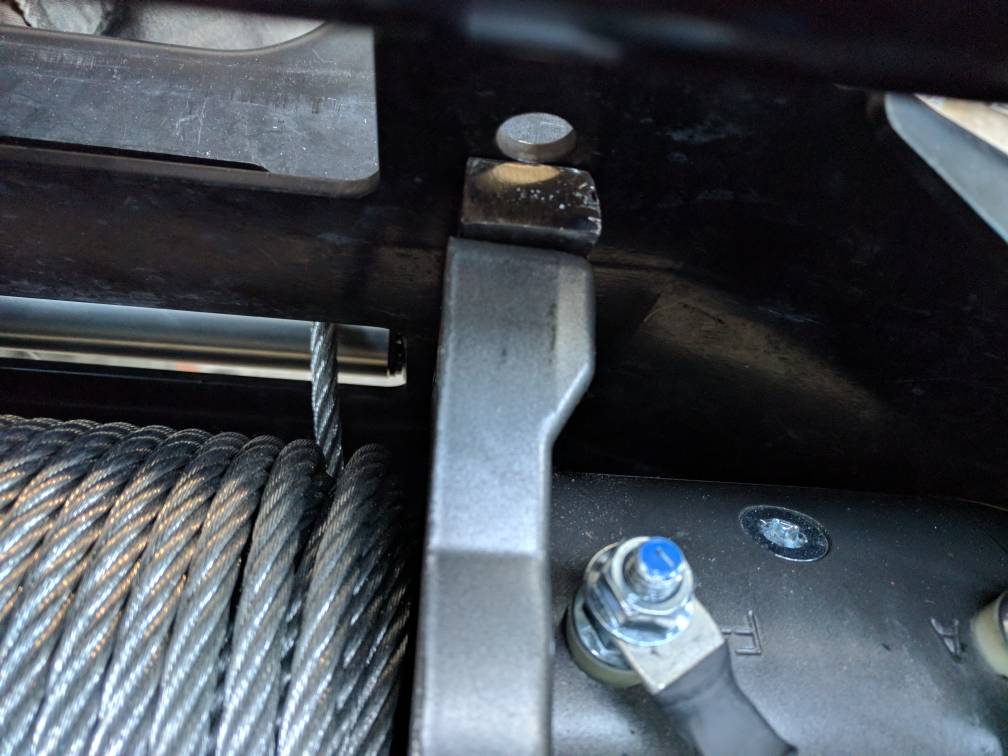
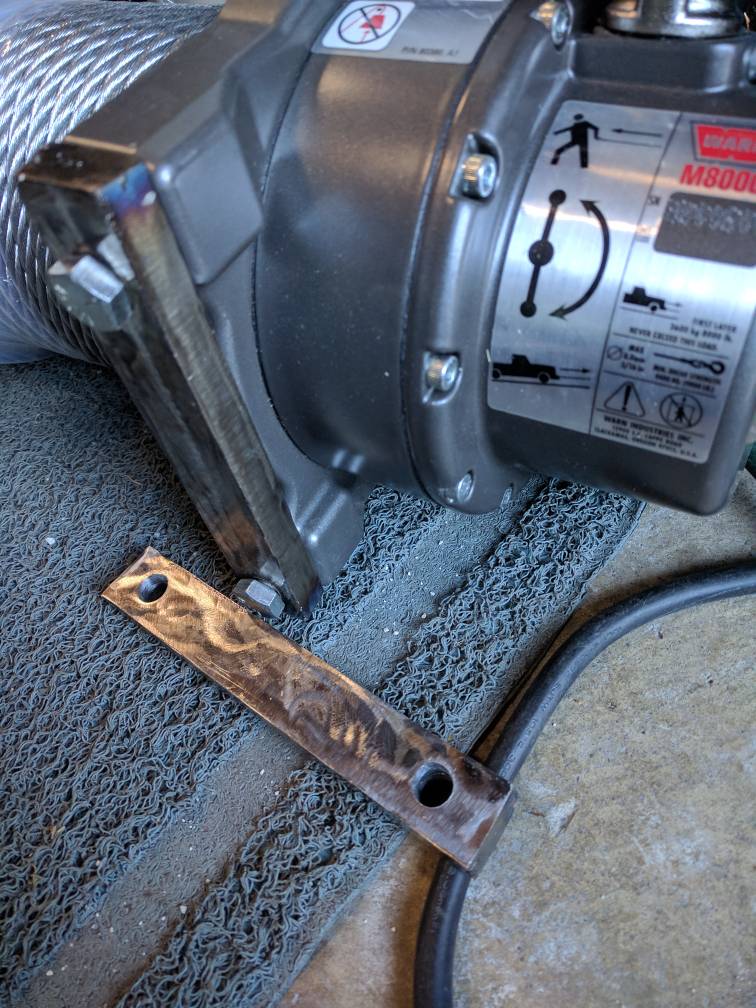
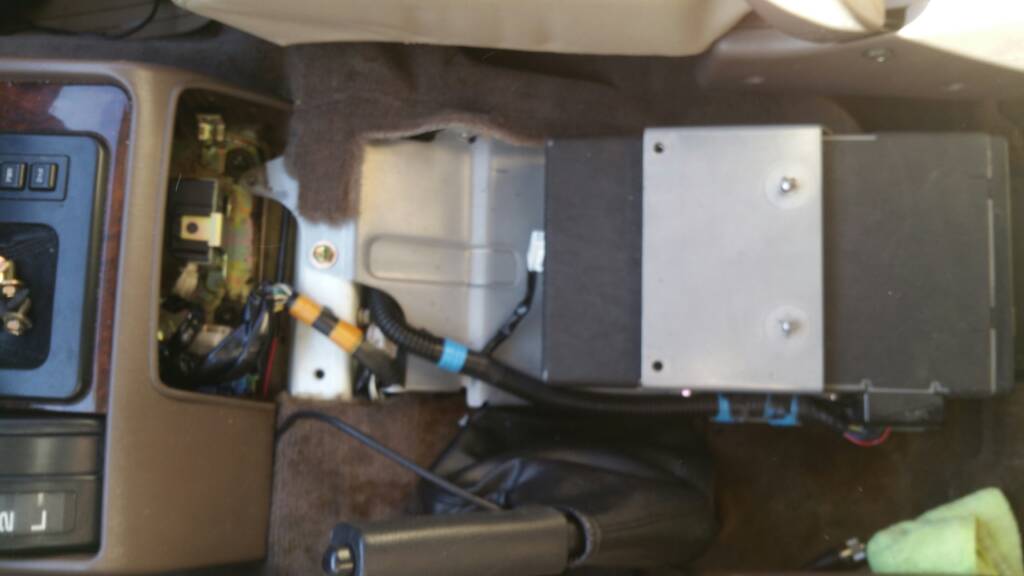
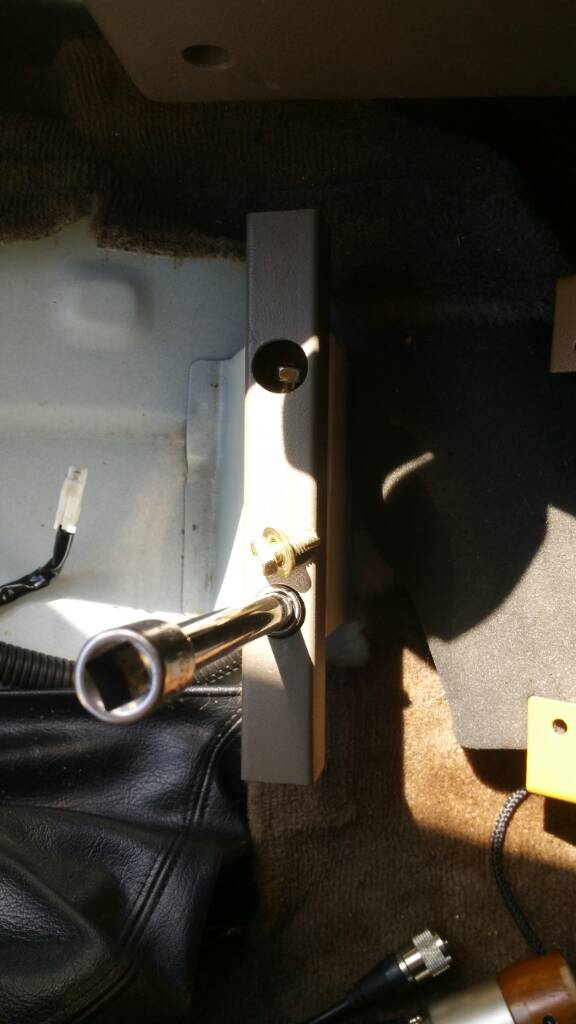
Make bracket using 1 inch square tube
b8b206e7465685afcdb97f468c2ef730.jpg


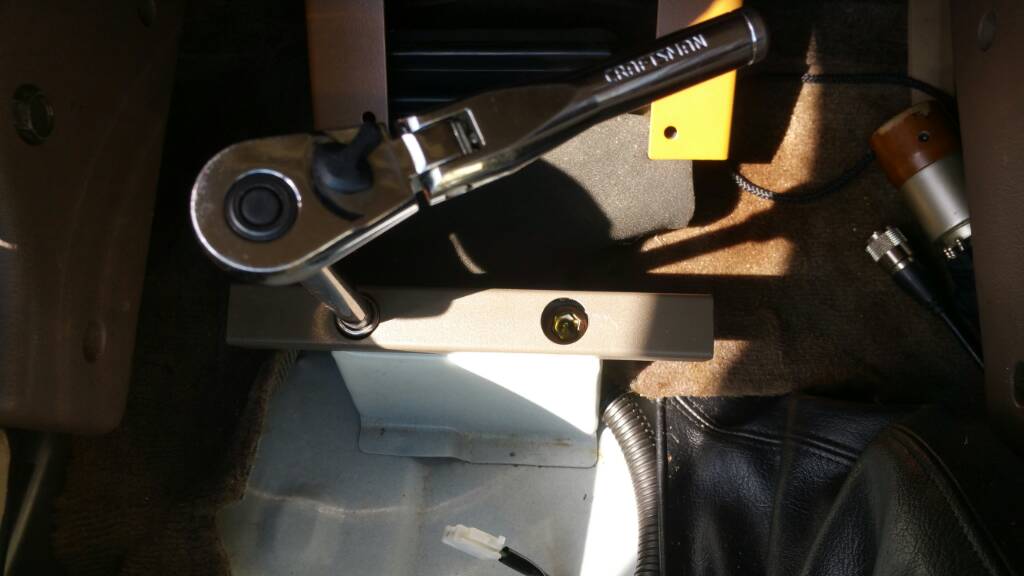
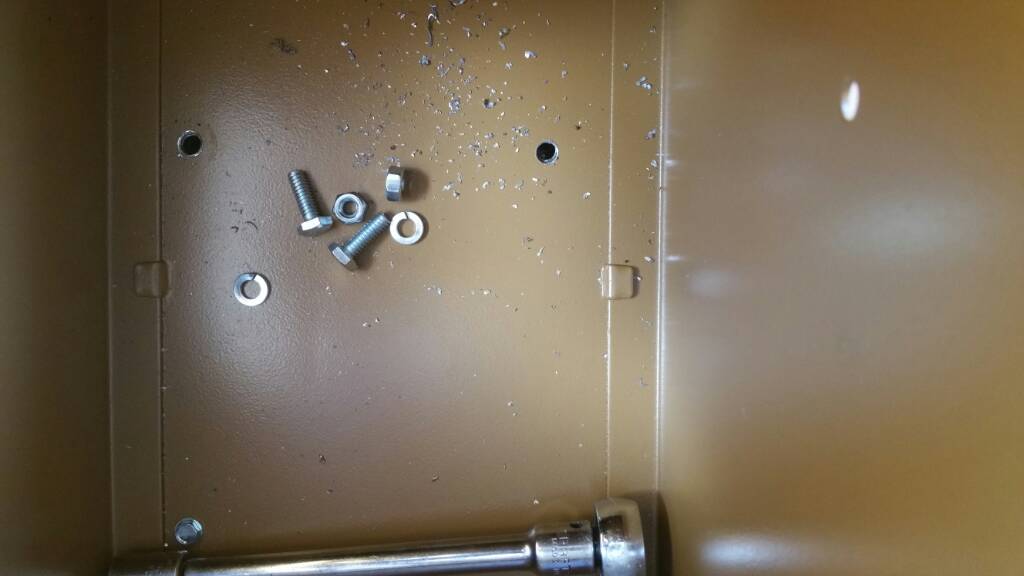
Drill holes to mount onto square tube
4b71bc2b9dab4c7a446993f705cd6f3d.jpg


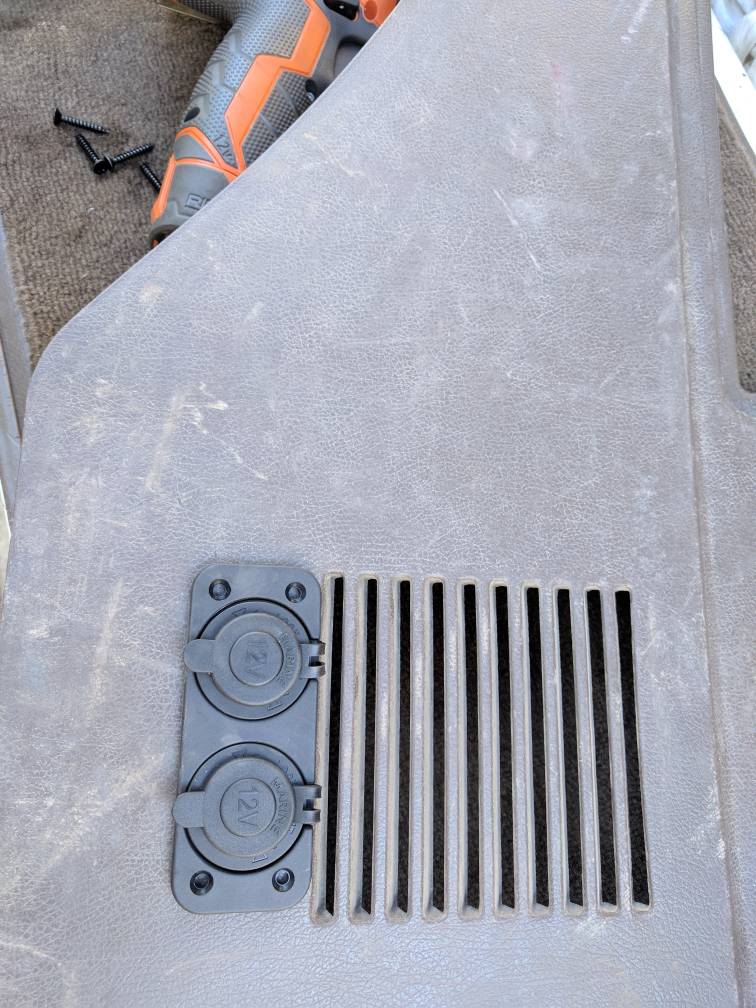
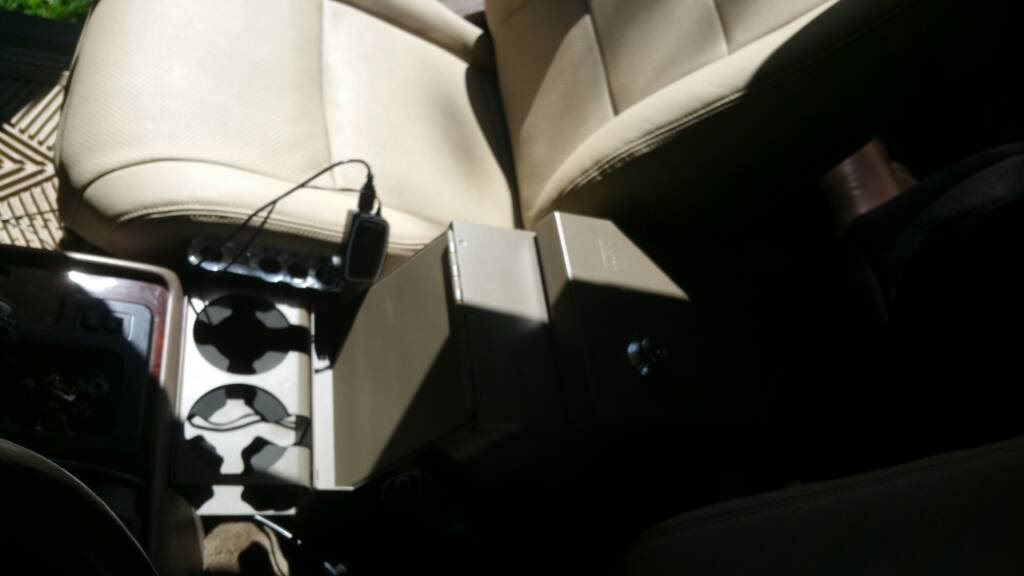
Finished and painted to match the tan interior of the fj80
1a53bbd1e0cb51b11318837811fb943e.jpg


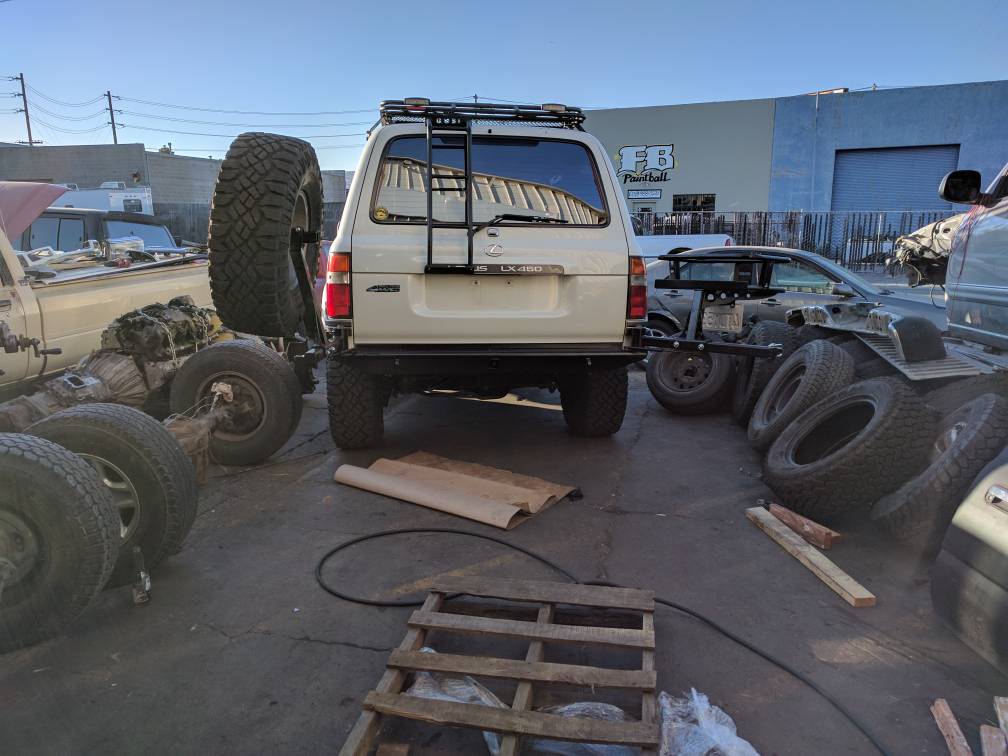
Sent from my SM-N910T using Tapatalk
 
This looks awesome been using an under dash locker for a long time but this article makes me think...
 
next mod.... Wheelskins leather wheel cover. Bought it from amzn and will be here tomorrow.
 
Been too busy lately but I did install the steering wheel wrap. Bought used sliders for 300 and installed them myself. Then installed my used ARB safari snorkel.
d1a91fc731702852bb179894d94ff8bf.jpg
bdcd14707b9cd8ec8488946076f8fd3e.jpg
 
4x4Labs.com Front and Rear Swing out bumpers ordered. ARB bumper will be sold once I get the new bumpers installed.

Next in queue for the LuX450 was the Front and Rear ARB lockers and 4.88 regear. But this may have to wait now because I have an offer from my buddy for a fully built 93 Toy pickup rock crawler. 36 Swapers, dual cases with marlin adapter, twin sticks, Elocker front and Detroit lockers, 5.29 geared, flat bed with roll bar, rebuilt motor, bumpers and sliders. Considering buying it since it's a decent deal and it's already been to Rubicon and back plenty of times. The 4runner and LuX450 have been built for overlanding and can do Rubicon but will sustain body damage I don't want on these clean chaises. Pickup will become the beater and will be played with till I'm bored with it.
 
Last edited:
Been slow on the progress of the LuX450 as I've been devoting time on my 93 Crawler to get ready for Rubicon. I did finally install my badge on the LuX450 and my Gobi Ladder.
411d07a4abfebe69fd0c8097f1e2cb01.jpg
6b0071265102fe5fddc8a61c97c1d2c2.jpg
 
  • Like
Reactions: O.Dfj
Radiator went out on the Cruiser. Luckily I caught it 2 blocks away from home and not in the middle of no where. Otherwise I would have overheated and blew a head gasket and been stranded.

While I was in there, I replaced it with an all metal radiator it was $315 vs the plastic $150. The original plastic one lasted EDIT: 5 years and 22k ** WRONG 20 years (174,000 miles)** and busted at the plastic seams like all plastic radiators. Changing it to the metal one should last a lifetime now. While I was in there I also did the fan clutch, water pump, thermostat and all the heater hoses to silicone. The dreaded pesky heater hose was the worse one. At least I'll never have to do it again because it's now silicone. I also did routine maintenance and replaced the front, center and rear differential fluids with fresh gear oil, changed out the automatic transmission fluid and the power steering fluid. I haven't did jack to this and just drove it since I bought it a year ago. I figured the owner took decent shape of it. That was a bad assumption and it looked like the fluids never been changed or at least haven't been in over 100k or more. Thick black sludge and one of the diffs was foamy! I'm running distilled water in the new radiator right now to circulate through the system. Will flush it completely to remove the green coolant and switch back to factory Toyota Red (long life) coolant which is rated for up to 100k miles. 4 jugs at $15 each aint cheap but it's a hella of a lot cheaper than paying the dealer $25-30 per gallon jug.

Part Numbers:
CSF ALL Metal Radiator 3 Row #2517 $315
HPS Silicone Host Kit HPS-57-14441-BLK + 90 degree gates heater hose to firewall and a 3" straight heater hose to firewall. Pesky Heater Hose (PHH) replaced with the HPS Silicone hose. PHH was as bad as they say it is.
Aisin Water Pump WPT023
Aisin Fan Clutch FCT004
Toyota OEM V-Drive Belts 90913-02353-83
Gates Green Strip AC Belt

16996193_10212934686345988_6198387183006303483_n.jpg 17097458_10212934835869726_7633477503489455759_o.jpg 17156243_10212934686145983_7694458963216326693_n.jpg 17156290_10212934686225985_90851480498803584_n.jpg 17190397_10212934686265986_4578043745077457257_n.jpg
 
Last edited:
  • Like
Reactions: Ol Red
Been lagging on the posts too. Here's a pic of Pismo Oceana Dunes during the Land Cruiser Turf and Surf 2016 Event and overlandbound off the grid 2 @ bald mountain.

IMG_20161112_113340.jpg 14484591_10211246336178289_6052743131904296884_n.jpg
 
I've done a ton of work on it and haven't posted in awhile. Been lazy. Here's some pics of recent stuff I did.

DIY drawer system $200 on parts from HomeDepot . Bolted my ARB fridge slide and ARB elements fridge to it.

$200 DIY beats $1800 ARB drawers.

Sent from my Nexus 6P using Tapatalk
d40ecc427f53efe9e65300b1ccb339e5.jpg
86addfd6c04def72270170522e05f714.jpg
3b0ccfba013bd5a6a447069352911360.jpg
f161f94e67c47266336df278673db187.jpg
82aa2709a5659d13eae5c320c174c7c0.jpg
9ed8b11a70d7940e4eed3fecb8333602.jpg
6f0f1fee5754e3ef4253dbf1727624fc.jpg
399cd97cf654be39f1d629caaddcdf5c.jpg
2257886d61f7e64e737cc94667e1815e.jpg
 
  • Like
Reactions: Boort
Switched out OME 2.5” heavy 863 springs for the OME 863J 3" springs. Helps when loaded down with sag.

Also had the welds break pre cat on the trail. Loud ride home. Welded it up at home and added 2 additional exhaust hangers. Good as new.
f332a68b26ac65211ef3ab270a26a22e.jpg
76e005e99bed64852ffb3412783be6a0.jpg
8832c0feb6fe50b2b7cf028a29e39dc1.jpg
32fa78df55010feb47d66270c06edf93.jpg
e60c4c7a15356701ccd39b1c2a15a476.jpg
c669bf1ad3d0ff8567463e3f60f09127.jpg
b812b950da589ca45d3e86fc3c85b595.jpg
ee5d4fe158d83461d7ce5cfc426ef2ab.jpg


Sent from my Nexus 6P using Tapatalk
 
Let's see... Fab'd my own hilift mounts to go onto the Gobi rack. Also fab mounts for the other side for the shovel. No pics for that (must have forgotten). Fab'd up a inverter and always on 12v sockets to go with my dual battery setup (pics in next post). Welded some 1/4 plate together to make my own ARB warn mounting plates. Yeah I'm too cheap to buy plates I can make for almost nothing.
5f5593ef06b0e1f02959fb0311708da3.jpg
30a7222e0080766a68f2fbe88d27cd9b.jpg
3c9932ef36edee28e56f785c2986b706.jpg
383c70a458476db346e0cb2d1d1137cb.jpg
a8587e426c4134bc88cf8f581bb010b8.jpg
590a50220c69ad27123f7307e11aa96c.jpg
77fad88e8b3ebc92e823a8e79a461cb6.jpg
e02f372e18f1d23db82d17167d2da975.jpg
c6338050dfddd590a0a8196d92b1dbd0.jpg


Sent from my Nexus 6P using Tapatalk
 
Tjmax dual battery kit. Installed. Wiring 2ga wire from front to rear sucked big time. Decent kit. I even bought a 2nd kit for my crawler I'm going to install this weekend.

I also installed a slee rear elocker armor. Next post with pics with my buddies pulling 2 nighters helping me do a factory locked front and rear axle swap from a donor salvaged factory locked cruiser.
1c6abbe76ec9f902f8cd1ea9956de833.jpg
19ee20ccb50c6da12d4f368e50d00c49.jpg
c8531a294be1ca63649ce1714f2d2aee.jpg
eaddaa3ceeae4be8b9bca7b5b91e5a69.jpg
db6342bfed75f6ae56ccac0b62256b74.jpg
918b70027cf8f26c9511fa51fbccabf8.jpg
2a833a4654e1622f1bae4c4144e082c6.jpg
08b8f2705e7741bfbcf764e4089c0412.jpg


Sent from my Nexus 6P using Tapatalk
 
Part 2 of donor factory locked axle swap. The bulbs, wiring and finishing touches. Next post with part 1
781322323399170901f262ccdcc684c3.jpg
89ca62ff6e83eb3e18729da19c21a74d.jpg
bcf4570aa182c2db4984ea48d99f63ad.jpg
16a9395020fd0e5ffe348699fc3b0b8d.jpg
325f795077eb054526391c17eb229600.jpg
8fadbd106fbda18873886d3c1d78822b.jpg
41a88bec314da277e5d7f716a7b29f13.jpg
3134d581dc87810022d38ce151be3179.jpg
8759a1a62c39619e1c39df88e2f082fc.jpg


Sent from my Nexus 6P using Tapatalk
 
  • Like
Reactions: Arailt
Sorry I'm going backwards with pics scrolling down through older pics in the phone.

Part 1 of donor factory locked swap.

Me and my buddies pulled 2 nighters helping me do a factory locerd front and rear axle swap from a donor salvaged factory locked cruiser. It was brutal. We have a story we'll never forget. One buddy also got killed with a swinging axle (complete axle). Scarry stuff.

Last pic shows my 4x4labs bumper installed. That was really interesting cutting it off with a plasma torch. My very first time cutting stuff off with a torch. Not so sure after the first 10 seconds. Then it was like cool I need one at home now. This pic also has my donor axle for part 2.

[emoji3]
bc4809feccdaea62385d4a89585268d8.jpg
8f39b4fe3624a0acc5de0fb782222420.jpg
a8b7fe61df05b00db153c22b5b407bb6.jpg
4200cdf21e6d0b093323a85f62776a27.jpg
20c2b635d9d88fee5810c01bce92e495.jpg


Sent from my Nexus 6P using Tapatalk
 
I pulled some spare Land cruiser drive shafts for Cruise Moab event next weekend. Working under a factory tire non lifted cruiser sucked. It had low miles (130k) miles tho [emoji3].

Bought some spare used birfs and front inners axle shafts and rear axle shafts. Should be here next week.

I even degreased the drive shafts and wrapped them up. Keeps the carpet clean inside the rig.

I know this isn't the spot for pics of my 93 since it's for my cruiser build thread. But here's a peak at what we fab'd late last night. Rear tire carrier with a chopped axle shaft on my upper cage.
e125fe1a145b59b464a0423275709edc.jpg
867d18340474a32fe2b6cce0e16595f0.jpg
c61c0652f3385f01fcf2fe972dd7289f.jpg
695e123910f5c1ad68982a3706dfd476.jpg
c31b3e7f15f0d17d20c5f4eff0e555ec.jpg
fb7a7c7e2f4aeeb742dc320066b25fb2.jpg
4657baeef7c2713700df0a933629de05.jpg
3ed0db55d54c0ea54ad18d297a106e80.jpg
272d9fc22ec3955b43b1c8ab92e625a4.jpg
95712d781529513d7bf7cfb86d5dbea3.jpg


Sent from my Nexus 6P using Tapatalk
 
Been too busy lately but I did install the steering wheel wrap. Bought used sliders for 300 and installed them myself. Then installed my used ARB safari snorkel.
d1a91fc731702852bb179894d94ff8bf.jpg
bdcd14707b9cd8ec8488946076f8fd3e.jpg

How is that the Autozone antenna working for you? My antenna on my LC is busted and was thinking of going with one of those universal ones from Autozone too but I have to get my CFO (wife) approval
 
next mod.... Wheelskins leather wheel cover. Bought it from amzn and will be here tomorrow.
@Spyduh

I'd love to know how the steering wheel cover goes in. I've been thinking about recovering my Tacoma's wheel as it is getting sticky in places and cleaning it only makes it worse.

Boort