hello all
new to the sit
so let start with the build
1995 land rover discovery 1 NAS v8 auto was the start of my build first of the 5 door d1
this was in 06 when I got the bug to build her
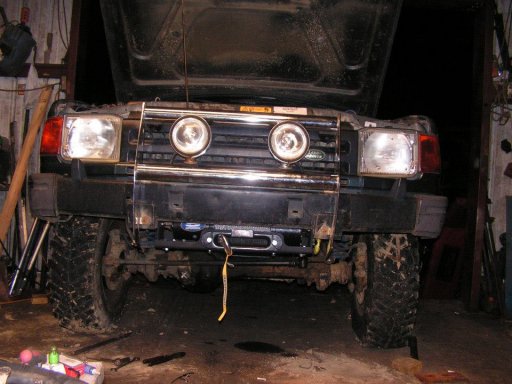
so first off on the list of things to get tiers 265/75/16 MT! well that was when it all started.. need a lift kit next then it all snow balled from there so 2 inch big blue 185lbs up front 125lbs in the rear then I when looking for a snorkel and did not like the prices on some the kits and most of the time stuff for the d1 is hard to find as the d1 is an older rig.
so I started custom building all the parts for build
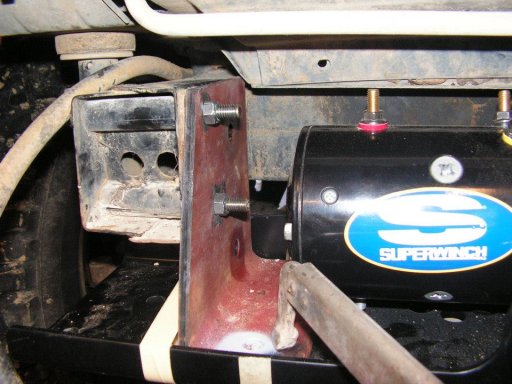
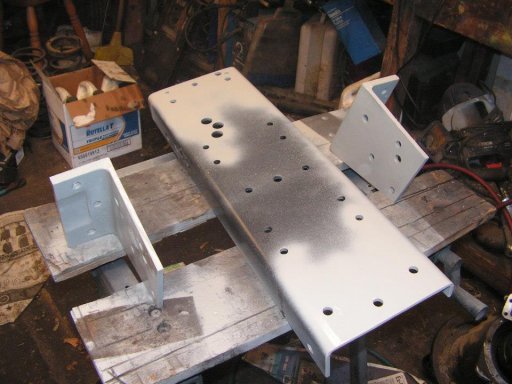
custom snorkel and wadding kit light bar
next its time to go for a rid with the jeep club so the year is now 09 and I am out there playing for the first time all is well and have not worked the disco to hard up till the hill clime not knowing the history on my rig before I owned her was I bit of a nag in my mind well as it turns out she did not like the new life and the auto box gave out on the clime up the hill from hell so them the real mods started the auto box is grate but I needed something a bit more driver and lest auto so I did a bit of digging and found a 5 speed and all the new bits to swop it over so now she is a r380 v8 doing 10 mpg that in the time of $4.00 a gl yes that not to good lets just say not much was don in the was of getting out and over landing for the next 4 years so I'll skip the boring bits of sitting at home trying to go out and thinking dam 26gls and I get 260 miles
something has to give here the wife is always mad at me for not going out with the d1 then it hit me
time for a complete rebuild of my rig and that means a 300 tdi with a r380 yes I you read that right 300 turbo Diesel 2.5l
so in may of 2014 I did the most complete rebuild on the disco after ordering a engine and drive line from the uk and shipping it I have the next 3 month and pulled out the v8 and r380 that I put in rewire the engine bay and get all the new box and drive line in and fit the engine and get her to run right
July 18th 2014 the build sheet is now looks like this
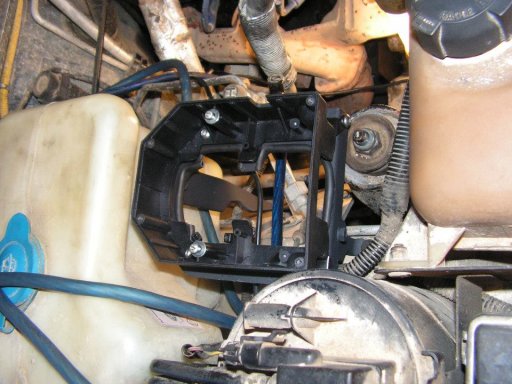
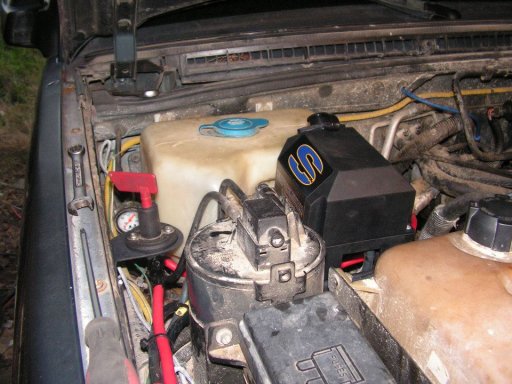
2 inch lift, deep water wadding kit snorkel, custom hidden winch in the bumper light bar, 300 tdi ,upgraded intercooler, bigger rad, with a hot climate grill (Saudi grill), r380 5 speed, lt230 t-case new tires 245/75/16 MT and more gauges then I know where to put them get the truck out of my shop and back on the road 500 miles out of the build and there is 35mpg I have not had to see a gas station yet dam this is just grate
it been 5000 from the build and its now time to get back out there and do some of the things I have been planning with the wife and daughter
2015 2nd of April and the trekking starts
new tent and camping gear and all the things that are needed for a good camping trip next up we are loaded and the rig is set and the 30a sand rover rally is up for the 11th and that's in Grayton beach Florida ok let go there was not much planning in this is just about 1 week from the event and its mad 333 miles there so now we know where we going and we are gone its a grate weekend out there round trip was 667 and 24gl of Diesel we get back from this trip and rigs back in the shop for a quick driver shaft rebuild one of the u joints broke so I get all that new parts and then I get asked to come out to the scarr for the weekend hold up scarr texas rovers in tx and when 17th of April ummm ok 387 miles there ya I am lets go so the wife and daughter have to stay home on this one because she has testing for school so I have to do this one solo truck is load back up with spares and camping gear and off I go heading out to meat up with a friend in baton rouge for the drive to tx
so here we are 7th of July 2015 and its been one hell of a change in pace and have the ability to jump in the disco and go has changed the way I think now I can run for 700 miles befor I need to stop for fuel now that I can get out and not have to think about the cost of gas it more about the trip and the trek and the friends that make it just that much more then camping
there is more to this build but its like 5 am now

new to the sit
so let start with the build
1995 land rover discovery 1 NAS v8 auto was the start of my build first of the 5 door d1
this was in 06 when I got the bug to build her
so first off on the list of things to get tiers 265/75/16 MT! well that was when it all started.. need a lift kit next then it all snow balled from there so 2 inch big blue 185lbs up front 125lbs in the rear then I when looking for a snorkel and did not like the prices on some the kits and most of the time stuff for the d1 is hard to find as the d1 is an older rig.
so I started custom building all the parts for build
custom snorkel and wadding kit light bar
next its time to go for a rid with the jeep club so the year is now 09 and I am out there playing for the first time all is well and have not worked the disco to hard up till the hill clime not knowing the history on my rig before I owned her was I bit of a nag in my mind well as it turns out she did not like the new life and the auto box gave out on the clime up the hill from hell so them the real mods started the auto box is grate but I needed something a bit more driver and lest auto so I did a bit of digging and found a 5 speed and all the new bits to swop it over so now she is a r380 v8 doing 10 mpg that in the time of $4.00 a gl yes that not to good lets just say not much was don in the was of getting out and over landing for the next 4 years so I'll skip the boring bits of sitting at home trying to go out and thinking dam 26gls and I get 260 miles
something has to give here the wife is always mad at me for not going out with the d1 then it hit me
time for a complete rebuild of my rig and that means a 300 tdi with a r380 yes I you read that right 300 turbo Diesel 2.5l
so in may of 2014 I did the most complete rebuild on the disco after ordering a engine and drive line from the uk and shipping it I have the next 3 month and pulled out the v8 and r380 that I put in rewire the engine bay and get all the new box and drive line in and fit the engine and get her to run right
July 18th 2014 the build sheet is now looks like this
2 inch lift, deep water wadding kit snorkel, custom hidden winch in the bumper light bar, 300 tdi ,upgraded intercooler, bigger rad, with a hot climate grill (Saudi grill), r380 5 speed, lt230 t-case new tires 245/75/16 MT and more gauges then I know where to put them get the truck out of my shop and back on the road 500 miles out of the build and there is 35mpg I have not had to see a gas station yet dam this is just grate
it been 5000 from the build and its now time to get back out there and do some of the things I have been planning with the wife and daughter
2015 2nd of April and the trekking starts
new tent and camping gear and all the things that are needed for a good camping trip next up we are loaded and the rig is set and the 30a sand rover rally is up for the 11th and that's in Grayton beach Florida ok let go there was not much planning in this is just about 1 week from the event and its mad 333 miles there so now we know where we going and we are gone its a grate weekend out there round trip was 667 and 24gl of Diesel we get back from this trip and rigs back in the shop for a quick driver shaft rebuild one of the u joints broke so I get all that new parts and then I get asked to come out to the scarr for the weekend hold up scarr texas rovers in tx and when 17th of April ummm ok 387 miles there ya I am lets go so the wife and daughter have to stay home on this one because she has testing for school so I have to do this one solo truck is load back up with spares and camping gear and off I go heading out to meat up with a friend in baton rouge for the drive to tx
so here we are 7th of July 2015 and its been one hell of a change in pace and have the ability to jump in the disco and go has changed the way I think now I can run for 700 miles befor I need to stop for fuel now that I can get out and not have to think about the cost of gas it more about the trip and the trek and the friends that make it just that much more then camping
there is more to this build but its like 5 am now