Jeep XJ 2000 Build (Navajo)

  • HTML tutorial

RKTJeep

Rank IV
Launch Member

Advocate III

1,346
Harford County, MD
Member #

6848

Hey all,


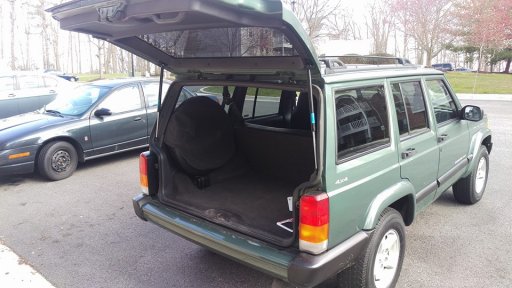
New here and I just paid off my 2000 Jeep XJ Sport I bought last March. I first bought it as a vehicle to cruise around town/county to keep the miles off my commuter car and my Wrangler I use to off-road in. Next Summer the Fiancee and I will be traveling across USA and we were originally going to take her CRV until she brought up the idea to take the XJ. Although it's not in the worst of shape, it needs a few upgrades to make it long distance road worthy.

First off some quick Specs:

-It's a 2000, so about 17yrs old right now
-COMPLETELY Stock.
-I'm the second owner
-Bought it with 84K miles on it, It currently has 89K
-Has the 4.0L and 8.25 rear
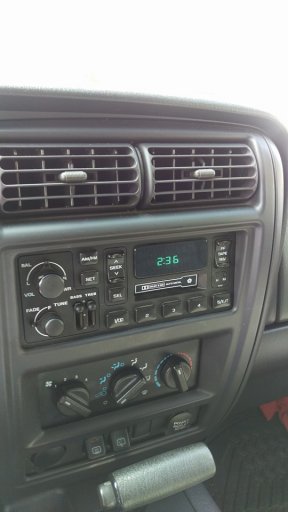
-Cassette Player still works, and all interior is in working order
-Heater Core replaced right before I bought it, one of the reasons I pulled the trigger


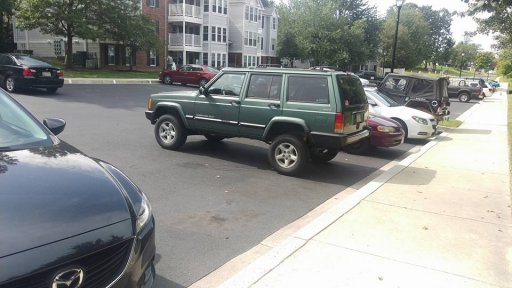
Pictures of it when I first bought it:
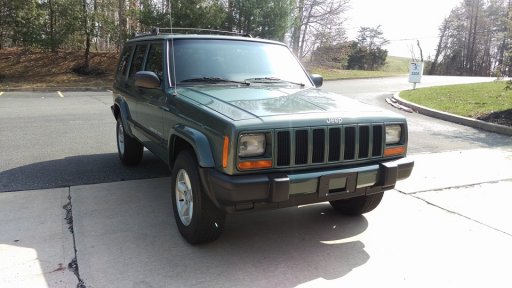
10367799_739759302602_3780019205595716204_n.jpg

1175713_739760495212_1190391280293844215_n.jpg

So far all the the things I did and got done to it are:

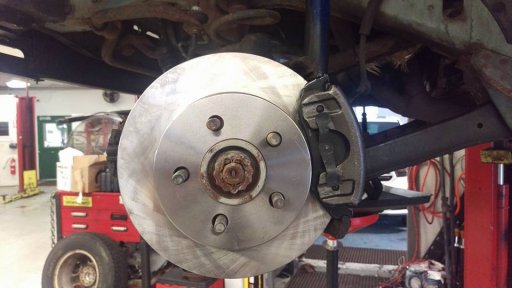
-All new brakes all around, both disc brakes and drums are ALL NEW
-Rear main seal
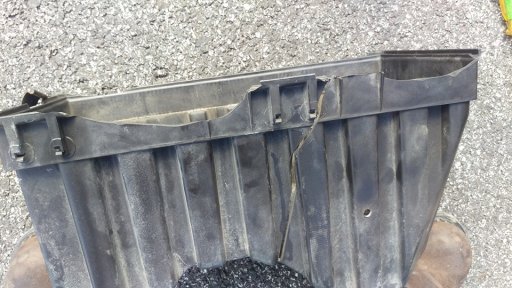
-New air box (Thanks eBay!)
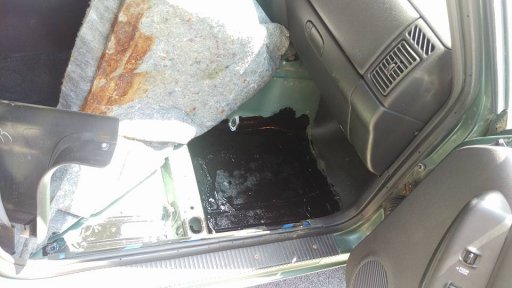
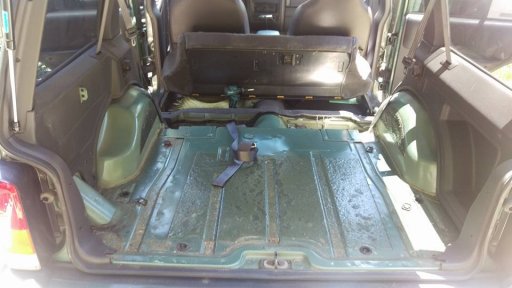
-Cleaned up some surface rust on the front driver/passenger floor boards. Checked for any other rust
-Fixed the struts for the rear tailgate
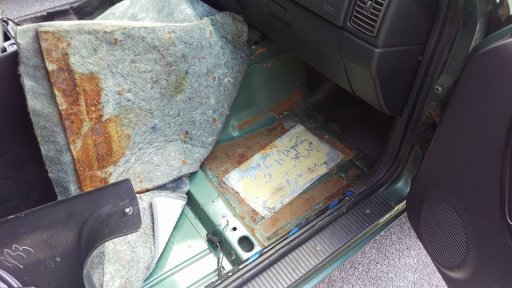
19059249_806679833322_2933565502829876652_n.jpg
19105767_806678505982_7081290585459515482_n.jpg
19060134_806681355272_3665589099629386788_n.jpg
1000868_741221227892_6130648201259474985_n.jpg
11228031_741226133062_8769896243010910490_n.jpg
18740126_803864839592_2738795160980211337_n.jpg


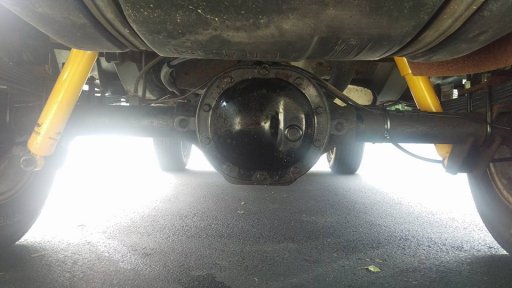
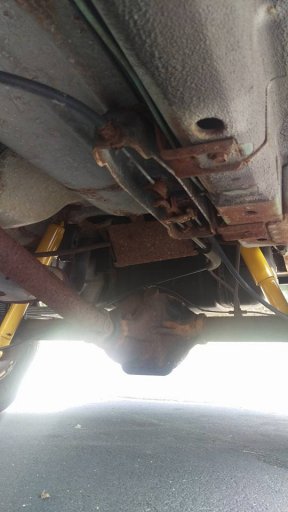
Next thing I need to get done with no questions asked is the underside needs TLC. The place I bought this XJ from told me the previous owner garaged kept it most of it's life. It has some surface rust on the underside but it's not that bad. They used it as a grocery getter and in the snow storms here in Maryland....which we are a part of the salt belt so this is no surprise of the rust. The suspension also needs to get replaced, It's the original suspension. All my shocks are blown! I'm thinking of a 2" OME lift for it. I was looking at Metal Cloaks 3.5" lift, but you need to get a SYE to go with it, and probably new drive shafts....etc. Seeing how this will not see HEAVY off-roading I feel comfortable with the 2" OME lift. Also thinking of getting 30" BF Goodrich All-Terrains on it.
 

Greg Galbo

Rank V
Launch Member

Enthusiast III

1,798
York, PA, USA
First Name
Gregory
Last Name
Galbo
Member #

2758

Looks super clean brother! Im excited to watch the build grow! My 97 XJ is almost that clean..... almost.. lol after about 178,000 miles!
 

RKTJeep

Rank IV
Launch Member

Advocate III

1,346
Harford County, MD
Member #

6848

Thanks Greg!

So here is an update. I was going to get the headliner fixed on the XJ before the weather gets cooler until I drove the XJ to my part time job the other day. It was making an odd sound when the XJ was in motion, almost like a stream engine train. The sound was coming from under the XJ, not in the motor compartment. I was thinking it might have been the bearings and as I kept driving, the XJ started to slam down on the axles. My shocks were a bit blown which I knew, so I guessed that the springs gave up that day and I had little to no suspension. I ended up limping it to the shop near me and told them what happened. A few hours later I talked to them on the phone. Apparently the shocks were blown and done. The springs had little "Spring" in them. I bent 2 control arms, a control arm mount on the axle ripped off, the transmission mount rusted thru/broke. They think the bearings are OK, but I wouldn't be surprised if they are worn out as well. NOT HOW I WANTED TO START MY WEEKEND! Although this sounds like a lot, I knew it was going to happen eventually, just was hoping not this soon. It does have the original suspension and bushings. I told them I was too busy this month and next month working my 3 jobs to wrench on her and told them to get it done. I know this community and others we like to do things ourselves, but at this time I just can't do it, I literally work everyday from now till November (Planning a wedding is FUN....).

So Good News/Bad News. Good news is It's getting it's OME 2.5" lift a little earlier then expected, and new whatever parts broke. Bad news is I didn't have enough money to get new tires to go with it so it's going to look a little funny for a little while....I'll post pictures as I get them hopefully next week or the following week.
 
  • Like
Reactions: Greg Galbo

RKTJeep

Rank IV
Launch Member

Advocate III

1,346
Harford County, MD
Member #

6848

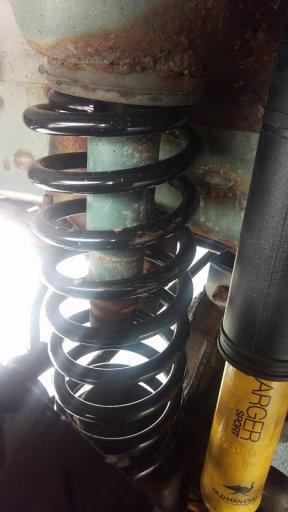
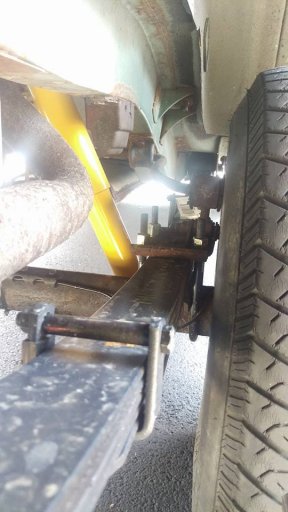
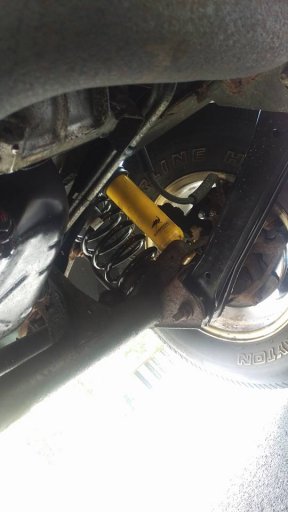
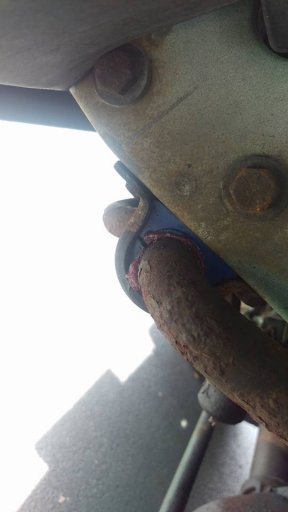
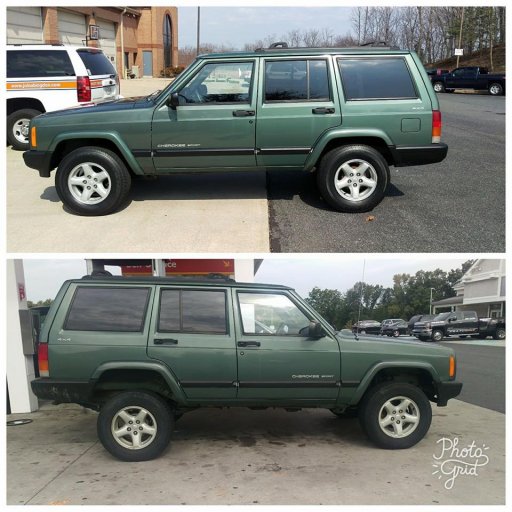
Alright well I got the Jeep back from the shop yesterday. They didn't get me too bad on the parts/labor but it is what it is and I just didn't have the time. So below are pictures of the Old Man Emu 2.5" Lift. I still have the stock tires on it, I believe they are 28" tires. It has a noticeable rake in it, I need to weigh her down a bit in the back to break it in. I also got new stock control arms, transmission mount, sway bar bushings...etc. This XJ rides incredible, like it's a new vehicle. I did about 70-75mph in it, and it had a slight vibration. I looked into it and I just need to break in the suspension a bit more and it will hopefully go away. Anyway, enjoy the pictures:


21728156_822942393022_3961038663743509910_n.jpg

21728214_822942452902_1434233050221276061_n.jpg

21730959_822942547712_4870841493389339923_n.jpg

21731230_822942358092_2169951685218589784_n.jpg

21740380_822942502802_1967487967917426011_n.jpg

21731283_822942522762_3569492278772494628_n.jpg

21761376_822970666362_7342326967164271144_n.jpg

21730895_822942338132_5282292602789520056_n.jpg


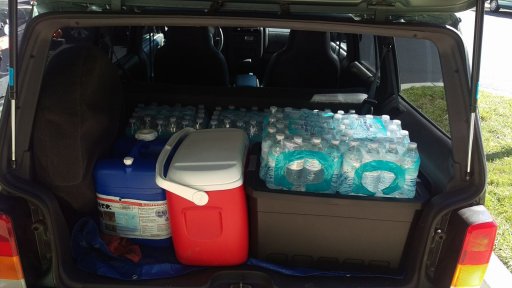
Hopefully on Friday I can start getting that rust taken care of. Seems like every time I have off from work it rains, so hopefully Friday brings good weather! Also going to take some parts off, knock the rust/repaint them as the weeks go by like the sway bars and other easy bolt on/off parts. Luckily my firehouse has a small shop in it so I can do a lot of the little stuff there. Thinking of going to 30" tires on this, keeping the stock rims. When I start adding things to it like a roof rack and full size spare tire it should start bringing the back end down. For now I just the trunk loaded with cases of bottled water to help break it in.
 
  • Like
Reactions: Jimmy P

RKTJeep

Rank IV
Launch Member

Advocate III

1,346
Harford County, MD
Member #

6848

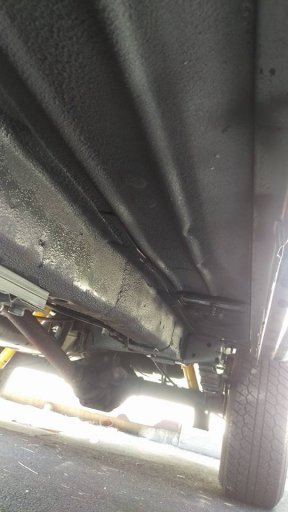
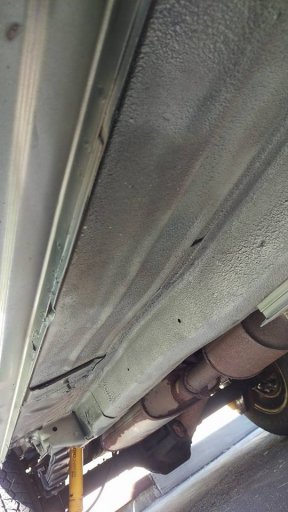
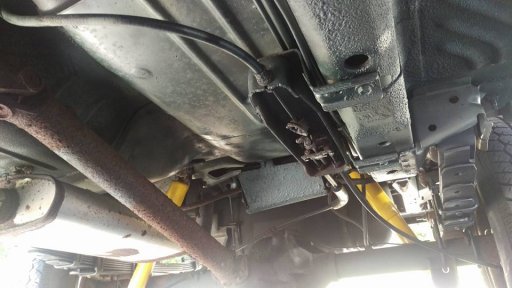
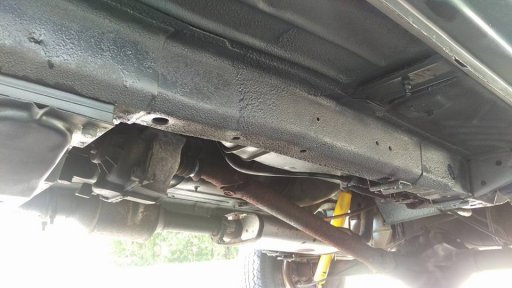
Also I forgot to add. I cleaned up all the surface rust (well, the rust on the underside of the body). Took all morning/some afternoon. Paint is still drying, but it looks 100x's better under there. So much grinding.... :|

21728426_823332665912_8334791267711461974_n.jpg
21730889_823332700842_8338059243186286567_n.jpg
21731332_823332625992_4490780133092387873_n.jpg

21751538_823332606032_4709743277378276644_n.jpg


Like anything else, the pictures don't do it justice. Lighting is a bit wonky, but you get the idea...
 

IdahoGrizz

Rank IV
Launch Member

Enthusiast III

1,041
Buhl, ID
Member #

7335

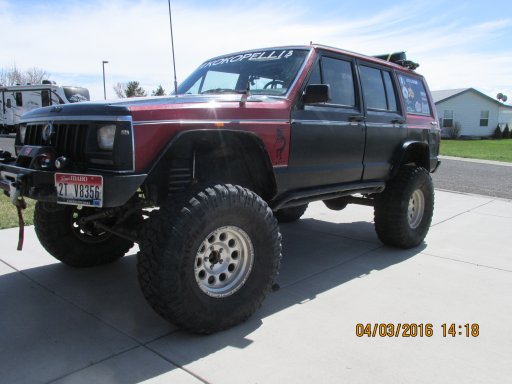
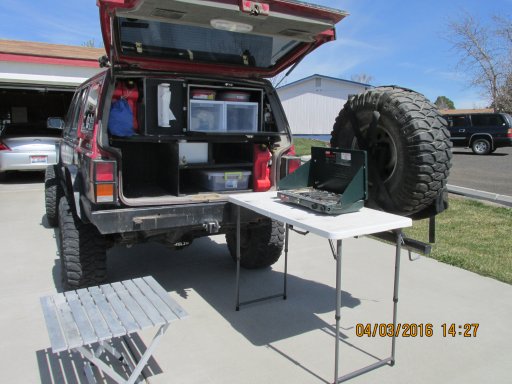
IMG_1090.JPG IMG_1096.JPG One of my favorite rigs (sold it about a year ago) was an '89 Cherokee. Very capable rig and was set up nicely for overlanding/camping. Just a few of the mods: ARB locker front and rear, 35" tires, curry steering components, 5.5" long arm lift, Ford 8.8 rear axle, 4.88 gearing, well the list goes on. But the best mod for the money was a RCV front axle for the Dana HP 30 (guaranteed for up to 35" tires) This mod ended my problems of breaking axles.

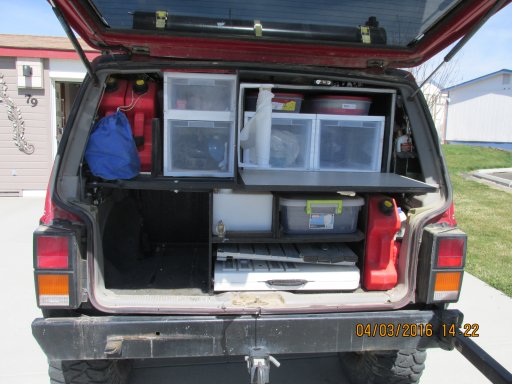
I'm going to try and post a pic of my rear galley set up. The open space is for a cooler. It has a 5 gallon built in fresh water tank. Space for a folding 2X4 table, propane stove, food storage, etc. Worked very well. The black ABS tube you see on top the rig in the rear in the top frontal photo is a built in shower I devised.

I realize this is way more than you intend for your Cherokee, but still, there may be some ideas that will help or inspire to some degree. (BTW, I named this rig Kokopelli)
 
Last edited:

RKTJeep

Rank IV
Launch Member

Advocate III

1,346
Harford County, MD
Member #

6848

I would like to see how you did the rear storage area. I'm on the fence on building shelving in it. On one hand it comes in handy to organize and fit everything nicely in the back, but at the same time it takes away from the trunk area of the vehicle. That looks like a great rig you had, like you said a bit more then I need. I off road my Wrangler a lot, that's my main off road toy, this will be more for mild offroading/camping. The axles I don't know if I'll keep them open or lock them, I have lockers in my wrangler and love them but I think it would just be wasted money on the XJ, I could just get a winch. I'll be adding a roof rack on it eventually, so I can put stuff on top of it and make room for other things. Part of the reason I got it is for driving longer distances and can hold a lot more then the Wrangler can..also a bit more comfortable ride. I drove the Wrangler from Maryland to Myrtle Beach and back last august and although I didn't mind it, I would just rather have AC and better MPG's lol.
 

Overland-Indiana

Overland Bound - Midwest Regional Ambassador
Launch Member

Influencer II

3,316
Kokomo
Member #

0750

Just a word of advice...I had some vibrations after my lift. I replaced the U-joints, which needed it anyways and it helped a lot. Plus, the vibrations will wear out U joints really fast anyways. Judging by the look of your rear driveshaft U joints i'd say they're probably OEM and should be replaced anyways. lol Best of luck man, my XJ build has been going on for over a year now and at nearly $10k invested I still have a ton of plans for it haha
 

RKTJeep

Rank IV
Launch Member

Advocate III

1,346
Harford County, MD
Member #

6848

Just a word of advice...I had some vibrations after my lift. I replaced the U-joints, which needed it anyways and it helped a lot. Plus, the vibrations will wear out U joints really fast anyways. Judging by the look of your rear driveshaft U joints i'd say they're probably OEM and should be replaced anyways. lol Best of luck man, my XJ build has been going on for over a year now and at nearly $10k invested I still have a ton of plans for it haha
Your'e probably right. I checked the driveshafts and when I tried to move them they didn't budge, but I might as well put new ones in, can't hurt...What are some good brands for this these days...? Moog?
 

Overland-Indiana

Overland Bound - Midwest Regional Ambassador
Launch Member

Influencer II

3,316
Kokomo
Member #

0750

Your'e probably right. I checked the driveshafts and when I tried to move them they didn't budge, but I might as well put new ones in, can't hurt...What are some good brands for this these days...? Moog?
I run MOOG... A lot of guys swear by Spicer tho. I abuse my XJ pretty good, but I also maintain the hell out of it. I have replaced rear and front drive shaft u-joints twice in the past almost 2 years. But, I am also very rough on it.
 
  • Like
Reactions: Nate 5303

bambamthexj

Rank 0

Traveler I

View attachment 34628 View attachment 34627 One of my favorite rigs (sold it about a year ago) was an '89 Cherokee. Very capable rig and was set up nicely for overlanding/camping. Just a few of the mods: ARB locker front and rear, 35" tires, curry steering components, 5.5" long arm lift, Ford 8.8 rear axle, 4.88 gearing, well the list goes on. But the best mod for the money was a RCV front axle for the Dana HP 30 (guaranteed for up to 35" tires) This mod ended my problems of breaking axles.

I'm going to try and post a pic of my rear galley set up. The open space is for a cooler. It has a 5 gallon built in fresh water tank. Space for a folding 2X4 table, propane stove, food storage, etc. Worked very well. The black ABS tube you see on top the rig in the rear in the top frontal photo is a built in shower I devised.

I realize this is way more than you intend for your Cherokee, but still, there may be some ideas that will help or inspire to some degree. (BTW, I named this rig Kokopelli)
I thought Id chime in quick too, Id love to see/get some more detail on the rear storage area on that 89. Ive been trying to design something but that looks worlds better than anything Ive put together so far
 

IdahoGrizz

Rank IV
Launch Member

Enthusiast III

1,041
Buhl, ID
Member #

7335

IMG_1095.JPG
I thought Id chime in quick too, Id love to see/get some more detail on the rear storage area on that 89. Ive been trying to design something but that looks worlds better than anything Ive put together so far
I'll post that rear view photo or one that may be better again so you can follow along. Starting at the top left, two 3 gal rotopax tanks, the door with the paper towel roll swings out (shown open in this photo) and I have some pull-out plastic drawers with some food items, next to that is a drop down door with a Formica top and in those plastic pull-out drawers are cooking pans and related items. Above that space is a couple of air tight containers for paper plates and eating utensils. To the very far right is a little space large enough for little propane tanks for the stove.
On the bottom row beginning far left is space for the ice cooler that I used. (a word about that: I used plexiglass dividers for the ice and food items. I kept a solid block in two spaces and those plastic freezer packs in the other one. I would cover the whole works with a layer of chipped ice. I could keep ice for at least 5 days with good management) The white rectangle next to the cooler is a 5 gal plastic fresh water container with a spigot. Next, on the upper shelf is space for the Coleman stove. The space below houses the table (2'X4' folding/telescoping legs and folded in half in the middle) and the metal table you see in the photo stored on top of the folding white table. Then there was just enough space on the far right bottom for another 3 gal rotopax tank (removed when cooking). I added a LED light on the hatchback so when open gave light for the whole cooking process. In the blue bag hanging from the rotopax gas containers are some small wooded blocks for leveling the tables.
 

bambamthexj

Rank 0

Traveler I

View attachment 34861
I'll post that rear view photo or one that may be better again so you can follow along. Starting at the top left, two 3 gal rotopax tanks, the door with the paper towel roll swings out (shown open in this photo) and I have some pull-out plastic drawers with some food items, next to that is a drop down door with a Formica top and in those plastic pull-out drawers are cooking pans and related items. Above that space is a couple of air tight containers for paper plates and eating utensils. To the very far right is a little space large enough for little propane tanks for the stove.
On the bottom row beginning far left is space for the ice cooler that I used. (a word about that: I used plexiglass dividers for the ice and food items. I kept a solid block in two spaces and those plastic freezer packs in the other one. I would cover the whole works with a layer of chipped ice. I could keep ice for at least 5 days with good management) The white rectangle next to the cooler is a 5 gal plastic fresh water container with a spigot. Next, on the upper shelf is space for the Coleman stove. The space below houses the table (2'X4' folding/telescoping legs and folded in half in the middle) and the metal table you see in the photo stored on top of the folding white table. Then there was just enough space on the far right bottom for another 3 gal rotopax tank (removed when cooking). I added a LED light on the hatchback so when open gave light for the whole cooking process. In the blue bag hanging from the rotopax gas containers are some small wooded blocks for leveling the tables.
This is just brilliant to me, I was having trouble figuring out how to utilize every inch back there but this gives me a great foundation to build off of. Thanks so much! Whenever I get around to setting mine up maybe Ill throw some pictures up for comparison

One other question tho, behind this setup inside the cabin do you have some sort of a barrier to keep stuff from falling out the backside under heavy breaking or steep areas?
 

IdahoGrizz

Rank IV
Launch Member

Enthusiast III

1,041
Buhl, ID
Member #

7335

This is just brilliant to me, I was having trouble figuring out how to utilize every inch back there but this gives me a great foundation to build off of. Thanks so much! Whenever I get around to setting mine up maybe Ill throw some pictures up for comparison

One other question tho, behind this setup inside the cabin do you have some sort of a barrier to keep stuff from falling out the backside under heavy breaking or steep areas?
Yes I do. I made a grid from metal shelving parts and fastened at ceiling and floor. This also served as a place to Velcro lash a small shovel and garden rake. The rear seat area in mine was rarely used for seating so I organized containers to hold camping gear (tent, sleeping bags, air mattresses, etc) and some tools, tire care items, etc. Worked very well and I could be ready to go in a jiffy when traveling with a group. I converted my A/C unit to an on-board air compressor. That worked very well too. Often times I traveled without front doors entirely or I had half doors made. I could switch from no doors, half doors or full doors, depending on weather conditions and my mood.
 

bambamthexj

Rank 0

Traveler I

Yes I do. I made a grid from metal shelving parts and fastened at ceiling and floor. This also served as a place to Velcro lash a small shovel and garden rake. The rear seat area in mine was rarely used for seating so I organized containers to hold camping gear (tent, sleeping bags, air mattresses, etc) and some tools, tire care items, etc. Worked very well and I could be ready to go in a jiffy when traveling with a group. I converted my A/C unit to an on-board air compressor. That worked very well too. Often times I traveled without front doors entirely or I had half doors made. I could switch from no doors, half doors or full doors, depending on weather conditions and my mood.
Youre just listing my dreams now, this is my first build and Im learning as I go. Also my XJ is my daily (broke college student) so Im limited in resources. Still I might need to pick youre brain on some of the things youve run in the future
 
  • Like
Reactions: IdahoGrizz

IdahoGrizz

Rank IV
Launch Member

Enthusiast III

1,041
Buhl, ID
Member #

7335

Youre just listing my dreams now, this is my first build and Im learning as I go. Also my XJ is my daily (broke college student) so Im limited in resources. Still I might need to pick youre brain on some of the things youve run in the future
Any time.