


So, i have been meaning to do a short write up of my lights and wiring setup for some of the subaru folks who follow me here or on instagram and have asked questions about it. Anywho, the best hp gains are obviously made with lights. Lol.
So as of now, i have (as shown above), a 32" ebay bar mounted to my reese basket. Walmart special, but hey it's held up better than i anticipated. I have the brush lights on the mirrors and two pods on the side under the smittybilt awning.

For these side pods, i went over to walmart and grabbed 6 steel, straight brackets that already were predrilled with holes.

I cut four down just a bit to fit snug and bolted them to the basket on the bottom, and then...

Bent the remaining two into an 's' shape so that it would clear and sit under the awning. I wanted them below the awning so that when we are setup at night, camping, we have some extra lighting. Once mounted i ran some wire, i believe 10 or 12 gauge, to the rear hatch of the forester.

I ran the wire through the hatch, which i'll show next. I found some plastic ziptie mounts with adhesive on the back, stuck those to the side of the rail, and then covered my wire and ziptied it all nice and tidy.

Here is where i entered the inside of the vehicle. I ran along the top edge of the headliner..

And then brought it to the floor at the passenger rear pillar. All hidden within the plastic for a clean factory look.

From there, i ran the wire to the front passenger side, across to the driver side and out the firewall to the relay switch. I mounted four switches to the outer, front ceiling trim that holds sunglasses, etc.
The far driver switch is a bigger style switch that powers my bar. Then, in order i have one to run future pods i will be mounting to the left side basket, the next runs the existing right side basket pods, the next is ready for future pod on the rear of the basket. Those most likely won't go on until after i fab a new basket. I am working on consolidating our camp gear to see how many plano totes i will end up needing. Mind you, we camp with our two boys (1 year old and 4 year old). So we take a lot of crap, to say the least. So that's first, then i will build a rack to suit our needs. End tangent.
The pods mounted to the mirrors.. i took some steel plate and welded up some small brackets that i mounted directly to the side mirrors. Sorry, i don't have many pics yet. I had to take the door panel off, remove the mirror, dissasemble the mirror, and bolt the mount. Then, soldered the wire and drilled a hole just barely big enough under the mount to run my wire from the pod into the mirror. Once reassembling the mirror, i reinstalled the mirror to the door and ran my wire through the factory rubber tubing that everything else runs through, again to keep a factory look. This was kind of a pain in the butt to do, but worth it. Once into the cab, the rest was wired to a seperate relay switch and i have the switch in the car where the factory aux input is. On 06-08 forsters, there is a trim piece that clicks open and close over the aux port, so the switch can be covered if i ever need to leave it in a sketchy parking lot overnight.
I hope this helps for those who are in the subaru game and can't decide whether or not to try and mount bars or pods. Some run through the hatch like me, others run down the side of the windshield, it's all personal preference. I did not want to drill any holes in the roof, ao this was my next best idea.


I even use the lights at home to mow the lawn at night when it's cool. Lol

Without front led lights
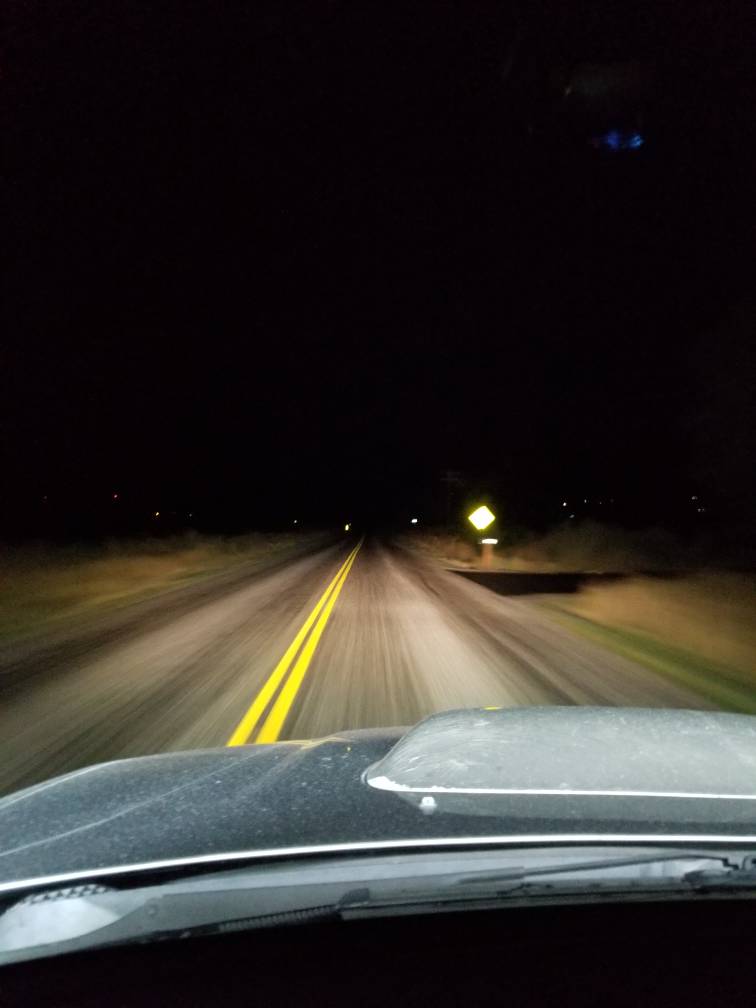
With bar and pods on. They're no rigids, but they work for my budget.


My next thread will probably be about my kitchen setup. I have redesign a kitchen, built from aluminum, and fitted for the Subaru market. They will in fact fit in most other rigs so stay tuned for that. It's a new business launching soon!
Thanks for reading, leave your questions and comments below and i will respond as i can, thanks all!
Instagram: @tyleromyah
Fb: Tyler Haymore
Sent from my SM-G950U using OB Talk mobile app


