Influencer II
- 3,913
- First Name
- Brandon
- Last Name
- Eberhardt
- Member #
-
20143
- Ham/GMRS Callsign
- KE0JBH
- Service Branch
- Air Force 02-18
So at the time of starting this, I'm done with the initial build, just waiting on Raptor lining. So most of this will be in a single post, but thought I'd share and pass on some of the things I've learned along the way.
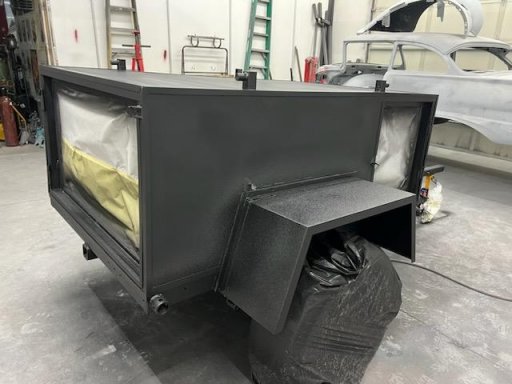
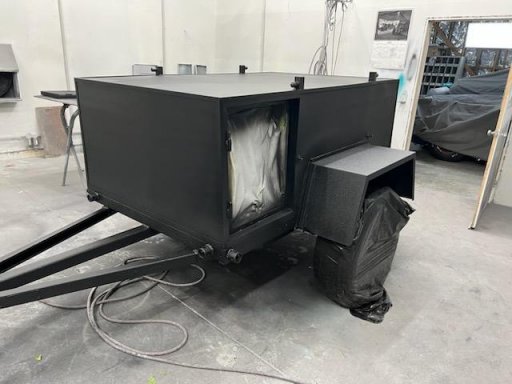
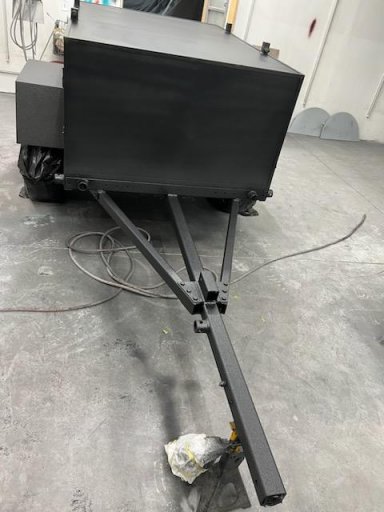
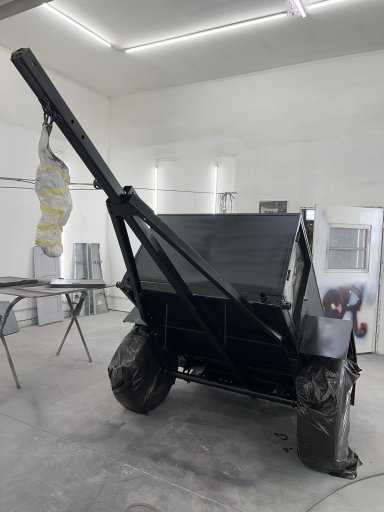
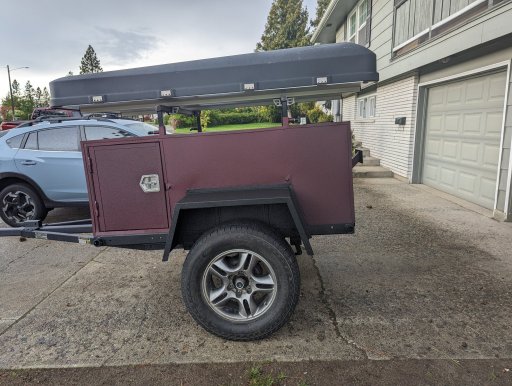
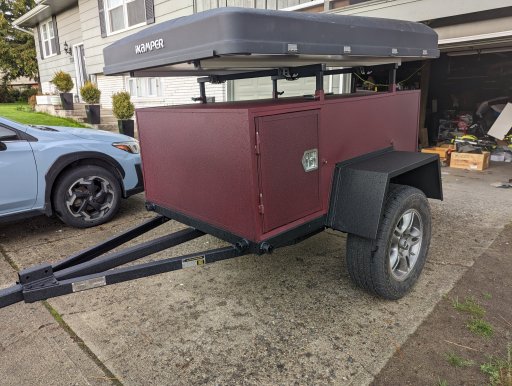
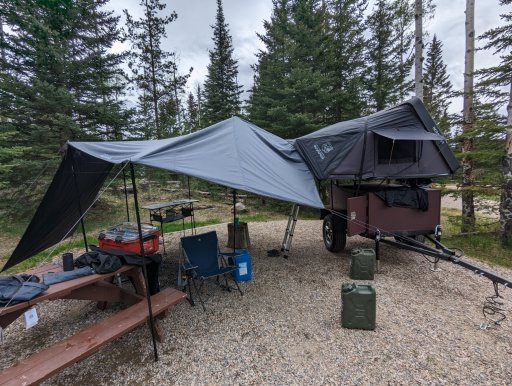
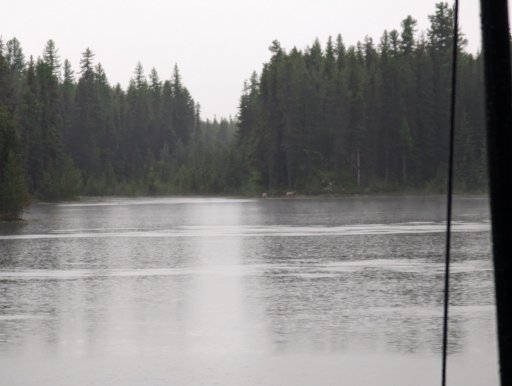
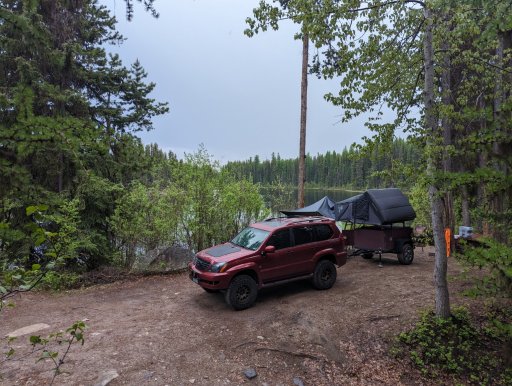
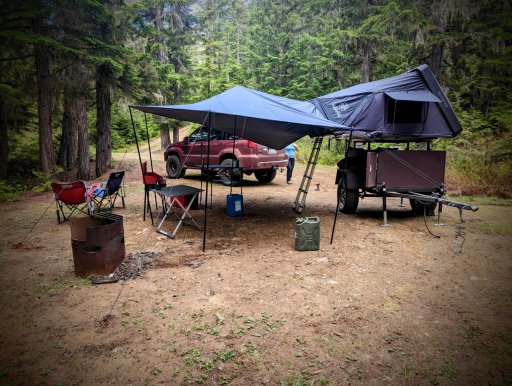
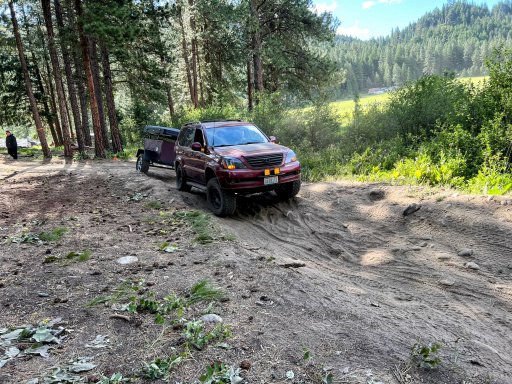
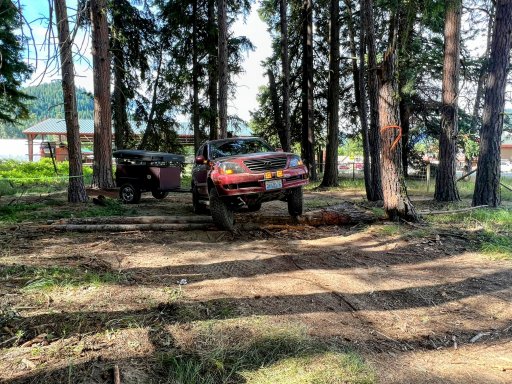
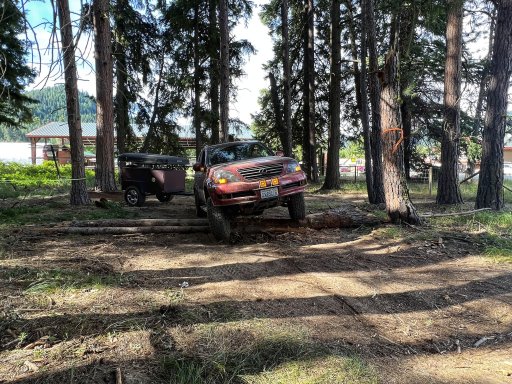
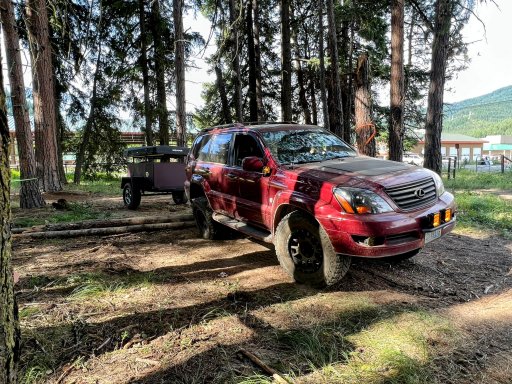
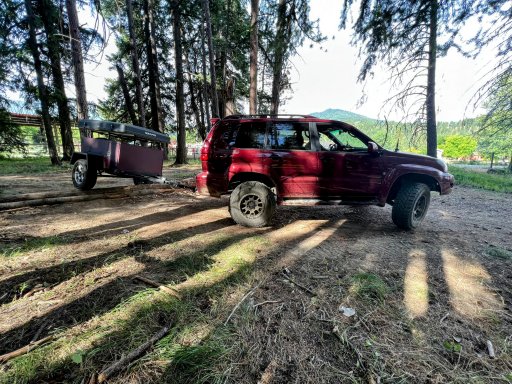
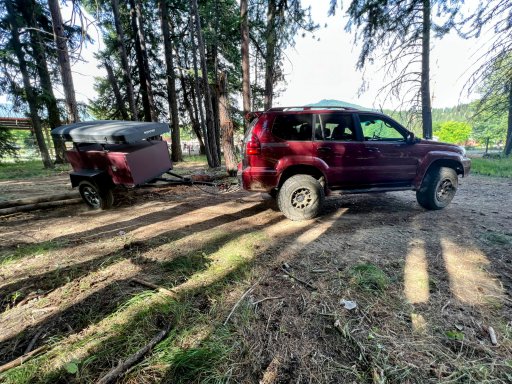
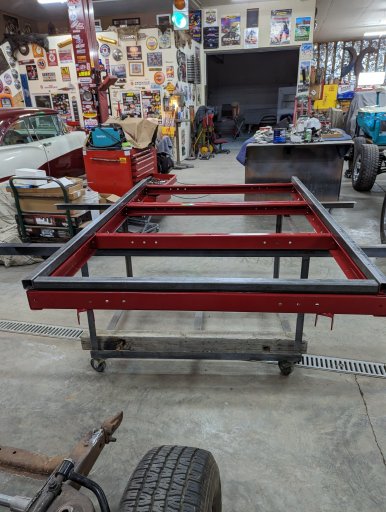
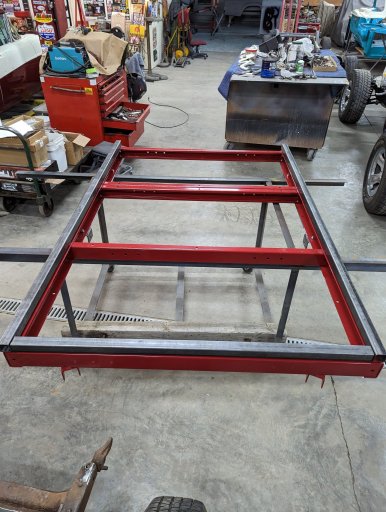
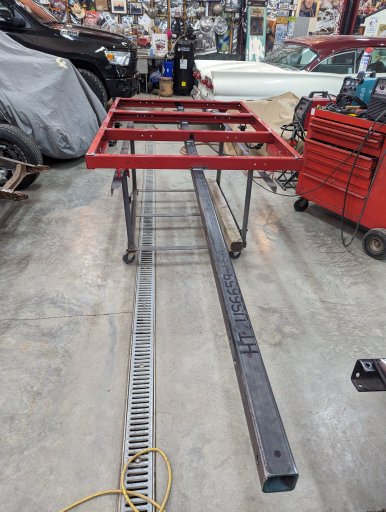
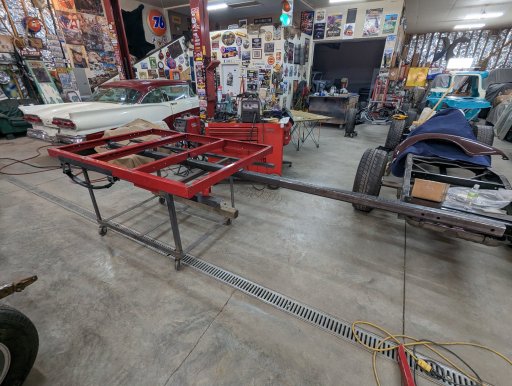
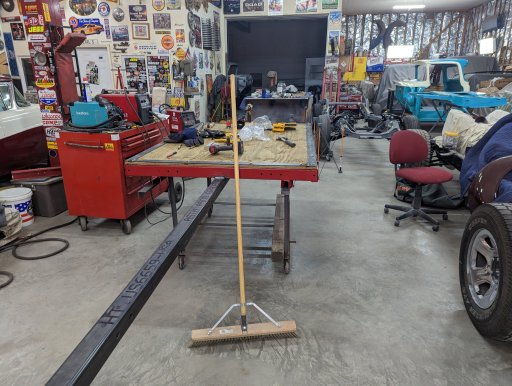
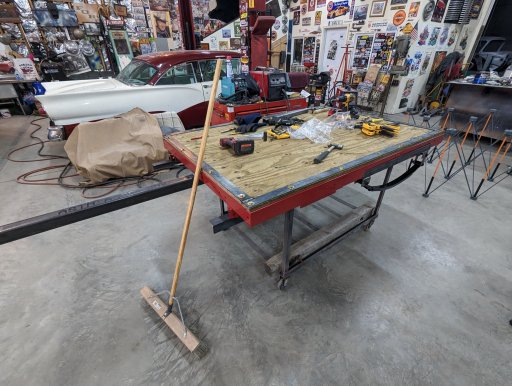
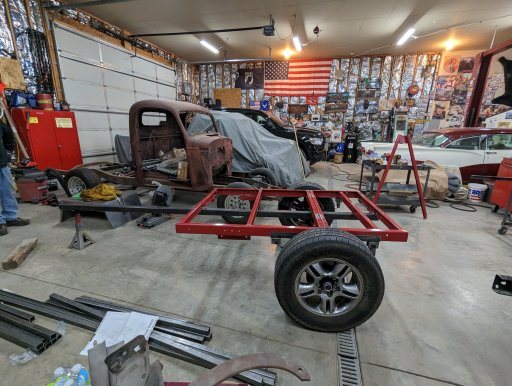
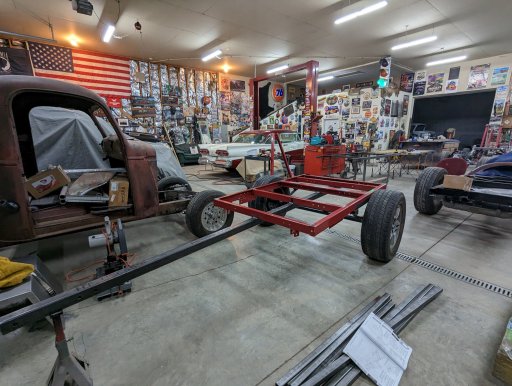
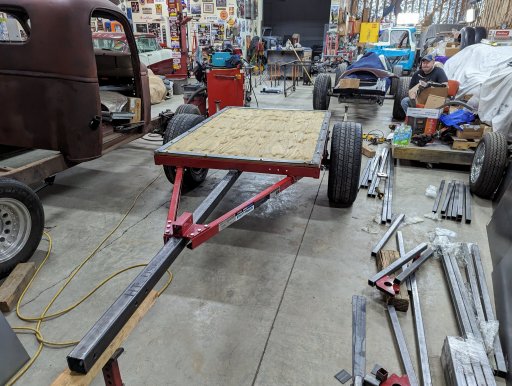
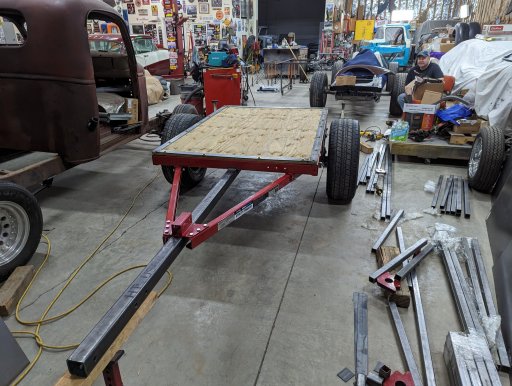
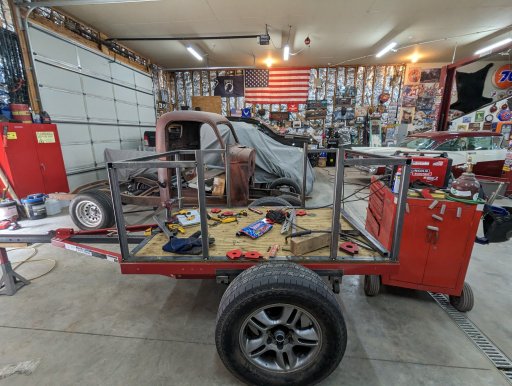
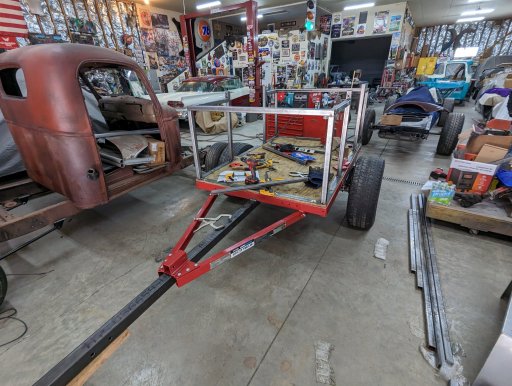
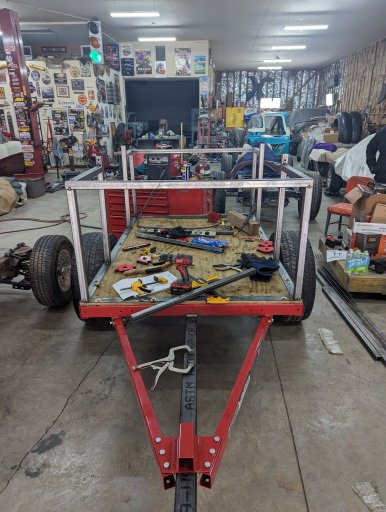
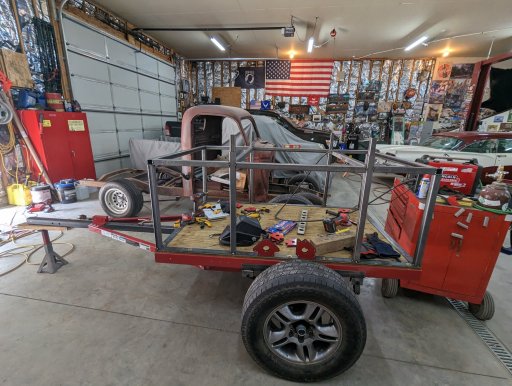
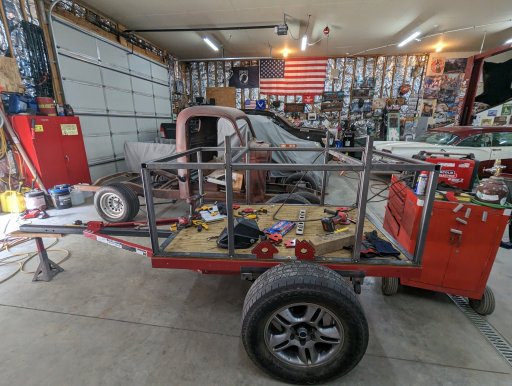
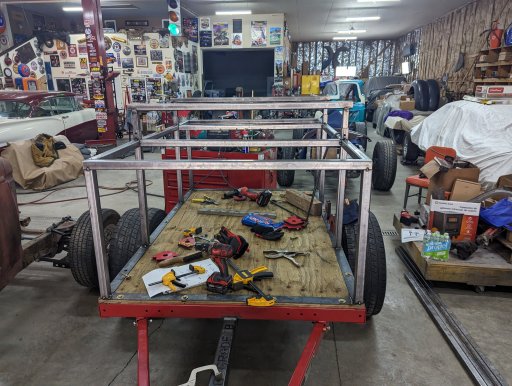
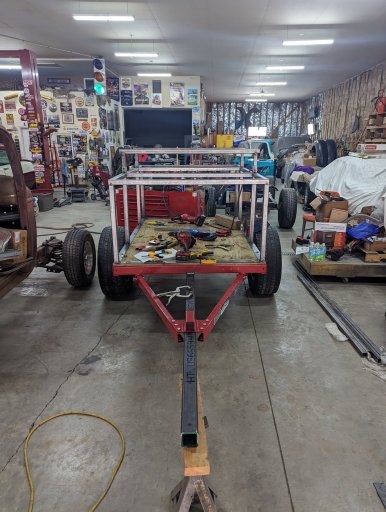
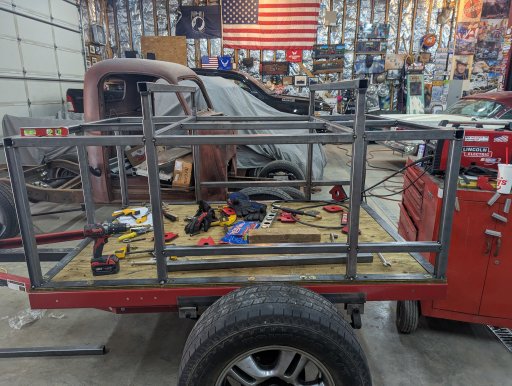
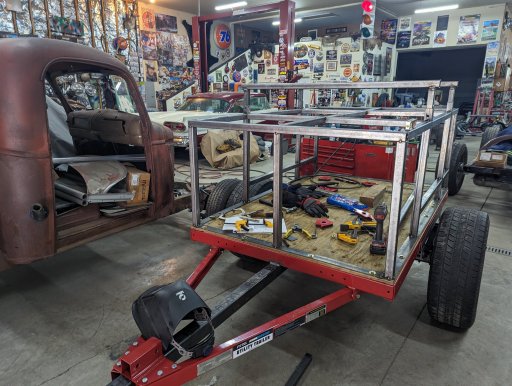
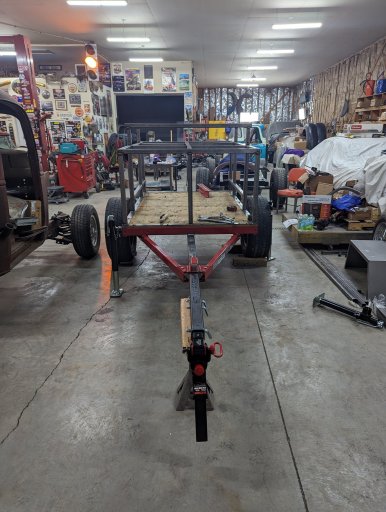
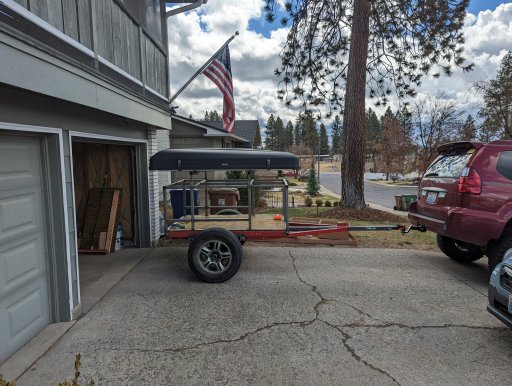
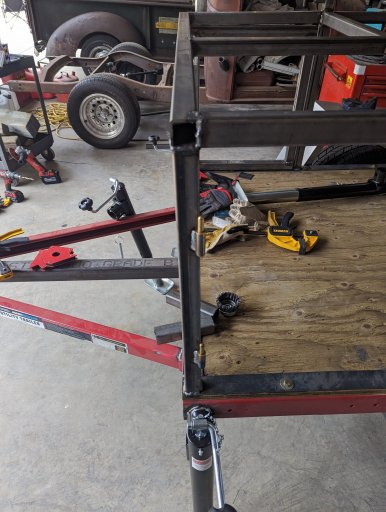
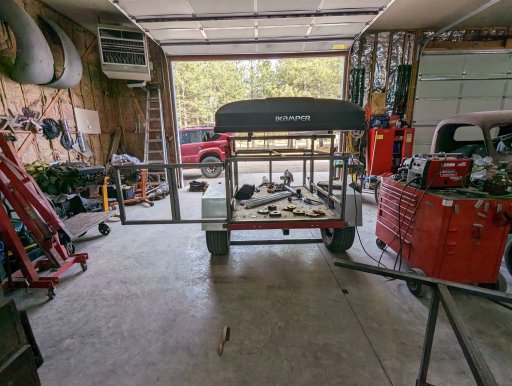
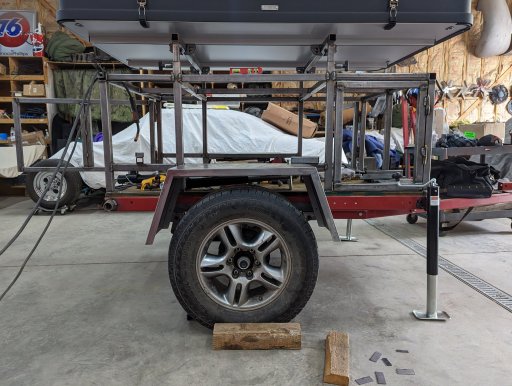
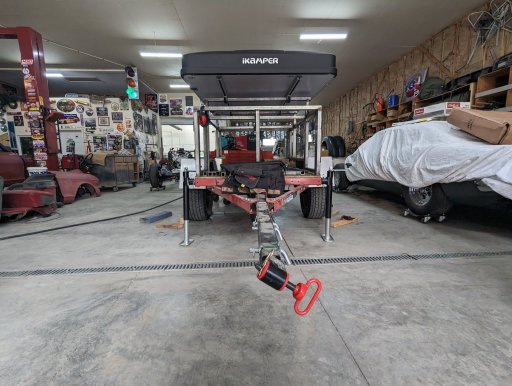
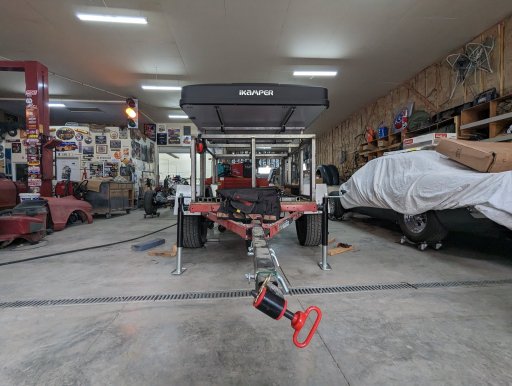
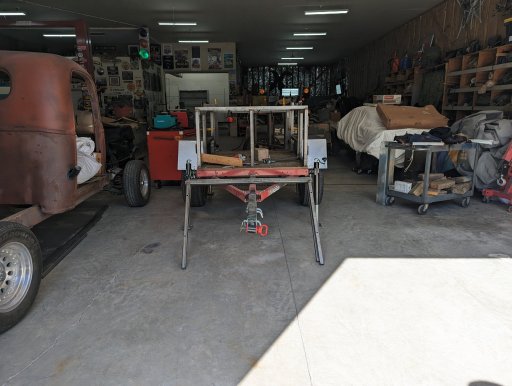
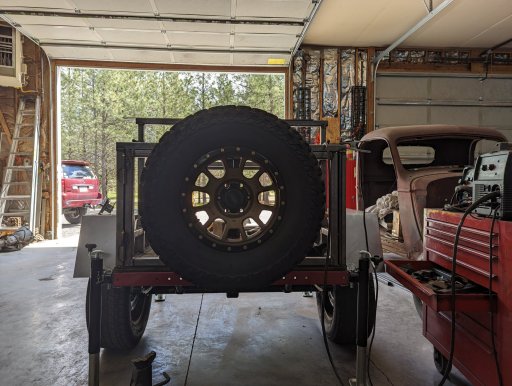
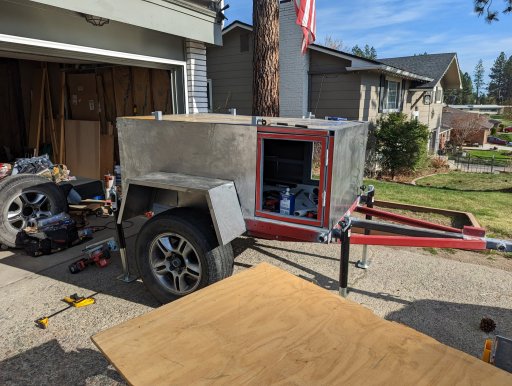
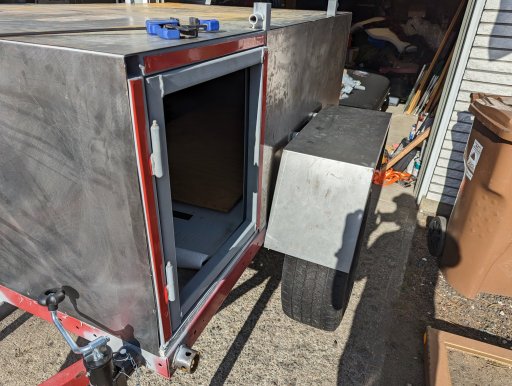
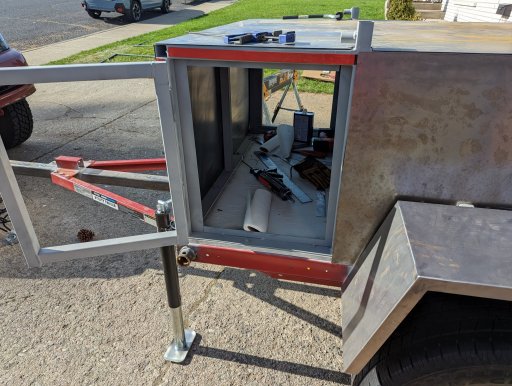
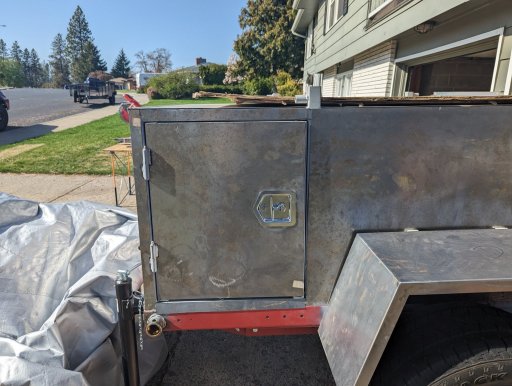
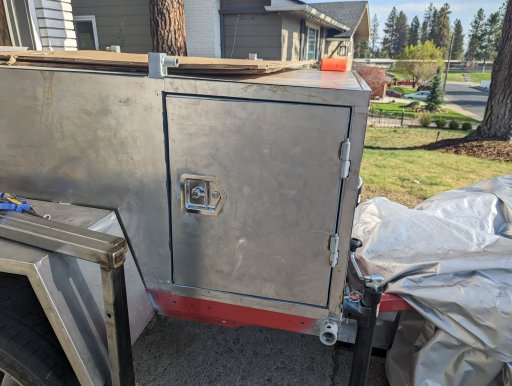
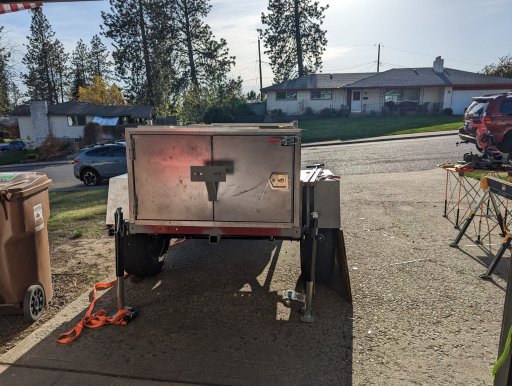
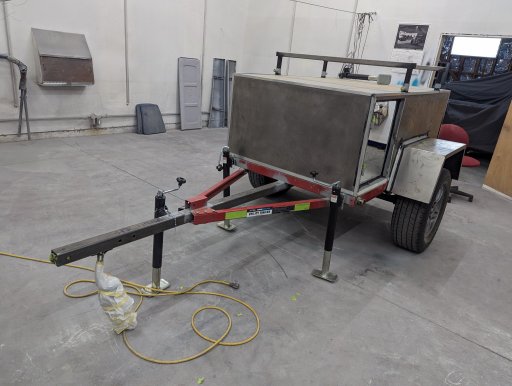
For those just looking for pics, you came to the right place lol here's how it sits right now (I'll update this as things change)


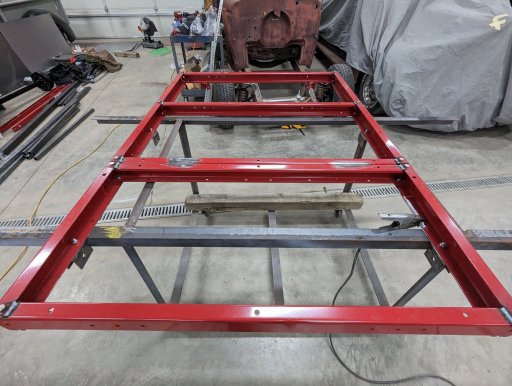
First a rundown of what my build consists of
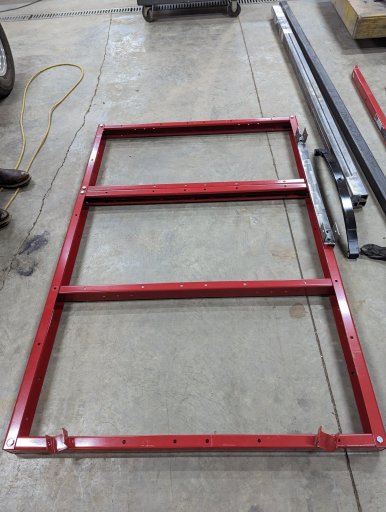
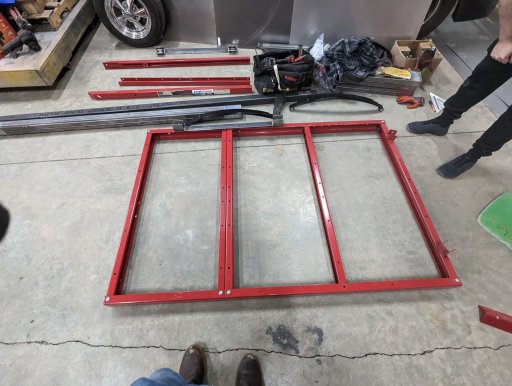
a Harbor Freight "Super duty" 1720lb trailer frame 1720 lb. Capacity 48 in. x 96 in. Super Duty Folding Trailer
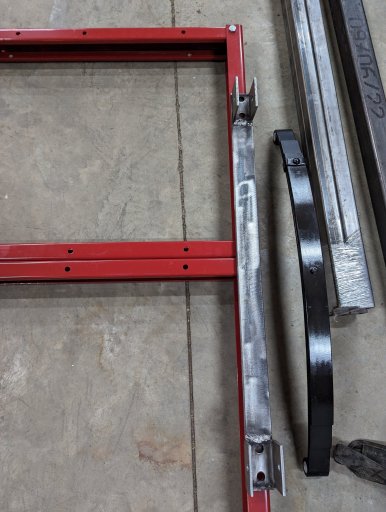
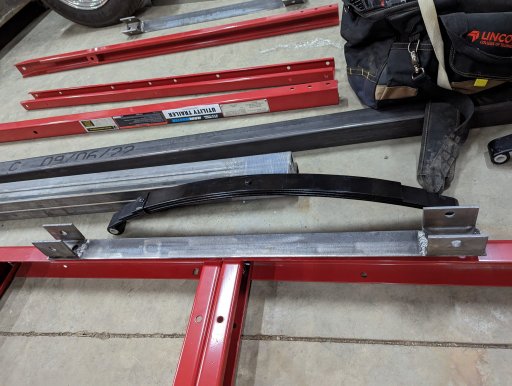
Compact Camping Concepts Soft ride spring Conversion Kit Harbor Freight Frame Smooth Spring Retrofit kit
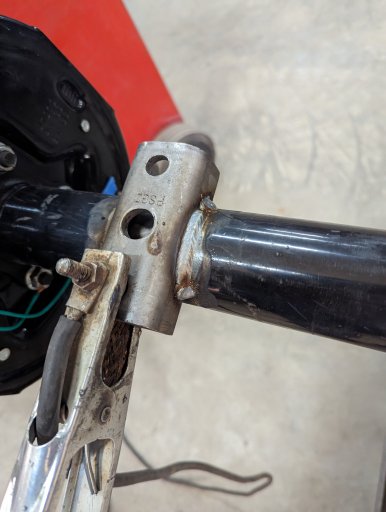
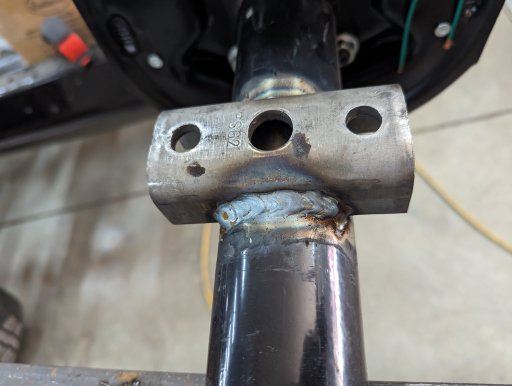
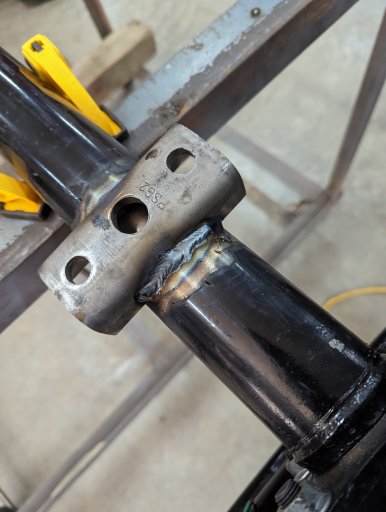
A custom width 3500lb Axle to match the GX's track. as well as 6x5.5lug pattern and brakes Camping Trailer Axle
Compact Camping solution Shock mount kit Weld-on Shock Kit
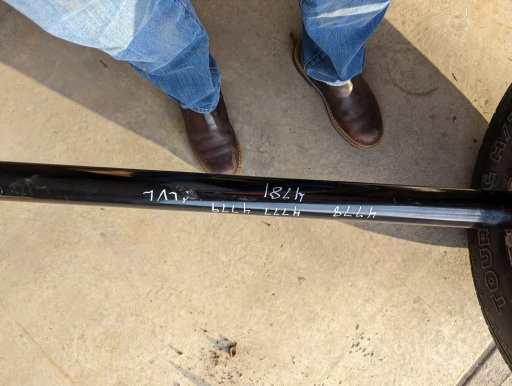
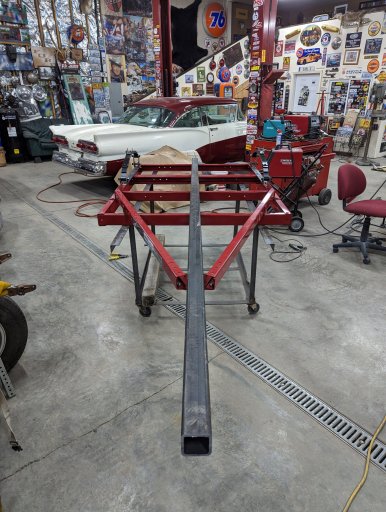
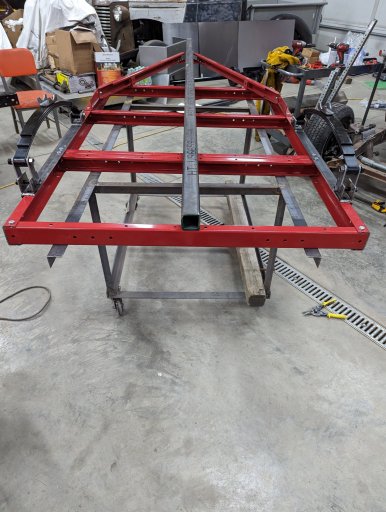
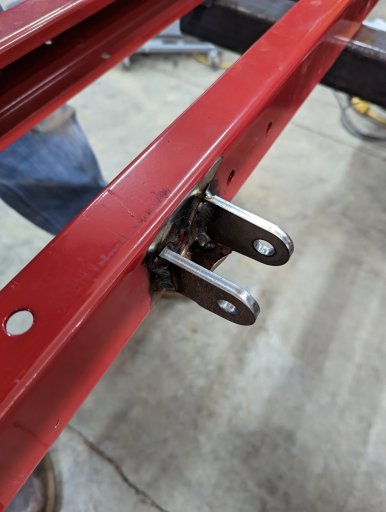
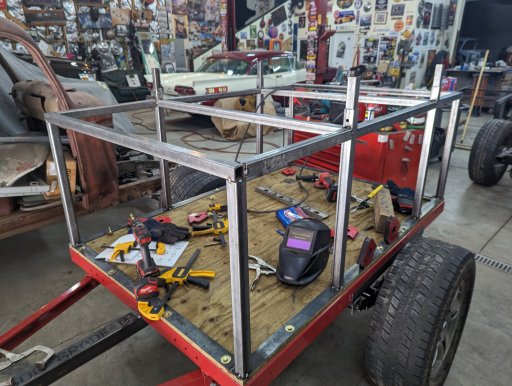
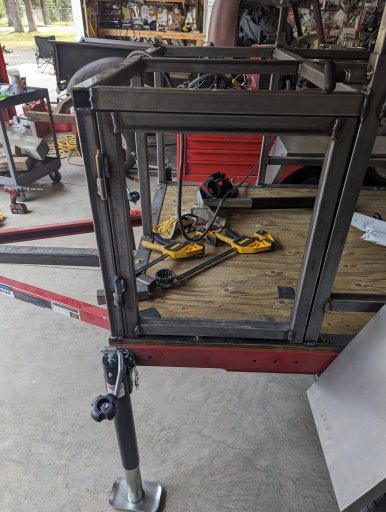
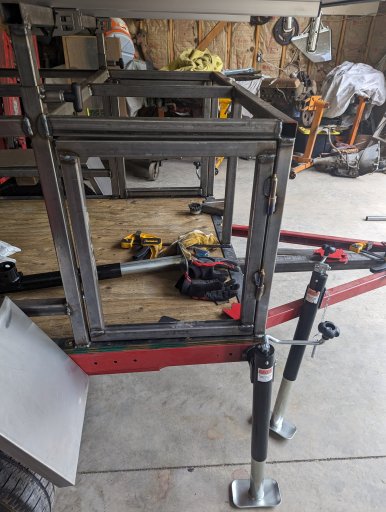
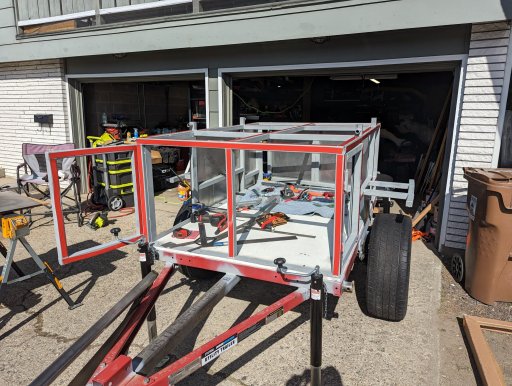
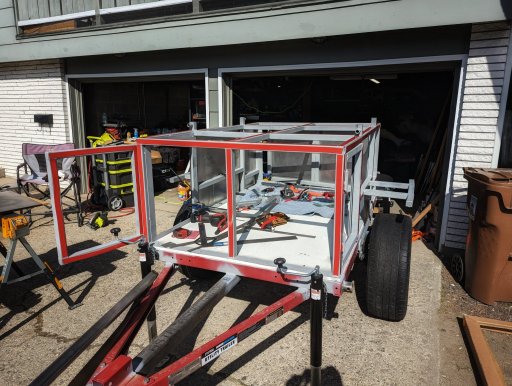
I ran a 11.5' 2.5" receiver tube down the middle as the spine of the trailer
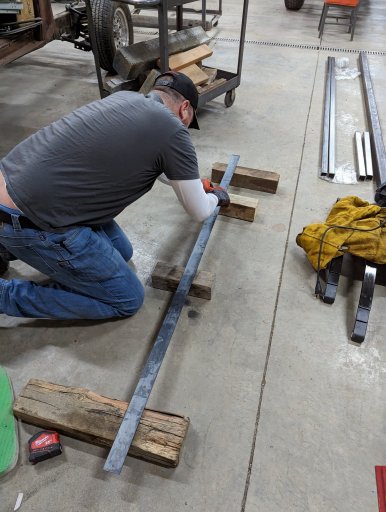
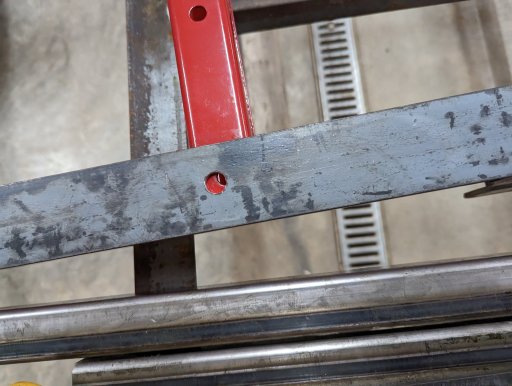
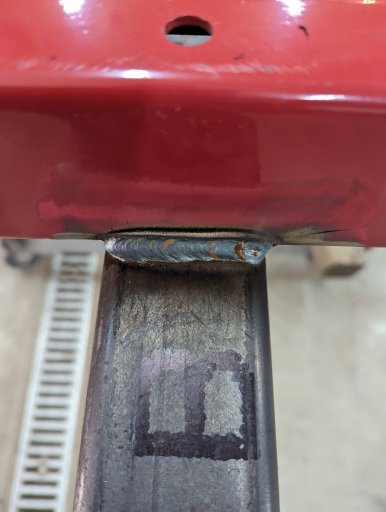
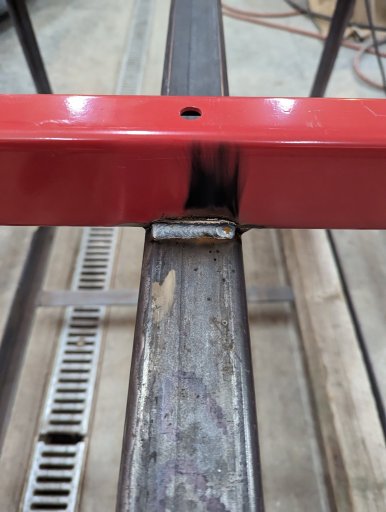
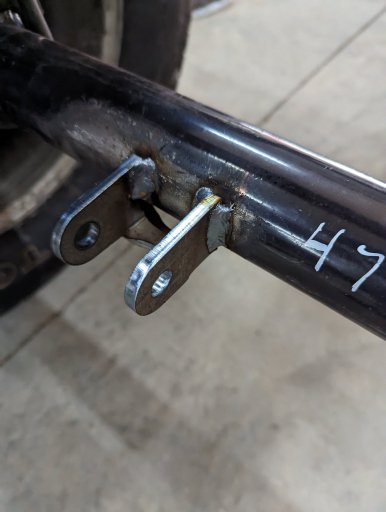
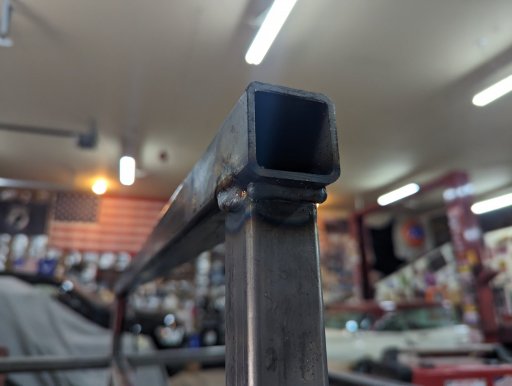
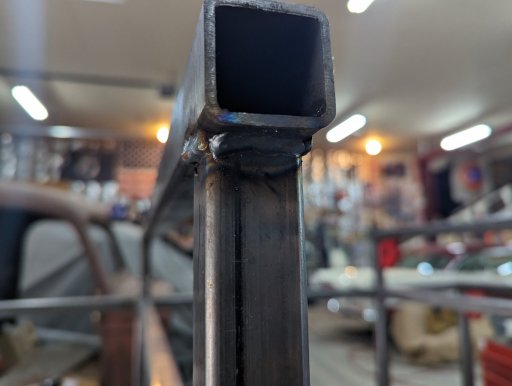
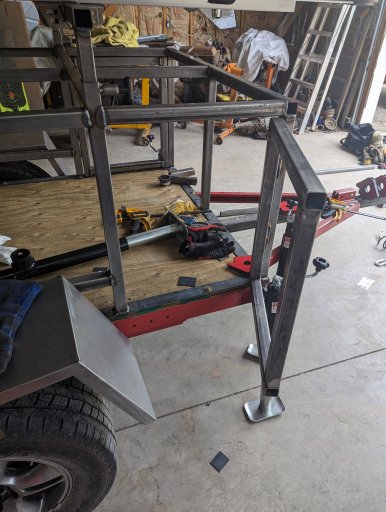
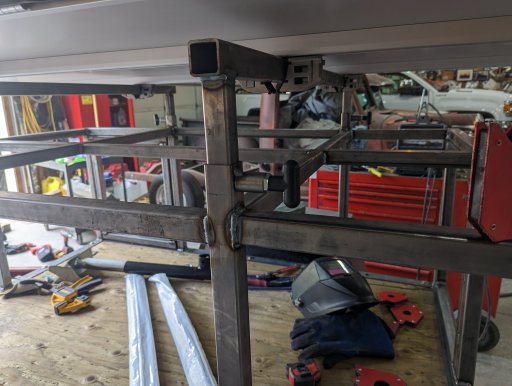
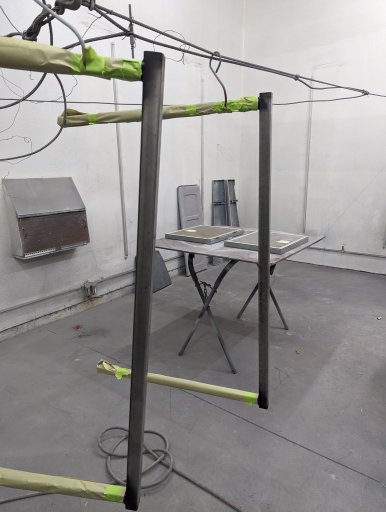
most of the "box" is 1.5" 11g square tubing, the 4 vertical posts for the telescopic aspect are 1.5" 14g, with 1.25 14g inside, this provided enough tolerance to avoid binding.
really I should have built the whole thing out of 14g and saved some weight...
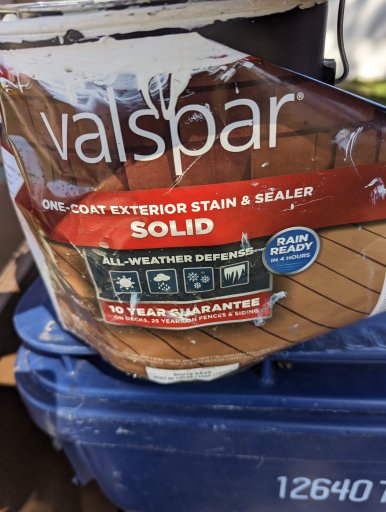
3/4" marine grade plywood(pressure treated) that was then painted with 10 year all weather paint/stain
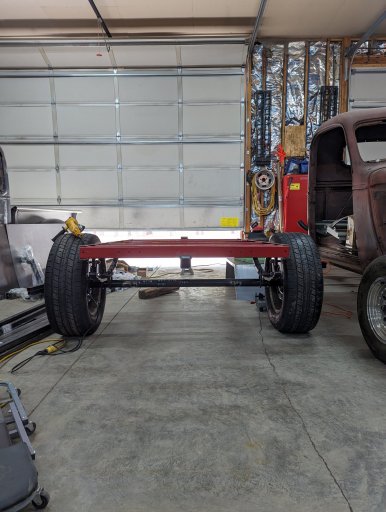
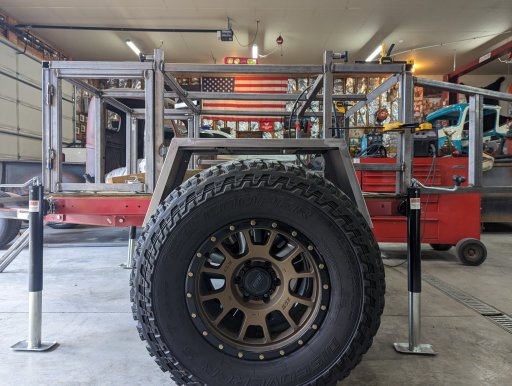
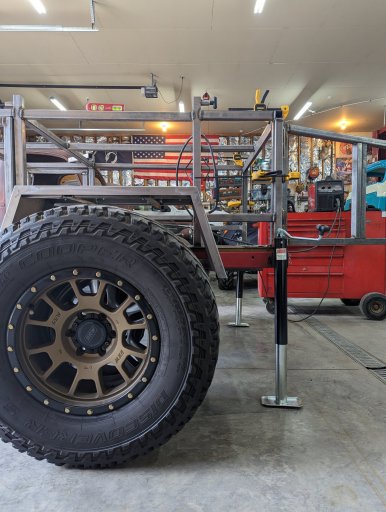
Wheels and Tires are take-offs from my GX, I'll eventually upgrade to at least 33's (they're 30's, which I thought were 32's... this will come into play later) but more than likely 34's to match the GX
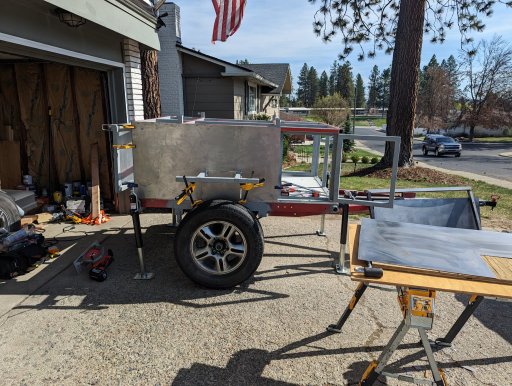
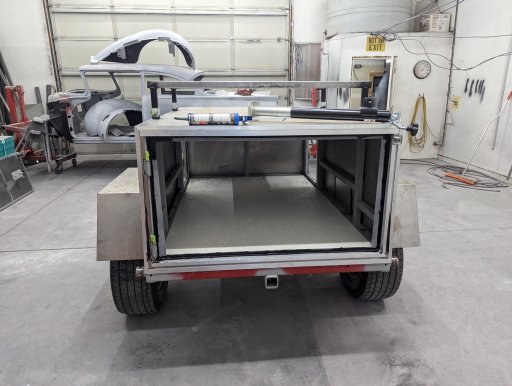
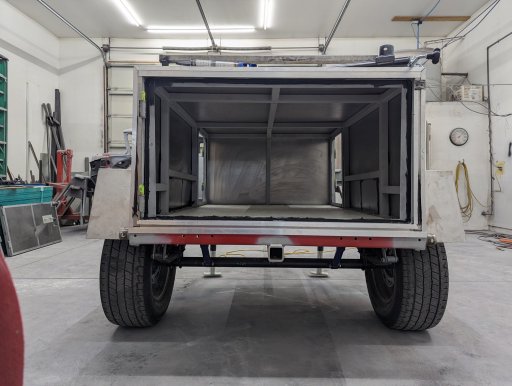
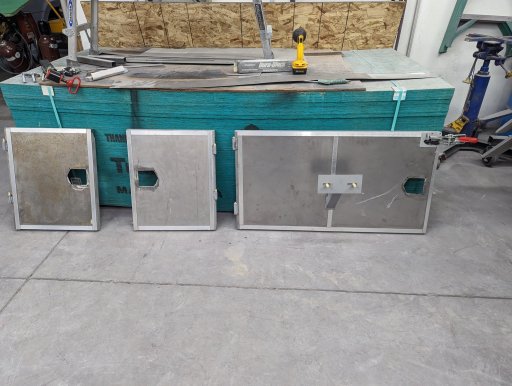
I did 20g sheet for the body,
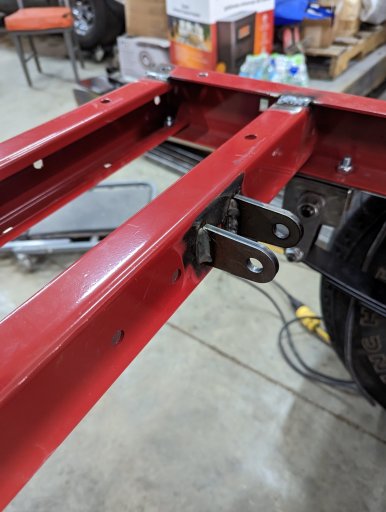
Max Coupler for the hitch/receiver.
Compact Camping Solutions Wide M416 Trailer Fenders
I chose the HF Frame for 1 main reason, ease of titling in Washington. I've heard tales that ever since covid, the state police aren't super responsive with trailer inspections (admittedly I never even tried) I cut this down from a 4x8 to 4x6. and welded it (as well as bolts just because) looking back, I probably should have just built the frame myself, as much of my initial issues were trying to make my design fit the HF frame. and so I had to make several design decisions around it. it's also the weak point on my build, not that I think it'll fail, just that I overbuilt the rest.
I added the compact camping soft spring kit
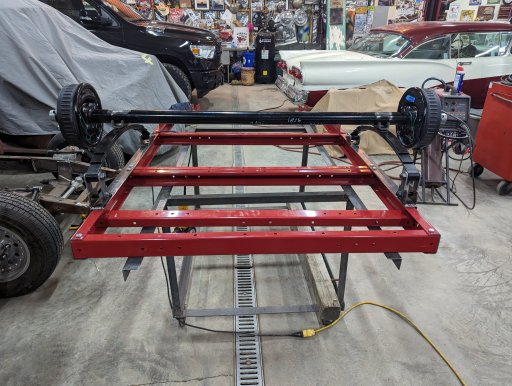


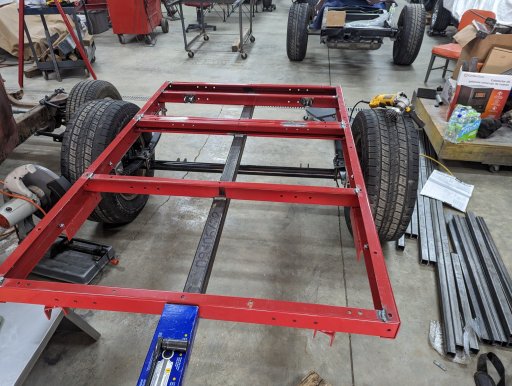

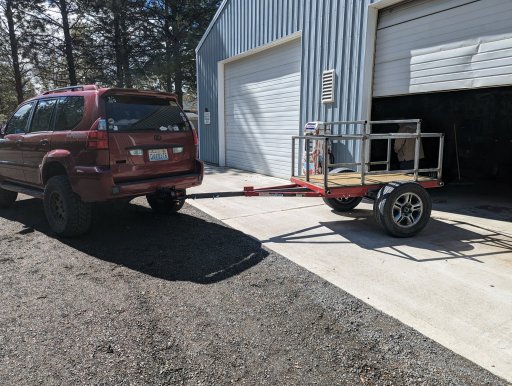
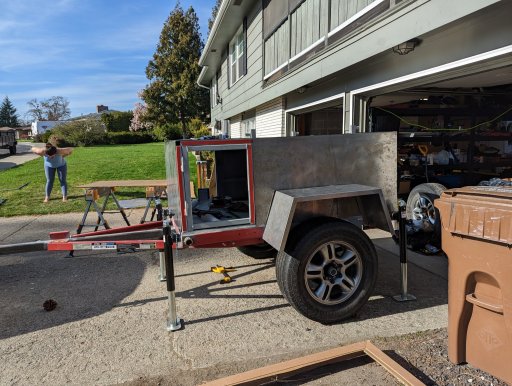
At this point is where I realized... that my tongue weight was too much for my liking already even with nothing really on it... my axle was too far to the rear. When I cut the frame down, I never moved the axle to compensate. I moved it forward 6" and it's perfect.

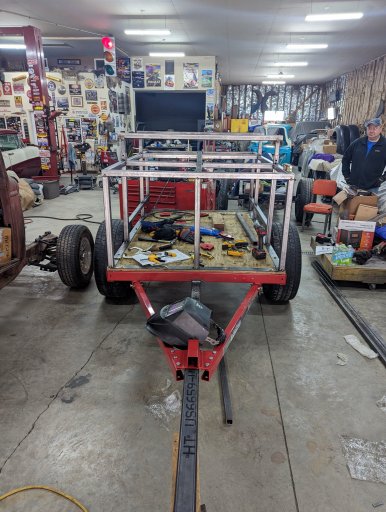
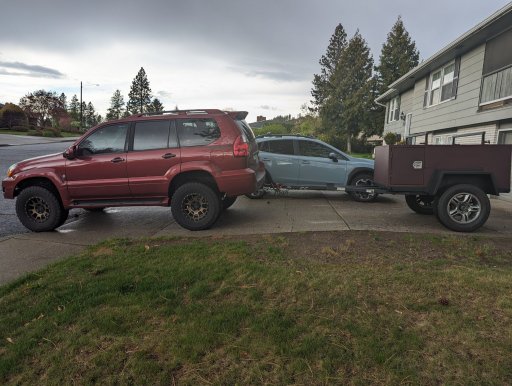
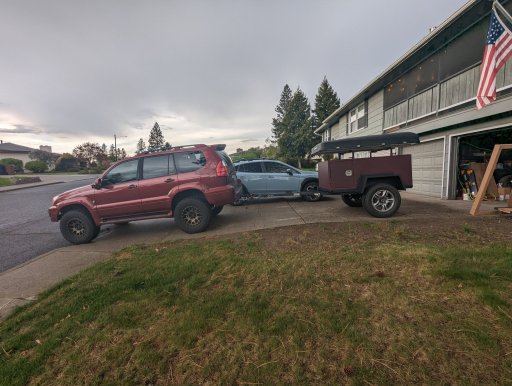
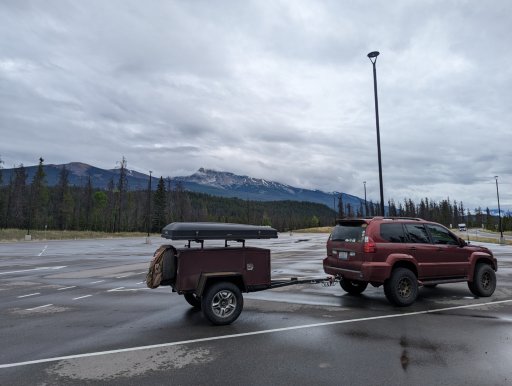
I towed the trailer home and it towed awesome. the max coupler really made it feel connected it tracked amazing


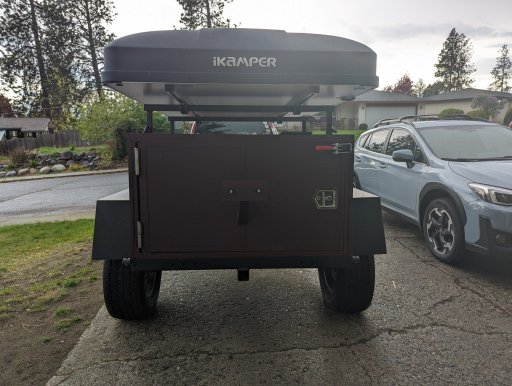
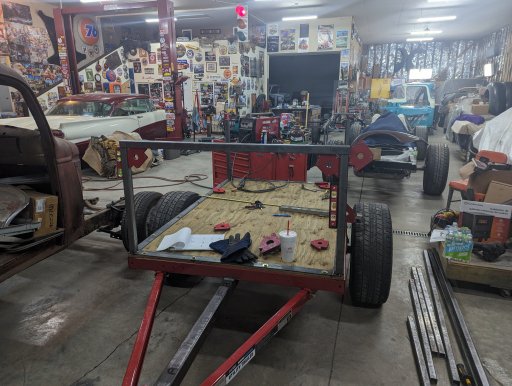
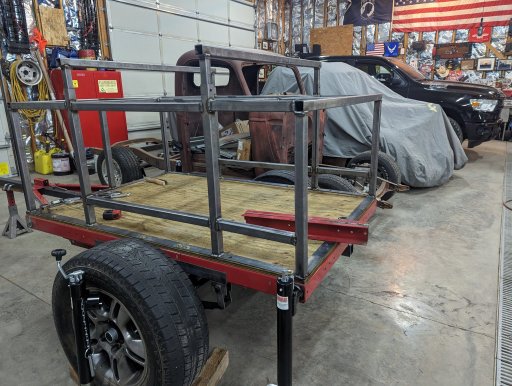
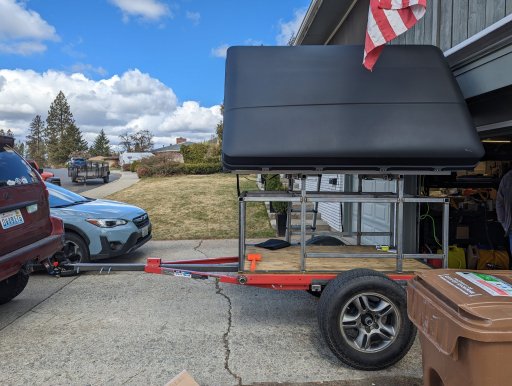
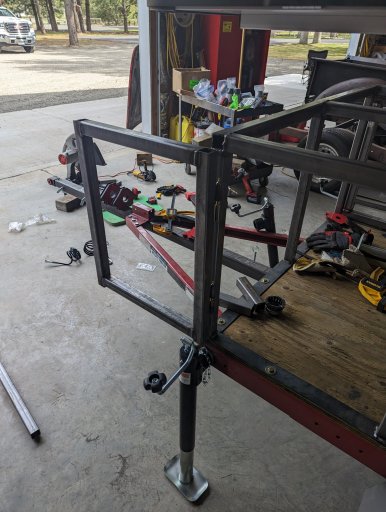
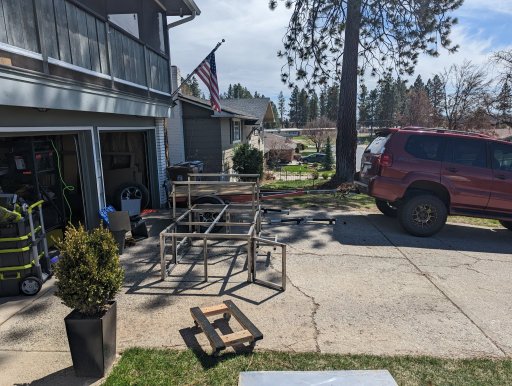
I test-fit the tent on(mainly because the tent was taking up the spot in the garage... so I had to put it on so I could get the trailer into the garage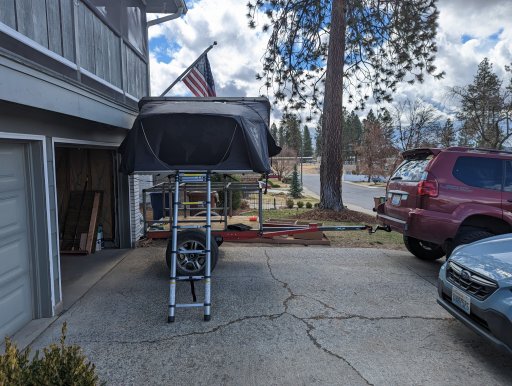


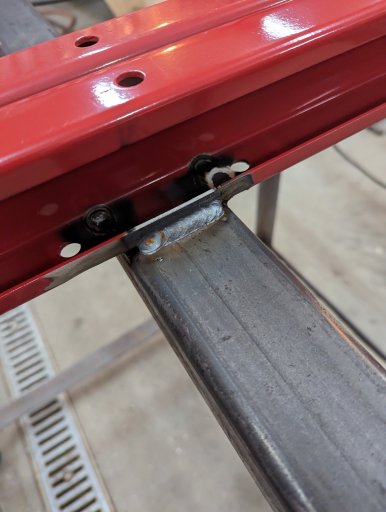
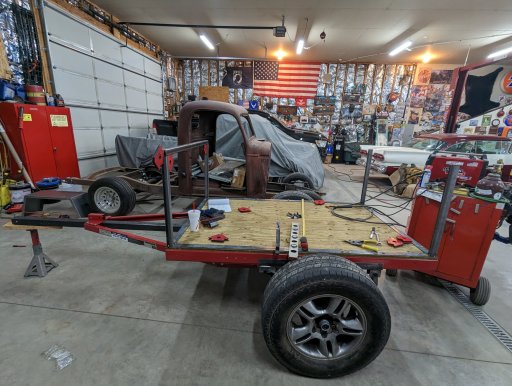
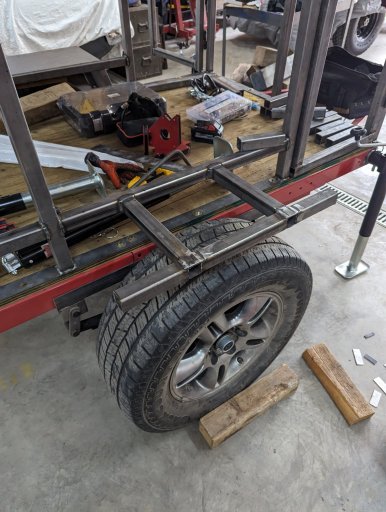
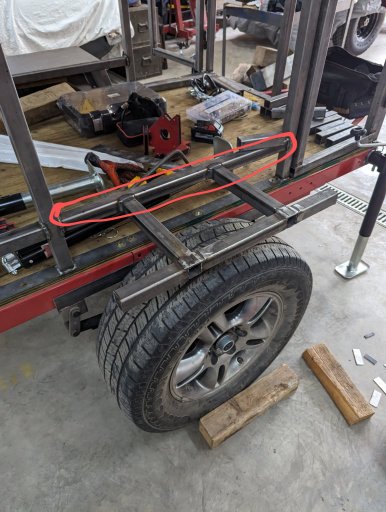
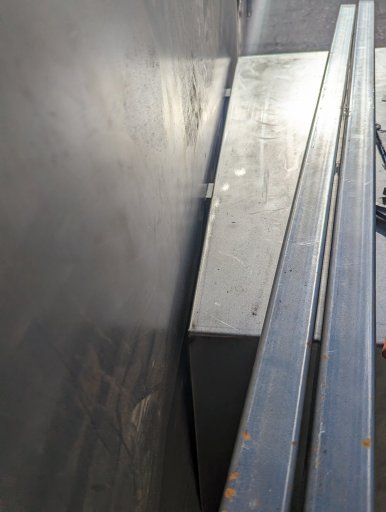
Here's the support I built to support the fender so I can use it for a step or as a mount
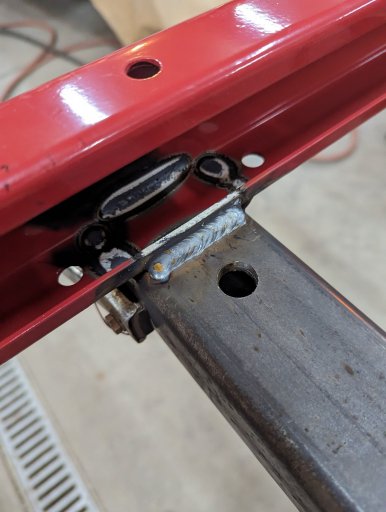
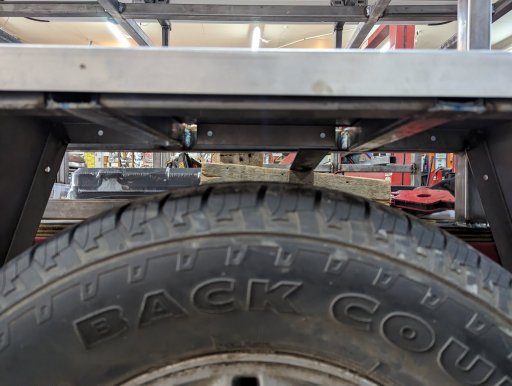
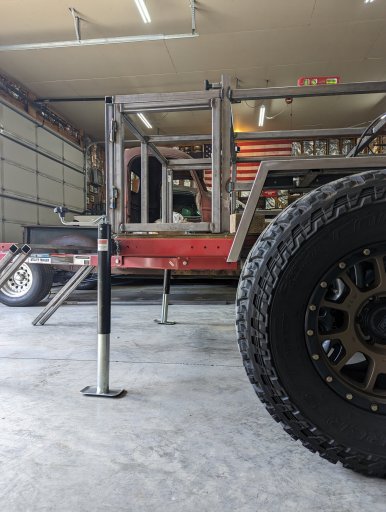
I ended up having to move this bar up about 5"s to allow clearance for 34's... This is the point I realized that my fender was too low because I was using my stock tires to get measurements, and I thought they were 32's, when in fact they were 30's (I think i would have been too low even if they were 32"s now that I look at it) thanks @Codeman and @PapaDave for calling this out that!
Sitting my 34 spare in front of the stock to see about clearance. the fenders are built to allow a 35, so they're wide enough...it's jus the camera angle that makes it look like they'll hit
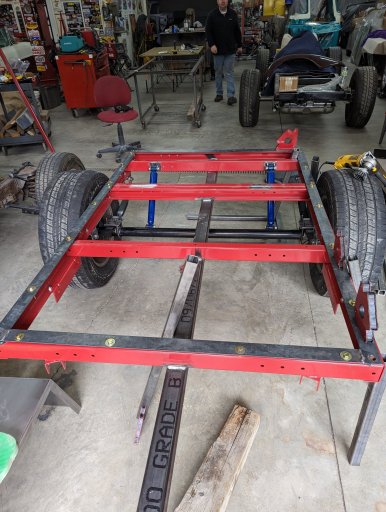
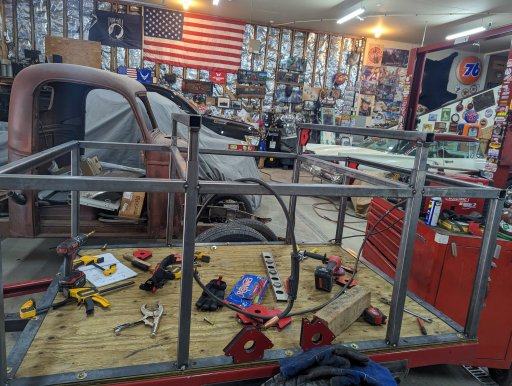
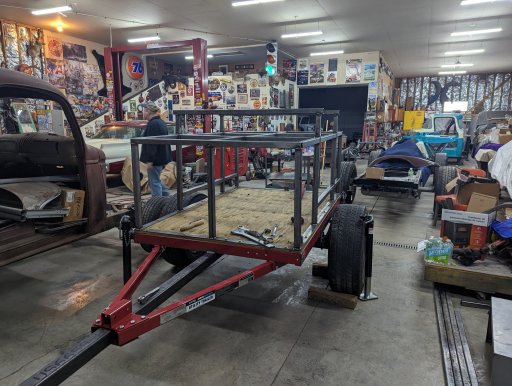
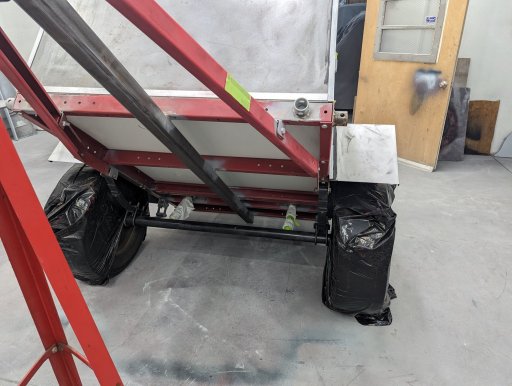
test fitting the 34 spare so I could get proper placement of the spare carrier so I don't make the same mistake as I did with the fenders Pulled it all apart to paint the plywood, primer all the bare metal, and grind down all the welds to prepare for skinning.

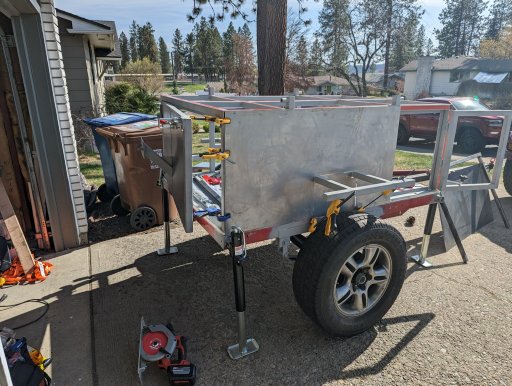
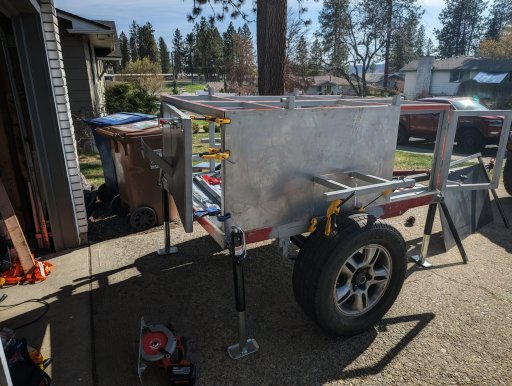
I put on about 150' of VHB tape to hold on the sheet metal and trim. at 35 lbs of adherence per inch I'm confident it's not going anywhere LOL also threw in some construction adhesive in a few areas, and some seam sealer to ensure it'll stay dry inside.
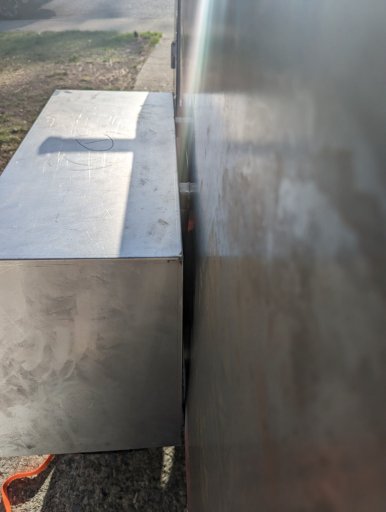
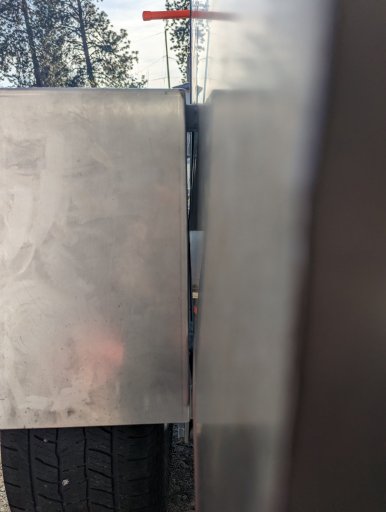
Due to my lack of pre-planning, I ended up with a gap between the fender and the wall... took a great idea by @PapaDave
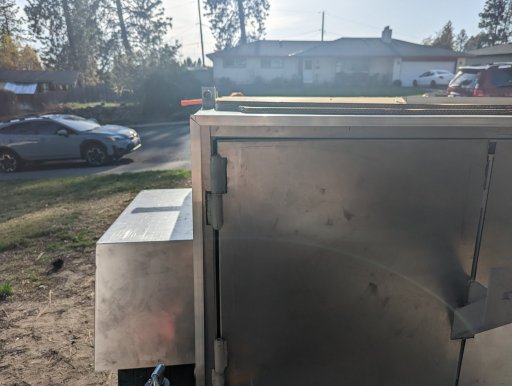
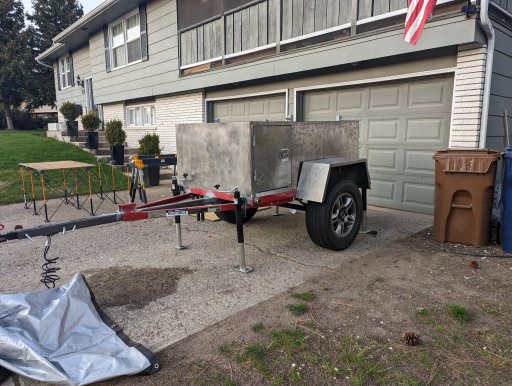
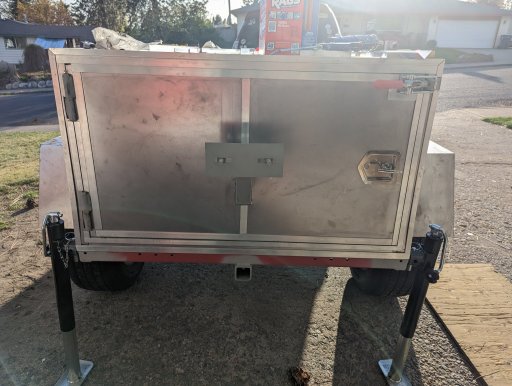
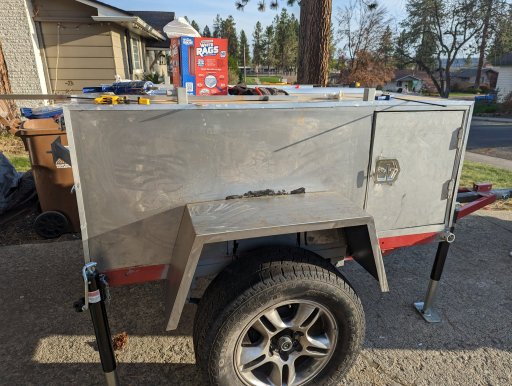
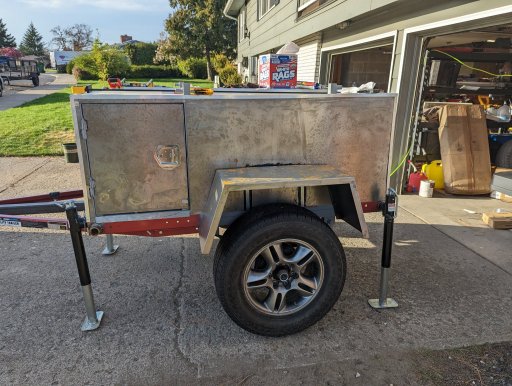
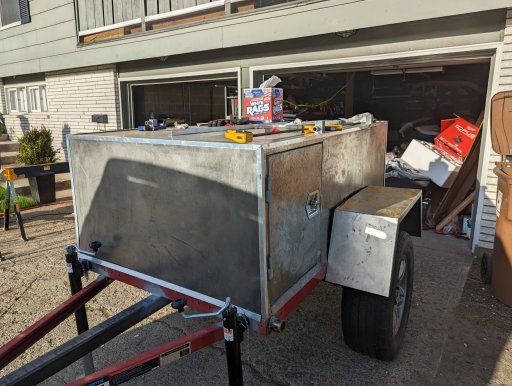
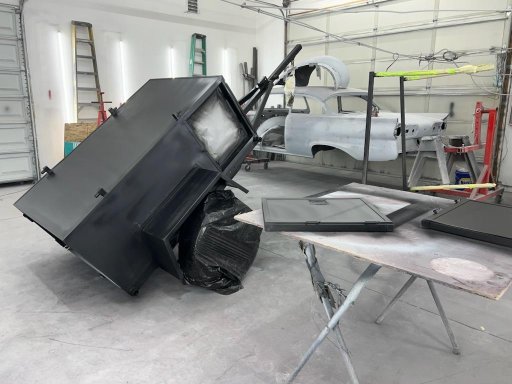
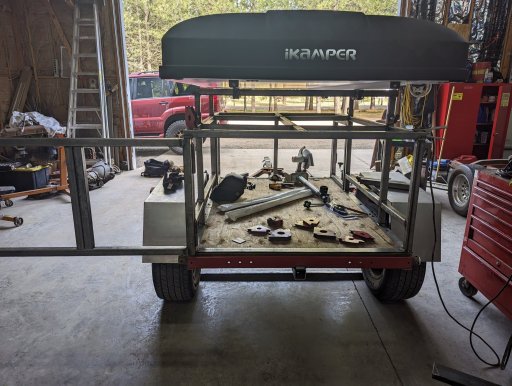
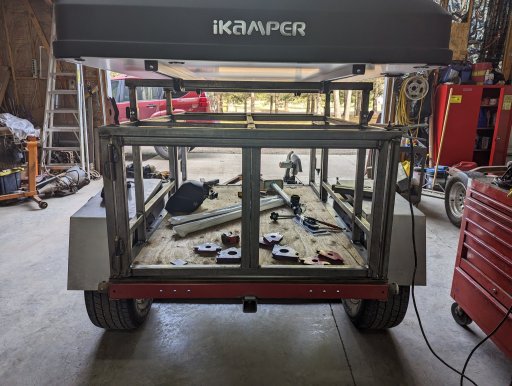
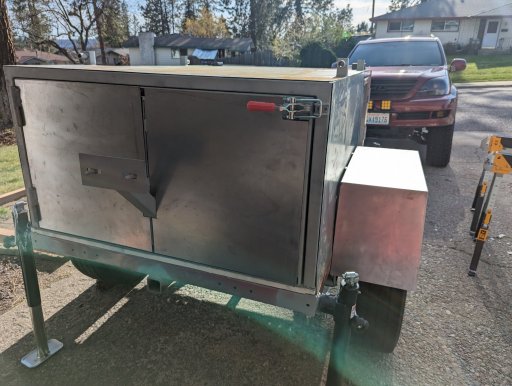
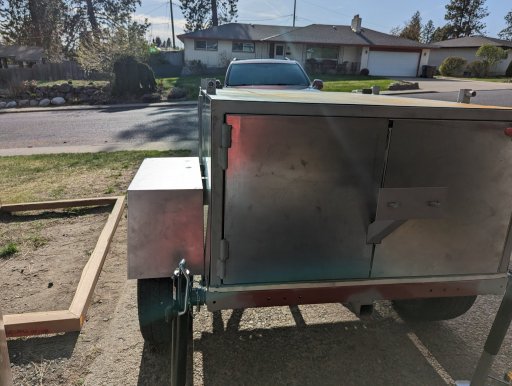
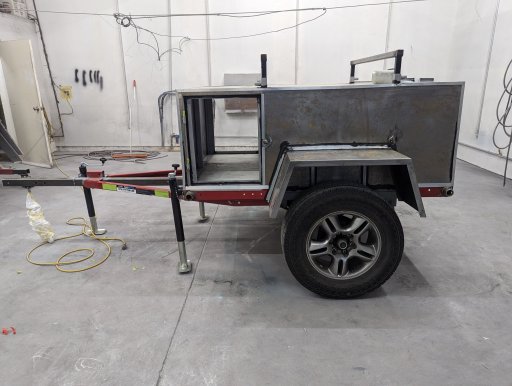
And here it sits. ready for Raptor lining.

For those just looking for pics, you came to the right place lol here's how it sits right now (I'll update this as things change)
First a rundown of what my build consists of
a Harbor Freight "Super duty" 1720lb trailer frame 1720 lb. Capacity 48 in. x 96 in. Super Duty Folding Trailer
Compact Camping Concepts Soft ride spring Conversion Kit Harbor Freight Frame Smooth Spring Retrofit kit
A custom width 3500lb Axle to match the GX's track. as well as 6x5.5lug pattern and brakes Camping Trailer Axle
Compact Camping solution Shock mount kit Weld-on Shock Kit
I ran a 11.5' 2.5" receiver tube down the middle as the spine of the trailer
most of the "box" is 1.5" 11g square tubing, the 4 vertical posts for the telescopic aspect are 1.5" 14g, with 1.25 14g inside, this provided enough tolerance to avoid binding.
really I should have built the whole thing out of 14g and saved some weight...
3/4" marine grade plywood(pressure treated) that was then painted with 10 year all weather paint/stain
Wheels and Tires are take-offs from my GX, I'll eventually upgrade to at least 33's (they're 30's, which I thought were 32's... this will come into play later) but more than likely 34's to match the GX
I did 20g sheet for the body,
Max Coupler for the hitch/receiver.
Compact Camping Solutions Wide M416 Trailer Fenders
I chose the HF Frame for 1 main reason, ease of titling in Washington. I've heard tales that ever since covid, the state police aren't super responsive with trailer inspections (admittedly I never even tried) I cut this down from a 4x8 to 4x6. and welded it (as well as bolts just because) looking back, I probably should have just built the frame myself, as much of my initial issues were trying to make my design fit the HF frame. and so I had to make several design decisions around it. it's also the weak point on my build, not that I think it'll fail, just that I overbuilt the rest.
I added the compact camping soft spring kit
At this point is where I realized... that my tongue weight was too much for my liking already even with nothing really on it... my axle was too far to the rear. When I cut the frame down, I never moved the axle to compensate. I moved it forward 6" and it's perfect.
I towed the trailer home and it towed awesome. the max coupler really made it feel connected it tracked amazing
I test-fit the tent on(mainly because the tent was taking up the spot in the garage... so I had to put it on so I could get the trailer into the garage
Here's the support I built to support the fender so I can use it for a step or as a mount
I ended up having to move this bar up about 5"s to allow clearance for 34's... This is the point I realized that my fender was too low because I was using my stock tires to get measurements, and I thought they were 32's, when in fact they were 30's (I think i would have been too low even if they were 32"s now that I look at it) thanks @Codeman and @PapaDave for calling this out that!
Sitting my 34 spare in front of the stock to see about clearance. the fenders are built to allow a 35, so they're wide enough...it's jus the camera angle that makes it look like they'll hit
test fitting the 34 spare so I could get proper placement of the spare carrier so I don't make the same mistake as I did with the fenders Pulled it all apart to paint the plywood, primer all the bare metal, and grind down all the welds to prepare for skinning.
I put on about 150' of VHB tape to hold on the sheet metal and trim. at 35 lbs of adherence per inch I'm confident it's not going anywhere LOL also threw in some construction adhesive in a few areas, and some seam sealer to ensure it'll stay dry inside.
Due to my lack of pre-planning, I ended up with a gap between the fender and the wall... took a great idea by @PapaDave
And here it sits. ready for Raptor lining.
Last edited: