

First thing you may be asking (and you'd be right to do so) is what the hell is CAISOB? Well, it's an acronym I coined a long time ago, and it describes me to a "T": Cheap And Impatient SOB. I am cheap. I am impatient, and, according to my ex-wife, I am an SOB. What it boils down to is this: there are hundreds upon hundreds of functional yet expensive farkles to be found for the Tacoma, yet there are also many, many DIY projects (or simply lower priced options) that can yield the same results without the significant expense.
As I build my truck, I am gearing for the most bang for the buck. This doesn't mean always going with the cheapest option, and, at times, I have and will continue to splurge on high dollar items as I see fit. Ultimately, I am a creature that prefers function over form, though I do believe the two don't have to be mutually exclusive. This is the third vehicle I've owned that is getting the overland (aka EAF) treatment, as such, I am utilizing lessons learned and equipment & gear accumulated from those previous builds.
To get things started, I'll share a couple of pictures from my previous overland ventures.
First, my H2.
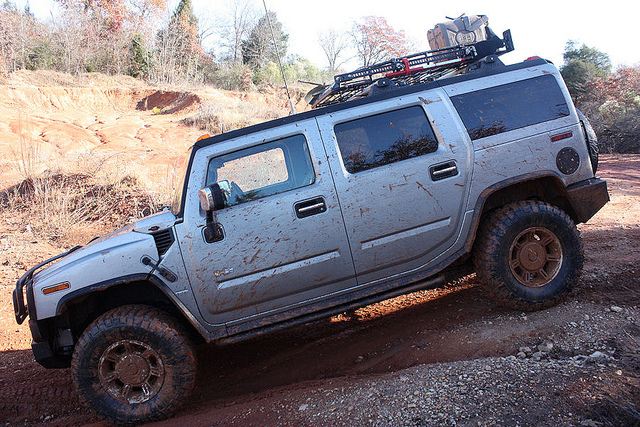

Factory installed 35's (swapped the BFG AT's for BFG MT's), electronic locking center and rear diff, what more could you ask for as a basic platform to build from? I bought and built the H2 in 2010 when gas was just hitting $2 a gallon. Unfortunately, less than a year later, it was upwards of $5 a gallon where I was living, so it had to go. I traded it for a Subaru Forester that I subsequently kitted out:

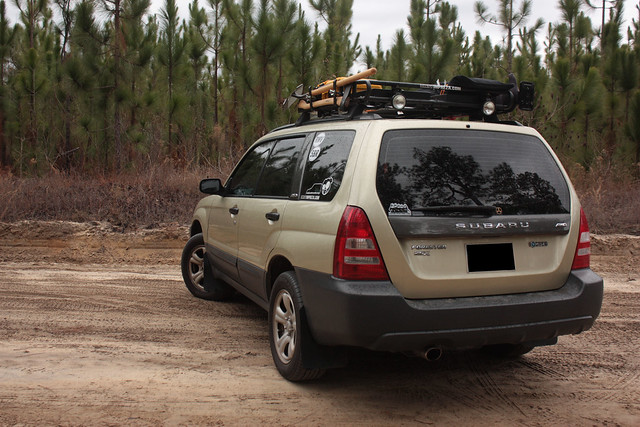
After moving back to Florida, the Subaru was coming due for it's 100k service, and I was hearing a few more clicks and clunks than I could afford to fix at the time, so I traded it for another vehicle that was cheap yet fun to drive, a Fiat 500.
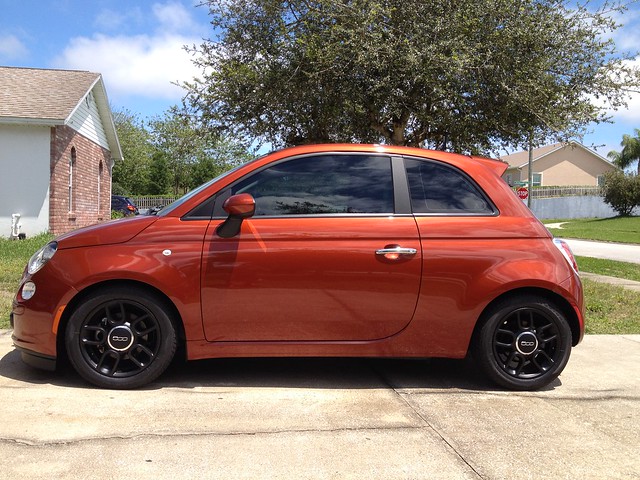
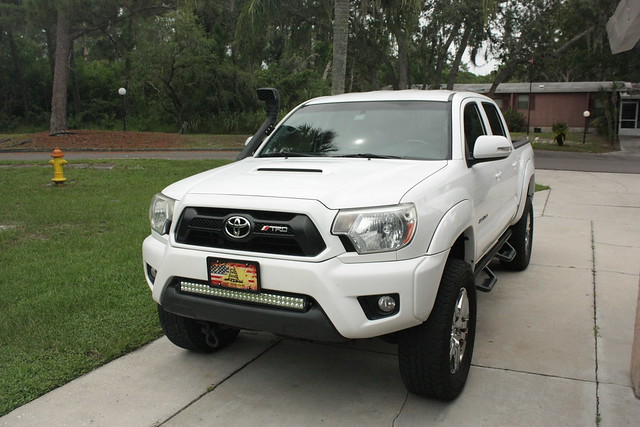
Laugh all you want, but those things are a blast to drive! After a couple years in that, I started to get the itch for another 4 wheel drive vehicle, which brings us to my 2012 Toyota Tacoma.
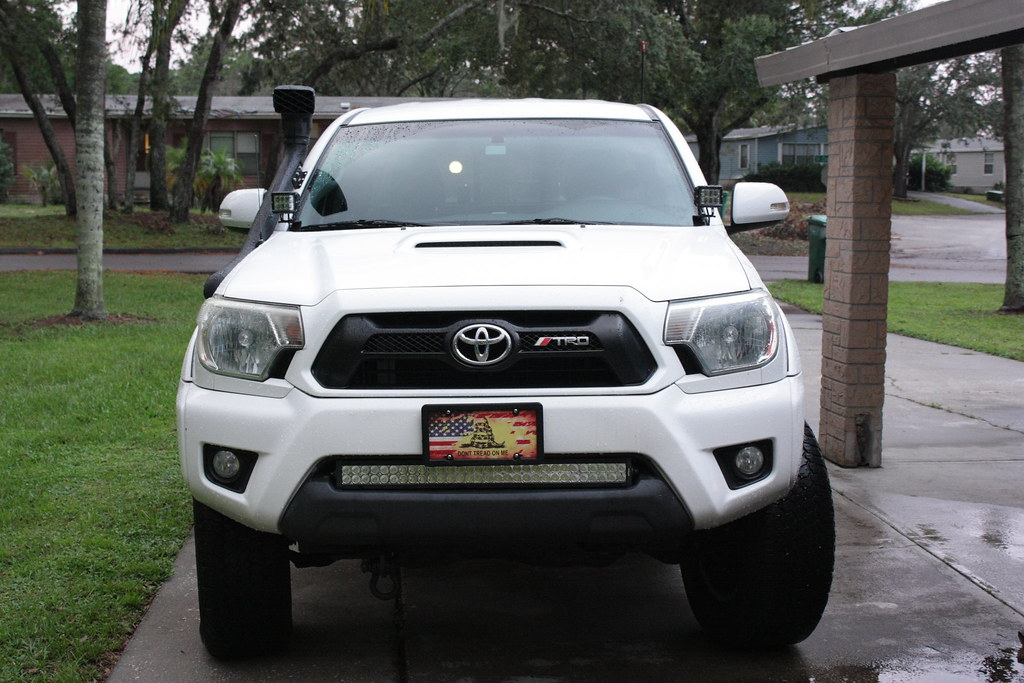
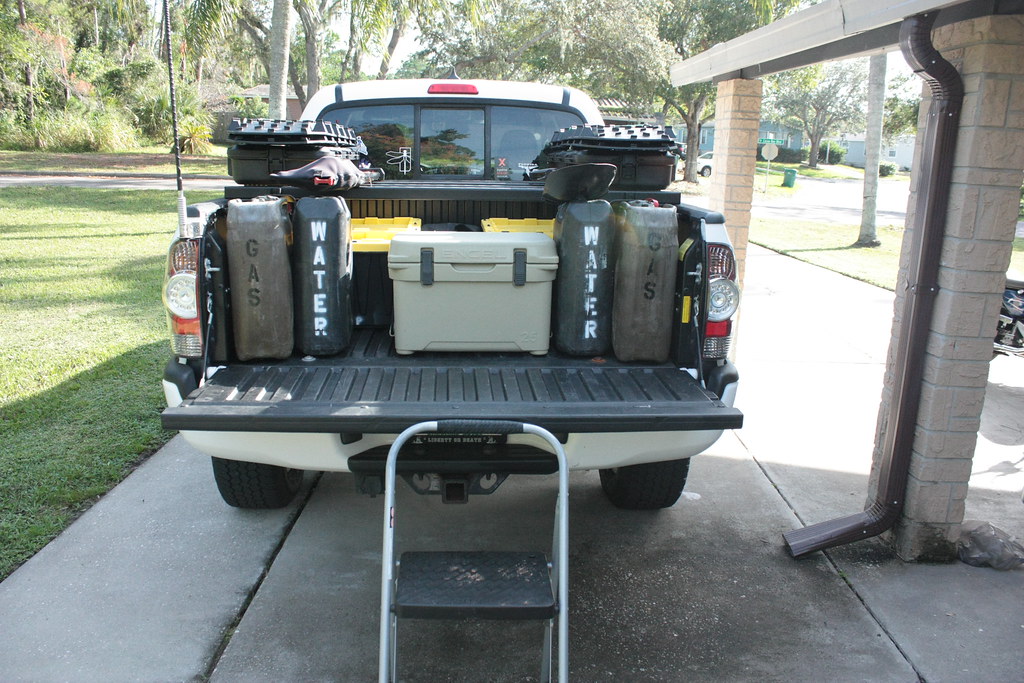
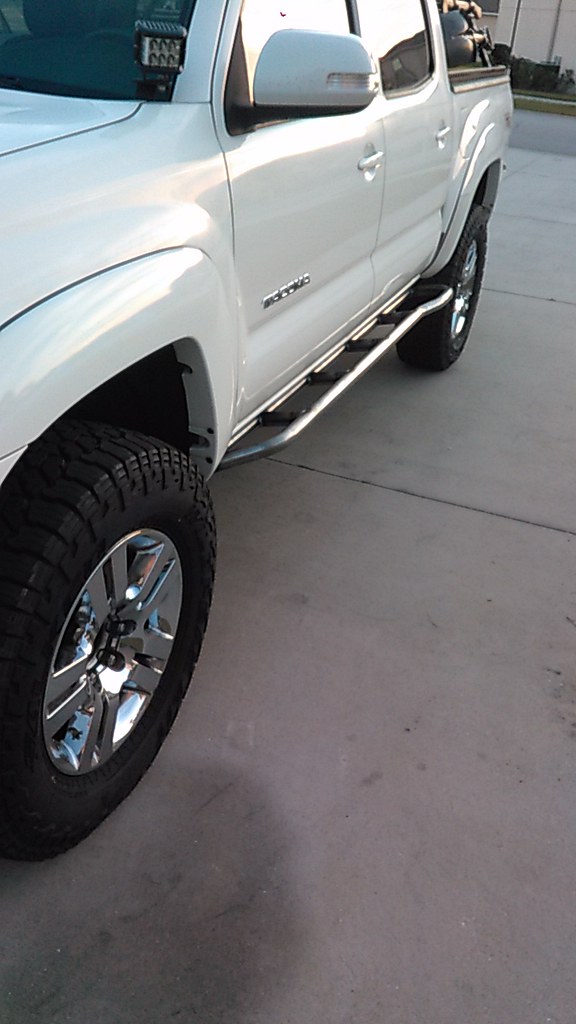
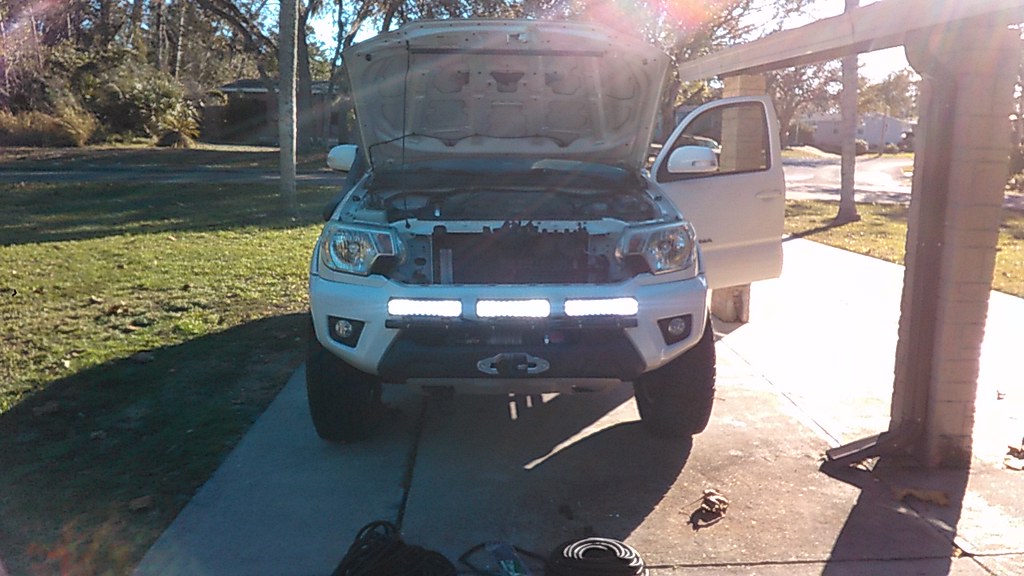
I don't have pictures of when I first got it, or even the pictures I took after I first installed the lift, so I'll start with how it sits today:
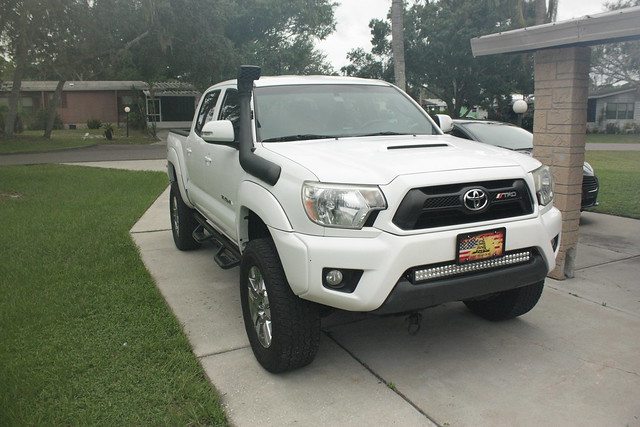


Modifications
Suspension
Bilstein 5100s - Installed
OME 885 Springs - Installed
SD Truck Springs AAL - Installed
UCAs - Future Upgrade
Tires
Falken Wildpeak AT3W 275/70-18
Maxxis Bighorn 315/75-16
Exterior - Functional
eBay HiLux Snorkel - Installed
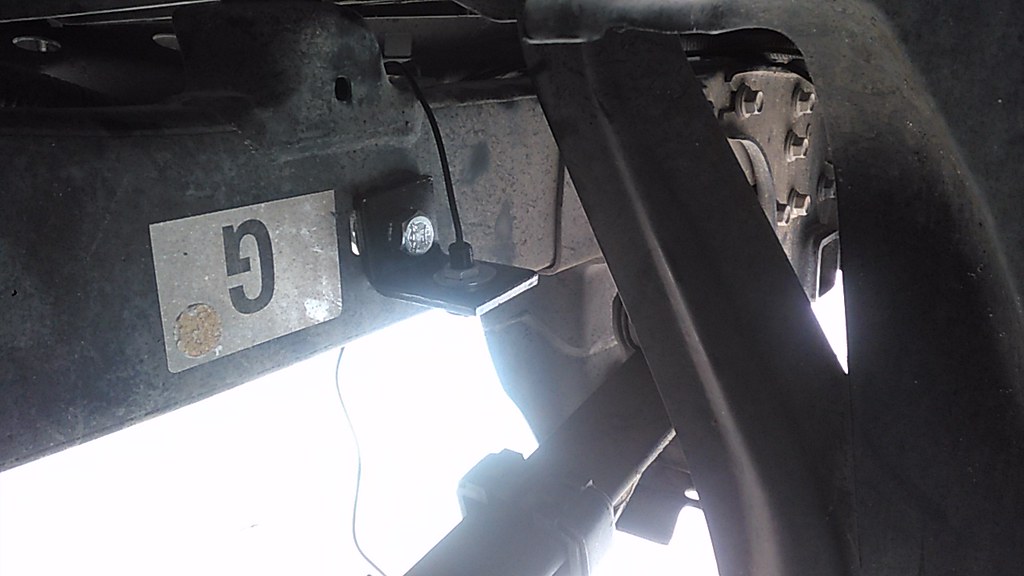
Rear Diff Breather relocation - Installed
eBay Side Steps - Installed - Sold
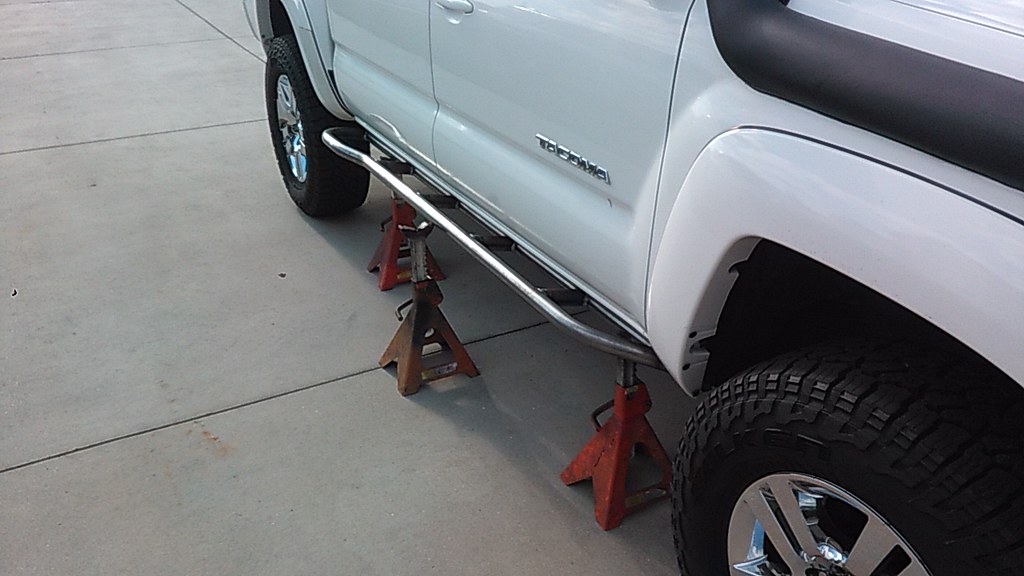
Sliders (4x Innovations) - Installed
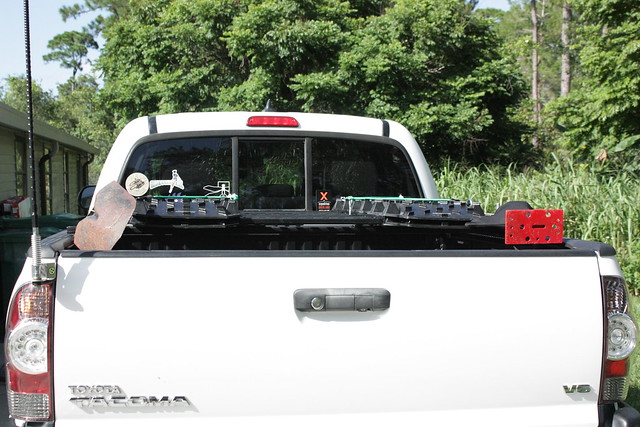
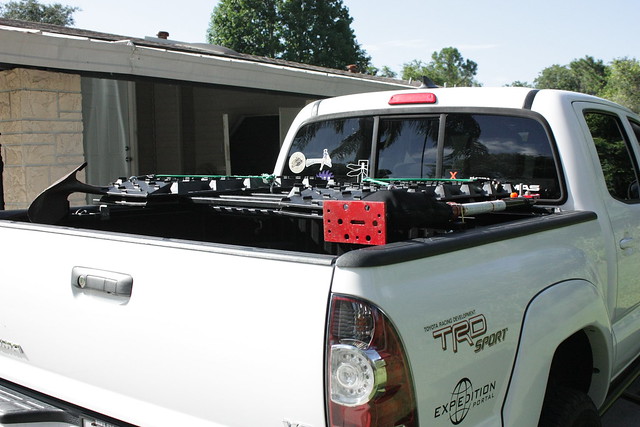
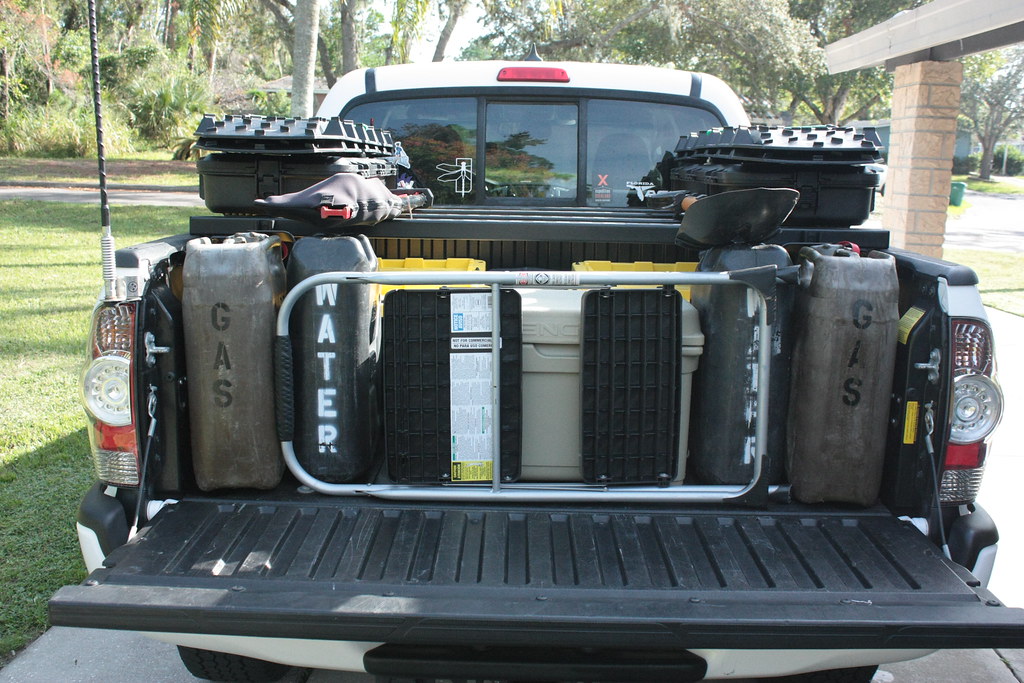
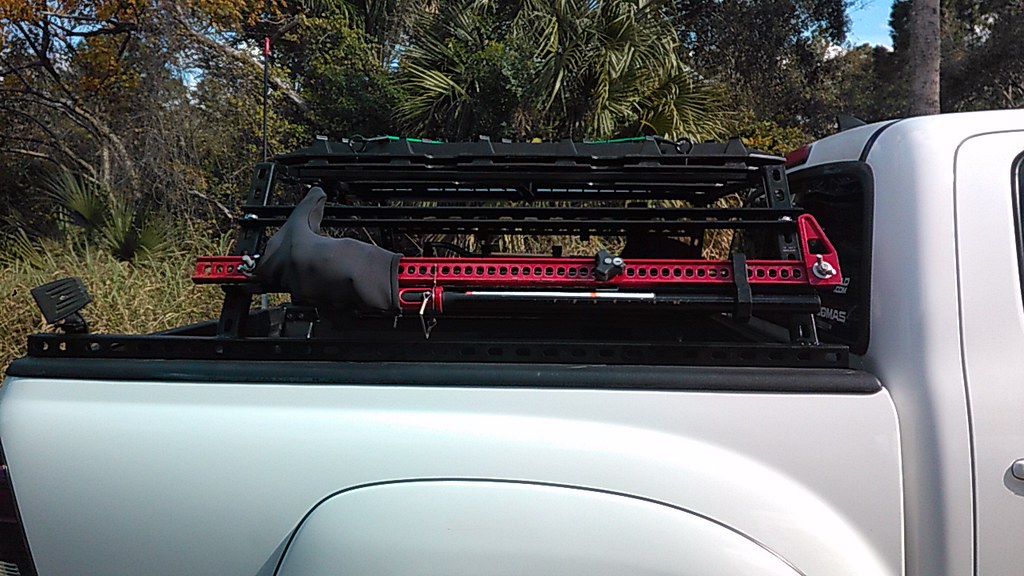
Bed Rack (AllPro) - Installed (bought from Tacomaworld member)
Skid Plates (SOS)- Installed
Plate Rear Bumper with tire carrier (SOS) - Installed
RTT - Smittybilt Overlander (bought from Tacomaworld member)
LCA Skids (4x Innovations)- Installed
Exterior - Aesthetic
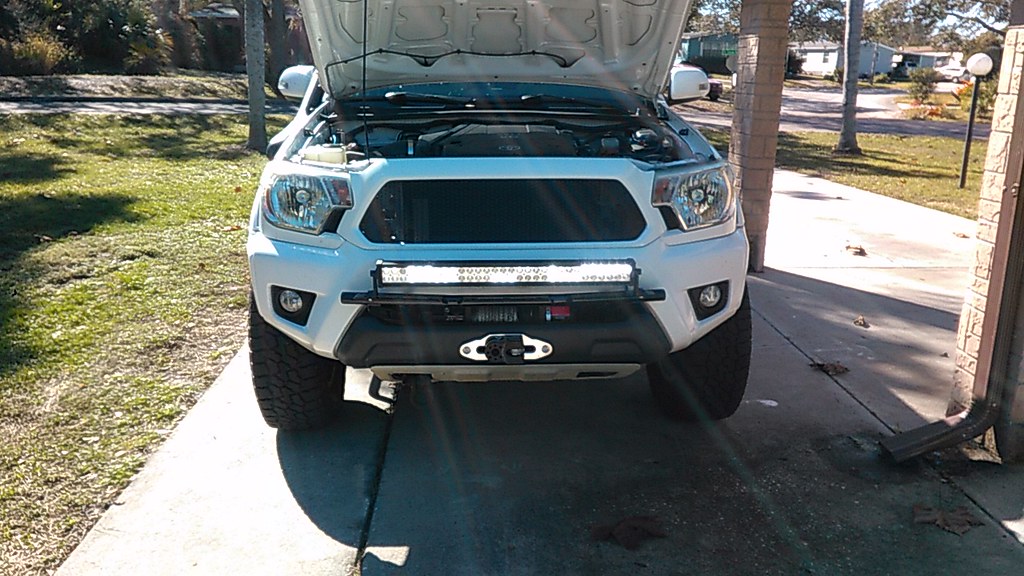
Mesh Grill (Customcargrills.com) - Installed
Lighting/Electrical
30" Light bar in lower valance opening - Replaced with N-Fab light bar mount and 3x 12" eBay light bars
Ditch Lights - Installed
Rock Lights - Installed
Camp Lights - Installed
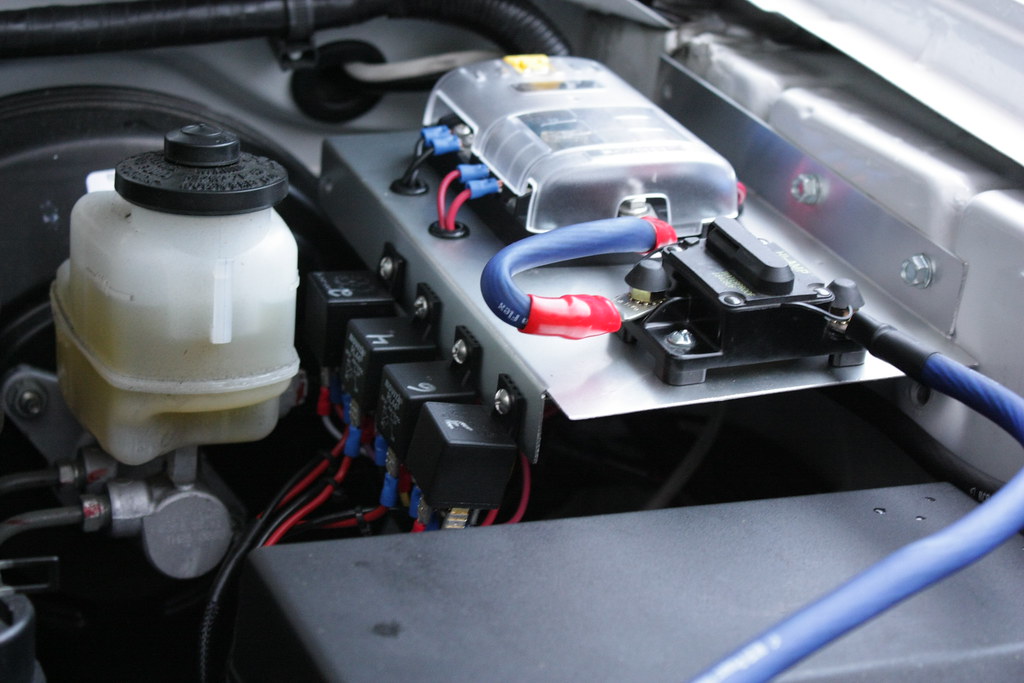
Auxiliary Relay/Fuse Block - Installed
Dual Battery/Group 31 Battery tray - Future Upgrade
Recovery
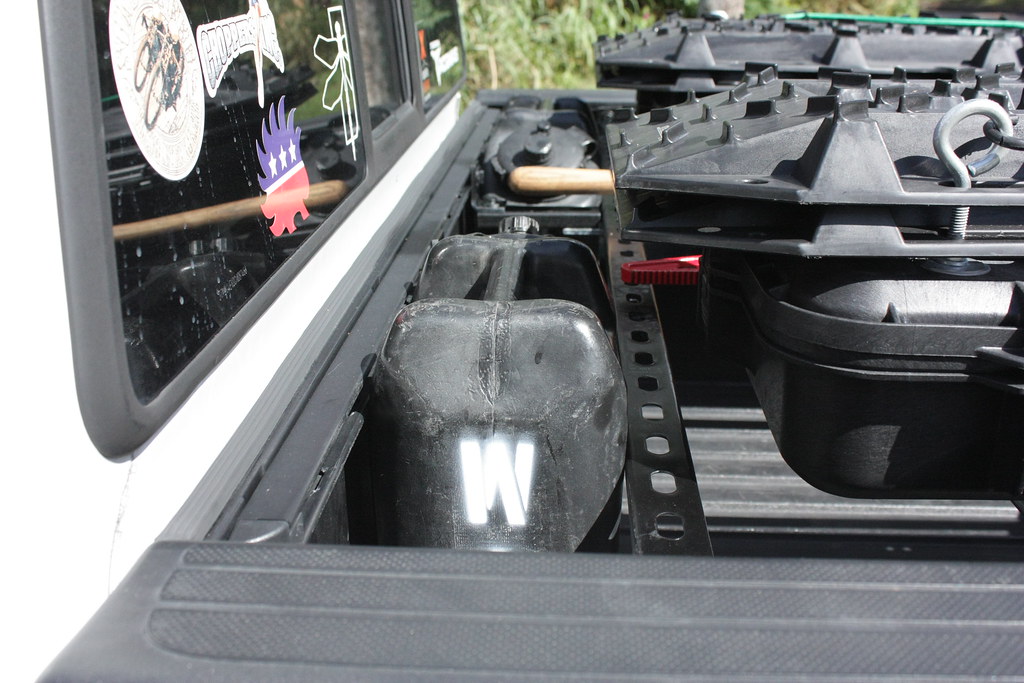
48" Hi-Lift - Mounted
Speedmaster Traction Boards (x4) - Mounted
Wyeth Scott More Power Puller Hand Winch (3 Ton w/ Amsteel Blue line, capable of 6 Ton pulls) - Purchased
Snatch Blocks & Shackles - Purchased
BulletProof front recovery point - Installed
Receiver shackle for rear - Installed (kept under rear seat)
Hidden Winch Mount (Pelfreybilt) - Installed
Smittybilt XRC 9500 - Installed
Navigation - Software
Gaia Maps - Installed
Hema Maps - Future Upgrade
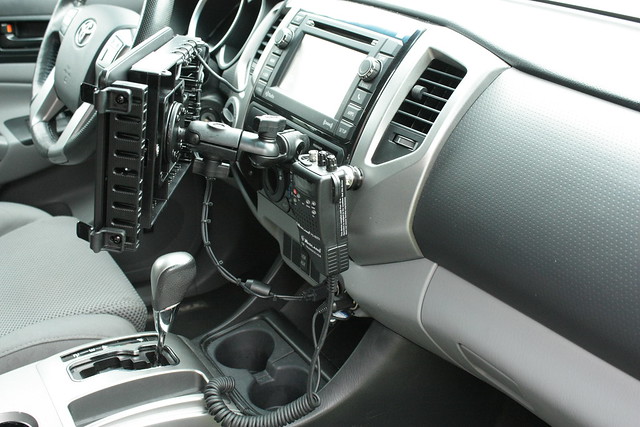
Navigation - Hardware
RCA 10" tablet - Installed
Globosat ST-359 Blue Tooth GPS Puck - Installed
BirdDawg Industries Tech Deck HD - Installed
Ram Tablet mount - Installed
Communications
Midland 75-822 - Installed
Cobra WX NW ST - Installed
Nite Ize Steelie magnetic mount for CB (passenger side)- Installed
Nite Ize Steelie magnetic mount for CB (driver side) - Installed
UHF/VHF Radio - BTECH UV-25X2 - Installed, using for scanning functions pending license/exam
As I build my truck, I am gearing for the most bang for the buck. This doesn't mean always going with the cheapest option, and, at times, I have and will continue to splurge on high dollar items as I see fit. Ultimately, I am a creature that prefers function over form, though I do believe the two don't have to be mutually exclusive. This is the third vehicle I've owned that is getting the overland (aka EAF) treatment, as such, I am utilizing lessons learned and equipment & gear accumulated from those previous builds.
To get things started, I'll share a couple of pictures from my previous overland ventures.
First, my H2.
Factory installed 35's (swapped the BFG AT's for BFG MT's), electronic locking center and rear diff, what more could you ask for as a basic platform to build from? I bought and built the H2 in 2010 when gas was just hitting $2 a gallon. Unfortunately, less than a year later, it was upwards of $5 a gallon where I was living, so it had to go. I traded it for a Subaru Forester that I subsequently kitted out:
After moving back to Florida, the Subaru was coming due for it's 100k service, and I was hearing a few more clicks and clunks than I could afford to fix at the time, so I traded it for another vehicle that was cheap yet fun to drive, a Fiat 500.
Laugh all you want, but those things are a blast to drive! After a couple years in that, I started to get the itch for another 4 wheel drive vehicle, which brings us to my 2012 Toyota Tacoma.
I don't have pictures of when I first got it, or even the pictures I took after I first installed the lift, so I'll start with how it sits today:
Modifications
Suspension
Bilstein 5100s - Installed
OME 885 Springs - Installed
SD Truck Springs AAL - Installed
UCAs - Future Upgrade
Tires
Maxxis Bighorn 315/75-16
Exterior - Functional
eBay HiLux Snorkel - Installed
Rear Diff Breather relocation - Installed
eBay Side Steps - Installed - Sold
Sliders (4x Innovations) - Installed
Bed Rack (AllPro) - Installed (bought from Tacomaworld member)
Skid Plates (SOS)- Installed
Plate Rear Bumper with tire carrier (SOS) - Installed
RTT - Smittybilt Overlander (bought from Tacomaworld member)
LCA Skids (4x Innovations)- Installed
Exterior - Aesthetic
Mesh Grill (Customcargrills.com) - Installed
Lighting/Electrical
30" Light bar in lower valance opening - Replaced with N-Fab light bar mount and 3x 12" eBay light bars
Ditch Lights - Installed
Rock Lights - Installed
Camp Lights - Installed
Auxiliary Relay/Fuse Block - Installed
Dual Battery/Group 31 Battery tray - Future Upgrade
Recovery
48" Hi-Lift - Mounted
Speedmaster Traction Boards (x4) - Mounted
Wyeth Scott More Power Puller Hand Winch (3 Ton w/ Amsteel Blue line, capable of 6 Ton pulls) - Purchased
Snatch Blocks & Shackles - Purchased
BulletProof front recovery point - Installed
Receiver shackle for rear - Installed (kept under rear seat)
Hidden Winch Mount (Pelfreybilt) - Installed
Smittybilt XRC 9500 - Installed
Navigation - Software
Gaia Maps - Installed
Hema Maps - Future Upgrade
Navigation - Hardware
RCA 10" tablet - Installed
Globosat ST-359 Blue Tooth GPS Puck - Installed
BirdDawg Industries Tech Deck HD - Installed
Ram Tablet mount - Installed
Communications
Cobra WX NW ST - Installed
Nite Ize Steelie magnetic mount for CB (passenger side)- Installed
Nite Ize Steelie magnetic mount for CB (driver side) - Installed
UHF/VHF Radio - BTECH UV-25X2 - Installed, using for scanning functions pending license/exam
Last edited:


 KIMG0798
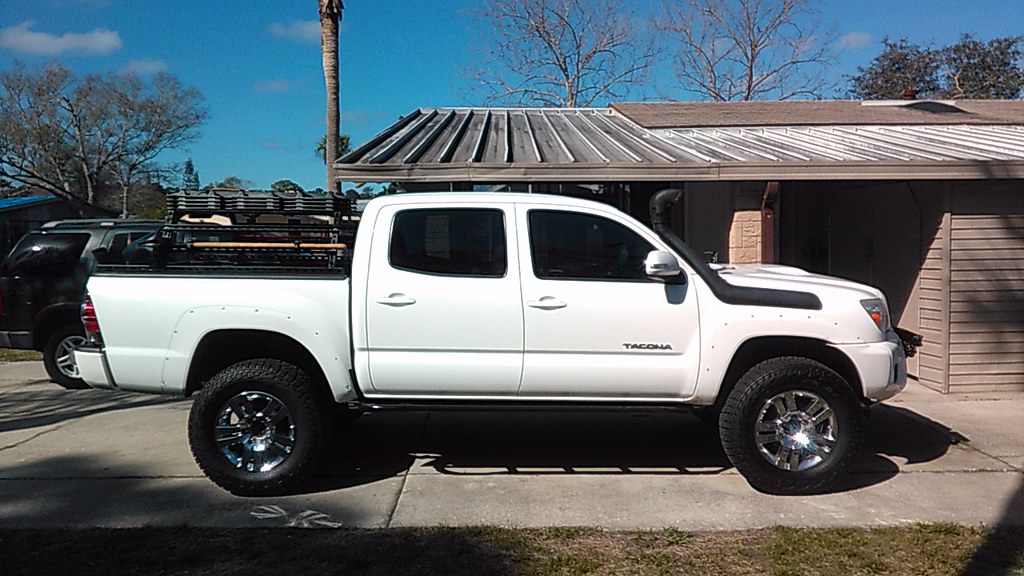 KIMG0799
 IMG_7788
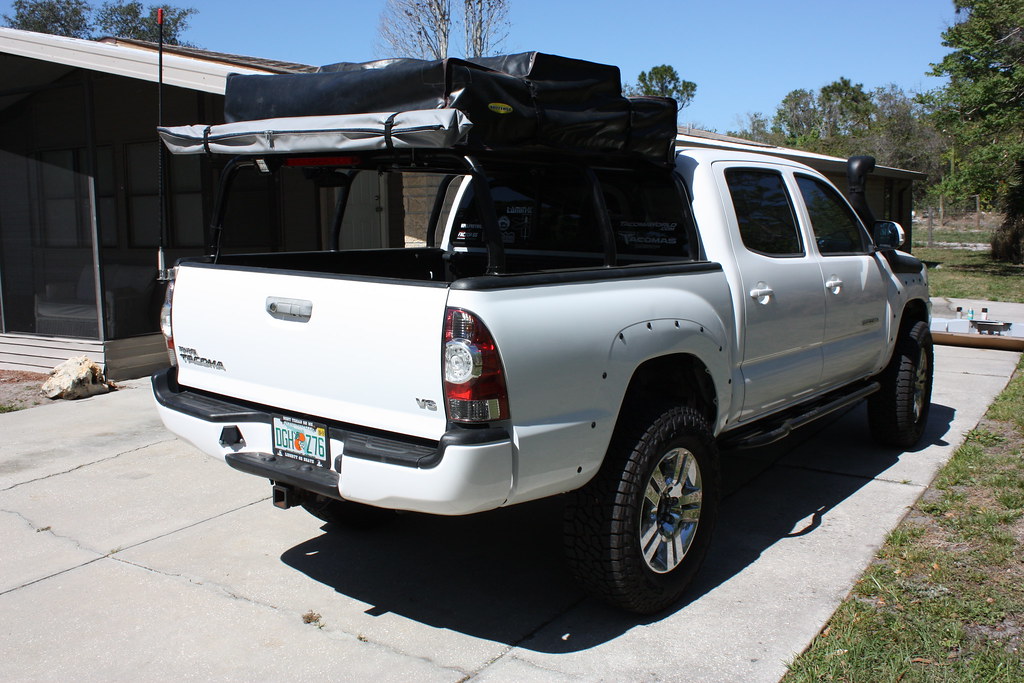 IMG_7789
 KIMG0821
 KIMG0823
 KIMG0822
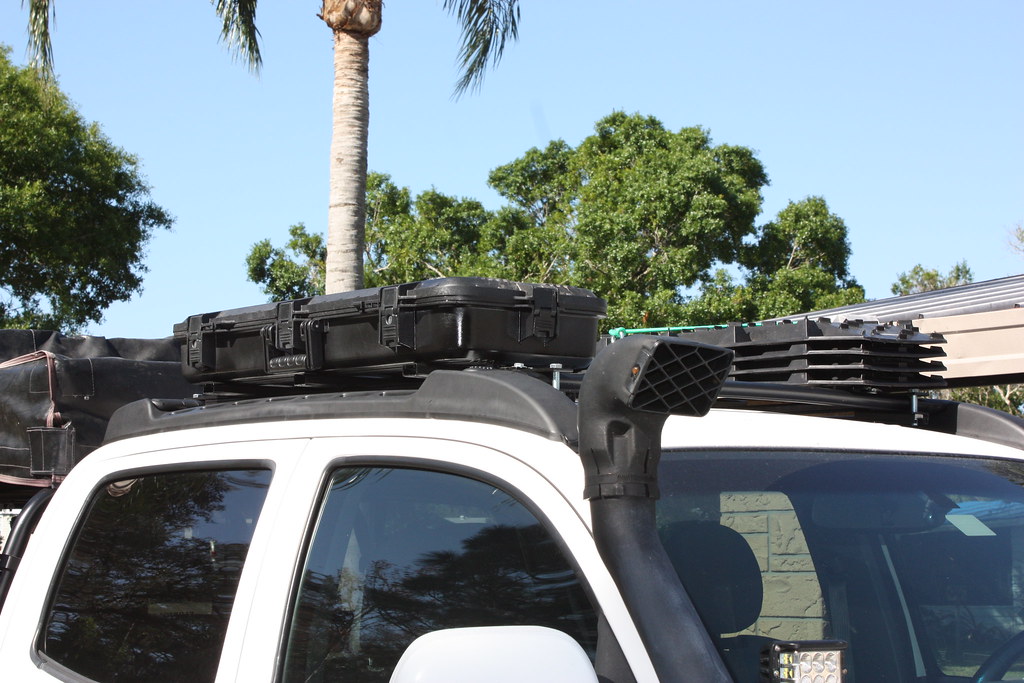 IMG_7812
 IMG_7814
 IMG_7815
 IMG_7817
 IMG_7827
 IMG_7828
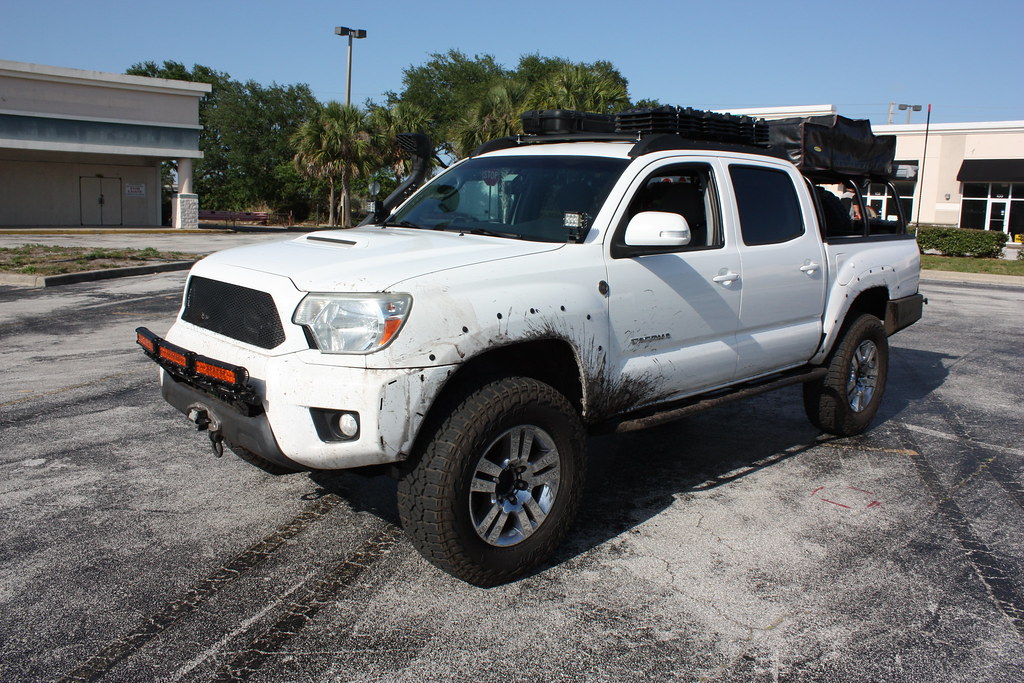 IMG_7829
 IMG_7830
 IMG_7831
 IMG_7832
