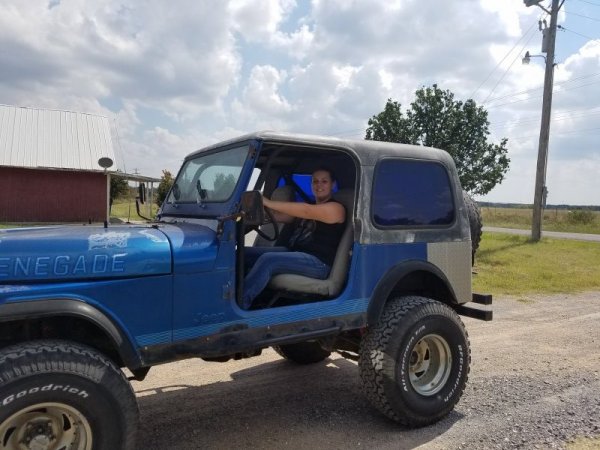
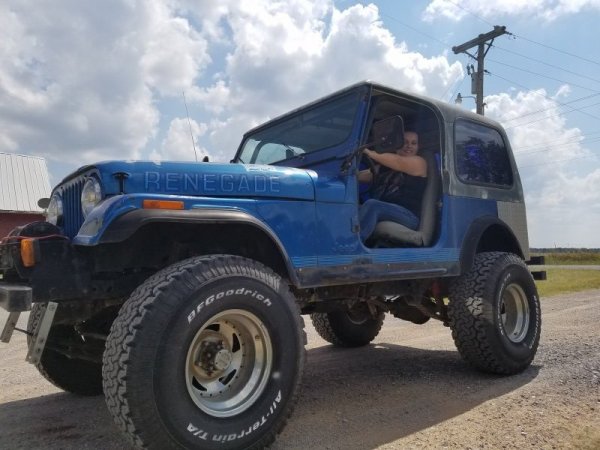
'85 Jeep CJ7 - Let's get this party started

  • HTML tutorial

Jimmy P

Rank V
Launch Member

Off-Road Ranger I

1,415
Duncan, OK, USA
Member #

15768

Ham/GMRS Callsign
KG5JLP
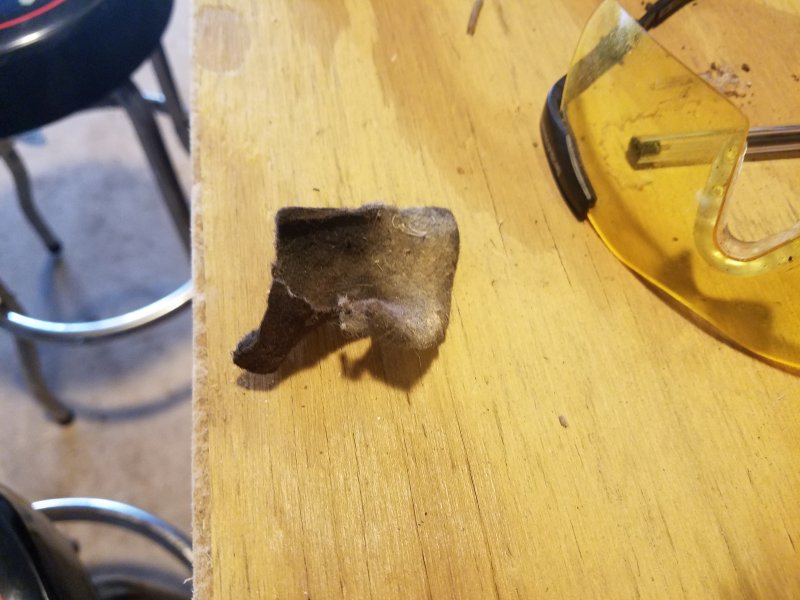
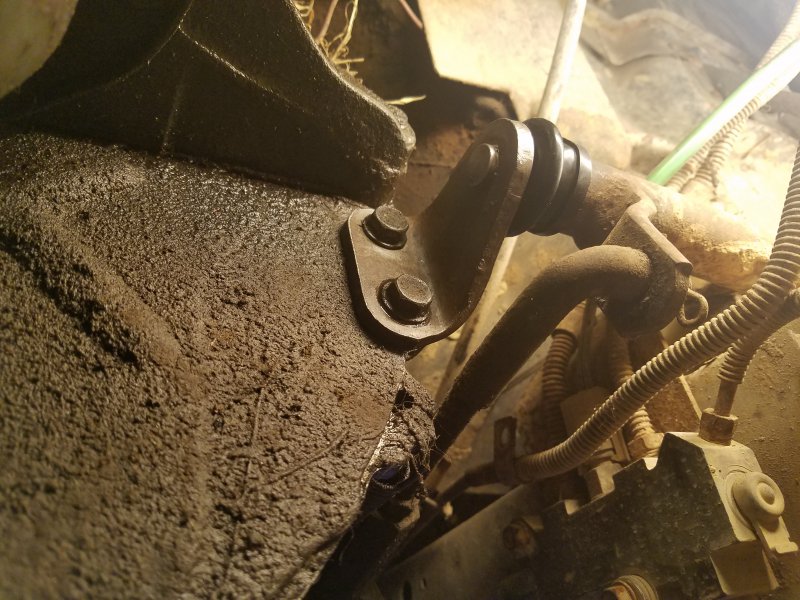
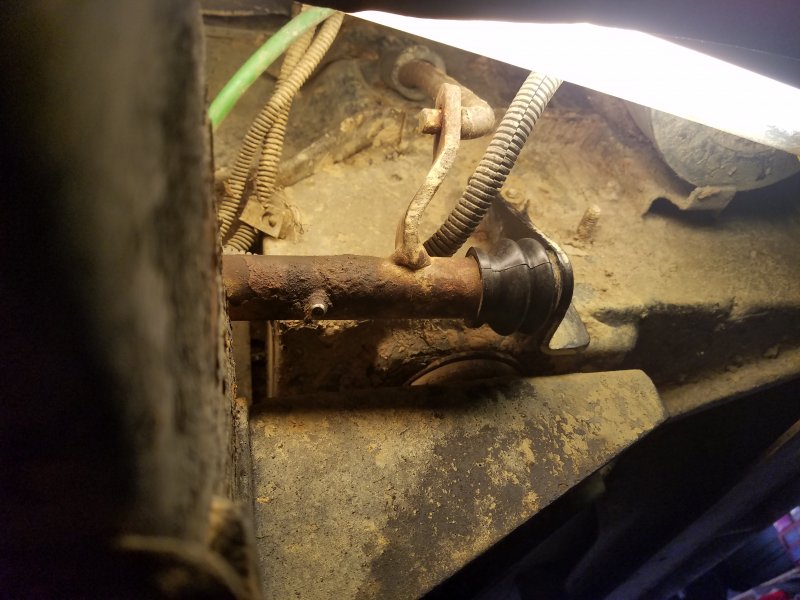
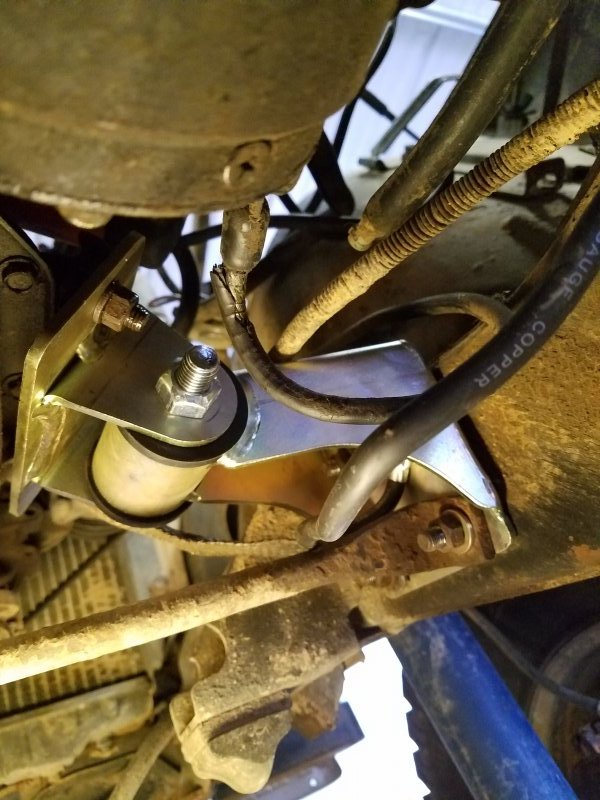
You may have seen yesterday that it was a party. Well, we got the party started last night, and shut'er down today. There was a bit of agitation, a bit of confusion, a bit of cursing, and a bit of rejoicing, and it got done. The motor mounts weren't all that bad to change out. Actually none of the mounts were from the perspective of getting the bolts out. Now, actually getting things back in and aligned is a different story.

When I pulled the motor mounts, there was a ground strap on the drivers side that didn't reach around the new mount correctly. That threw me off, but eventually I was able to get new cables and replace some other grounds that were simply missing. Once again the guys at the Jeep-CJ forums were invaluable in getting me pointed in the right direction.

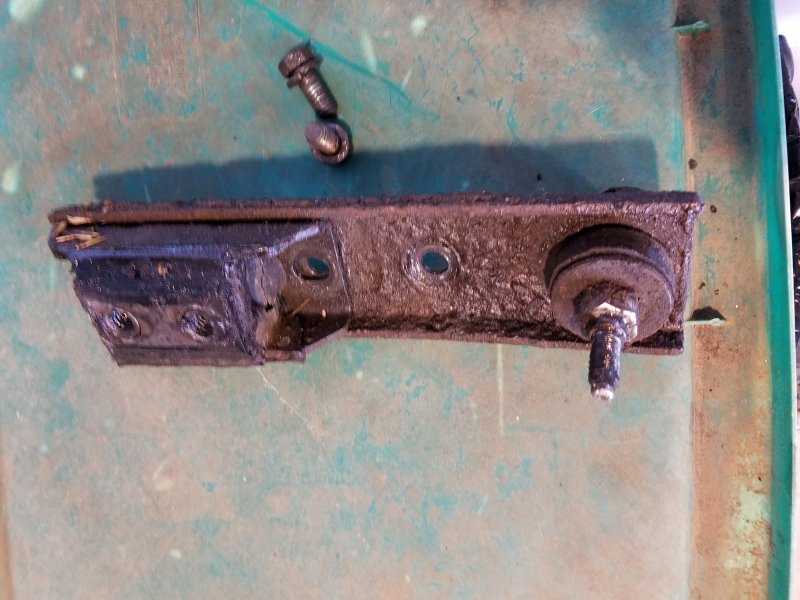
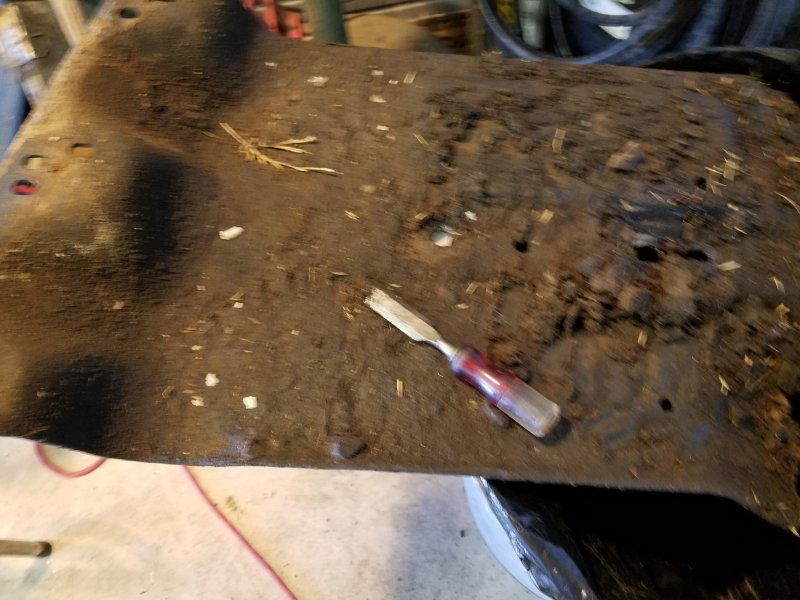
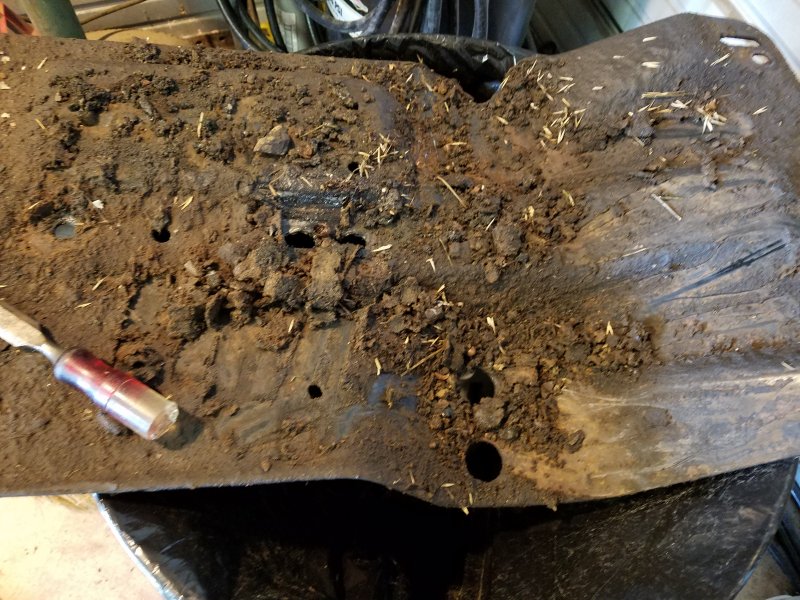
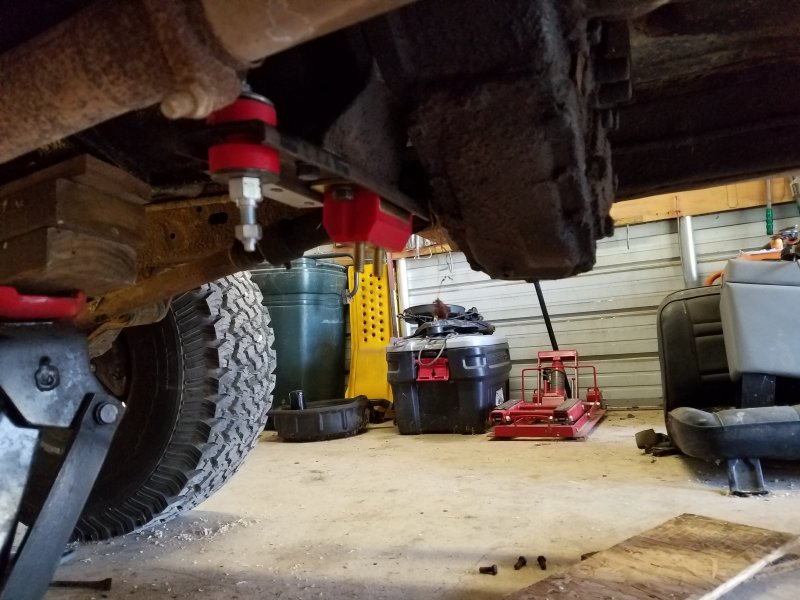
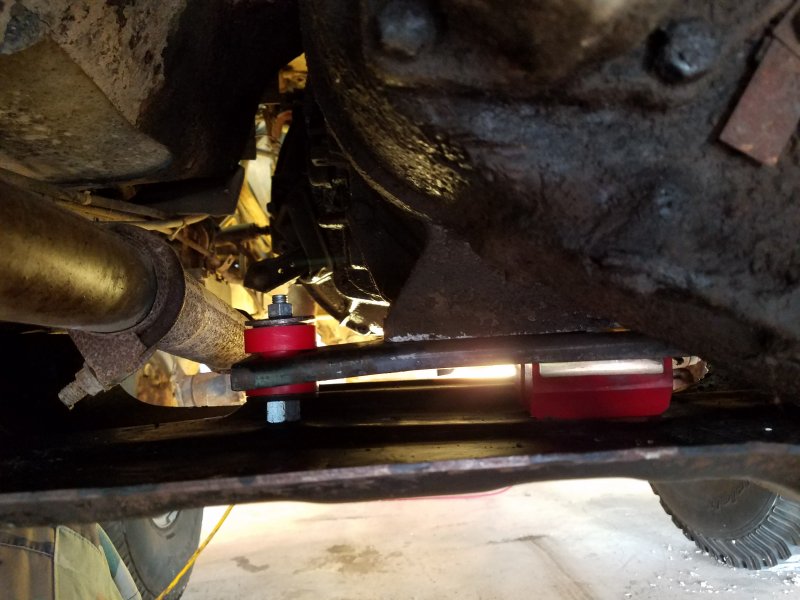
The transmission mount and torque arm was super easy to get out, even though it was literally caked with about a 1/2 inch of nastiness. I pulled it down and got to cleaning. I kid you not, I think I pull close to 15lbs of crud off the mounts and skid pan. Once I got everything cleaned up, I threw the new mounts on, and that's when the real fun began. I had a heck of a time getting the pan mounting bolts to line up on both sides of the frame rails. To add insult to injury, one of the captive nuts decided to pop out when I went to put the bolt back in. I'm just thankful it didn't decide to start spinning when I was taking it out. I'm not sure what I'm going to do about that, just yet, but for now it's got 5 out of the 6 bolts in place. Actually, that's the way it was when I pulled it out, just reversed.

And now on to the pictures. I dig the payoff, and I'm sure the jeep is going to thank me for it. Of course, I found a few other things I need to deal with, like the steering shaft and rear main seal, but at least now the motor's not going to torque out of the frame. I call it a win.


Jimmy P

Rank V
Launch Member

Off-Road Ranger I

1,415
Duncan, OK, USA
Member #

15768

Ham/GMRS Callsign
KG5JLP
Quite some time ago i was 4 wheeling somewhere I shouldn't have been, and my clutch went out. One of my friends who was a novice mechanic said that an "e clip" had popped out of the mechanism, which I now know is called a bellcrank. We ended up using duct tape to get it out of where we were, and sometime later it was "fixed". Now, I'm not saying I didn't "fix" it, but I will say I don't remember ever doing anything like what I found. As a matter of clarification, I remember putting an "e clip" in place and got a "mechanic" to do the "repair". (That's a lot of sarcastic quotes)

Tonight, armed with the correct repair parts (2 bushings, 2 boots, and 2 clips) and an idea of what I had to do i set off to refresh it. It was working, but after replacing all those mounts it was suggested that those being worn probably had an adverse effect on the bellcrank bushings and they'd be cheap insurance. Well, let me tell you, it was a good thing I did.

How it didn't fall apart, I'll never know. The side connected to the transmission was missing the boot and the retaining clip. The side closes to the outside of the vehicle didn't have the boot, the bushing, or the clip. It had, what I believe to be, a piece of steel wool stuffed in the hole to take up the slack. Did I mention that I took it to a "mechanic" to do the "repair"? Pictures don't lie.

The repair process was really simple. Two nuts, two bolts, and a bit of fidgeting and it was done. All in all it took about 20 or 30 minutes, and wasn't hard at all. Knowledge is power apparently. I still need to lube it, but I didn't have the time to go through and lube everything, so it'll happen when I do that. Hopefully it will last a good long while now.

So, check out the creative fix and my subsequent refresh...

Transmission side


Driver side


Creative aftermarket bushing


Repaired


Jimmy P

Rank V
Launch Member

Off-Road Ranger I

1,415
Duncan, OK, USA
Member #

15768

Ham/GMRS Callsign
KG5JLP
It's been a while since I've had anything to add. The holidays had me put this on the back burner, and I'm still trying to catch up :smile: The next big thing is still to get a new radiator so I can progress in road tests, etc. I did get a new bluetooth marine amp for Christmas to try and solve my audio issues, and I think it's going to work fine for my purposes. It eliminates the need for me to run a head unit, and I'm good with that.

This weekend I created a new audio panel to fill the space on the dash where the head unit would go. It's got a simple gain control, 3.5mm aux cable input, and 2 12v USB charging ports with a voltage meter. I'm not the greatest fabricator as I haven't done much of this, but I think it looks decent enough for now :smile: My phone will act as my main source of music and will mount to the roll bar, and be plugged into the charger most of the time.


I also created a panel to mount the amp, my aux fuse block, and a ground distribution block. I may swap the ground distribution block out for a buss bar, but I need to finish getting this installed and then make my decision. I still have to mount my circuit breaker and relay under the hood and then final mount the panel, but a temp test reveals everything works as is, which is good. Again, not a beautiful install, but far better than things I've done in the past :smile:


Hopefully I can get this finished up in short order, and get my radiator in so I can continue with the important drive line stuff.
 

Jimmy P

Rank V
Launch Member

Off-Road Ranger I

1,415
Duncan, OK, USA
Member #

15768

Ham/GMRS Callsign
KG5JLP
Who needs a functional radiator if you got tunes?
That's what I keep saying, but my daughter thinks she wants to drive this old rattle trap to school at the end of the year. I can sit in the garage and jam out, no need to go anywhere. Who am I kidding, I want to get it back on the road as bad as she wants to drive it :smile:

The louder the tunes , the less noises you hear . It's the best way to deal with rattles on a old rig
I'm with you there. There's a loud squeak that I can't find nor get rid of, so I just keep turning it up. When I hear a new noise, I play a different song :smile:
 

caswanson

Rank V

Enthusiast III

1,478
Flint Hills
An exciting day indeed. No worries on the patience, though. I taught her how to drive to begin with, and we click very well in that type of situation.

We got out relatively early this morning and did a quick power washing of the undercarriage, and then pulled it back in the garage to flush and bleed the brakes. We thought that it would be a good to be able to stop assuming she were able to get going :smile:

After we finished up with the brakes we began. Now bear in mind, she has ridden a motorcycle, so the concept of a clutch is not foreign to her. She let out on the clutch and took off, no problem at all. Twice in a row at that. The squeals of delight and ear to ear smiles were priceless. She's got a long way to go, but we spent about 2 hours laughing at the starts, stops, stalls, clutch popping, and bucking. Just like with any of the other journeys we've taken, it's all about building those lasting memories :smile:

All was not fun and games, unfortunately. I did find that my radiator is leaking, so another repair to go on the list. We've got a few months to work through the driving lessons, the repairs, and the upgrades. Plenty of time.

And, of course, this would be worthless without a picture for posterity.


HOLY BOOMERANG SHACKLES BATMAN! LOL!
 

Gilligan

Rank IV
Launch Member

Off-Road Ranger I

1,146
Norton, Massachusetts, USA
First Name
Daxton
Last Name
Tarantino
Member #

21789

Ham/GMRS Callsign
Gilligan
Some consumables (wire / connectors / etc.) showed up today and I was able to finish up the under hood stuff and moved on to the lights. That means that the temp sending unit is good to go! WooHoo!!! Of course, I still need to tie and wrap everything, but I'm going to finish the lighting and under dash wiring before I close it all up. Who cares, the gauges all work! :smile: I'm not sure about the idiot lights, yet, but I'll get there.

I also replaced my dimmer switch as it was wreaking havoc on my lighting circuit. While I was at it I went through and checked my flashers and under dash relays. Let me tell you, there has been some hack work done under the dash as well. How about having someone adding a 3rd flasher because the turn signal flasher in the fuse block wasn't good enough? Strange. I need a new horn relay, too. That and some light bulbs, but so far things are continuing to look up.
Hey there just going through your post and wanted to see if you were still actively working on this project or if it was completed how did it come out? I have an 83 I was toying around with converting into an overland project. love to know how everything turned out!