Over the last 8 months, I've been going through the long, and often frustrating, task of outfitting my 2002 Ford Explorer to be my daily driver/overland rig.
Let's start with the basics:
Year - 2002
Make - Ford
Model - Explorer
Trim - Eddie Bauer Edition
Engine - 4.6L V8
Differential - 8.8" D4 (limited slip)
Tires - 245/70 R16
Miles (@ purchase) - 119,500
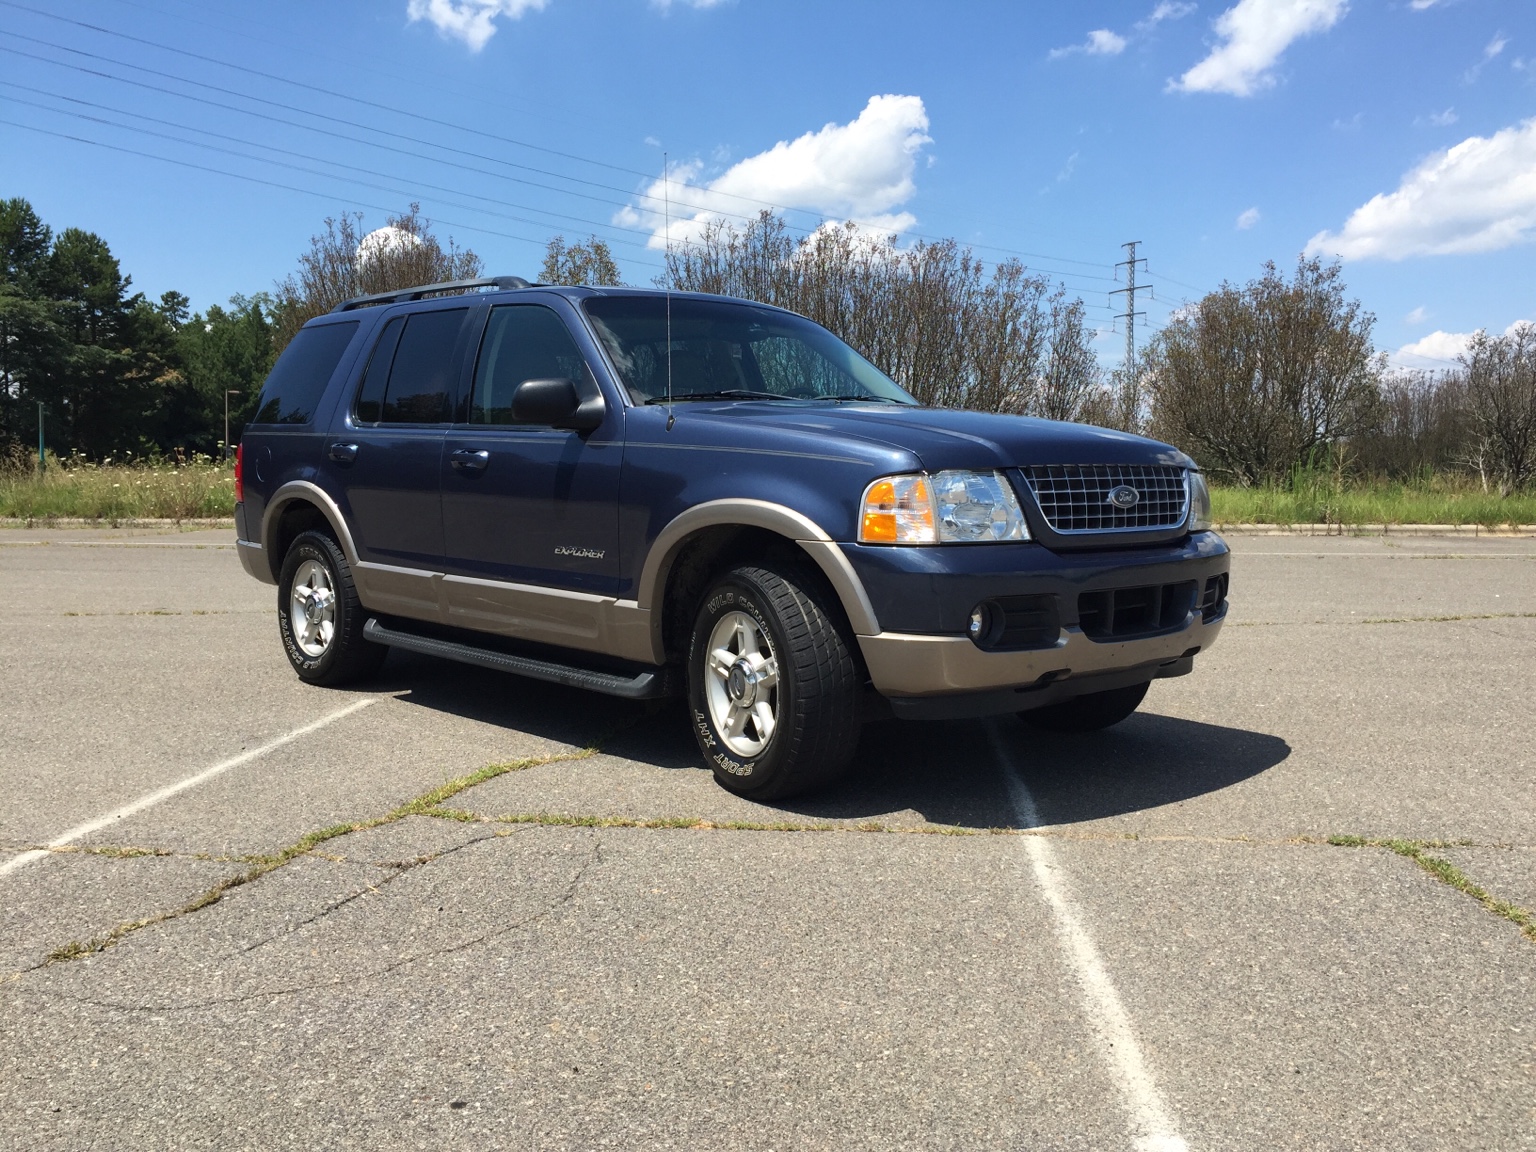
Here's how Ed looked when I picked him up
The very first thing I did was remove the steps. Once removed, the truck looks like it has more clearance. However, the frame rails are just as low as the steps, so no additional clearance is achieved by removing them (it just looks cooler)

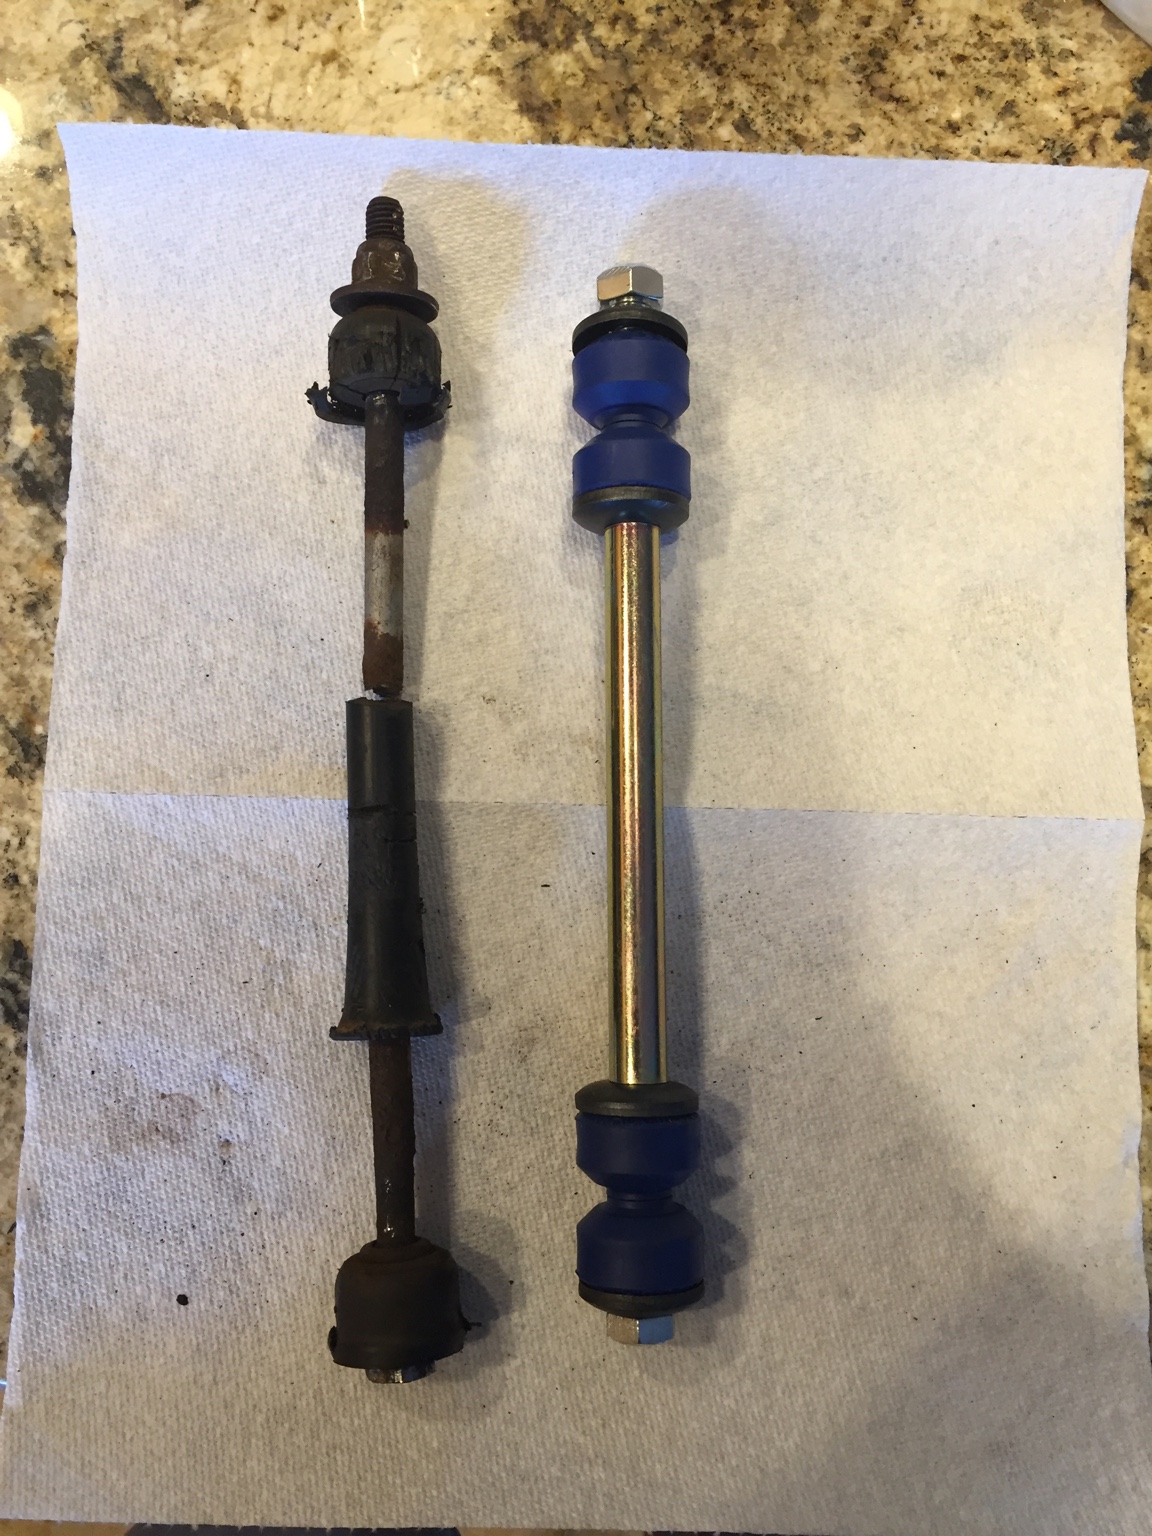
I put in Moog sway bar end links to replace the factory ones. They're slightly longer allow for a bit more articulation
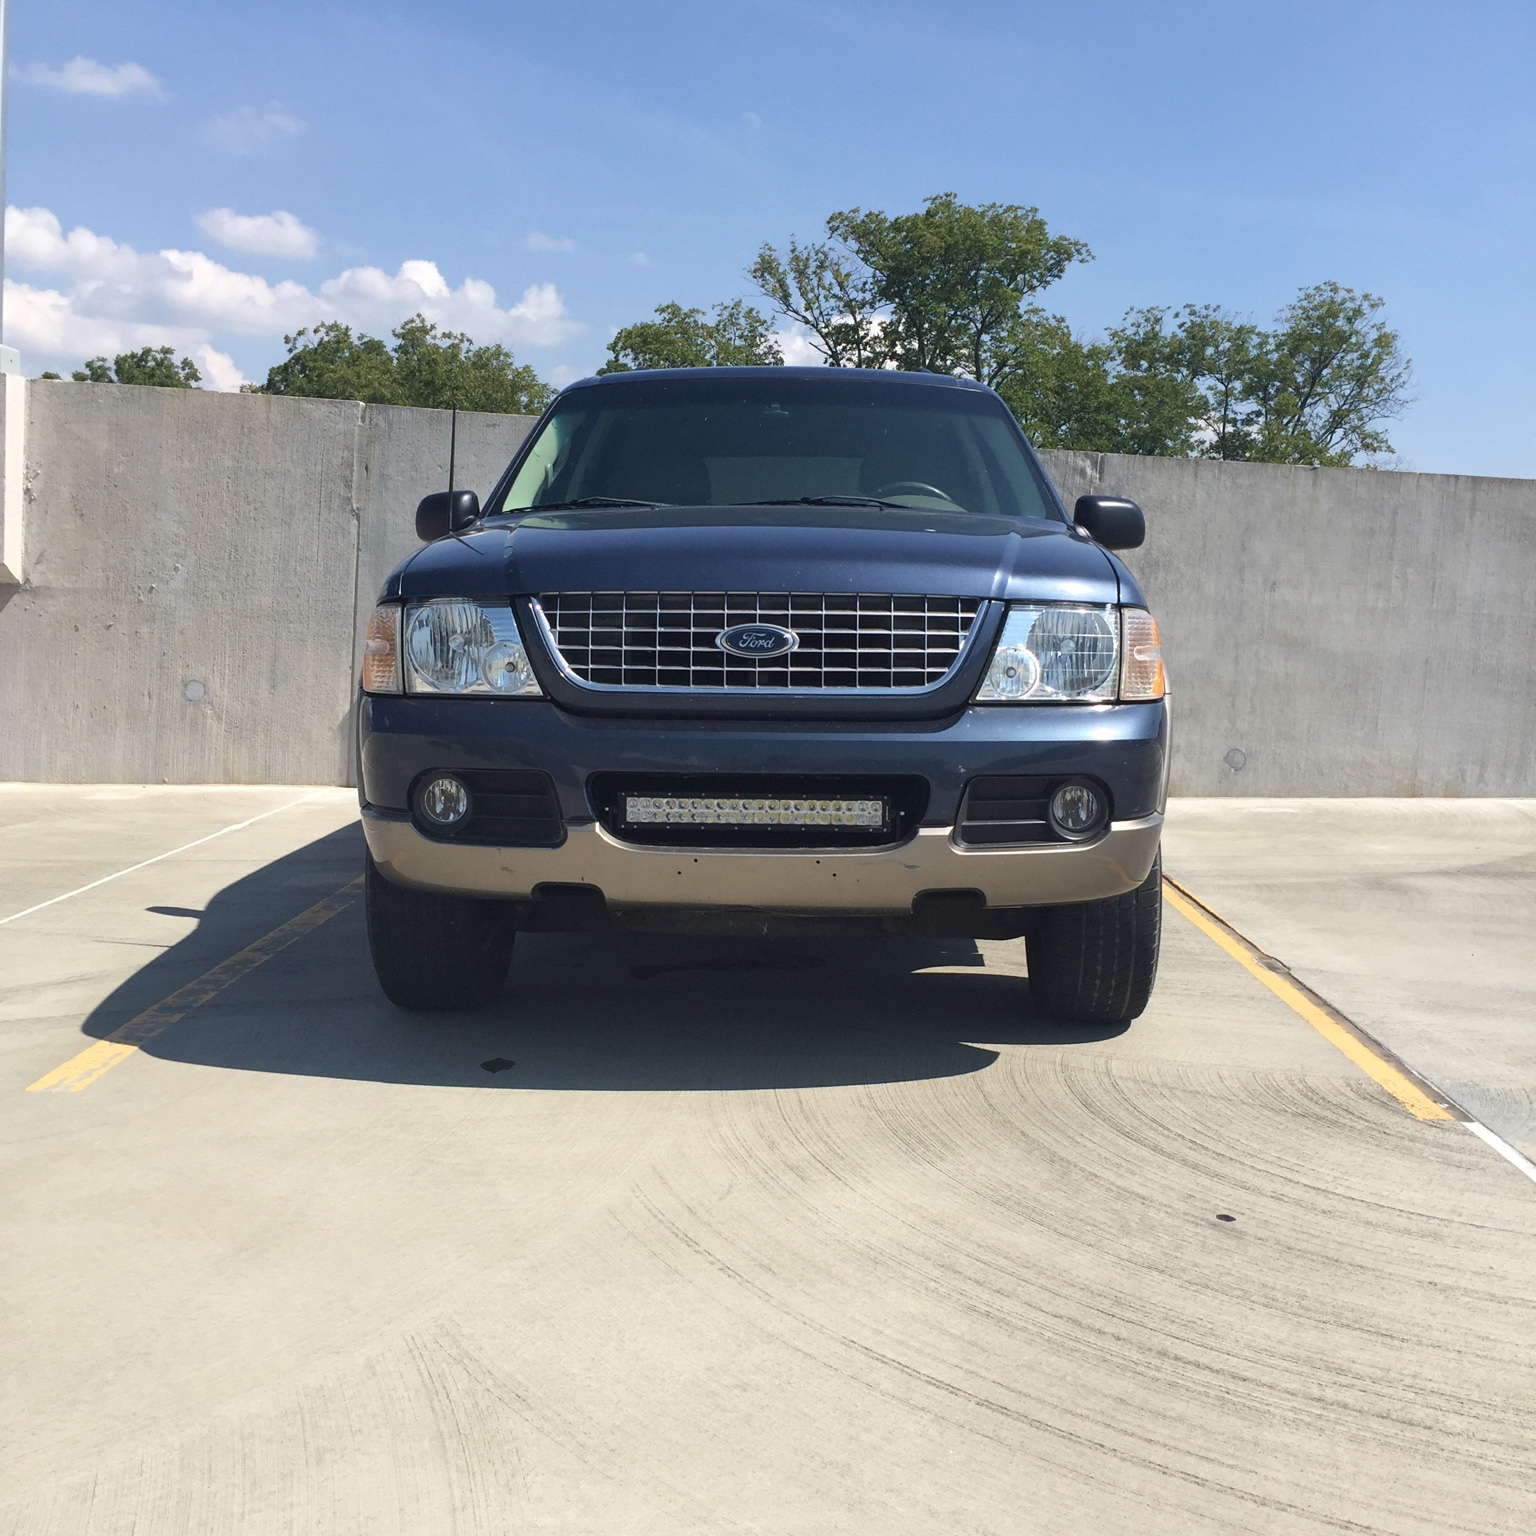
Next up was lighting. I started by removing the center bumper trim piece and measuring how wide it was. It was just large enough to fit a 22" LED light bar. I went with a brand called Auxbeam because it was affordable and had great reviews (I have never had a problem with it and I use it every weekend for hours at a time)
I used a piece of wood to mock up what the light bar would look like in my bumper

The light bar is mounted directly to the metal bumper support. I removed the bumper cover and bumper support in order to drill the holes necessary for the hardware that was supplied with the light bar. The mounts are pointed in, towards the light bar itself, to allow for a bit of clearance on either side

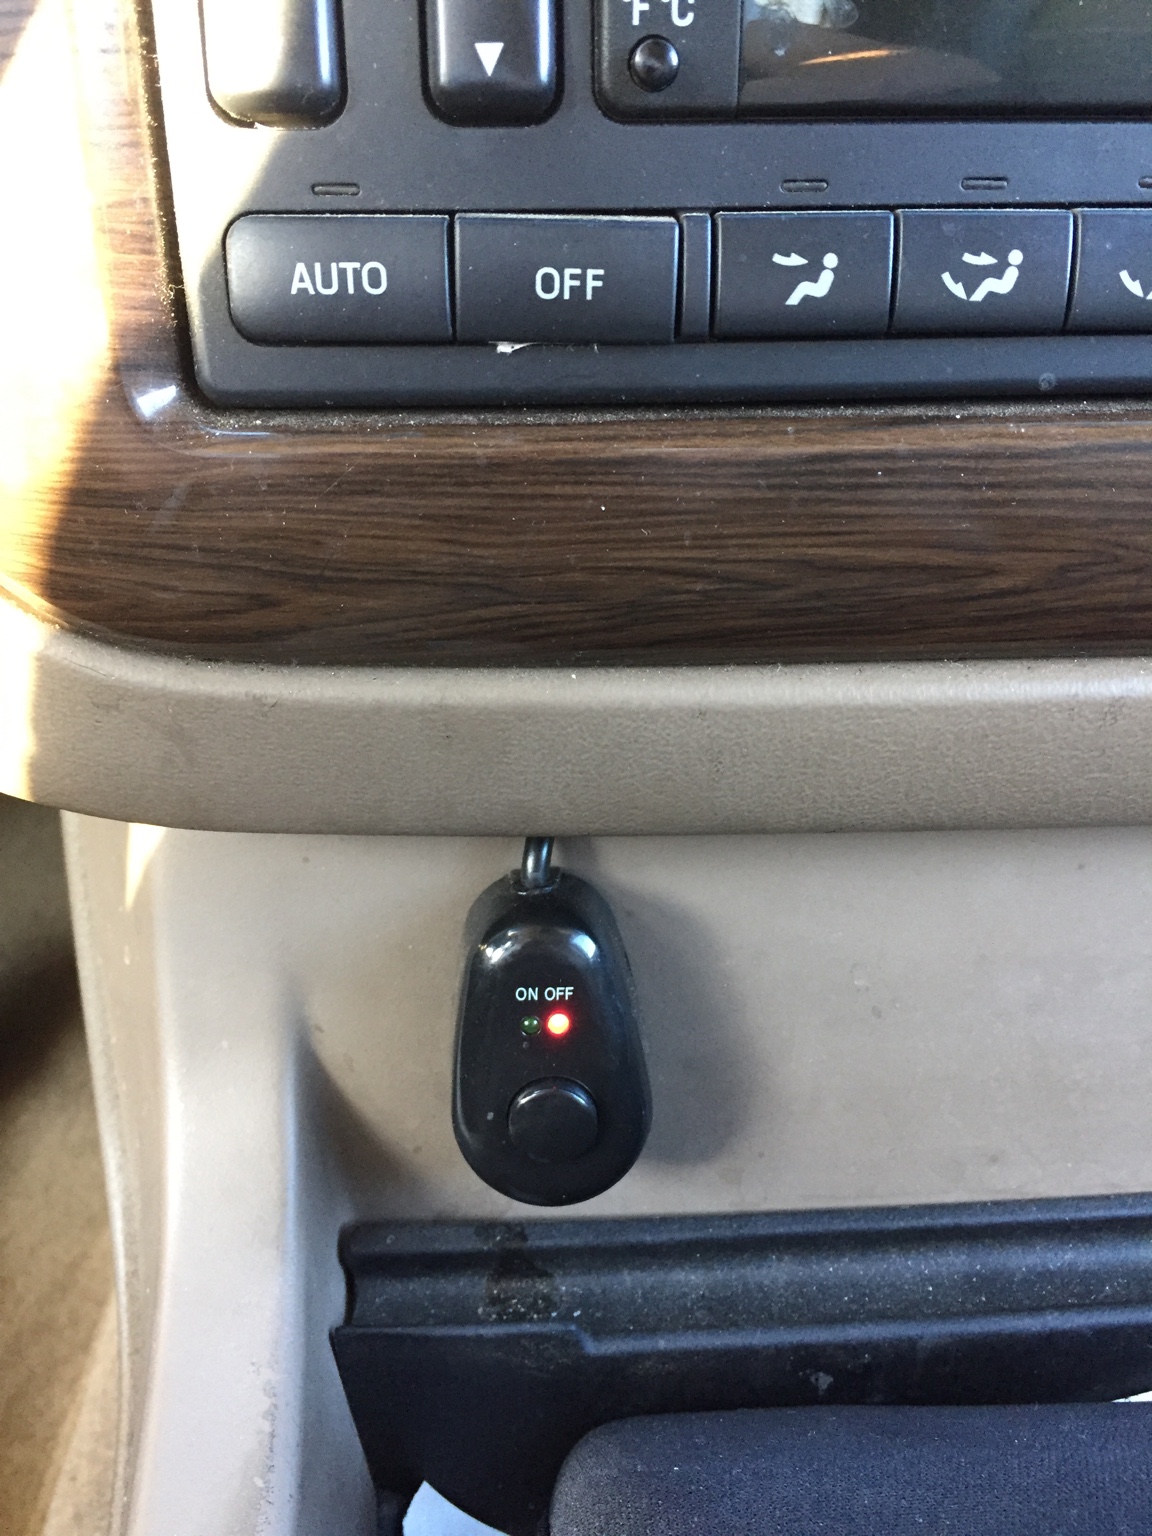
After cleaning up the plastic around the mounts, I ran the wiring up and behind the drivers side head light, and connected it to the wiring harness I bought with my light bar. I then ran the switch and all of its wiring into the cab and placed the switch on my center console
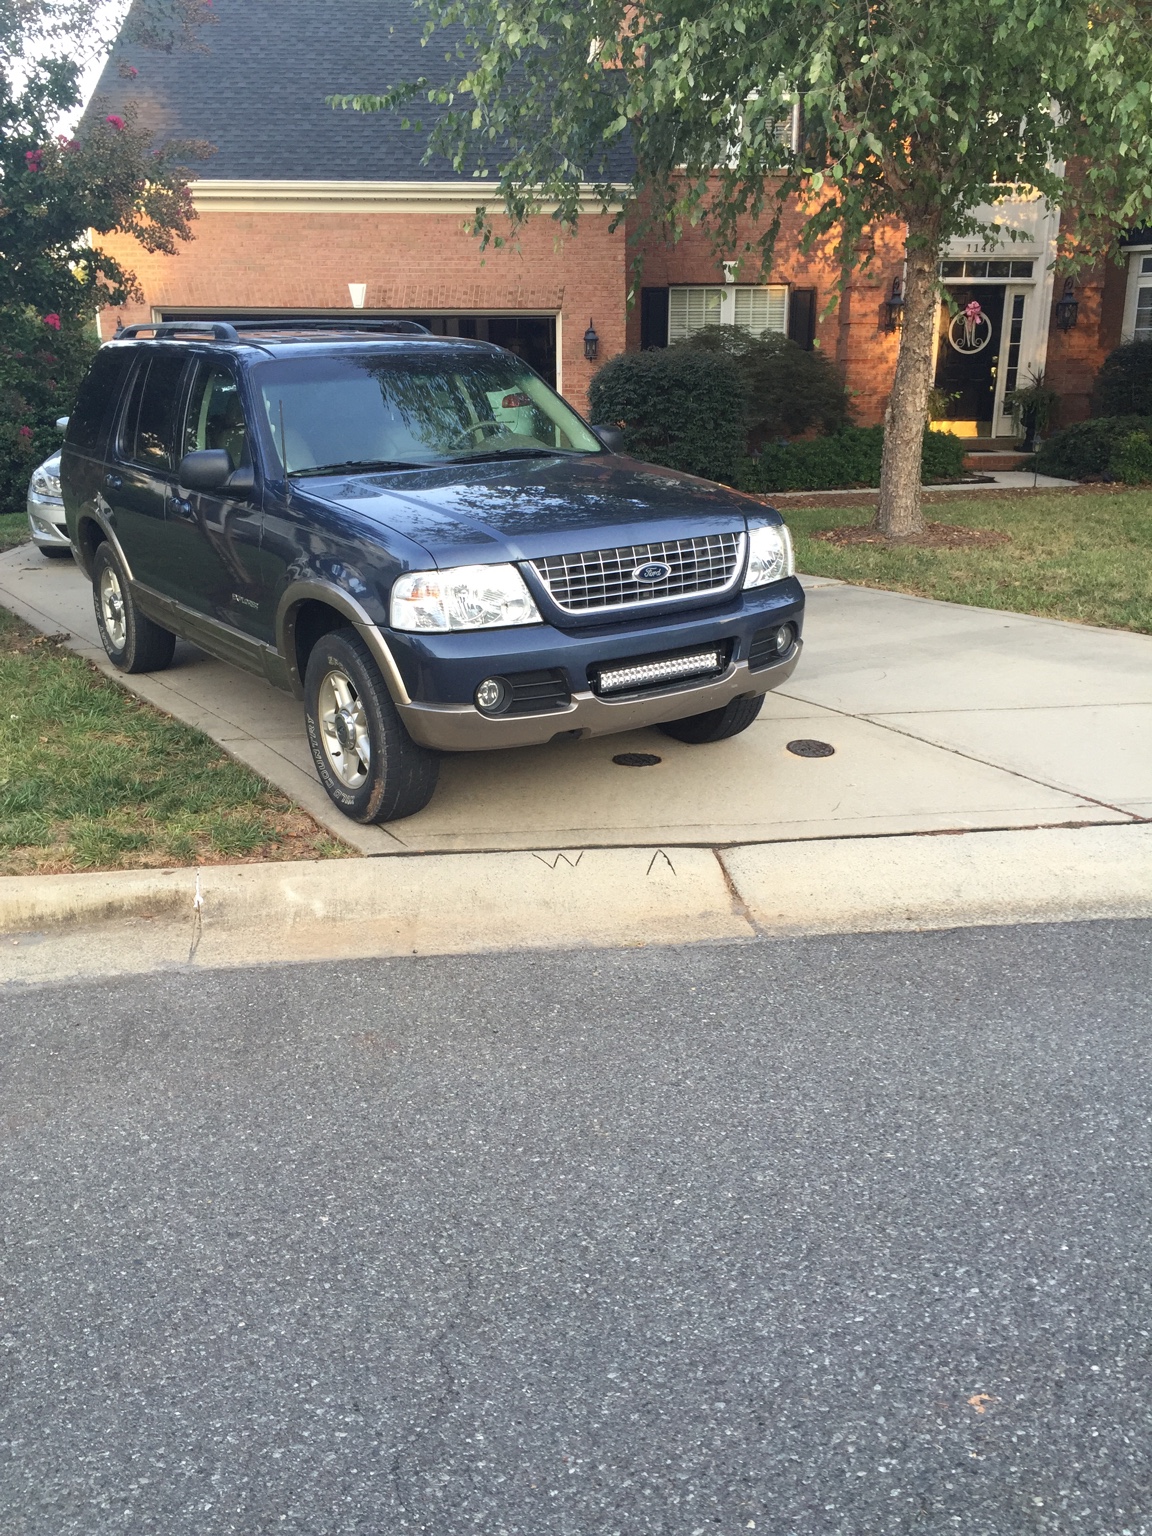
With the bumper cover back on and trimmed, the light bar was complete
I started looking at other lights for Ed too. I liked the simple, stock head lights because they'd be cheap to replace if they ever broke on the trail. I found some corner lights on eBay that didn't have the orange inserts and I decided to get those. Well, my girlfriend beat me to the punch and got them as a gift! A girl that buys you truck parts, she sure is a keeper!
The stock corner lights:

And the new ones:

I also slightly tinted my tail lights because I don't like bright red tail lights. It's just a preference

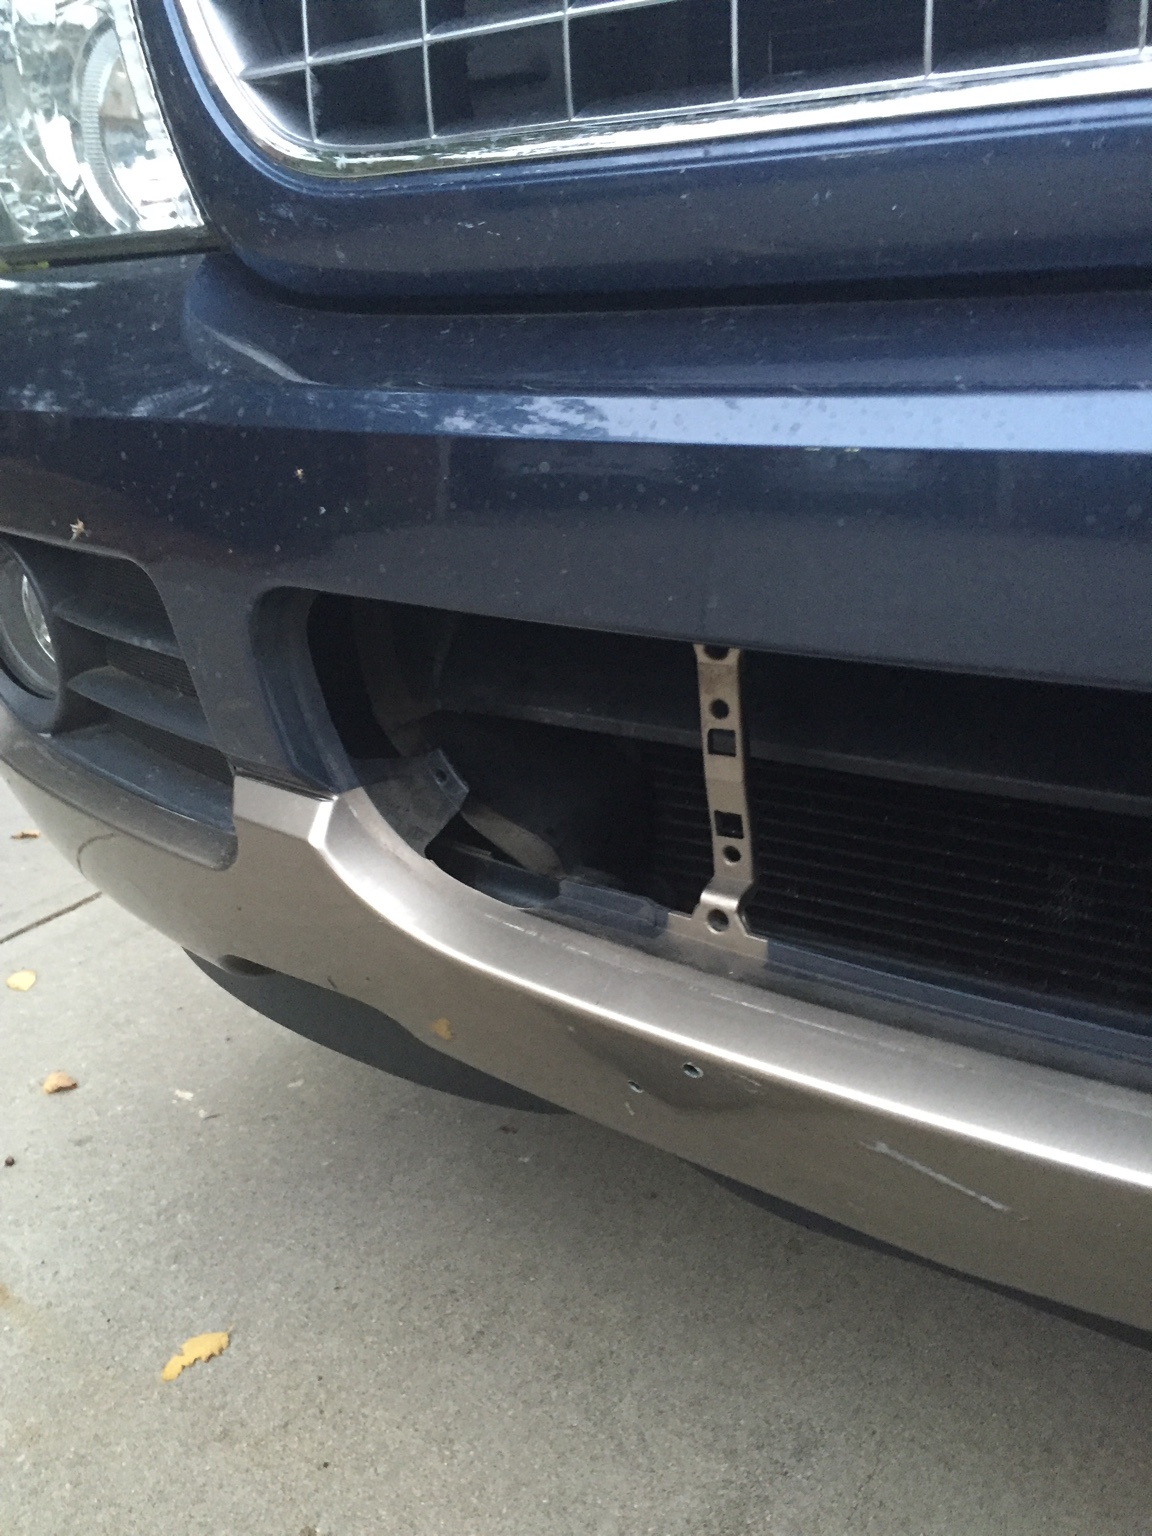
I found some pre-owned factory tow hooks from an F-150 that bolt directly to the frame rails on the Explorer. There's even cutouts in the bumper already!

I then bought new upper control arms because it was time to pick a lift kit and the upper control arms that were in the truck were too worn to handle the extra strain. I bought stock replacements instead of upgraded ones due to my tight budget

With 3rd and 4th Gen Explorers, there's really only two ways to go when it comes to lift kits (not including ready lift struts). There's the billet aluminum lift from BTF Fabrication out of California and there's cheap, steel, eBay grade lifts. Like I previously stated, I was on a tight budget so I went with the steel lift. It was $110 cheaper and still the same size as the BTF equivalent (about 3" in the front and 2.5" in the rear)

I got the front done in a weekend in my garage at home. I used hand tools only and it was quite the task.
The struts needed to be removed so that the springs could be compressed to rotate the top-hat. It has to be rotated 180 degrees to allow the lift to be bolted on. Once the top-hat is rotated, the spring can be decompressed and the lift spacer can be bolted up to the factory strut bolts. Then the strut is placed back into its correct position (with some standing on the lug bolts to get the lower control arm low enough to account for the 3" difference)
The front was complete but I knew I couldn't do the back at home due to time and impatience. So, I swallowed my pride and drove my truck with a slight squat for two weeks, until I could get shop time with a friend of mine. (I was embarrassed for every second I was near that thing, even though it was only slightly squatted)
I only took one picture of it and the angle makes it look leveled instead

I finally drove the hour out to my friend's shop to get the rear lift installed. The rear lift (the triangle pieces in the picture above) was not the right shape to fit into the body where the rear struts mount. We had to cut them down until the points of the triangles were rounded out (a little hack, yes, but hey, it's eBay!).
After the cuts and new paint to keep the parts from rusting, the new lifted struts, that also needed to be rotated went back in the truck.

Now if it wasn't obvious already, the tires were hideously small. They barely had any tread left in them and were about to start showing chords in the rears if I wasn't careful
The tire pictured is the best of all four:

So I had a very big decision to make: All-Terrains or Mud-Terrains
Considering the truck is my daily driver, I quickly decided on All-Terrains due to the fact that no Mud-Terrains on the market today come with a mileage warranty.
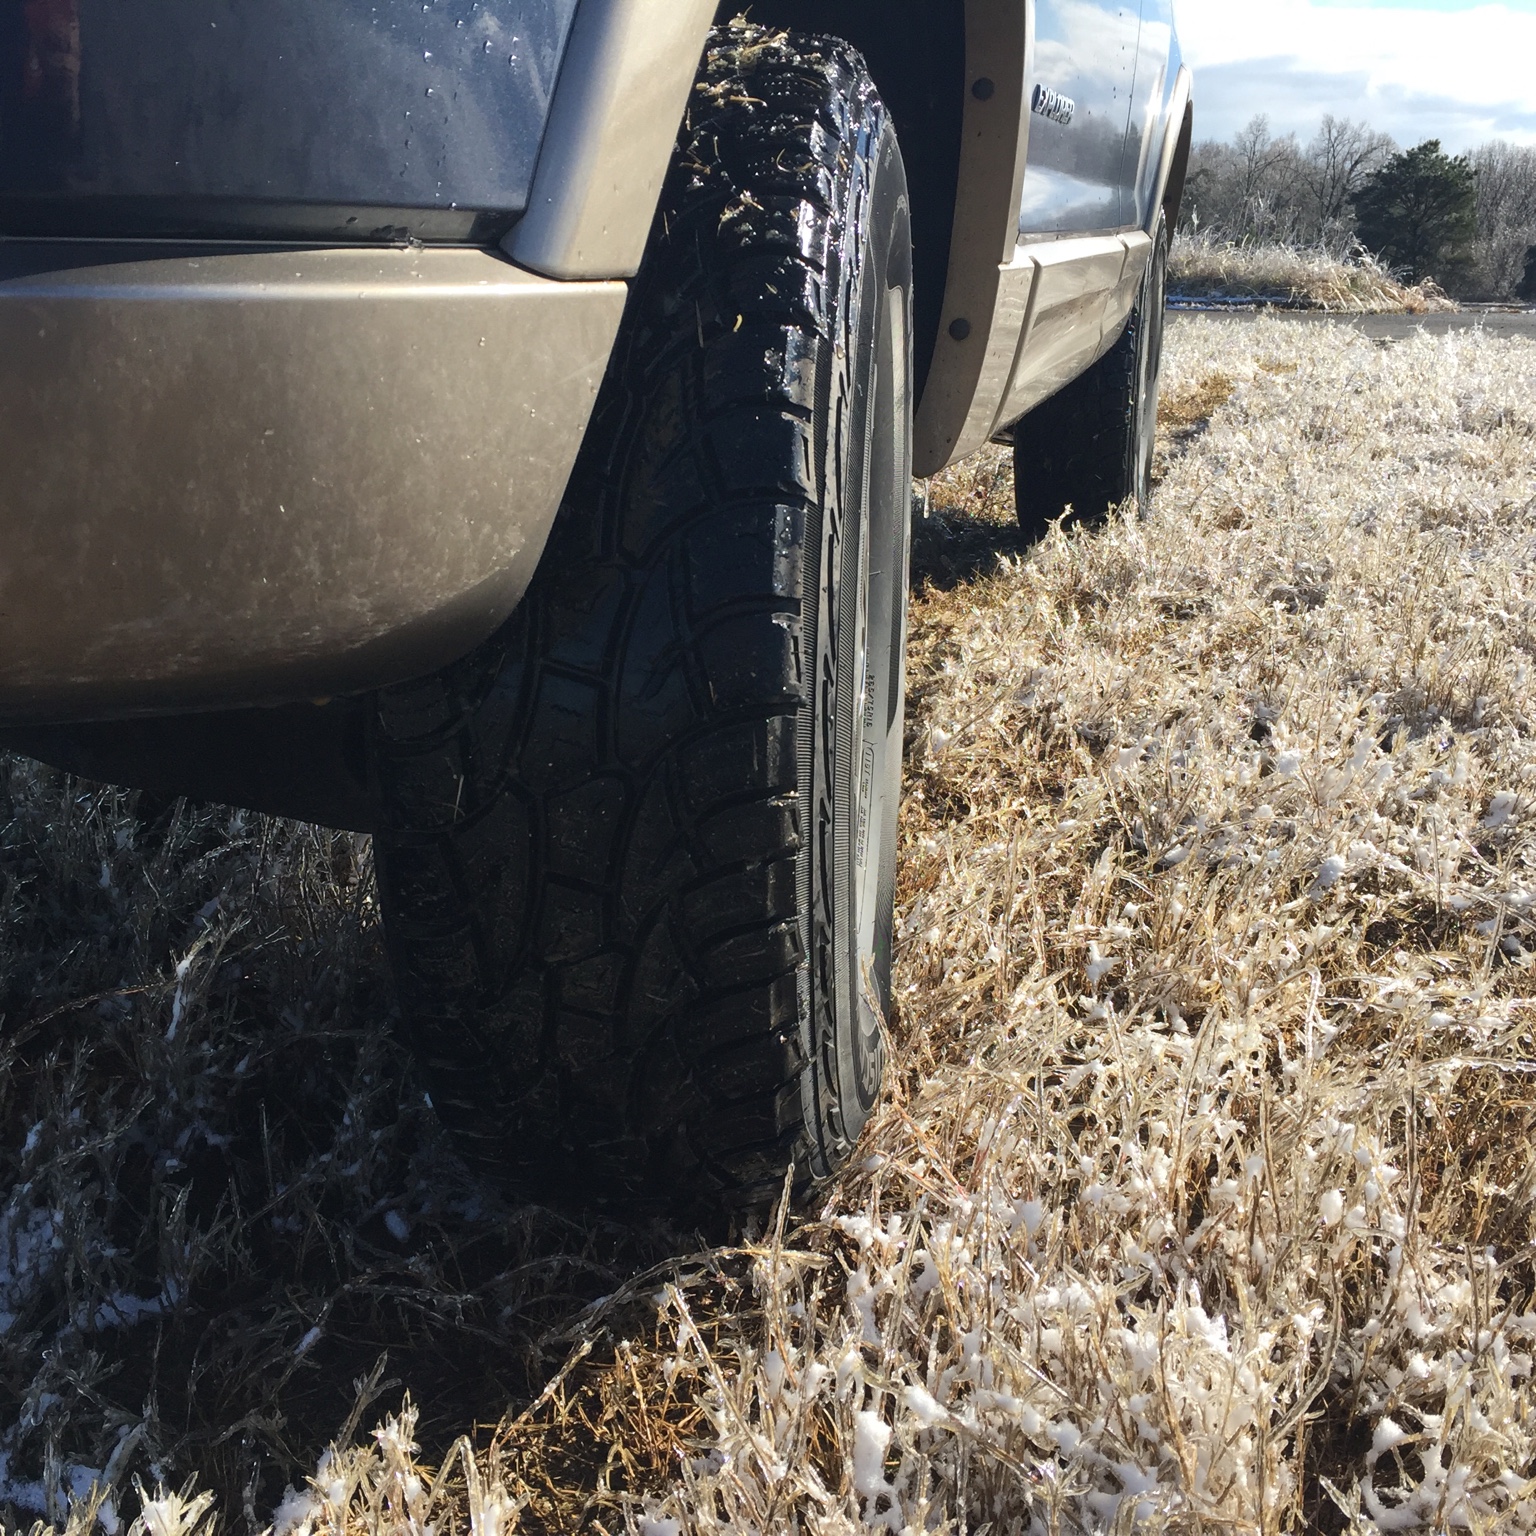
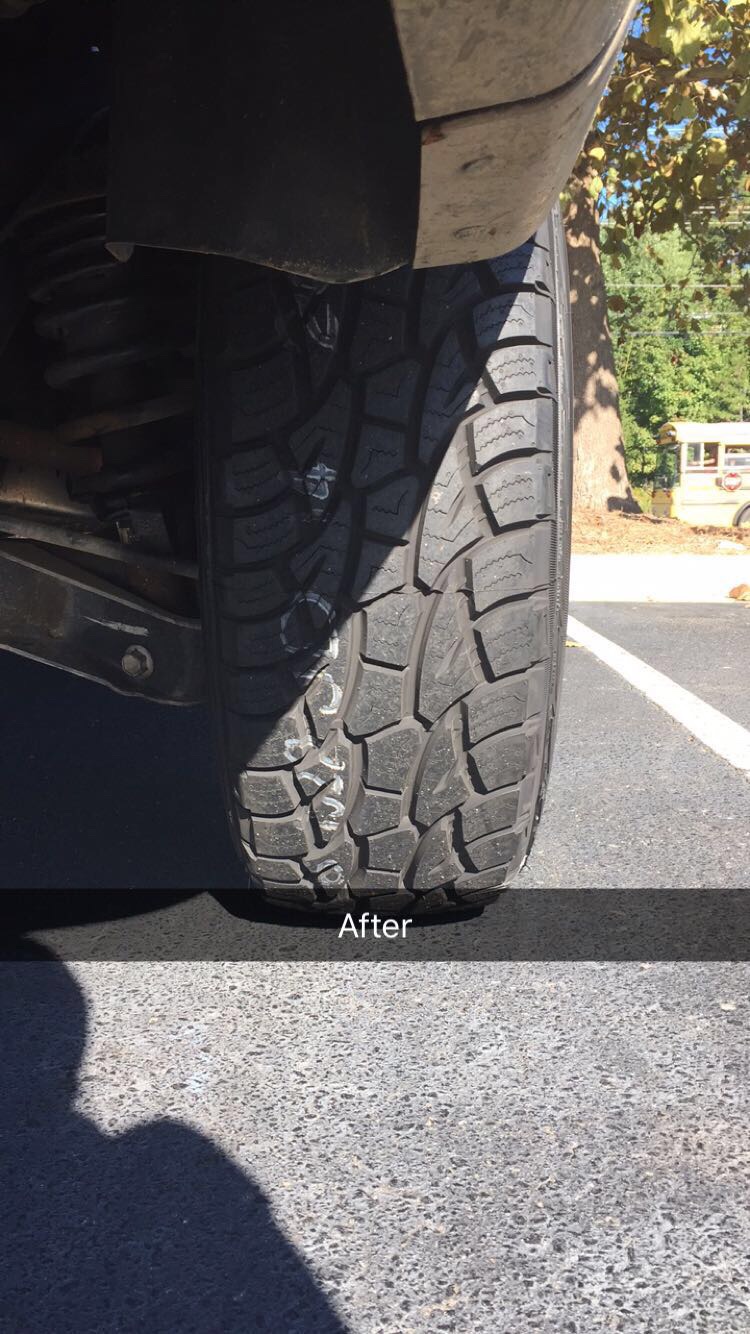
I went with 265/75 R16 Cooper Discoverer ATPs due to their 55,000 mile warranty and aggressive tread pattern
Sent from my iPhone using OB Talk
Let's start with the basics:
Year - 2002
Make - Ford
Model - Explorer
Trim - Eddie Bauer Edition
Engine - 4.6L V8
Differential - 8.8" D4 (limited slip)
Tires - 245/70 R16
Miles (@ purchase) - 119,500
Here's how Ed looked when I picked him up
The very first thing I did was remove the steps. Once removed, the truck looks like it has more clearance. However, the frame rails are just as low as the steps, so no additional clearance is achieved by removing them (it just looks cooler)
I put in Moog sway bar end links to replace the factory ones. They're slightly longer allow for a bit more articulation
Next up was lighting. I started by removing the center bumper trim piece and measuring how wide it was. It was just large enough to fit a 22" LED light bar. I went with a brand called Auxbeam because it was affordable and had great reviews (I have never had a problem with it and I use it every weekend for hours at a time)
I used a piece of wood to mock up what the light bar would look like in my bumper
The light bar is mounted directly to the metal bumper support. I removed the bumper cover and bumper support in order to drill the holes necessary for the hardware that was supplied with the light bar. The mounts are pointed in, towards the light bar itself, to allow for a bit of clearance on either side
After cleaning up the plastic around the mounts, I ran the wiring up and behind the drivers side head light, and connected it to the wiring harness I bought with my light bar. I then ran the switch and all of its wiring into the cab and placed the switch on my center console
With the bumper cover back on and trimmed, the light bar was complete
I started looking at other lights for Ed too. I liked the simple, stock head lights because they'd be cheap to replace if they ever broke on the trail. I found some corner lights on eBay that didn't have the orange inserts and I decided to get those. Well, my girlfriend beat me to the punch and got them as a gift! A girl that buys you truck parts, she sure is a keeper!
The stock corner lights:
And the new ones:
I also slightly tinted my tail lights because I don't like bright red tail lights. It's just a preference
I found some pre-owned factory tow hooks from an F-150 that bolt directly to the frame rails on the Explorer. There's even cutouts in the bumper already!
I then bought new upper control arms because it was time to pick a lift kit and the upper control arms that were in the truck were too worn to handle the extra strain. I bought stock replacements instead of upgraded ones due to my tight budget
With 3rd and 4th Gen Explorers, there's really only two ways to go when it comes to lift kits (not including ready lift struts). There's the billet aluminum lift from BTF Fabrication out of California and there's cheap, steel, eBay grade lifts. Like I previously stated, I was on a tight budget so I went with the steel lift. It was $110 cheaper and still the same size as the BTF equivalent (about 3" in the front and 2.5" in the rear)
I got the front done in a weekend in my garage at home. I used hand tools only and it was quite the task.
The struts needed to be removed so that the springs could be compressed to rotate the top-hat. It has to be rotated 180 degrees to allow the lift to be bolted on. Once the top-hat is rotated, the spring can be decompressed and the lift spacer can be bolted up to the factory strut bolts. Then the strut is placed back into its correct position (with some standing on the lug bolts to get the lower control arm low enough to account for the 3" difference)
The front was complete but I knew I couldn't do the back at home due to time and impatience. So, I swallowed my pride and drove my truck with a slight squat for two weeks, until I could get shop time with a friend of mine. (I was embarrassed for every second I was near that thing, even though it was only slightly squatted)
I only took one picture of it and the angle makes it look leveled instead
I finally drove the hour out to my friend's shop to get the rear lift installed. The rear lift (the triangle pieces in the picture above) was not the right shape to fit into the body where the rear struts mount. We had to cut them down until the points of the triangles were rounded out (a little hack, yes, but hey, it's eBay!).
After the cuts and new paint to keep the parts from rusting, the new lifted struts, that also needed to be rotated went back in the truck.
Now if it wasn't obvious already, the tires were hideously small. They barely had any tread left in them and were about to start showing chords in the rears if I wasn't careful
The tire pictured is the best of all four:
So I had a very big decision to make: All-Terrains or Mud-Terrains
Considering the truck is my daily driver, I quickly decided on All-Terrains due to the fact that no Mud-Terrains on the market today come with a mileage warranty.
I went with 265/75 R16 Cooper Discoverer ATPs due to their 55,000 mile warranty and aggressive tread pattern
Sent from my iPhone using OB Talk
Last edited: