2019 Ranger “Rufus” Overland Build

  • HTML tutorial

Jon Norris

Rank III
Launch Member

Enthusiast II

509
Lake Forest, CA
First Name
Jon
Last Name
Norris
Member #

14177

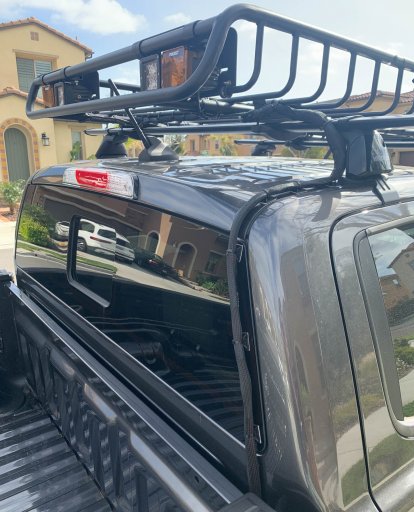
Good evening all ... am at the very beginning of building out my stock 2019 Ranger Lariat for overlanding trips ... looking to build a well-equipped truck to support my photography and camping trips for weekend and longer adventures.

IMG_0785.JPG

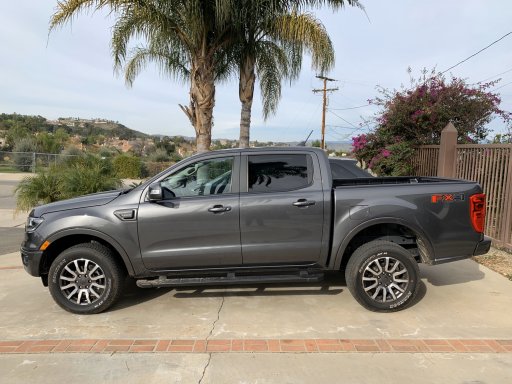
The only mod so far has been removing the stock tread boards ... lots of ideas and thoughts in my head but taking my time to plan out what I want to do.

APC_2081.jpg

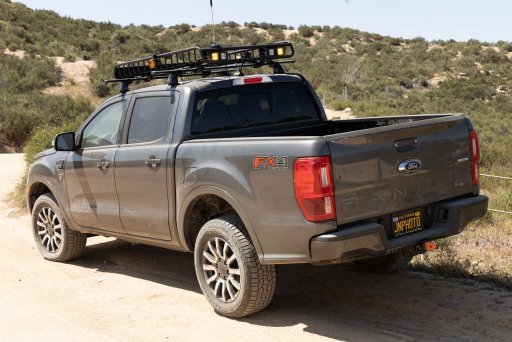
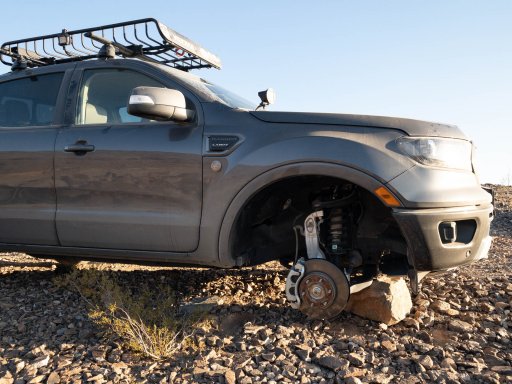
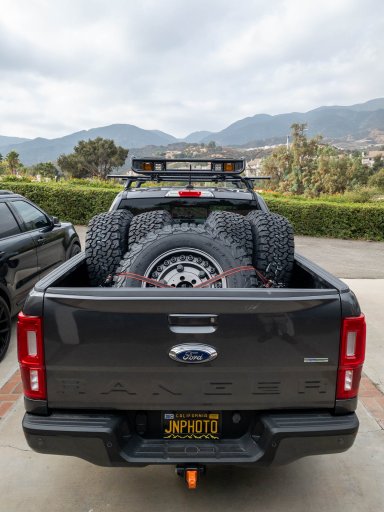
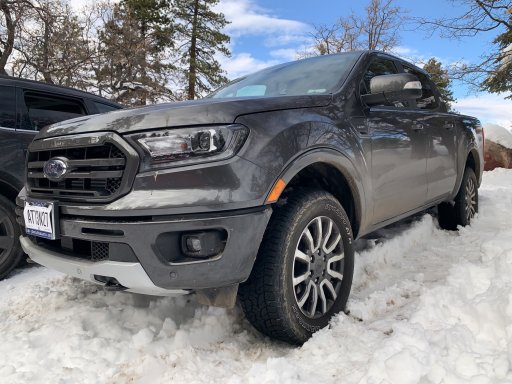
Here’s Rufus minus the tread boards ... prefer the look without ... but may add rock sliders ... looking for suggestions on good sliders for Rangers.

APC_2091.jpg

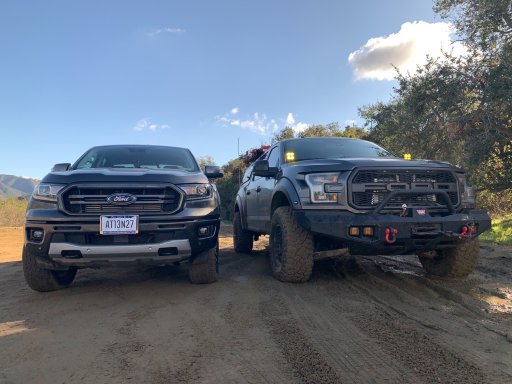
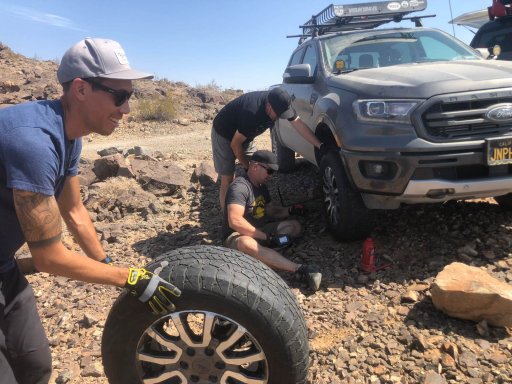
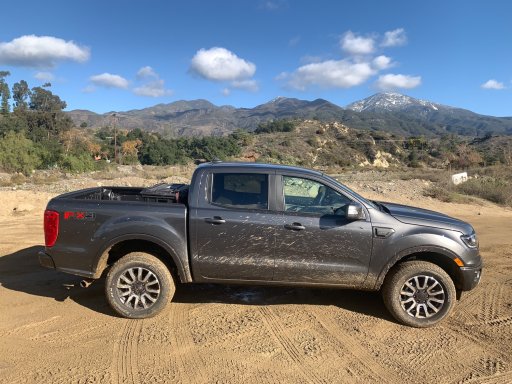
Had a quick jaunt yesterday with Rufus’s new friend ... @Ncat ‘s Raptor ... to get some mud on the tires and try out the terrain mode handling.

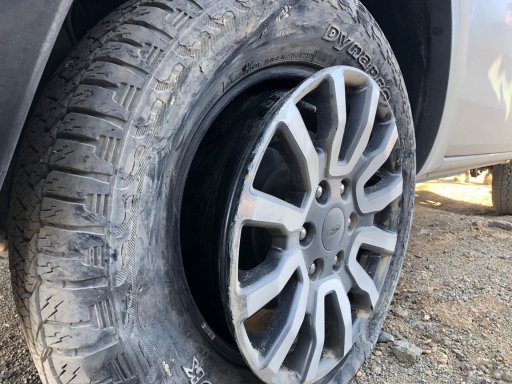
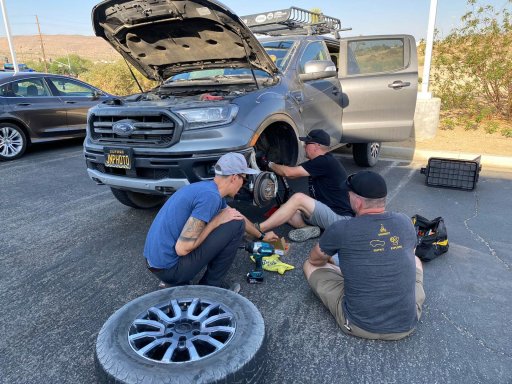
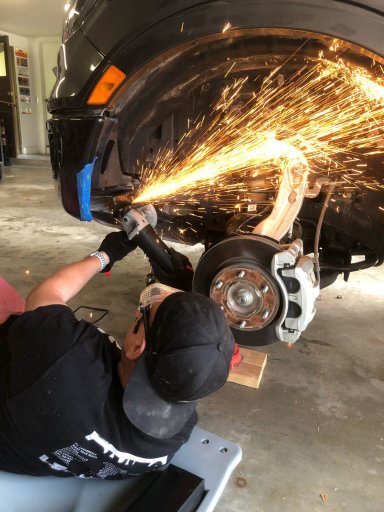
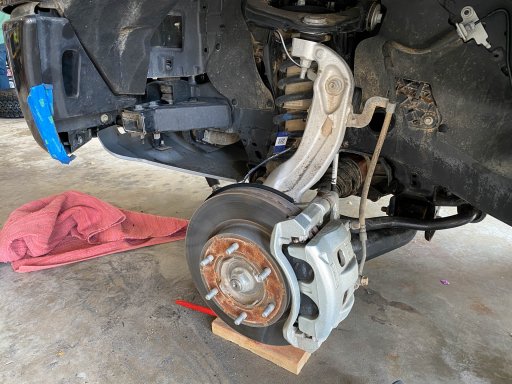
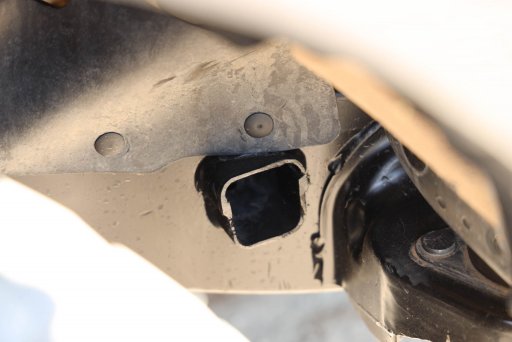
Would appreciate feedback from OB members who’ve had experience of cutting/removing the crash bars in a Ranger to install larger tires. I’m running 18” stock wheels and tires at the moment ... but would like to install larger tires and possibly new wheels.

Thanks in advance for any advice you can give ...

I’ll do my best to keep the build thread updated as and when mods are added.

Finally, pic from today’s trip to Big Bear for some snowshoeing.

APC_2116.jpg

Bye.
 

PicNick

Rank IV
Launch Member

Advocate III

1,402
Gonzales, La
First Name
Nick
Last Name
deVeer
Member #

12073

Looking forward to this build! I drove a 2001 Ranger for about 8 years and so this platform has a special place in my heart. It looks a lot better without the side steps, but I think some good rock sliders would toughen up the look. Can't comment on the crash bars, but I think a good 2-3" lift would get you to fitting a decent sized tire in there. Any size in particular you are looking to run?
 
  • Like
Reactions: Jon Norris

Jon Norris

Rank III
Launch Member

Enthusiast II

509
Lake Forest, CA
First Name
Jon
Last Name
Norris
Member #

14177

Looking forward to this build! I drove a 2001 Ranger for about 8 years and so this platform has a special place in my heart. It looks a lot better without the side steps, but I think some good rock sliders would toughen up the look. Can't comment on the crash bars, but I think a good 2-3" lift would get you to fitting a decent sized tire in there. Any size in particular you are looking to run?
Hey @PicNick ... I agree about the rock sliders ... think they’ll be an early addition ... after wheels and tires.

Looking at 285/65R18 or 285/70R18 KM3’s ... but from what I’ve read I know this means cutting or removing the crash bars.

Certainly going to add a leveling kit ... but would like to go for a lift ...
 

CWu21

Rank IV
Launch Member

Trail Blazer III

1,033
Meridian, ID, USA
First Name
Joe
Last Name
A
Member #

12382

I wasn't a fan of the rangers when they first came out but the more and more I see them the slicker they look. How do you like the engine?
 
  • Like
Reactions: Jon Norris

Jon Norris

Rank III
Launch Member

Enthusiast II

509
Lake Forest, CA
First Name
Jon
Last Name
Norris
Member #

14177

Peak Suspension is a good resource who took to the platform early on. The owner, Nick, is super helpful and will help you find the parts you need even if he doesn't sell them.

Check out their IG page for some inspiration.
Hey Justin ... thanks for the info on Peak Suspension and Happy New Year! Will take a look at their site later ...
 
  • Like
Reactions: JCWages

Jon Norris

Rank III
Launch Member

Enthusiast II

509
Lake Forest, CA
First Name
Jon
Last Name
Norris
Member #

14177

I wasn't a fan of the rangers when they first came out but the more and more I see them the slicker they look. How do you like the engine?
Hey Joe ... I’ve only done 750 miles so far but am liking everything about this truck so far. Engine seems to be a good balance between being responsive and good to drive with reasonable mpg. Will let you know more as I cover more miles ... need a good long road trip to shake it down.
 
  • Like
Reactions: CWu21

Jon Norris

Rank III
Launch Member

Enthusiast II

509
Lake Forest, CA
First Name
Jon
Last Name
Norris
Member #

14177

So it's been a while since my last build post - so you get 2 for the price of 1 :-)

I wanted a better way of holding my phone, GPS, and GoPro in place and clearly visible whilst I drive - so opted to modify the dashboard tray that's behind the speaker.

@Ncat has the Builtright Industries Dash Mount (2015-2019 Ford F-150/Raptor, 2017+ F-250/F-350) in his Raptor ... so measuring that I saw that it would fit in the Ranger's dashboard tray.

A big thank-you to Matt at BuiltRight Industries for swapping the dash mount as I'm an idiot and ordered the wrong one initially - here's the link to the correct part: BuiltRight Industries Dash Mount - 2015-2019 Ford F-150/Raptor, 2017+ F-250/F-350 — BuiltRight Industries

20200122_Lake_Forest_JNP_1196.JPG

The tray is easy to remove using a trim removal tool and some tape to protect the dashboard surface.

20200122_Lake_Forest_JNP_1200.JPG

The 3 retaining clips and the underlying support (Note: I had to enlarge the cutouts at the front left and right of the support structure to clear the mount attachment bolts - just used my Dremel to cut out a bit more of the plastic).

20200122_Lake_Forest_JNP_1202.JPG

The tray with the dash mount attached and RAM ball plates ready to be attached (Note: you'll want to attach the ball mounts to the bracket before you put the tray back into the recess - makes getting to the nuts much easier).

20200122_Lake_Forest_JNP_1208.JPG

Tray and dash mount back in place with x-grip for phone, Garmin inReach GPS powered mount and GoPro arm.

During my next build mod I ran wires to the tray for a Blue Sea Systems 4.8A dual USB outlet which will be installed so that I don't have wires running down to the USB outlet in the center console.

(12/24V Dual USB 4.8A Chargers - Switch Mount - Blue Sea Systems)
 
  • Like
Reactions: slightNine and Ncat

Jon Norris

Rank III
Launch Member

Enthusiast II

509
Lake Forest, CA
First Name
Jon
Last Name
Norris
Member #

14177

And ... straight into the next project.

I want to say a massive thank-you to @Michael for his excellent "DIY Fuse Relay Panel - Protect Your Rig!" video on the OB YouTube channel


- it's clear, easy to follow and has a ready-made parts list.

Parts List

1. Blue Sea Fuse Panel: https://amzn.to/31nQ8Et
2. Bus Bars: https://amzn.to/2KnrSLI
3. WeatherProof Relays: https://amzn.to/2YGGNtH
4. ABS Plastic: https://amzn.to/2Kg8wcr
5. & 6. I didn't use
7. Wirefy Heat Shrink Connectors: https://amzn.to/3383c2h
8. 100 Amp Breaker: https://amzn.to/2YFNEzp

The video gave me the inspiration and the confidence to make my own fuse relay panel - not just for the reasons that @Michael gives in the video but because I wanted to use the LightForce Replacement Switch Fascia in the Ranger to provide an OEM style look to the install.

Link for the LightForce Switch Fascia: Replacement Switch Fascia to suit Ford Ranger & Everest

Anyone who has a 2018+ Ranger knows that there is very little room in the engine bay to build a box big enough for a fuse relay panel. I went through lots of different iterations using junction boxes of various sizes but nothing fit the space that I had forward of the battery.

Using a cardboard template I created a 3D mockup of the space that I had ... and then cut out and folded an ABS version.

IMG_1606.JPG

After mounting the relays and fuse panel I realized that I didn't have room for the breaker and bus bars - and needed to relocate some of the parts and add a side angle for the breaker.

IMG_1612.JPG

IMG_1619.JPG

Side bracket added to the mounting plate ... ended up moving one of the LH relays to the RH side to give me more room. I also removed the yellow wires from the relays as that connector is not used in this configuration.

IMG_1641.JPG

Final configuration of the fuse/relay panel (with bottom bus bar changed to an 8 contact bus bar). This config gives me 6 switched relays (controlled from the LightForce switch panel) and 3 non-switched (non-relay) power supplies. All wiring has crimped connectors with heat shrink sleeves. I may be a little OCD so every fuse and bus bar is labeled to show what it is.

IMG_1652.JPG

The finished fuse/relay panel nestled in its cozy new home forward of the battery. I used rivnuts to attach the panel to the top frame and the battery clamp plate - using existing holes where I could.

I removed the glove box to gain access to the existing feedthrough grommet in the engine bay firewall. To remove the glove box open it and then press both sides in and pull down - then remove the 2 white plastic hinges and the glove box comes off in one piece.

Using a fish wire from inside the cab I pulled by wire bundle through the existing accessory hole in the grommet. My wire bundle had 6 x 18AWG wires for relay switching, 1 x 18AWG wire for switch lighting (connected to the passenger side marker light) and 2 x 16AWG wires (+ve and -ve) for the USB outlet in the dashboard tray.

All of the -ve wires from the switches were spliced into the USB outlet 16AWG return wire.

The wire bundle was run through PET Expandable Braided Sleeving https://geni.us/braid and routed around the engine bay to the fuse/relay panel.

IMG_1673.jpg

The final connections were to add the battery wires: https://geni.us/4AWG_Cables

IMG_1668.JPG

Close up of the LightForce Fascia Panel with dual voltmeter / usb outlet, 3 x customized double switches and one of the original 12V outlets.

Dual Voltmeter with 3A USB Fast Charger: Dual Voltmeter with 3.0 Amp USB Fast Charger - Lightforce Custom Switches
Custom Double Switch to suit Toyota/Holden/Ford: Custom Double Switch to suit Toyota/Holden/Ford - Lightforce Custom Switches

IMG_1671.JPG

Close up of my custom light switches - I am really pleased with how they look. With sidelights on the switches light up cyan and then when pushed (i.e. lights on) they turn amber.

Now I 'just' need to wire up my lights ...
 
Last edited:
  • Like
Reactions: Rick-O and Ncat

Jon Norris

Rank III
Launch Member

Enthusiast II

509
Lake Forest, CA
First Name
Jon
Last Name
Norris
Member #

14177

It's been a while and I'm well overdue updating the build thread ... so here goes.

April 2020

Once I'd completed the custom fuse/relay panel and light switches it was time to get some lights on the truck. I couldn't stretch to new everything so was fortunate to be able to pick up some used lights for the rear work lights and trail lights ... plus got some Baja Designs Squadron Sports https://geni.us/bd_ss to do double duty as front trail lights and ditch lights.

20200312_Lake_Forest_JNP_1759.jpg

I modified the Yakima Light Mounts Amazon.com: Yakima - Light Mounting Bracket for Cargo Baskets: Automotive I already had to act as supports for the rear-facing lights. I positioned the mounts so that they covered the lights inside my Yakima LoadWarrior https://geni.us/loadwarrior basket. This way they can't get bashed when I'm carrying anything in the basket.

20200404_Lake_Forest_JNP_1908-2.jpg

I fed the wiring loom down from my custom fuse/relay panel (see 2019 Ranger “Rufus” Overland Build for details) to the truck frame, into the frame, and then back inside the frame until fishing it out of the frame near the forward end of the bed. I used a fiber glass fish tape https://geni.us/fishtape to slowly feed the loom down inside the frame. It was a frustrating job but eventually after some cursing and multiple attempts I got it fed through the frame.

Just below the top of the bed, the loom splits to provide power to the switched 12V/USB outlet that I installed in the bed. I ran the loom up the edge of the cab rear window and secured it with cable ties and self-adhesive mounts Amazon.com: 28mm Cable Tie Mounts Self Adhesive Black Wire Clips Base Holders Wall Collector Insulation for Car Office Home 100Pcs: Home Improvement.

In the image above you can see the final light installation at the back of the rack, with amber covers on the trail lights. I also attached lights to the side of the basket to provide light to set up camp.

20200404_Lake_Forest_JNP_1903.jpg

20200404_Lake_Forest_JNP_1907.jpg

For the bed outlet, I made a switched 12V/dual-USB outlet from the following:

- Waterproof plastic project box https://geni.us/jbox
- Pre-wired 12V Dual USB Breaker Switch Panel https://geni.us/12v_usb

The box is attached to the bed using rivnuts.

20200427_Lake_Forest_JNP_2173.jpg

With the rack lights complete (for the moment) I ran another wire from the fuse/relay panel to the hood and attached the BD Squadron Sports https://geni.us/bd_ss using a-pillar brackets from Ford Ranger Lifts https://fordrangerlifts.com/shop/ols/products/a-pillar-ditch-light-brackets-2019-ford-ranger . These fit the hood hinge attachment bolts and it's an easy 5-minute job to install them.

20200509_Cleghorn_Ridge_Trail_JNP_0735.jpg

Rufus out at Cleghorn for his first run after finishing the lights on the rack. My custom fuse/relay panel is wired and ready to add a light bar to the front bumper and also another to the front of the rack ... but that project is on hold at the moment as the rack is temporary. More info to come ...
 

Jon Norris

Rank III
Launch Member

Enthusiast II

509
Lake Forest, CA
First Name
Jon
Last Name
Norris
Member #

14177

Fast-forward to September 2020. Pretty much nothing happened between April and September 2020. I stayed home, worked from my home office, and the truck stayed parked on the drive.

A few friends and I had been itching to get out on the trails for some time so we hatched a plan to go to Joshua Tree and drive a few trails including Old Dale Road. Now up until this time, Rufus was still running on stock wheels and tires, and I learned the hard way that stock wheels and tires are not up to the job.

Before starting the trail we aired down ... I went down to about 20 psi. We were heading North on Old Dale Road and all was going well until suddenly I heard the horrible noise of a wheel hitting rock, immediately followed by the steering going spongy as the tire lost all of its air. I stopped, got out of the truck and the driver's front tire had a 3-inch gash through the sidewall. Crap. No problem, the team jumped into action and we got the tire swapped out for the spare.

75ba7fdb-6a77-4559-a488-02f2bb64da5f.jpg

So we start moving again and just 5 minutes later the same thing happens again ... this time to the passenger's front tire. I swore. I swore a lot. And then it dawned on me. I wasn't going any further, I didn't have a second spare and we were about 20 miles from the nearest tarmac. No one was coming to tow me out.

I'm very lucky to roll with a great group of friends who immediately started thrashing out a plan on how we were going to extract Rufus from the desert. Huge thanks again to @Ncat , Cliff and Cynthia ... you guys rock!

So the plan was to leave Rufus where he was and drive both damaged wheels/tires into 29 Palms/Joshua Tree ... find a tire shop and get new tires. Both tires had gashes in them ... they were not repairable.

3ccd5a78-5e37-48f8-803a-1d67dd6738e8.jpg

So we slowly maneuver Rufus off the trail and jack him up to remove the second flat. But we don't want to leave him jacked for a prolonged period on the bottle jack so now what? See that large rock. Yes, we used the rock as an axle stand.

20200926_Joshua_Tree_JNP_92601.jpg

Rufus as we left him to go in search of tires.

By the time we got back to the tarmac, it was about 6 pm on Saturday. And guess what? There are no tire places open anywhere in Yucca Valley / Joshua Tree / Twentynine Palms at 6 pm on Saturday. We searched and called anywhere and everywhere in a 50-mile radius and nothing had tires available until Monday.

After a fruitless search @Ncat and I rejoined the other two at camp, exhausted and frustrated.

Sunday morning came and we headed out to try again. The only place we found that was open on Sunday and might possibly have tires was a used tire place in Yucca Valley.

2e86a339-86f4-4962-a616-84a786b41f0b.jpg

Seek and You Will Find ... Tires!

For $90 I got two damaged wheels cleaned up with a grinder (so they wouldn't puncture the tires) and two used tires that while they had seen better days were still serviceable and had at least some tread left on them.

We headed back to Rufus, got the new (used) wheels/tires back on him, and slowly made our way out of the desert. The light had been turned back on at the end of the tunnel. It was a painful 20 miles as I slowly drove Rufus back to the tarmac very aware of how precarious the situation was. Finally, we got back to the road and aired up.

We started back toward home and I was starting to feel very much relieved. The over the radio, "Jon ... your car's giving out a lot of white smoke ..." WTF.

We slowly creep onwards to the Ford dealer in Yucca Valley and in their car park take a look to try and find the cause of the leak. We were getting pretty fast at taking off wheels by this point.

04581fca-cff4-4c18-9dad-88f806d6165b.jpg

There's oil dripping from the underside of the engine. Looks like it's coming from the oil filter. Yep ... it is. The oil filter is loose, I turn it about half a turn to close it against the mounting flange.

To cut a long story short I cadge a lift home and leave Rufus in Yucca Valley, Ford tows Rufus to Palm Springs Ford where they give it a good looking at, clean up the oil, and 2 days later I'm in Palm Springs driving Rufus back to OC.

Now the long-put-off project of new wheels and tires comes to the fore.
 
  • Like
Reactions: Ncat

Jon Norris

Rank III
Launch Member

Enthusiast II

509
Lake Forest, CA
First Name
Jon
Last Name
Norris
Member #

14177

It's October 2020 now. I've spent much of September going through a whole bunch of different wheel/tire options and whether or not I get a lift done at the same time. Essentially it all boils down to is if I don't get the lift done at the same time I'll get wheels/tires that I don't really want and will want to replace them once I get the lift.

So it was 'buy once, cry once' time ... new wheels, tires, and a lift.

I knew that my first choice wheels were Black Rhino Armory's ... and for the Ranger lug pattern, the positive offset (6) would give Rufus a wider stance as compared to the stock wheels. Next, I was debating whether to go with BFG KO2s or KM3's ... I'd heard good things from lots of people about both.

A friend had recommended America's Tire to me so I headed over to my local one in Lake Forest. They could get the wheels and KO2s pretty quickly but KM3s were not available for love nor money in the size I was after (285/70R17). So decision made KO2's it was.

20201010_Lake_Forest_JNP_2611.jpg

I couldn't get the new wheels/tires installed until I'd 'removed' the crash bars from the front wheel wells. This wasn't a task that I was looking forward to and was very thankful for @Ncat 's help ... and the use of his well-equipped garage.

7d2e6fbe-259f-47c9-b378-7e4ebcc3dcac.jpg

Removing the crash bars involved an off-hand grinder, a lot of grinding wheels, and sparks aplenty.

20201010_Lake_Forest_JNP_3740.jpg

One down, three to go!

20201017_Trabuco_Canyon_JNP_3010.jpg

The rear crash bar cut back and painted.

20201017_Trabuco_Canyon_JNP_2962.jpg

After a few hours of cutting and grinding, we had made room for the new wheels and tires. The photo above is pre-lift and on full-lock, the front tires did rub the inside of the fender so driving was minimized until the lift was done.

I do love the look of these wheels and tires ... very excited to get the lift done ... and to get back out on the trails.