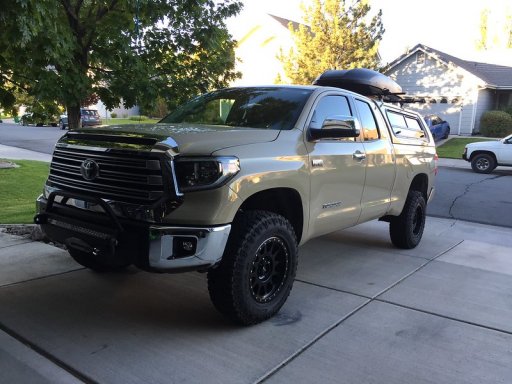
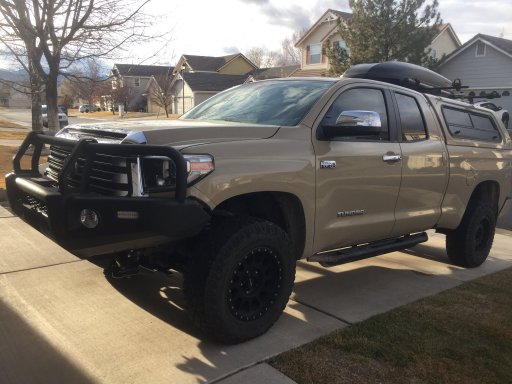
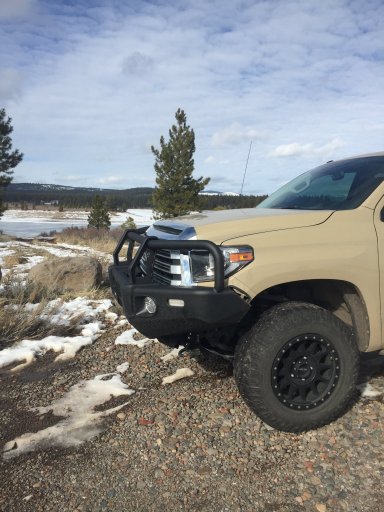
2018 Toyota Tundra Double Cab build

  • HTML tutorial

Cobblecrazy

Rank V
Launch Member

Enthusiast III

1,721
Reno
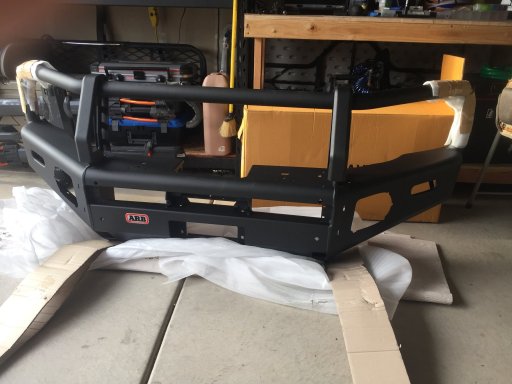
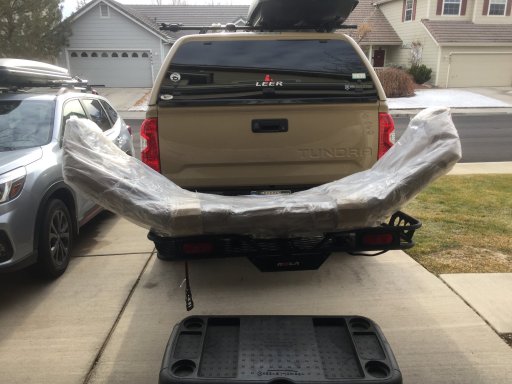
Well, I made the order, and, a week or so later, it came...
IMG_9436.JPG
IMG_9437.JPGIMG_9440.JPG

There are a few things in the instructions that area a little daunting, but no more than the install of the CBI rear bumper on my 4runner, so I think I'll be fine. As expected the fit and finish on the bumper is exceptional. Many of the items have been individually boxed and labeled which should aid in the installation. A perusal of the instructions suggests everything has been covered fairly well. I wish they would have pre-drilled for the front bumper sensors, but they included a template to drill the appropriate holes so I'll see how that goes.

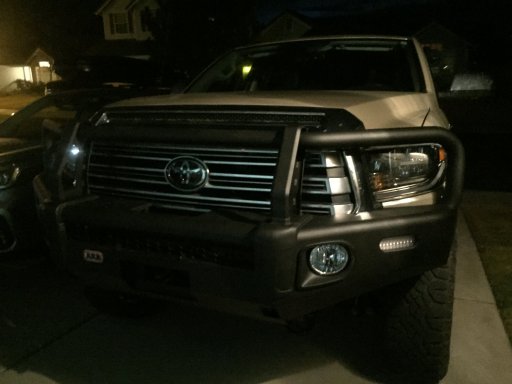
There's a lot of videos/blogs on getting the ARB bumper installed on 4runners and Tacomas, but haven't found any on the Tundra so far (a few "after" shots).

When I put together my Tacoma with the Relentless Fabrication front bumper, I installed a combo light bar. It was exceptionally useful during several trips on the backcountry dirt roads where we were traveling in the dark searching for a particular campground/campsite. I have been looking at the 7" and 9" round LED lights that are commonly seen with this particular style of bumper, but the cost of the more well known brands is a little staggering to say the least. I've found a few Nilight (or similar) ones on Amazon which are reasonably priced, but many of them have some less than stellar long term reports. I did a quick measurement of the single row LED light bar in my current Southern Style Offroad bumper (30") and it appears as it will fit in the center, but I would have to drill in some mounting points. Additionally, I will have to see if it would interfere with how/where the winch controller is mounted.

Once I get the SSO bumper off, I'll be posting it for sale, so if anyone's interested, or knows of someone who might want one, let me know. If I can't get the light bar situated to my liking I'll be including it (and the wiring harness) with the bumper. I really liked the SSO bumper, on the Tundra and on my 4runner, and I think the company is top notch. Hopefully I can find it a good home.

I'm looking forward to the install...
 

Cobblecrazy

Rank V
Launch Member

Enthusiast III

1,721
Reno
Well, the ARB bumper is on.

IMG_9445.JPG

The install took a little longer than I had planned as I had to remove the SSO Slimline bumper first. As I had already done much of the same OEM parts removal for the SSO Slimline bumper, I was able to jump ahead in the ARB instructions a little. The instructions are good, but at times a little vague and the printed out images are hard to make out so that slowed my progress. I had previously contacted ARB and had them send me a PDF of the instructions so I was able to look at the color images to get a better idea of what I needed to do, but I didn't want my computer lying out where I was working so I tried working off the paper instructions as much as possible.

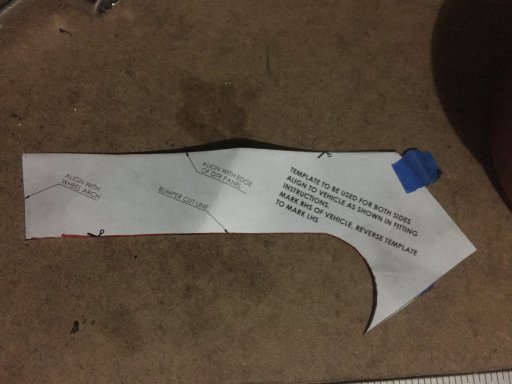
There is a small amount of trimming that needs to be done. The panels just beneath the headlights have a section around the "side" which needs to be cut out following this template.
IMG_9446.JPG

The long part of the "J" is pretty straight forward, and it is supposed to leave about a 20mm gap between the bumper and panel, but where it ends after the arch, you have to guess at how it continues down to the base of the panel. I taped a line which followed the straight edge, but a test fit showed the cut was not enough. However, If you lay a tape line which follows the curve point you end up with another few inches cut off, and this seemed to be perfect. The base of the front grill has a series of cuts which are based on measurements off of the center line of the grill. The measurements are in mm so if you don't have a metric ruler you'll need to convert them to inches.

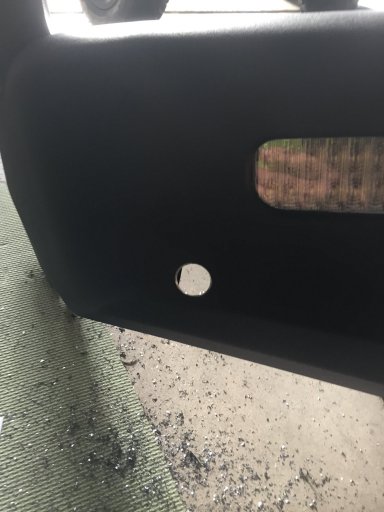
The holes for the parking sensors are not pre-drilled (at least for mine). Again, there was a template that was pretty straight forward, and I would say better than the other template. I used a stepped drill bit, first checking it on the existing OEM sensor hole and making a mark on the bit for the correct diameter for the hole. I stopped a few times to check fitment, and it seemed to work out just fine. A small amount of touch up paint was added to negate the possibility of rust.

IMG_9441.JPG

I tried fitting the OEM fog lights into the supplied ARB mount, but it just didn't seem to work. Again, the instructions are a little vague. The bumper I purchased came with the ARB fog lights and wiring harness. I installed their lights, but I haven't connected them. I was hoping for an actual adapter which would be a plug and play so it would work with the existing factory wiring, but it does not look as if this is possible. The gauge of wire on their harness is heavier than the OEM wiring so I'm going to need to talk to one of the Toyota tech guys to see if there's a workaround to get them hooked up. Similarly they supplied the blinker lights with wiring you're supposed to splice into the existing blinker wiring. The OEM wires to the blinker are hard to get access, and I have some questions before I'm going to do anything with the lights.

I test fit the 30" light bar from my other bumper. If you go with the end mounts, the mounts are about 2mm too long for the area between the front bars due to a plastic base that you install. I could trim the plastic, but it would also necessitate drilling additional holes in bumper. I found another mount in the stuff that came with the light, and I found some rear mounts that would utilize the existing holes in the bumper, but it looks like I'm going to be selling the light along with the old bumper. I'll probably look at a pair of 7" round LEDs that are tailor made for this bumper.

The main "parts" are labeled so easy to identify, and the lights had their own set of hardware. The main hardware comes dumped in one large bag. I laid everything out on the workbench based on the type/size, but I would like to have seen them individually wrap the hardware with labels which are to each specific task. This would have speeded up the process considerably.

I did not do the install of the winch at this point as I was working by myself without the aid of any kind of mechanical lift (a heavy duty plastic container acted as the main "lift" coupled with the addition of a series of wood blocks was used to step the bumper up in increments). I found I can install the winch from underneath - with some help with the bolts - and that should be pretty easy. The only question is the wiring from the controller to the winch is a little short, but I did a test fit when the bumper was on the ground and it seemed to work okay. The instructions call for you to unscrew the gearbox side of the winch (for a Smittybilt) and rotate it 72 degrees anti-clockwise, then re-attach. The motor is also supposed to be rotated so the electrical connectors are facing upwards. Didn't do this for the test fit, and it seemed to work, so not sure I'll go that direction. I need to go through my Smittybilt instruction manual to see what it says to any of this type of manipulation.


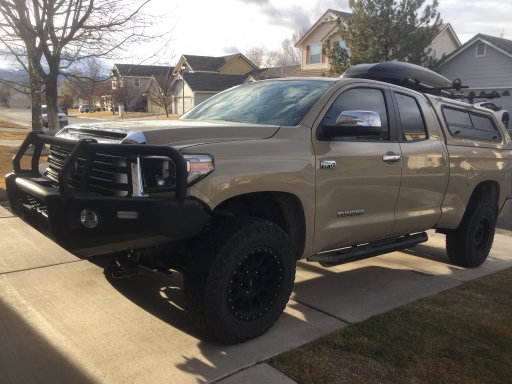
When I did the Relentless Fabrication bumper on my Tacoma, I could just see the top of the cross bar over the hood, but it was not in the way. With this bumper, and the curve of the Tundra hood, I cannot see the cross bar, but it still seems to have ample coverage for the front of the truck as it sits just a little below the hood "bulge". One plus, and it's purely cosmetic, is it covers up much of the horrendous chrome on the grill and hood bulge.
 

Cobblecrazy

Rank V
Launch Member

Enthusiast III

1,721
Reno
Whenever you embark on a project, you must know there will be trying times. Most of those times are self induced...
Previously, I mentioned how the instructions for the winch installation indicated you needed to rotate the gear box 72 degrees to get the handle in the correct location for easy operation. I was reluctant to take the winch apart in any degree, and, at least initially, I figured I could live with how it could be operated in the stock configuration.

I subsequently searched the Smittybilt instruction manual for their take on this issue. I found their term for it was "clocking". The instructions indicated you simply unscrewed the retaining bolts and rotated the housing to the desired point - at 90 degree intervals to coincide with the locations of the bolt holes - then re-attach the bolts. Sounds simple enough...
With the instructions in hand I embarked on what I thought would be a couple minute operation, but which led to the dreaded "...three hour tour..." (if you get the reference). The housing came apart easy enough after the bolts were taken out. I rotated the housing to where I needed it, but it did not see to want to seat back into place. There is a metal "drum" housing that surrounds the gears, and it seemed to be off kilter. I tried moving the drum, to no avail, as it seemed to be stuck in place. I was able to fully remove the gear box, and the interior gears would rotate with no indication of what might be the issue. There is a long hex style rod which runs through the center of the gears and into the drum, and I could not see any real issue with that as well. I got the gear box back onto the winch body, and with a series of little manipulations it seemed to fall into place. I re-attached the bolts, but upon trying the handle it would only stay in the engaged position. You could rotate the handle about 45 degrees toward the freespool selection, but no further. I was able to get the housing back off, and I removed the top gear housing. The gear housing just below appeared to be a little tilted, but it would not move, or come out. Needless to say I was frustrated at this point.
If I've learned anything in all these years, the one that stands out in situations like this is sometimes it's best to just step back, take a break, and then come back with a little clearer mind. Luckily, I had an errand to run so I was forced to leave behind this project. When I returned, I started to tackle the issue a little more methodically. Once again I had the gear box removed, but this time I also removed the gear handle by taking out the retaining bolt. I was able to then get all the gear housings (there are three) out, and I discovered a single cog at the bottom. The center of the cog it milled to accept the hex rod through the center allowing the rod to pass through and keep everything in line. It appeared as if, upon the initial removal of the gear box, I had probably knocked this small cog out of place/line, and this is what was causing the binding I experienced. As each of the housings have several gears, it took a little patience to get everything aligned, but I was able to get them all back in and turning with no binding. To keep everything in line, I placed the small cog on the rod and set it in the housing. I put the next gear housing in, then the metal drum. The final two gear housings then dropped into place. Not sure if this was the "authorized" way to do it, as there was nothing in the manuals about it, but it worked for me.

The trick now was to get everything back together without disturbing the gears again. I placed the gear box on the floor (gears facing up) and dropped the main winch body down onto it. I had an issue with the rod not seating. Initially, I had the rod in the gear box side, but I found it was hard to get it to seat in the main body so I switched it around. I was able to hold the winch body and the rod while lowering both onto the gear box body. Slow is the key here. I was able to get the two pieces together with no issues. Bolts back on, and then I re-attached the selection handle and retaining bolt. Fingers crossed, I manipulated the handle, and it turned like it was designed. The drum also turned when in freespool, but stayed locked when in the "engaged" position. Heavy sigh at this point....

Well, I'm sure there are some who would have just gone to my final steps right away and corrected the problem, but, as this was my first time taking apart a winch, I hope you will forgive my ignorance. To any others, I hope this helps if they find themselves in a similar predicament.
 
Last edited:

Cobblecrazy

Rank V
Launch Member

Enthusiast III

1,721
Reno
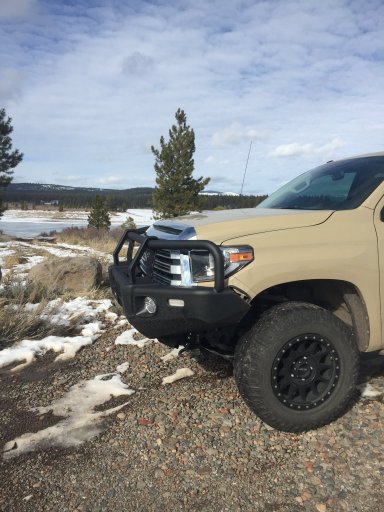
So far impressed with how the bumper turned out. This angle makes it look like it sticks out a considerable distance.

IMG_9456.JPG

But a little more of a side profile shows it is not that bad.

IMG_9465.JPG

The panels in front of the wheel well are removable, allowing for access to the additional lights mounted in the bumper, but it also will allow for larger sized tires if that is what you're looking to do (I went up from the 265 to the 275 when I changed out the tires/wheels during the initial build). When I end up needing new tires I'm considering going to the 285x75x18 which is listed as a 34.8" tire. I really like the way the a 35x12.5 looks on the truck. 88Rotors, on Youtube, put a lot of them on Tundras, but they do a body mount chop (which looks incredible when they're done), and I'm not sure I want to go that far at this point.

IMG_9460.JPG

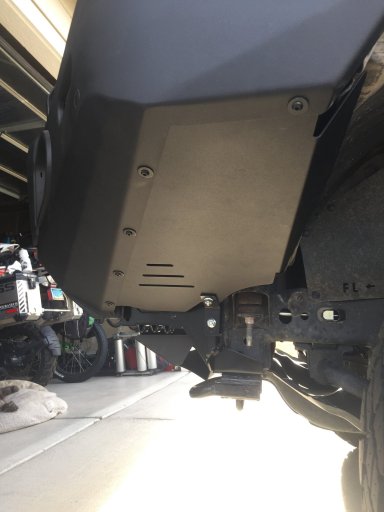
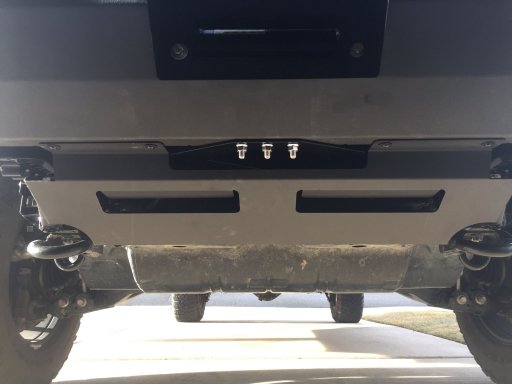
The front skid plate ties into the existing metal pan, but you need to bend down several of the tabs at the front of the pan. There are slots on each side which slide into the two front bolts then gets secured between the pan and the frame when you tighten those to bolts.

IMG_9462.JPG

In the picture you can see three of the bolts which hold a triangle shaped metal piece in place. The instructions show the bots to be placed in so the threads are exposed (as in the photo). I'm considering turning them around so just the head of the bolt is exposed in case of any unexpected strikes to the undercarriage.
 
  • Like
Reactions: Wallygator

Cobblecrazy

Rank V
Launch Member

Enthusiast III

1,721
Reno
I'm not interested in turning the Tundra into a rock crawler, or "monster" truck, but I've been considering going a size or so bigger for my tires for some time, and, for a few reasons, going to an E rated one over the D rated one I currently have. As the need for new tires draws nearer it seems like it's time to make a few decisions. Anyone who has had a Toyota know that at some point you may have to consider a body mount chop depending on how "big" you want to go. I have previously mentioned I've been looking at the 285/75r18 as the specs for width are about 11.2" compared to 10.8 with my 275's. At right around 34.8" it is around 2" taller than the 275's as well. During my last rotation/balance trip to Discount Tire, we test fit a Duratrac (what I'm using now) in that size and it appears to fit without the need for doing the BMC.

Now for the not so good news. We also tried fitting the larger tire underneath, but it doesn't seem like that is feasible. So another decision must be made - an aftermarket bumper with a swing out tire carrier. The only problem is the choices are limited. I reached out to several top name companies - including one local company - and I none offered what I needed. There were two companies that would come up when searching "rear swing out tire carrier bumper Tundra" - Expedition One and P&P Engineering.

I reached out to a person I knew who had installed the Expedition One bumper, and he provided me with his experiences (some good, some bad). There was no doubt they provide an excellent product so it was definitely a possibility.

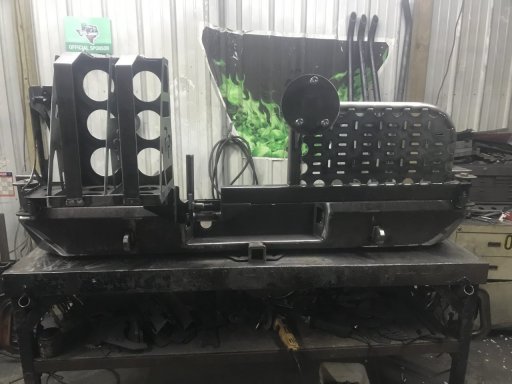
I knew very little about P&P Engineering, other than I had looked at their website a while back. I happened across their Instagram page, and I noticed a photograph of a dual swing out bumper for the Tundra - which was a different design than what I had seen on their website. I commented on the Instagram post, and discovered this was their new/current design (all the items in the pic are included in their price - including a camera relocate bracket).

40845CF7-5249-4491-AF4E-54585418FA0A.jpg

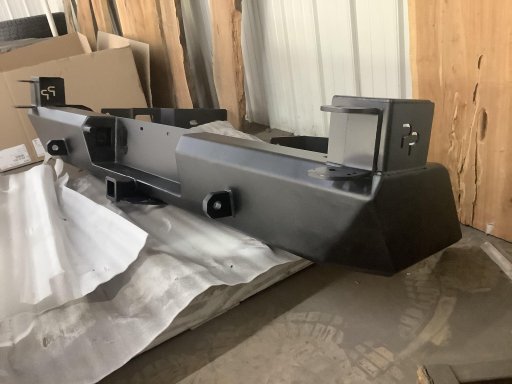
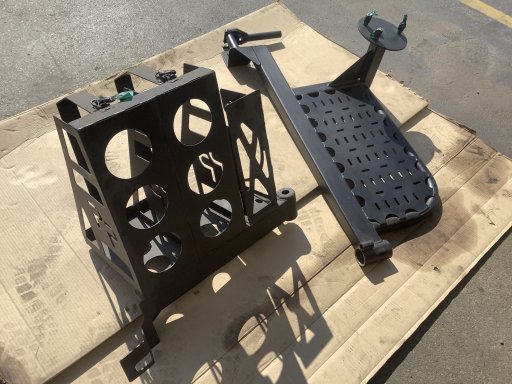
A series of question and answer e-mails followed, and I found out they had one in stock (powder coated). I got some pics of the pieces powder coated, and I decided this was the way I wanted to go so we made a deal.
3.jpg

IMG_1988.jpg

Shipping (to a commercial location) is also included in the price, and the drop off/pick up location for my town was about 6 miles from my house. It took a little over a week...

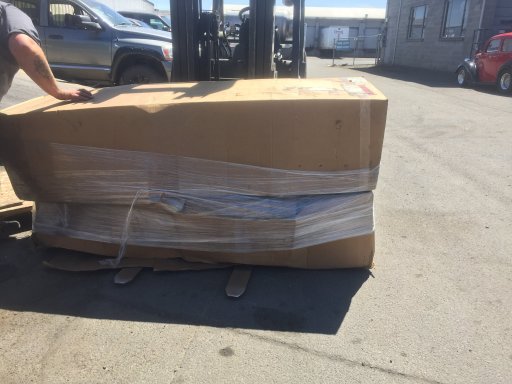
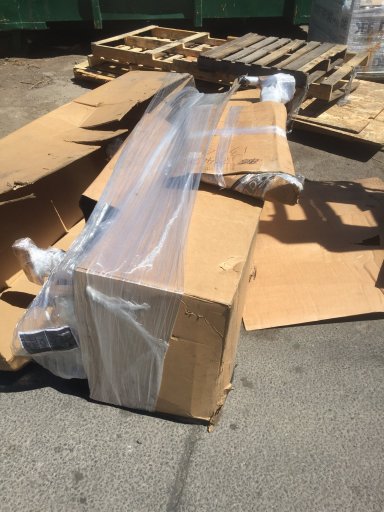
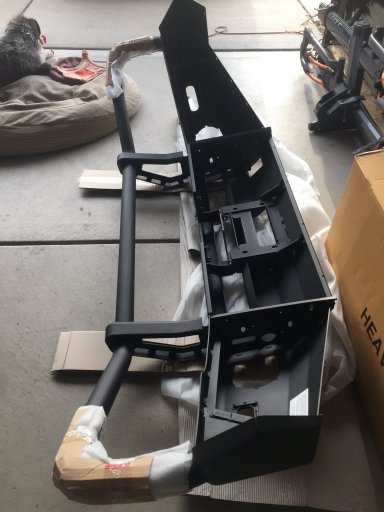
At the shipping company they brought out the box on a forklift, and the employee said they got the box in pretty poor condition so he suggested I look it over before signing.
IMG_9536.JPG
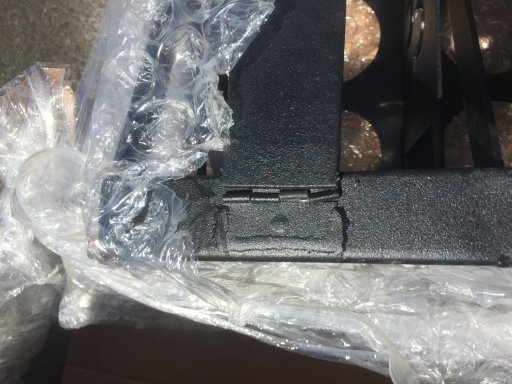
IMG_9537.JPG

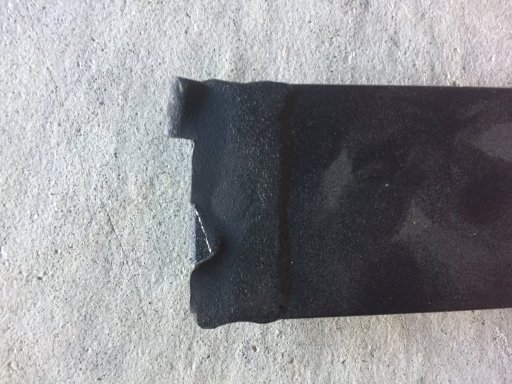
If you notice the tire swing out arm is wrapped then "wrapped" to the outside of the main box. By some unknown powers I was only able to find a few rub marks and what appeared to be a bent piece on the hinge for the arm which holds the jerry can in place .

IMG_9539.JPG

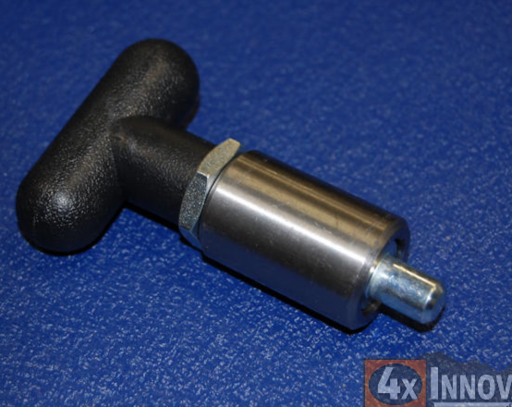
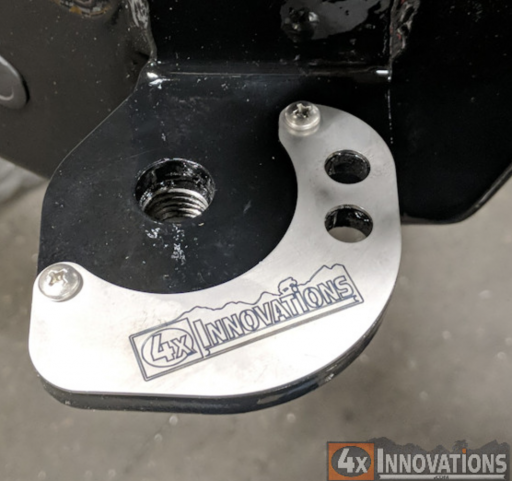
I got the items home and began setting everything out. I will say I was impressed with the design, and the workmanship that had been put into this particular bumper. On the jerry can swing out the locking/spring pin (to lock the swing arm open) was missing, but the barrel for the pin was welded in place. The two stainless steel spring pin slider plates were also missing (I think they also add some strength to the locked out position for the spring pin - these are images from the website of the company they use to help understand what I'm talking about).

Screen Shot 2020-06-02 at 1.20.37 PM.png
Screen Shot 2020-06-02 at 1.19.39 PM.png
Screen Shot 2020-06-02 at 1.04.00 PM.png

Upon closer inspection of the parts I also noticed something unusual. The swing outs were different. A post I had researched prior to making the purchase had been on TundraTalk.net which included the pictures of the actual bumper I bought. In one of the posts dated May of 2019 was answered about the mechanism they use utilized a "tapered roller bearing" with the link to the 4xinnovation website.

Screen Shot 2020-06-03 at 10.51.23 PM copy.png

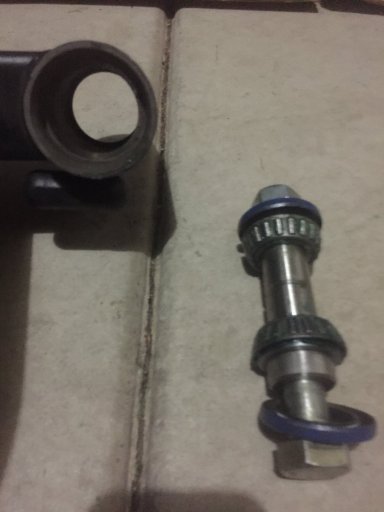
The tire carrier swing out contained such a swing out/bearing design (it's hard to see, but the inner portion is tapered in conjunction with the bearing design).
IMG_9553.JPG
IMG_9554.JPG

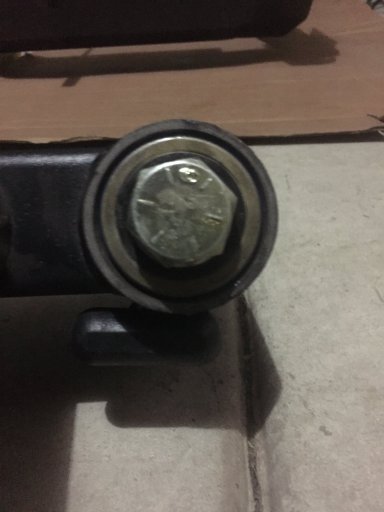
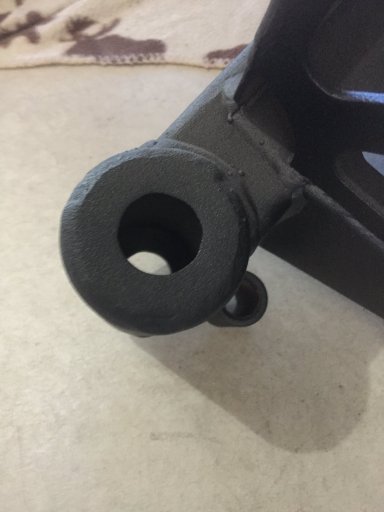
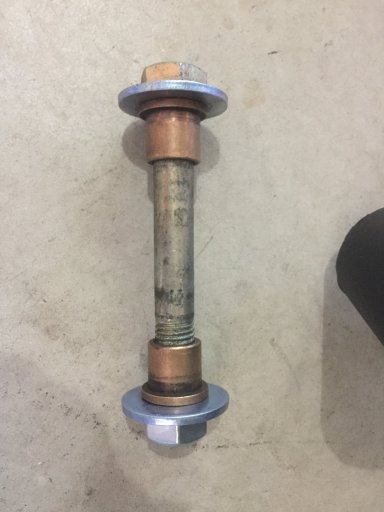
However, the jerry can/high lift jack swing out was a bolt and two barrel "washer" type pieces that are pressed down into a hole on the top and the bottom of the "swing out" barrel.

IMG_9540.JPG
IMG_9541.JPG

In the early afternoon after I picked up the bumper I e-mailed P&P to let them know about the missing items (I also let them know about the condition the box arrived in), and I also asked about the reason for the difference in the two swing out mechanisms (my first e-mail only asked about the difference, a day or so later I sent a second e-mail where I included the TundraTalk post). In my second e-mail I explained I was somewhat torn as I was disappointed in a few things, but I seriously was impressed with the bumper itself after I had a chance to put everything together on the floor of my garage. The first of my two e-mails was on Tuesday, it's Friday, and still waiting for some kind of reply...
 
  • Like
Reactions: Wallygator

Wallygator

Rank III

Contributor II

830
USA
I'm not interested in turning the Tundra into a rock crawler, or "monster" truck, but I've been considering going a size or so bigger for my tires for some time, and, for a few reasons, going to an E rated one over the D rated one I currently have. As the need for new tires draws nearer it seems like it's time to make a few decisions. Anyone who has had a Toyota know that at some point you may have to consider a body mount chop depending on how "big" you want to go. I have previously mentioned I've been looking at the 285/75r18 as the specs for width are about 11.2" compared to 10.8 with my 275's. At right around 34.8" it is around 2" taller than the 275's as well. During my last rotation/balance trip to Discount Tire, we test fit a Duratrac (what I'm using now) in that size and it appears to fit without the need for doing the BMC.

Now for the not so good news. We also tried fitting the larger tire underneath, but it doesn't seem like that is feasible. So another decision must be made - an aftermarket bumper with a swing out tire carrier. The only problem is the choices are limited. I reached out to several top name companies - including one local company - and I none offered what I needed. There were two companies that would come up when searching "rear swing out tire carrier bumper Tundra" - Expedition One and P&P Engineering.

I reached out to a person I knew who had installed the Expedition One bumper, and he provided me with his experiences (some good, some bad). There was no doubt they provide an excellent product so it was definitely a possibility.

I knew very little about P&P Engineering, other than I had looked at their website a while back. I happened across their Instagram page, and I noticed a photograph of a dual swing out bumper for the Tundra - which was a different design than what I had seen on their website. I commented on the Instagram post, and discovered this was their new/current design (all the items in the pic are included in their price - including a camera relocate bracket).

View attachment 157352

A series of question and answer e-mails followed, and I found out they had one in stock (powder coated). I got some pics of the pieces powder coated, and I decided this was the way I wanted to go so we made a deal.
View attachment 157353

View attachment 157354

Shipping (to a commercial location) is also included in the price, and the drop off/pick up location for my town was about 6 miles from my house. It took a little over a week...

At the shipping company they brought out the box on a forklift, and the employee said they got the box in pretty poor condition so he suggested I look it over before signing.
View attachment 157355
View attachment 157356

If you notice the tire swing out arm is wrapped then "wrapped" to the outside of the main box. By some unknown powers I was only able to find a few rub marks and what appeared to be a bent piece on the hinge for the arm which holds the jerry can in place .

View attachment 157357

I got the items home and began setting everything out. I will say I was impressed with the design, and the workmanship that had been put into this particular bumper. On the jerry can swing out the locking/spring pin (to lock the swing arm open) was missing, but the barrel for the pin was welded in place. The two stainless steel spring pin slider plates were also missing (I think they also add some strength to the locked out position for the spring pin - these are images from the website of the company they use to help understand what I'm talking about).

View attachment 157358
View attachment 157359
View attachment 157360

Upon closer inspection of the parts I also noticed something unusual. The swing outs were different. A post I had researched prior to making the purchase had been on TundraTalk.net which included the pictures of the actual bumper I bought. In one of the posts dated May of 2019 was answered about the mechanism they use utilized a "tapered roller bearing" with the link to the 4xinnovation website.

View attachment 157361

The tire carrier swing out contained such a swing out/bearing design (it's hard to see, but the inner portion is tapered in conjunction with the bearing design).
View attachment 157362
View attachment 157363

However, the jerry can/high lift jack swing out was a bolt and two barrel "washer" type pieces that are pressed down into a hole on the top and the bottom of the "swing out" barrel.

View attachment 157364
View attachment 157365

In the early afternoon after I picked up the bumper I e-mailed P&P to let them know about the missing items (I also let them know about the condition the box arrived in), and I also asked about the reason for the difference in the two swing out mechanisms (my first e-mail only asked about the difference, a day or so later I sent a second e-mail where I included the TundraTalk post). In my second e-mail I explained I was somewhat torn as I was disappointed in a few things, but I seriously was impressed with the bumper itself after I had a chance to put everything together on the floor of my garage. The first of my two e-mails was on Tuesday, it's Friday, and still waiting for some kind of reply...

Great build! An you went all in on the rear but just so you know I believe you can fit that tire underneath. You have to cut off the factory "wings" that somewhat hold the stock tire in place. Anyway none of that matters now. :grinning: Look forward to more of this amazing build.
 
Last edited:

Cobblecrazy

Rank V
Launch Member

Enthusiast III

1,721
Reno
Great build! An you went all in on the rear but just so you know I believe you can fit that tire underneath. You have to cut off the factory "wings" that somewhat hold the stock tire in place. Anyway none of that matters now. :grinning: Look forward to more of this amazing build.
Thanks. I'm having fun with the build.

I was trying to stay away from any cutting if possible. On my Tacoma, I fit a 285/75r16 in the factory spare location by taking a small sledge to the retaining "wings". I also chose to wrap the exhaust with some heat shield because the tire was very close to the tire.

On the Tundra, we had an issue with the tow hitch and the hangars for the leaf springs when we tried test fitting the larger tire. The Expedition One uses the factory hitch - as many of the other "just bumper" designs. The P&P has a built in hitch so you gain a lot of room. In the long run I was kind of set on the swing out tire carrier. My thought is I might take the 275 spare I have since it's basically brand new (it wasn't in the rotation with the other 4) and put it on the factory spare rim and tuck it up underneath if I really wanted to have two tires on a specific trip (I wouldn't be able to run in 4 wheel drive if I had to go to that, but it would beat walking back to civilization - like a donut spare on other vehicles). The other possibility was putting my spare for my teardrop under there when I was towing so I could use the trailer's spare tire location for my generator.
 
  • Like
Reactions: Wallygator

Cobblecrazy

Rank V
Launch Member

Enthusiast III

1,721
Reno
So I got to it today.

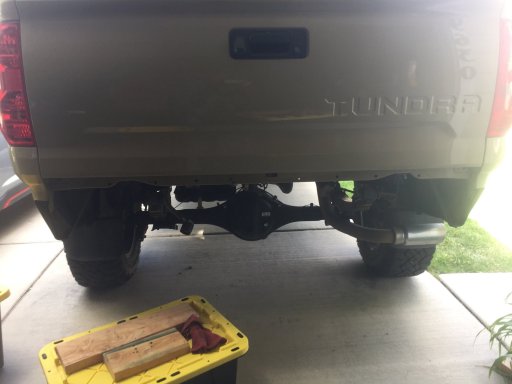
The removal of the stock hitch and bumper is pretty straight forward, and there are some really good YouTube videos out there so I didn't really go for the pictorial "how to" on that part. A few plugs needed to be removed which included the trailer plug, a couple of main harness plugs, the license plate lights and disconnecting and removing the sensors. Pretty much you were left with this.

IMG_9559.JPG

IMG_9566.JPG

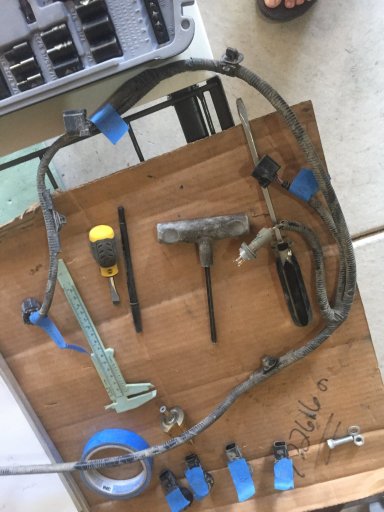
I taped and labeled the corresponding sensors and plugs so when/if I re-installed them I knew their proper location.

I have the proximity/sonar sensors in the side, and they were a little tricky getting to the plug as they are hidden between the metal parts of the corner of the bumper and the plastic corner bumper piece.

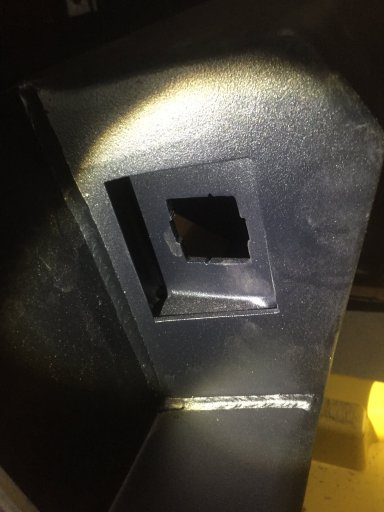
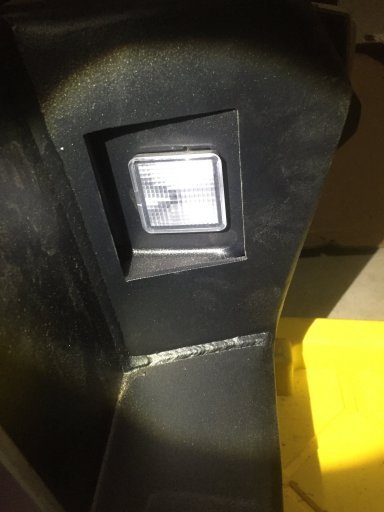
The license plate lights aren't a huge deal, but thought I'd share just a quick note on how they go into the new bumper. Once I got the lights out (they just twist out), there are two tabs that you pinch together and the diffuser and "base" pop right out.

IMG_9560.JPG
The P&P cutout has some notches that these two tabs slide into until you hear the tabs snap into place.
IMG_9562.JPG
IMG_9563.JPG

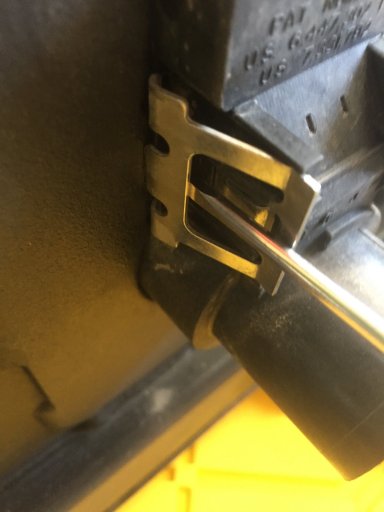
On the trailer plug, it popped out pretty easy. When I pushed it into the P&P cutout I had to press a little bit and use a screw driver to gently help the retaining metal pieces to snap into place.
IMG_9555 2.JPG

I was not positive if the sensors would clip into place due to the metal being thicker than the factory bumper, and I wasn't sure if I was going to re-install them anyway, but I decided to drill pilot holes where I determined the sensors should go. The outer one would have been too hard to reach from the inside once the bumper was on so this will allow me to drill from the outside later (the holes are pretty small so they don't stand out if I just left them as is).

Again, the install of the bumper was pretty standard. The factory nuts are welded into place so I used the factory bolts on the re-install (the bolts that were included with the bumper didn't fit anyway). You have to come up at about a 45 degree angle to miss the hangar bolts. Install the front most bolt (not tight) and then rotate the bumper up. I had a construction grade large plastic storage box that I used as a base then used a series of 2x6 pieces to get the bumper up into alignment with the factory holes. Then it was just a matter of putting the bolts back in. One hole on each side (of the rear 4 bolts) was slightly off and had to be filed a little to accept the bolt.

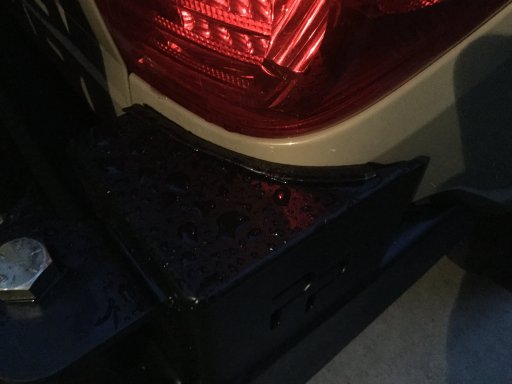
If I were to do it again I would have put in this trim onto the corner pieces which the swing arms are attached to prior to installation as I had some rubbing issues. I was able to get a piece in there by loosening all the bolts and sliding it across. I also had some rubbing issues on the bottom part of the rear passenger side corner panel, but I was able to solve that by tapping the panel in just slightly.

IMG_1836.JPG

Another thing I would have done was probably installed the wiring harness while the bolts were still loose. There is a little notch on each side to clear the body panel, and once everything is tightened down you can't get the end of the wiring connector through the gap so you have to go up and around which shortens the reach of the outer sensor wires (the sensor by the license plate lights don't need to be threaded through there).

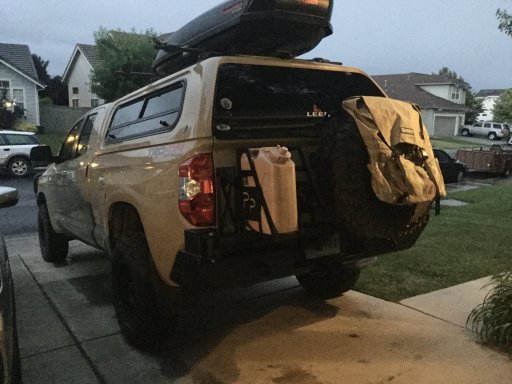
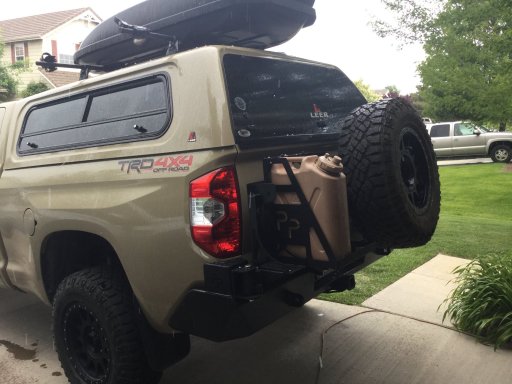
I think it looks pretty nice.


IMG_1828.JPG

Still not happy with them not doing the jerry can swing out with the bearing design (and still waiting for a response from P&P - I think they need to make it right). I purchased a Nylock nut so I don't have to "crank down" on the nut as a regular nut and lock washer causes the swing arm to be too tight. On the tire swing out I'm going to get a longer bolt and probably go with a Nylock as well. The bolt supplied doesn't give much purchase for the supplied nut so there's no way to get a lock washer in there (the bearing design does not have the issue of binding like the other side).

The jerry can retaining/security arm that had the partially damaged hinge basically broke after only a few manipulations at the hinge as it was cracked worse than I had originally thought. The other hinge was really no better so it too came off. 4xinnovations offer several models that have bolted on hinges so I may no with one of their designs down the road. For now I prefer a strap system to hold in the water cans.

IMG_9547.JPG

I've had this Trasharoo hanging on my wall since about three vehicles ago. Finally have somewhere useful to hang it... ;)IMG_1834.jpg

The tire basically cuts out all the rear view from the camera (I can still see where the hitch is so could still use it for connecting my trailer). I could probably see more if I only ran the tire swing out - and yes that is possible the way it's designed. P&P supplied a relocation bracket for the rear camera. It bolts onto the center of the tire carrier (there is a hole to thread in the wiring) so that may be the next part of the project.
 
  • Love
Reactions: Wallygator

trikebubble

Rank V
Launch Member

Advocate I

2,522
Penticton, BC
Member #

1969

So I got to it today.

The removal of the stock hitch and bumper is pretty straight forward, and there are some really good YouTube videos out there so I didn't really go for the pictorial "how to" on that part. A few plugs needed to be removed which included the trailer plug, a couple of main harness plugs, the license plate lights and disconnecting and removing the sensors. Pretty much you were left with this.

View attachment 157598

View attachment 157605

I taped and labeled the corresponding sensors and plugs so when/if I re-installed them I knew their proper location.

I have the proximity/sonar sensors in the side, and they were a little tricky getting to the plug as they are hidden between the metal parts of the corner of the bumper and the plastic corner bumper piece.

The license plate lights aren't a huge deal, but thought I'd share just a quick note on how they go into the new bumper. Once I got the lights out (they just twist out), there are two tabs that you pinch together and the diffuser and "base" pop right out.

View attachment 157600
The P&P cutout has some notches that these two tabs slide into until you hear the tabs snap into place.
View attachment 157601
View attachment 157602

On the trailer plug, it popped out pretty easy. When I pushed it into the P&P cutout I had to press a little bit and use a screw driver to gently help the retaining metal pieces to snap into place.
View attachment 157603

I was not positive if the sensors would clip into place due to the metal being thicker than the factory bumper, and I wasn't sure if I was going to re-install them anyway, but I decided to drill pilot holes where I determined the sensors should go. The outer one would have been too hard to reach from the inside once the bumper was on so this will allow me to drill from the outside later (the holes are pretty small so they don't stand out if I just left them as is).

Again, the install of the bumper was pretty standard. The factory nuts are welded into place so I used the factory bolts on the re-install (the bolts that were included with the bumper didn't fit anyway). You have to come up at about a 45 degree angle to miss the hangar bolts. Install the front most bolt (not tight) and then rotate the bumper up. I had a construction grade large plastic storage box that I used as a base then used a series of 2x6 pieces to get the bumper up into alignment with the factory holes. Then it was just a matter of putting the bolts back in. One hole on each side (of the rear 4 bolts) was slightly off and had to be filed a little to accept the bolt.

If I were to do it again I would have put in this trim onto the corner pieces which the swing arms are attached to prior to installation as I had some rubbing issues. I was able to get a piece in there by loosening all the bolts and sliding it across. I also had some rubbing issues on the bottom part of the rear passenger side corner panel, but I was able to solve that by tapping the panel in just slightly.

View attachment 157612

Another thing I would have done was probably installed the wiring harness while the bolts were still loose. There is a little notch on each side to clear the body panel, and once everything is tightened down you can't get the end of the wiring connector through the gap so you have to go up and around which shortens the reach of the outer sensor wires (the sensor by the license plate lights don't need to be threaded through there).

I think it looks pretty nice.


View attachment 157614

Still not happy with them not doing the jerry can swing out with the bearing design (and still waiting for a response from P&P - I think they need to make it right). I purchased a Nylock nut so I don't have to "crank down" on the nut as a regular nut and lock washer causes the swing arm to be too tight. On the tire swing out I'm going to get a longer bolt and probably go with a Nylock as well. The bolt supplied doesn't give much purchase for the supplied nut so there's no way to get a lock washer in there (the bearing design does not have the issue of binding like the other side).

The jerry can retaining/security arm that had the partially damaged hinge basically broke after only a few manipulations at the hinge as it was cracked worse than I had originally thought. The other hinge was really no better so it too came off. 4xinnovations offer several models that have bolted on hinges so I may no with one of their designs down the road. For now I prefer a strap system to hold in the water cans.

View attachment 157616

I've had this Trasharoo hanging on my wall since about three vehicles ago. Finally have somewhere useful to hang it... ;)View attachment 157615

The tire basically cuts out all the rear view from the camera (I can still see where the hitch is so could still use it for connecting my trailer). I could probably see more if I only ran the tire swing out - and yes that is possible the way it's designed. P&P supplied a relocation bracket for the rear camera. It bolts onto the center of the tire carrier (there is a hole to thread in the wiring) so that may be the next part of the project.
That looks great. FYI, Camera Source online makes a plug & play replacement rear camera for the Tundra. It comes with a long lead so you can place it somewhere that gives it a better unobstructed view. I have mine screwed to the right side of my camper, and the view is still great even with my tire carrier.
 
  • Like
Reactions: Wallygator

Cobblecrazy

Rank V
Launch Member

Enthusiast III

1,721
Reno
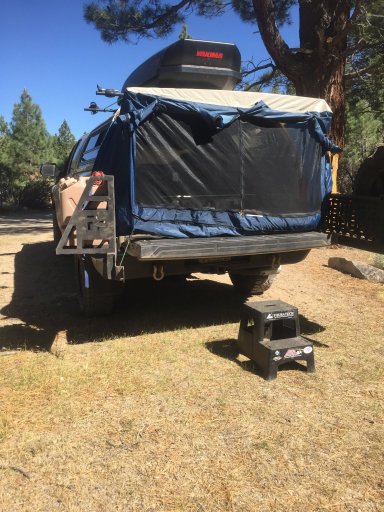
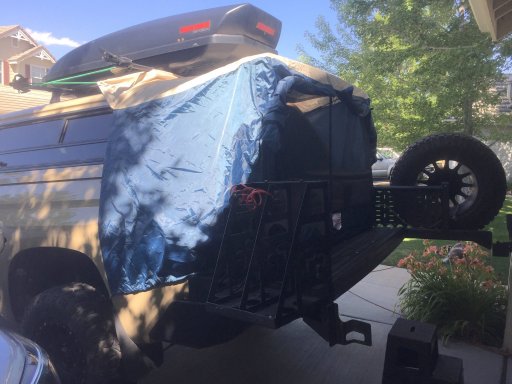
Several posts ago, I mentioned I would be using the DAC shell enclosure on the back of the Tundra/shell for some camping trips, but I didn't have any photographs. here are a few.

IMG_9632.JPG

The instructions have the bottom of the enclosure go over the tailgate, but I've actually found that it fits nicer if you have the bottom across the the tailgate. If you connect a bungee to the two bottom corners and run it under the tailgate the top actually sits nicer and doesn't pull down the shell hatch. A couple items sitting on the fabric/tailgate (like shoes, or a duffel) also helps.

IMG_9626.jpg

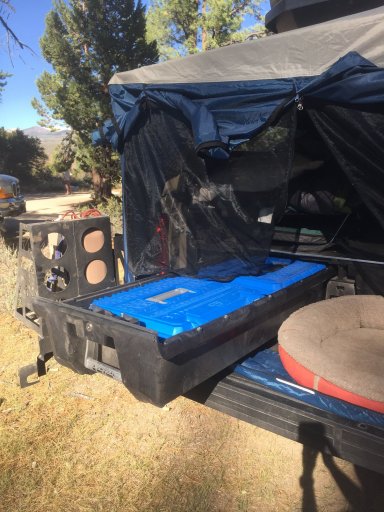
When the rear "doors" and screens are unzipped, I can access the Decked drawer system.

IMG_9634.JPG

At night, I have the dog bed and my Yeti (65L) sitting on the tailgate, inside of the zipped up screen/doors. During the night I can access the cooler if I need something to drink, and in the morning it makes for a good seat to put on my shoes.

It only takes a few minutes to put on. It packs down into a bag that's about the size of a ladies purse, and I keep it in one of the drawers. Not the luxury of a roof top tent, but it works.
 

Cobblecrazy

Rank V
Launch Member

Enthusiast III

1,721
Reno
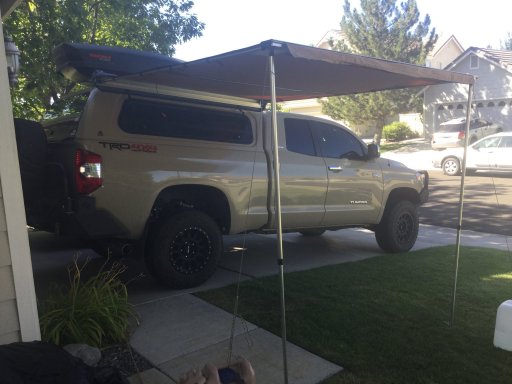
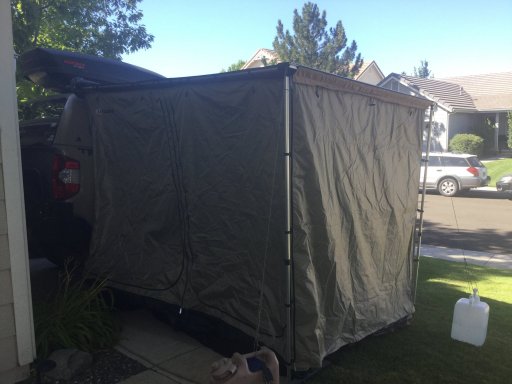
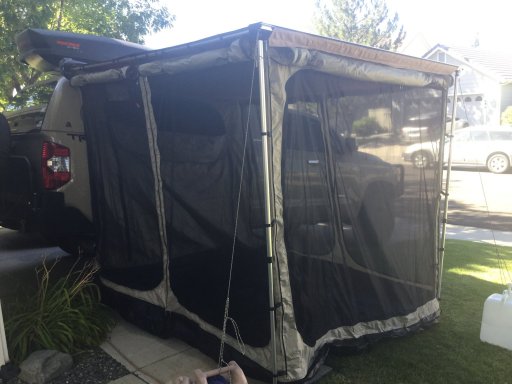
I thought I'd do a separate post for the awning, but it is also part of our camping setup. I purchased the ARB 2000x2500 awning, and awning room. I've had a Tepui set in the past, but I sold it when we got rid of a camper it was usually kept on. Most of the awning out there are similar in function and design, so there wasn't a "ooh, I've to to have that" about the ARB, but it was priced right, and I've had good luck with ARB products in the past (this one also came with a LED light built into the awning).

IMG_1896.JPG

The awning room was particularly of interest to me due to the way the walls were set up.

IMG_1898.JPG
IMG_1899.JPG

Specifically, all three walls can be completely rolled up and the floor is attached to the walls, which makes this into a really nice "out of the bugs" room for those nights up in the Sierras. The front "flap" can also be extended outward, and with the addition of two poles (you can get these on Amazon for around $20-30) you can get an additional awning/shade off the front.

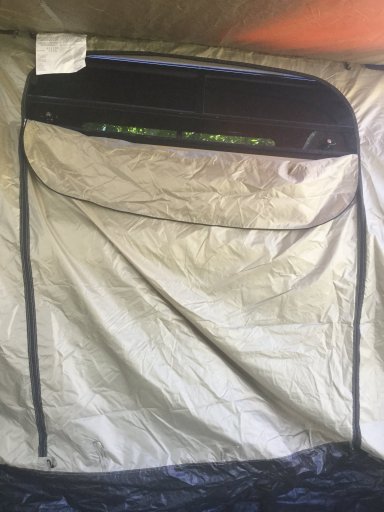
The final piece was the "door" up next to the truck.

IMG_1900.JPG

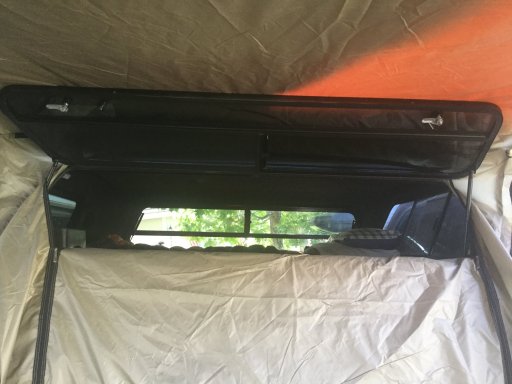
I have the windoor side windows on the Leer shell, and they are almost exactly the same length as the opening in the wall.

IMG_1901.JPG

I can keep my Yeti cooler just inside the windoor which makes it nice for meal prep, or simply grabbing something while we sit inside the enclosure. There is only a slight gap at the corners, but we did not have any issues of bugs finding their way into the enclosure.

The setup worked well on a trip we took down to the Yosemite area and Lee Vining canyon (I had an issue with the memory card so the photos from that trip are gone now). We set up two chairs and had the Yeti as a pseudo table inside the enclosure. It was a nice place to have dinner and watch a movie on the iPad before crawling up into the shell to go to sleep.

I haven't used the built in LED light on the awning as the power cord is a cigarette lighter style, and I don't have anything within reach of the wiring at this point. There is a second lead off of the wiring for the shell light, and I'm thinking of wiring that to one of the marine grade panels (usually they have a USB, cigarette lighter, and power readout) and putting it in the corner of the truck bed.

The only modification I've done to what you see in the photos was to move the awning over to the driver's side of the truck. I know it is better placed on the passenger side for pulling over to the side of the road, but the issue was the exhaust was right up against the awning room when it was attached. I decided the easiest option was simply to move the awning.
 

Cobblecrazy

Rank V
Launch Member

Enthusiast III

1,721
Reno
One of the hardest things to find was an awning mount for the Yakima round bars.

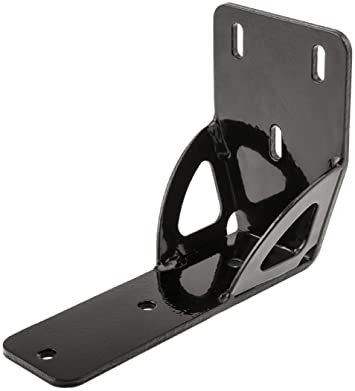
When we had our previous trailer, our awning mount was a beefy "L" shaped mount that directly connected to the Yakima track system, but we were running the awning off the back of the trailer.

61iYQ-MWzdL._AC_SX355_.jpg

I liked the mount, but I couldn't connect it to the Yakima tracks on the Leer shell since we were running the awning off the side of the truck. I've seen people drill through the Yakima round bars, but I never liked that solution.

Several of the other mounts I found were simple L brackets (a narrow piece of metal with a single bend and a few holes). One of the mounts supplied with a smaller ARB awning I had used these same mounts, and I found they had a little flex, not to mention I ran into the same issue of not being able to use the tracks and having to drill holes in my round bars.

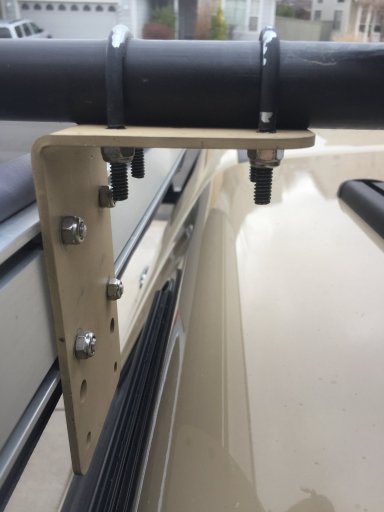
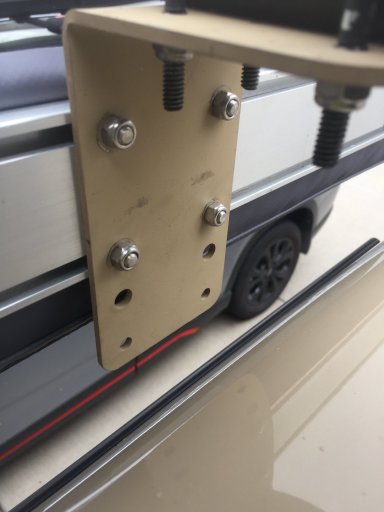
I did some checking around, and I located a simple, yet a little more "beefy" looking solution, on GoWesty's website Awning Mounting Kit for Rack Bars | GoWesty At $41.95, I thought it was worth taking a chance.

The bracket comes pre-drilled for a number of widths, but the main ones appeared to be consistent with ARB design. I used some paint I had lying around to paint the u-bolts black (they are in need of some tough up as you can see), and I had some camo paint that appeared to be pretty close to the truck color.

Installation was pretty straight forward. Since I'm using the 66" round bars, I was able to bring the awning pretty close to the shell (I wanted the awning room to be up as close as I could to the shell), and it still afforded a little space to keep a Yakima bike mount on that side as well (I also use a Yakima top box).

IMG_9778.JPG

IMG_9779.JPG

So far I haven't had any issues with any bolts loosening, or the mount (or awning) moving/shifting after some off-road travel. There are some write-ups out there that suggest a three point mounting design for some of the longer/heavier awnings (and I would assume if you were consistently driving over some real punishing tracks). I have an older style Yakima tower so I haven't been able to find two towers to add to my current system. Our new camper came with the new style Yakima towers. We don't really use them for anything more than mounting a couple bikes, so I will probably swap them with the older ones on the truck shell, and then go with Yakima's beefy HD cross bars.