2018 Subaru Outback aka Otto

  • HTML tutorial

DaveT

Rank V
Launch Member

Enthusiast III

1,540
Edmonton, Alberta, Canada
Member #

11506


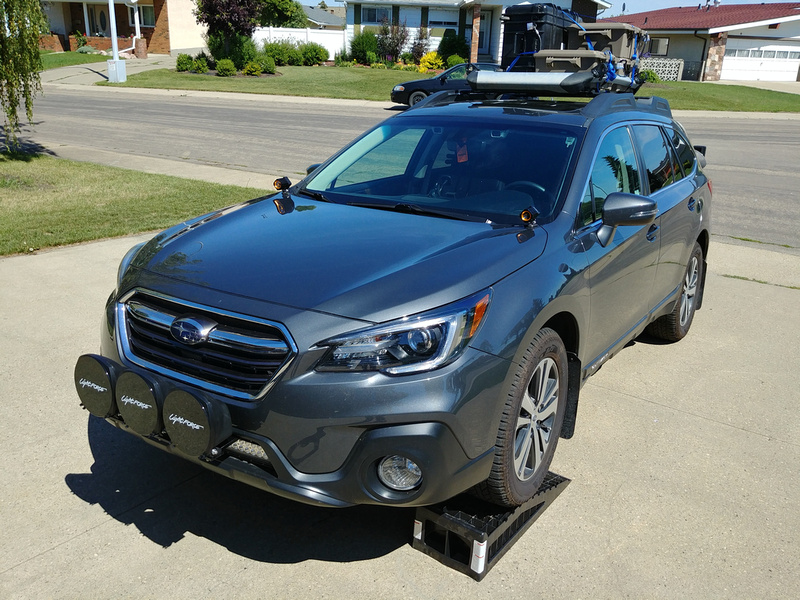
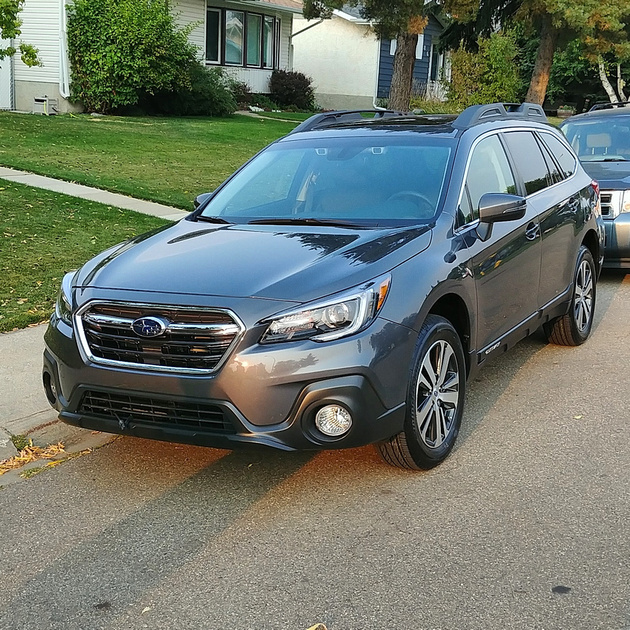
Last year we bought a 2018 Subaru Outback to help me commute to a new job out of town. My wife named the car 'Otto'...she thinks he looks like an Otter. It wasn't long before something bit me and I wanted to make it my own. Being a new car, my wife wasn't so sure about that so a rule was put in place...nothing permanent. What ever I tweak, it has to be such that I can put it back to stock. A Trail Chameleon if you will. Grocery getting dad wagon by day and trail slayer by night. I held off on posting this for a little while. I don't really feel the need to share this sort of stuff just to share but if it gives others good ideas and/or I get some in return as I finish the build, that would be just what I think is great about this community.


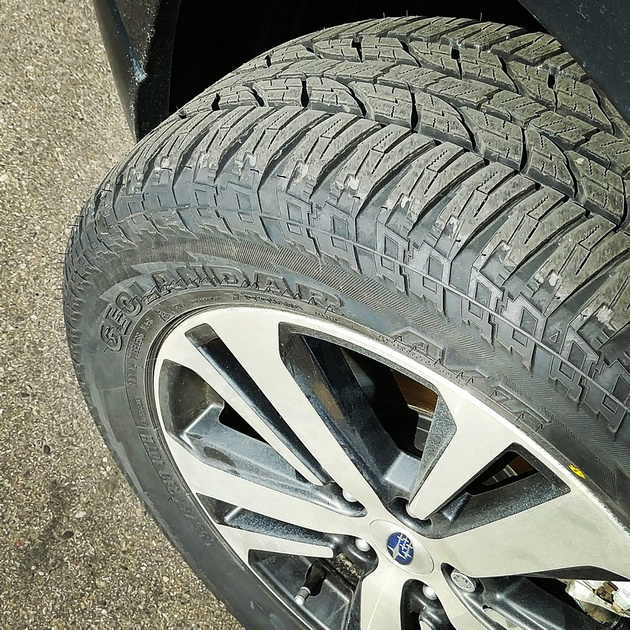
The first thing I did was change the tires. I wanted off road tires. I also needed winter tires...and i wasn't in love with the cheap tires the car came with. I also planned on putting about 20,000 highway KM in the first year alone so didn't want KO2s. Being budget conscious, I just swapped the OE tires for winter rated A/T tires. Yokohama Geolandar G015s were the best choice. Good on all terrains, fit on the OE 18" wheels, and are actually more quiet on the highway than the OE tires. So far they are up to every terrain I've thrown at them.


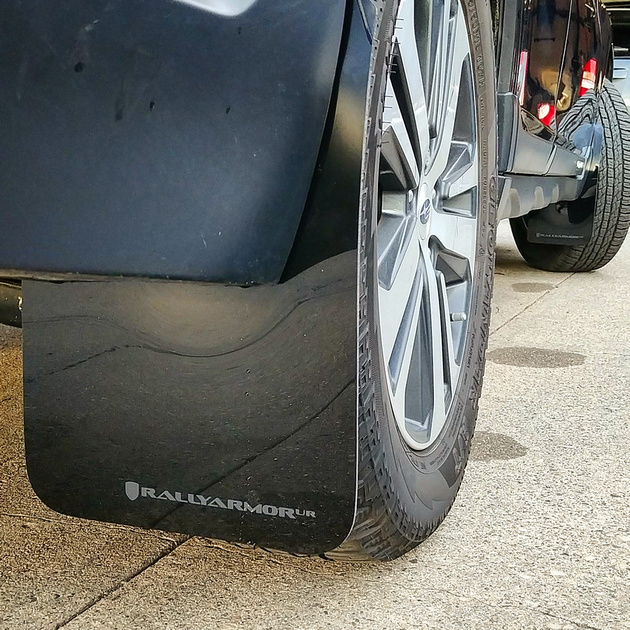
After that I noticed that the car was pretty good at spraying itself in the wet so to protect the paint as much as I could, I ordered up a set of Rally Armor mud flaps. They fit perfectly, and do a really good job of keeping the crud off the paint. Very much worth the price. Came with all the brackets and hardware to mount them in under an hour.


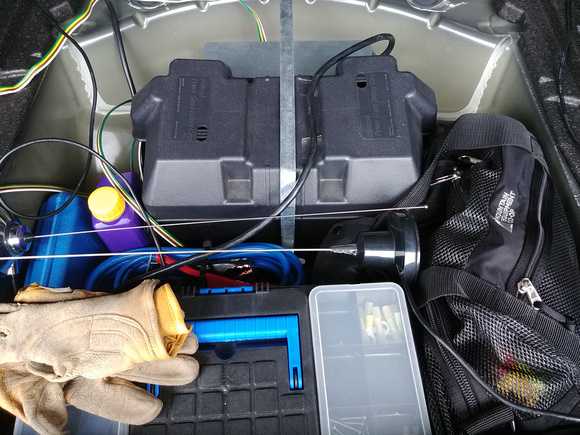
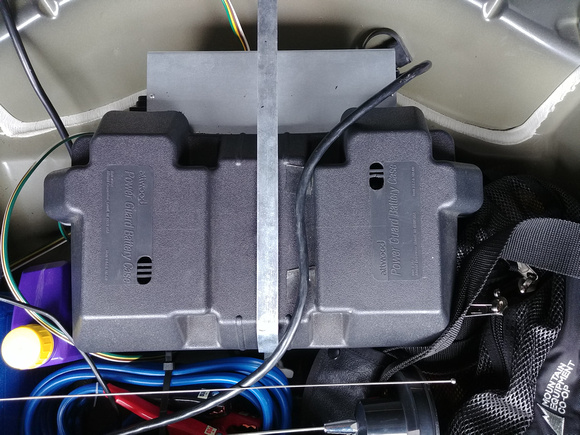
Being a Ham, I always have a radio in my vehicles. Not being able to screw mounts into the inside of the car PLUS wanting to add a CB since a lot of the 4x4 clubs still go the CB route posed a unique challenge. The solution was two fold. First magbase antennas. I have two at the back of the roof. A small circle of clear vinyl rock guard protects the paint from the magnets. Inside the car I have a Yaesu FT-2900R and a Cobra 29LX. I built hooks to let them hang over the cup holders on the passenger side of the centre console. It's not the prettiest thing but it's very effective. Velcro keeps the radio brick from flopping around by securing it to the carpet. Power wires route around the back of the drivers seat under the carpets to the fuse panel where they steal a bit of power from the sun roof fuse.


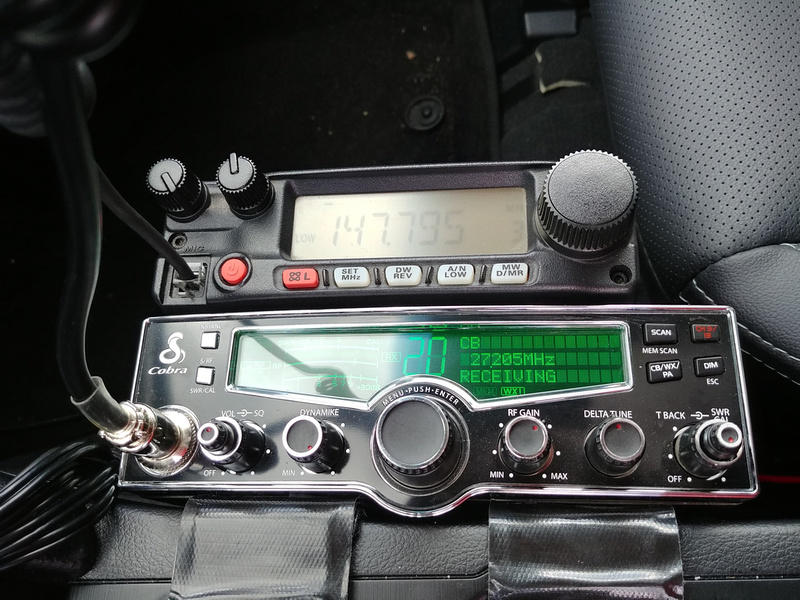
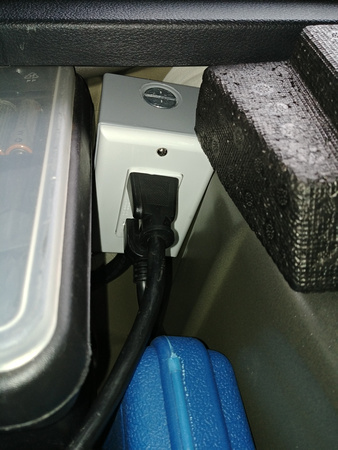
The Cobra radio was second hand and ended up having an issue with the speaker. Fixing simple problems with overly complex solutions is sort of my wheelhouse so instead of fixing or replacing the speaker I installed a small 4 channel pre-amp in the centre console. This takes the speaker signal from each radio and mixes it into the aux input for the stereo...with several channels left over to connect to something else like a phone, tablet, HT radio...anything. It's overkill to pipe a CB radio through a 7 speaker Harmon Kardon system but it works very well. On top of the pre-amp are some magnet mounts (not pictured) for holding my phone. The fit was pretty good and it all comes out with the pre-amp if I want to put it back to original condition. The amp is powered from wires piggy backed off the power lines for the radios.


When I first got into getting off the main roads, I wanted a nice GPS. A proper off road friendly GPS is pretty expensive so I used an old tablet. The apps which are available these days are amazing. I had an old Samsung tablet which was commuting with me anyhow so I built a mount for it on the dash. This lets me run mapping apps and/or ODBII gauges via an ODBII bluetooth dongle under the dash. Helps me keep an eye on things the dash doesn't show like Trans temp...or measure my quarter mile time LOL. The tablet has a GPS so I can also run Google Maps offline or Viewranger or any other number of good off road mapping apps.


I've lowered the mount since that picture was taken so that it doesn't obscure my view of the road. I'm still playing around with the mounting. It's tough to mount a tablet without any permanent mounts but a combination of a suction cup base and a CD slot base cobbled together are doing an OK job so far.

Spoiler alert! I like lights...a bit too much...

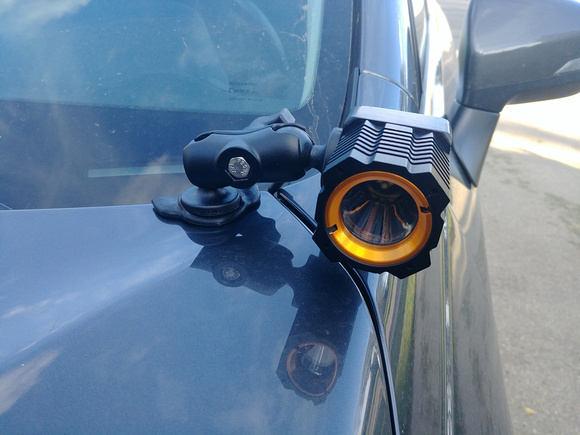
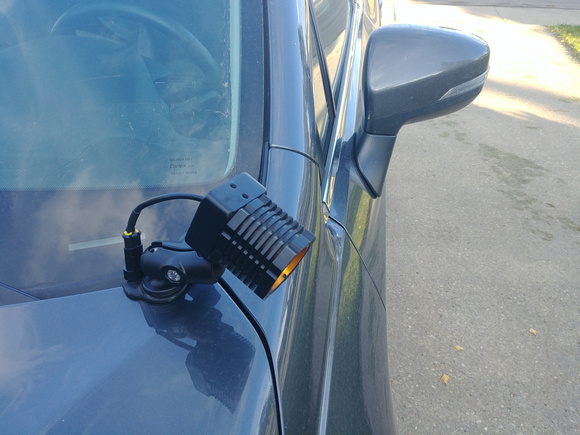
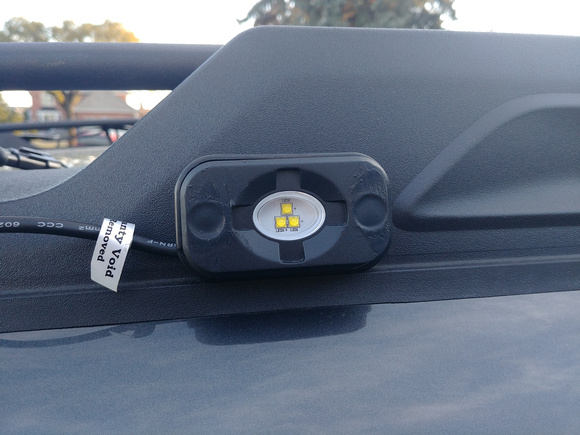
The LED headlights on the Outback are excellent...but that's no fun. I was always a fan of rally racing and Subarus when I was a kid so I wanted some big round driving lights. I happened to find some Lightforce Genesis lights on the cheap locally. Not wanting to do what everybody else does, I picked up three 210mm Halogen lights. That's about 8 1/4 inches each. I built my own light bar which bolts to the factory steel bumper. Completely removable with no cutting of the front bumper plastics required. These have been upgraded with LED bulbs from Aliexpress. They're just as bright as the 100W bulbs which were in the lights but the color now matches the LED headlights. The cube lights on the hood are an experiment which I may or may not stick with.


When I was still toying with what I wanted to do for lights I bought some super el-cheapo chinese light bars to play with. I didn't want to waste them so I was able to squeeze a 30 inch bar inside the opening of the lower grill. It's just wide enough that the brackets and bolts are hidden. It's not super functional so low but it's pretty stealthy.


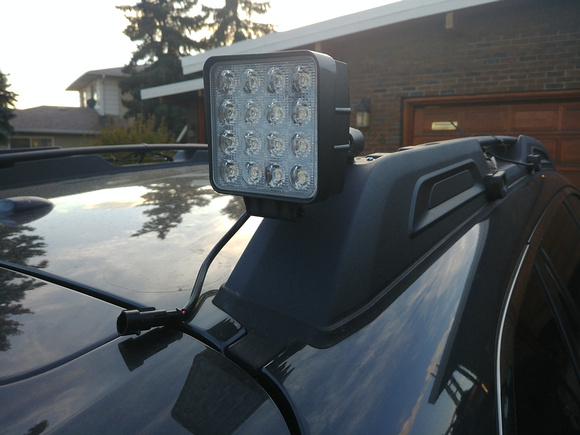
I still want to put roof lights on somehow. Right now I think I'm going to put a row of LED pods on the front of the cargo basket. I had good success putting rivnuts into the aluminum. Not sturdy enough for a light bar but for some small pods it should work great. I may also have some side facing lights or even some lights I can clamp to the basket to light up a camp spot. Nothing makes setting up in the dark easier than lots of light.

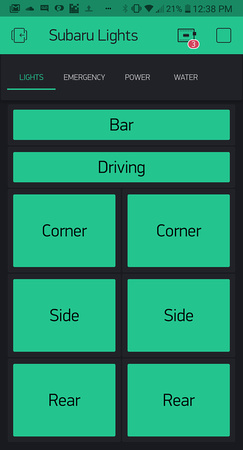
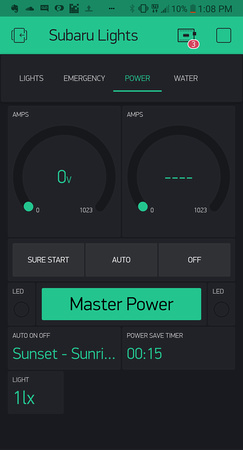
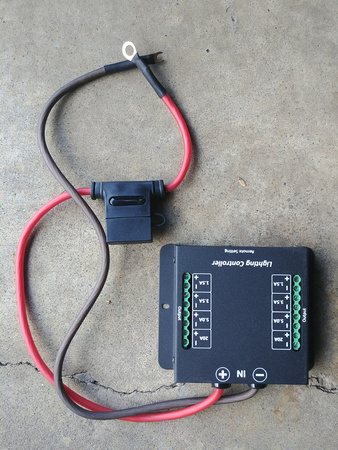
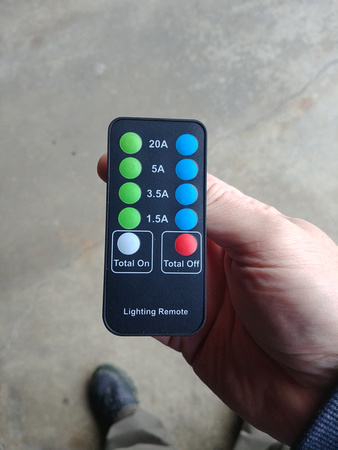
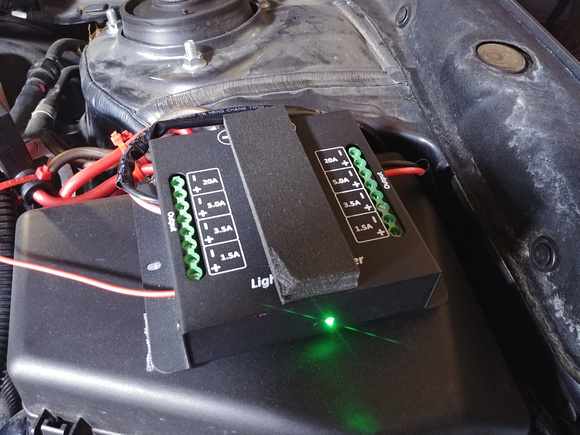
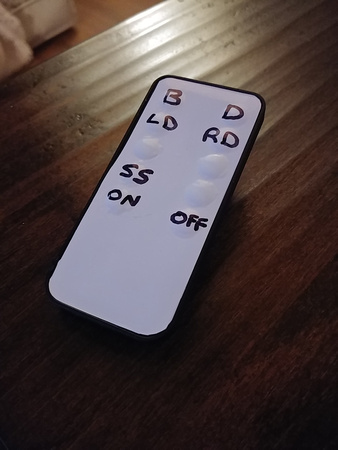
All the lights have cheapo eBay harnesses with wireless remote controls. No interior switches routed. All the lights are linked to the high beams however I am going to change the lower grill light bar to be linked to the fog lights instead. They're very low and I'd rather have them supplement the fog lights than the high beams.

I also swapped the fog light bulbs for LEDs since the Aliexpress bulbs were only $17 a pair.

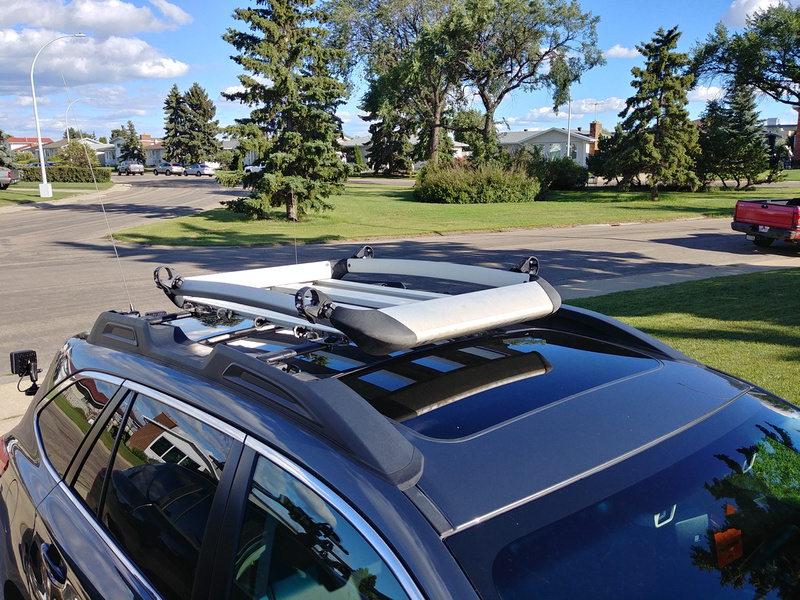
For the past 10 years I've had a Thule Aluminum rack on my Jeep. Since the Subaru is my new adventure wagon, I took it off the Jeep to see how it fits on the Subie. It fits exceptionally well. I like the look and the bar spacing was even the same. The factory bars are sturdy enough to hold plenty of weight...enough for my needs. I added some Koplin Rhinoflex mounts with rivnuts for holding things like a shovel, tarp poles, canoe paddles, etc. I'll be using these to hold up my Big Agnes Twin Butte awning while in camp.


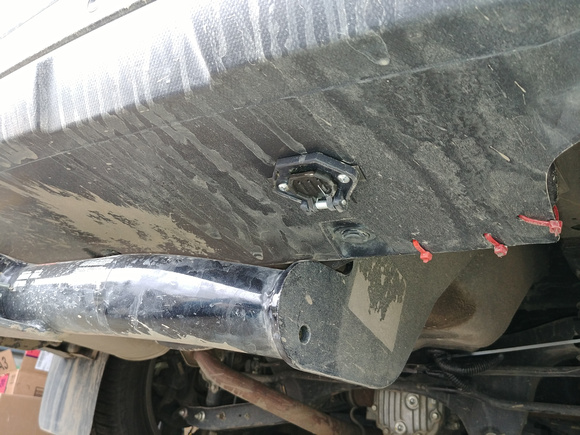
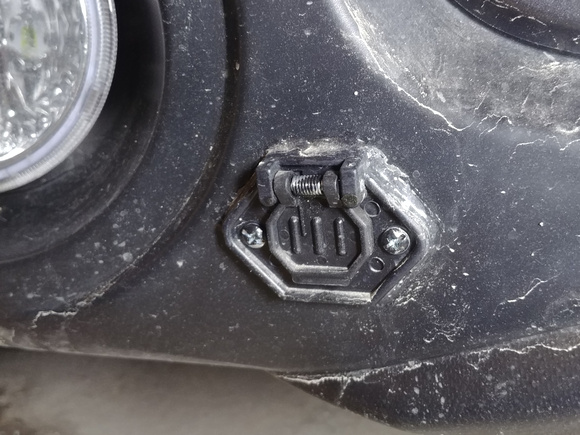
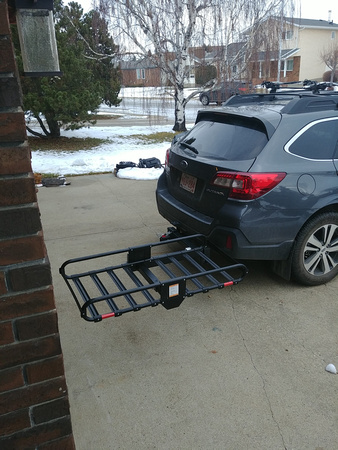
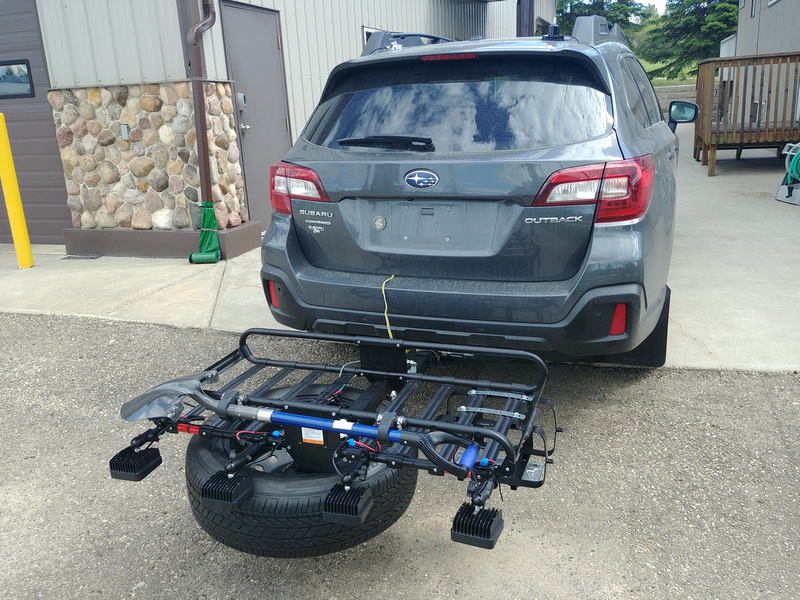
I had a proper class III hitch installed from the dealer. Driving around town there's a tow shackle hanging back there. Once negative of a lot of new vehicles is the spare. It's either too small or too hard to access or both. The Subaru is no different. You can buy spare tire carriers which slide into the receiver hitch but they're very pricey...so I built one. It's basically a 500 lb rated steel cargo basket on a hinged mount which I adjusted (by redrilling some pin holes) to primarily ride upright. On the under side (now the rear) of the basket is a spare tire carrier and a steel jerry can holder. I rebuilt the basket so that it could be accessed through the sides and I use this space to hold traction boards. I also wired it with trailer lights as I was worried the boards might obscure the tail lights. Since there was wiring there, I also added wiring for four LED work lights. These run off the same wireless remote harnesses like are in the front. There's also two Koplin Rhinoflex mounts for holding a small shovel. I still have some space back there for future expansion. I left the hitch ball out of it. The bolt hangs down too low and drags in the dirt. Instead I use it as a tow point with a big shackle. I don't have a great picture of the rack since I picked up the jerry can and the traction boards. Here it is flipped down. in an earlier version.


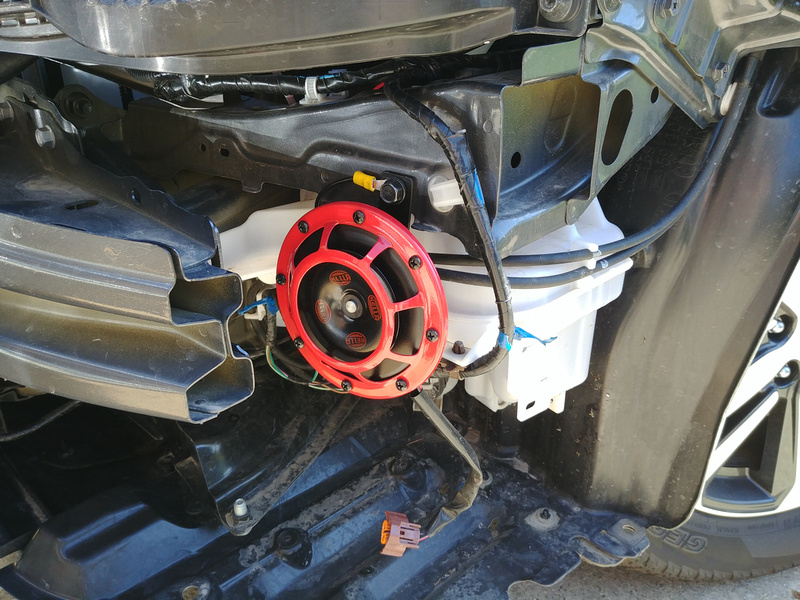
Less exciting but I've also replaced the pathetic OE horns with Hella Supertones. They fit behind the bumper in the OE locations perfectly and the Subaru wiring is beefy enough to handle them thanks to a circuit and fuse for each horn. Not as loud as in the grill but again, I like having everything either hidden or removed in grocery getter mode.


My to do list is a lot shorter than it used to be but other than some roof lights, I'd like to put a bit of a lift into it. It's a bit beyond the set rules I made for myself but an inch or so is barely anything. There are so many options and it's a big investment so I'm not jumping into anything just yet. A friend of mine is bugging me to put a winch behind the bumper. It can be done but requires replacing the bumper internals with an expensive tube steel assembly and I can think of better ways to pull myself out of a rut for a thousand bucks plus the cost of the winch itself. I'm never in a rush and come-alongs are cheap. Anything after that will purely be accessories for the betterment of my overland experience. Maybe a 12v fridge or a different tent.

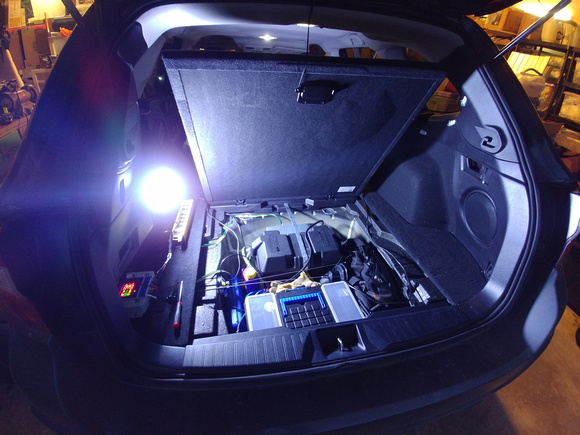
Once the last few things are done I'll give Otto a good wash and take some nice pictures to finish up this post. This is how he looked after I mocked up all those bolt on goodies.


Wawa Skittletits

Local Expert East Region USA
Staff member
Launch Member
Member

Expedition Master I

5,079
Wilkes-Barre, PA, USA
First Name
Drew
Last Name
Hawley
Member #

1537

Ham/GMRS Callsign
WRBZ674
Service Branch
USN veteran
Nice custom touches! Welcome to the exciting world of off road Subaruing haha!
 
  • Like
Reactions: Crosstrek315

martin_j001

Rank V
Launch Member

Enthusiast III

1,798
Lawrenceville, GA
First Name
Jeff
Last Name
Martin
Member #

13185

Nice! I like the use of the folding cargo basket for the spare! I'd love to see some more pics of it in it's upright position, and all stocked up.
 

Crosstrek315

Rank I
Launch Member

Traveler I

233
East Syracuse, NY
Member #

13773

I like it, there are two Ottos on here now. I have also named my subie Otto but I named my 2018 Sunshine Orange Crosstrek after the Syracuse mascot Otto the orange.
 
  • Like
Reactions: DaveT

DaveT

Rank V
Launch Member

Enthusiast III

1,540
Edmonton, Alberta, Canada
Member #

11506

Too long of a pause between updates here...I'm working on a bunch of changes to how I have things set up. Trying to race the snow. I'll try to take some pictures this weekend...it's been miserable weather here lately so no good for photos. I've since met up with the only other Overland Bound member in Edmonton with a hankering for Subaru adventuring...got some inspiration from things he's already done.

A tease of things which are done: Wired in an aux battery in the trunk complete with charger and shore power port, solar charge controller, and inverter, reworked how I control the extra lighting, worked out a way to store and pump water, and sorted out a new awning situation for maximum privacy and protection from the elements in camp. Still working on some tweaks to the hitch rack, remounting some of my lights, and sorting out how to mount RAM balls for attaching accessories inside. Lots of little things that don't seem super important at first but once you have them dialed in...feels so good.

Some of those things will get sorted this weekend. Otto needs a good cleaning anyhow before winter hits for good so I'll get some pics while I'm at it.
 
Last edited:

Wawa Skittletits

Local Expert East Region USA
Staff member
Launch Member
Member

Expedition Master I

5,079
Wilkes-Barre, PA, USA
First Name
Drew
Last Name
Hawley
Member #

1537

Ham/GMRS Callsign
WRBZ674
Service Branch
USN veteran
Looking forward to seeing your accessory battery setup. I’m working on that for my Outback now.
 
  • Like
Reactions: PB&Me

DaveT

Rank V
Launch Member

Enthusiast III

1,540
Edmonton, Alberta, Canada
Member #

11506

Since there's interest in my aux battery, I'll start there. My usual disclaimer...I'm doing this on a budget and with intent to not permanently modify the vehicle so some of my design choices might seem strange...you've been warned. And forgive the dirty Subie...it's been raining so Otto hasn't had a bath this week.

My old work van had an aux battery so I already had much of the hardware I needed laying around. In fact the AGM battery now in the trunk is from that van. I kept it when I sold the van because it was still really new and I didn't want to take a loss on it. I had to buy very little to get this to happen.

The battery is in an Attwood battery box. The box is too big for the battery. My old set up had a small AGM battery and the inverter, switches, and fuses were all inside the box. I filled the gaps in the box with wood blocks. The box is stuck to the bottom of the spare tire well with Gorilla mounting tape and held down from above with a custom steel strap I built which screws into the old bolt which held the spare tire down. The strap is also attached to the lid of the box to prevent the box from slipping on the strap. 0 gauge wires run from the battery, out of the box via a 200 Amp fuse and out one of the existing holes through the rubber plug which I cut into a grommet. The ground wire is bolted to the subframe using an existing bolt. The positive wire runs over the rear diff and inside the skid plates to the transmission where it finds it's way into the engine compartment. Both wires are shielded with a corrugated shroud for extra protection and the ground bolt under the car has been sprayed over with Leak Seal to protect the wire from corrosion.


The positive wire runs through a Samlex ACR-160 switch through another 200 amp fuse. If the wire wears through in the middle of the car, this should protect either side from a short. The switch is a microcontroller controlled battery isolator. It's a bit pricey but it's also pretty amazing. It isolates the battery automatically based on the voltages of the two batteries and has a very low current draw. It's bolted to a bracket under the hood which I modified slightly to fit the isolator. It's right next to a factory ground bolt so the location was pretty convenient. The isolator has an option to force the connection on. If you drive an emergency vehicle you'd know it as a Sure Start but it basically lets you boost the car using the rear battery with a push of a button.

The accessories in the front, like off road lights are being rewired to run off of the rear battery. If they stay on for what ever reason and the engine isn't charging, this will only kill the rear battery. There's much more under-hood work on the go so you'll see pictures of that soon.

In the back the rear battery will power a bunch of stuff including an inverter and all of the lighting on the roof...more on that later too.

Last year I found an RV power supply/charger at a pawn shop. It was new in the box and the guys there didn't know what it was so I got it for $65 instead of $500. It's overkill in a big way. 20Amp AC in and 75 Amp DC out. The wife and I camp a fair bit in proper campgrounds which sometimes have electrical hookups so this well let us be generous with our electricity in camp without killing the battery. The charger is attached to the front of the battery box and is braced against the front wall of the spare tire well. 4 gauge wires run from there into the battery box.


The AC portion of the charger runs through the spare tire well (right now right over everything because it's too short...I'll fix that later) to a power outlet I've installed in an outdoor junction box. Inside is a 20Amp GFCI. AC power comes in through the other plugged hole in the pan via a 30 AMP rated cable into the box. Under the car the cable comes out through a hole in the plug, back inside the bumper plastic and ends at a 10 pin panel connector designed for marine shore power. 10 gauge wires should be good for 30 amps. It's on the under side of the plastics. Pretty well protected by the tow bar. I lubed the socket up so that it shouldn't hold any moisture. There's no breakers in the system other than what's in the GFCI because camp power outlets all have their own. I also velcro'd in a power bar which can run direct or through the inverter.


Photos include my trunk junk. I'll have to pull everything out when I rewire the inverter...I'll take more pictures then.

I made an adapter to connect a std 15 amp extension cord up. I'll be making another one with a 30 amp plug later.

When shore power isn't available, I've installed a solar charge controller...more on that later...such a tease today!

Of everything I've done, the only thing I'm concerned about is the wires under the rear of the car. They could get snagged in a proper off road situation. I have some ideas to mitigate the risk...we'll see where that leads.
 

DaveT

Rank V
Launch Member

Enthusiast III

1,540
Edmonton, Alberta, Canada
Member #

11506

In my last post I showed my trunk battery set up. Now I'll fill in some gaps for you starting with the solar set up.

Again I'm using parts I had around from previous builds so the parts aren't all matched well but they work.

In the trunk I've mounted a 20 Amp solar charger. It's a 'Raggie' brand from Amazon. Cheap to be sure but it does provide 3 phase charging, an on/off button, and has 4 USB charging ports which I like. It also surface mounts so I was able to screw it down to the floor in the trunk.


I chose to put it right in front of a small storage cubby...one which I've never had a use for. Inside the cubby I've mounted 4 cigarette power sockets. This happens to be right next to where the OE socket is. One of the issues Subaru folks have with the Outback when they start using them for stuff like camping is that the socket is only powered when the ignition is on. The usual route to take is to rewire the fuse panel a bit to give the sockets constant power. I've circumvented this by doing it my way even though it makes the OE port pretty useless. Because these are wired through the solar controller I can switch them on and off plus monitor how much current they are drawing...very handy when rationing the electrons.


The output of the charger is wired directly into the trunk battery. For solar panels I have 4: Two small folding soft panels good for about 15-20 Watts and two folding glass panels good for about 100 Watts. Tech has improved since I bought these and I could go out and buy much more powerful panels...one day I will but for now they are a bit too pricey. I pass the wire through the hatch seal. At such a low wattage, the wire is very thin.


The glass ones are so heavy and cumbersome I couldn't even be bothered to dig them out and take a picture...they stay at home 9 trips out of 10.

Also pictured is some COB LED strips I picked up at a surplus store for about $2.50 each. They are crazy bright. I had originally planned to wire them into the dome lights but they turned out to be too bright and the light was too blue...looked a bit too Disco at night. Instead I wired them into a cigarette plug and put some velcro on the back. They now are used for lighting the trunk when needed either by sticking them to the side wall carpet, under the spare tire hatch, or to the under side of the hatch. The latter two will come in handy one day I'm sure if I'm ever stuck on the side of the road with a flat tire or mechanical issues. The hatch blocks the rear dome light perfectly making getting at your spare in the dark a pitch black experience at night...good work Subaru!


Took these at dusk to try and accentuate just how bright they are.

Last photo is a new thing and a bit of an experiment. Cheap bedding foam a few inches thick carved to fit the inside of the trunk. Just over 6 feet head to toe without having to run the seats forward. I'm building a platform which velcros to the carpet on the back and hangs from the headrests in the front to make the most of the flat space. It works great. I just have to upholster it and find straps which are a bit more subtle. The twin mattress cover isn't quite wide enough but it will work. It's an electric cover. About 60 Watts on high and very warm. Even through the inverter, the 75 Ah battery should be able to run it for quite a while. WAY more efficient than any other type of heater. The cubby will be a perfect place for a cell phone or two to sit and charge at night. I plan to carry most gear on the roof and leave the mattress for the dogs to have while travelling...more testing is needed to get it just right. I just set it up for the first time today.
 
  • Like
Reactions: Daryl 32 and PB&Me

SiDbaru

Rank III
Launch Member

Traveler I

632
California
Member #

14702

Loving your rig. Can't wait to get a secondary battery going in my outback.
Keep up the good work
 

DaveT

Rank V
Launch Member

Enthusiast III

1,540
Edmonton, Alberta, Canada
Member #

11506

I've been struggling with how to control lights and accessories in Otto. I have plans for things inside and out which will require AC and DC power. I want to control everything in a user friendly way without breaking the bank and without having to run wires all over the place.

I have two finalists for how I'm going to do this. I'm going to try and build one myself and if that doesn't work, the runner up will be the go to.

My top pick is the super nerdy way to go using an app called Blynk. Blynk lets me build custom GUIs on my phone and control wireless boards over bluetooth or wifi which can be programmed to do my bidding. A combination of Arduino, Rasperry Pi, and NodeMCU boards will be utilized. If it works it should be relatively reliable and allow near infinite customization without having to rewire things every time. It does require me to build my own circuits and program all the controllers myself. Here's a screen shot of my first control screen mock up. I've already tested this having a NodeMCU board light up LEDs to simulate my off road and utility lights using the first GUI shown below. In practice these will control relays instead. If I can figure a way to set it up solid state instead like a proper (and super expensive) power management system, I will. The first screen is pretty basic and the others are mockup using some of the more advanced features I could utilize.


Failing that I'm just going to shell out for a proper light controller. I can get a Feniex 4200 for around $500. It can control 18x 10 amp channels, has integrated fusing, and has a fully programmable control panel that only needs one cable to be run through the firewall. It's overkill but I like overkill.

https://www.feniexindustries.com/emergency/4200-dl-controller

For now I'm going the cheapo Amazon route to get things functional on a tight budget. I originally tried the small 10 amp relay controllers operated by 433MHz keychain remotes. Not only are these not weather sealed or soldered properly, they require many modules, fuses, and remote controls be installed...creating the rats nest of wire I'm trying to avoid. I settled on this controller via Amazon:


It's an 8 channel wireless controller with a metal casing, much more robust circuitry, and a nice thick power wire which has a built in 60 amp fuse. I picked up two of these on the cheap. One for the front and one for the back so that I have to run even less wire.

The module under the hood has had the circuit board spray coated to protect from moisture and the components have been braced with silicone to prevent vibration from wrecking them. It's mounted right next to the battery isolator so that it can be powered directly by the rear battery. If a light gets left on, this won't kill the starter battery. The only strange thing is the power handling. It has 2x20 amp channels, 2x5 amp channels, 2x3.5 amp channels, and 2x1.5 amp channels. I don't know why this is when the relays inside are nearly all 10 amp rated...but for my purposes it's enough.

The remote has a visor clip on it. So far in testing it works well but there might be some signal issues that will require an antenna be added to the receiver under the hood.

I've also installed some RAM balls so that I can mount lights just for a trip OR GoPro cameras as desired. The only down side is that they can walk away easily. Going to invest in some security nuts with a key I can put on a keychain so that I can feel safe enough to walk away from the car for a few minutes and expect them to be there when I get back.


Here is one of the side scene light pod close up:

 
Last edited:

PB&Me

Rank V
Launch Member

Traveler I

1,440
Portland, Oregon
First Name
Matt
Last Name
Merges
Member #

19126

Love your rig and the time & care you’re putting into it. I’ve had 2 subies and love them.

Where off-road do you usually go?
 

DaveT

Rank V
Launch Member

Enthusiast III

1,540
Edmonton, Alberta, Canada
Member #

11506

Love your rig and the time & care you’re putting into it. I’ve had 2 subies and love them.

Where off-road do you usually go?
I'm still very new to getting properly off road since most of the locals are off roading in either trucks or Jeeps but so far most of our journeys end up between Edmonton and Jasper National Park. I want to do some longer road trips next year. Two trips I want to do next year: Head into the states for some MtnRoo events and/or Subifest and make a trip North on the new Inuvik-Tuktoyaktuk Highway and see how close we can get to the Arctic Ocean.
 

DaveT

Rank V
Launch Member

Enthusiast III

1,540
Edmonton, Alberta, Canada
Member #

11506

Some overdue under the hood photos. I'm pretty much done with things under the hood for now so here's what's going on.

After killing the OE battery down to 5 volts a few times, I didn't trust that it hadn't been damaged permanently. I swapped it for a second hand Optima red top. More CCA, larger reserve, and it's an AGM battery. Looks a bit rough but it was thoroughly tested and seems to be tip top electrically. In the photo you can also see the 200 Amp fuse. The new battery is a 34 so it's a bit shorter than the OE battery. There's still plenty of clearance even with that fuse.


The isolator is bolted to a bracket which I straightened on the end of a hammer. Fit's pretty good even though I have to dodge some plumbing to get the wires to the battery.


The Amazon-riffic wireless power management switch is velcro'd to the top of the fuse box. In this picture it's not fully connected but you get the idea. I added some peel and stick foam just to keep it from rubbing on the hood liner but I don't think it's actually that close...hard to be sure when the hood is closed.


The winters here are long and cold. The OE block heater is enough to get your engine started when it's -40 but it's still pretty hard on things. To help mitigate that I've added some heat. a 60W battery heating blanket to make sure I have all the cranking amps I can get, and a 125W oil pan heater. I've routed the power cables for these to the passenger side of the car to a 3 way, 12 gauge stinger. The male end of the stinger is connected to a panel connector designed for marine shore power. 3 pins, 10 gauge wire. I've always hated the power cord dangling out of the front grill which every car here has...so I solved it. This is the same sort of plug I have at the rear for connecting to shore power. I bungled the silicone bead pretty bad when I was trying to make it look tidy but it's not all that noticeable unless you're super close.


The three heaters draw about 600 Watts together. Not bad. Still less than just the block heater in a big truck.

As always, forgive the dirt. I was going to get a good car wash in again today...then it snowed all night.
 

DaveT

Rank V
Launch Member

Enthusiast III

1,540
Edmonton, Alberta, Canada
Member #

11506

Working on finishing the wiring today. Want to have all the loose wires sealed up before I give Otto the big wash and wax before winter.

I was able to label my interim remote controls by putting some white vinyl on top and just labeling it with a Sharpie. It's not pretty but it's effective.


DaveT

Rank V
Launch Member

Enthusiast III

1,540
Edmonton, Alberta, Canada
Member #

11506

can you post some more pictures of your hitch mount basket/tire rack please?
Funny you should mention the rack. I've completely redesigned things. I found that the rack was too heavy for my wife to flip up when she needed access to the hatch, so I built a swing away receiver for mounting the rack. I just finished it this week so pictures will be incoming soon. It took a while after some design fails which needed to be addressed.

Just as a tease I'm still using the basket as a basket with a separate tire carrier. This way I can use the basket as a basket when I need it and simply pull it out of the receiver leaving the tire in place when I don't. I'm just finishing some mods to the tire carrier to accomplish this so I'll have pictures in a day or two. I'll post and update then.

I've also swapped the rack for a more traditional steel basket. The Aluminum Thule was a bit corroded and I was having some issues. Replacement parts for the Thule were more expensive than a whole new budget rack so I upgraded. I'll post pictures of that too. I modded the basket a little and the paint is drying as I type this. I'll have it bolted in tomorrow for pics
 

DaveT

Rank V
Launch Member

Enthusiast III

1,540
Edmonton, Alberta, Canada
Member #

11506

Apologies...took longer than I planned. What I've built for the rear receiver hitch is a little heavy for a car but it should be adaptable to any vehicle I run with now or in the future and is modular so I can change out parts of it as I need.

I built the swing gate out of heavy wall steel. Inspired by the Wilco hitch based tire carrier. The pivot is lined with brass bushings and has a grease nipple to keep everything gliding and water free. A spring loaded pin secures the gate and a clamp latch pinches the top half of the gate between two thick layers of HDPE so the arms and hinge aren't under load while driving. It hasn't been torture tested just yet but so far everything is pretty solid.


This attaches to the receiver with a length of thick walled tube. Eventually this will have my tow shackle welded to the end of it. Wobble is mitigated by using grade 8 bolts and washers instead of pins. I'm not pulling anything with this so there's no risk of bolts shearing. I've also integrated a plate mounting bracket and a plate light which hooks into the hitch wiring.


Into the upper receiver I have a normal hitch based tire carrier. I've modded this a little. First with some spacing washers so that the tire clears the arm. I'll replace this with a thick spacer made of Aluminum in time. On the bottom I've welded yet another hitch receiver! This is for the optional cargo basket.


The basket is a standard basket. The same one I posted about earlier but no longer in the vertical hinged hitch mount. Now I can use the basket to carry Jerry cans, totes, traction boards, propane, firewood, etc. When I don't need it, it simply pulls out. It will need to be modified if I ever go to 245 Mud tires but for now, with the OE takeoff spare, it works really well.

It will be easy to overload the basket but I've tested the basket with my weight (about 230) on it, fully swung out, and while there's a fair bit of flex, all of the welds hold. Only time will tell if they stick after hammered by some rough roads. Here's a mock up from the garage. Still weighing things and deciding on the best distribution of gear.


Wish I could have taken some better photos of the rack mounted but it's a blizzard here right now...no good for photos.
 
  • Like
Reactions: sgthusk