
Terrawagon makes front flare trim pieces.Looks awesome.
very very minor detail but I think the fenders being different colors would eventually get on my nerves. I get why it's like that and all but I'd have to paint one or the other to match.
Love it when you post, always something neat to drool over.
2018 SPrinter
- Thread starter grantwilson
- Start date
You are using an out of date browser. It may not display this or other websites correctly.
You should upgrade or use an alternative browser.
You should upgrade or use an alternative browser.

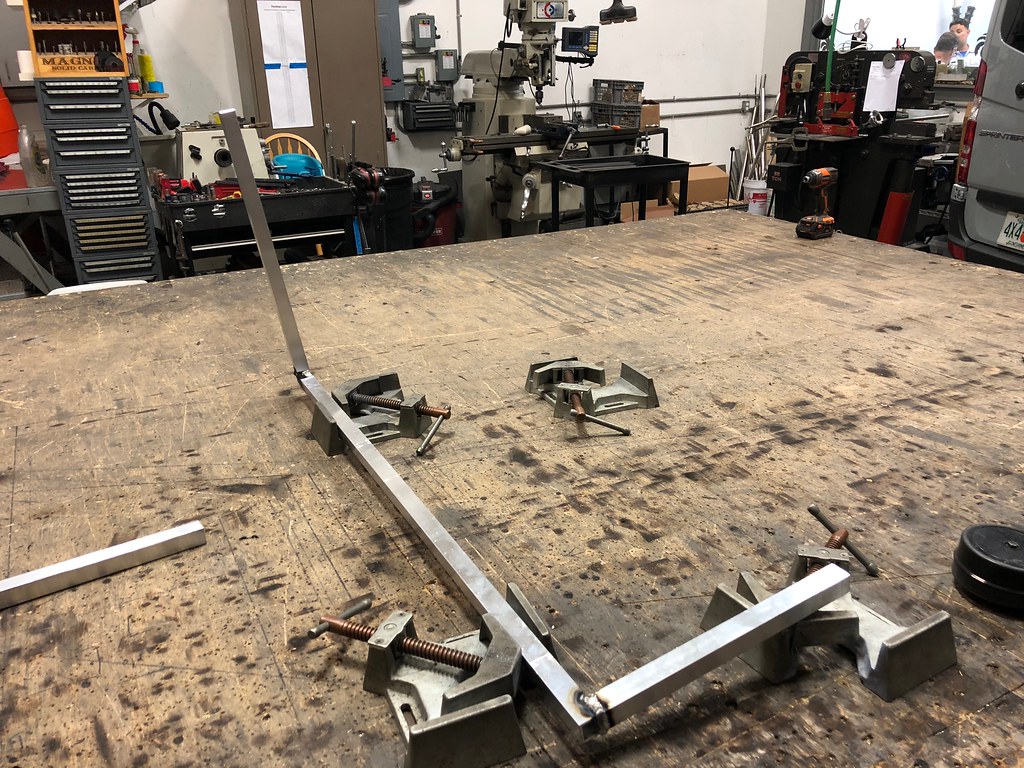
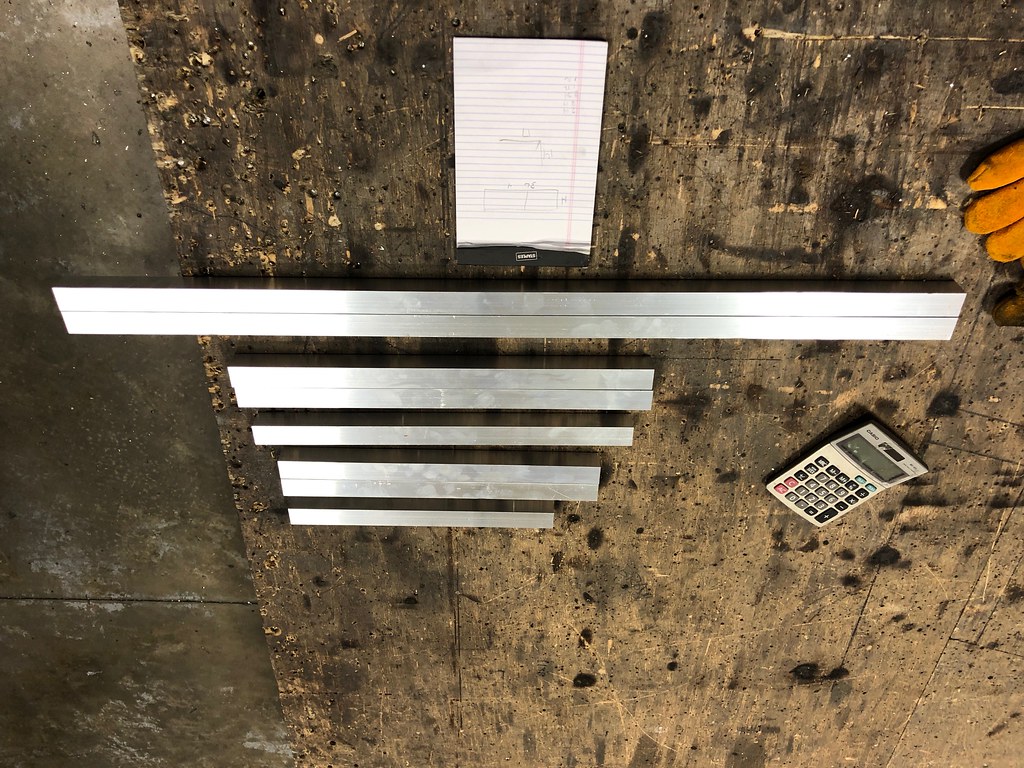
Making moves!
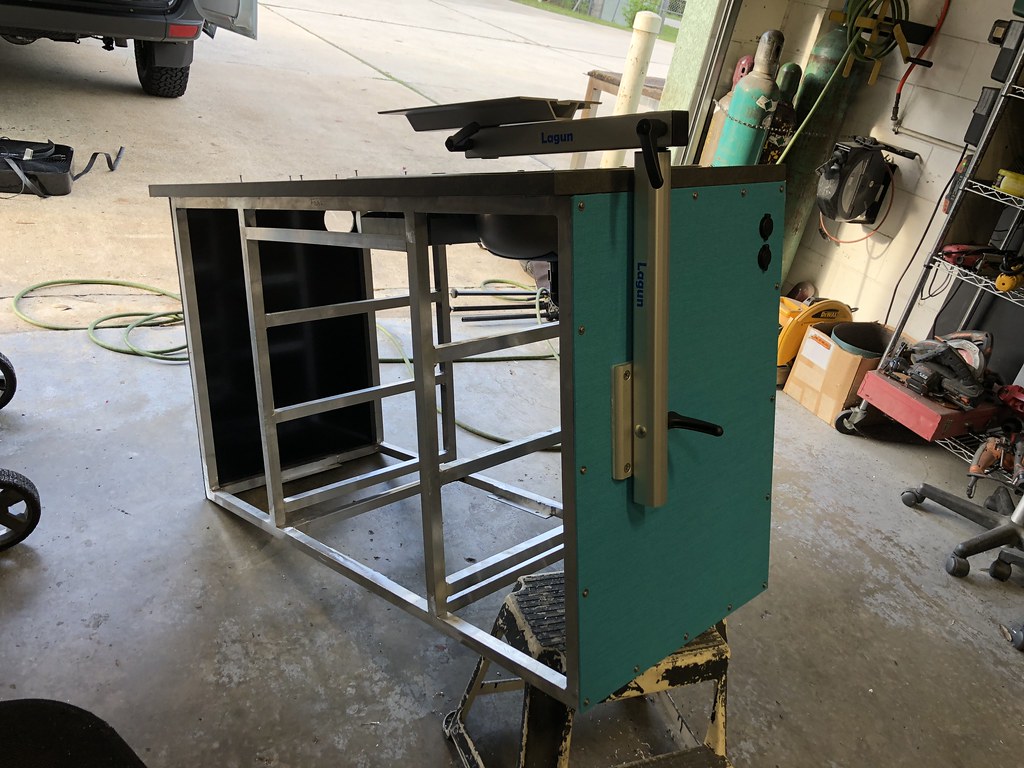
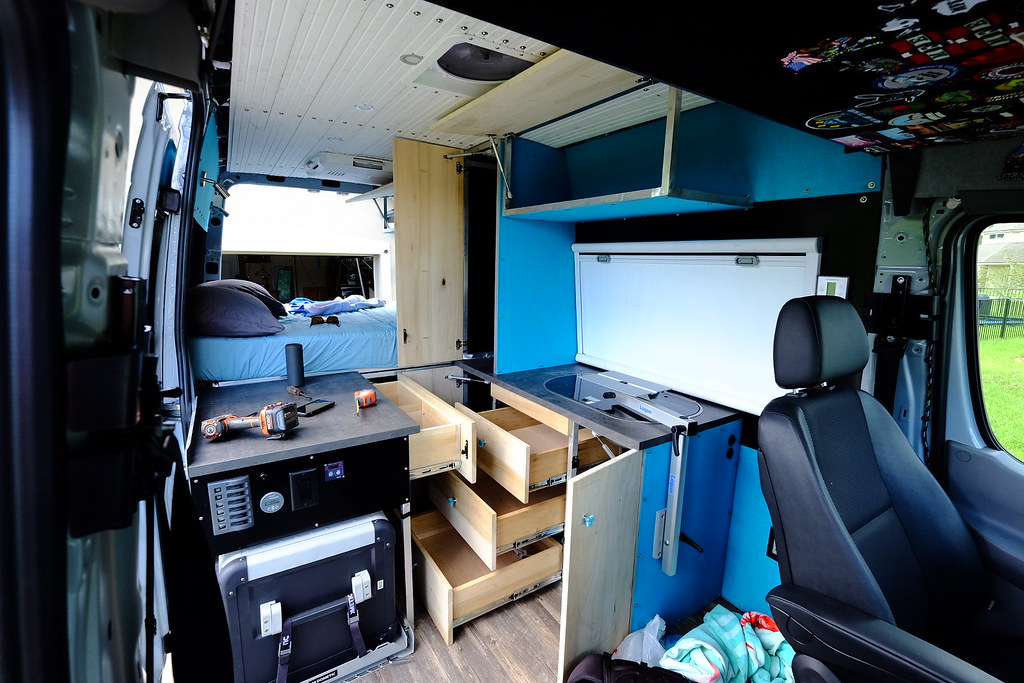
Started out building the vertical cabinet. I decided to do it as a separate unit because last time it was all one unit. I couldn't make it as tall as I wanted to in order to fit it in. This way, it fits much better.
 Untitled by Grant Wilson, on Flickr
 Untitled by Grant Wilson, on Flickr
 Untitled by Grant Wilson, on Flickr
 Untitled by Grant Wilson, on Flickr
 Untitled by Grant Wilson, on Flickr
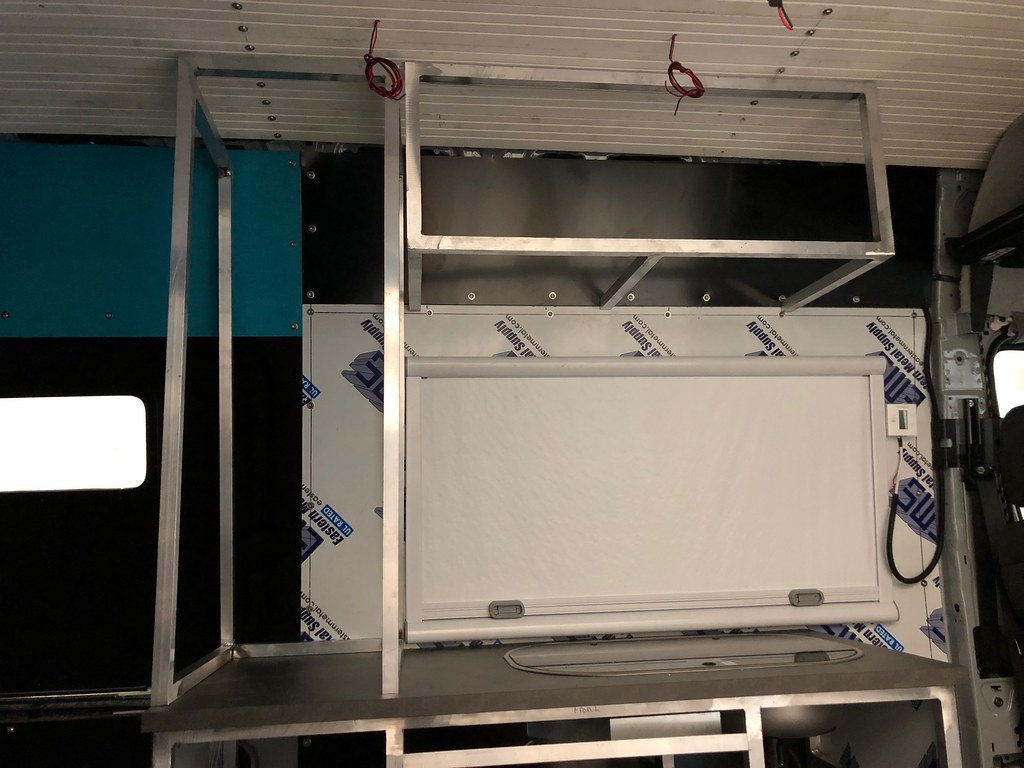
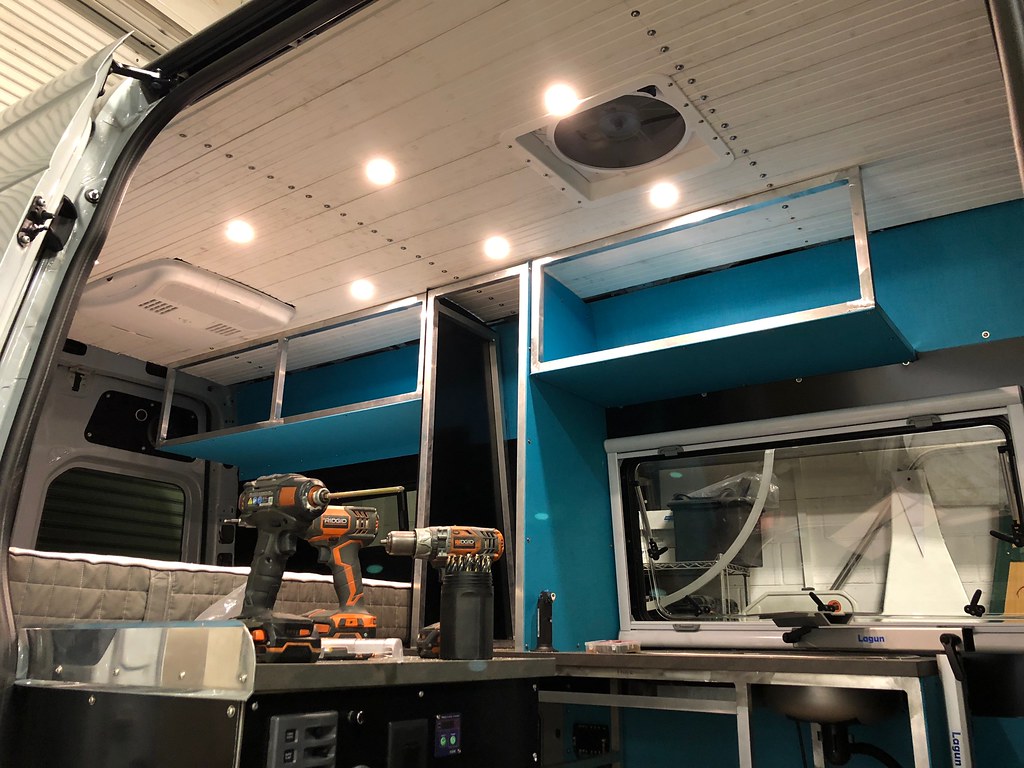
Then I needed to build the upper cabinet over the kitchen
 Untitled by Grant Wilson, on Flickr
 Untitled by Grant Wilson, on Flickr
9 degree angle on the cut on the back wall fits perfect
 Untitled by Grant Wilson, on Flickr
 Untitled by Grant Wilson, on Flickr
 Untitled by Grant Wilson, on Flickr
Gotta make the other end upper cabinet over the bed, then ill skin the sides, lowers, and cover them with fabric. I will be getting all the doors and drawers made once i finish it all, and the van will be pretty much done!
Started out building the vertical cabinet. I decided to do it as a separate unit because last time it was all one unit. I couldn't make it as tall as I wanted to in order to fit it in. This way, it fits much better.
Untitled by Grant Wilson, on FlickrUntitled by Grant Wilson, on FlickrUntitled by Grant Wilson, on FlickrUntitled by Grant Wilson, on FlickrUntitled by Grant Wilson, on FlickrThen I needed to build the upper cabinet over the kitchen
Untitled by Grant Wilson, on FlickrUntitled by Grant Wilson, on Flickr9 degree angle on the cut on the back wall fits perfect
Untitled by Grant Wilson, on FlickrUntitled by Grant Wilson, on FlickrUntitled by Grant Wilson, on FlickrGotta make the other end upper cabinet over the bed, then ill skin the sides, lowers, and cover them with fabric. I will be getting all the doors and drawers made once i finish it all, and the van will be pretty much done!
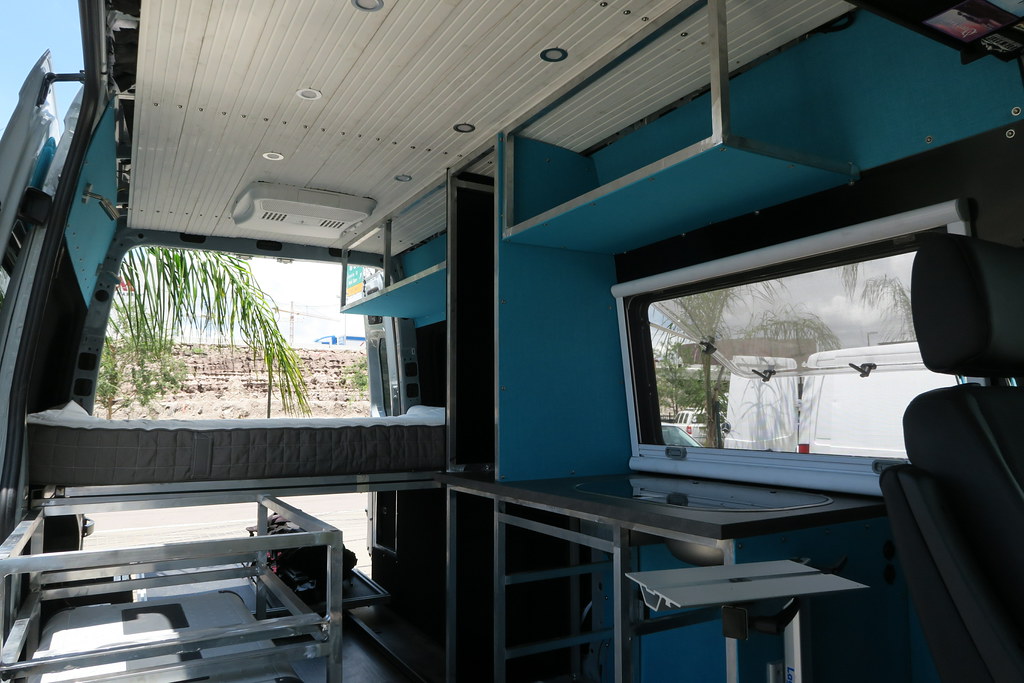
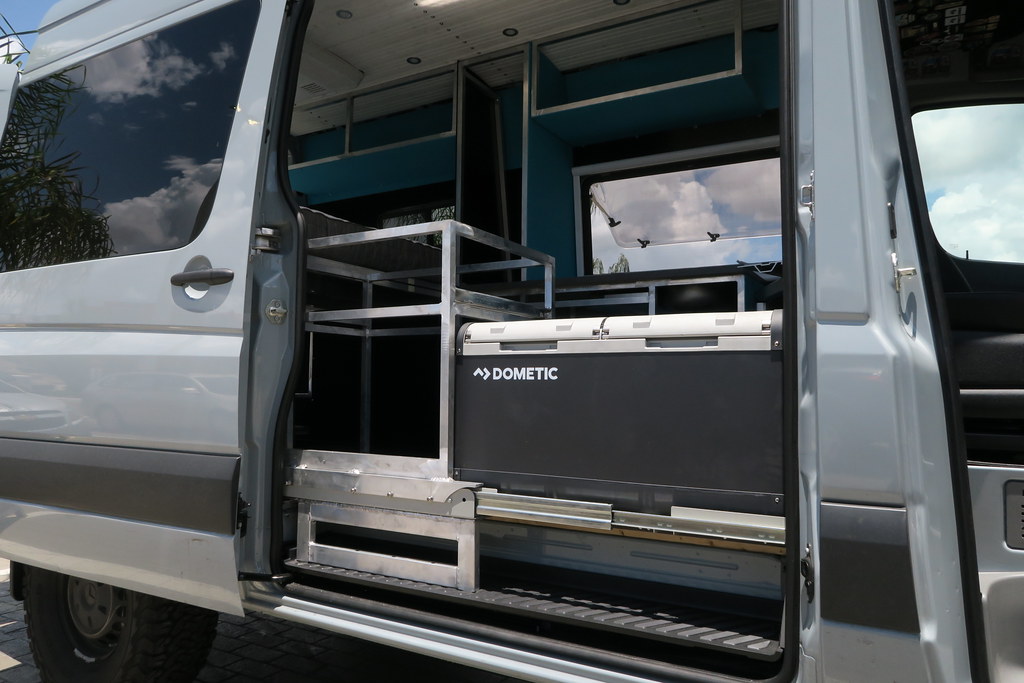
And more progress!
 Untitled by Grant Wilson, on Flickr
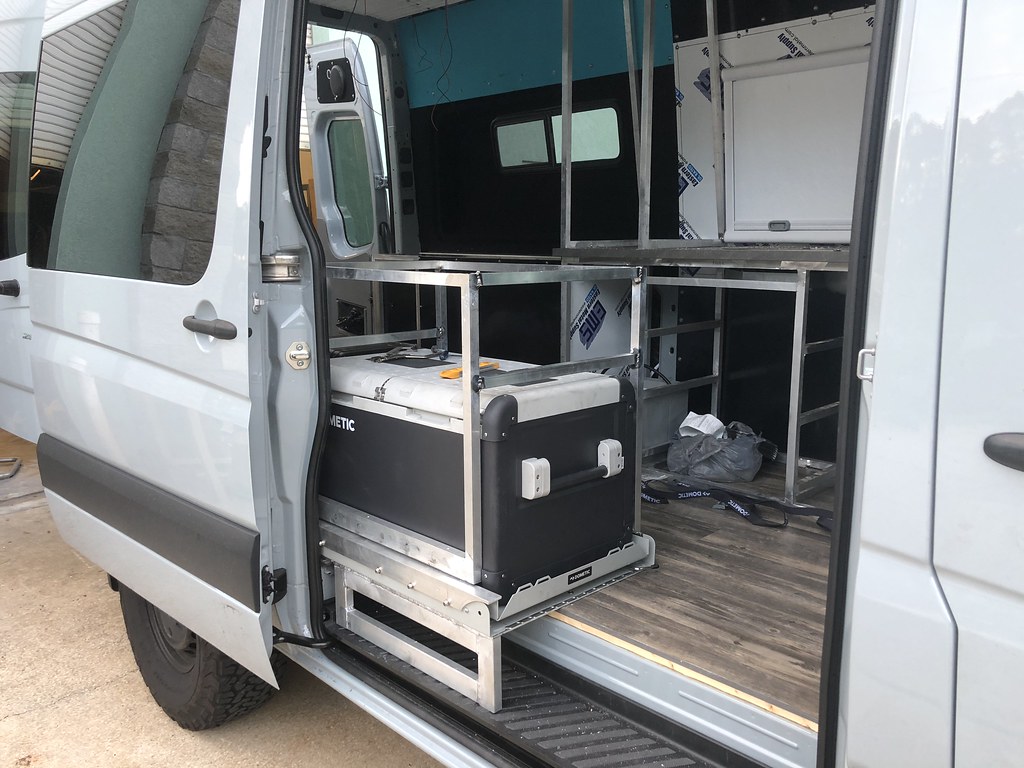
Needed to build the unit above the fridge
 Untitled by Grant Wilson, on Flickr
actually used the slide itself to mount half the unit, saves about an inch and a half of walkway space by doing this.
 Untitled by Grant Wilson, on Flickr
shane back there working on his stuff for something
 Untitled by Grant Wilson, on Flickr
not my best work, and i have to take a half an inch out of the side not welded to the slide because im a dipshit. Or raise the slide platform up 1/2 an inch (most likely the way im going)
 Untitled by Grant Wilson, on Flickr
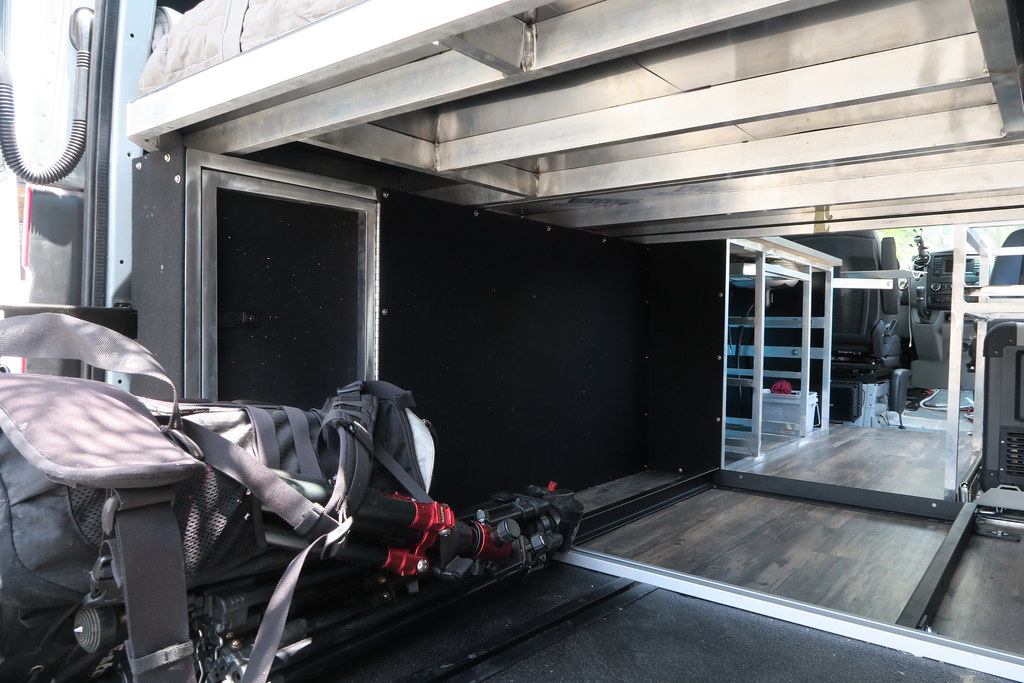
this is the upper wall above the window.
 Untitled by Grant Wilson, on Flickr
since part of this assembly is visible when it is all installed (door and surround around the door), took it into the polishing room and make it pretty
 Untitled by Grant Wilson, on Flickr
 Untitled by Grant Wilson, on Flickr
 Untitled by Grant Wilson, on Flickr
 Untitled by Grant Wilson, on Flickr
All assembled and ready to go in
 Untitled by Grant Wilson, on Flickr
 Untitled by Grant Wilson, on Flickr
 Untitled by Grant Wilson, on Flickr
Installed into the van
 Untitled by Grant Wilson, on Flickr
 Untitled by Grant Wilson, on Flickr
also covered the wire wall
 Untitled by Grant Wilson, on Flickr
covering the galley unit
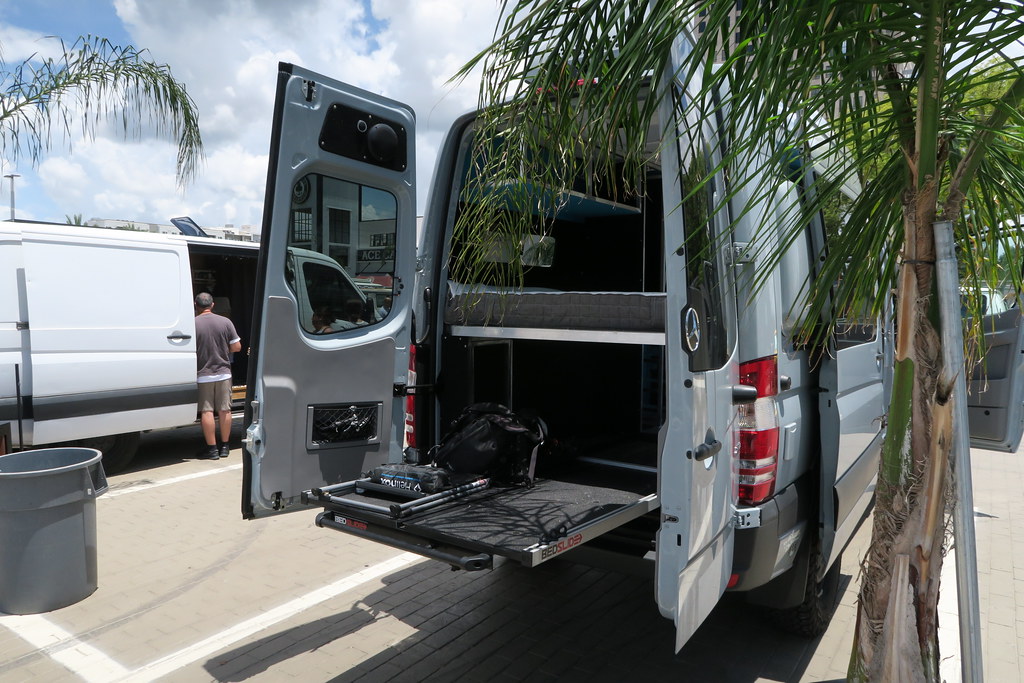
And some 80% build pics!
Went to a van show in orlando today, thrashed 22 hours between friday at 12pm to saturday at 1am to get it from a bare shell to what you see. Had to take i tall apart to do some more wiring nad fabrication, so the time was the crunch!
 Untitled by Grant Wilson, on Flickr
 Untitled by Grant Wilson, on Flickr
 Untitled by Grant Wilson, on Flickr
 Untitled by Grant Wilson, on Flickr
 Untitled by Grant Wilson, on Flickr
 Untitled by Grant Wilson, on Flickr
 Untitled by Grant Wilson, on Flickr
 Untitled by Grant Wilson, on Flickr
 Untitled by Grant Wilson, on Flickr
 Untitled by Grant Wilson, on Flickr
Untitled by Grant Wilson, on FlickrNeeded to build the unit above the fridge
Untitled by Grant Wilson, on Flickractually used the slide itself to mount half the unit, saves about an inch and a half of walkway space by doing this.
Untitled by Grant Wilson, on Flickrshane back there working on his stuff for something
Untitled by Grant Wilson, on Flickrnot my best work, and i have to take a half an inch out of the side not welded to the slide because im a dipshit. Or raise the slide platform up 1/2 an inch (most likely the way im going)
Untitled by Grant Wilson, on Flickrthis is the upper wall above the window.
Untitled by Grant Wilson, on Flickrsince part of this assembly is visible when it is all installed (door and surround around the door), took it into the polishing room and make it pretty
Untitled by Grant Wilson, on FlickrUntitled by Grant Wilson, on FlickrUntitled by Grant Wilson, on FlickrUntitled by Grant Wilson, on FlickrAll assembled and ready to go in
Untitled by Grant Wilson, on FlickrUntitled by Grant Wilson, on FlickrUntitled by Grant Wilson, on FlickrInstalled into the van
Untitled by Grant Wilson, on FlickrUntitled by Grant Wilson, on Flickralso covered the wire wall
Untitled by Grant Wilson, on Flickrcovering the galley unit
And some 80% build pics!
Went to a van show in orlando today, thrashed 22 hours between friday at 12pm to saturday at 1am to get it from a bare shell to what you see. Had to take i tall apart to do some more wiring nad fabrication, so the time was the crunch!
Untitled by Grant Wilson, on FlickrUntitled by Grant Wilson, on FlickrUntitled by Grant Wilson, on FlickrUntitled by Grant Wilson, on FlickrUntitled by Grant Wilson, on FlickrUntitled by Grant Wilson, on FlickrUntitled by Grant Wilson, on FlickrUntitled by Grant Wilson, on FlickrUntitled by Grant Wilson, on FlickrUntitled by Grant Wilson, on Flickr
no. it is an aluminum composite materialHey is that abs board you are skinning those walls with? Sweet build man quite the craftsman!
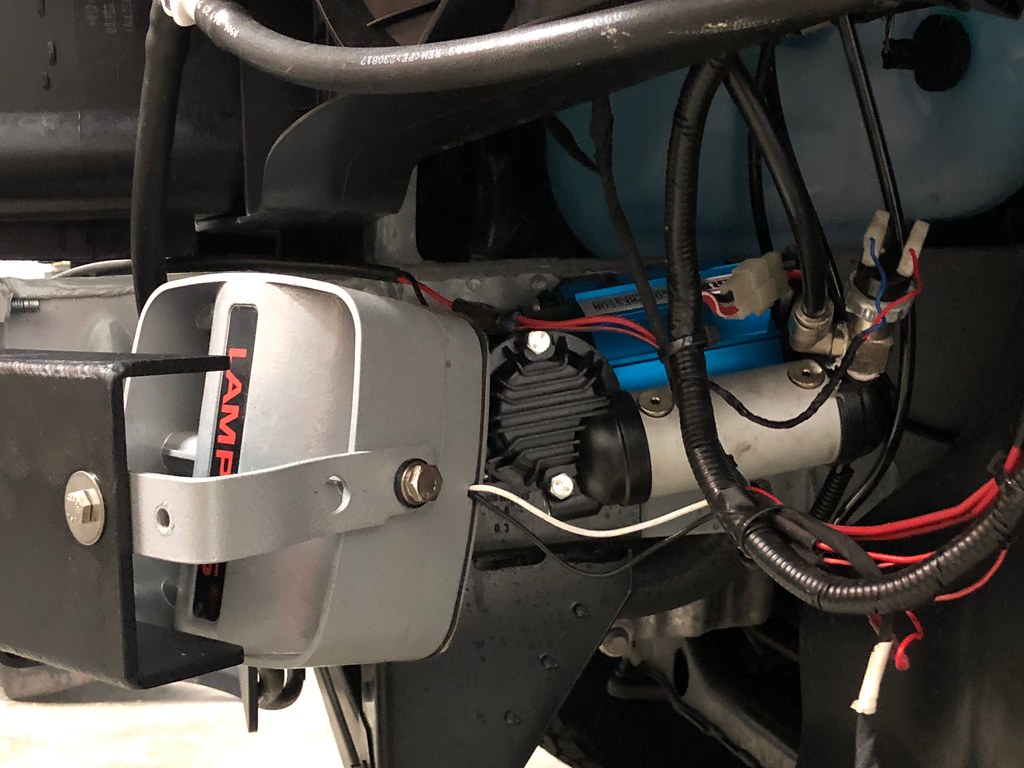
Lights work finally! Couldn't finish the wiring and stuff until i did the panels on the fridge enclosure.
Now everything is all wired up and good to go. 110v is golden, switch for the hot water heater to come on, inverter panel, ignitors on the stove and all that jazz.
 Untitled by Grant Wilson, on Flickr
Note the super cool aluminum backsplash thing for the countertop that i polished out. Untitled by Grant Wilson, on Flickr
 Untitled by Grant Wilson, on Flickr
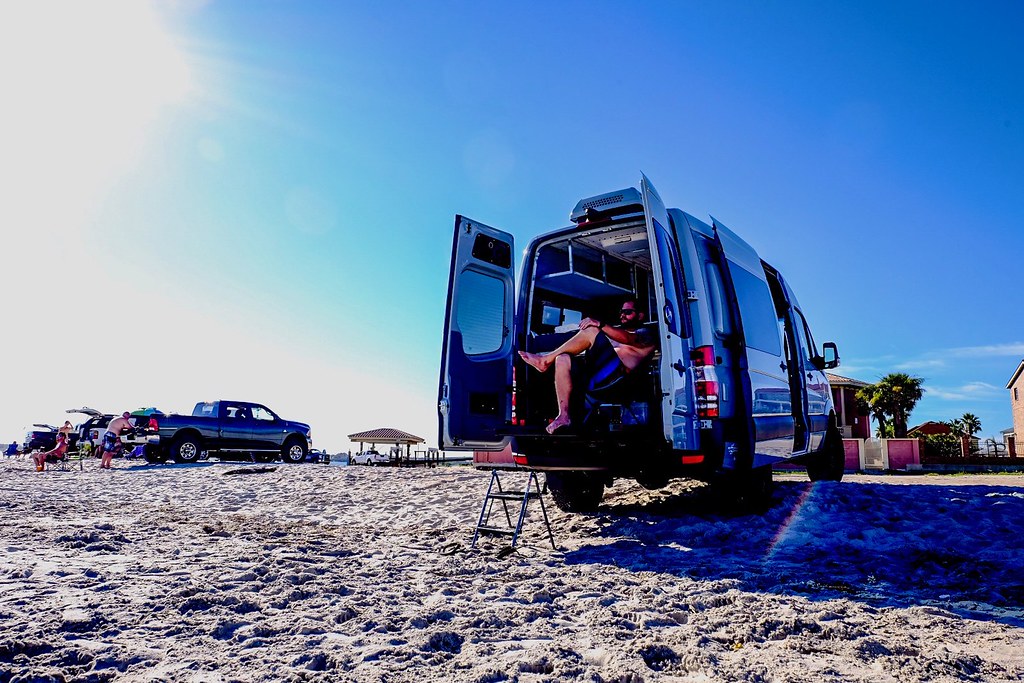
when your overlanding helinox chair sinks into the sand, you use your bedslide as a porch....duh
 Untitled by Grant Wilson, on Flickr
 Untitled by Grant Wilson, on Flickr
Also installed the forward maxxair fan finally, wired it up and trimmed it out
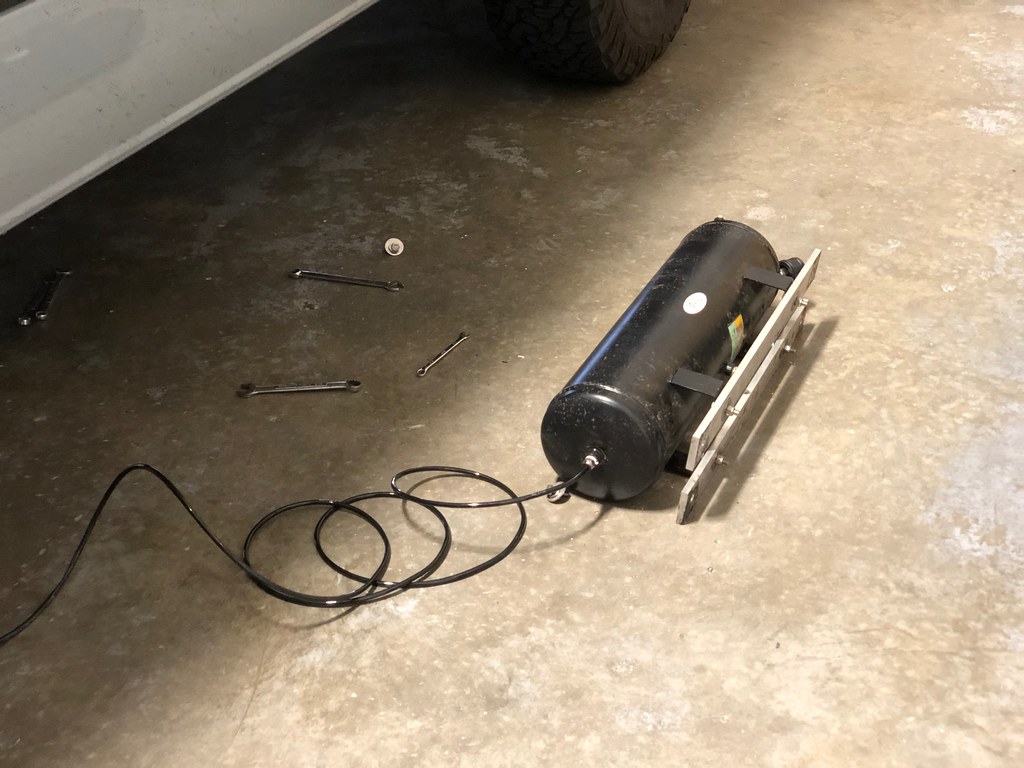
Last but not least, installed the winch mount (winch will be here tomorrow) and finished up the air system with the tank and horn
 Untitled by Grant Wilson, on Flickr
 Untitled by Grant Wilson, on Flickr
 Untitled by Grant Wilson, on Flickr
 Untitled by Grant Wilson, on Flickr
 Untitled by Grant Wilson, on Flickr
 Untitled by Grant Wilson, on Flickr
Now everything is all wired up and good to go. 110v is golden, switch for the hot water heater to come on, inverter panel, ignitors on the stove and all that jazz.
Untitled by Grant Wilson, on FlickrNote the super cool aluminum backsplash thing for the countertop that i polished out.
Untitled by Grant Wilson, on FlickrUntitled by Grant Wilson, on Flickrwhen your overlanding helinox chair sinks into the sand, you use your bedslide as a porch....duh
Untitled by Grant Wilson, on FlickrUntitled by Grant Wilson, on FlickrAlso installed the forward maxxair fan finally, wired it up and trimmed it out
Last but not least, installed the winch mount (winch will be here tomorrow) and finished up the air system with the tank and horn
Untitled by Grant Wilson, on FlickrUntitled by Grant Wilson, on FlickrUntitled by Grant Wilson, on FlickrUntitled by Grant Wilson, on FlickrUntitled by Grant Wilson, on FlickrUntitled by Grant Wilson, on Flickr Untitled by Grant Wilson, on Flickr
 Untitled by Grant Wilson, on Flickr
 Untitled by Grant Wilson, on Flickr
Got the winch mount and winch all installed and spooled up. E brake works great for keeping tension while doing the KiKi chalenge
Then modified my bike carrier so it sits 4 inches higher for better approach angles
 Untitled by Grant Wilson, on Flickr
 Untitled by Grant Wilson, on Flickr
 Untitled by Grant Wilson, on Flickr
 Untitled by Grant Wilson, on Flickr
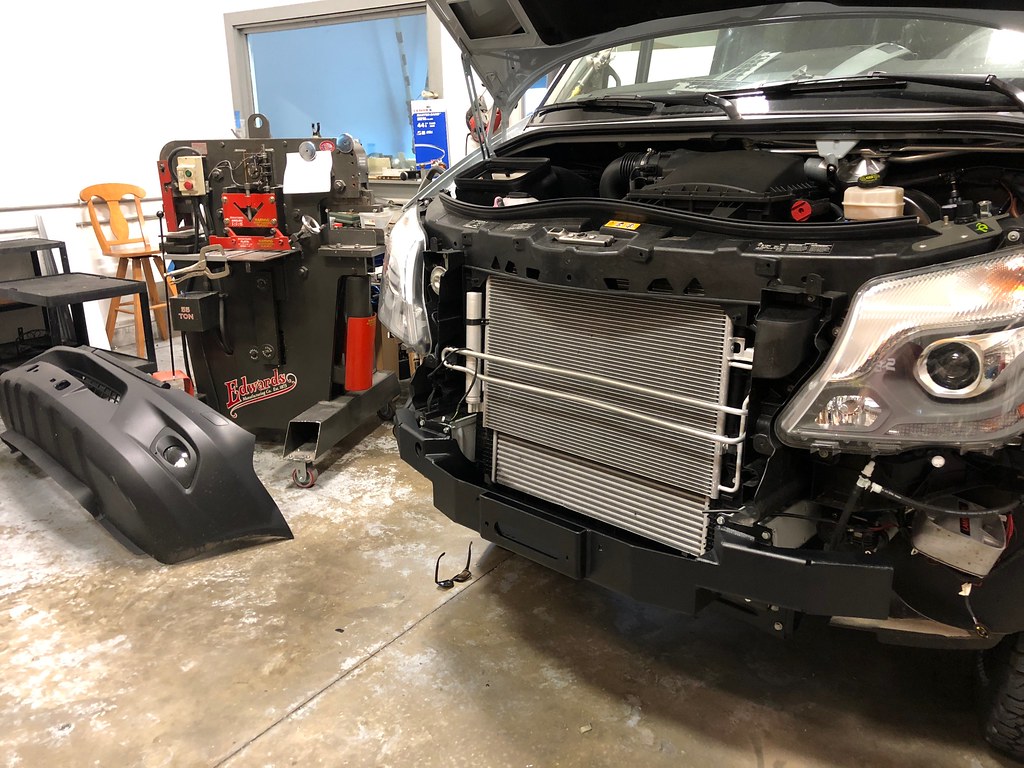
May be some headlight impact? Big ass roof lights going on says it should be okay
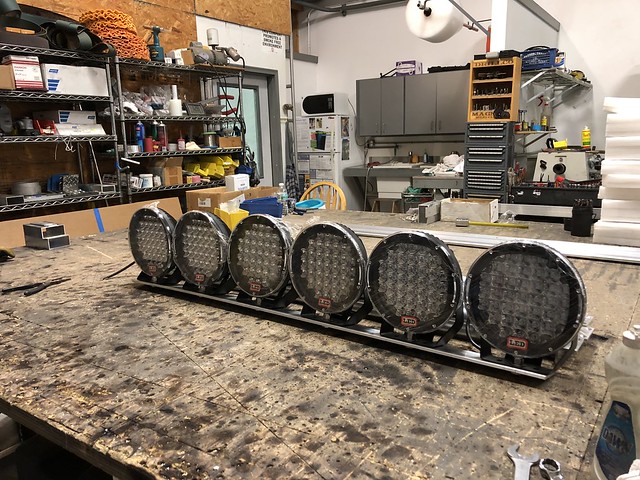
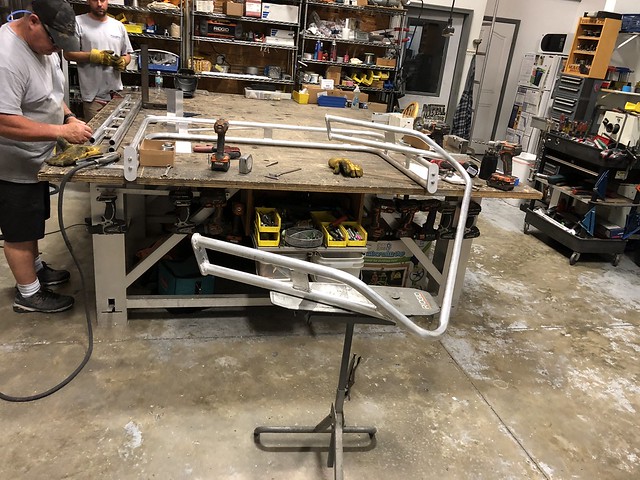
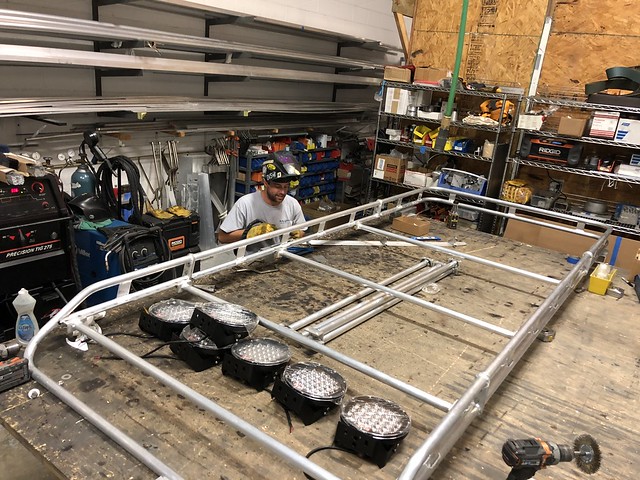
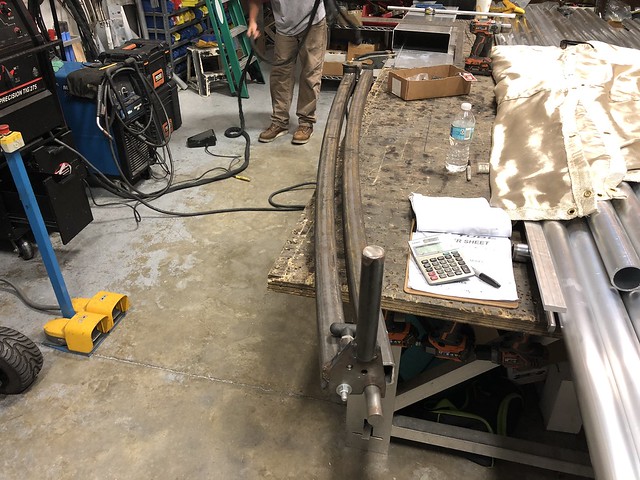
We also decided to start making our own line of sprinter racks. Modular, with a front, middle and rear, an extension piece or 170wb vans and cool light tab options and modular cross bars so you can put them wherever you want. First prototype is in work now as you can see. we decided it was about 4" too wide at 60"
 Untitled by Grant Wilson, on Flickr
 Untitled by Grant Wilson, on Flickr
 Untitled by Grant Wilson, on Flickr
 Untitled by Grant Wilson, on Flickr
 Untitled by Grant Wilson, on Flickr
more to come
Pretty good progress again.
Made a loop to hold recovery gear (straps and rope etc on the van left side. will have one on top and bottom to keep tension. Some webbing, a buckle and a pull tab
 Untitled by Grant Wilson, on Flickr
Simple yet effective. Keeps from carrying a bunch of bags, when i have plenty of visible and unused storage to use it on.
Also got pretty far on the rack.
 Untitled by Grant Wilson, on Flickr
Dont like my knockoffs? Send me real ones. Come at me bro
Either way, gonna suck if you cut me off
 Untitled by Grant Wilson, on Flickr
 Untitled by Grant Wilson, on Flickr
Our patent pending modular rack. Never worry about "if i put a fan on will it fit?" Just move your damn crossbars
 Untitled by Grant Wilson, on Flickr
 Untitled by Grant Wilson, on Flickr
 Untitled by Grant Wilson, on Flickr
 Untitled by Grant Wilson, on Flickr
 Untitled by Grant Wilson, on Flickr
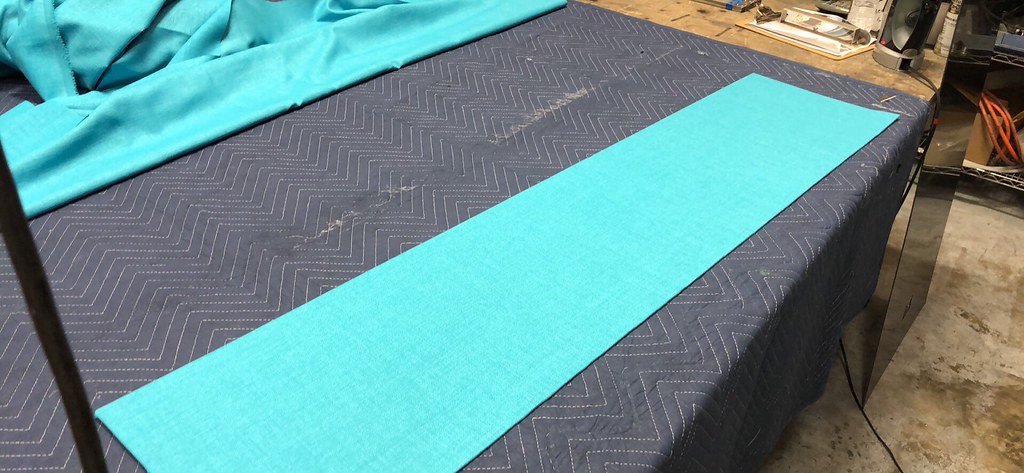
Also. Curtains finally came in! Insulated, reflective lining and super cool. Makes it feel like a home and not a cave like some of the grey and black inners do
 Untitled by Grant Wilson, on Flickr
 Untitled by Grant Wilson, on Flickr
Should have the rack done today and mounted. New version will be a slip together not bolt together, but other than that, relatively the same. Expect production availability within the next few weeks at a sub 1600 tag
Made a loop to hold recovery gear (straps and rope etc on the van left side. will have one on top and bottom to keep tension. Some webbing, a buckle and a pull tab
Untitled by Grant Wilson, on FlickrSimple yet effective. Keeps from carrying a bunch of bags, when i have plenty of visible and unused storage to use it on.
Also got pretty far on the rack.
Untitled by Grant Wilson, on FlickrDont like my knockoffs? Send me real ones. Come at me bro
Either way, gonna suck if you cut me off
Untitled by Grant Wilson, on FlickrUntitled by Grant Wilson, on FlickrOur patent pending modular rack. Never worry about "if i put a fan on will it fit?" Just move your damn crossbars
Untitled by Grant Wilson, on FlickrUntitled by Grant Wilson, on FlickrUntitled by Grant Wilson, on FlickrUntitled by Grant Wilson, on FlickrUntitled by Grant Wilson, on FlickrAlso. Curtains finally came in! Insulated, reflective lining and super cool. Makes it feel like a home and not a cave like some of the grey and black inners do
Untitled by Grant Wilson, on FlickrUntitled by Grant Wilson, on FlickrShould have the rack done today and mounted. New version will be a slip together not bolt together, but other than that, relatively the same. Expect production availability within the next few weeks at a sub 1600 tag
 Untitled by Grant Wilson, on Flickr
 Untitled by Grant Wilson, on Flickr
weld joins from where we have been playing with different front end lengths
 Untitled by Grant Wilson, on Flickr
 Untitled by Grant Wilson, on Flickr
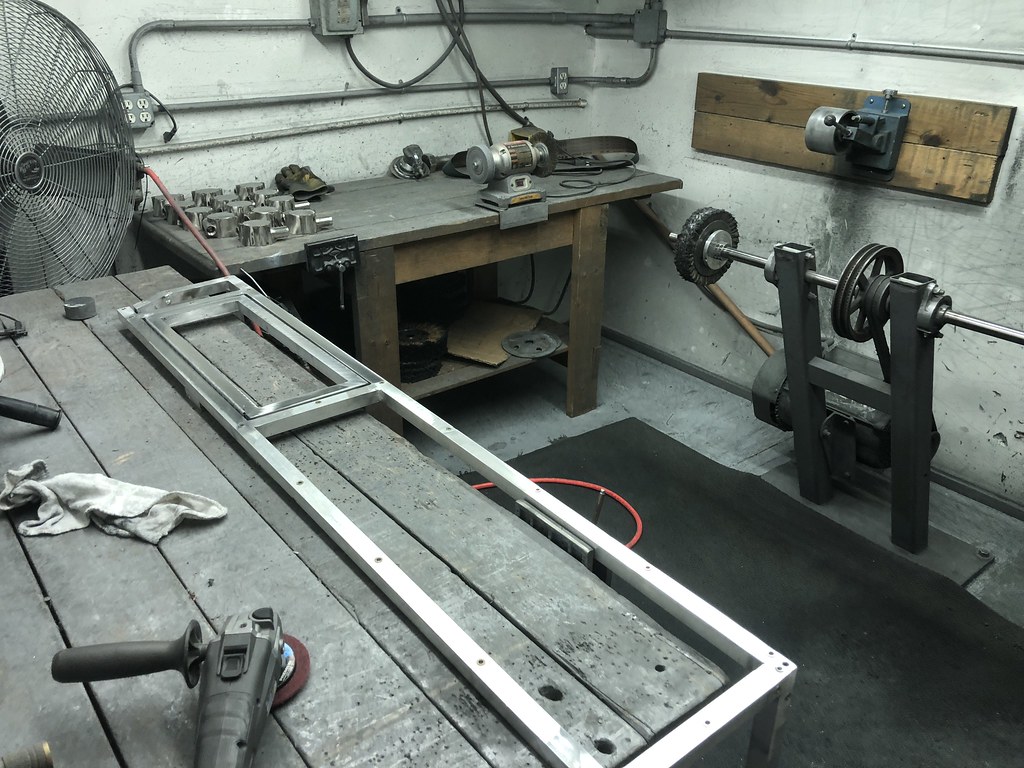
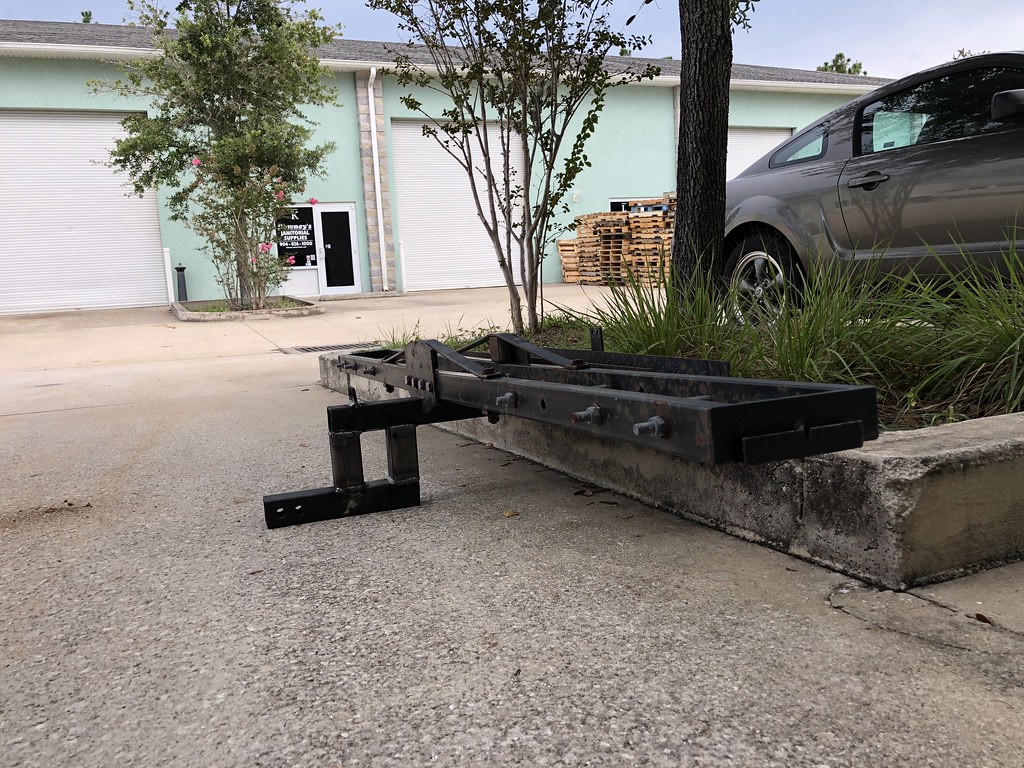
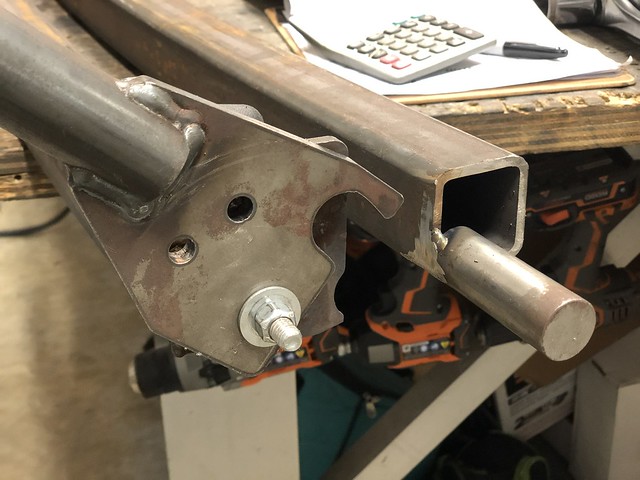
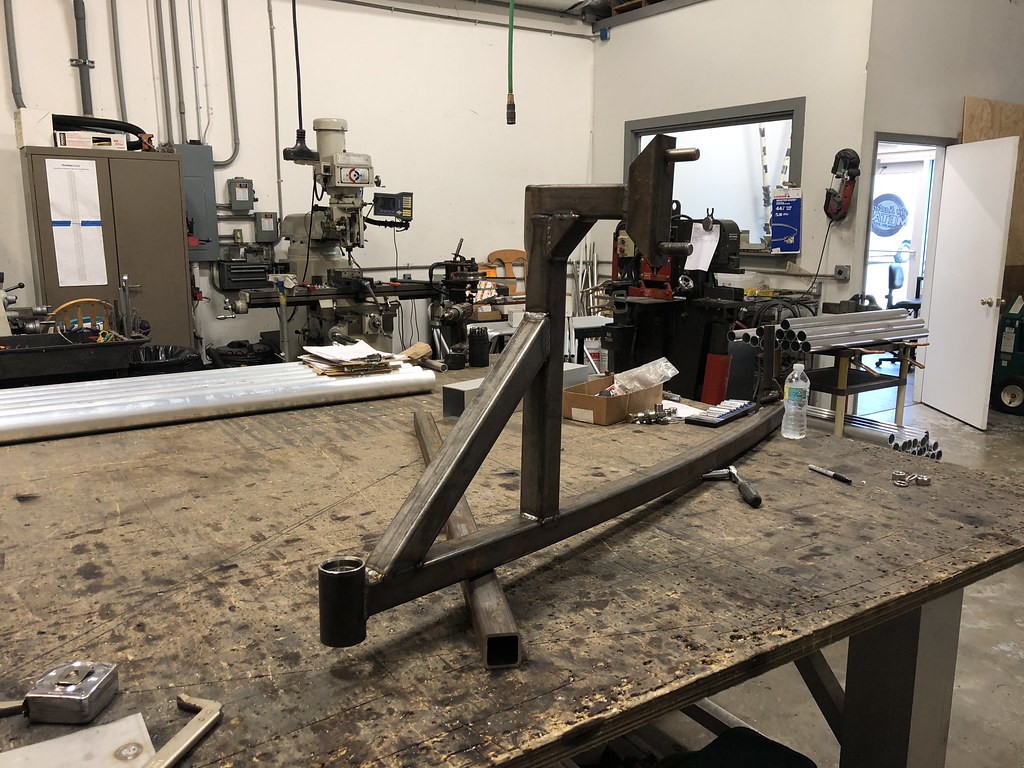
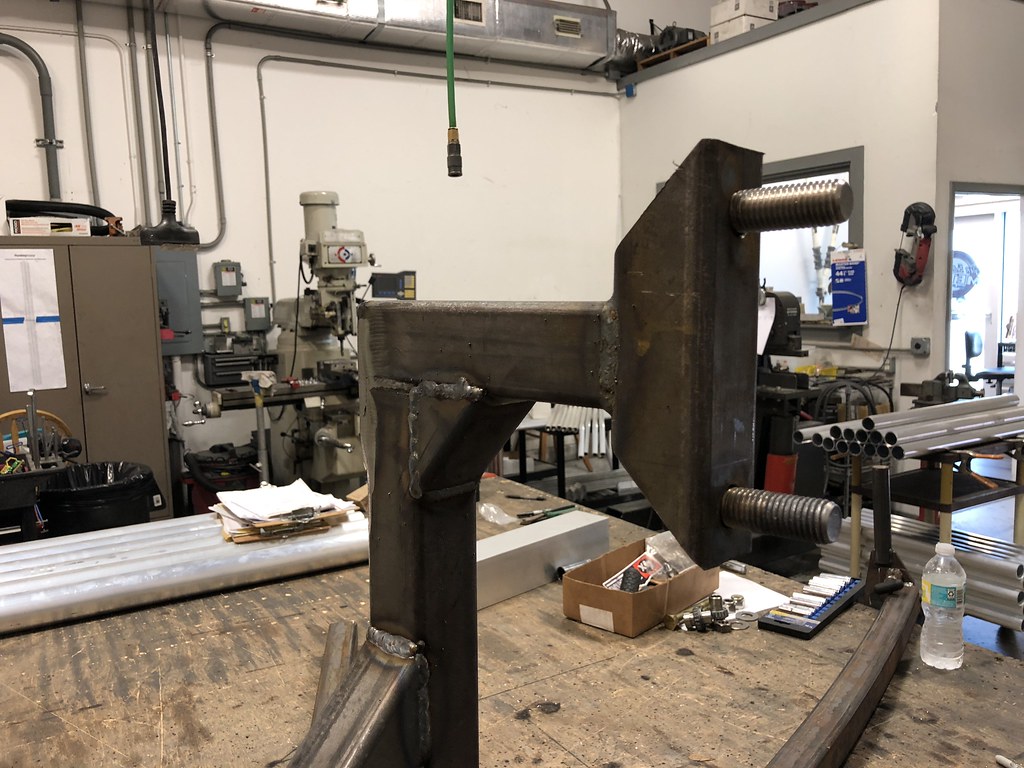
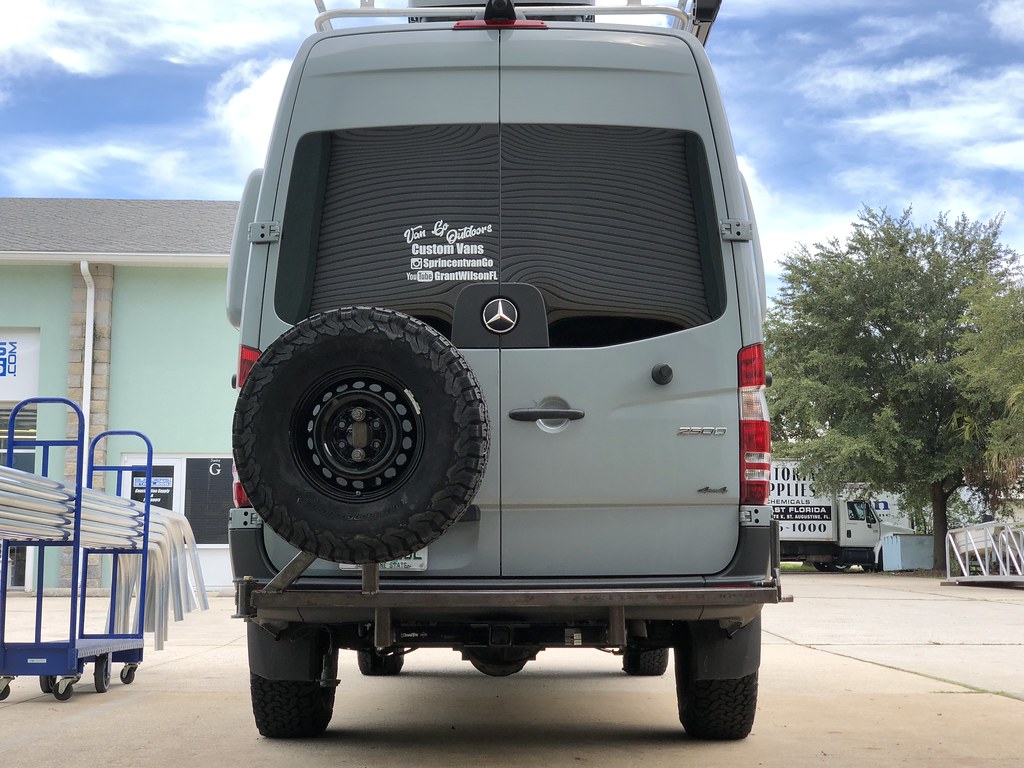
While waiting for final cabinets to be finished so i can do one last blow apart of the interior for finishing work, I decided to work on a rear tire swingout.
The series of pictures here are the building process of the main structure. It will mount via either welding, or drilling and tapping the hitch frame itself to mount it using the hitch as the mount, similar to aluminess, but without all the overhang and rock dragging.
I used the 4x innovations kit to put it together, and 2x2x1/4" rec tube.
We did a radius bend at around 56 to get close to matching the rear without sticking too far out.
Then welded it up. This is the main base structure. Saturday i should have enough time to make the mounts for the hitch, tire and when the generator box gets here thursday, add that too.
 Untitled by Grant Wilson, on Flickr
 Untitled by Grant Wilson, on Flickr
 Untitled by Grant Wilson, on Flickr
 Untitled by Grant Wilson, on Flickr
 Untitled by Grant Wilson, on Flickr
 Untitled by Grant Wilson, on Flickr
 Untitled by Grant Wilson, on Flickr
 Untitled by Grant Wilson, on Flickr
 Untitled by Grant Wilson, on Flickr
The series of pictures here are the building process of the main structure. It will mount via either welding, or drilling and tapping the hitch frame itself to mount it using the hitch as the mount, similar to aluminess, but without all the overhang and rock dragging.
I used the 4x innovations kit to put it together, and 2x2x1/4" rec tube.
We did a radius bend at around 56 to get close to matching the rear without sticking too far out.
Then welded it up. This is the main base structure. Saturday i should have enough time to make the mounts for the hitch, tire and when the generator box gets here thursday, add that too.
Untitled by Grant Wilson, on FlickrUntitled by Grant Wilson, on FlickrUntitled by Grant Wilson, on FlickrUntitled by Grant Wilson, on FlickrUntitled by Grant Wilson, on FlickrUntitled by Grant Wilson, on FlickrUntitled by Grant Wilson, on FlickrUntitled by Grant Wilson, on FlickrUntitled by Grant Wilson, on FlickrLooking good mate! Love the Sprinter builds! Can’t wait to see your tire carrier [emoji1598][emoji1598][emoji1598]
 Untitled by Grant Wilson, on Flickr
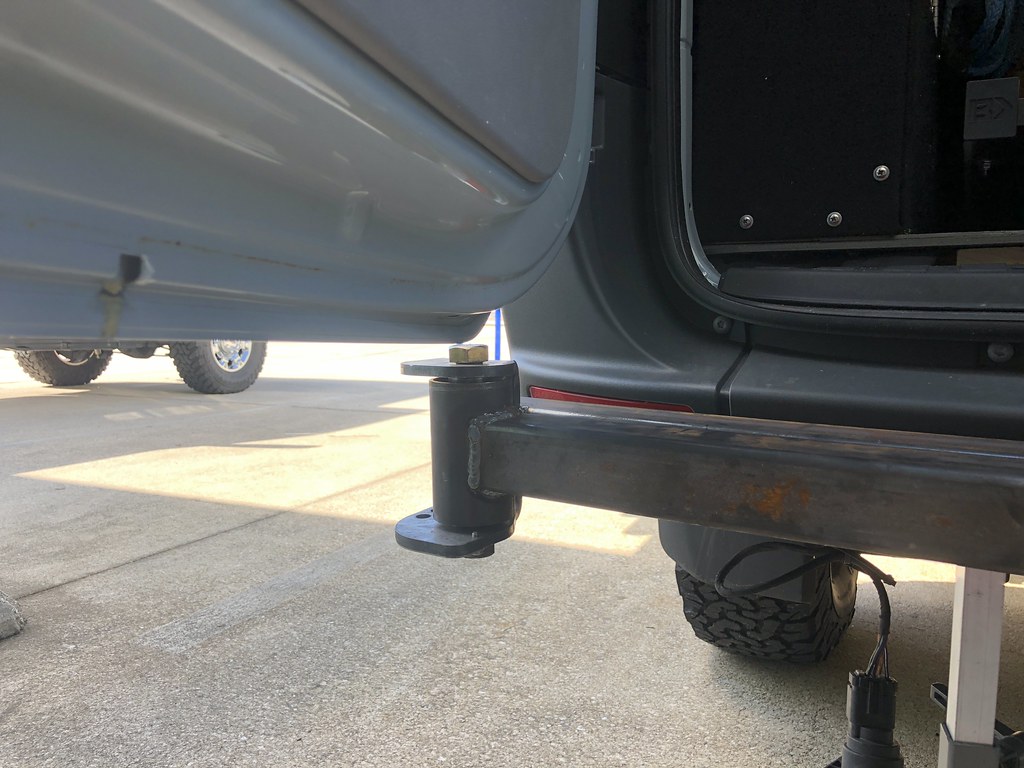 Untitled by Grant Wilson, on Flickr
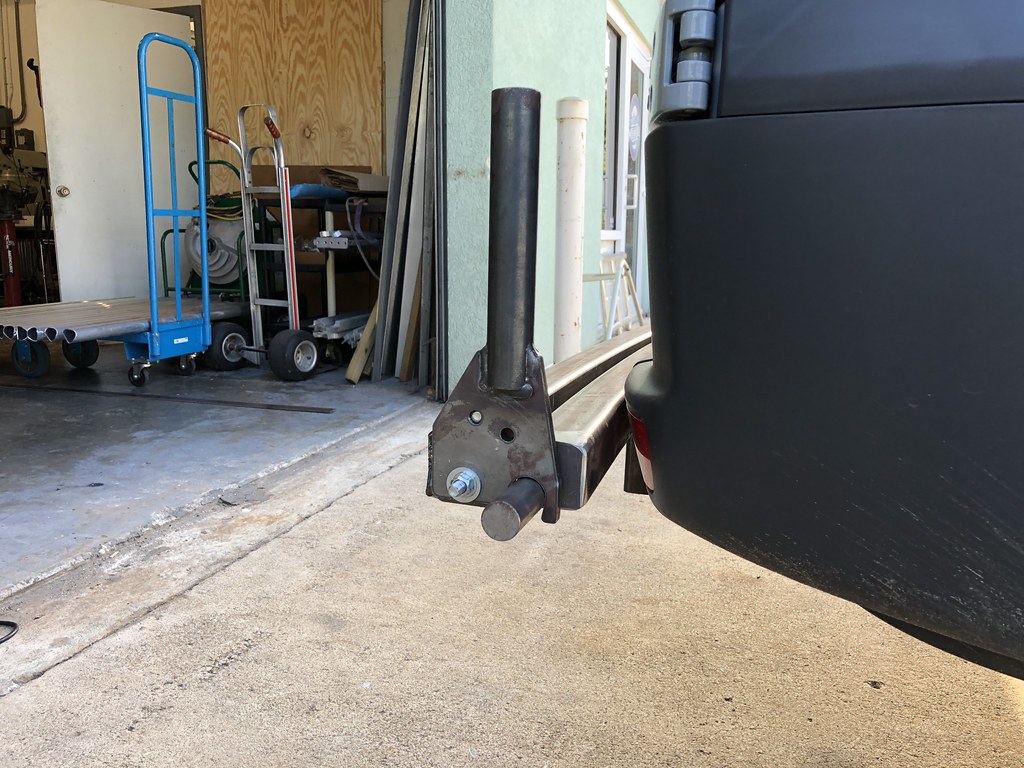 Untitled by Grant Wilson, on Flickr
 Untitled by Grant Wilson, on Flickr
 Untitled by Grant Wilson, on Flickr
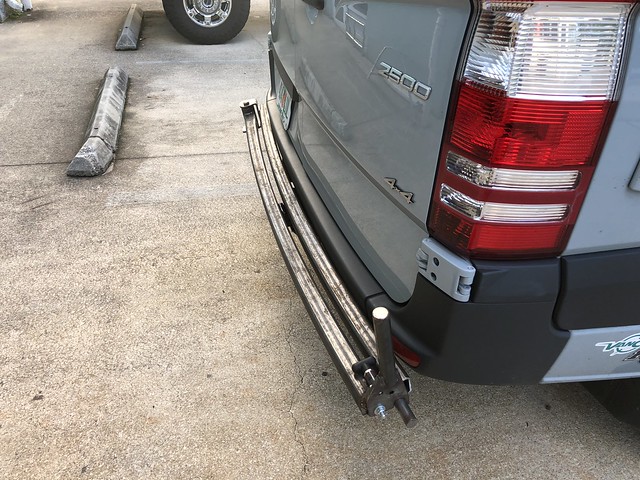
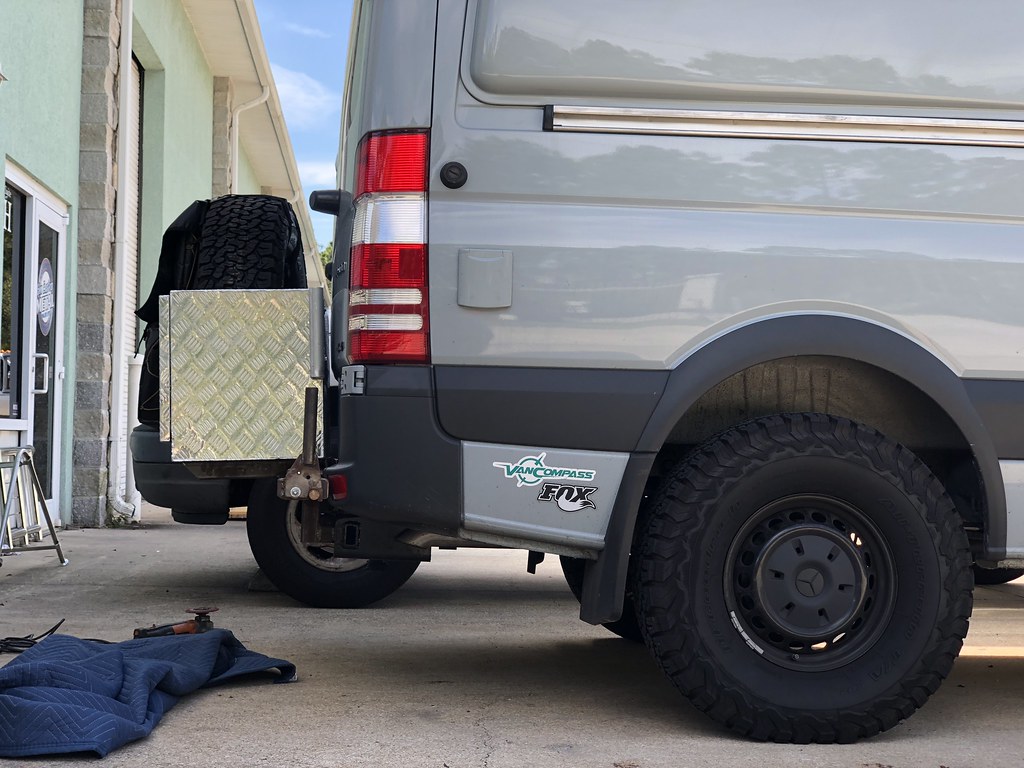
Got the tire on. Not as much movement as i was expecting, but enough to put some diagonal supports out to the hinge in and triangulate the extra hinge above and below the 2x2. Its perfectly usable as is honestly, but i want to make it better, so gonna try.
Put just enough preload in the hinge so it doesn't sag and needs an ever so slight downward push to get it to latch.
 Untitled by Grant Wilson, on Flickr
 Untitled by Grant Wilson, on Flickr
 Untitled by Grant Wilson, on Flickr
 Untitled by Grant Wilson, on Flickr
 Untitled by Grant Wilson, on Flickr
 Untitled by Grant Wilson, on Flickr
 Untitled by Grant Wilson, on Flickr
Put just enough preload in the hinge so it doesn't sag and needs an ever so slight downward push to get it to latch.
Untitled by Grant Wilson, on FlickrUntitled by Grant Wilson, on FlickrUntitled by Grant Wilson, on FlickrUntitled by Grant Wilson, on FlickrUntitled by Grant Wilson, on FlickrUntitled by Grant Wilson, on FlickrUntitled by Grant Wilson, on Flickr
Pathfinder I
- 2,271
- First Name
- Black
- Last Name
- Tan
- Member #
2385
- Service Branch
- Boys brigade
NoGrant can you build me a front bumper and rear wheel carrier
110% happier with it now.
There is still a bit of movement, but when compared to a CBI rear bumper on a tacoma (friend has one), its right at the exact same amount of movement. So I can live with that
Added some gussets, and a diagonal support to help with the twisting, moved the whole arm over about 2.5 inches to clear the door correctly (yes we all fuck up some times or the other), and added some welds to hidden spots on the hitch while it was all off.
The box arrived last night, so I will install the frame for that friday most likely, then drop it all off for powdercoat friday afternoon. It's nice to have a spare tire again.
 Untitled by Grant Wilson, on Flickr
 Untitled by Grant Wilson, on Flickr
 Untitled by Grant Wilson, on Flickr
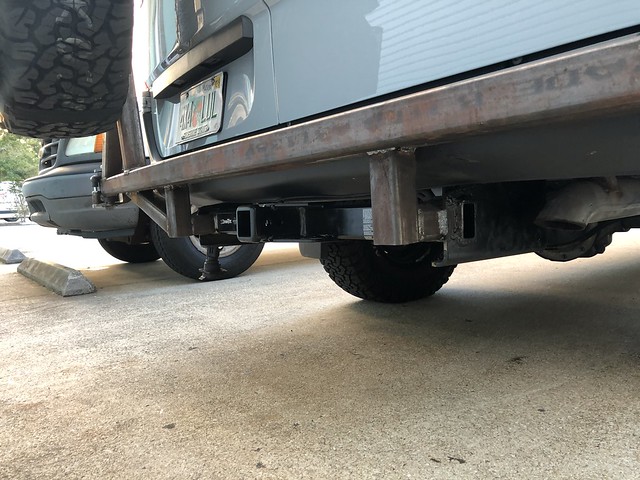 Untitled by Grant Wilson, on Flickr
 Untitled by Grant Wilson, on Flickr
Lord i hope my cabinets get finished this weekend. its been going on far too long so i can take it all apart one last time, paint the ceiling and cabinet faces, then put it all back in. Ready to use it.
Just got a raise at work and 5 weeks vacation extra a year in leiu of the rest of the raise, so i have 7 weeks of vacation now a year.
Winning.
Pathfinder I
- 2,271
- First Name
- Black
- Last Name
- Tan
- Member #
2385
- Service Branch
- Boys brigade
Dont sit on the fence grant lol. Iam in the process of getting one engineered your photos have helped. Front am knackerd are stupid govement has seen fit to BAR FRONT BARS. if you get my drift , looking sweet though grant nealy thereNo
110% happier with it now.
There is still a bit of movement, but when compared to a CBI rear bumper on a tacoma (friend has one), its right at the exact same amount of movement. So I can live with that
Added some gussets, and a diagonal support to help with the twisting, moved the whole arm over about 2.5 inches to clear the door correctly (yes we all fuck up some times or the other), and added some welds to hidden spots on the hitch while it was all off.
The box arrived last night, so I will install the frame for that friday most likely, then drop it all off for powdercoat friday afternoon. It's nice to have a spare tire again.
Lord i hope my cabinets get finished this weekend. its been going on far too long so i can take it all apart one last time, paint the ceiling and cabinet faces, then put it all back in. Ready to use it.
Just got a raise at work and 5 weeks vacation extra a year in leiu of the rest of the raise, so i have 7 weeks of vacation now a year.
Winning.
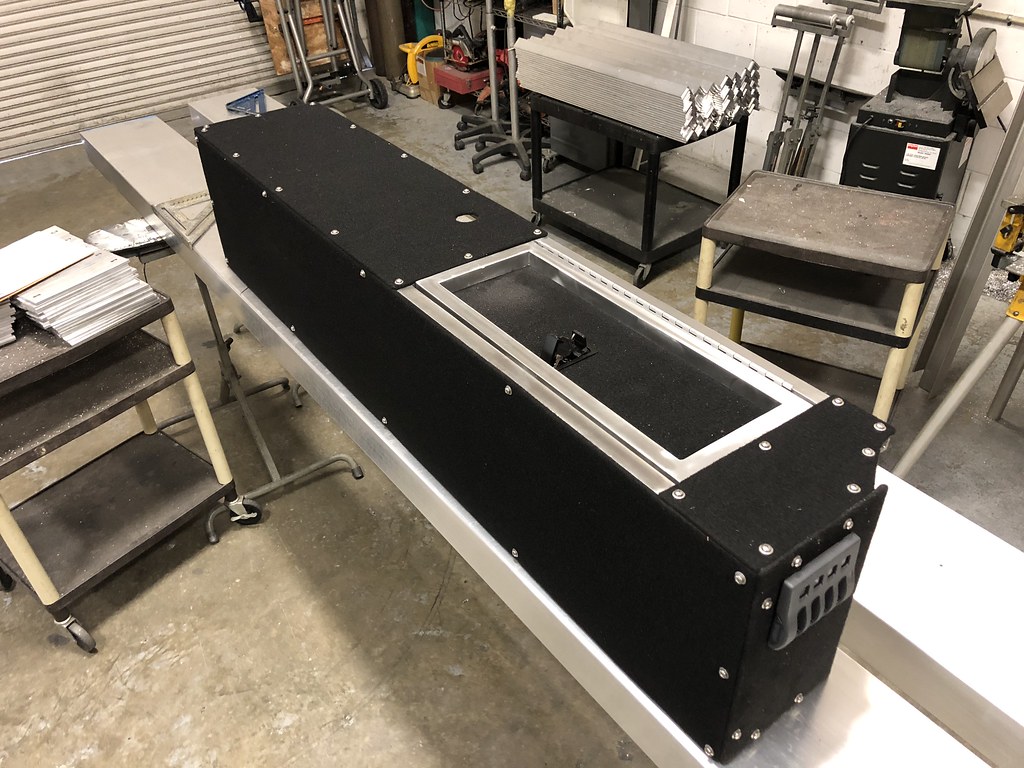
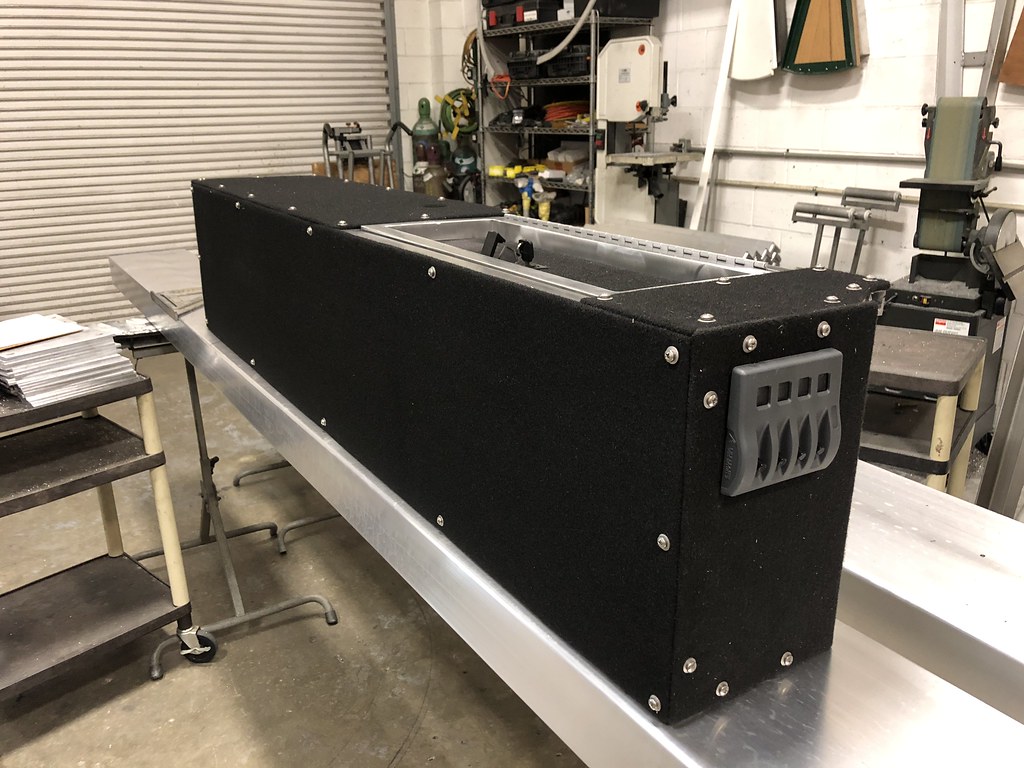
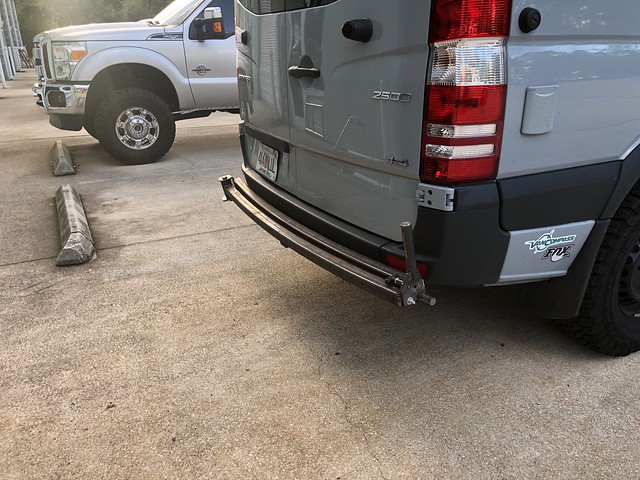
Finishing up the whole situation
Mounts for the box bolted on so i can position it and weld it in
 Untitled by Grant Wilson, on Flickr
 Untitled by Grant Wilson, on Flickr
 Untitled by Grant Wilson, on Flickr
 Untitled by Grant Wilson, on Flickr
Was going to add some gussets and stuff for the box, but even with the generator in there, there isnt any movement when closed, so perfectly happy with it.
Pulling the whole thing sunday for powder monday!
Mounts for the box bolted on so i can position it and weld it in
Untitled by Grant Wilson, on FlickrUntitled by Grant Wilson, on FlickrUntitled by Grant Wilson, on FlickrUntitled by Grant Wilson, on FlickrWas going to add some gussets and stuff for the box, but even with the generator in there, there isnt any movement when closed, so perfectly happy with it.
Pulling the whole thing sunday for powder monday!
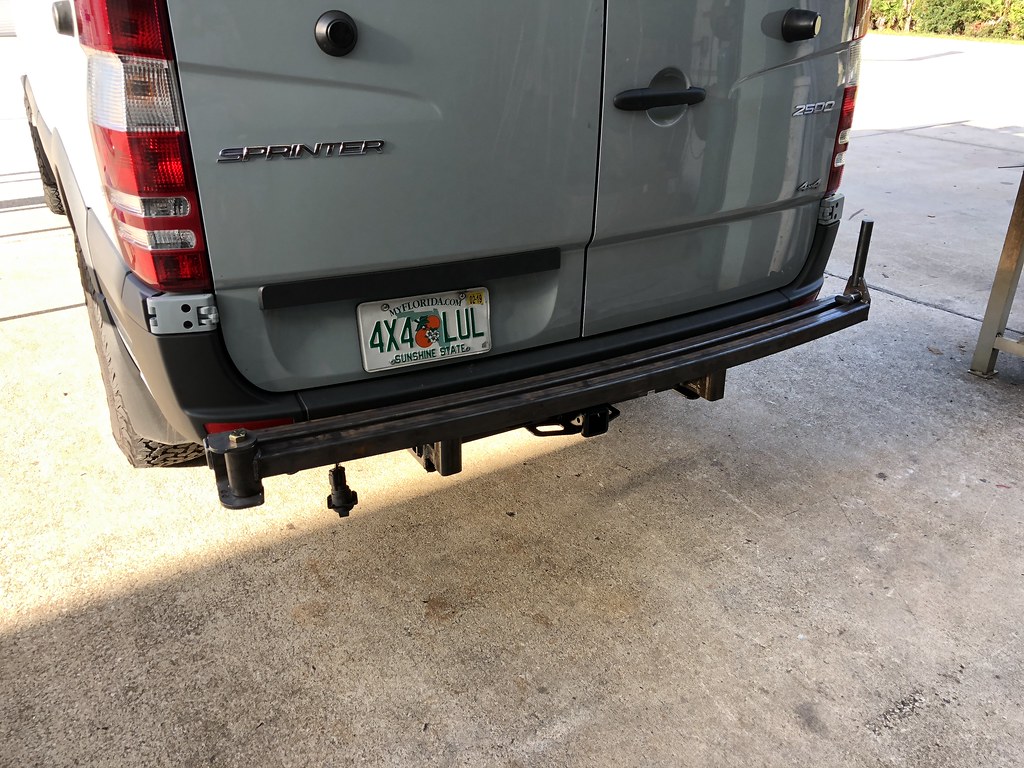
I think the LAST huge milestone before paint and putting it all back together
All the wood work is done. hinges and lifting/opening struts installed on all the upper cabinets to hold open, and vertical doors to keep them from closing on their own like on the last van. Super frustrating to try and get something out of the cabinet on a hill and the door keep hitting you. Also to prevent over opening and stressing the wood/hinges
I was going to blast it all apart today, but it has been super hot, and i have to do the lawn. So tomorrow after work, i should be able to start taking everything out.
all that is left is to paint the cabinets
Paint the ceiling
Put it all back together
Install table on mount (bamboo)
Finish final hookup of plubming once kitchen is backin
Cover the black wall panel in blue
Wire Espar Control panel onto that wall
Make some trim pieces for sides of cabinets and such
With the new days off, trying to get this thing done and get out there! Lots of florida to explore!
 Untitled by Grant Wilson, on Flickr
 Untitled by Grant Wilson, on Flickr
All the wood work is done. hinges and lifting/opening struts installed on all the upper cabinets to hold open, and vertical doors to keep them from closing on their own like on the last van. Super frustrating to try and get something out of the cabinet on a hill and the door keep hitting you. Also to prevent over opening and stressing the wood/hinges
I was going to blast it all apart today, but it has been super hot, and i have to do the lawn. So tomorrow after work, i should be able to start taking everything out.
all that is left is to paint the cabinets
Paint the ceiling
Put it all back together
Install table on mount (bamboo)
Finish final hookup of plubming once kitchen is backin
Cover the black wall panel in blue
Wire Espar Control panel onto that wall
Make some trim pieces for sides of cabinets and such
With the new days off, trying to get this thing done and get out there! Lots of florida to explore!
Untitled by Grant Wilson, on FlickrUntitled by Grant Wilson, on Flickr