
The radiused drawers look fantastic , I own a CNC router 5’x10’ so we have always just ran a few radius tools down the edges of our drawer systems , but I believe I like your look betterBecause old dominion freight sucks dick and my kitchen isnt here to put in and start welding a bed frame, i started on cabinet work
Bent and cut out 9 (need 7, made extra in case) supports to build curved cabinets
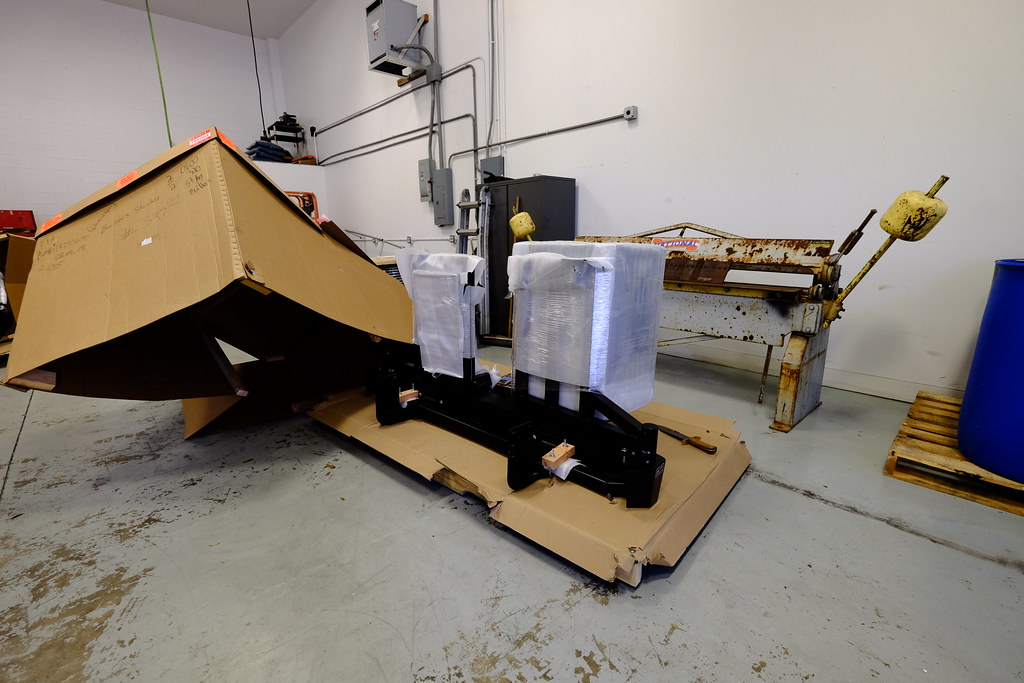
Untitled by Grant Wilson, on Flickr
These have a larger (about 1" more...test piece was a 9 " radius, the actual production is an 11" version)
I will be welding mount flanges, and tabs to screw the wood to.
THe bendy wood will go up until there is a vertical surface where the door will start. it will all make sense in about 2 weeks when i get back to them. I was just not trying to waste time tonight and actually get something done.
Untitled by Grant Wilson, on Flickr
And for credit given. Idea was stolen from Zen Vanz
2017 Sprinter 4x4 144"
- Thread starter grantwilson
- Start date
You are using an out of date browser. It may not display this or other websites correctly.
You should upgrade or use an alternative browser.
You should upgrade or use an alternative browser.

Thats what im working on replicating. Its not my design. As i mentioned in the postThe radiused drawers look fantastic , I own a CNC router 5’x10’ so we have always just ran a few radius tools down the edges of our drawer systems , but I believe I like your look better
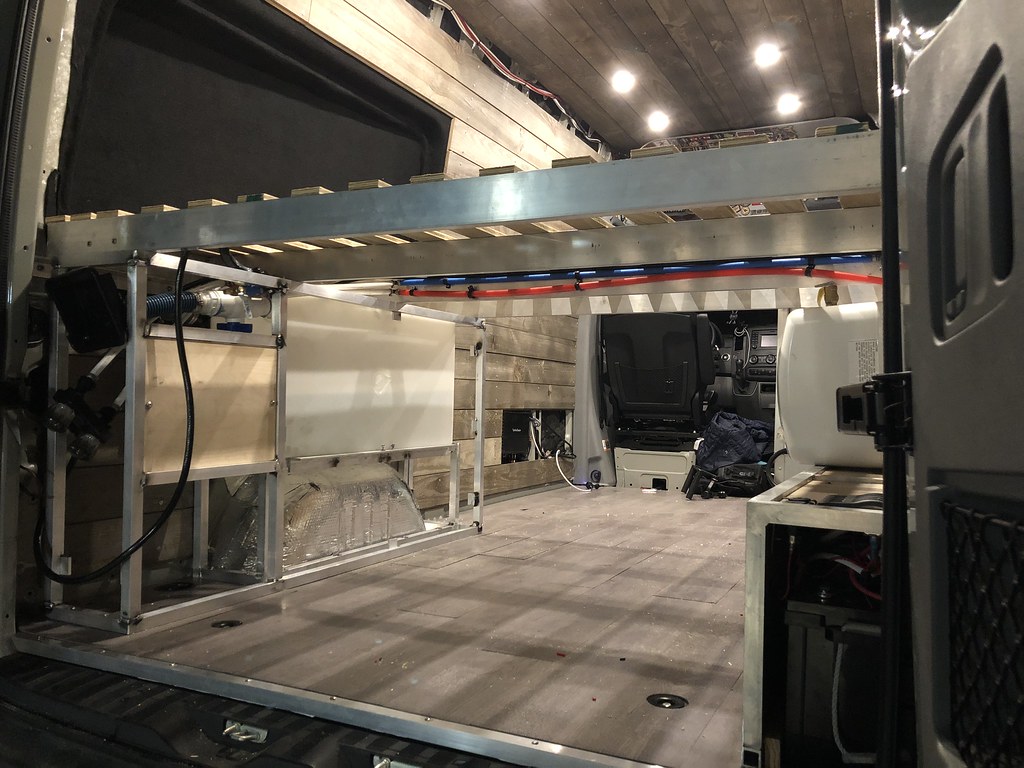
Water tank is mounted, and made a new rear floor trim piece
 Untitled by Grant Wilson, on Flickr
 Untitled by Grant Wilson, on Flickr
Untitled by Grant Wilson, on FlickrUntitled by Grant Wilson, on Flickr

Traveler III
- 4,007
- First Name
- Lucas
- Last Name
- Antes
- Member #
7082
- Ham/GMRS Callsign
- KE0ZXA
When's the kegerator getting installed?Water tank is mounted, and made a new rear floor trim piece


Pathfinder I
- 2,271
- First Name
- Black
- Last Name
- Tan
- Member #
2385
- Service Branch
- Boys brigade
Iam currently looking for a vw crafter 4x4. To turn into a camper my god there hard to get in the uk seems They are rare as hens teeth
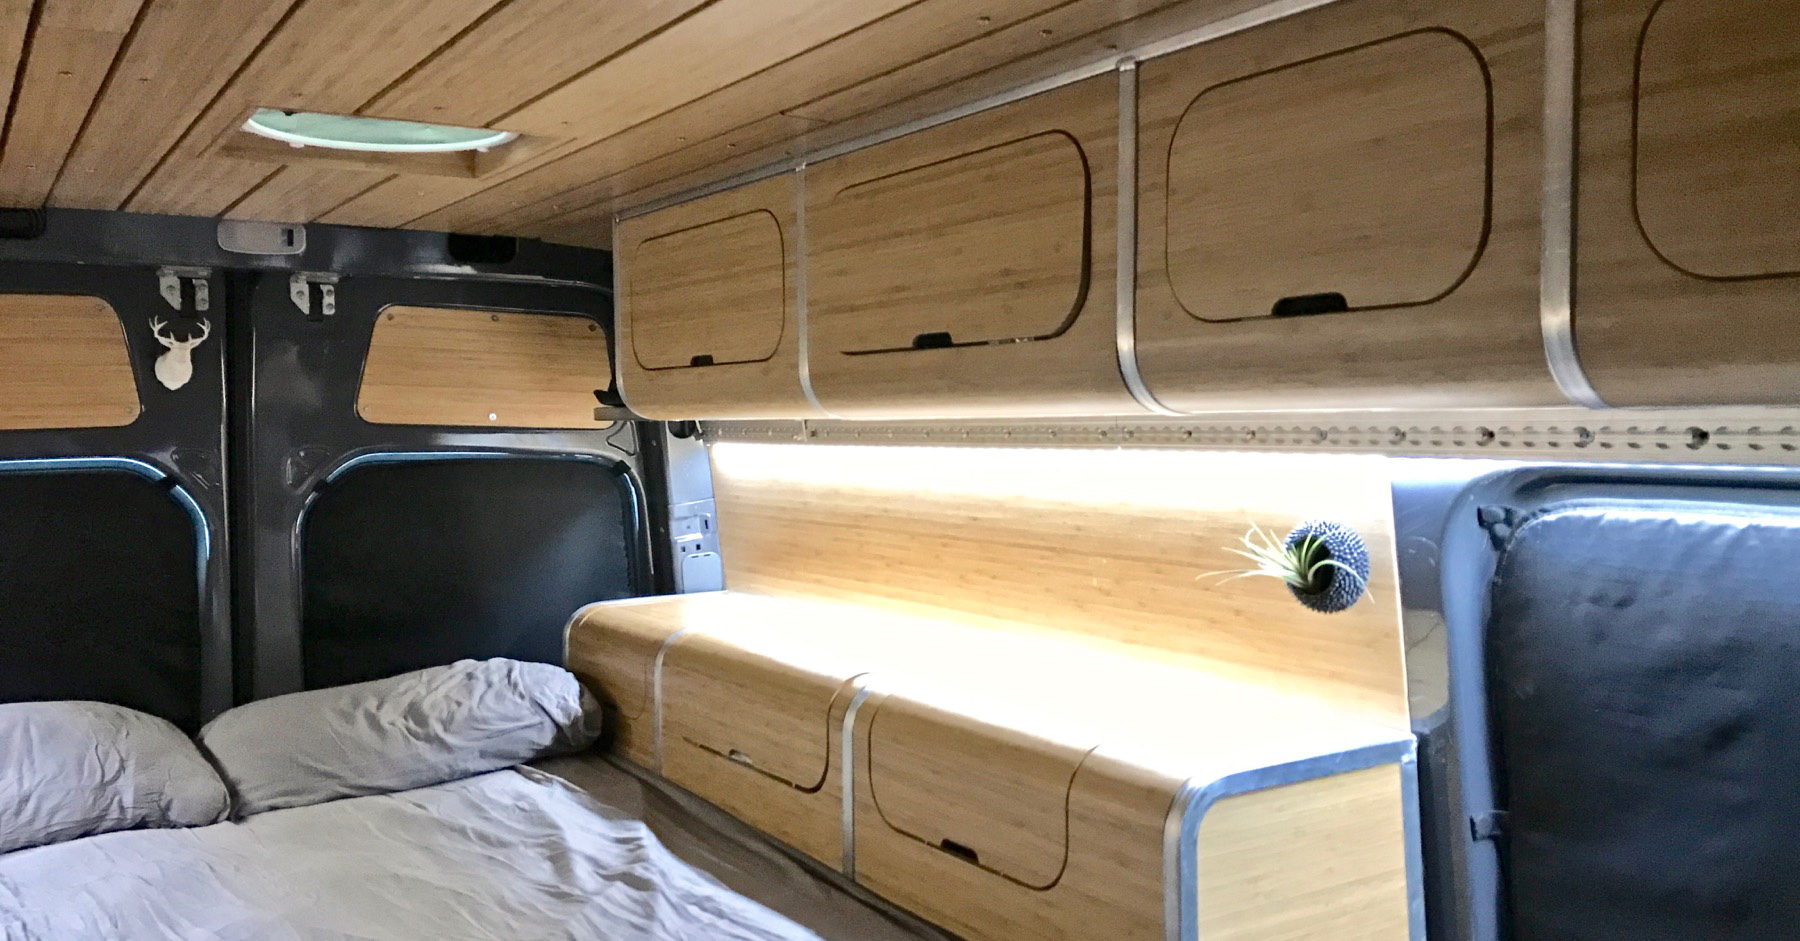
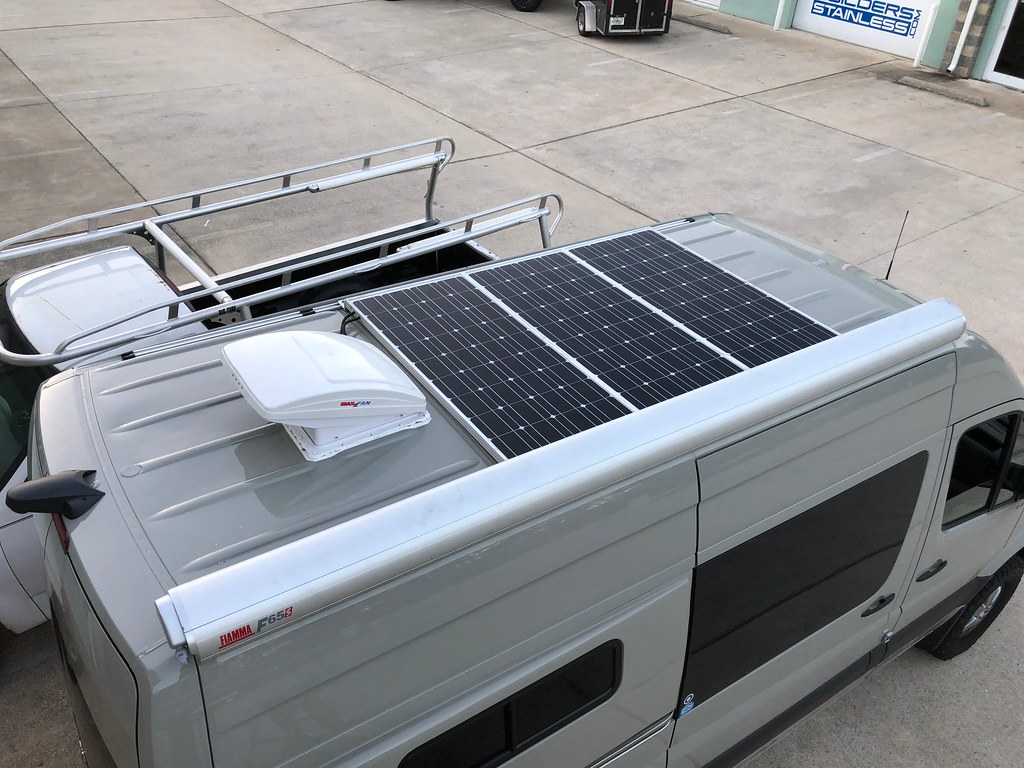
Finally got all the solar in and installed. For the fun of the in
depth portion of this build since everyone always asks what i use, I will divulge into it!
I use renogy. At one time (full disclosure) I was sponsored by them. Even after that ended i continue to buy their panels. They are quality, and work well.
I chose to use 3 100 watt Monocrystalline panels http://amzn.to/2BVLNeh
To connect those panels in series, i used two pairs of these - http://amzn.to/2BUqQk5
Then used these cables with the unused ends cut off to run the rest of the routing, super solid and thick stranded wire for good power conduction - http://amzn.to/2GLhXgx
I used this glad that i sealed, screwed then resealed over the screws - http://amzn.to/2GNWrYb
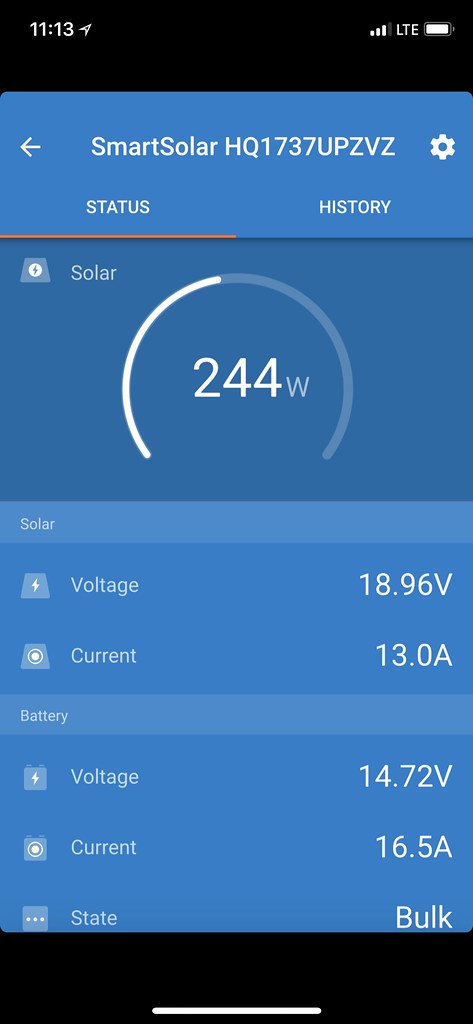
These wires then go into a victron 100/30 Smart MPPT charger - http://amzn.to/2BVhvZc
Which is also monitored by the Victron BMV 712 - http://amzn.to/2E4hKD2
Into this battery - http://amzn.to/2GNTw22
With this combination I can accurately track overall use, history, incoming and outgoing amps, and remaining time along with a shit ton of other stuff.
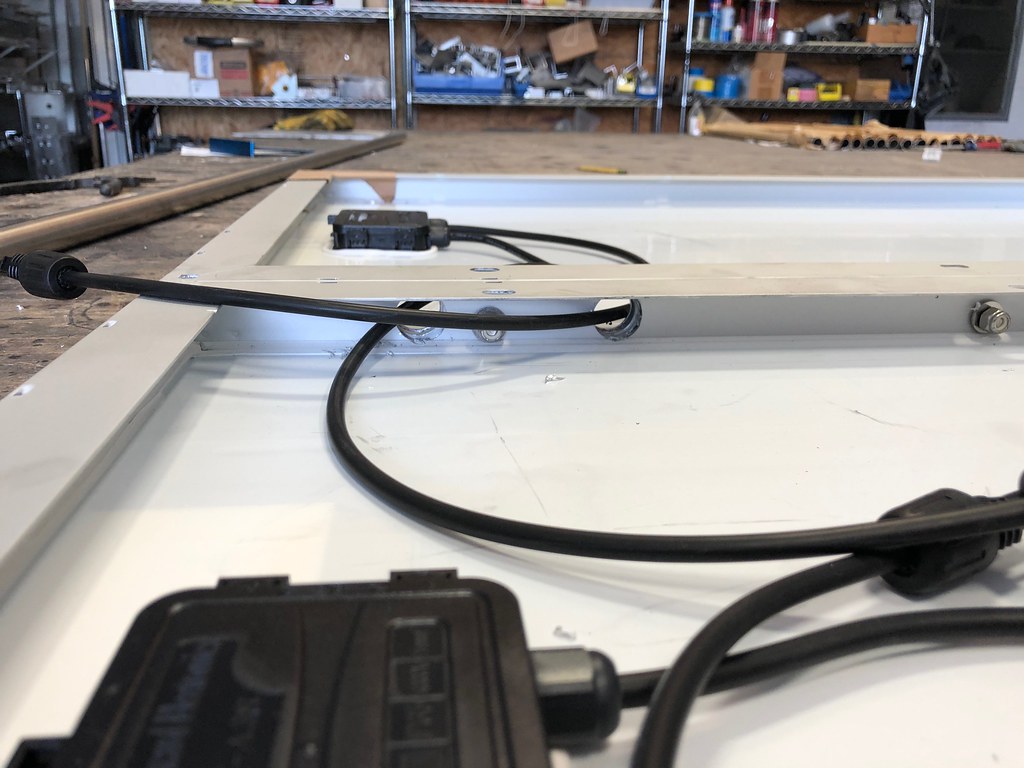
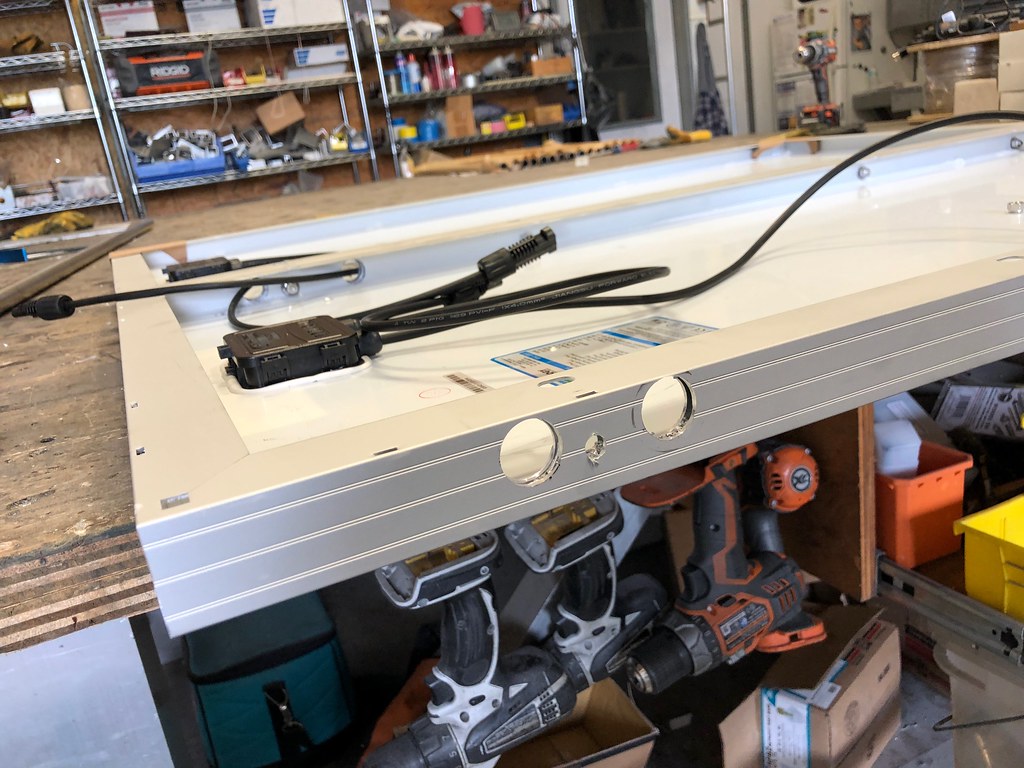
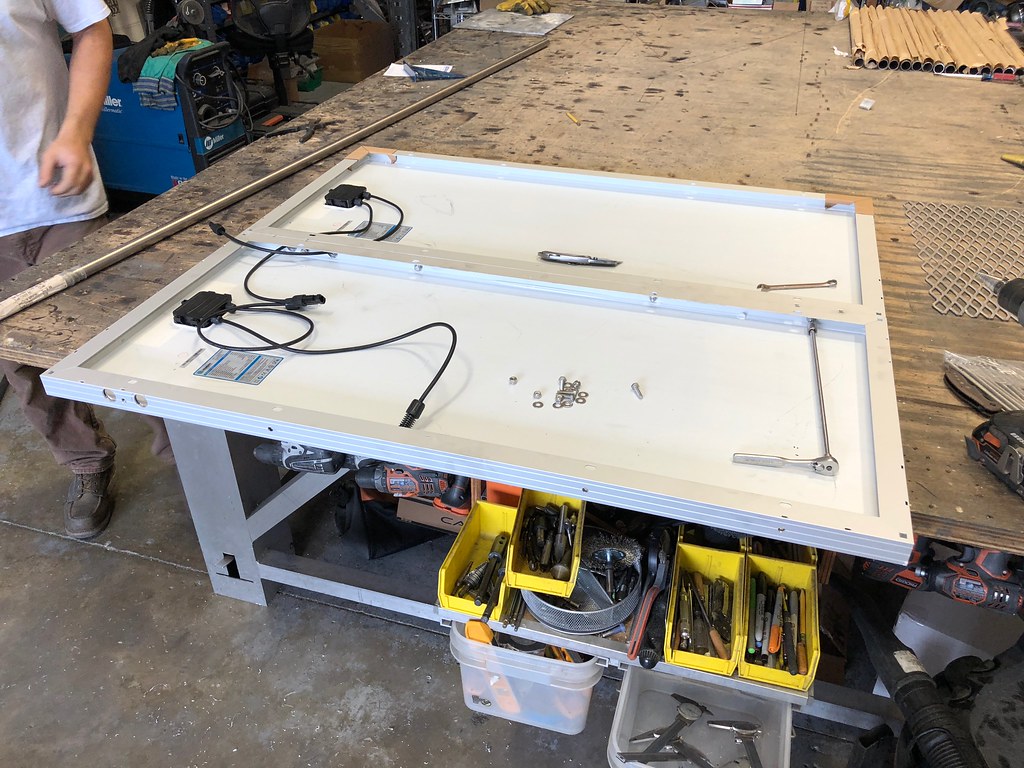
For the panels themselves, i bolted all three together with 1/4" stainless hardware from www.buildersstainless.com
for the mount i used 2" x 3" aluminum 1/4" thick angle with the 2" side on the solar and the 3" on the factory racks
 Untitled by Grant Wilson, on Flickr
panels bolted, routing for cables (they are later covered in loom for protection)
 Untitled by Grant Wilson, on Flickr
pretty stainless hardware
 Untitled by Grant Wilson, on Flickr
 Untitled by Grant Wilson, on Flickr
two together
 Untitled by Grant Wilson, on Flickr
angle mounted for installation
 Untitled by Grant Wilson, on Flickr
all together, cheating with a forklift
 Untitled by Grant Wilson, on Flickr
3 panels installed!
 Untitled by Grant Wilson, on Flickr
solar production at about 10AM on a winter day
 Untitled by Grant Wilson, on Flickr
what it takes to run a 1500 watt hot water heater to heat 4 gallons of water in 20 minutes.
depth portion of this build since everyone always asks what i use, I will divulge into it!
I use renogy. At one time (full disclosure) I was sponsored by them. Even after that ended i continue to buy their panels. They are quality, and work well.
I chose to use 3 100 watt Monocrystalline panels http://amzn.to/2BVLNeh
To connect those panels in series, i used two pairs of these - http://amzn.to/2BUqQk5
Then used these cables with the unused ends cut off to run the rest of the routing, super solid and thick stranded wire for good power conduction - http://amzn.to/2GLhXgx
I used this glad that i sealed, screwed then resealed over the screws - http://amzn.to/2GNWrYb
These wires then go into a victron 100/30 Smart MPPT charger - http://amzn.to/2BVhvZc
Which is also monitored by the Victron BMV 712 - http://amzn.to/2E4hKD2
Into this battery - http://amzn.to/2GNTw22
With this combination I can accurately track overall use, history, incoming and outgoing amps, and remaining time along with a shit ton of other stuff.
For the panels themselves, i bolted all three together with 1/4" stainless hardware from www.buildersstainless.com
for the mount i used 2" x 3" aluminum 1/4" thick angle with the 2" side on the solar and the 3" on the factory racks
Untitled by Grant Wilson, on Flickrpanels bolted, routing for cables (they are later covered in loom for protection)
Untitled by Grant Wilson, on Flickrpretty stainless hardware
Untitled by Grant Wilson, on FlickrUntitled by Grant Wilson, on Flickrtwo together
Untitled by Grant Wilson, on Flickrangle mounted for installation
Untitled by Grant Wilson, on Flickrall together, cheating with a forklift
Untitled by Grant Wilson, on Flickr3 panels installed!
Untitled by Grant Wilson, on Flickrsolar production at about 10AM on a winter day
Untitled by Grant Wilson, on Flickrwhat it takes to run a 1500 watt hot water heater to heat 4 gallons of water in 20 minutes.
somewhere in the middle. not a rock crawler, but better than a subaruThis looks excellent. Do you know what the 4x4 capabilities of the Sprinter are?
Proper offroad rocky pass capability or copes with a bit of gravel...

Steward I
This video is probably the best example of its capabilities that I've seen.
pretty good. Plus i have real tires.This video is probably the best example of its capabilities that I've seen.
 Untitled by Grant Wilson, on Flickr
did some more wiring. Water pump is triggered by switch in front and rear for ease of use.
 Untitled by Grant Wilson, on Flickr
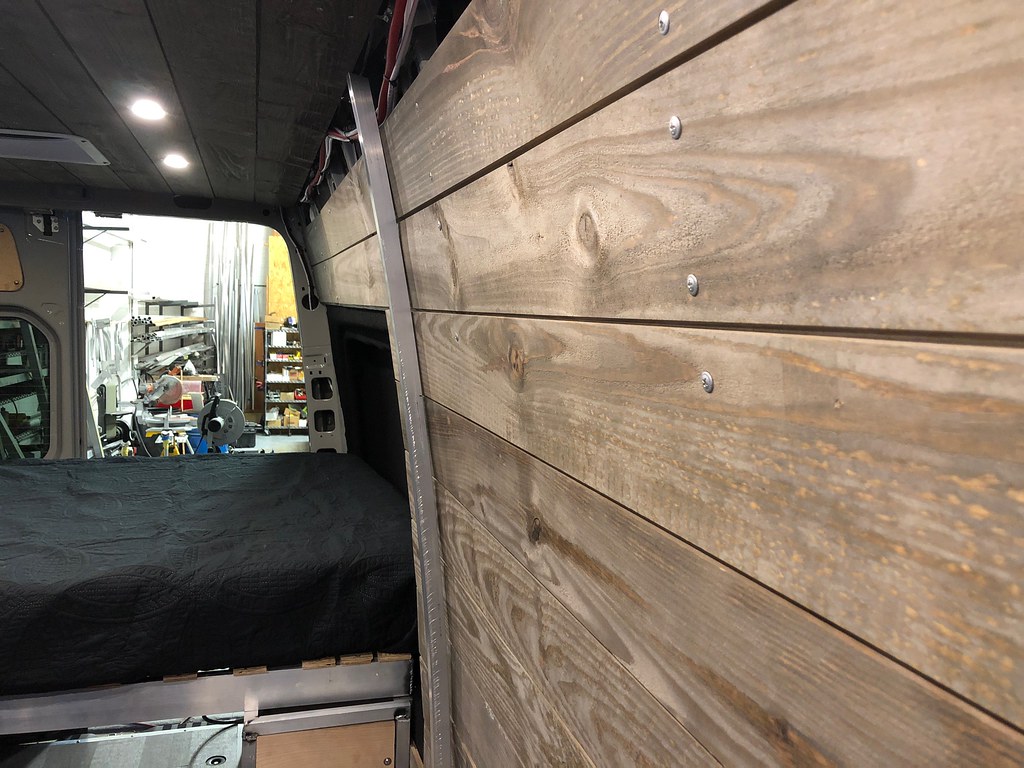
water tank shroud is installed. Cut the first wood panel, started raining. So I'll finish that up today along with (hopefully if my slide comes in) the front cabinet construction

pretty much mid build update yall. Im at about 80% with a big push this week to do much much more.
 Sprinter by Grant Wilson, on Flickr
 Sprinter by Grant Wilson, on Flickr
 Sprinter by Grant Wilson, on Flickr
 Sprinter by Grant Wilson, on Flickr
 Sprinter by Grant Wilson, on Flickr
 Sprinter by Grant Wilson, on Flickr
 Sprinter by Grant Wilson, on Flickr
 Sprinter by Grant Wilson, on Flickr
 Sprinter by Grant Wilson, on Flickr
 Sprinter by Grant Wilson, on Flickr
Sprinter by Grant Wilson, on FlickrSprinter by Grant Wilson, on FlickrSprinter by Grant Wilson, on FlickrSprinter by Grant Wilson, on FlickrSprinter by Grant Wilson, on FlickrSprinter by Grant Wilson, on FlickrSprinter by Grant Wilson, on FlickrSprinter by Grant Wilson, on FlickrSprinter by Grant Wilson, on FlickrSprinter by Grant Wilson, on FlickrI may have missed it somewhere in here, but how big is your water tank? 30gal?Water tank is mounted, and made a new rear floor trim piece
25 gallon with 4 gallon hot water heaterI may have missed it somewhere in here, but how big is your water tank? 30gal?
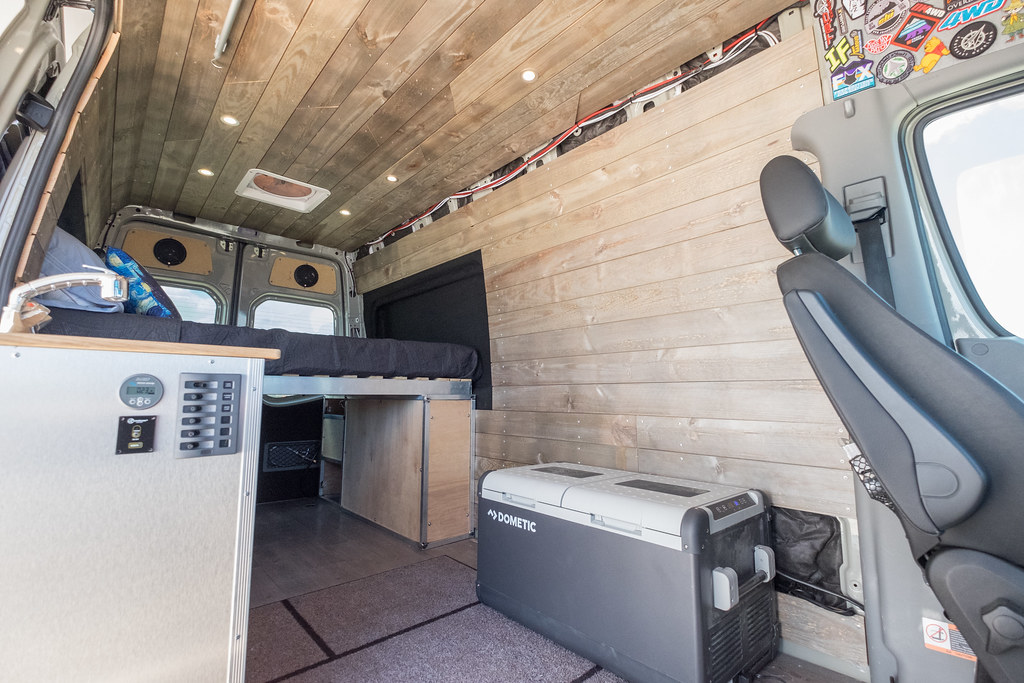
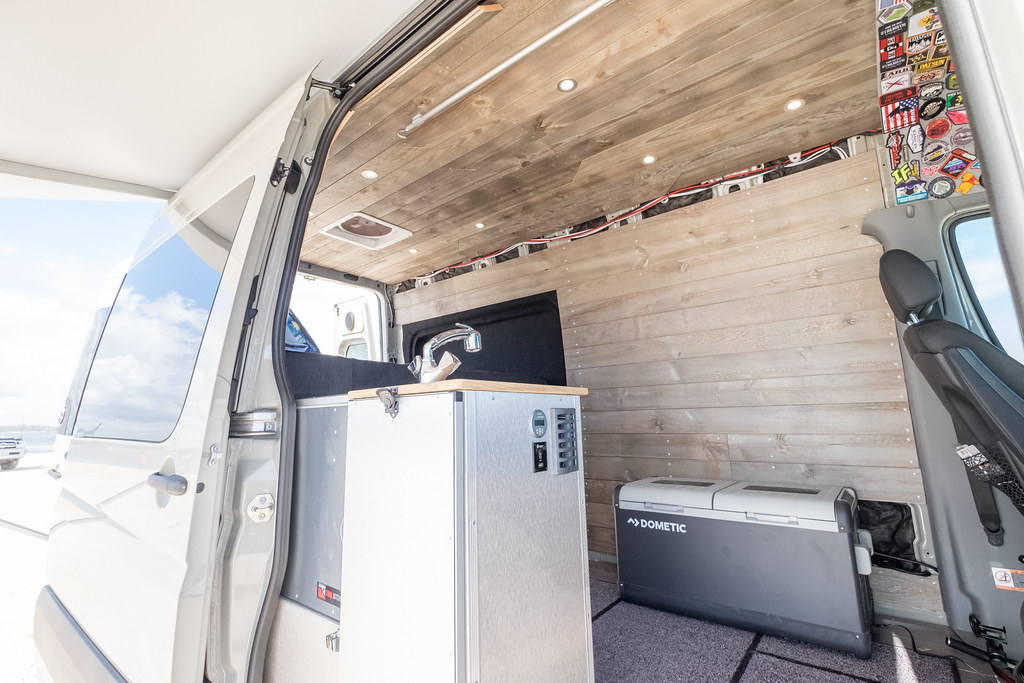
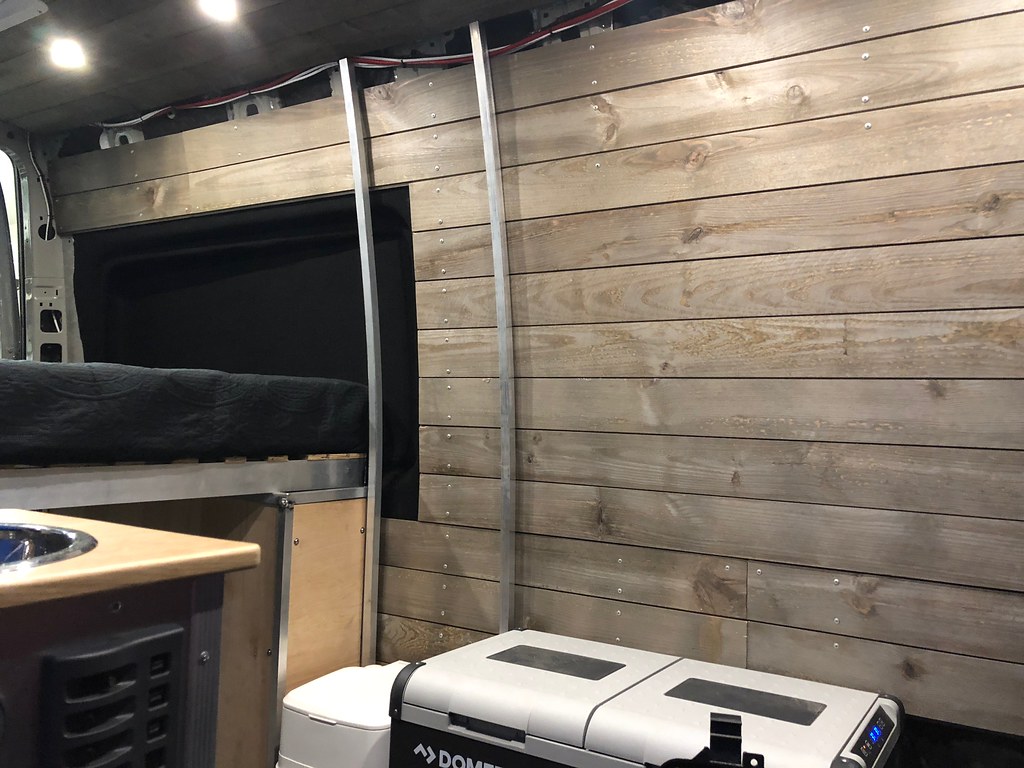
Ok. Lets get yall up to speed
Took a day or two to build the cabinet for the fridge and soon to be closet.
 Untitled by Grant Wilson, on Flickr
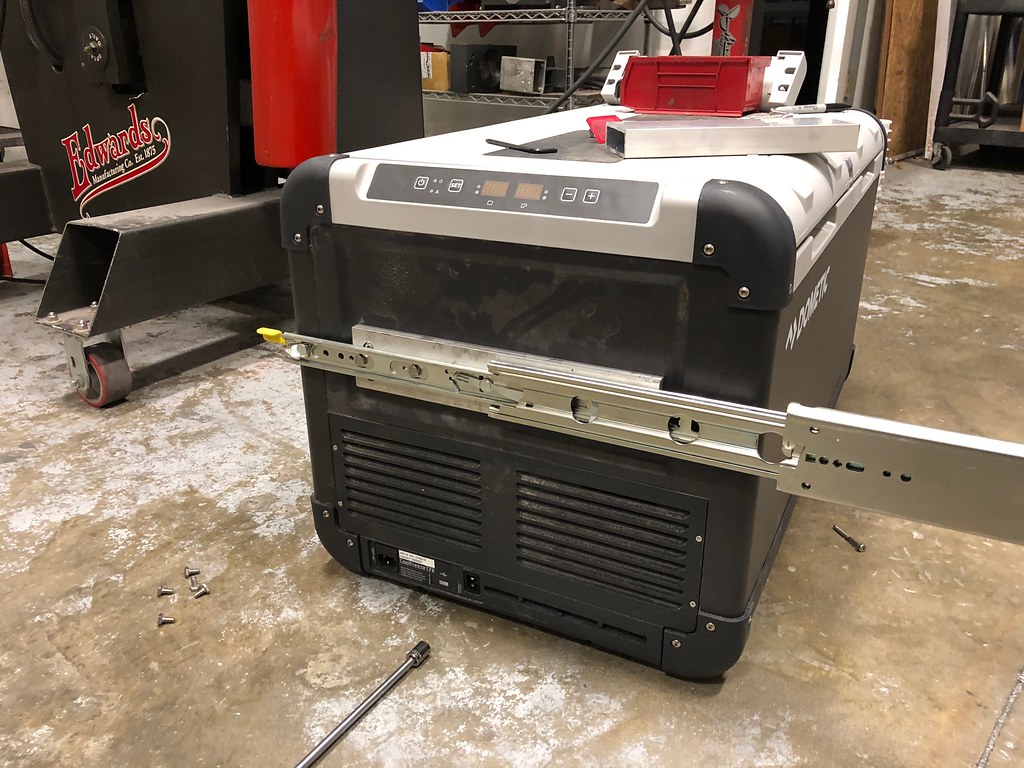
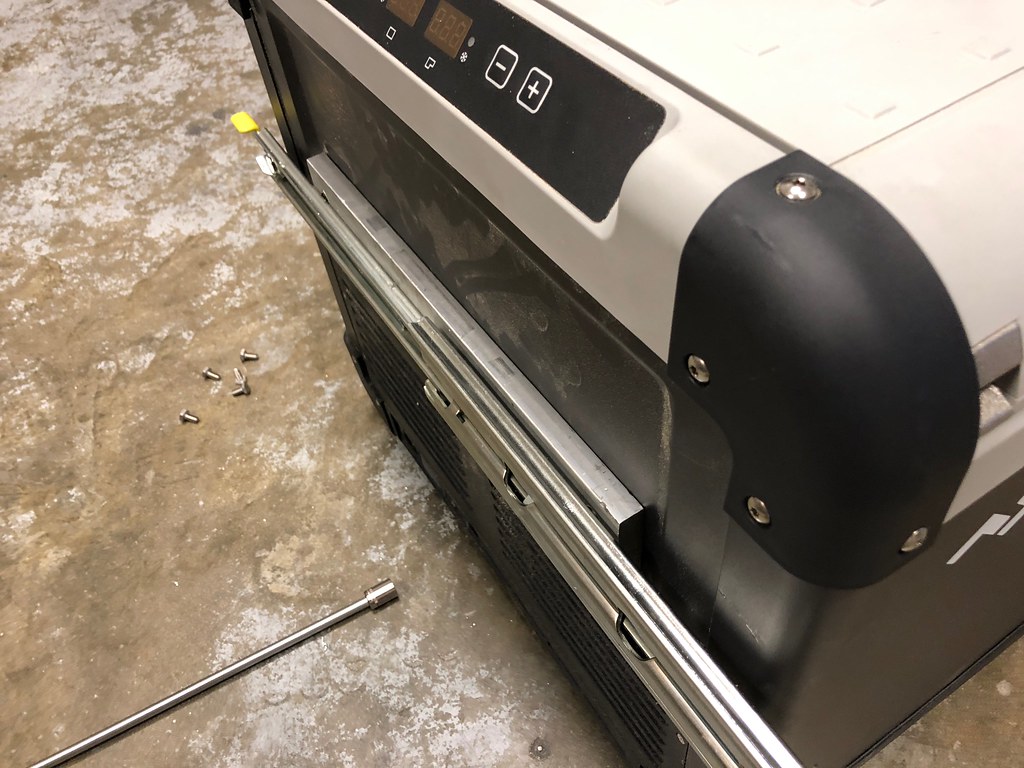
Had to figure out a way to mount up the fridge to the enclosure and save as much space as possible.
I ended up using 3/4" Aluminum block, some socket head m6 bolts. Transferred the pattern from the handle to make the mount holes, used an endmill to counterbore so its all flush, then used the slides to make a pattern for the actual mounting, drilled and tapped them.
 Untitled by Grant Wilson, on Flickr
 Untitled by Grant Wilson, on Flickr
This let me make the cabinet as compact as possible, and keep everything nice and close to the fridge so it doesn't stress it. Can't mess up my precious ice cream holder!
From there I Bent up some rear pieces on the roll bender to fit the contours of the van
 Untitled by Grant Wilson, on Flickr
 Untitled by Grant Wilson, on Flickr
A little bit of welding and it gets us a solid base
 Untitled by Grant Wilson, on Flickr
A little more welding and a burnt phone screen later, we have the carcas
 Untitled by Grant Wilson, on Flickr
 Untitled by Grant Wilson, on Flickr
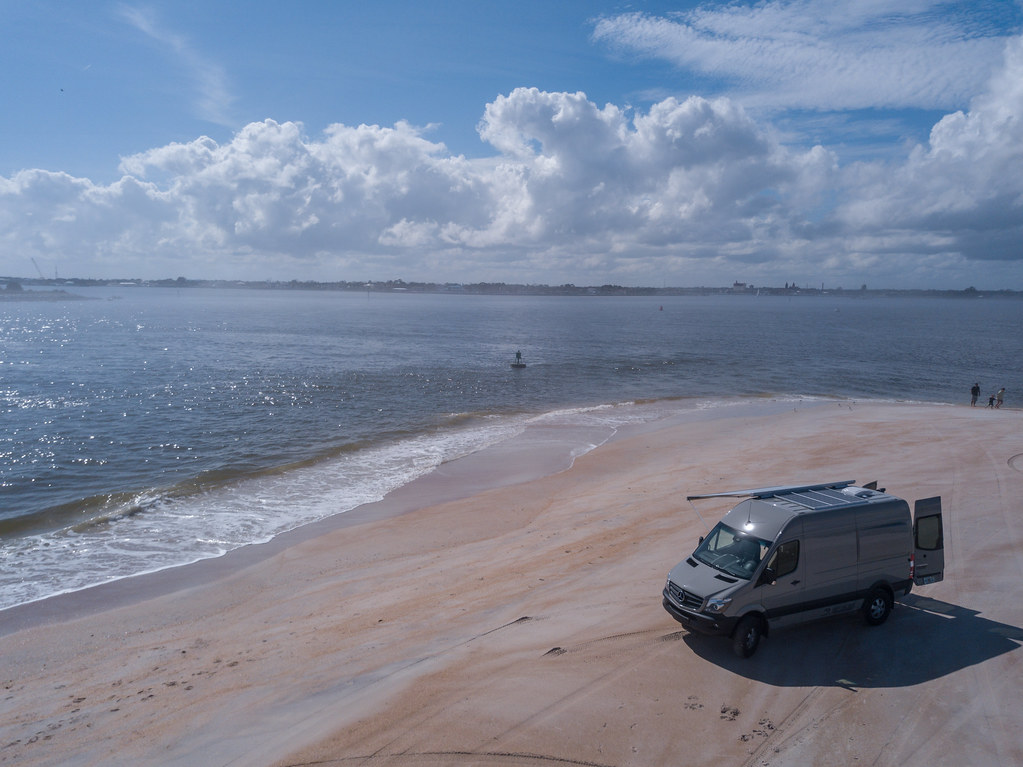
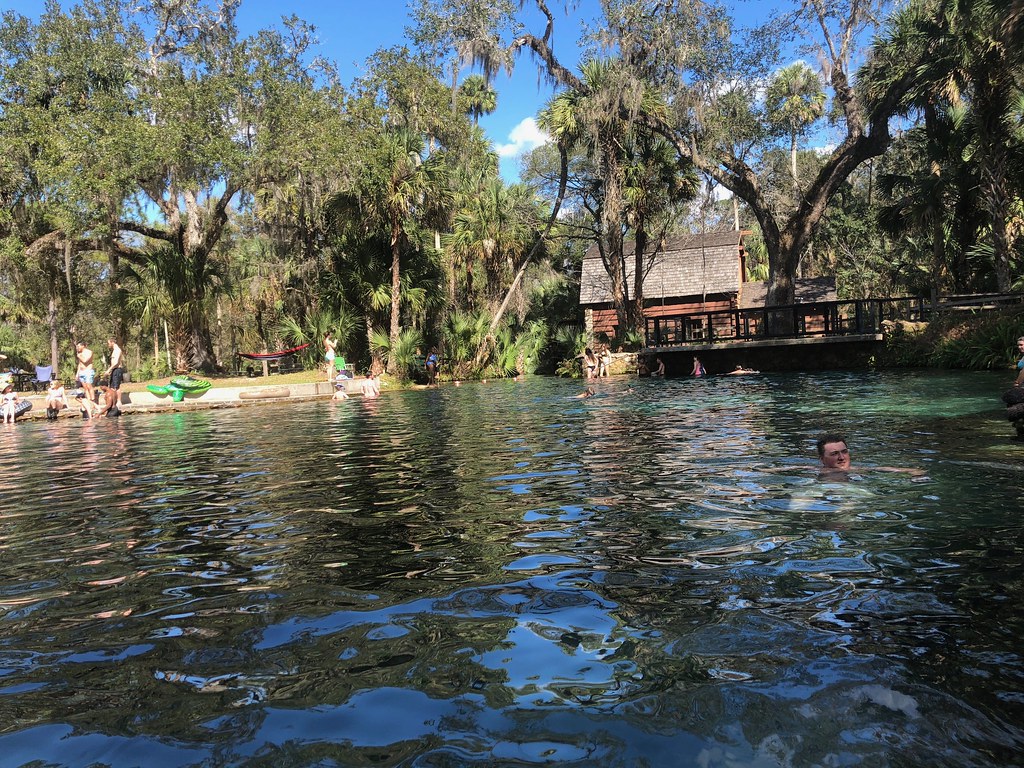
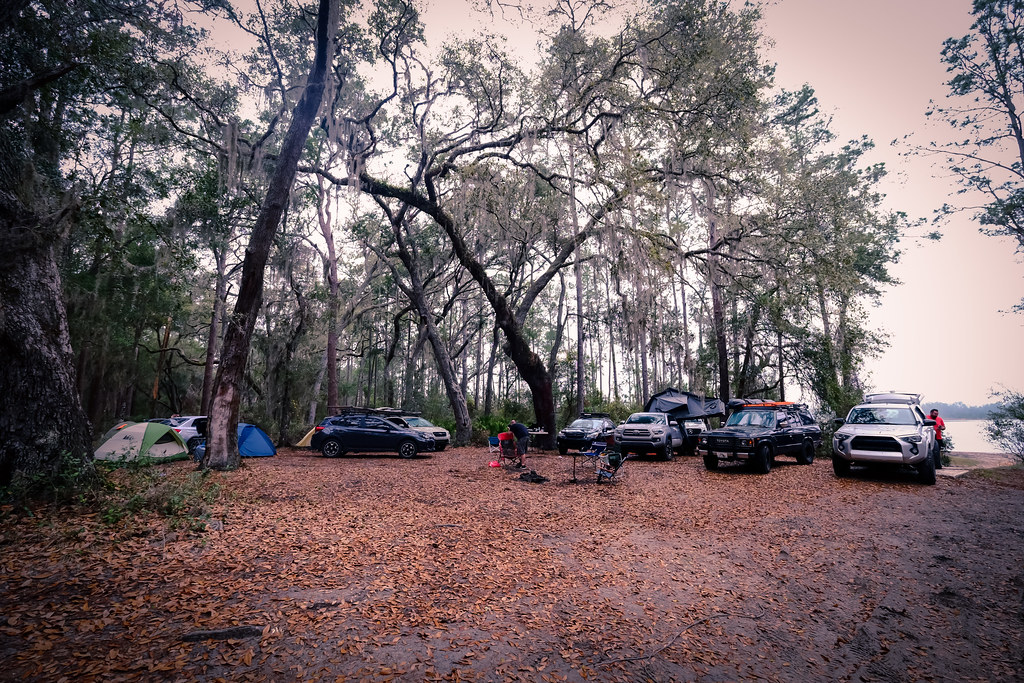
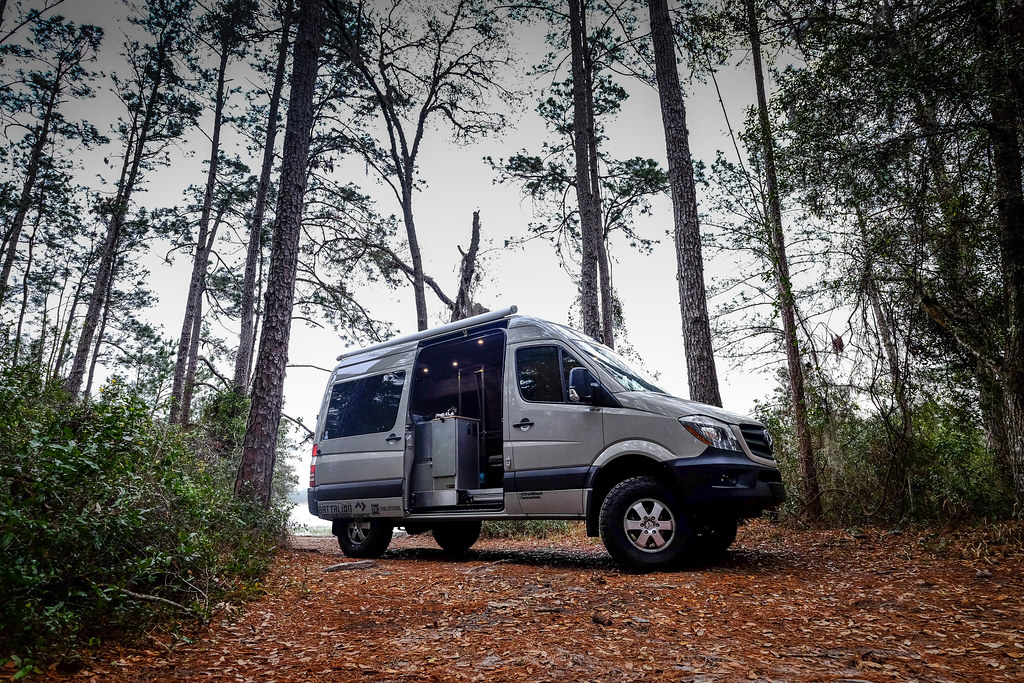
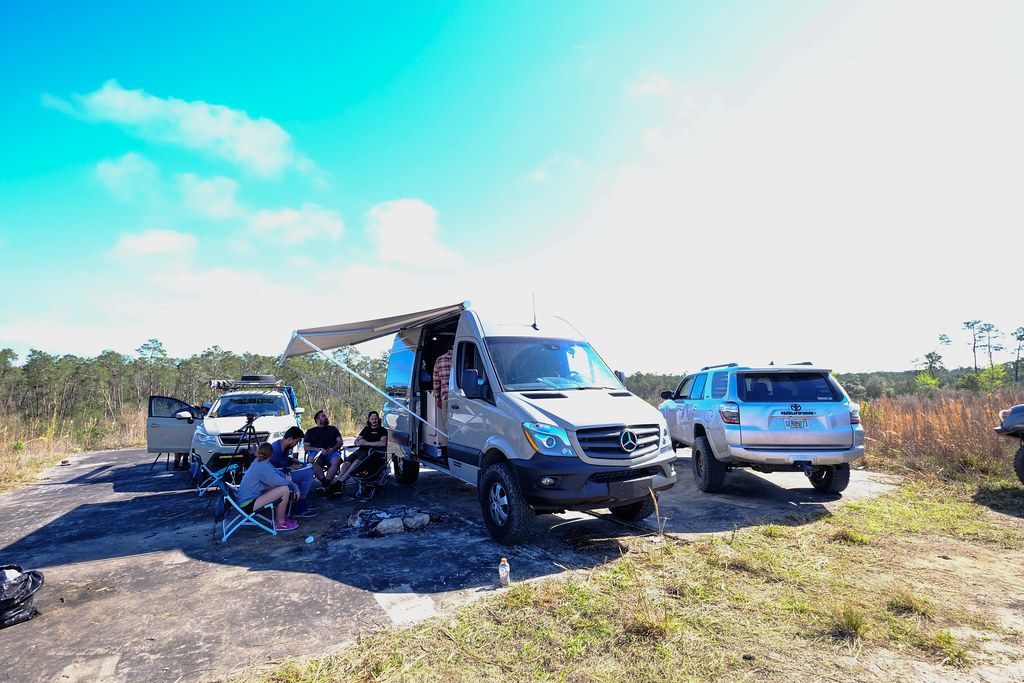
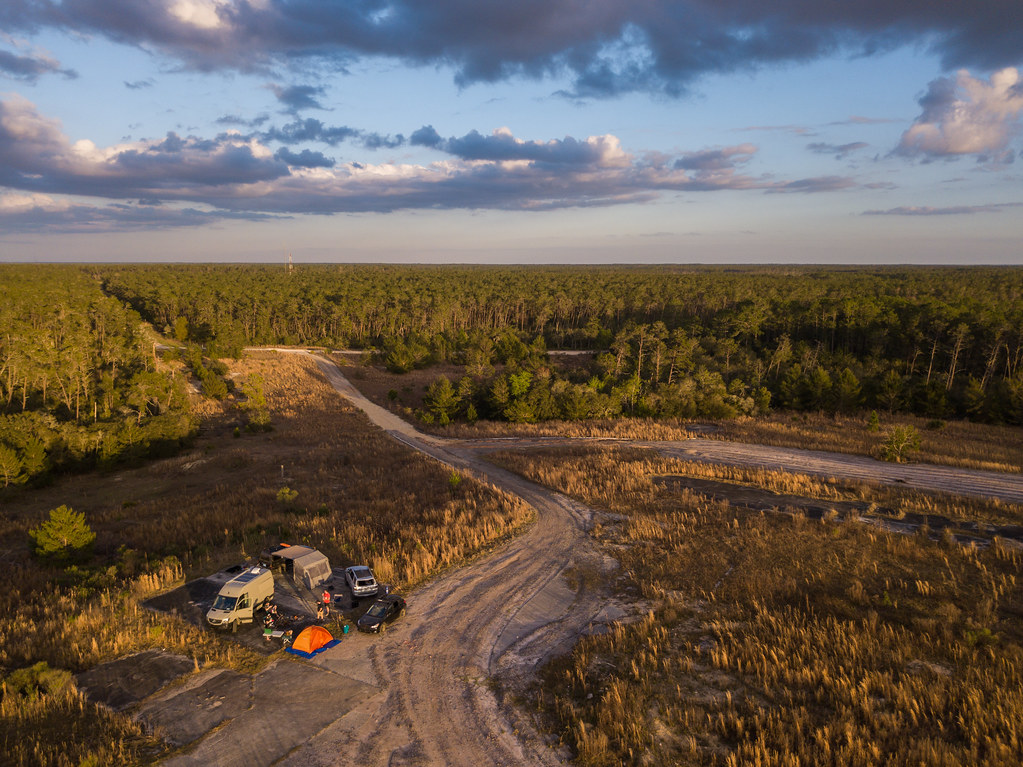
Far from done, but done enough to hold the cooler in while we go camping this past weekend! First weekend out. Can't be happier with the performance of this beast in the softest sugar sand known to man
Spent the weekend in Ocala National Forest, went to good ol Juniper Springs and even found a patch!
 Untitled by Grant Wilson, on Flickr
 Untitled by Grant Wilson, on Flickr
 Ocala national forest by Grant Wilson, on Flickr
 Ocala national forest by Grant Wilson, on Flickr
 Ocala national forest by Grant Wilson, on Flickr
 Ocala national forest by Grant Wilson, on Flickr
 Ocala national forest by Grant Wilson, on Flickr
 Ocala national forest by Grant Wilson, on Flickr
Also. bumpers came in this morning, so there is that
 Untitled by Grant Wilson, on Flickr
 Untitled by Grant Wilson, on Flickr
Took a day or two to build the cabinet for the fridge and soon to be closet.
Untitled by Grant Wilson, on FlickrHad to figure out a way to mount up the fridge to the enclosure and save as much space as possible.
I ended up using 3/4" Aluminum block, some socket head m6 bolts. Transferred the pattern from the handle to make the mount holes, used an endmill to counterbore so its all flush, then used the slides to make a pattern for the actual mounting, drilled and tapped them.
Untitled by Grant Wilson, on FlickrUntitled by Grant Wilson, on FlickrThis let me make the cabinet as compact as possible, and keep everything nice and close to the fridge so it doesn't stress it. Can't mess up my precious ice cream holder!
From there I Bent up some rear pieces on the roll bender to fit the contours of the van
Untitled by Grant Wilson, on FlickrUntitled by Grant Wilson, on FlickrA little bit of welding and it gets us a solid base
Untitled by Grant Wilson, on FlickrA little more welding and a burnt phone screen later, we have the carcas
Untitled by Grant Wilson, on FlickrUntitled by Grant Wilson, on FlickrFar from done, but done enough to hold the cooler in while we go camping this past weekend! First weekend out. Can't be happier with the performance of this beast in the softest sugar sand known to man
Spent the weekend in Ocala National Forest, went to good ol Juniper Springs and even found a patch!
Untitled by Grant Wilson, on FlickrUntitled by Grant Wilson, on FlickrOcala national forest by Grant Wilson, on FlickrOcala national forest by Grant Wilson, on FlickrOcala national forest by Grant Wilson, on FlickrOcala national forest by Grant Wilson, on FlickrOcala national forest by Grant Wilson, on FlickrOcala national forest by Grant Wilson, on FlickrAlso. bumpers came in this morning, so there is that
Untitled by Grant Wilson, on FlickrUntitled by Grant Wilson, on FlickrSo big moves for little people
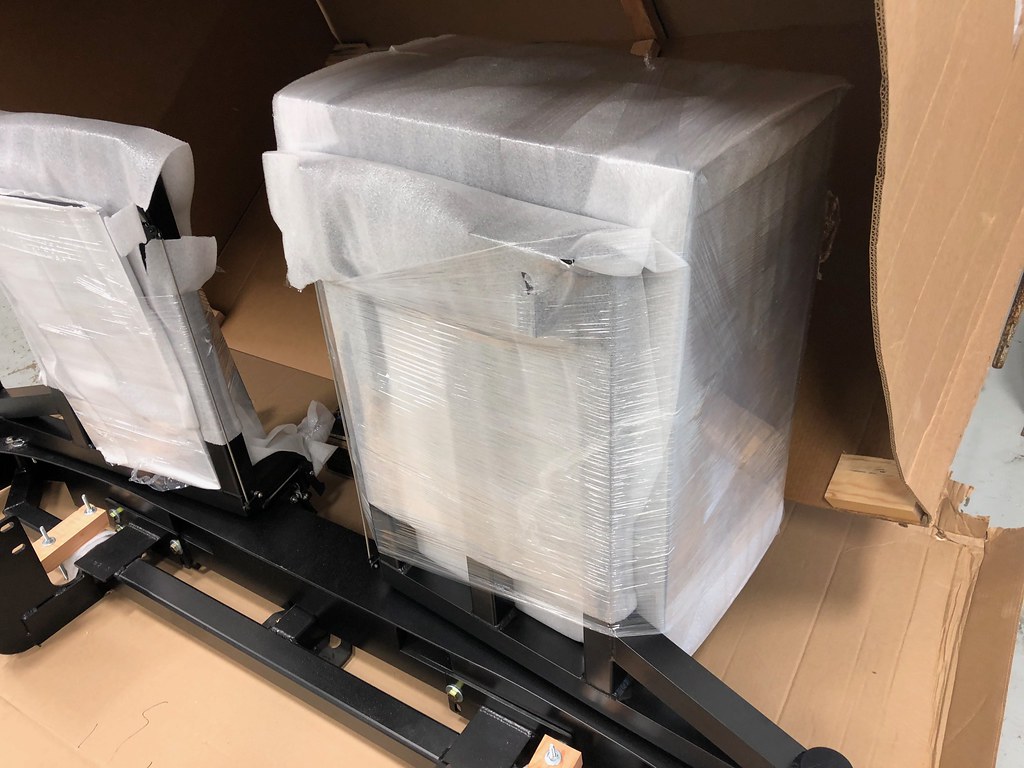
Bumpers!
Aluminess bumpers front and rear.
I will say this. They are the best packaged, safe and sound bumpers I have ever bought. I like the instructions (about 85-90% complete) and the fitment was really spot on. Have about 2.5 hours into it, and maybe a few more into the rear end of it to go. Front end fits perfect with zero issues. Rear end fits well, but wish it was an actual bumper instead of an add on, but i get why it isnt.
Overall, 10/10 would spend an arm and a leg again.
 bumpers by Grant Wilson, on Flickr
 bumpers by Grant Wilson, on Flickr
 bumpers by Grant Wilson, on Flickr
 bumpers by Grant Wilson, on Flickr
 bumpers by Grant Wilson, on Flickr
 bumpers by Grant Wilson, on Flickr
Bumpers!
Aluminess bumpers front and rear.
I will say this. They are the best packaged, safe and sound bumpers I have ever bought. I like the instructions (about 85-90% complete) and the fitment was really spot on. Have about 2.5 hours into it, and maybe a few more into the rear end of it to go. Front end fits perfect with zero issues. Rear end fits well, but wish it was an actual bumper instead of an add on, but i get why it isnt.
Overall, 10/10 would spend an arm and a leg again.
bumpers by Grant Wilson, on Flickrbumpers by Grant Wilson, on Flickrbumpers by Grant Wilson, on Flickrbumpers by Grant Wilson, on Flickrbumpers by Grant Wilson, on Flickrbumpers by Grant Wilson, on Flickr
Pathfinder I
- 2,271
- First Name
- Black
- Last Name
- Tan
- Member #
2385
- Service Branch
- Boys brigade
