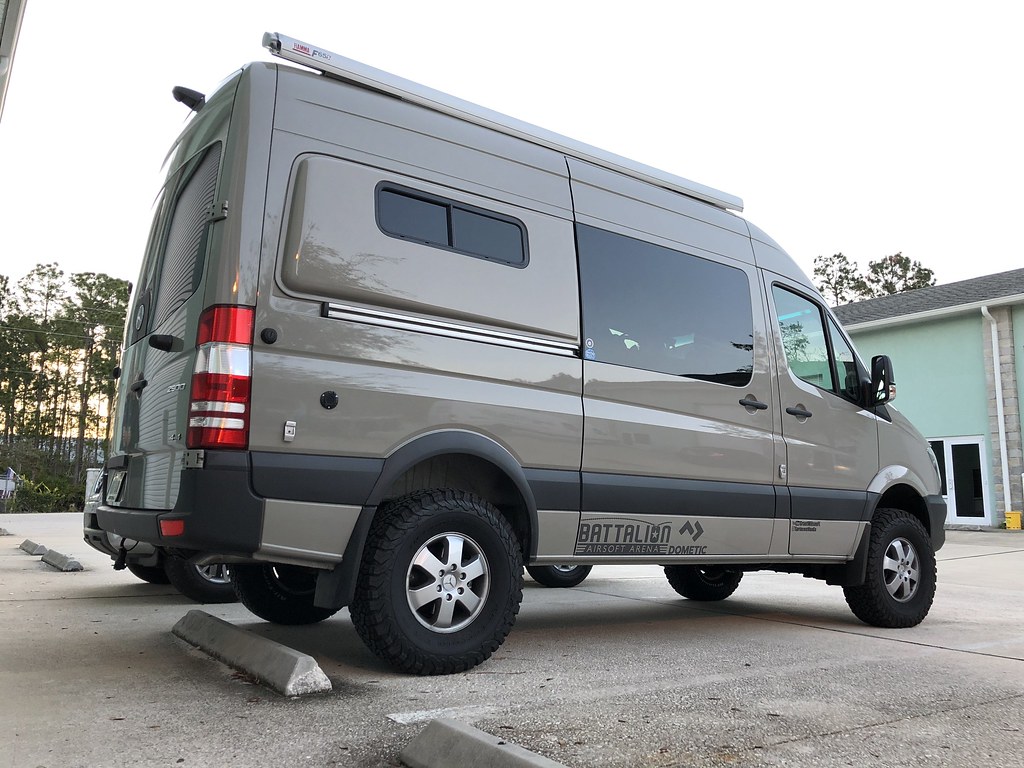
2017 Sprinter 4x4 144"
- Thread starter grantwilson
- Start date
You are using an out of date browser. It may not display this or other websites correctly.
You should upgrade or use an alternative browser.
You should upgrade or use an alternative browser.


So its been a while since im waiting on stuff, not much to do
All the wiring is completed and good to go up to this point.
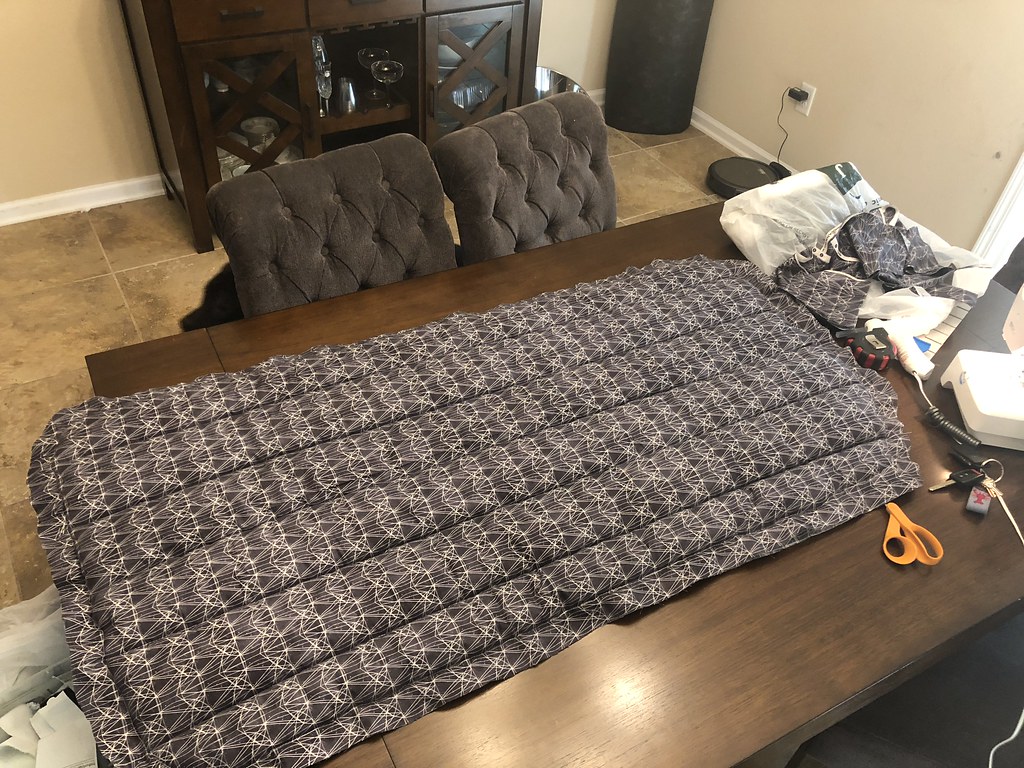
I made a sliding door cover out of fabric, thinsulate, and magnets that works great.
 Untitled by Grant Wilson, on Flickr
Its not pictured here, but white edging is added on now. Fits like a glove
 Untitled by Grant Wilson, on Flickr
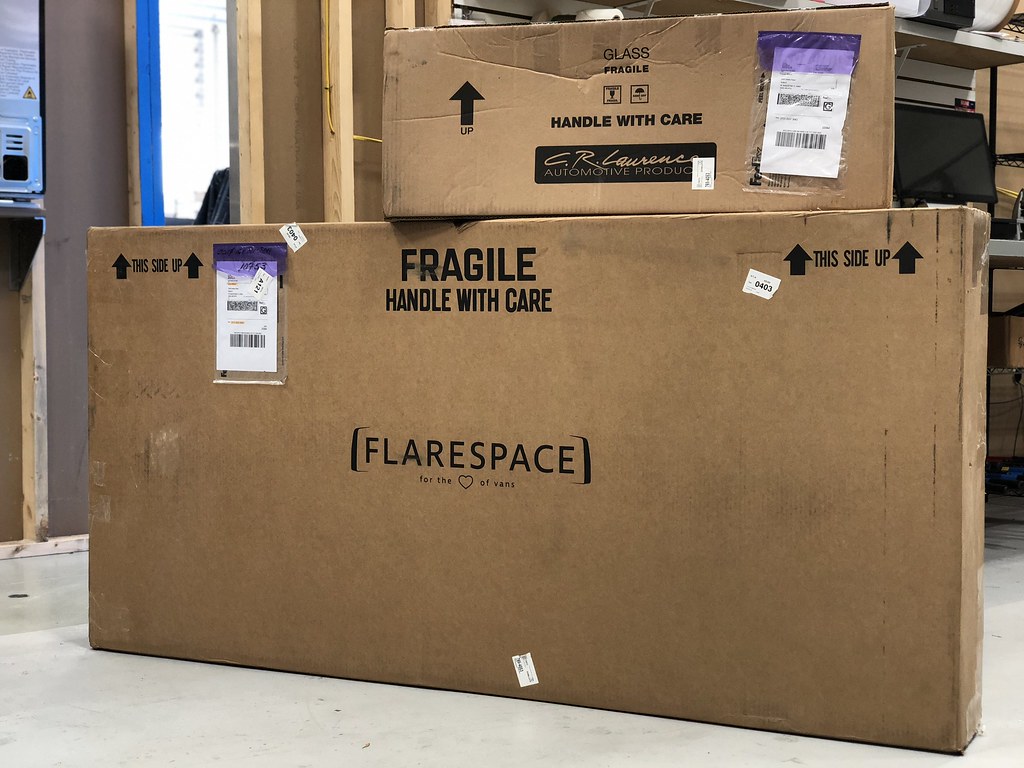
Flarespace Extended flares and a single window are here as well! test fitting after work if it stops raining, and dropping off to paint
fridge also arrived.
CFX75DZ that will fit perfect in the cabinet/drawer situation that will occupy this area.
 Untitled by Grant Wilson, on Flickr
Trail kitchen should be here tomorrow and the build really starts. Have been waiting on it to get here in order to build the bed frame to the right size to clear everything.
All the wiring is completed and good to go up to this point.
I made a sliding door cover out of fabric, thinsulate, and magnets that works great.
Untitled by Grant Wilson, on FlickrIts not pictured here, but white edging is added on now. Fits like a glove
Untitled by Grant Wilson, on FlickrFlarespace Extended flares and a single window are here as well! test fitting after work if it stops raining, and dropping off to paint
fridge also arrived.
CFX75DZ that will fit perfect in the cabinet/drawer situation that will occupy this area.
Untitled by Grant Wilson, on FlickrTrail kitchen should be here tomorrow and the build really starts. Have been waiting on it to get here in order to build the bed frame to the right size to clear everything.

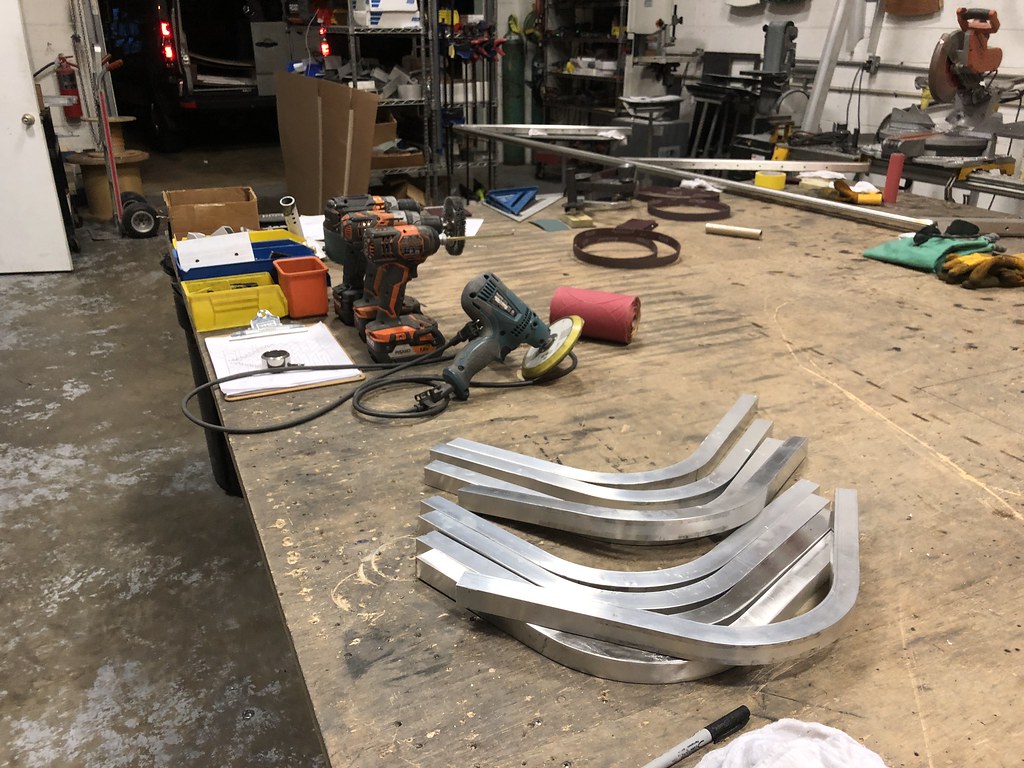
Because old dominion freight sucks dick and my kitchen isnt here to put in and start welding a bed frame, i started on cabinet work
Bent and cut out 9 (need 7, made extra in case) supports to build curved cabinets
 Untitled by Grant Wilson, on Flickr
These have a larger (about 1" more...test piece was a 9 " radius, the actual production is an 11" version)
I will be welding mount flanges, and tabs to screw the wood to.
THe bendy wood will go up until there is a vertical surface where the door will start. it will all make sense in about 2 weeks when i get back to them. I was just not trying to waste time tonight and actually get something done.
 Untitled by Grant Wilson, on Flickr
And for credit given. Idea was stolen from Zen Vanz
Bent and cut out 9 (need 7, made extra in case) supports to build curved cabinets
Untitled by Grant Wilson, on FlickrThese have a larger (about 1" more...test piece was a 9 " radius, the actual production is an 11" version)
I will be welding mount flanges, and tabs to screw the wood to.
THe bendy wood will go up until there is a vertical surface where the door will start. it will all make sense in about 2 weeks when i get back to them. I was just not trying to waste time tonight and actually get something done.
Untitled by Grant Wilson, on FlickrAnd for credit given. Idea was stolen from Zen Vanz
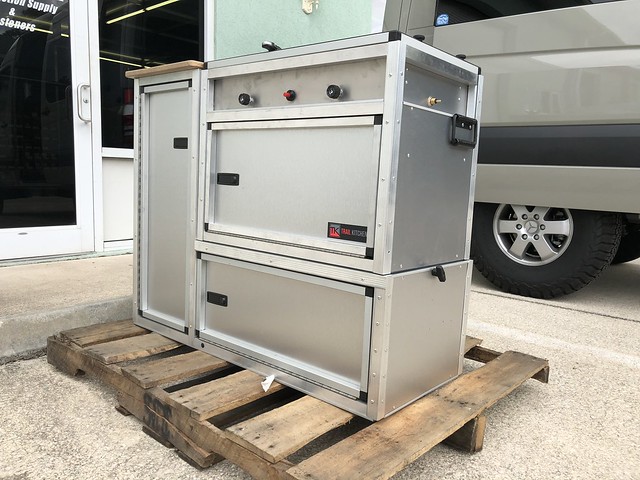
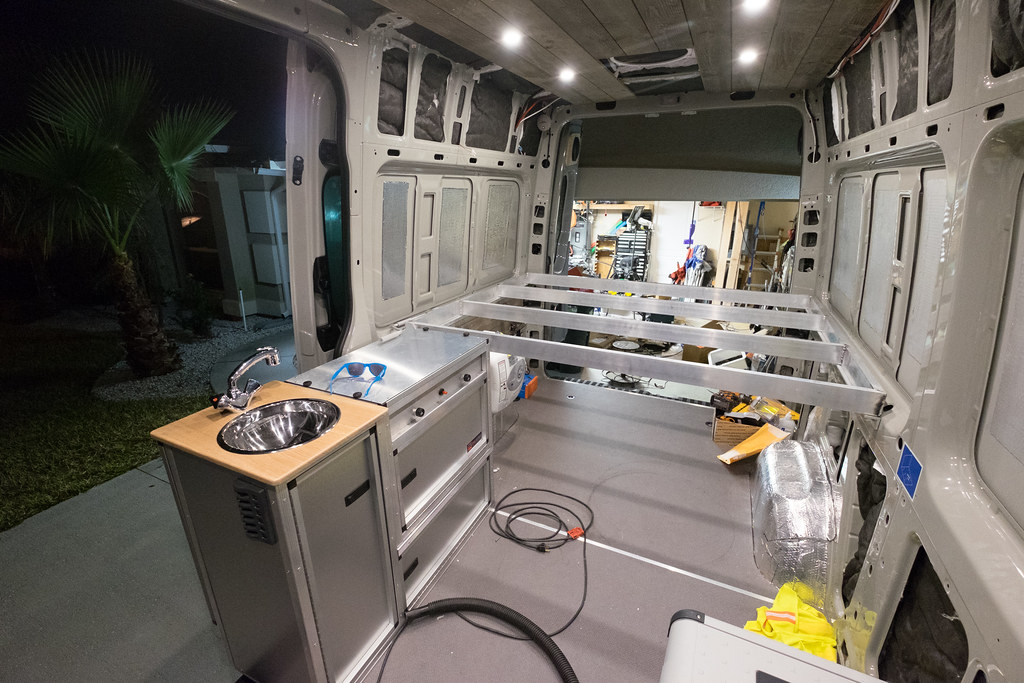
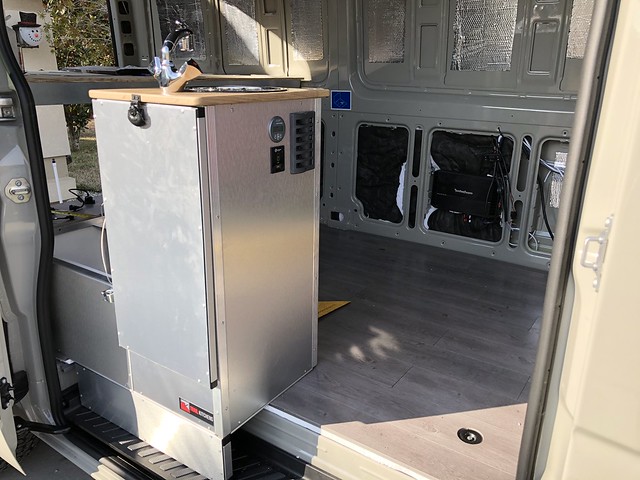
So the key item to start building the rest of the van came in.
The trail kitchens Sprinter Kitchen super magnificent model
https://trailkitchens.com/collections/portable-camp-kitchens/products/campervan-kitchen-unit
I did get a custom model kinda.
I requested NO plumbing or water system and NO electrics/fittings/switches of any kind, and this is the first one they did in traditional aluminum like the normal trail kitchen stuff is. This is literally the third product of theirs that I have owned. They are amazingly compact useful and strong. I had the medium size trail kitchen, and once i got the four wheel camper, sold it and bought the compact size to fit better. I love the ability to hot swap between cooking in the camper and cooking outside without carrying extra stuff and have so much prep and work space built in. I am quite happy with the companies quality and consistent amazing customer service.
 Sprinter Progress by Grant Wilson, on Flickr
 Sprinter Progress by Grant Wilson, on Flickr
 Sprinter Progress by Grant Wilson, on Flickr
 Sprinter Progress by Grant Wilson, on Flickr
 Sprinter Progress by Grant Wilson, on Flickr
 Sprinter Progress by Grant Wilson, on Flickr
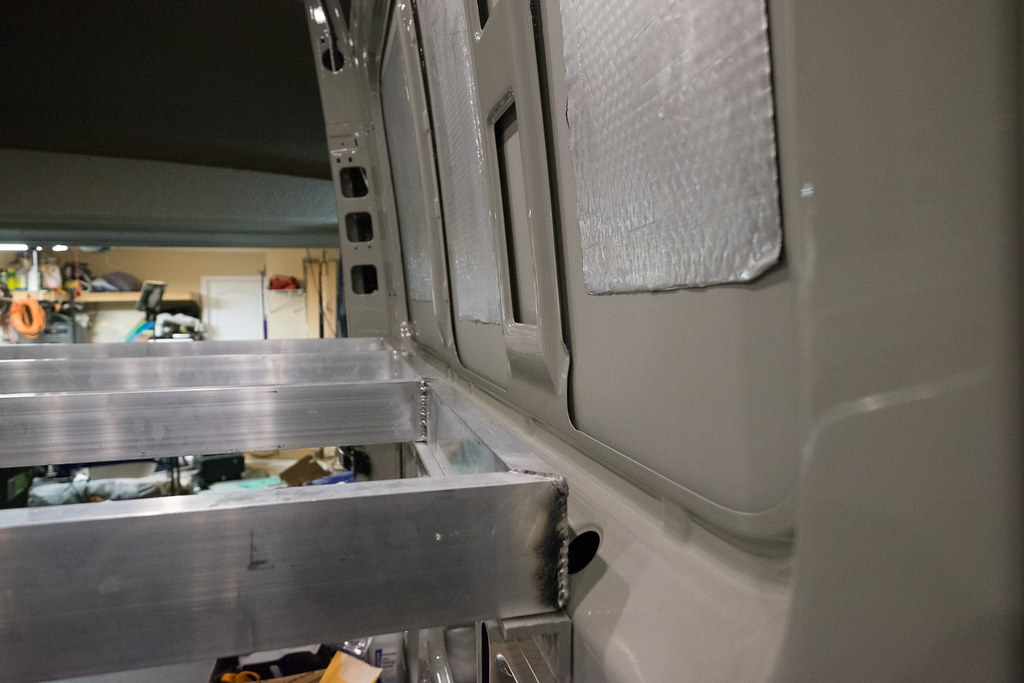
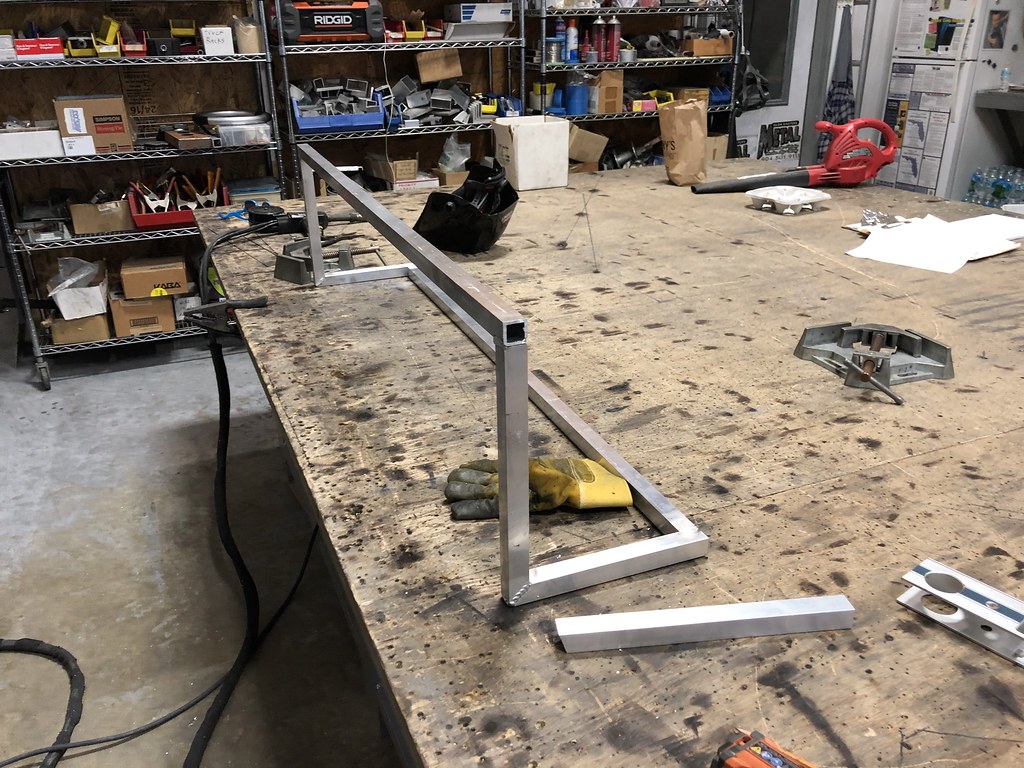
I also managed to get the rails built and temp installed. have to drill holes, pull them off, insert rivnuts and then put them back in.
 Sprinter Progress by Grant Wilson, on Flickr
clamped the first to the table
 Sprinter Progress by Grant Wilson, on Flickr
laid out the hole pattern
 Sprinter Progress by Grant Wilson, on Flickr
drilled and used the complete one as a template for the other. Work smarter not harder!
 Sprinter Progress by Grant Wilson, on Flickr
tek screwed it in.
More to come this week! Lots of work to do.
The trail kitchens Sprinter Kitchen super magnificent model
https://trailkitchens.com/collections/portable-camp-kitchens/products/campervan-kitchen-unit
I did get a custom model kinda.
I requested NO plumbing or water system and NO electrics/fittings/switches of any kind, and this is the first one they did in traditional aluminum like the normal trail kitchen stuff is. This is literally the third product of theirs that I have owned. They are amazingly compact useful and strong. I had the medium size trail kitchen, and once i got the four wheel camper, sold it and bought the compact size to fit better. I love the ability to hot swap between cooking in the camper and cooking outside without carrying extra stuff and have so much prep and work space built in. I am quite happy with the companies quality and consistent amazing customer service.
Sprinter Progress by Grant Wilson, on FlickrSprinter Progress by Grant Wilson, on FlickrSprinter Progress by Grant Wilson, on FlickrSprinter Progress by Grant Wilson, on FlickrSprinter Progress by Grant Wilson, on FlickrSprinter Progress by Grant Wilson, on FlickrI also managed to get the rails built and temp installed. have to drill holes, pull them off, insert rivnuts and then put them back in.
Sprinter Progress by Grant Wilson, on Flickrclamped the first to the table
Sprinter Progress by Grant Wilson, on Flickrlaid out the hole pattern
Sprinter Progress by Grant Wilson, on Flickrdrilled and used the complete one as a template for the other. Work smarter not harder!
Sprinter Progress by Grant Wilson, on Flickrtek screwed it in.
More to come this week! Lots of work to do.
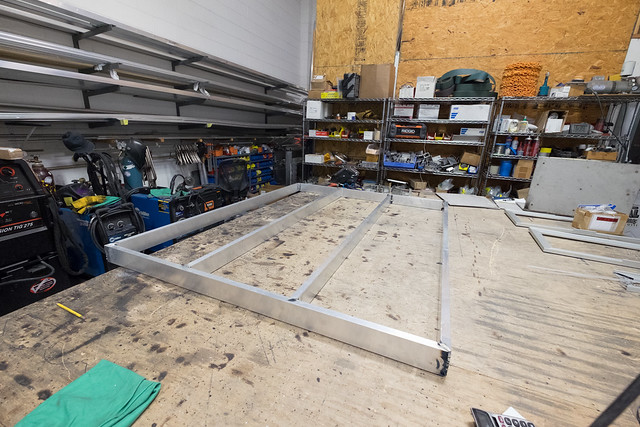
It's slow progress to me, because I only get a few hours each day during the week to do stuff, but took two hours yesterday to make the bed frame
Still need to skin it and get all the nutserts done, but its there.
 Bed frame only by Grant Wilson, on Flickr
 completed frame by Grant Wilson, on Flickr
 completed bed frame in van by Grant Wilson, on Flickr
Still need to skin it and get all the nutserts done, but its there.
Bed frame only by Grant Wilson, on Flickrcompleted frame by Grant Wilson, on Flickrcompleted bed frame in van by Grant Wilson, on FlickrMore progress!
 Sprinter by Grant Wilson, on Flickr
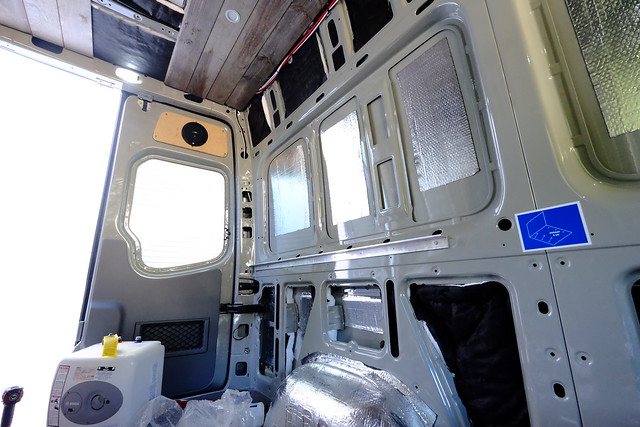
Bed is 100% drilled and bolted in. Just needs a skin of 1/2" ply and good to go. Flares should be done tomorrow, I will install sunday most likely.
200AH battery will be here friday, along with a 1500watt inverter to go ahead and wire all this fun stuff up. The fridge slide should be shipping tomorrow i think, then i can build that whole cabinet situation.
Zero idea how I am finishing under the bed, or where im putting a water tank just yet. Maybe between the wheel wells?
 Sprinter by Grant Wilson, on Flickr
 Sprinter by Grant Wilson, on Flickr
blue sea panel installed on the trail kitchens unit
 Sprinter by Grant Wilson, on Flickr
overall layout so far
 Sprinter by Grant Wilson, on Flickr
plenty of space still to take out the kitchen for outdoor use
 Sprinter by Grant Wilson, on Flickr
bed is perfect height to extend perfectly flat into the flarespace side flares!
Sprinter by Grant Wilson, on FlickrBed is 100% drilled and bolted in. Just needs a skin of 1/2" ply and good to go. Flares should be done tomorrow, I will install sunday most likely.
200AH battery will be here friday, along with a 1500watt inverter to go ahead and wire all this fun stuff up. The fridge slide should be shipping tomorrow i think, then i can build that whole cabinet situation.
Zero idea how I am finishing under the bed, or where im putting a water tank just yet. Maybe between the wheel wells?
Sprinter by Grant Wilson, on FlickrSprinter by Grant Wilson, on Flickrblue sea panel installed on the trail kitchens unit
Sprinter by Grant Wilson, on Flickroverall layout so far
Sprinter by Grant Wilson, on Flickrplenty of space still to take out the kitchen for outdoor use
Sprinter by Grant Wilson, on Flickrbed is perfect height to extend perfectly flat into the flarespace side flares!
 SprinterData144SideView by Grant Wilson, on Flickr
 OV_144_OVERHEAD_DRAWING_F by Grant Wilson, on Flickr
Pretttttty good amount of work done today.
No video from this day, mainly because it was just alot of cleaning, laying peel and stick floor, and tidying up loose ends so i can actually start building some more stuff tomorrow (mainly battery compartment and right hand wheel well cover and electrical panel in the rear)
First up was making sure my battery fit where i measured and hoped that it would
 Untitled by Grant Wilson, on Flickr
like a gloveeeeeeee
the next thing was to completely strip out the back. Pull the floor and insulate it. After alot of thinking, i went with a simple 3/4" rigid foam layer under the floor and dropped it back down. I made washer pucks to space the floor as it should when i tighten the tie downs back down, and went at it.
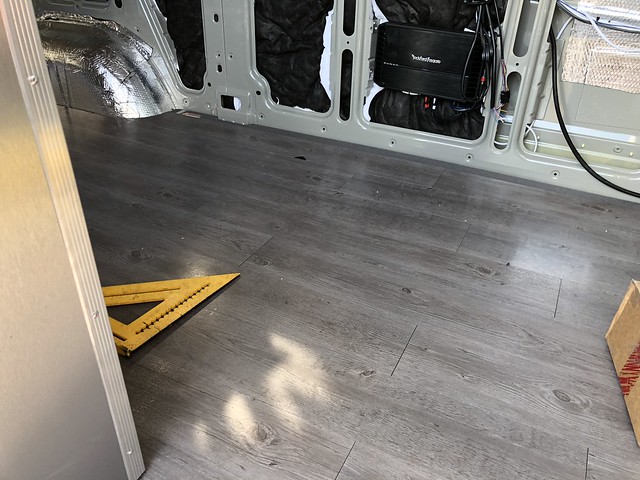
After i got it back in, i started laying the floor down. I used this product http://amzn.to/2FY3Pjn. It took 4 boxes exactly to do the whole truck in a 144"
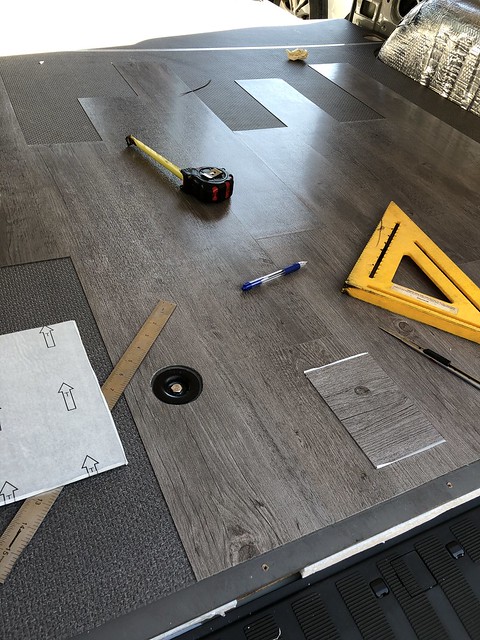 Untitled by Grant Wilson, on Flickr
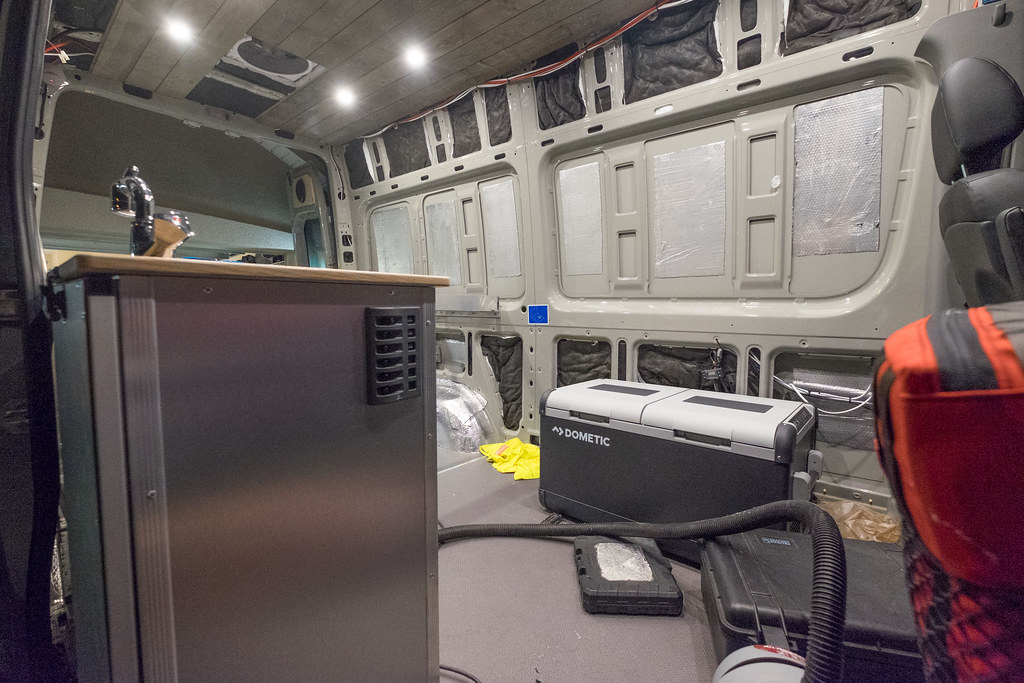
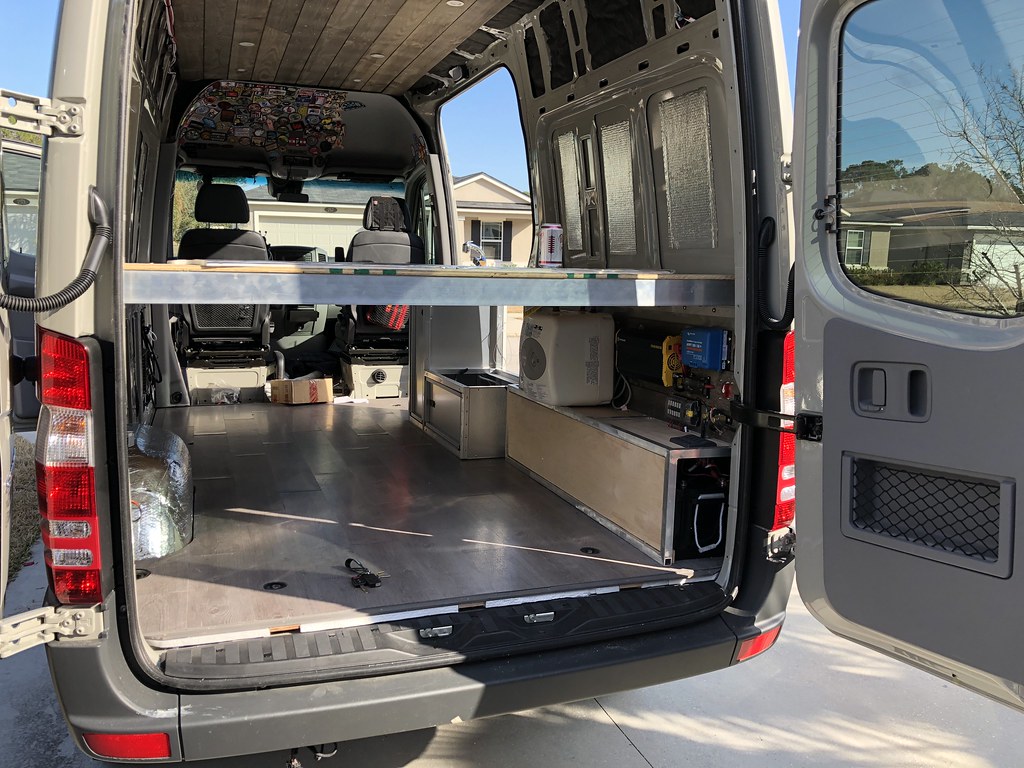
Threw back in the Trail Kitchen unit and started on buttoning it up. You can see the unfinished edge. I will be ordering 1x2 angle aluminum angle in order to make a trim in the side and rear.
 Untitled by Grant Wilson, on Flickr
 Untitled by Grant Wilson, on Flickr
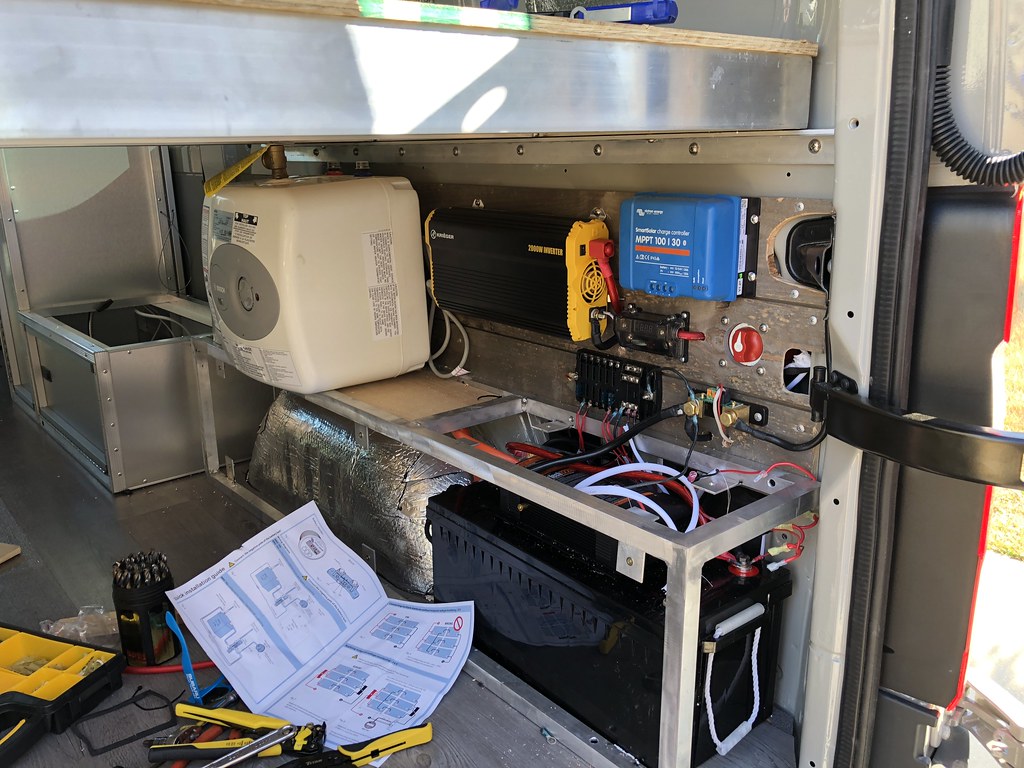
Most of the electrical panels are installed except for some USB and 12V chargers
 Untitled by Grant Wilson, on Flickr
These are the LBue sea switch panel, Victron Smart Battery Monitor and inverter remote. The water heater will run on the inverter, when its turned on (obviously) and also when shore power is plugged in (automatically, along with the battery charger topping off batteries).
Speaking of shore power. I made that hole also.
 Untitled by Grant Wilson, on Flickr
 Untitled by Grant Wilson, on Flickr
No video from this day, mainly because it was just alot of cleaning, laying peel and stick floor, and tidying up loose ends so i can actually start building some more stuff tomorrow (mainly battery compartment and right hand wheel well cover and electrical panel in the rear)
First up was making sure my battery fit where i measured and hoped that it would
Untitled by Grant Wilson, on Flickrlike a gloveeeeeeee
the next thing was to completely strip out the back. Pull the floor and insulate it. After alot of thinking, i went with a simple 3/4" rigid foam layer under the floor and dropped it back down. I made washer pucks to space the floor as it should when i tighten the tie downs back down, and went at it.
After i got it back in, i started laying the floor down. I used this product http://amzn.to/2FY3Pjn. It took 4 boxes exactly to do the whole truck in a 144"
Untitled by Grant Wilson, on FlickrThrew back in the Trail Kitchen unit and started on buttoning it up. You can see the unfinished edge. I will be ordering 1x2 angle aluminum angle in order to make a trim in the side and rear.
Untitled by Grant Wilson, on FlickrUntitled by Grant Wilson, on FlickrMost of the electrical panels are installed except for some USB and 12V chargers
Untitled by Grant Wilson, on FlickrThese are the LBue sea switch panel, Victron Smart Battery Monitor and inverter remote. The water heater will run on the inverter, when its turned on (obviously) and also when shore power is plugged in (automatically, along with the battery charger topping off batteries).
Speaking of shore power. I made that hole also.
Untitled by Grant Wilson, on FlickrUntitled by Grant Wilson, on Flickr
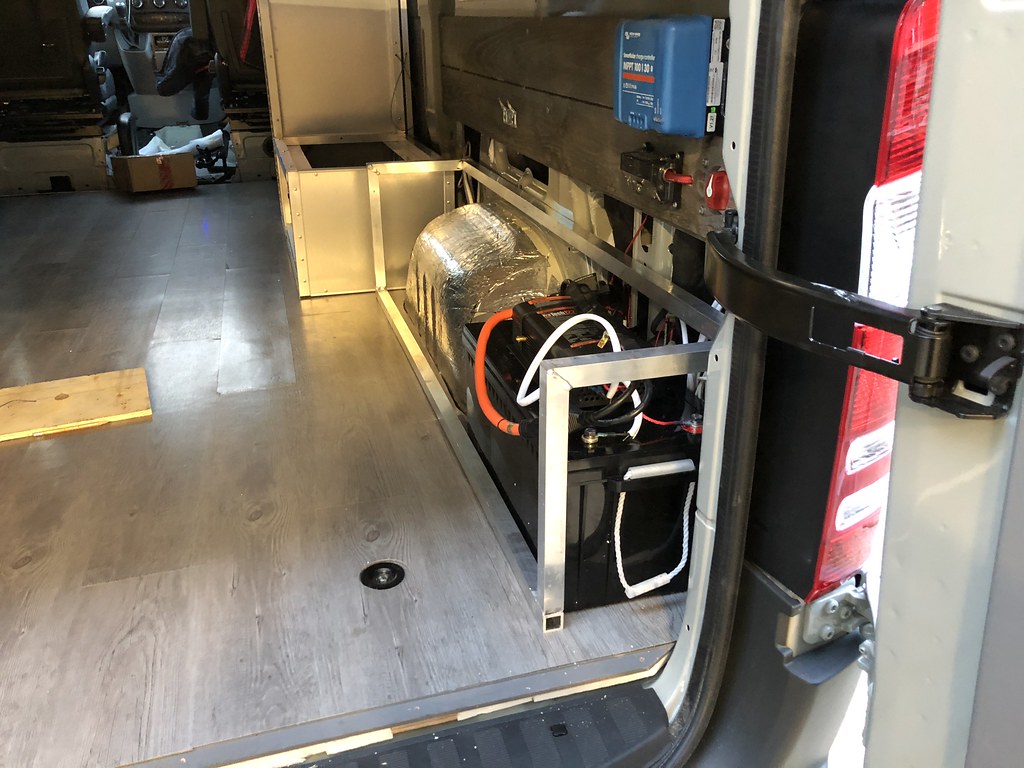
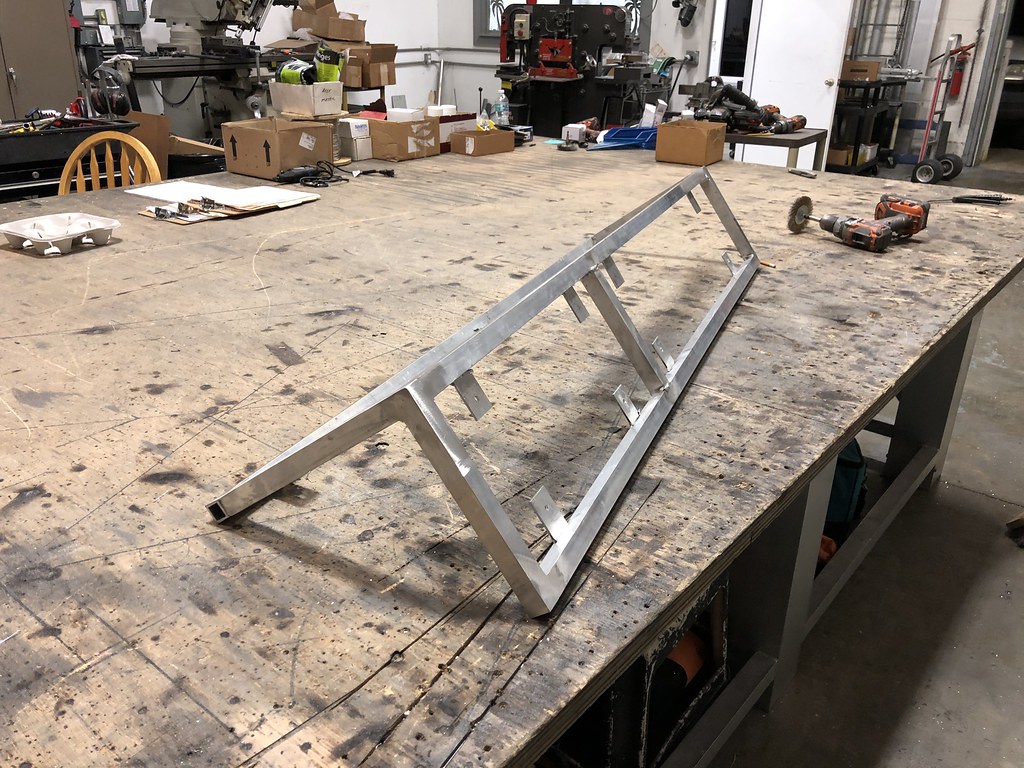
I have a really, really bad habit of just taking a bunch of metal and figuring it out as i go. The battery and wheel well compartment are no different. I have a couple sticks of 1"x1"x1/4" thick square aluminum 6061. I like the weight of aluminum but it is harder and more expensive to weld. Mainly because the machines needed cost much more than a steel mig or tig. Luckily we have a full workshop here at my place of business i get to play in. So the work continues!
This ended up being a 54" long assembly. Its designed to screw into the factory wood floor, and then with riv nuts into the vehicle side structure in about 4 or 5 places. The open areas have tabs welded (4 per section evenly spaced) so that I can use nutserts and button head hex machine screws to tighten them down. Will be using cabinet grade 1/2" wood, on top of the 1/4" tabs to have a 1/4" recess on the wood to the aluminum. Should reveal nicely.
First step was to make a frame. You see how I screwed up and left an exposed edge (because I dont plan well remember) I will end up filling that in, welding it and sanding it smooth. Will never know)
 Untitled by Grant Wilson, on Flickr
 Untitled by Grant Wilson, on Flickr
 Untitled by Grant Wilson, on Flickr
test fit success.
It doesn't cover the whole wheel well because the trail kitchen needs an inch for the pin to move, so ill just have to trim around it and deal with it. there is about an inch and a half of space between the trail kitchen and the frame.
 Untitled by Grant Wilson, on Flickr
main top corner brace welded and checked for fitment
 Untitled by Grant Wilson, on Flickr
battery separation bar for the battery access panel
 Untitled by Grant Wilson, on Flickr
I hate drilling holes. We have an ironworker that makes quick work of cutting, bending and punching up to 1/4" stainless. 1/4" Aluminum was cake here
 Untitled by Grant Wilson, on Flickr
and the final piece all welded up and cleaned up. Tabs are there like i mentioned for setting and mounting the wood to. I'm deathly sick right now, so i wont be doing any work today on it, but ill get the other side finished later this week and also another one for the water tank as well.
This ended up being a 54" long assembly. Its designed to screw into the factory wood floor, and then with riv nuts into the vehicle side structure in about 4 or 5 places. The open areas have tabs welded (4 per section evenly spaced) so that I can use nutserts and button head hex machine screws to tighten them down. Will be using cabinet grade 1/2" wood, on top of the 1/4" tabs to have a 1/4" recess on the wood to the aluminum. Should reveal nicely.
First step was to make a frame. You see how I screwed up and left an exposed edge (because I dont plan well remember) I will end up filling that in, welding it and sanding it smooth. Will never know)
Untitled by Grant Wilson, on FlickrUntitled by Grant Wilson, on FlickrUntitled by Grant Wilson, on Flickrtest fit success.
It doesn't cover the whole wheel well because the trail kitchen needs an inch for the pin to move, so ill just have to trim around it and deal with it. there is about an inch and a half of space between the trail kitchen and the frame.
Untitled by Grant Wilson, on Flickrmain top corner brace welded and checked for fitment
Untitled by Grant Wilson, on Flickrbattery separation bar for the battery access panel
Untitled by Grant Wilson, on FlickrI hate drilling holes. We have an ironworker that makes quick work of cutting, bending and punching up to 1/4" stainless. 1/4" Aluminum was cake here
Untitled by Grant Wilson, on Flickrand the final piece all welded up and cleaned up. Tabs are there like i mentioned for setting and mounting the wood to. I'm deathly sick right now, so i wont be doing any work today on it, but ill get the other side finished later this week and also another one for the water tank as well.

Advocate III
BOOM
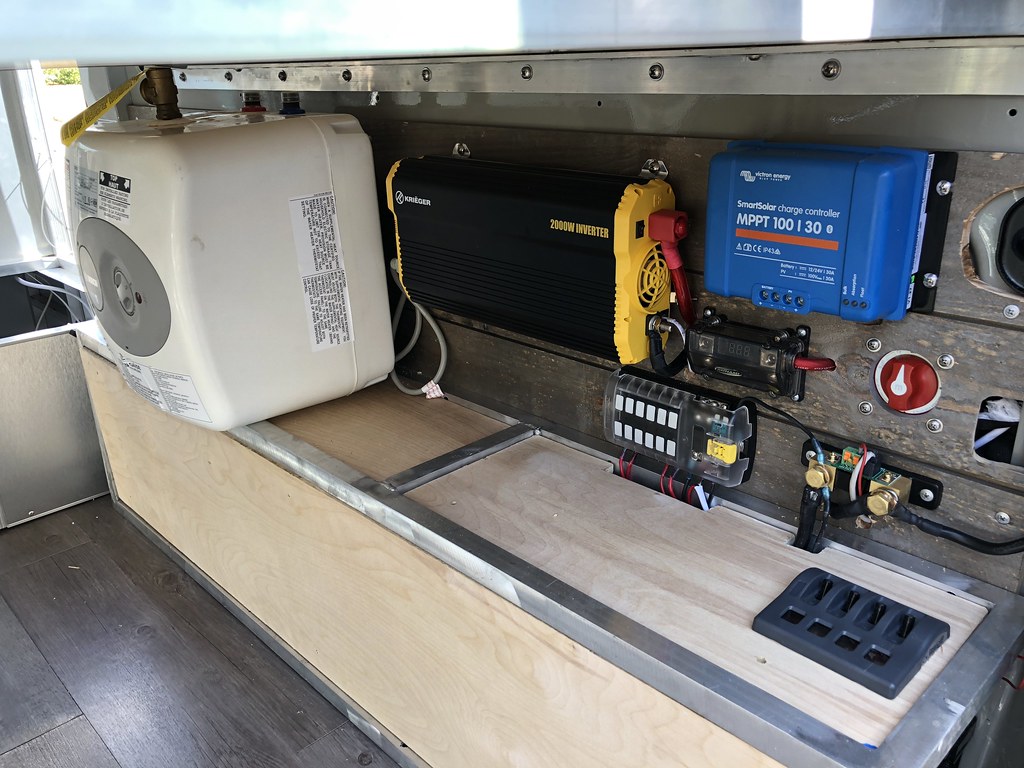
Electric all done (except screwing up a power strip and solar wires, and some 12v and usb plug tap ins)
 Untitled by Grant Wilson, on Flickr
sorting out all the connections and making sure everything is working properly and hooked up correctly so the victron battery monitor can read charging amps and used amps to accurately work
And all together! Waiting on some longer stainless 10-24 to come in to fasten the panels down all the way. but other than that, electrical is golden.
 Untitled by Grant Wilson, on Flickr
 Untitled by Grant Wilson, on Flickr
Electric all done (except screwing up a power strip and solar wires, and some 12v and usb plug tap ins)
Untitled by Grant Wilson, on Flickrsorting out all the connections and making sure everything is working properly and hooked up correctly so the victron battery monitor can read charging amps and used amps to accurately work
And all together! Waiting on some longer stainless 10-24 to come in to fasten the panels down all the way. but other than that, electrical is golden.
Untitled by Grant Wilson, on FlickrUntitled by Grant Wilson, on FlickrAnd another large step forward.
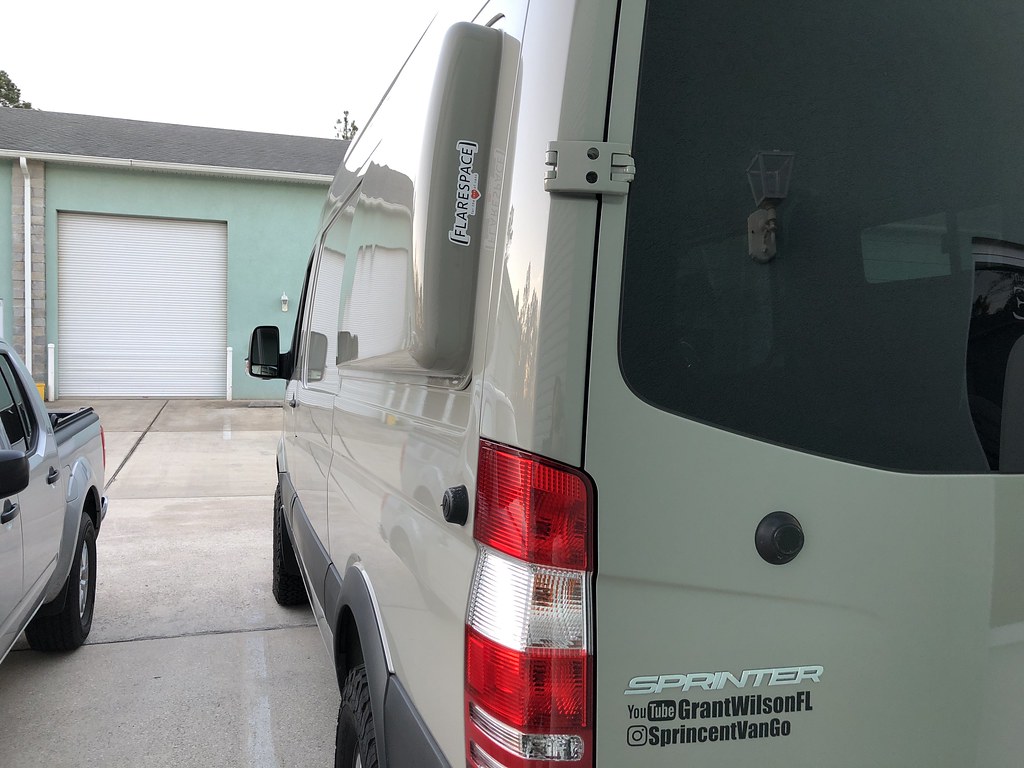
The Flarespace side window flares have arrived, been painted and now at least one of them installed.
http://www.flarespace.com/
 Untitled by Grant Wilson, on Flickr
They pretty much add in like 6" or so allowing you to put a double bed side to side in the van. This saves about 25 inches, extending only 54 inches into the van instead of 76ish. Game changing in a small chassis vehicle (well, relatively right?)
 Untitled by Grant Wilson, on Flickr
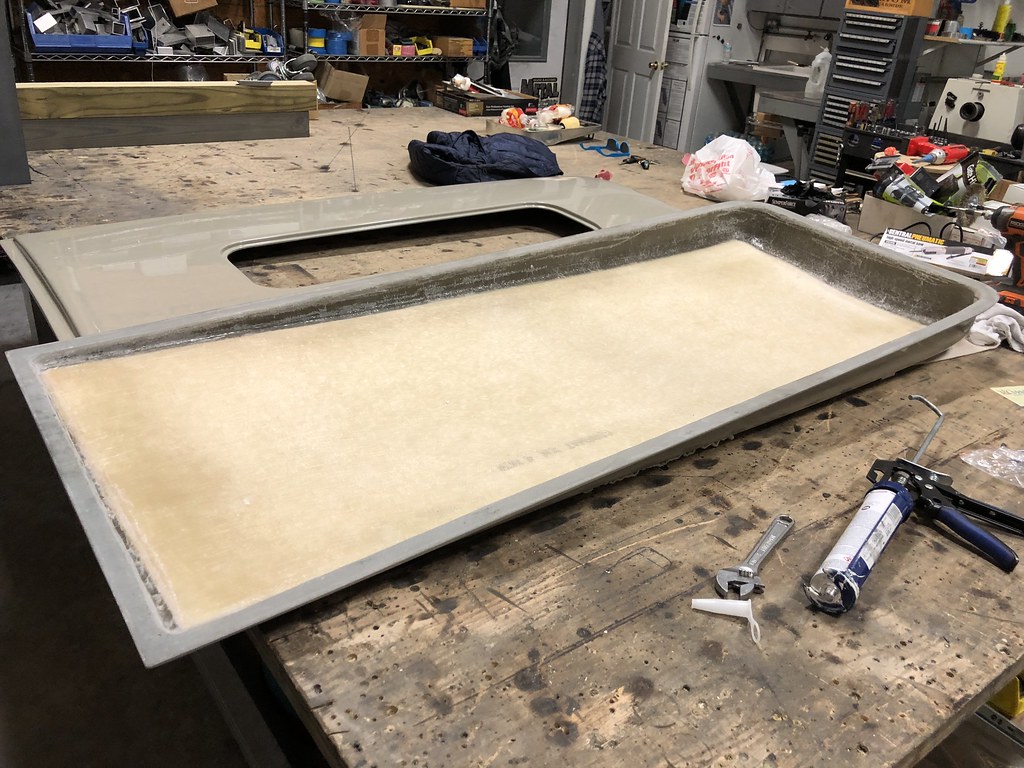
The construction of these things are amazing. One of the beefiest fiberglass parts I have ever handled. When i did a test fit, they actually required zero fitment modification. Unbelievable testament to the team putting these together
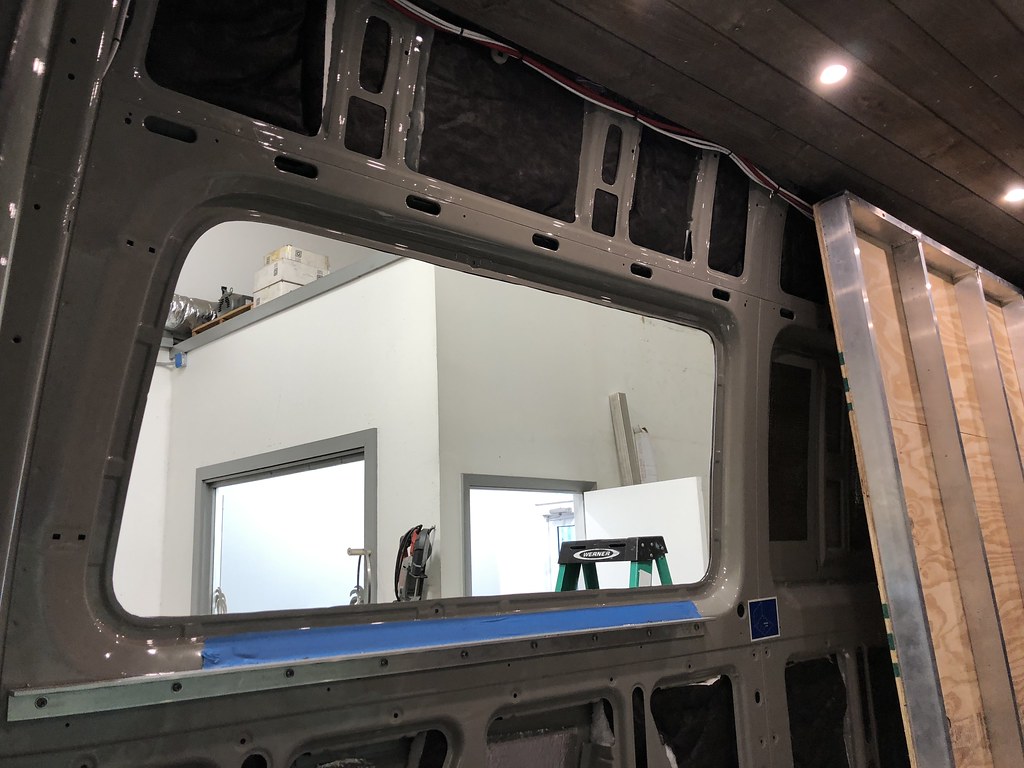
Anyways, what is the first thing you have to do when you want to widen your van? Cut into your very expensive van with an air saw.
 Untitled by Grant Wilson, on Flickr
The van has basically a template already there that you follow. Cut out the center supports and follow the line. Took about 30 minutes to cut it out being careful. Pretty easy actually.
 Untitled by Grant Wilson, on Flickr
From there you have to smooth out the cuts, debur them and make it pretty.
You then have to take some scotch brite, and scuff up the flange area (which you can see when you mock it up). This ensures the great adhesion you can expect from the 3M adhesive they include. Clean it with something after (i used mineral spirits, you can use alcohol as well, whatever)
The next step is the clean the flange on the flares and drop the adhesive on there.
After that, it's just a matter of popping it on, and making so it doesn't move.
 Untitled by Grant Wilson, on Flickr
 Untitled by Grant Wilson, on Flickr
After that you run a bead on the inside flange and smooth it all out and let it dry. After about 4 hours it wasnt moving anymore, but i let it cure overnight before driving so there would be no issue. Took about 4-5 hours total. Now to do the other side...
Also this week, hopefully, ill trim out the inside of the flares, build the water tank bracket over the driver rear wheel well, build the cabinet for the dometic fridge, and put the solar on the rack. Or i'll be lazy and not do anything. Depends on how i feel lol
The Flarespace side window flares have arrived, been painted and now at least one of them installed.
http://www.flarespace.com/
Untitled by Grant Wilson, on FlickrThey pretty much add in like 6" or so allowing you to put a double bed side to side in the van. This saves about 25 inches, extending only 54 inches into the van instead of 76ish. Game changing in a small chassis vehicle (well, relatively right?)
Untitled by Grant Wilson, on FlickrThe construction of these things are amazing. One of the beefiest fiberglass parts I have ever handled. When i did a test fit, they actually required zero fitment modification. Unbelievable testament to the team putting these together
Anyways, what is the first thing you have to do when you want to widen your van? Cut into your very expensive van with an air saw.
Untitled by Grant Wilson, on FlickrThe van has basically a template already there that you follow. Cut out the center supports and follow the line. Took about 30 minutes to cut it out being careful. Pretty easy actually.
Untitled by Grant Wilson, on FlickrFrom there you have to smooth out the cuts, debur them and make it pretty.
You then have to take some scotch brite, and scuff up the flange area (which you can see when you mock it up). This ensures the great adhesion you can expect from the 3M adhesive they include. Clean it with something after (i used mineral spirits, you can use alcohol as well, whatever)
The next step is the clean the flange on the flares and drop the adhesive on there.
After that, it's just a matter of popping it on, and making so it doesn't move.
Untitled by Grant Wilson, on FlickrUntitled by Grant Wilson, on FlickrAfter that you run a bead on the inside flange and smooth it all out and let it dry. After about 4 hours it wasnt moving anymore, but i let it cure overnight before driving so there would be no issue. Took about 4-5 hours total. Now to do the other side...
Also this week, hopefully, ill trim out the inside of the flares, build the water tank bracket over the driver rear wheel well, build the cabinet for the dometic fridge, and put the solar on the rack. Or i'll be lazy and not do anything. Depends on how i feel lol

I love checking out this build. Thanks for the updates and looking forward to more.

bit of an update!
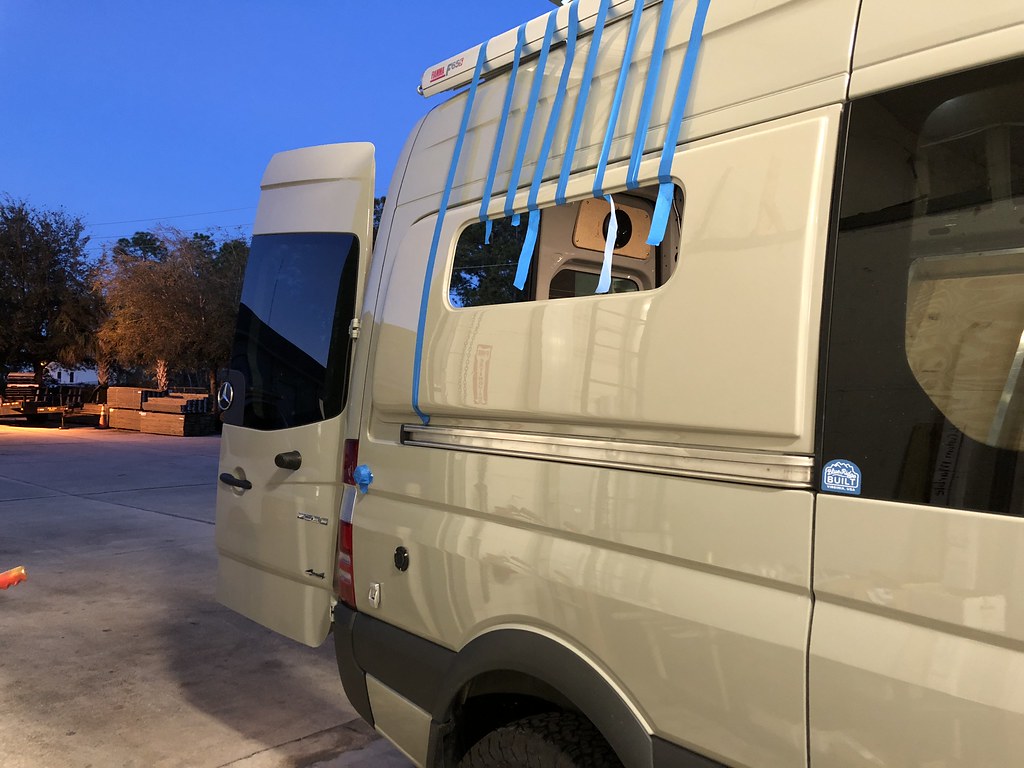
Got the other panel and window in with almost zero fuss. got it down to an hour from start to finish. Pretty easy now at this point. Could bust out a pair of these in an afternoon for sure.
 Untitled by Grant Wilson, on Flickr
 Untitled by Grant Wilson, on Flickr
 Untitled by Grant Wilson, on Flickr
Just as the other side, fitment was awesome and went right on.
Also laid down the wood on the driver wall so i could start building the wheel well cover/water tank holder. The tank will be on top of this with a cover built
 Untitled by Grant Wilson, on Flickr
Got the other panel and window in with almost zero fuss. got it down to an hour from start to finish. Pretty easy now at this point. Could bust out a pair of these in an afternoon for sure.
Untitled by Grant Wilson, on FlickrUntitled by Grant Wilson, on FlickrUntitled by Grant Wilson, on FlickrJust as the other side, fitment was awesome and went right on.
Also laid down the wood on the driver wall so i could start building the wheel well cover/water tank holder. The tank will be on top of this with a cover built
Untitled by Grant Wilson, on Flickr
Traveler III
I got alot done!
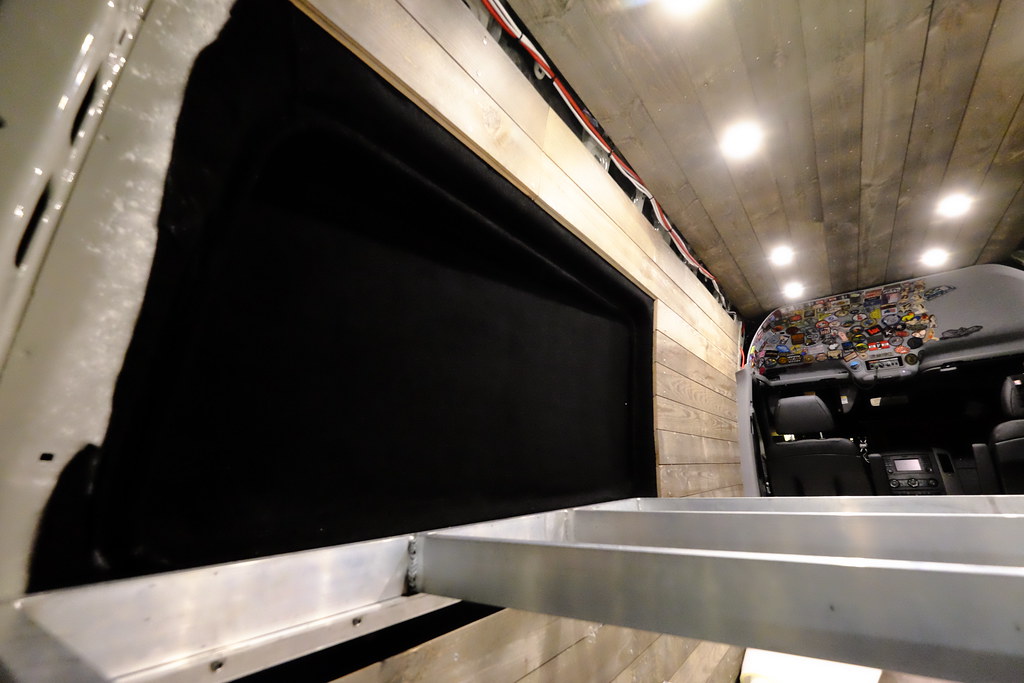
Skinned the driver side about 90%. I have to trim out the rear part back by the door opening and that top part that is exposed will be covered by cabinets, so not worried about that except for a small part on each end.
Passenger side is next up.
Trying to get to a point where i can get the bed platform installed for good and put a mattress in!
 Untitled by Grant Wilson, on Flickr
 Untitled by Grant Wilson, on Flickr
 Untitled by Grant Wilson, on Flickr
 Untitled by Grant Wilson, on Flickr
Skinned the driver side about 90%. I have to trim out the rear part back by the door opening and that top part that is exposed will be covered by cabinets, so not worried about that except for a small part on each end.
Passenger side is next up.
Trying to get to a point where i can get the bed platform installed for good and put a mattress in!
Untitled by Grant Wilson, on FlickrUntitled by Grant Wilson, on FlickrUntitled by Grant Wilson, on FlickrUntitled by Grant Wilson, on Flickr