Enthusiast III
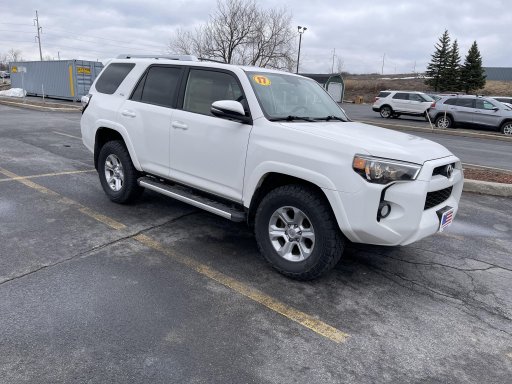
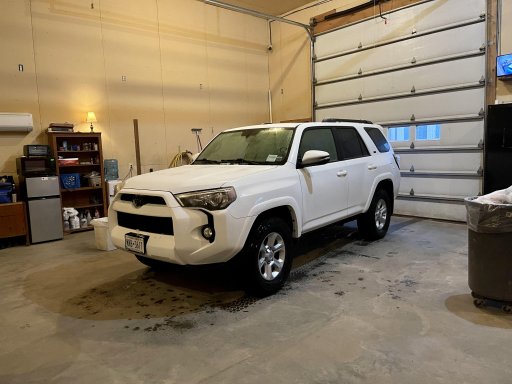
So I recently threw up a post in the general discussion thread about my new vehicle; The 2017 4Runner SR5 premium that I bought at the end of March. The build is coming along nicely so I'm starting a Build Thread. I'll try to include where I bought certain modifications, and what my lead time was and include a little info about the installation. When I purchased it, it was bone stock with around 85k miles on it. The previous owner had installed some Grabber ATx Tires and other than that, nothing was done to it.
The first thing I did after getting it home was to remove the side steps. I found that both myself and my girlfriend ended up stepping over them to get in and out. So off they came.
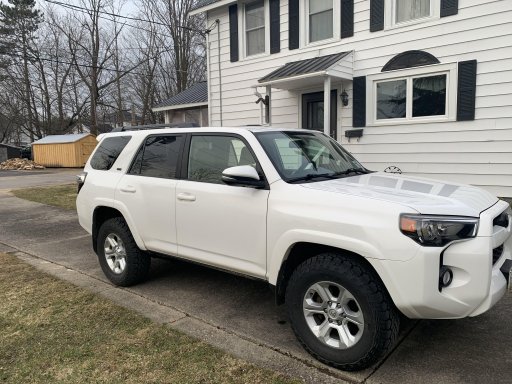
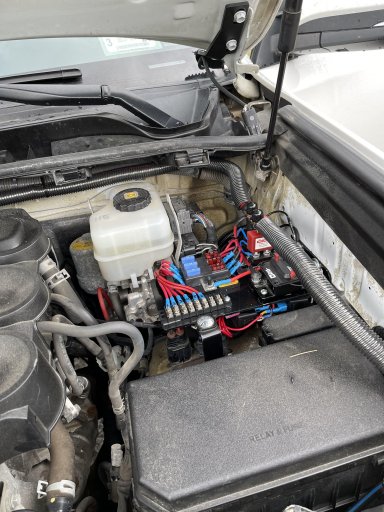
That same week we removed the roof rails and painted them black. I sanded them all with 320gr and cleaned them well with rubbing alcohol before applying 2 coats. We also applied the blackout badge covers to the front and rear badges. My original plan was to completely remove the SR5 badges. The driver side came off without any issues and the paint buffed clean with no ghosting. HOWEVER... the previous owner must have had the passenger side badge fall off at some point and instead of reapplying it with 3M Tape, they used gorilla glue. SO when I pulled it off, clear coat and paint came with it. I used it as an opportunity to paint them and reapply them with the proper 3m tape. Around this time I also installed a dual battery tray and accessory tray from C4fab. The battery tray was $129 and the accessory tray was $29. They came unfinished so I painted them with gloss black rustoleum. Into the battery tray was put a battery that I had from another vehicle which was nearly new. Its just a group 24 starting battery but it will work for now. Linking the batteries is a Redarc dual sensing battery isolator.
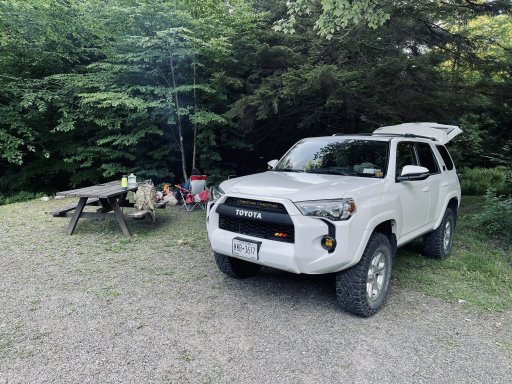
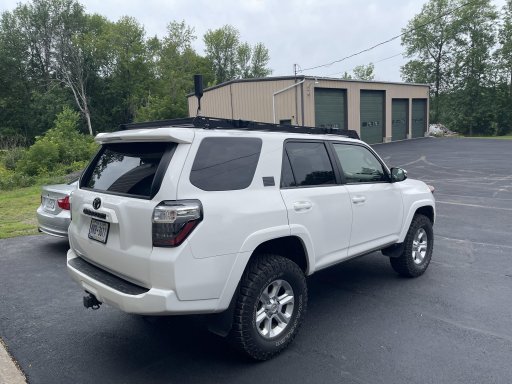
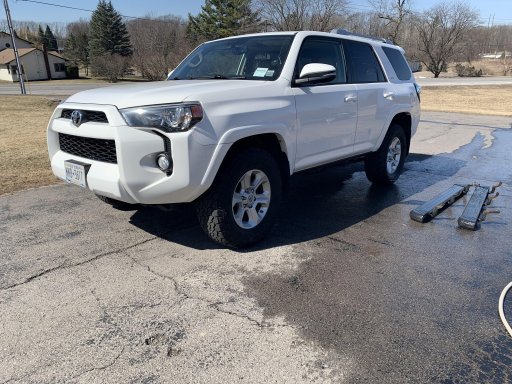
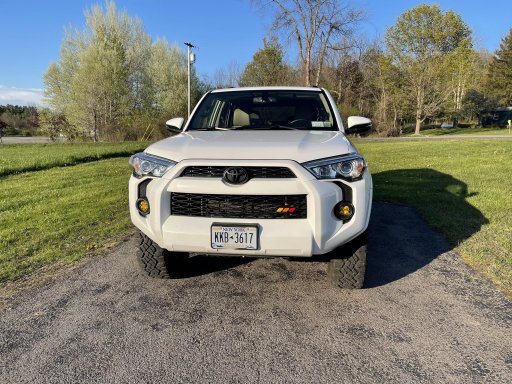
Next step was a lift and tires. I was having trouble getting the ATx tires that came on it to balance properly, A total of one regular and 2 roadforce balancers over a period of a month and they would still wobble and vibrate. Having ruled out all other possible causes I knew I needed to swap out the tires. I wanted to go up to 285/70 r17s and in order to safely clear it needed to be lifted. Not having the money all at once to get a proper lift and tires I opted to get cornfed suspension spacers. I chose the 2/1.5 kit as I don't mind a little bit of rake but I absolutely hate reverse rake. The kit cost me about 165 shipped to my door. I installed it myself over the course of 2 days and all went relatively smoothly. I was not able to loosen the Cam nuts on the LCAs which allows them to hang free for easy removal of the strut, but a trick I discovered was to attach a heavy duty ratchet strap to a hole on the underside of the LCA and ratchet it to the opposite wheel. It was perhaps a little dangerous being under all that tension but it puled the LCA down far enough to remove the strut without a compressor. The rear went in easily but I did have to use a spring compressor to get the second side in place. If you're even remotely inclined with a wrench, you can do this job in about 6-8 hours total. The next day I had my tires mounted and balanced for $100 at a local shop that does nothing but tires and had me in and out in 25min. Then drove directly to an alignment shop and had the front end done. It took them about 2 hours but they brought everything into perfect factory spec with stock UCAs. Total price for the alignment was $129. Below are some before and after pictures of the lift on the stock size tires as well as a photo of the new Goodyear Duratracs.

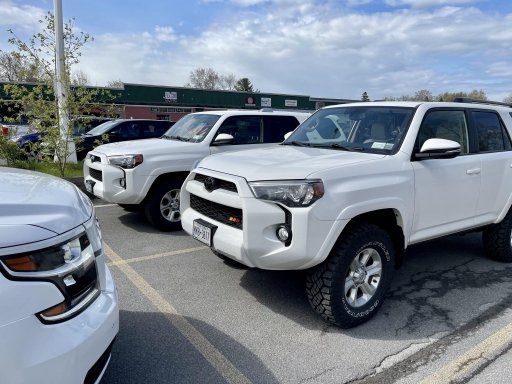
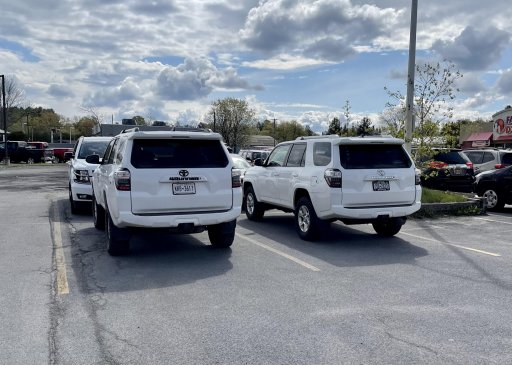
I also found a stock 5th gen and took a few pics side by side for comparison. The height difference is pretty significant.
Around early May I was ready to start upgrading some of the lighting. Not yet having sorted out power distribution, aftermarket fog replacements made the most sensible starting point as they use factory wiring and switch. I knew from the start that I planned to use Baja Designs all the way around so I went with their Squadron fog light replacement for the Toyotas which comes with plug and play harnesses and direct fit brackets. I opted for the Non SAE versions with wide cornering optics for max output. They installed in about an hour and look great in my opinion. The output is AMAZING. They easily out shine my low beams and throw a much taller and wider beam of light. I ordered them on Ebay from the seller rudys_performance_parts for $337.46 shipped and they arrived within 3 days.
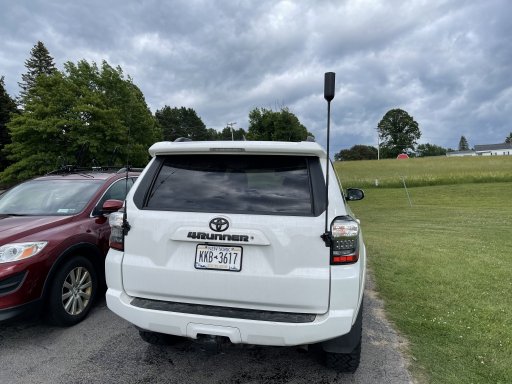
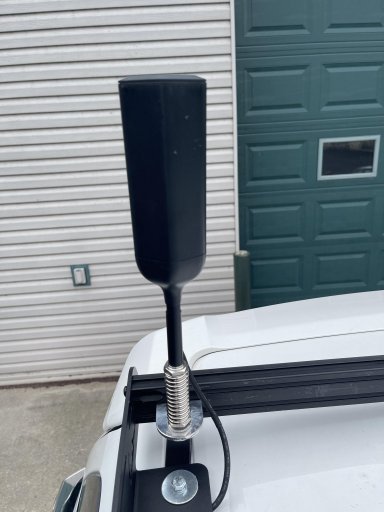
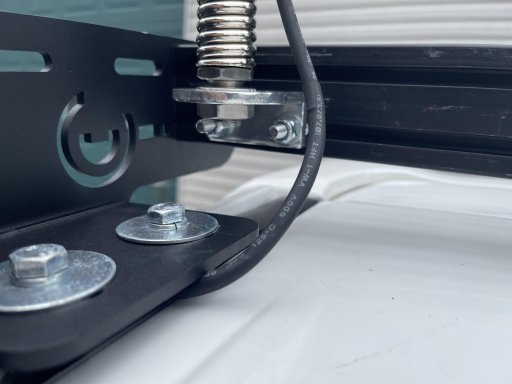
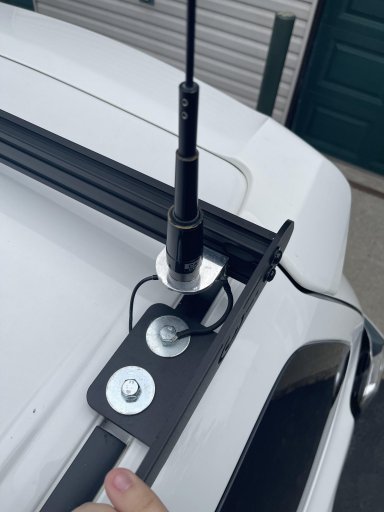
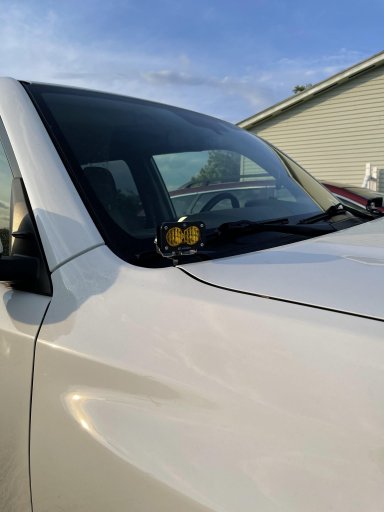
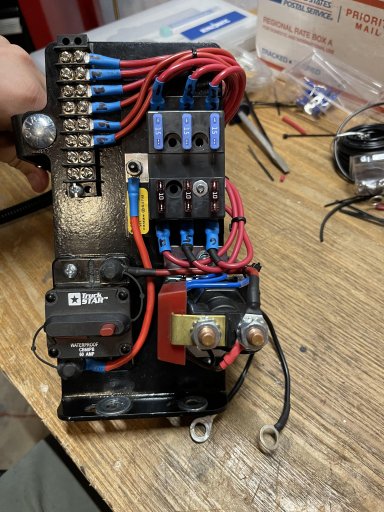
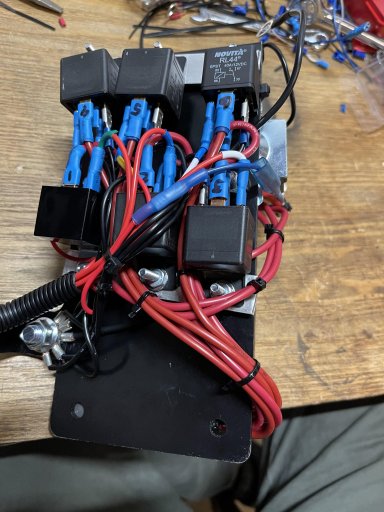
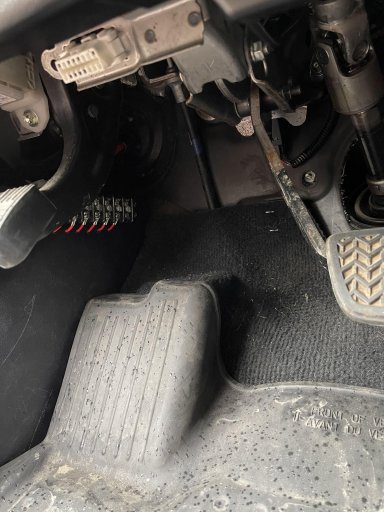
This past week I ordered some more Baja Designs to round out the forward facing lighting. I also ordered a TRD pro grill from TacoVinyl to accommodate one of those items. I got a pair of S2 Sports and caliraised ditch light brackets. and a 20" S8 Bar to go in the upper grill section. The ditch lights are installed now and pictured below. I'm still waiting on the grill to arrive which has a 2-4week lead time. Once that's installed ill update the thread. I also finished my power distribution center this past week. I work for a private ambulance company and some time ago, an old ambulance was going to scrap and was being stripped of anything of use. I got my hands on a few terminal strips, relays, fuse blocks and some breakers. I put them all to good use in my power distribution center under the hood. Now that its all hooked up, it allows me to just plug an accessory into the strip under the hood, and add a switch to the corresponding terminal strip under the dash. The underside of the accessory tray where the relays were mounted got a little messy but its functional and all the hot leads are well isolated. It works well and it cost me very little.
As of right now that's all that's been done. But I do have plans for a roof rack with lighting and some other accessories in the very near future. more to come.
The first thing I did after getting it home was to remove the side steps. I found that both myself and my girlfriend ended up stepping over them to get in and out. So off they came.
That same week we removed the roof rails and painted them black. I sanded them all with 320gr and cleaned them well with rubbing alcohol before applying 2 coats. We also applied the blackout badge covers to the front and rear badges. My original plan was to completely remove the SR5 badges. The driver side came off without any issues and the paint buffed clean with no ghosting. HOWEVER... the previous owner must have had the passenger side badge fall off at some point and instead of reapplying it with 3M Tape, they used gorilla glue. SO when I pulled it off, clear coat and paint came with it. I used it as an opportunity to paint them and reapply them with the proper 3m tape. Around this time I also installed a dual battery tray and accessory tray from C4fab. The battery tray was $129 and the accessory tray was $29. They came unfinished so I painted them with gloss black rustoleum. Into the battery tray was put a battery that I had from another vehicle which was nearly new. Its just a group 24 starting battery but it will work for now. Linking the batteries is a Redarc dual sensing battery isolator.
Next step was a lift and tires. I was having trouble getting the ATx tires that came on it to balance properly, A total of one regular and 2 roadforce balancers over a period of a month and they would still wobble and vibrate. Having ruled out all other possible causes I knew I needed to swap out the tires. I wanted to go up to 285/70 r17s and in order to safely clear it needed to be lifted. Not having the money all at once to get a proper lift and tires I opted to get cornfed suspension spacers. I chose the 2/1.5 kit as I don't mind a little bit of rake but I absolutely hate reverse rake. The kit cost me about 165 shipped to my door. I installed it myself over the course of 2 days and all went relatively smoothly. I was not able to loosen the Cam nuts on the LCAs which allows them to hang free for easy removal of the strut, but a trick I discovered was to attach a heavy duty ratchet strap to a hole on the underside of the LCA and ratchet it to the opposite wheel. It was perhaps a little dangerous being under all that tension but it puled the LCA down far enough to remove the strut without a compressor. The rear went in easily but I did have to use a spring compressor to get the second side in place. If you're even remotely inclined with a wrench, you can do this job in about 6-8 hours total. The next day I had my tires mounted and balanced for $100 at a local shop that does nothing but tires and had me in and out in 25min. Then drove directly to an alignment shop and had the front end done. It took them about 2 hours but they brought everything into perfect factory spec with stock UCAs. Total price for the alignment was $129. Below are some before and after pictures of the lift on the stock size tires as well as a photo of the new Goodyear Duratracs.
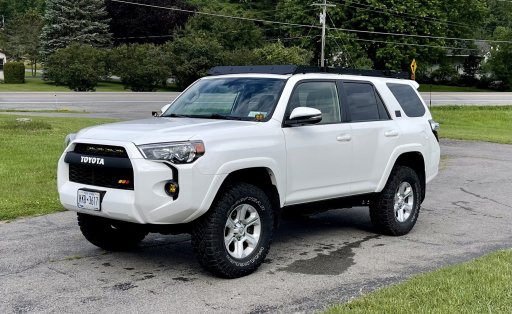
I also found a stock 5th gen and took a few pics side by side for comparison. The height difference is pretty significant.
Around early May I was ready to start upgrading some of the lighting. Not yet having sorted out power distribution, aftermarket fog replacements made the most sensible starting point as they use factory wiring and switch. I knew from the start that I planned to use Baja Designs all the way around so I went with their Squadron fog light replacement for the Toyotas which comes with plug and play harnesses and direct fit brackets. I opted for the Non SAE versions with wide cornering optics for max output. They installed in about an hour and look great in my opinion. The output is AMAZING. They easily out shine my low beams and throw a much taller and wider beam of light. I ordered them on Ebay from the seller rudys_performance_parts for $337.46 shipped and they arrived within 3 days.
This past week I ordered some more Baja Designs to round out the forward facing lighting. I also ordered a TRD pro grill from TacoVinyl to accommodate one of those items. I got a pair of S2 Sports and caliraised ditch light brackets. and a 20" S8 Bar to go in the upper grill section. The ditch lights are installed now and pictured below. I'm still waiting on the grill to arrive which has a 2-4week lead time. Once that's installed ill update the thread. I also finished my power distribution center this past week. I work for a private ambulance company and some time ago, an old ambulance was going to scrap and was being stripped of anything of use. I got my hands on a few terminal strips, relays, fuse blocks and some breakers. I put them all to good use in my power distribution center under the hood. Now that its all hooked up, it allows me to just plug an accessory into the strip under the hood, and add a switch to the corresponding terminal strip under the dash. The underside of the accessory tray where the relays were mounted got a little messy but its functional and all the hot leads are well isolated. It works well and it cost me very little.
As of right now that's all that's been done. But I do have plans for a roof rack with lighting and some other accessories in the very near future. more to come.
Attachments
-
 445.5 KB Views: 31