2016 T4R Trail

  • HTML tutorial

itarin

Rank IV
Launch Member

Advocate III

1,272
Jacksonville, Florida
Member #

2997

Ride quality is slightly stiffer than stock, but not so harsh as say putting racing springs into a 350Z. It still has street manners, and a big improvement on the nose dive.
I LOL'd when I read this, I had 800lb springs on my Track Z when we ran at RRR, so i get you on this aspect.
Rig looks good, keep the updates going, just starting my build.
 

JusticeZ33

Rank IV
Launch Member

Advocate II

1,018
Member #

1607

@itarin thanks man. Good to see another Z driver out there...by the way just a shot in the dark since you said you ran at RRR...is your first name by chance Ivan?
 

JusticeZ33

Rank IV
Launch Member

Advocate II

1,018
Member #

1607

@itarin lol small world. This is Gene, the White Z33. Good to see you on.

@TheSkiingJeep yeah Opt7 is great especially for the price. I am rather happy so far and have not had any issues.
 

JusticeZ33

Rank IV
Launch Member

Advocate II

1,018
Member #

1607

Yeah I have noticed that too but they keep the rocks away good and are a good step for working on things in the rack. I find I use them a lot for loading the rack.

Sent from my ONEPLUS A3000 using OB Talk mobile app
 
  • Like
Reactions: 4randal

Garry

Rank I
Launch Member

Contributor I

233
San Clemente
Member #

2665

Good to see pictures of those on.
Awaiting shipment of them.
I'm hoping... they allow the wife to enter the truck more easily.


Sent from my iPhone using OB Talk
 

mase001

Rank V
Launch Member

Advocate II

2,517
85018
Member #

2783

Where did the suspension end up settling at? I am installing the toytec Ultimate lift with Bilsteins all the around as well as the 650lb springs up front. Have Camburg UCA's as wel. Just wondering where it ended!

Thanks!
 

JusticeZ33

Rank IV
Launch Member

Advocate II

1,018
Member #

1607

With the steel bumper, the front settled around 2" lift on the red springs. The rear has not dropped much from first install but that will change once I get a rear bumper. The rake of the car is noticable when looking at it but not overly so.

Sent from my ONEPLUS A3000 using OB Talk mobile app
 

mase001

Rank V
Launch Member

Advocate II

2,517
85018
Member #

2783


Thanks for the info! I am going with the SSO slimline bumper and winch. Was figuring it would settle about .5" in front since it's a lightweight bumper comparatively. I'm happy as it sits and won't be sad if it stays the same or drops a little in front! One hell of a nice ride for the money!!!
 

jrbechthold

Rank V
Launch Member

Influencer II

1,632
Little Elm, Texas
Member #

1860


Thanks for the info! I am going with the SSO slimline bumper and winch. Was figuring it would settle about .5" in front since it's a lightweight bumper comparatively. I'm happy as it sits and won't be sad if it stays the same or drops a little in front! One hell of a nice ride for the money!!!
Great looking truck... I am looking at the SSO slimline bumper as well.
 

jgleas114

Rank 0

Traveler I

Build goal is to build an overland vehicle that is able to aid me in getting to remote photography spots and to explore the world. This is my first truck build but I have worked on race cars for many years.

List of modifications so far:
- ABR Diff breather kit
- 275/70 17 KO2s
- CBI Hood mount Ditch Light brackets
- OP7 Ditch light
- OP7 interior LED strips
- XenonDepot HID low beams
- Toytec Ultimate Kit
- Total Chaos UCA
- Metal Tech Rock Sliders
- Warn VR10000 Winch
- GOBI Stealth Rack w/ accessories
- Demello Offroad Front Bumper
- Yakima Skybox 16

Modification awaiting install (as soon as I find time):
- 20" OP7 Flood light
- NVU switch panel

Loadout Kit
- MaxTrax
- Hi Lift Jack
- ARB Snatch strap
- Smittybilt hitch and bow shackle
- SuperFlow Air Compressor
- ARB Deflator
- Self build medical kit
- Navigation Tablet
- InReach
- Custom Splice Soft Shackles


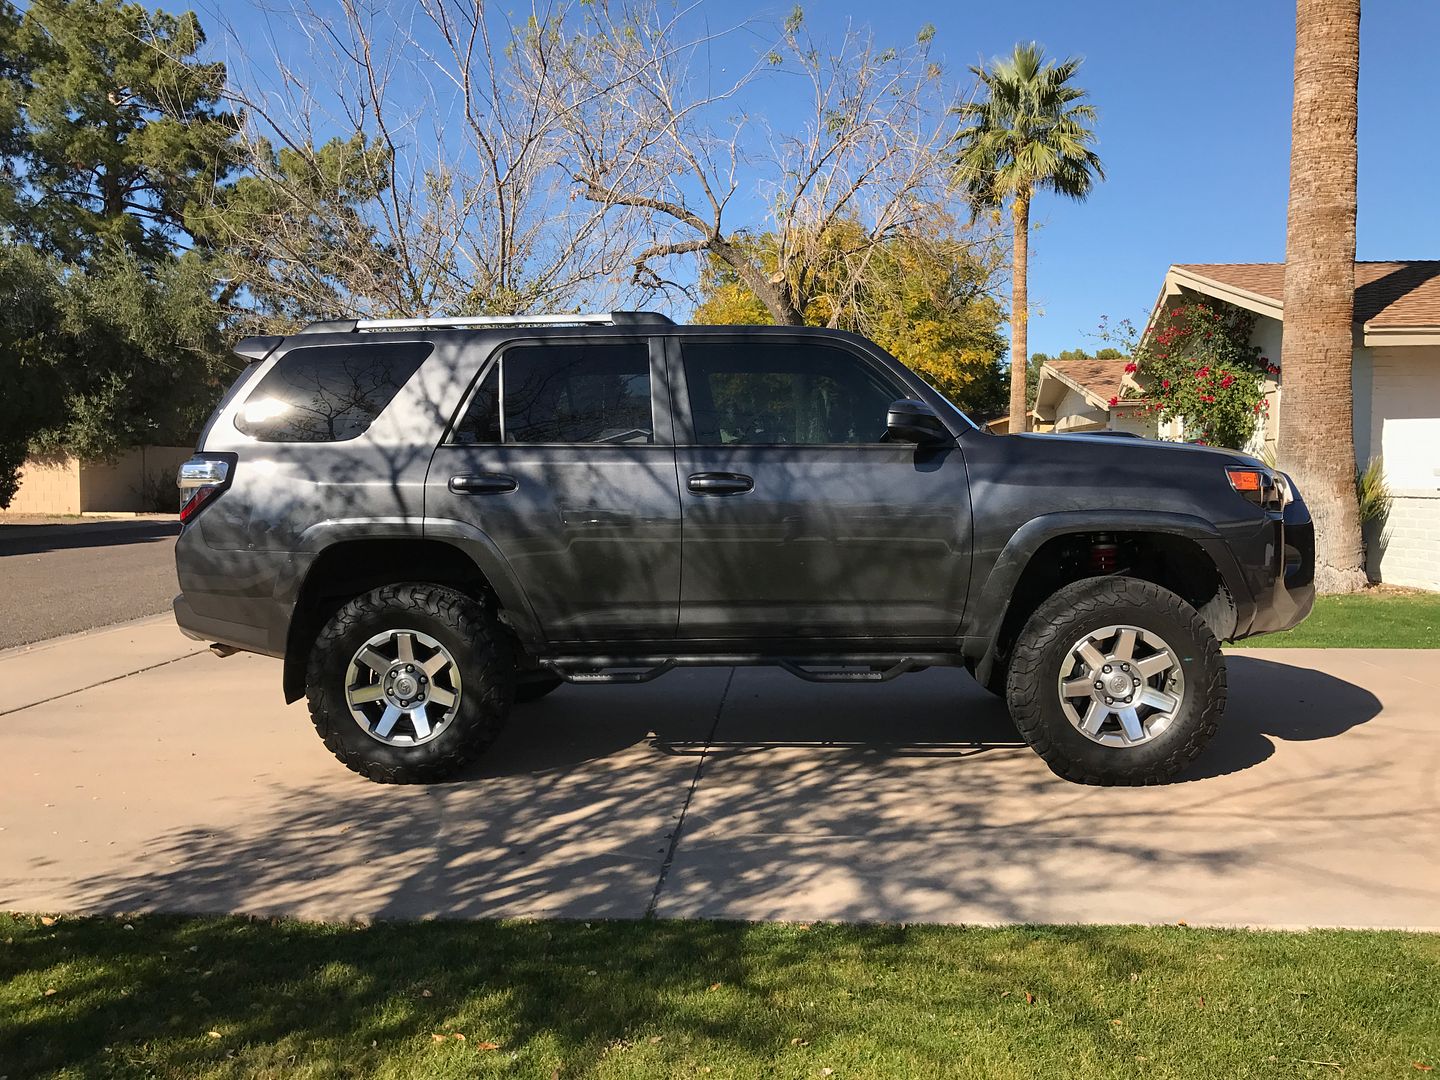
Current Picture of build:

View attachment 11832
What is the height of your lift? Great looking rig. Order my 4 runner this week
 

JusticeZ33

Rank IV
Launch Member

Advocate II

1,018
Member #

1607

@jgleas114 ^ what he said. its about 2" in the front and 3" in the rear but that is with a 170lb steel bumper and winch added in the front. remember though that is is a coilover set up so you can also adjust it quite a bit to meet what you want in the front. In the rear you are limited to the 3" lift. I have a steel rear bumper on order so once that comes in we will see if the rear drops a bit.
 

GSDforLife

Rank IV
Launch Member

Advocate II

1,080
Hudson Valley, NY
Member #

5136

Really enjoyed going through the build. Looks great. If I may, where did you get that roof net? As we test for space for our upcoming trip, we are realizing we are quickly challenged for space. This would be a very helpful solution. Thanks.
 

JusticeZ33

Rank IV
Launch Member

Advocate II

1,018
Member #

1607

@GSDforLife ; I got the roof net off of Amazon. It is meant to be a cargo net to mount to the floor to keep cargo from shifting but I adapted it for a roof rack. Not the strongest thing so only super light stuff like a paper towel roll or my light jacket go up there. Blue Ridge Overland Gear sells a nice set up but it costs more then my $20 roof net. I have actually been thinking of shifting the mount points to the hanger hooks in the roof by swaping out the bolts for eye bolts and tying the ends to the eye bolts for more support. To reduce droop, i have thought about getting 550 paracord and weaving it through to give the center better support and structure.
 
  • Like
Reactions: GSDforLife

JusticeZ33

Rank IV
Launch Member

Advocate II

1,018
Member #

1607

A few weekends ago I installed a 40" Extreme LED Pro 2D light bar and their 3" fog lights on the front of the truck and two 6" LED bars out the back for camp light/reverse light on the trails. I re-cut and soldered new automotive grade weatherproof connectors and re-sheathed all the wires in nylon.

For the routing of wires from the roof into the engine bay, I was able to fit a one power and one ground 14ga wire down each side of the windshield. I used plastic pry bars (interior removal bars) to move and stuff the wire under the weather strip without pulling the entire weather strip out. All wires then went into an SPod SE. Originally I was going to make my own fuse box system since the SPod is so expensive but as I read about it, I realized that my DIY jerry rigging skills would be utter crap compared to the capabilities and safety that the SPod SE provides. The circut board acts like an electronic breaker system eliminating the need for fuses (dont ask me how, not a technical guys).

From the SPod, I routed the HD control panel into the cabin and put it up on the roof. Cable routing went through the firewall, up through the driver side A-piller (but behind the side airbags), along the headliner

Wiring1.jpg
wiring2.jpg
SPod.jpg
SPod HD.jpg
rearlights.jpg
InTown.jpg
 

GSDforLife

Rank IV
Launch Member

Advocate II

1,080
Hudson Valley, NY
Member #

5136

A few weekends ago I installed a 40" Extreme LED Pro 2D light bar and their 3" fog lights on the front of the truck and two 6" LED bars out the back for camp light/reverse light on the trails. I re-cut and soldered new automotive grade weatherproof connectors and re-sheathed all the wires in nylon.

For the routing of wires from the roof into the engine bay, I was able to fit a one power and one ground 14ga wire down each side of the windshield. I used plastic pry bars (interior removal bars) to move and stuff the wire under the weather strip without pulling the entire weather strip out. All wires then went into an SPod SE. Originally I was going to make my own fuse box system since the SPod is so expensive but as I read about it, I realized that my DIY jerry rigging skills would be utter crap compared to the capabilities and safety that the SPod SE provides. The circut board acts like an electronic breaker system eliminating the need for fuses (dont ask me how, not a technical guys).

From the SPod, I routed the HD control panel into the cabin and put it up on the roof. Cable routing went through the firewall, up through the driver side A-piller (but behind the side airbags), along the headliner

View attachment 25054
View attachment 25055
View attachment 25056
View attachment 25057
View attachment 25058
View attachment 25059
I have to do the sPod. Looks great! Very nice job