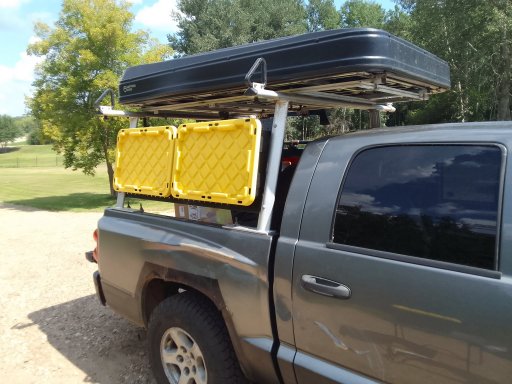
2006 Dodge Dakota Quad Cab 4wd SLT - "Rumble"

  • HTML tutorial

CR-Venturer

Rank VI
Launch Member

Traveler III

3,372
Ardrossan, AB, Canada
First Name
Jas
Last Name
Spr
Member #

16340

Thanks for sharing the build in progress! Loved my 95 Dakota. Never built it out because I was at sea, workups and deployment, most of the time. Then parted with it because a carseat in the extended cab without back doors sucked. Have fun with yours!
Yeah, I gotta say, the four door model really makes hauling kids around much easier. The doors on the third gen open almost 90 degrees, which really helps too. Cheers!
 
  • Like
Reactions: JeepingMike

Motohead1

Rank IV

Enthusiast III

But isn't the 2nd gen a 6 lug wheel, whereas they went to a 5 lug with the third gen?
Correct. Thats what I said. You already have the 5 lug third gen rear that matches the Dana 44s that came in the 70s fords. I was saying I had to swap in a 3rd gen 9.25 rear to match the cheap and plenty-full 5 lug dana 44 that has the same 65" WMS. It was very much worth it. ;) But if you have access to a cheap rubicon axle then that 1" less probably wont bother you.
 

CR-Venturer

Rank VI
Launch Member

Traveler III

3,372
Ardrossan, AB, Canada
First Name
Jas
Last Name
Spr
Member #

16340

But isn't the 2nd gen a 6 lug wheel, whereas they went to a 5 lug with the third gen?
Correct. Thats what I said. You already have the 5 lug third gen rear that matches the Dana 44s that came in the 70s fords. I was saying I had to swap in a 3rd gen 9.25 rear to match the cheap and plenty-full 5 lug dana 44 that has the same 65" WMS. It was very much worth it. ;) But if you have access to a cheap rubicon axle then that 1" less probably wont bother you.
Oooooh, now I get what you're saying, thanks! We have a wrecker nearby who has a ton of old vehicles on his lot and is a very reasonable guy, so it's definitely something to think about.
 

CR-Venturer

Rank VI
Launch Member

Traveler III

3,372
Ardrossan, AB, Canada
First Name
Jas
Last Name
Spr
Member #

16340

On the subject of lifting the Dakota front end, I've been doin some thinks.

I looked into the strut spacers available for it. I found out that a 1.9" spacer equals a 3" lift due to suspension geometry, and similarly 1.25 = 2", 1.6 = 2.5"

I had previously concluded that I had a very large spacer, like 3.7" thick, however after some research into Daystar, the manufacturers of the lift installed on mine and re-examining the strut assembly, I think I was wrong. Unfortunately, I think what I have is a 1.25" spacer resulting in a 2" lift, although it's difficult to tell when the struts are installed. I'm not sure what I'm going to do when it comes time to update the suspension, however I'm pretty sure I don't want to go any higher than what I have now. I'm surprised that it seems to bind so much with only a 2" lift, especially given that all the research I've done into lifting IFS says 2" is safe.

I'll probably just wheel it and not worry about it. lol When it comes time to replace the front struts, I will do an in depth consideration of what to do.
 
  • Like
Reactions: jscusmcvet

CR-Venturer

Rank VI
Launch Member

Traveler III

3,372
Ardrossan, AB, Canada
First Name
Jas
Last Name
Spr
Member #

16340

So I finally decided to hook up my CB radio. Eventually, I also plan to get a cheapo UHF programmed with the LADD and FSR channels, but I really like my CB and I'm curious if it will work better/be more popular in Alberta than mountainous BC, where its effectiveness is limited.

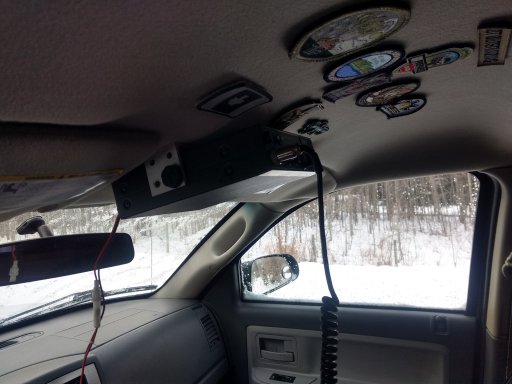
So I tried every spot I could think of, but honestly, CB radios are pretty big and the room in the Dakota's cab is very limited. I finally settled on removing the map lights and screwing it into the plastic frame above the headliner. There were two perfect spots to drill for the mounting screws.
IMG_20230128_111742465_HDR.jpg
Eventually I may buy some slightly longer brackets to mount this a little bit more level, but I can see the readout and controls well enough, so this will do for now. I may also try to rig up a way to have the map lights attached to the bottom of the radio so I still have the functionality.

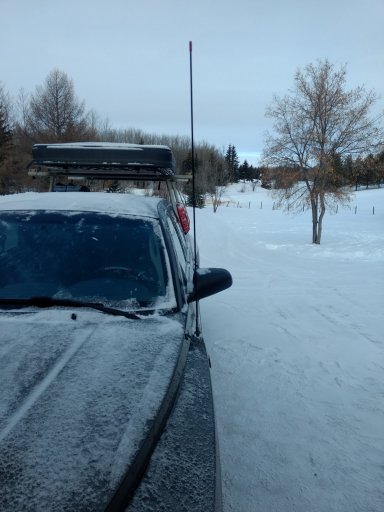
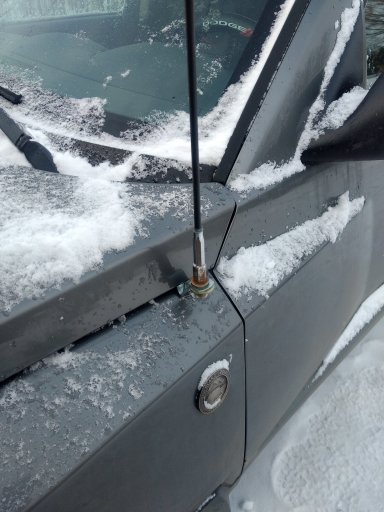
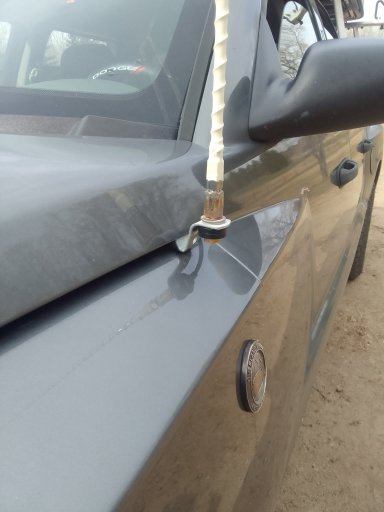
I also fabbed up a hood mount from some scraps of a broken come along I had laying around. I decided that a hood area mount was the simplest and easiest way of running the cables, so that everything goes forward instead of trying to run the cable out the cab vents behind the rear seats or something.
IMG_20230128_111728047.jpg
There's only barely enough room for the coax connector, so I may end up going with something like a firestik fire ring connector eventually, but for now this will do.
IMG_20230128_111734162.jpg
Next I have to find some electrical wire to hook up the radio to the battery, and then hook up the antenna and tune it. When I find some power cable, I'm going to park in the garage to let it all warm up before I start prying trim panels off, since they tend to get quite brittle in this -20 weather.
 
  • Like
Reactions: jscusmcvet

CR-Venturer

Rank VI
Launch Member

Traveler III

3,372
Ardrossan, AB, Canada
First Name
Jas
Last Name
Spr
Member #

16340

So I got the CB all hooked up and it works, with the SWR being okay but not great. I suspect the biggest culprit is the old coax cable I'm using. It was on the CR-V previously, and when my father in law salvaged it for me, he nicked the sheathing on the cable. I taped up the spot, but that's probably a factor in the not-great SWR. It's at least within a reasonable working range, however, certainly good enough for convoy work. Eventually I'll replace it with a firestik fire ring cable.

Unfortunately I recently found out the truck needs $2000 of repairs. I managed to get it down to $1350 by sourcing some of the most expensive parts online, but I found out the website I ordered from can be a bit shady in their dealings with customers - sending the wrong parts, taking forever to deliver, refusing to take responsibility when they screw up etc. I flat out told them not to screw with me and exactly the consequences that will result if they do, up to and including a lawsuit, so hopefully they take the hint and get their act together on this order. There are some reviews where they got it right and the customer received the right parts on time, so I'm hoping I'm one of those.

I can't feel to bad about having to shell out the bucks for this considering it's all parts that one expects to wear out eventually on a truck that's 17 years old with 317,000km+ on the clock, especially in the harsh climate of Northern Canada: front wheel bearing, inner tie rod, front drive shaft CV joint seized, intermediate steering shaft U-joints seized up, leaky rear diff pinion seal.

The upshot is that once all this stuff is replaced, it should drive almost like a new truck! Looking forward to that, if not the repair bill. I will update once everything is fixed.
 

CR-Venturer

Rank VI
Launch Member

Traveler III

3,372
Ardrossan, AB, Canada
First Name
Jas
Last Name
Spr
Member #

16340

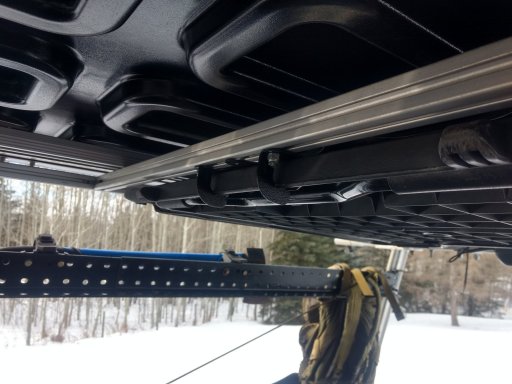
Rigged something up I've been mulling over for a while. I've wanted to integrate the CR-V table into the new rig somehow ever since I put the rack on, but I wasn't sure of the best way to do it. Finally it dawned on me that the wheelbarrow mounting brackets I've had kicking around for a couple years might be just the ticket, and indeed they were!

I just had to cut some notches into the edge of the table to allow it to fit into the brackets, but this has the advantage of preventing side to side movement, so the table cannot slide out sideways. The awesome thing is, the latch has a built in locking mechanism so that you have to push up on the table to get the latch to be able to open by sliding toward the tailgate. Seems quite secure.
table1.jpg
table2.jpg
 
  • Like
Reactions: Motohead1

CR-Venturer

Rank VI
Launch Member

Traveler III

3,372
Ardrossan, AB, Canada
First Name
Jas
Last Name
Spr
Member #

16340

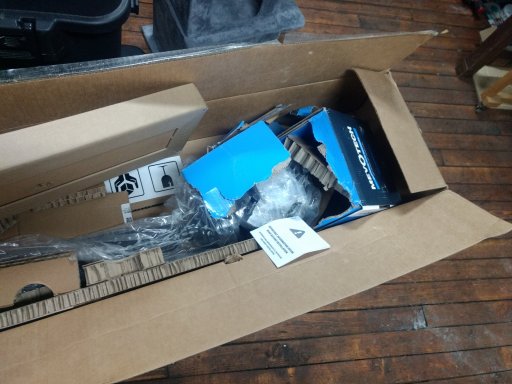
Got my parts today. It seems they sent what I ordered, and the parts themselves seem to be in good condition, which is more than I can say for the packaging lol. Luckily these are big chunky parts not easily damaged.
 

Attachments

  • Like
Reactions: DintDobbs

CR-Venturer

Rank VI
Launch Member

Traveler III

3,372
Ardrossan, AB, Canada
First Name
Jas
Last Name
Spr
Member #

16340

So I got the work done March 1st (most of it, more on that shortly) and I ended up saving a bundle, even with having to pay to have the front drive shaft lengthened at a drive shaft shop because I was a dummy and bought the wrong one. So there's no more horrid wheel bearing noise and the steering is now nice and smooth thanks to the new steering shaft, and the rear pinion doesn't leak anymore.

That's the good news.

The bad news is they didn't do the tie rod because it requires an alignment afterward, and lo and behold, now the passenger side wheel bearing is starting to go a little bit, and the mechanic recommended not having to do the alignment twice. So now I have to buy a new hub for the passenger side to get that work done. Not a huge deal, but it gets worse...

The new drive shaft in the front was definitely necessary, because the old one fell apart when they removed it, but after installing the new one there is still a problem in the transfer case. It's making sporadic clunking sounds and causing minor bumps and lurches. A new one of those is $1500 for the part and $210 for the labour to swap it. I could get a used one for about $500, but I did a little bit of research into it, and I felt certain it must be a slack chain. Apparently chain stretch is a common issue on these T-cases that can cause exactly these symptoms, but I did the test today that involves jacking up the truck, putting it in neutral and engaging 4wd, then crawling under it and turning the front drive shaft by hand - if you get a 1/4 turn or more, your chain is too slack. Unfortunately the T-case passed the test, which suggests something else may be wrong - broken teeth, a problem with the clutch perhaps. I can't be certain, though, so I may take the cover off the t case to investigate further. My wheels seem a bit stiff to turn by hand, so perhaps that is masking the slackness.

Then there's the worst news...last night I had a very harsh downshift while driving home. I was climbing a hill, and when it downshifted, it slammed hard and threw an engine code. One of the most common issues on Chrysler transmissions that can cause a hard shift is the input shaft speed sensor going bad. It's a $40 part held in by 1 bolt and it's not that hard to reach, so I figured I would go ahead and just change it out. The mechanic whose video I watched on how to do it said that something like 90% of the time, this little sensor is the problem and solves the hard shift.

Well it didn't. On my test drive, I got the same hard downshift and code light when exiting the freeway. It did confirm something for me, though - it only shifts hard when downshifting from the highest gear. All the rest of the gear shifts were perfectly smooth, both up and down the range. Back to the mechanic I go...sigh.
 
  • Like
Reactions: DintDobbs

DintDobbs

Rank V

Advocate III

1,412
First Name
Daniel &
Last Name
the Vulture
@CR-Venturer Keep your head up, at least you found these problems when you weren't on a month-long trip out of state, or some such. Even the inconveniences are often blessings, since they could be a lot more inconvenient.

Make a list... and check parts associated with parts that need replaced.

I have a hub going on wrecked and am replacing hubs and bearings on both sides, because, well, they're both ancient - if you replace both sides, it will cost more up front, but you will spend much less garage time in the long run, which means more time spent enjoying your rig.

Hope you get things worked out soon, needing repairs is no fun!
 

CR-Venturer

Rank VI
Launch Member

Traveler III

3,372
Ardrossan, AB, Canada
First Name
Jas
Last Name
Spr
Member #

16340

@CR-Venturer Keep your head up, at least you found these problems when you weren't on a month-long trip out of state, or some such. Even the inconveniences are often blessings, since they could be a lot more inconvenient.

Make a list... and check parts associated with parts that need replaced.

I have a hub going on wrecked and am replacing hubs and bearings on both sides, because, well, they're both ancient - if you replace both sides, it will cost more up front, but you will spend much less garage time in the long run, which means more time spent enjoying your rig.

Hope you get things worked out soon, needing repairs is no fun!
Yeah, you've got a good point there! Could well be blessings in disguise.

I do hope the transmission issue isn't a fatal or exceptionally expensive one. I was really hoping that input shaft sensor would do it, but for $40 it's not a big deal to have swapped in a new one.

I think I will have to start keeping notes on this thing. It looks like it might need a lot of new parts before it's tickety boo.

Thanks for the pep talk! :D We'll see what the OBD II reader says when I can manage to get it in to the shop.
 
  • Like
Reactions: DintDobbs

DintDobbs

Rank V

Advocate III

1,412
First Name
Daniel &
Last Name
the Vulture
@CR-Venturer Oh, the local parts store counter jockeys all know me plenty well, knocking in there every three weeks to borrow the scan tools, ha ha. I bought my own OBD-II scanner, for whatever reason it stopped interfacing with my Explorers but still works on my other cars. Consider getting a cheap one (OxGord makes one for like $25) to keep on hand when traveling; some codes matter more than others, but it can save you a trip to a shop (fuel costs) or a trip to a garage (can buy your own tool for less than 1 hour's labor).

I hope you get that straightened out easily, I've been chasing some wacky T-case behaviors on my '99 for over a year.
 

CR-Venturer

Rank VI
Launch Member

Traveler III

3,372
Ardrossan, AB, Canada
First Name
Jas
Last Name
Spr
Member #

16340

@CR-Venturer Oh, the local parts store counter jockeys all know me plenty well, knocking in there every three weeks to borrow the scan tools, ha ha. I bought my own OBD-II scanner, for whatever reason it stopped interfacing with my Explorers but still works on my other cars. Consider getting a cheap one (OxGord makes one for like $25) to keep on hand when traveling; some codes matter more than others, but it can save you a trip to a shop (fuel costs) or a trip to a garage (can buy your own tool for less than 1 hour's labor).

I hope you get that straightened out easily, I've been chasing some wacky T-case behaviors on my '99 for over a year.
I'm really curious what it is with mine. Everything functions just fine, goes in and out of 2wd, 4wd and 4lo just fine.

Also, even though mine seemed to pass the basic test for chain slackness, I watched a video today of a guy whose NP231 was behaving exactly like mine, same sounds and everything, and it turned out to be a slack chain. The 231 is the manually operated version of my 233D, so basically identical but with a lever in place of the electric shift motor mine has.

I've also watched several tear downs of various t-cases now, and even the ones that were broken by severe neglect, being run bone dry of oil, didn't break the chains or any of the gear teeth.

In spite of the test I tried, I feel like it just has to be a slack chain. I'm thinking I will order a new chain and try installing it without dropping the case. If I discover it really is something else broken, I guess I will drop it and do a full rebuild at that point.

First I'm getting the tranny looked at. Hoping the mechanic can fit me in this week.
 

CR-Venturer

Rank VI
Launch Member

Traveler III

3,372
Ardrossan, AB, Canada
First Name
Jas
Last Name
Spr
Member #

16340

So, I had checked the transmission fluid after having the problem I had, but it was in direct sunlight and it was difficult to see exactly where the mark was - I thought it was okay, somewhere in the middle of the range between hot and cold.

Well, I took the truck to the mechanic today, and hallelujah, it was just low on fluid! Checked the code and it was a low/reverse solenoid fault, which can be caused by low pressure in the transmission due to low fluid. The tech checked it, and lo and behold, it was at the Cold mark when it should have been at the Hot mark as it was at operating temp.

Topped up the fluid and she's running beautifully again. There's probably some leaky-ish seals in that old tranny, I guess - to be expected at 317,000+kms I suppose. It's due for a flush soon anywho, so the mechanic can inspect for leaks at that point, and maybe we'll consider putting some stop leak/transmission fix in it if there's no obvious leaks.

Rumble rides again!

Now to source a new chain for the t-case and crack er open.
 
  • Like
Reactions: DintDobbs

DintDobbs

Rank V

Advocate III

1,412
First Name
Daniel &
Last Name
the Vulture
@CR-Venturer Hallelujah is right, thank goodness for simple solutions. Always clean your dipstick and dunk it again, it never hurts to look twice.

But that fluid went somewhere, so even if you change seals, check for leaks again.

Hopefully the T-case chain is the only issue. If all roads lead to Rome, then that's probably where you should go...
 

CR-Venturer

Rank VI
Launch Member

Traveler III

3,372
Ardrossan, AB, Canada
First Name
Jas
Last Name
Spr
Member #

16340

Small update: Had the truck in the shop last week to get an oil and filter change, transmission oil change and replace the shift solenoid at the same time. They also found and repaired a small leak in the transmission cooler hose, which must account for why the fluid was low previously. Truck seems to be running great now.

Next on the agenda will be some more rust repair and most importantly, rebuilding the T-case.
 

CR-Venturer

Rank VI
Launch Member

Traveler III

3,372
Ardrossan, AB, Canada
First Name
Jas
Last Name
Spr
Member #

16340

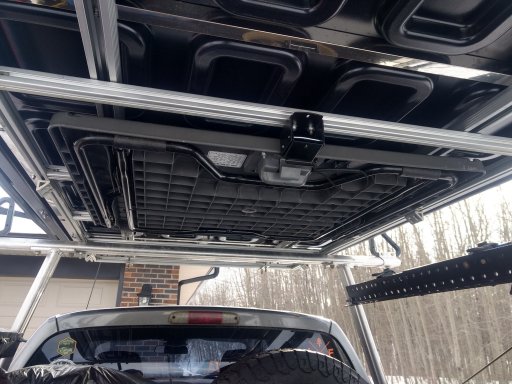
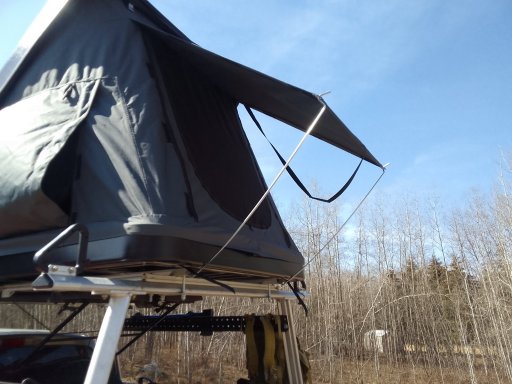
My RTT didn't come with poles for the rear facing door, so I made some. Now I can prop all three flaps open and still have some rain protection.
IMG_20230501_112150.jpg
 

CR-Venturer

Rank VI
Launch Member

Traveler III

3,372
Ardrossan, AB, Canada
First Name
Jas
Last Name
Spr
Member #

16340

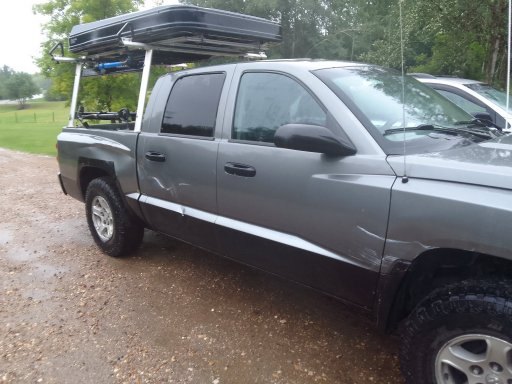
Well, it finally happened. My confidence overran my skill, and Rumble had an unfortunate encounter with the end of a guard rail. It was a very tight entrance into a cool little track beside a lake nearby, and on the way in I beautifully navigated around it, not touching it at all. Well on the way out, the angles were very different, and very much worse, and this was the result:
damage.jpg
Embarassing to say the least, but I've been working away at fixing the body damage as best I can using hot glue pulling, hammers, etc. I have made some signficant progress, and while it will retain some "character" from this incident, I hope to get it looking fairly decent again.

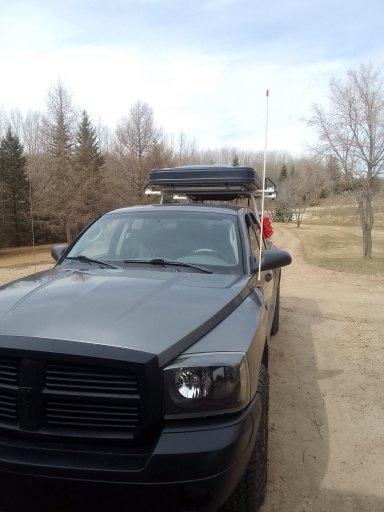
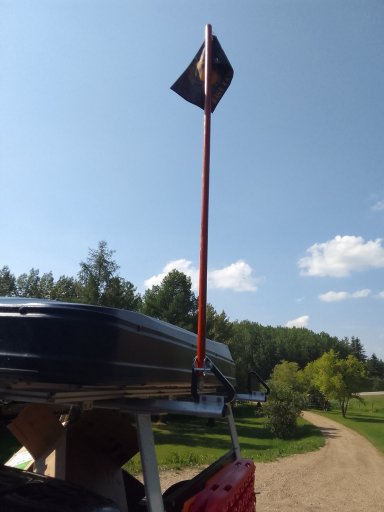
I also added a flag mount:
flag.jpg
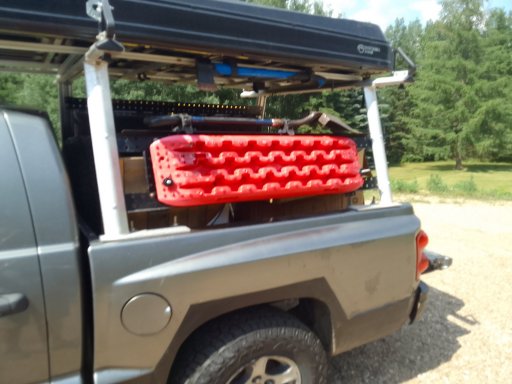
And I rearranged my recovery gear to make room for some storage bins, as I find lack of storage space a real challenge:
recoverygear.jpg
bins.jpg
I plan to paint the lids black and add some "hinges" to the bottom as well as probably some cords to stop the lids from going beyond horzontal when open.
 
  • Like
Reactions: jscusmcvet