1995 FZJ80 Land Cruiser

  • HTML tutorial

John Galt

Rank III

Advocate II

626
Bend, OR
I am new to this community so I figured I would post a quick write up on my land cruiser. I bought it a year ago in April and it was still bone stock. I am copying and pasting a bunch from another build thread I have so hopefully this will work and show the progress that has taken place.
4/1/15 - Oil change 215,800

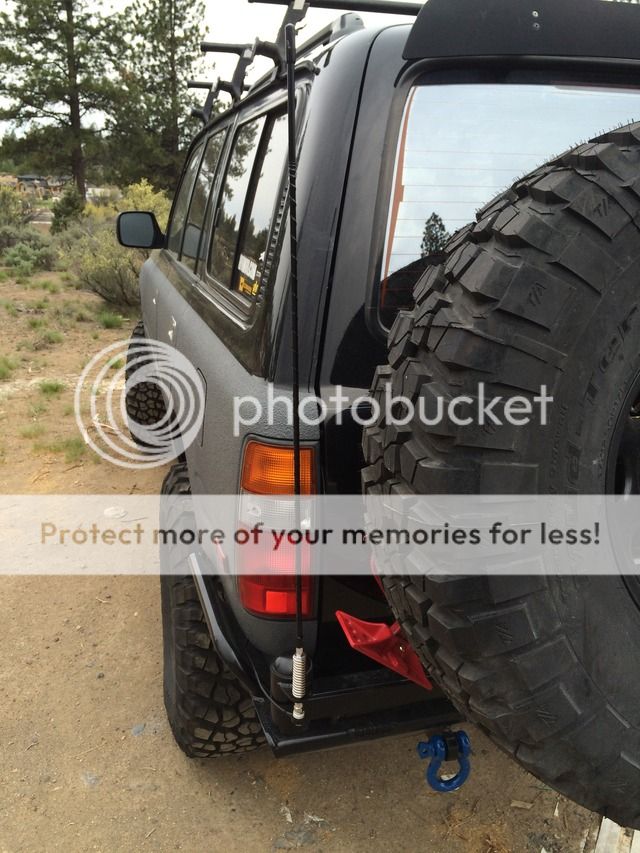
4/1/15 - New Antenna

4/8/15 - Lift 216,000, Full Slee 6"

4/8/15 - Replaced Brake Fluid

4/15/15 - Rear Bumper 4x4 Labs dual swing outs

4/18/15 - Front Bumper 4x4 Labs

4/27/15 - Installed AC Dryer in battery trey with custom made AC hose/line

8/1 PHH

8/1 FHH

8/1 Full Coolant flush (block and radiator)

8/1 3 new radiator hoses with constant torque clamps

8/1 new o-ring on dizzy

8/1 new heater valve

8/1 advanced timing to 7

8/1 New AC Controller

8/1 New AC Relay

8/1 New Air intake tube

11/2/15 Changed Diff oil front and rear

11/3/15 2 New Exhaust hangers

12/1/15 Deflared, fiberglass holes, sprayed Raptor Liner Gun Metal Tint

12/9/15 New valve cover gasket

12/9/15 New PCV Valve and Grommet

12/9/15 New Throttle body gasket

12/9/15 Cleaned throttle body

12/9/15 New EGR Vacuum Modulator

12/9/15 New PCV #1 and #2 hoses

12/9/15 New #2 water bypass hose

12/9/15 (6) New Spark plug tube gaskets

12/9/15 Painted valve cover with Engine Enamel Blue

03/23/16 ARB Lockers Front and Rear

03/23/16 Nitro 5.29 gears

03/23/16 ARB CKMA 12 Compressor

05/03/16 Changed Oil. Napa filter. 10w40

05/03/16 Rear rotors turned

05/09/16 New Ujoints in rear driveshaft

05/09/16 CB install with external speaker and Firestik

06/16/16 Intall ARB on board air

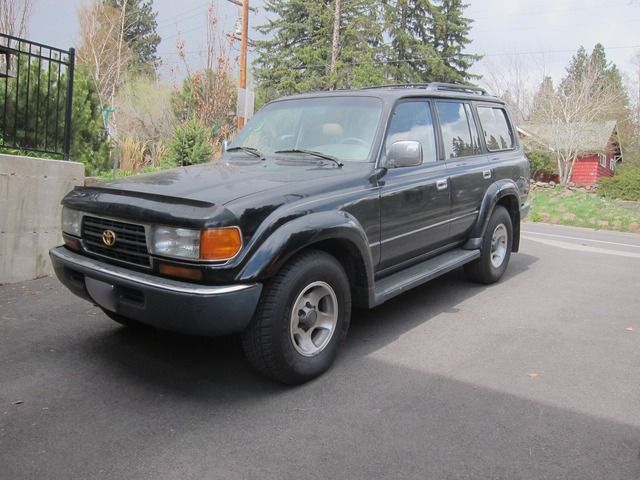
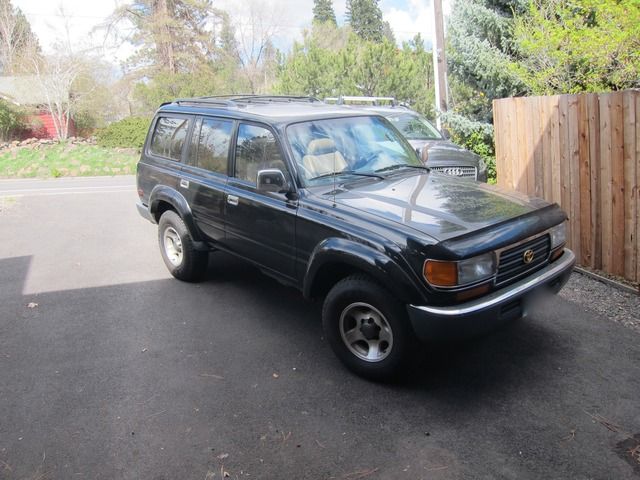
Just brought home my first 80. I have owned a 55 in the past but havent been in the cruiser world for a while. The 80 seemed like a perfect platform for a family wheeler/camp/snow rig. I bought it sight unseen (kinda). I had a friend check it out for me and he seemed to think it was a decent deal so I bought it. It has a few quirks, but all in all seems ok. Time will tell I guess. Its a 1995 with 215,000 miles on it. Body and frame are straight. No lockers. No rust anywhere except a 1" spot right above the windshield in the direct center. I believe the cruiser has been repainted years ago but its hard to tell. Interior is so-so. Front driver seat has tears, the rest have some major wear. Passenger side power seat works good, driver side motor works and right side moves but the left side seems like it may be off the track? Radio antenna is taped together and doesnt retract/extend. A/C looks complete but doesnt blow super cold, probably just needs a recharge. After an inspection under the vehicle it looks like it has had an oil leak for a long time (this is judging by the amount of buildup). It doesnt drip in the driveway that I see and I didnt lose any on the dipstick on my 300 mile drive home. Will have to get it cleaned up and see where the oil is coming from. The only thing I did before driving it home was change the belts. The previous owner had the wrong belt on the alternator side and only had 1 out of 2 belts on that side. Here she is when I pulled in.


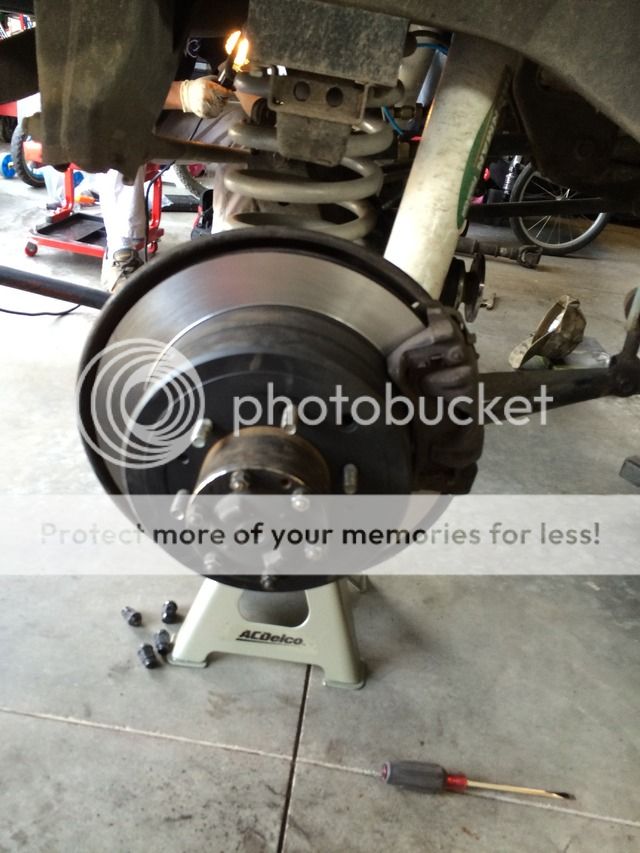
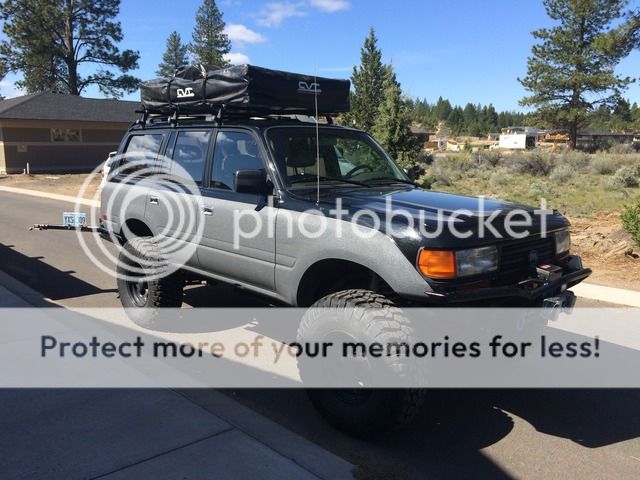
Did a few things today. Changed the oil. Took off the running boards and mud flaps. And put in a new radio antenna which retracts/extends and works great now. Also took off the spare tire and lifting system for the spare as I will not be using it any longer. Cruiser goes in the garage tomorrow to get a complete Slee 6" lift put on it. I got 5 new 37x12.5.17 KM2's mounted on black soft 8's. I also have complete front and back bumpers from 4x4 Labs. I'm sure I will be pulling the fender flares and getting him sprayed with line-x but have a few questions about that. I i know everyone welds the fender flare holes. However, i'm not a welder (as much as I would like to be). Has anyone filled the holes any other way or is every other way just a waste of time? I know everyone says to go with the 4" lift with 37s and trim. However, I just couldnt bring myself to cut her up right off the bat so I will start with 6" and see how it goes. Also got a couple cup holders and badges ordered today. Cant wait to get started!
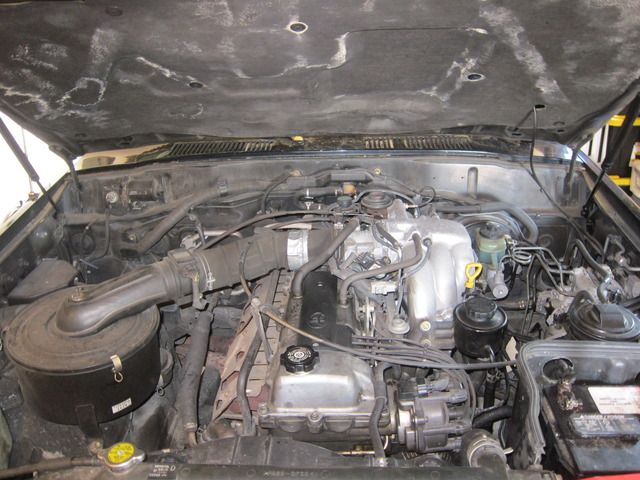
Here is a pic after running boards have been removed. If anyone is looking for running boards, mud flaps, or OEM wheels I will be getting rid of them all. Also here is a pic of the engine compartment. No show vehicle that is for sure. Notice the bonus duct tape :) The head gasket has not been done to my knowledge.


Last edited:
  • Like
Reactions: Tim

John Galt

Rank III

Advocate II

626
Bend, OR
Started doing the lift today. Everything seems to be going pretty good so far. Broke a wheel stud on the rear that I will have to fix. Got most of the front done today minus the control arms. Nothing seemed to give me trouble except getting the new panhard bar to line up. Once the panhard was out and the new springs where in, the panhard (that according to Slee is supposed to be 3/8" longer than the stock panhard) did not want to line up. It was as if the axle shifter to the passenger side. I used a ratchet strap and it pulled into place pretty easily. The only other thing that seemed weird is that according to Slee's directions you are supposed to hook up the sway bar then let the truck back down on the wheels. However there is no way the sway bar bolts back in with the axle rotated the way it is (without the new control arms on and the axle rotated back to the proper position). The drag link is in the way. But I'm sure it will be fine once the new control arms are on.

Some of the goodies.


Shot of the installed spring and shocks.


This is off the jack stand and on the wheels. Current ride height with the 265/75's


Well the lift is all done (minus the steering stabilizer). I like the way it turned out so far. I think I was pretty fortunate, not a single nut/bolt was seized up on the whole vehicle. I bled the breaks for quite a while today along with the LSPV. They are still a little mushy but not horrible. However, after I got the tires on, I went to park in the drive way and the e-brake doesnt seem to be working. Can anyone think of why this would be? It was working when I put the stock tires back on the vehicle to drive it out of the garage and down to the tire shop.

She's all dirty but at least the lift is done. Bumpers are next.

 
  • Like
Reactions: Byron Eby and Tim

John Galt

Rank III

Advocate II

626
Bend, OR
Well got some more goodies.


Hopefully will start on the front bumper today. Only thing I havent figured out is where to remount the a/c dryer. I have been reading up on it here on the forum and it looks like you an bend it out of the way for some bumpers, but with the reveal with the 4x4 labs front it will still show. I know @jcardona1 tucked it up behind the turn signal, but since I wont (at least for now) have the fancy LED turns signals he does, I will still need my factory turn signal. Thinking of unhooking it for now (dont need the a/c right now) and then repiping it later. And yes, both bumpers are powdercoated. Seems to be more popular as of late to paint it yourself but I still like the powdercoat.

Got the rear bumper mounted today. Moral of the story......get a friend to help you lift it into place. Unfortunately all my friends were working so it was just me and my back.

Stock bumper off


Ground down the welds and then took off the cross members.


Cut off 3 1/2" of the frame and mounted her up. Really like how high and tight it is.

[/URL][/IMG]

Forgot to mention that I had to cut the exhaust back. Wouldn't fit with the new bumper. Nothing special just hacked it off shorter under the rig. In need of a whole new exhaust system anyway.
Before


After


Got the front bumper on today. The front 4x4Labs bumper is way more of a PITA than the rear in my opinion. It did not fit as well without some modification. And even so, I still didnt get 2 of the bolts in. Love the way it turned out though. Approach angle just improved a ton.
I started off by taking off the AC Dryer. I want to remount this in the battery box and need to start sourcing some dryer lines from a 91-93. Then I was able to do some trimming.
Before:


After:


After having the bumper on and off 4 times trying to get it to line up I finally got all the bolts in except one on each side. I had to grind some of the weld on the body mount on the passenger side so the bumper could be pushed back far enough. Also had to use a flapper wheel and buff out the frames so the bumper would fit on. It is so tight its ridiculous.

You can see how each side the same bolt doesnt line up.


Lots of frustration later and its done.


John Galt

Rank III

Advocate II

626
Bend, OR
Went out on a little shake down run today. Nothing serious but had a great time and even found some snow (too much at one point). Took the family out with another buddy in his Taco and made it up to a nice mountain lake and had a picnic. First impressions are that I love the lift and the ride it provides. However, there are a few glaring things that I took away from this little jaunt. 1. The FZJ80 is heavy as S*&$! 2. 5.29's cant come soon enough. 3. ARB's cant come soon enough. 4. FZJ80's are really really heavy. We found a XJ Jeep that someone looked like they walked away from a few weeks ago when it got stuck in the snow. I went around it but went a little too far and my rear wheel went over an embankment. It swallowed the 37 like it wasnt even there. All in all it was a really fun little trip though. Didnt get any pics when I got stuck (I was shoveling). But here are a couple.


Did some plastic dipping yesterday (yeah I know people get tired of seeing people plastic dip all their chrome). So I will only give you guys one pic of it.
All the chrome pieces on the front and the mirrors


The big news of the day though was that I rented a block tester from O'Reily's and tested to see if my HG is leaking at all. At first it scared me pretty bad because the fluid turned yellow after a couple squeezes on the ball. However, it was just that I hadnt taken out enough anti-freeze and it sucked some of it up into the plunger and spoiled the sample. I drained it a bit further and did the test again for 2 more minutes. Liquid stayed completely blue! I was pretty happy to see it since I have no idea the service records on this truck from the past.
Also been trying to look at different oil leaks and where its all coming from. Guess I will start at the stop and work my way down. Looks like the distributor is leaking so I will start there.

Also I am pretty sure this is my PHH, correct? If so its looking pretty bad I would say. It is greenish and very scaly. The hose doesnt look like its in terrible shape, but the hard pipe looks bad. So its probably a good idea to get this done soon. Where is the best place to order the hose/kit from?


I was able to source some AC Dryer lines out of a '92. So I will be continuing the project of relocating the dryer to the battery box and getting the AC back up and running.
 
  • Like
Reactions: NorthStar96

John Galt

Rank III

Advocate II

626
Bend, OR
I installed the new AC lines I had made to relocate the dryer up into the battery trey. All fit pretty darn well. Will bring the vehicle in tomorrow to have them pull a vacuum on the system and see if there are any leaks. Fingers crossed I will have running AC by the end of tomorrow.


Also found something else today. When I bought the vehicle it had some duct tape on the air cleaner hose. I thought that the hose probably had a crack or a pin hole in it and so the PO patched it with duct tape. However, while off-roading yesterday something must of jiggled loose. After I installed the AC lines today I fired up the engine and heard a huge sucking sound and i found that it was much more than a pin hole or crack.

It was in two completely different pieces. This didnt just happen either. It must of happened for the PO and he decided to put it together with duct tape. Makes me scared for what else I will find if this is how stuff was taken care of. Fingers crossed.

On the other hand, the cruiser did AWESOME wheeling yesterday. Was amazed what she will do, even being unlocked.


Put an Engo 12000 lb winch on today. We will see how it goes. Some people seem to like them and some dont. Price was right so I thought I would take a stab at it. I put 3/8" Amsteel Blue synthetic line on it and a stainless thimble. Still need to order the right Hawse Fairlead for the synthetic and get rid of the roller fairlead.


John Galt

Rank III

Advocate II

626
Bend, OR
So I finally deflared the beast. I truly like the look of the flares but the 37s were rubbing at full stuff and I practically took two of the flares off on a tree the other weekend so I figured it was time. Nothing new here that tons of people havent done, but I fiberglassed the holes (since I have no welding experience) and sanded them smooth. Then threw some paint on any spots of bare steel. Sanded down the area that I was going to shoot with bedliner. I used Raptor Liner because I wanted to be able to shoot it with a different color than black (since the vehicle is black). I haven never sprayed anything in my life so this was a whole new experience. The color I went with is a GM color called Gun Metal. The Raptor Liner came with a gallon of bedliner and that was plenty to give it 3 good coats. I have to say that I am happy with the way it turned out. Its not perfect but pretty darn good.


Well since I crushed the muffler it was time for a new one. Needed a gasket between the cats also because it was tweaked from when I smashed the muffler.


Well I got a few things done over the last couple days. I ordered some parts from Cdan (pcv valve & grommet, both pcv hoses, & egr vacuum modulator) in order to try and get rid of my p0401 code. Like I said earlier my EGR vacuum modulator was definitely not working any longer and since I was ordering one I though I might as well replace my pcv valve, grommet, and hoses while I was at it. Easy enough right? Well the pcv grommet was hard as a rock and bonded with the pcv valve like cement. It would not come out! However, it dropped down inside. So I figured I had to take the valve cover off to get to it. So off came the air intake, throttle body, egr, and valve cover. Little did I know that there is an enclose chamber that the pcv valve goes into. :( So I forced the valve out with a pair of vice grips and then had to spend about an hour fishing out all the rock hard pieces of grommet that were still left inside. While I had everything apart I cleaned the throttle body really good, cleaned and painted the valve cover, new valve cover gasket, new egr gasket, new throttle body gasket, new spark plug tube gaskets, and new #2 water bypass hose. All in all it all went ok. But I sure turned a tiny job into a much bigger one. I also painted the heat shields with ceramic coating.


John Galt

Rank III

Advocate II

626
Bend, OR
This is a very condensed build thread of what I have done in the last year. From now on I will update it here with more detail. Hopefully all the pictures show up (i'm on very slow internet).
5.29s and ARB's are on order and will be the next update.
 

shoredreamer

Rank V
Launch Member

Member III

2,809
Santa Cruz
First Name
Chris
Last Name
RRU
Member #

2117

Ham/GMRS Callsign
KM6AZV
Very nice! 80s are tanks, that's for sure. When you get locked you'll be unstoppable. You can get new seat gears from Gamiviti.com to fix your stuck seat. You did the bed liner very well, nice color. I need to sit down and do a build thread too, ha. Hope to see more.
 

John Galt

Rank III

Advocate II

626
Bend, OR
I got a couple things done lately. Been chasing a clicking in the rear passenger side when turning left. I think it could be a couple different things but my ujoints were shot in my rear drive shaft and I believe that there could have been a high spot in my rotor and it was hanging up on the ebrake shoe when it heated up creating the tick.
- Turned the rotors
- Took the whole ebrake system apart and put it back together
- Installed new ujoints in rear drive shaft
-Wired antenna for cb and mounted it on my rear bumper
- Changed oil and sent off an oil analysis to Blackstone
- Reset preload on both front wheel bearings (they had quite a bit of play in them)
-Installed 3 sets of Yakima load bars with gutter mounts
-Put the RTT on for the summer


RiverCityDave

Rank V
Founder 500
Launch Member

Advocate II

1,788
Austin, Texas
First Name
Dave
Last Name
Hunter
Member #

267

Service Branch
Army
I got a couple things done lately. Been chasing a clicking in the rear passenger side when turning left. I think it could be a couple different things but my ujoints were shot in my rear drive shaft and I believe that there could have been a high spot in my rotor and it was hanging up on the ebrake shoe when it heated up creating the tick.
- Turned the rotors
- Took the whole ebrake system apart and put it back together
- Installed new ujoints in rear drive shaft
-Wired antenna for cb and mounted it on my rear bumper
- Changed oil and sent off an oil analysis to Blackstone
- Reset preload on both front wheel bearings (they had quite a bit of play in them)
-Installed 3 sets of Yakima load bars with gutter mounts
-Put the RTT on for the summer


My front wheel bearings had significant play as well, and I was very pleased to find that the PO had used high quality replacements when they were done, I just needed to snug them up. I went ahead and repacked them with Redline Synthetic as well.

Its funny when I see bedliner on the bottom of trucks, as with mine, that's the only place the paint is any good. The hood and roof are shot, I'd be doing the reverse of yours, however I plan to just do the whole truck, in gray, as close to the factory "Moonglow Pearl" as I can find.

Thats a really nice rig man.
 
Last edited:

John Galt

Rank III

Advocate II

626
Bend, OR
My front wheel bearings had significant play as well, and I was very pleased to find that the PO had used high quality replacements when they were done, I just needed to snug them up. I went ahead and repacked them with Redline Synthetic as well.

Its funny when I see bedliner on the bottom of trucks, as with mine, that's the only place the paint is any good. The hood and roof are shot, I'd be doing the reverse of yours, however I plan to just do the whole truck, in gray, as close to the factory "Moonglow Pearl" as I can find.

Thats a really nice rig man.
Thanks for the kind words! Yeah I did the bedliner because I was forced to lose the flares (partially took 2 of them off on a tight trail). I really do like the way it turned out though. There is some pretty brushy areas around here and I dont get anymore pin striping. I went for the 2-tone for a little tribute to the oldschool cruisers.
 

John Galt

Rank III

Advocate II

626
Bend, OR
I was able to get the rear driveshaft with new ujoints back in the vehicle. Drove it a decent amount and didnt hear any clicking from the rear at all. Hopefully that problem is solved!
Also was able to get my CB install done. Went with an external speaker because with the CB installed in the dash the internal speaker is just about worthless.
 
  • Like
Reactions: RiverCityDave

RiverCityDave

Rank V
Founder 500
Launch Member

Advocate II

1,788
Austin, Texas
First Name
Dave
Last Name
Hunter
Member #

267

Service Branch
Army
Very nice!! I am going to start looking for an 80 this fall then over the winter do a restoration on it.
Be careful, they are a sickness. Though at least right now, the parts are pretty much available. If it isn't available from Toyota USA, there are several folks bringing in parts at reasonable cost from the countries where they were available for a few years longer than here. Seems that its mostly cosmetic stuff that's unavailable, hard parts are still easy to get.