Contributor II
Yo!
I've been lurking on here for the past year since getting my '00 Limited after moving to the PNW. I've been slacking pretty bad with getting this thread going and I suck at remembering to take pics of what I've been doing, but my documentation more than makes up for it, lol.
I got her a little built already, but it was primarily high mileage maintenance, which ended up costing around what I paid for it: $7,200. The goal is to make it into an overland, go-most-anywhere vehicle when all is said and done. There's not a ton left to do, but my mind is always wandering.
The day I brought her home:

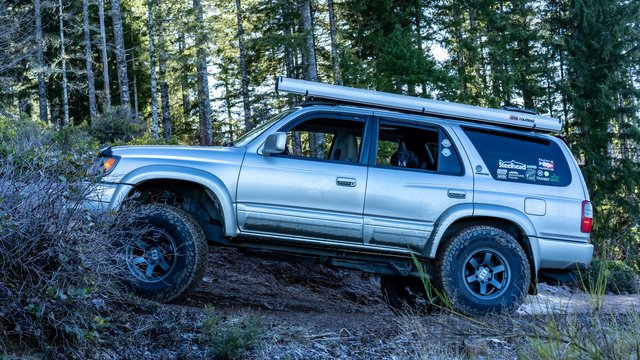
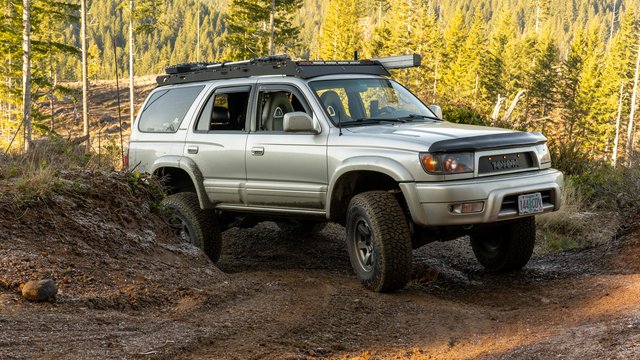
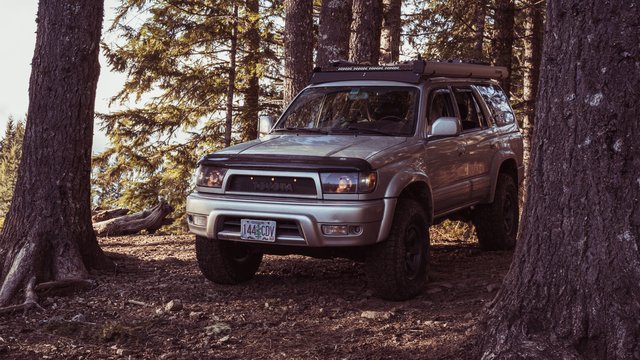
How she's sitting as of 01/23/21:
The guy before me babied this rig and really didn't want to give it up, but his wife gave him an ultimatum of either continuing to wrench on this or sell it and wrench on their GX470; with three kids in tow, he chose the latter for it's 3rd row seating.
I haven't really met any people around here yet that are into wheeling/camping. Also haven't gone out much in lieu of work and all of the weekend projects so far. HMU and we can make some plans to get lost!
Engine & Drivetrain:
- 3.4 5VZ-FE all stock
- 4.30 gears (soon to be 4.88)
- Factory e-locker rear
- Airbox deckplate mod and ISR Mod with K&N filter
- 4 hole Denso fuel injectors (OEM upgrade)
- Odyssey Batteries 34R-PC1500T
- "Big 3" wiring
- Blue Sea fuse block for light and other accessories
- All else was OEM maintenance items done by the previous owner within the last 30k... like, almost the entire engine bay and drivetrain was serviced/replaced outside of a motor rebuild. It's at 262k right now, so I plan on rebuilding at 300k regardless
Suspension & Brakes:
- Bilstein 6112 3rd Gen 4Runner specific
- Bilstein 5100 rears
- Bilstein 5160 4th Gen 4Runner
- OME 2890 rear springs
- Dobinsons C59-210v springs (LC front coils that work on the rear)
- Durobumps 2.5"+ option, F/R
- Eimkeith PCK
- Mstudt end links, F/R
- Sway bar delete, F/R
- Front diff drop kit
- JBA UCA's
- 13WL TBU with Powerstop drilled/slotted rotors & HD braided brake lines
- E-brake bracket made for lift
- Extended rear brake line with stainless braided line
Wheels:
- 17x7 et+15 2017 4Runner wheels
- 1" hub centric spacers
- 255/75R17 Goodyear Duratrac
- 16x8 et-10 Level 8 MK6's
- No spacer
- 285/75R16 Falken Wildpeak AT/3
Exterior:
- Morimoto D2 projectors retrofit with 5k Morimoto HID’s
- Panamera 2.0 DRL LED projector shrouds with Switchback LEDs
- Satoshi grille mod
- Sherpa Matterhorn MKII roof rack w/ 38" X6S light bar, MaxTraxx mount, & Hi-Lift mount
- Running board delete (sliders to come soon)
- Slim window visors
- ARB 8x8 aluminum case awning w/ tent add-on
Interior:
- RX8 leather front seat conversion
- Leatherique black leather dye for rear seats
- Black carpet replacement throughout
- Gray seatbelt swap from another 3rd Gen
- WeatherTech mats
- Full color conversion to satin black interior with light gray upper half
- Led bulb conversion for HVAC and gauge cluster
- Diff lock button light-up mod
- Clock mod so green matches the green led in HVAC controls
- Rear storage box/camp kitchen built by McKinsey Craft, modded by me to include black carpet dye, locking 36" sliders, & Tembo Tusk XL fridge slider w/ cutting board attachment
- Sherpa rear cargo base (removed the carpet underneath and it works perfect with the box)
- Rago rear racks (botched the **** out of the install)
- Raingler full ceiling net (not installed and not really impressed with the non-existent customer service nor their install guide - probably going to install soon)
Electronics:
- Pioneer AVH1440-NEX
- Alpine rear flip-down TV
- Midland Micro GMRS w/ stubby antenna
- Uniden CB w/ 4' Firestik
I've been lurking on here for the past year since getting my '00 Limited after moving to the PNW. I've been slacking pretty bad with getting this thread going and I suck at remembering to take pics of what I've been doing, but my documentation more than makes up for it, lol.
I got her a little built already, but it was primarily high mileage maintenance, which ended up costing around what I paid for it: $7,200. The goal is to make it into an overland, go-most-anywhere vehicle when all is said and done. There's not a ton left to do, but my mind is always wandering.
The day I brought her home:
How she's sitting as of 01/23/21:
The guy before me babied this rig and really didn't want to give it up, but his wife gave him an ultimatum of either continuing to wrench on this or sell it and wrench on their GX470; with three kids in tow, he chose the latter for it's 3rd row seating.
I haven't really met any people around here yet that are into wheeling/camping. Also haven't gone out much in lieu of work and all of the weekend projects so far. HMU and we can make some plans to get lost!
Engine & Drivetrain:
- 3.4 5VZ-FE all stock
- 4.30 gears (soon to be 4.88)
- Factory e-locker rear
- Airbox deckplate mod and ISR Mod with K&N filter
- 4 hole Denso fuel injectors (OEM upgrade)
- Odyssey Batteries 34R-PC1500T
- "Big 3" wiring
- Blue Sea fuse block for light and other accessories
- All else was OEM maintenance items done by the previous owner within the last 30k... like, almost the entire engine bay and drivetrain was serviced/replaced outside of a motor rebuild. It's at 262k right now, so I plan on rebuilding at 300k regardless
Suspension & Brakes:
- Bilstein 6112 3rd Gen 4Runner specific
- Bilstein 5160 4th Gen 4Runner
- Dobinsons C59-210v springs (LC front coils that work on the rear)
- Durobumps 2.5"+ option, F/R
- Eimkeith PCK
- Sway bar delete, F/R
- Front diff drop kit
- JBA UCA's
- 13WL TBU with Powerstop drilled/slotted rotors & HD braided brake lines
- E-brake bracket made for lift
- Extended rear brake line with stainless braided line
Wheels:
- 1" hub centric spacers
- 255/75R17 Goodyear Duratrac
- 16x8 et-10 Level 8 MK6's
- No spacer
- 285/75R16 Falken Wildpeak AT/3
Exterior:
- Morimoto D2 projectors retrofit with 5k Morimoto HID’s
- Panamera 2.0 DRL LED projector shrouds with Switchback LEDs
- Satoshi grille mod
- Sherpa Matterhorn MKII roof rack w/ 38" X6S light bar, MaxTraxx mount, & Hi-Lift mount
- Running board delete (sliders to come soon)
- Slim window visors
- ARB 8x8 aluminum case awning w/ tent add-on
Interior:
- RX8 leather front seat conversion
- Leatherique black leather dye for rear seats
- Black carpet replacement throughout
- Gray seatbelt swap from another 3rd Gen
- WeatherTech mats
- Full color conversion to satin black interior with light gray upper half
- Led bulb conversion for HVAC and gauge cluster
- Diff lock button light-up mod
- Clock mod so green matches the green led in HVAC controls
- Rear storage box/camp kitchen built by McKinsey Craft, modded by me to include black carpet dye, locking 36" sliders, & Tembo Tusk XL fridge slider w/ cutting board attachment
- Sherpa rear cargo base (removed the carpet underneath and it works perfect with the box)
- Rago rear racks (botched the **** out of the install)
- Raingler full ceiling net (not installed and not really impressed with the non-existent customer service nor their install guide - probably going to install soon)
Electronics:
- Pioneer AVH1440-NEX
- Alpine rear flip-down TV
- Midland Micro GMRS w/ stubby antenna
- Uniden CB w/ 4' Firestik
Last edited: