Building, Driving and Adventuring the MTN4RNR

  • HTML tutorial

MTN4RNR

Rank V
Launch Member

Advocate II

1,750
Bay Area, CA
Member #

0614

The Mountain 4Runner Platform

When I first bought the 4Runner, it didn’t take long before I realized that I would need to modify the stock cargo area to best fit my personal needs. I had a few basic requirements to consider:

Cargo Security:
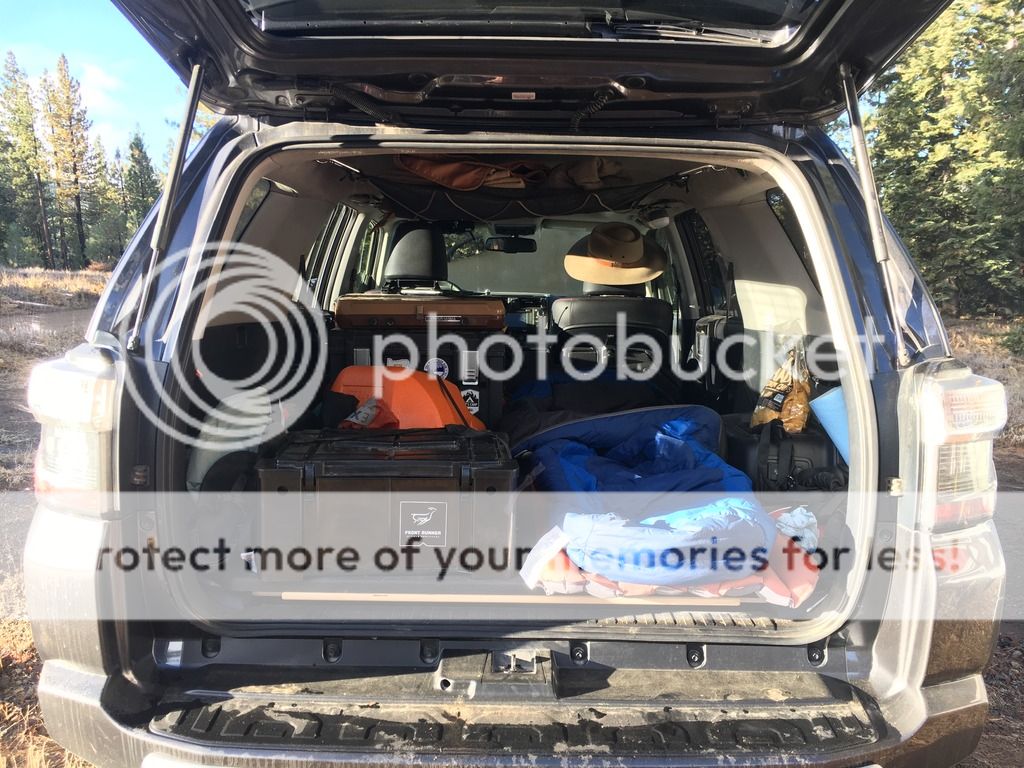
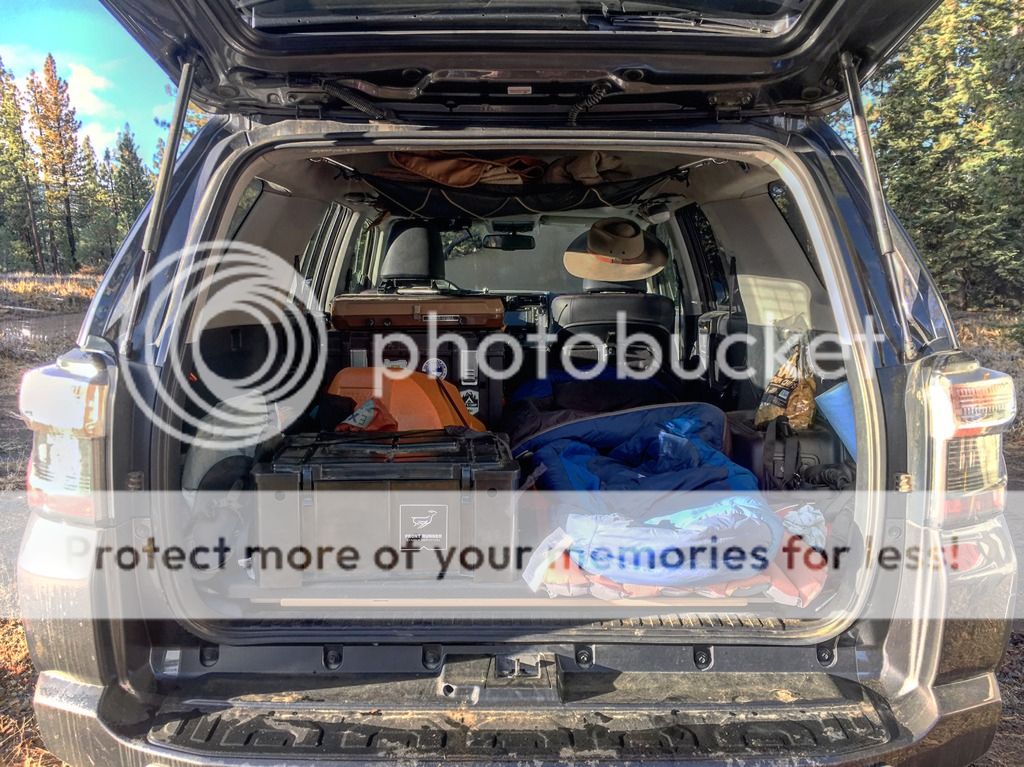
My typical cargo usually consists of the Ruff Tough kennel for the pup and a Front Runner Wolfpack (used to be Action Packer). When I switch to camping/Overlanding mode, I will typically add my camping box (DeWalt Tough boxes), the cooler, and other miscellaneous small items. All of these things needed to be secured in case of a collision or other accident. The last thing that I want is for the dog kennel to smash around, or to see a fully packed Yeti cooler cruising through the windshield. A tie down system can also be more practical by keeping your gear secure when four wheeling as you start/stop/pitch/jolt. It was really clear that the stock 4 point system wasn’t going to cut it after a few 4wd trips, however for the better part of a year I have made it work.

A Fully Flat Cargo Area:
The 4Runner (without the OEM cargo tray) with the rear seats folded down does not allow the cargo area to be flush with the rear seats. It’s about a 2-3 inch drop, and that drop makes a huge difference when it comes to sleeping comfortably in the back. Like my issue with securing cargo, I was able to make it work using a yoga mat, and an extra blanket. It worked, but I slept terribly.

Additional Preparation Space:
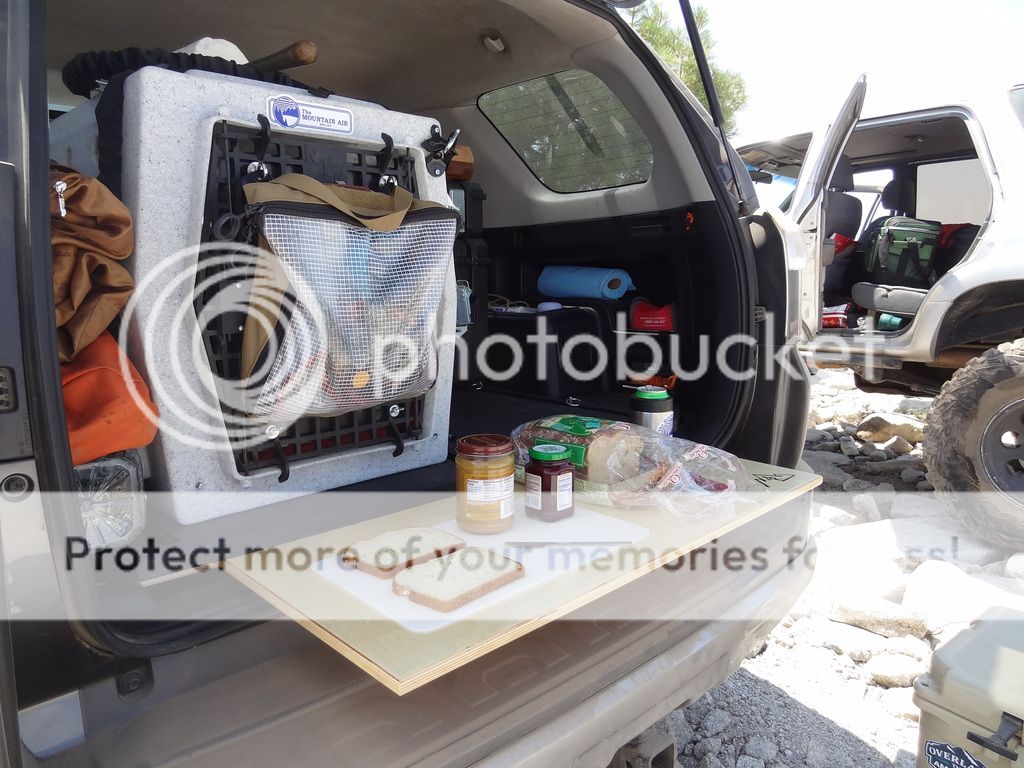
When I camp and spend time outdoors, I tend to need a flat surface to perform various tasks. Cooking, organizing gear, working with maps, etc. In the past I have made due with cooking on my camping box, requiring me to pull everything out that I will need for the meal, and ultimately I forget something mid-cook. How hard is it to open the camping box while there is a full pot of water boiling on the stove? It’s very difficult, trust me. Sparing myself buying a table for camping, I thought having something that could be easily deployed when needed would be a great addition to this platform.

Room for growth:
When I design/start any project, I understand that even if it is well planned, and even better built, there is always the likely possibility that I will find some way to make it better. So I incorporated that reality into my build by using materials and a general layout that would allow me to incorporate drawers, a fridge slide or anything else later on down the road.

Note:
I won’t be going into full design details with this particular project at this time, mainly because I am contemplating doing a small production run of this platform once I give it a good shake down to test the integrity of my design. Once I can establish that there aren’t any weak points, I will consider moving forward if there is a suitable demand. In the meantime, I will be pricing the unit as it is currently designed because I understand that the first question many ask with this sort of product is “How much?” That’s what I am going to work out.

Product details:
-Baltic birch plywood construction
-Aluminum L-track tie down strips with movable tie downs
-Line-X platform coating
-Stainless steel hardware
-Minimal modification of the 4Runner to fit (plastic trim removal; no cutting)
-Flush to seat design
-Slide out preparation space

Product Description:
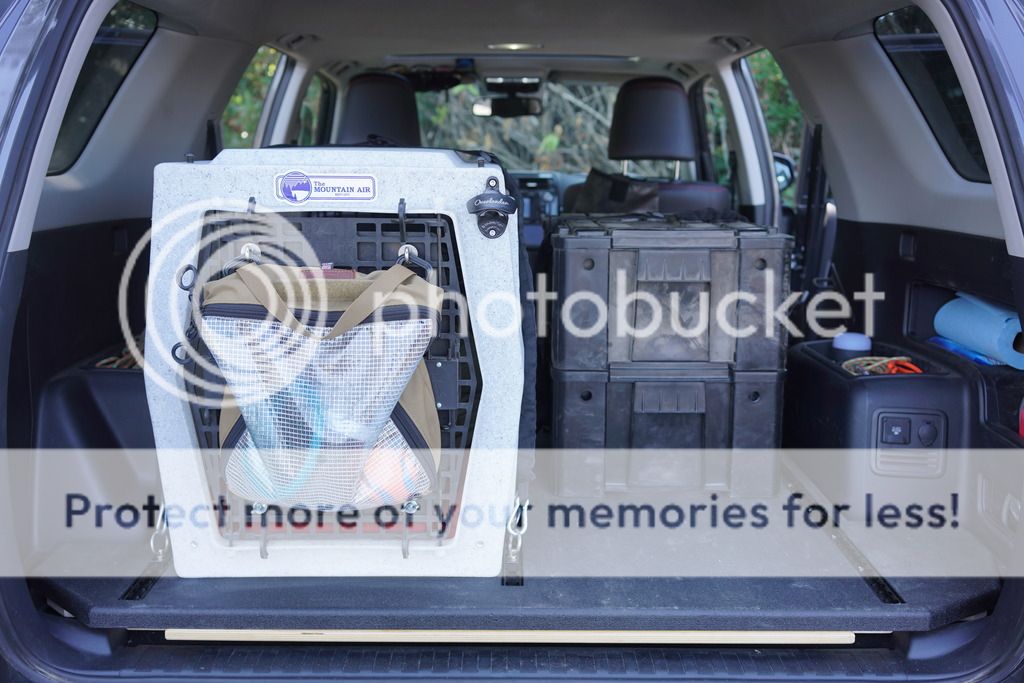
The platform is constructed using strong, Baltic birch plywood. It is made of a hardwood ply, and unlike cheaper substitutes, it doesn’t use a weaker filler between the layers of hardwood. It is hardwood through and through making it very rigid and durable. The plys are bonded together using marine grade adhesive, and the outside veneers are thicker allowing for a more durable surface. It’s not a cheap material to use, but the benefits well outweigh the cost.

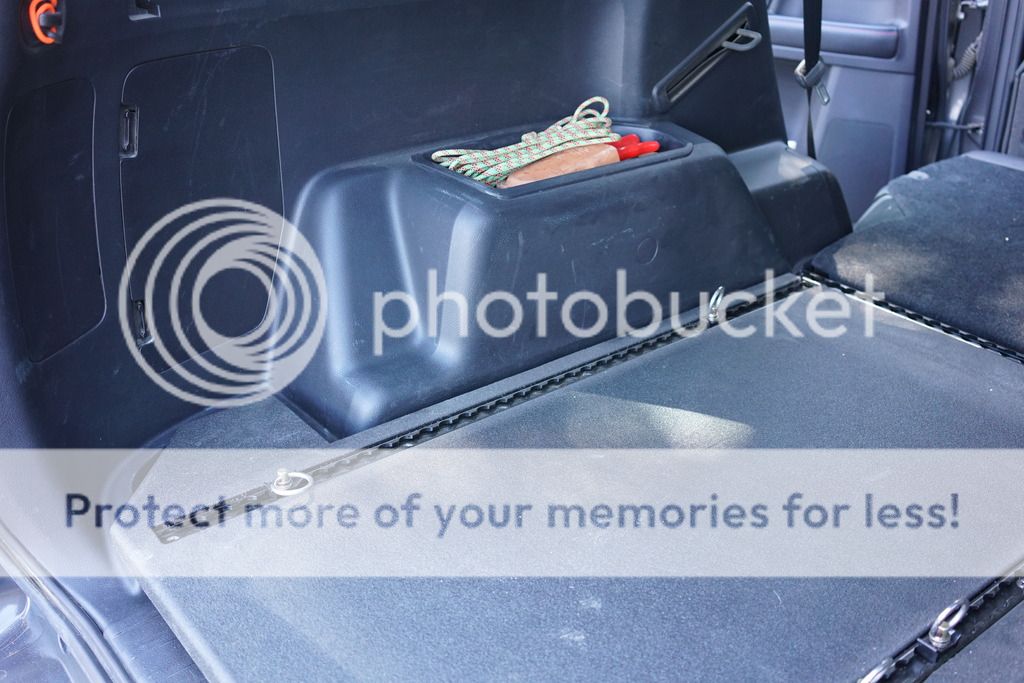
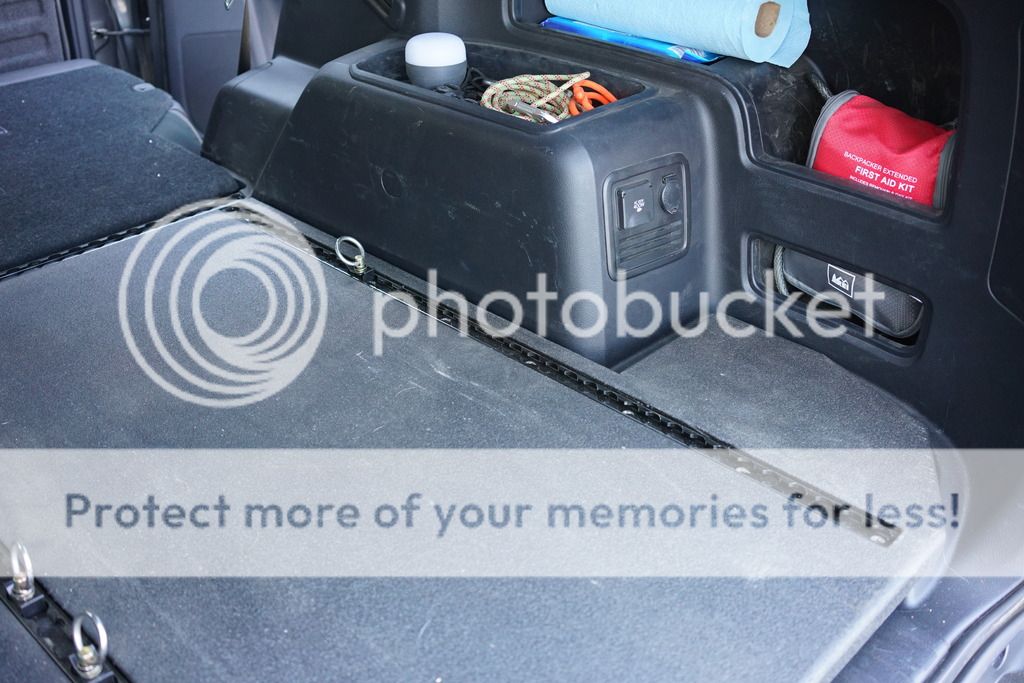
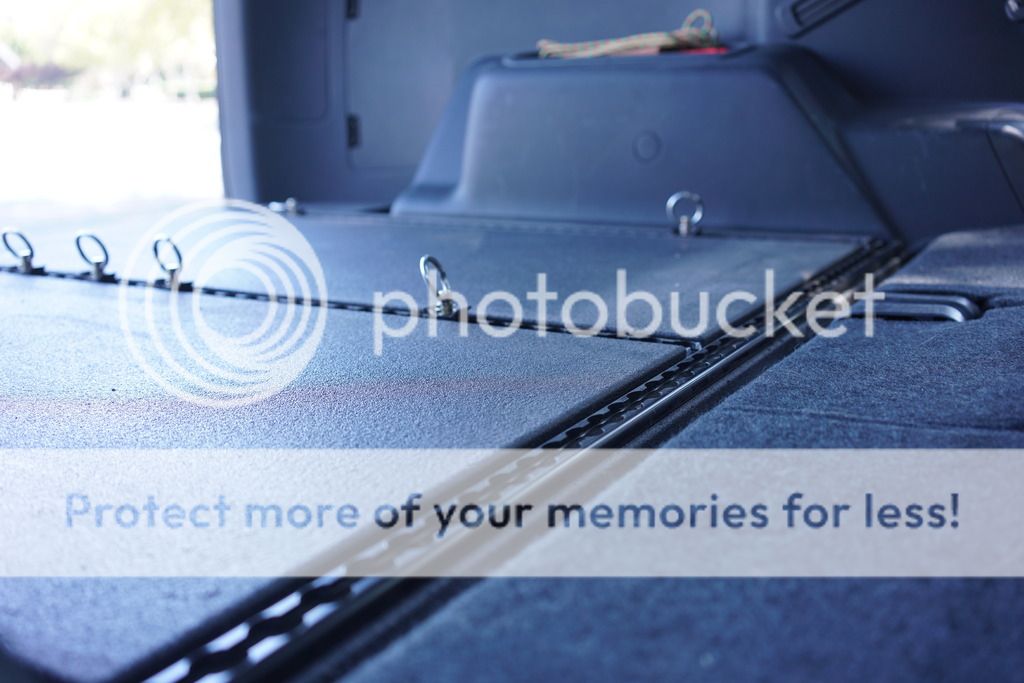
The platform incorporates 4 aluminum L-track strips. Left, center, right, and against the rear seats. Each one with approximately one tie down option every 1-2 inches. This means that as cargo needs change, so do the tie down points. This variable approach allows for securing different cargo in different arrangements without compromise.

A Line-X finish on the platform was used to increase the base material’s overall strength, provide a waterproof finish to the top surface, and to increase the long term durability of the platform. As an added bonus, it ended up looking like something that should have come from the factory as it closely matches the plastic color.

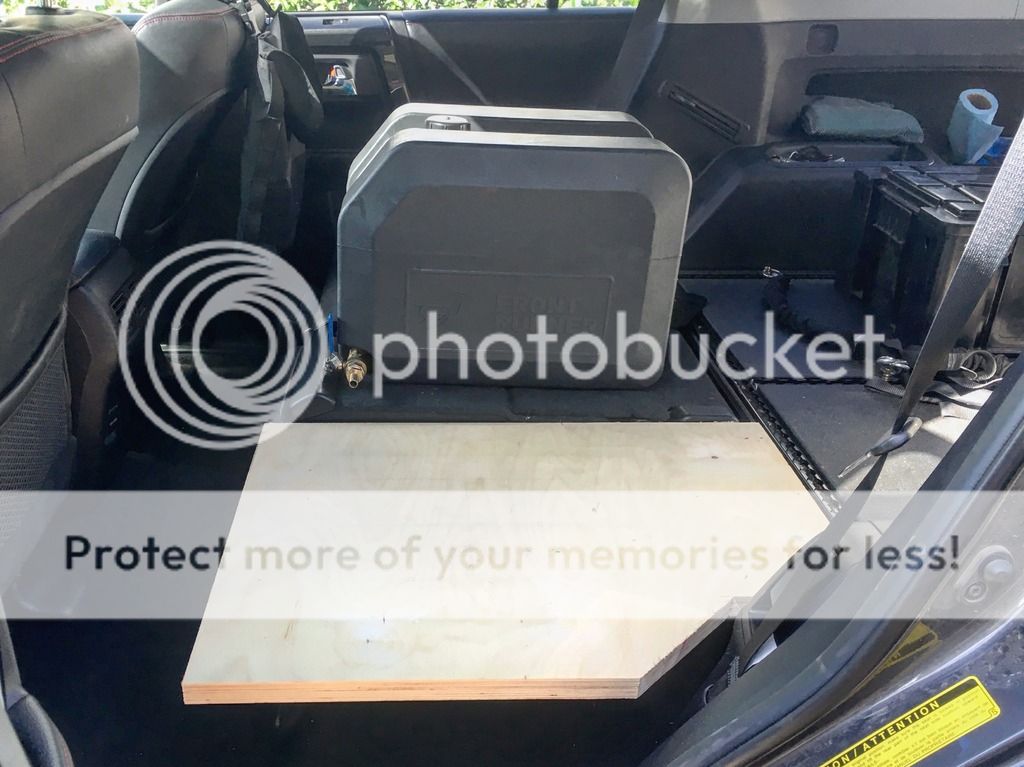
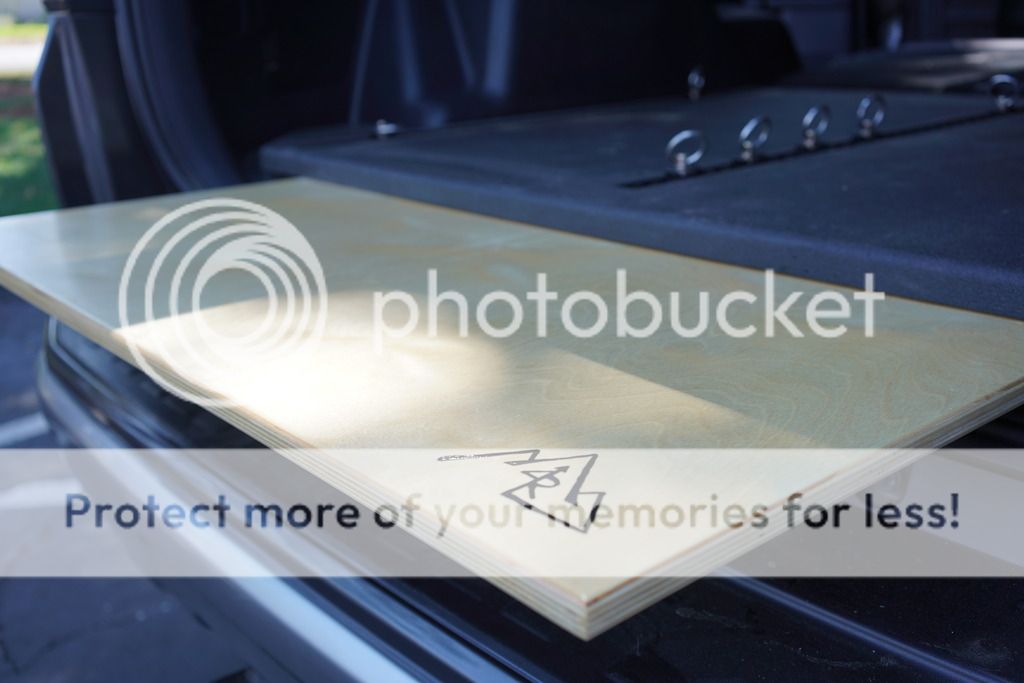
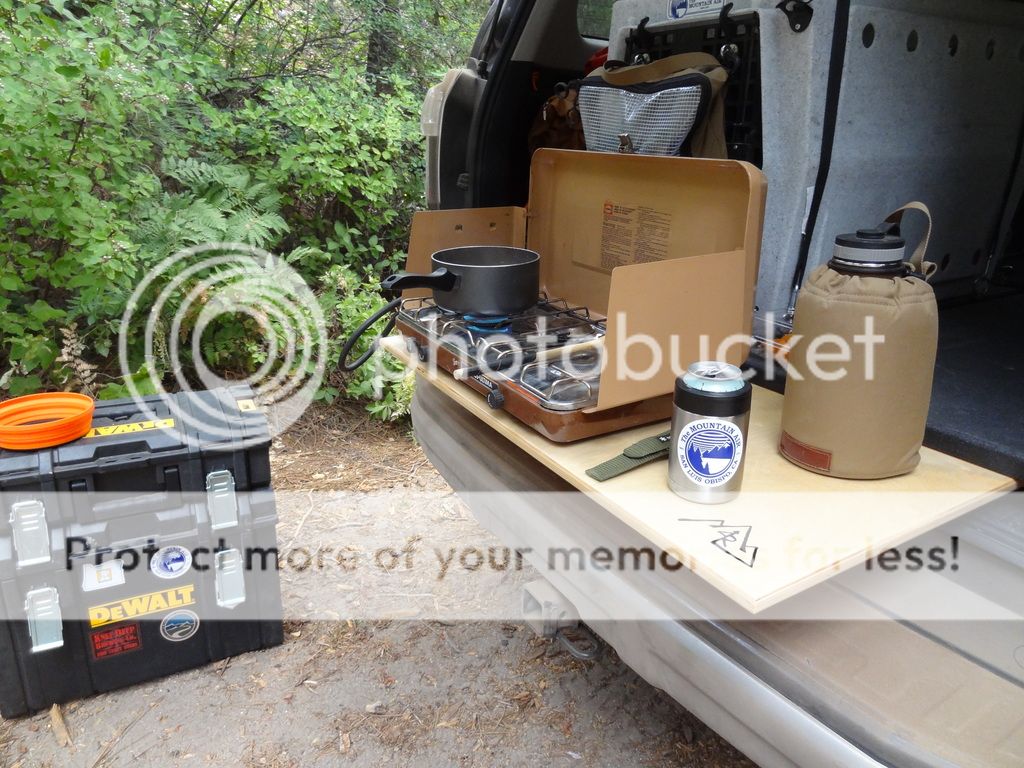
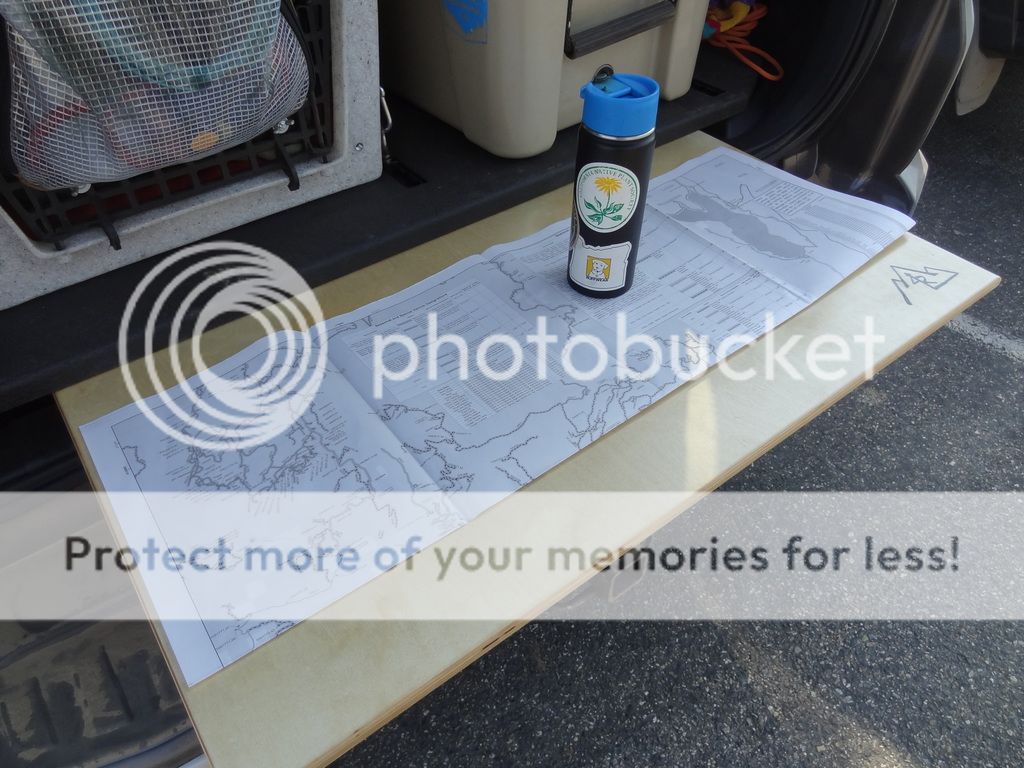
The slide out is made of the same Baltic birch plywood, but with an added polyurethane surface protectant to seal it from water and other stains. The edges have been routed to provide a smoother grip when extended. The slide can come out approximately 18” with enough rigidity to hold a stove and food preparation supplies. It is branded with the Mountain 4Runner logo on the lower right corner.

The platform attaches to the 4Runner using existing threaded holes, and only requires the removal of 2 plastic trim pieces. No cutting is required for installation. It fits with approximately ½” per side to spare, and enough room to fold the rear seats up and down without interference.
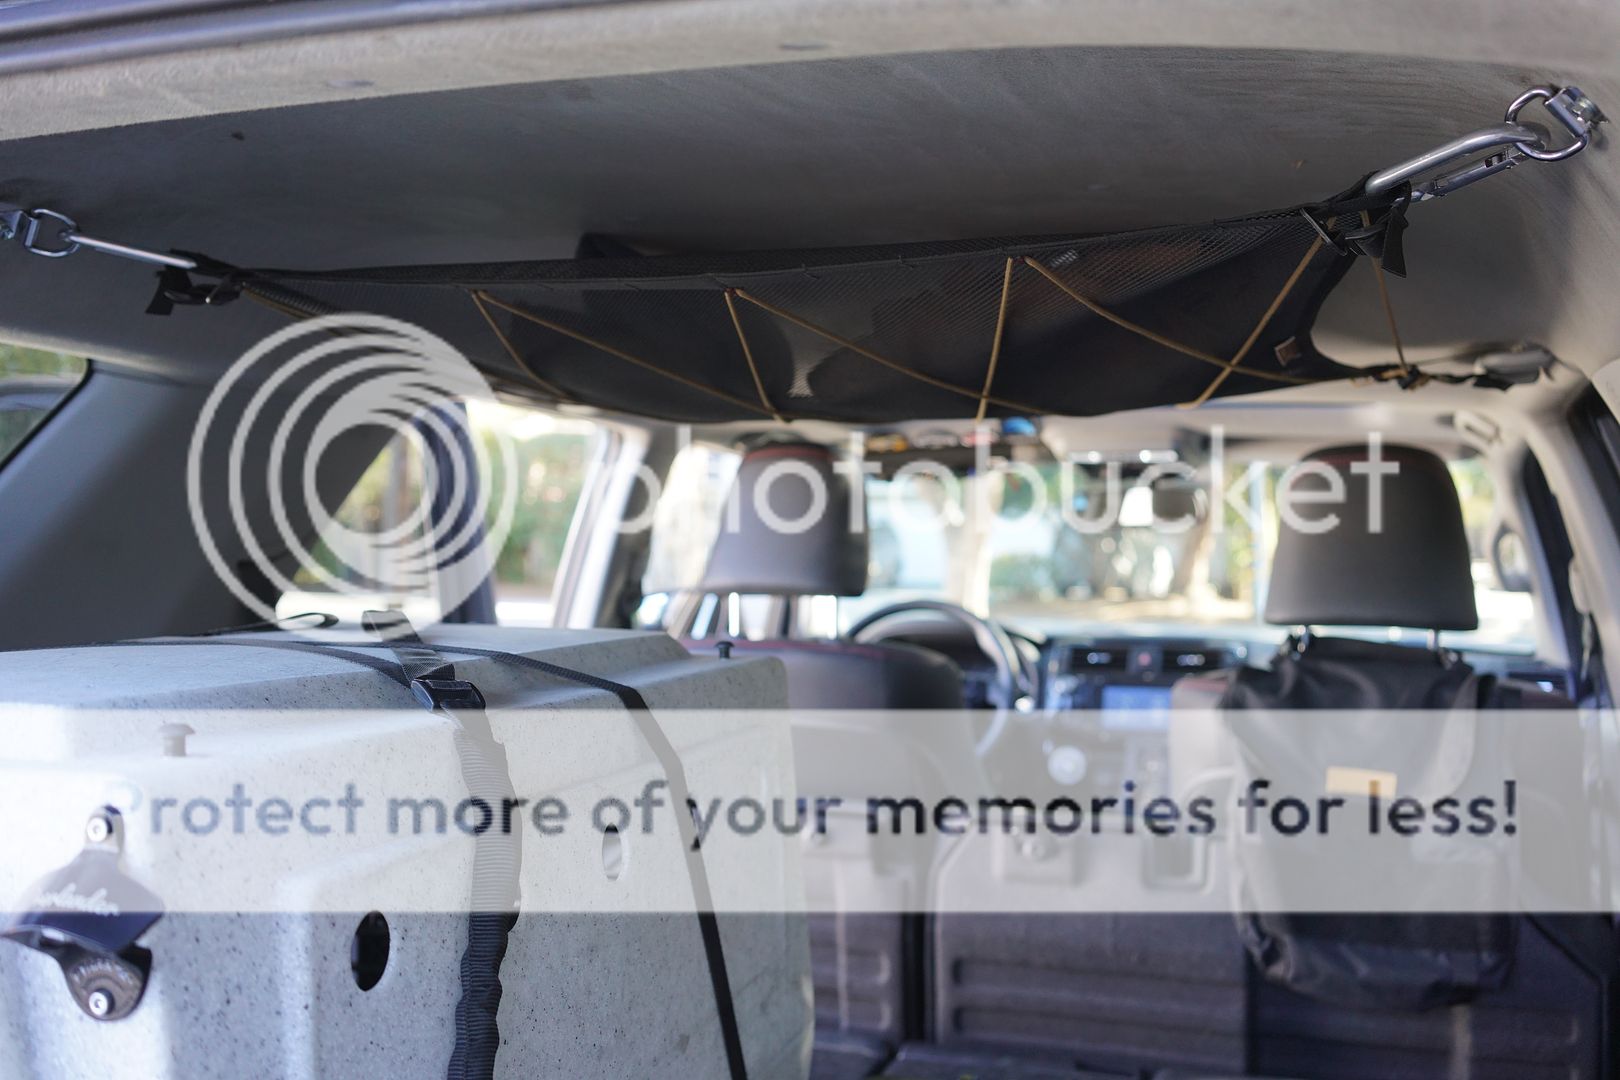
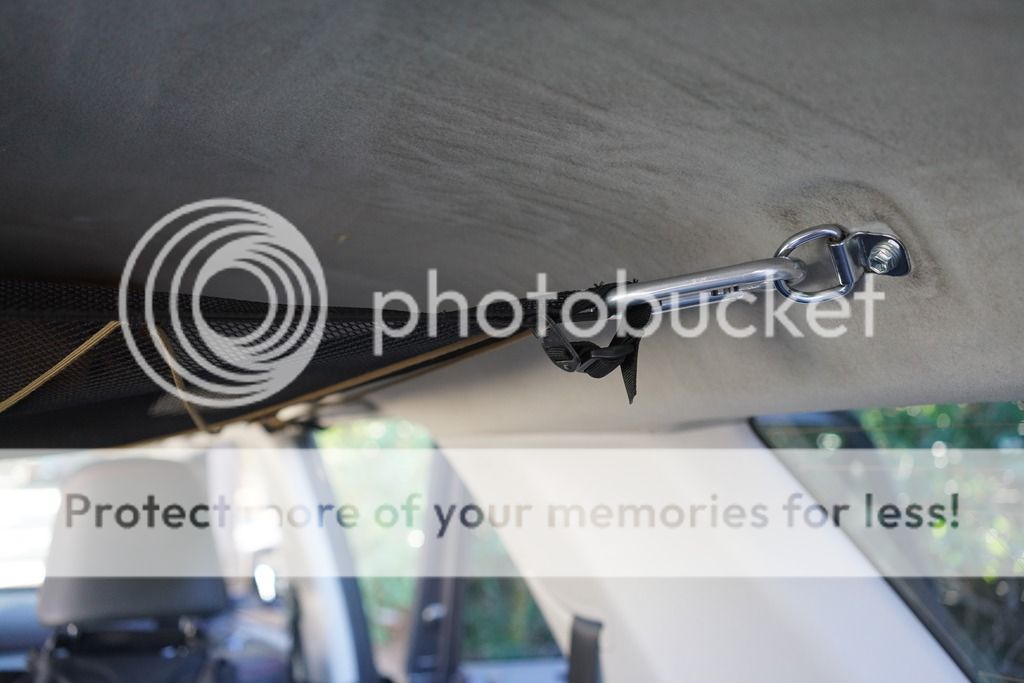
Product photos:


http://i1380.photobucket.com/albums/ah175/mtn4rnr/4Runner%20Platform/DSC04581_zpsen3nguxk.jpg[img]

[img]http://i1380.photobucket.com/albums/ah175/mtn4rnr/4Runner%20Platform/DSC04578_zpsljtsfvxl.jpg


As I mentioned above, I will be testing the platform in the coming months and determining if I can produce a small number of units and what the associated cost would be. I will update the build page with information as it comes. Feel free to send any questions to me via the personal message feature on the forum.

More to come…
 

MTN4RNR

Rank V
Launch Member

Advocate II

1,750
Bay Area, CA
Member #

0614

After the exhaust tip was a bit... squished... after the last trip, I took it upon myself to knock out 2 birds with one stone; cut the exhaust back for better clearance, and turn the tip out to the passenger side to eliminate exhaust fumes from entering the back window. The stock piping is 60mm, or 2.38" more or less. We made the tip out of 2.25" pipe, and the direction/angle is spot on. The fumes have been eliminated, but I am going to have this tip replaced with one that is 2.5" because when I get on the skinny, it makes a nice (and by nice I mean unappealing) whooshing noise which I think is because the tip is just slightly smaller than the stock piping. Oh well, live and learn.


MTN4RNR

Rank V
Launch Member

Advocate II

1,750
Bay Area, CA
Member #

0614

Labor Day Adventures in the Sierras - September 2016

I decided that the long weekend would be a good opportunity to bring the ladies along for a weekend adventure in the Sierras. My girlfriend is a grad student, so we like to take advantage of whatever time that she’s not busy. This weekend, we decided to hike the Sierra Buttes Fire Lookout, located in Tahoe National Forest just outside Sierra City. We left Saturday, and headed for my cabin near Grass Valley where we hit the river in the afternoon after a few beers at Knee Deep Brewing in Auburn. We crashed for the night for an early start up highway 49.


Sunrise at the cabin


We took off towards the trailhead, and as we were driving I noticed that there was a dirt shortcut that would bring us to the same spot, wahoo! It was an improved gravel road, and after a quick air down to 28psi, we were cruising along…


Nothing but green on the OEM nav, perfect.


We arrived at the trailhead to find that we weren’t the only ones that had this great idea to spend the morning outdoors. While the parking lot was full, thankfully the trail didn’t feel crowded


Doggo was rocking a new pack my buddy gave me, and enjoying every bit of it


As we hiked up the trail, we could see the fire lookout far up the mountain…


Nothing beats a cold summit beer…


1,700’ elevation gain in 2.5 miles. Solid. On the way into town we caught a glimpse of where we had come from, and it was pretty amazing.


We made our way into Sierra City for lunch, and wound up getting some good BBQ at an event being held at a local historical mine, score!


Our campsite was going to be the Gold Lake 4x4 Campsite, located about 20 minutes outside of Sierra City. The 4x4 trail was about 2 miles long and had plenty of rock gardens to make the way in fun, and just the right amount for the lady. She has not been out with me on 4x4 trails before, so I am starting things out slowly to make it a good time for all! After almost a year with the 4Runner, I feel rather confident taking it on trails, and being able to pick good lines that work with my stock suspension. We went through a couple of tricky spots, and I am happy to say that not a skid plate was touched this time out, although I did use my sliders a few times. It’s a great feeling being confident, especially when you have a new to 4-wheeling passenger along for the ride. It makes things easy, and fun.


We ended up camping at Little Gold Lake, on the west side of it’s bigger compadre


The slide out in action


In the morning, we broke camp and headed out. Next stop, Truckee for lunch and then home to the Bay Area.


Overall, it was a great weekend exploring with the family, checking out areas new to us all. Every time that I go on one of these trips, I am amazed with how many roads, trails, and path are just there waiting to be explored. Using my GPS, I am constantly seeing off-shoots and places that I can go to on the next trip. I mark them with a waypoint, and archive them for when I plan another trip. I will likely be coordinating a T4R group trip in this area either in the upcoming months, or in the spring as there are a good amount of 4x4 trails, as well as some hikes and nearby lakes/rivers/towns. So look for something in the future discussing it more.


More to come…​
 
  • Like
Reactions: Crispy

MTN4RNR

Rank V
Launch Member

Advocate II

1,750
Bay Area, CA
Member #

0614

Mod Update
A few weeks back, after crumpling my exhaust tip at Bald Mountain, I had a new tip welded on at a local shop that pointed slightly out to the passenger side. After spending a weekend at elevation with the back window down a good portion of the trip, my exhaust smell problem is almost non-existent. I was able to smell it a bit as we climbed a winding, slow grade outside of Donner Lake traveling at about 20mph, but that was it. It came and went quickly. Very happy for a $20 mod. It also allowed me to add a second recovery point that I picked up from a friend when I helped him install his CBI bumper swing out. If you haven't done an exhaust tip, it's worth the small amount of money to have it done


MTN4RNR

Rank V
Launch Member

Advocate II

1,750
Bay Area, CA
Member #

0614

Blue Ridge Overland Gear - The Attic
This weekend I installed The Attic from Blue Ridge Overland Gear. I wanted to add more storage for light objects (blankets, jackets, sleeping bags, etc.) while using previously unused space.

Installation:
The install was a little tricky, but I eventually figured out my own method the best way to install the attic. I used the left over stock cargo tie downs to replace the standard clothes hooks. Then using a carabiner, I hooked the outer most loop of the attic to the tie down. I installed the front attachment points as BROG had designed them.

Impressions:
The dimensions fit the 4Runner well, and the design allows for a good amount of 'stuff' to be stored up top. Anyone sitting in the backseat over 5'6" - 5'9" could bump into the attic, but for me that's a non-issue as I rarely have people back there for long distances. Removing the attic is fairly simple if cargo needs change, allowing for the best headroom possible. Once I get this thing on the trail for an extended trip, I will update this post.


MTN4RNR

Rank V
Launch Member

Advocate II

1,750
Bay Area, CA
Member #

0614

Informal weekend update

Hit the road...


Tahoe City Oktoberfest...


Stopped at Tahoe after Oktoberfest for a roll-fest


Stopped at an overlook...


Lens flare courtesy of a perfectly placed sunset...


Breakfast Pie...


Beer stop on the way home...


I'm going to mark it down as a successful 2 days....​
 

MTN4RNR

Rank V
Launch Member

Advocate II

1,750
Bay Area, CA
Member #

0614

I finally put the bike on the 4Runner this weekend as I needed to make a day trip to the central coast to pick up meat for a BBQ. Man, it felt good getting out on the trail, but I suffered the consequences of not having ridden in a while. Death on the way up, adrenaline on he way down. No pain-o, no gain-o!


MTN4RNR

Rank V
Launch Member

Advocate II

1,750
Bay Area, CA
Member #

0614

Niagra Rim/Eagle Peak - October 2016 (Part 1 of 3)

Summer is coming to a close in the Sierras, and fall has begun. We set out on a trip to the Niagra OHV area in Stanislaus National Forest, off of Highway 108. V_man lead a group through this trail last year around the same time, and it rained the whole trip. Here, a year later, and the forecast hasn’t changed. Rain was predicted Friday, with a lull on Saturday, and then rain late in the afternoon Saturday lasting through Sunday. Snow was predicted at 7.5k feet, and a high wind warning had been issued in the area. Sounds like the perfect weather for an adventure. It was perfect trip for me because I had not been to that area previously, nor had I camped in adverse weather like that. I now know what I need and don’t need for that sort of weather, and thankfully the need list isn’t that big. On with the trip report…


Driver/Rig:

V_man [Vincent] - 1990 Toyota 4Runner

jAndyMendo [Andy & Taco] - 2014 Toyota Tacoma TRDOR (Not to be confused with Hodor)

MTN4RNR [Max] - 2016 Toyota 4Runner Trail

NatersXJ6 [Nate & Charlotte] - 2014 Jeep JKUR

GHOSTFJ [Cha] - 1997 Lexus LX450

Samiman [Nick] - 2001 Toyota Tundra


Vincent, Andy and I left the Bay Area Friday night, wanting to get up the hill before/if the road was going to close because of snow. Also, because our good weather window was for Saturday morning, so the earlier we started, the better off we’d be. This meant rolling into camp at around 12:30am, where Nate and Charlotte had already made it there and had packed in for the night. There was some stargazing, as the clouds were rushing by providing windows to the stars and full moon behind. We all had a beer for accomplishing the drive, and hit the sack.


Morning in camp was spectacular. Clear skies with the occasional passing cloud meant that we could enjoy some dry coffee and breakfast before going to meet with the others at the trailhead at 10am.


Shortly after meeting-up and airing down, we hit the Niagra Rim 4x4 Trail.


The first obstacle was a decent with a rocky surface, and to top it off, you couldn’t see anything over the hood. Spotters and a quick pre-run look were helpful here. Vincent, naturally, just went straight down, because 37’s.


PC: v_man


Then came a challenging uphill “No way out hill”, with two options. Left took you to a tight squeeze between a boulder, and a tree that had enough scars to tell me it was something to watch out for. Right was the harder route with a solid rock shelf, and a few off camber boulders to mix things up.


Lets start with the left. I followed Vincent and Cha to the left, and watched them squeeze through the tight section; Vincent with large tires just rolled over the left most part of the boulder, Cha with less large but still large tires took a line closer to the tree and was able to push through once he locked his front diff. For me, I knew I would need to get up on the rock, but more importantly I would need to avoid the tree. So I went higher on the rock, and onto the slider. Once the rock had slid about half way down the slider on the bottom side I lost traction and momentum, but I expected this being on stock suspension, with wet conditions. Could I have gone lower on the rock? Yes. But hitting a tree wasn’t an option, and I had a perfectly good strap and a LX450 in front of me to scoot me over the hump. Being stock, these are some of the considerations that I need to take, and as I upgrade things, my capabilities will be upgraded as well. For today, I still made it; without a scratch. Nate with his JK made it through the squeeze without incident, but the tree found it’s way into the rear bed panel of Nick’s Tundra. Full size rigs make for a tight squeeze. But, with a bit of work, it’ll buff out.


PC: GHOSTFJ


PC: v_man


PC: v_man


PC: GHOSTFJ


PC: GHOSTFJ


Now, the right line. Andy took the right line because his Tacoma has been built to handle this type of a line, and he likes to smell rock on metal. Rock stacking got his front tires over the shelf, but dragging the rear weight proved to be too much, and because he was slowly sliding downhill attempting to hop over, we elected to winch over before we got into a sideways situation. A quick tug, and he was over the top and on his way. This would be a fun line later on in the 4Runner when I have equipped it properly.


PC: GHOSTFJ


PC: v_man


PC: GHOSTFJ


We kept on heading through the trail. There were a few well placed boulders and some tight tree squeezes that brought us to the next challenge; wet tree roots, and a slippery downhill section called “hard-break hill”.


PC: GHOSTFJ


PC: GHOSTFJ


PC: GHOSTFJ
 

MTN4RNR

Rank V
Launch Member

Advocate II

1,750
Bay Area, CA
Member #

0614

Niagra Rim/Eagle Peak - October 2016 (Part 2 of 3)

We paused as we approached the rooted section known as “P.H. Rock”, to walk the lines, and then head through one by one. Vincent went first, with some wheel spin, and pulled over the roots. His tall tires helped with the slippery roots, but also started to create some mud that would only get worse as each vehicle passed. Cha had to work a bit harder to get through but made it without much of a problem. I watched both to try to figure out my line. I came through as outside as I could, knowing that I couldn’t attack the roots head on because I lacked tire height and the clearance to do so. So I came at an angle. It took me a few times to find where the traction was, but with a little skinny pedal on the right line, I made it over without an issue. Nick was next in the Tundra. He was also able to navigate the roots with some V8 torque and finesse. Nate came through in the Jeep, but a tough line choice and the mud that had built up on the roots made for a winching situation to help him over the taller roots. With Nick’s Tundra as the anchor point, and a few spotters to keep an eye on sideways movement, Nate was over and out quickly. Andy has the heaviest rig in our group and with the slick mud and sideways camber, it showed. He worked through the roots with a good line and some throttle. But on the other side of the roots, there was an off-camber section over a rock. With the back end of the Tacoma being as heavy as it was, Andy elected to throw out a winch line, just in case he slipped sideways coming over the rock. Turns out that winch line wasn’t needed as he stayed planted the whole time. Better safe than sorry though.


PC: GHOSTFJ


PC: GHOSTFJ


PC: GHOSTFJ


PC: GHOSTFJ


Hard Break Hill was slick. It was a good mix of clay and volcanic sediment, and it was just the right amount of wet from the rains the day before. A rider on a dual sport warned us that it took him 2 runs to get up it, and that we should walk it first. There were a few rocks on the way down that we had to snake around, and a big boulder off to one side at the steepest point that we had to avoid sliding into. But we all were able to navigate down the trail with a bit of slipping and sliding. I elected to use CRAWL control, mostly because it’s there and I hadn’t had any good reason to use it until that point. I figured on a slippery steep descent, why not try it out. I will say that it worked very well, albeit I did brake myself as I started to slide, but I think that was more out of habit.. As soon as I remembered that I was taking over, I released the brake and let CRAWL do it’s thing the rest of the way.


PC: GHOSTFJ


We came to a rock wedge on the trail. I watched how Cha handled it, and the line he took. I had to modify my line to suit the 4Runner. I needed to let the slider do the work as it is the most protected section of the rig, so I swung wide, and let the weight of the 4Runner slide on the inside rock through the feature. These sliders are solid, and I had not had the chance to use them as much as I did on this trip. I am extremely happy that I spent the money to do sliders properly. Unfortunately, I led Nate on a line that put him in a bit of a bind. Spotter’s mistake on that one. With a strap and a gentle pull, he was free.


PC: GHOSTFJ


PC: GHOSTFJ


“Sidewall Suicide” involved a short, technical climb, and a narrow/steep/off camber/(insert trail description here) descent. I asked Vincent if I can make it through, and he said I better sit this one out. Soon I saw why. It’s great to wheel and spend time with people that you respect because they’ll honestly encourage you to press your boundaries, and they will equally as honestly tell you when you should save it for another trip. I have been fortunate and thankful to get to know a few guys pretty well, and I trust their judgement immensely. Because of them I have learned a ton, and I cannot wait to keep learning!


PC: v_man


We decided that after the winching, wheeling and rock stacking, it was time for lunch. We headed to the Lion’s Butt for lunch. After a day of wheeling, and not earning a scratch of body damage, my hatch unfortunately met Andy’s Maxtraxx. Fun fact: Maxtraxx are tougher than Toyota sheet metal.


PC: GHOSTFJ


PC:GHOSTFJ


We hit double dome rock on the way back to Highway 108 where Cha and Nick aired up and hit the road back home, while Andy/Taco, Vincent, Nate/Charlotte and I hit the trail again this time back down Highway 108 to the Eagle Peak trailhead.


  • Like
Reactions: Steve

MTN4RNR

Rank V
Launch Member

Advocate II

1,750
Bay Area, CA
Member #

0614

Niagra Rim/Eagle Peak - October 2016 (Part 3 of 3)

With weather approaching, we wanted to hit our campsite before dark, and before weather intensity ramped up. At this point we were getting rain at 6k feet, our goal was to get into the snow zone, above 7.5k feet. Camp was set for Eagle Peak, 9.1k feet up, West of the Niagra Rim Trail. After a quick jaunt on 108, we drove an improved dirt track, onto a 4x4 trail that would lead us to camp. It started in trees, opened into an earthly moonscape, and then back into the trees along a cliff to the campsite. We made it just as it started to “ice”; a cross between hail and snow to create a lovely mix. We got a campfire started immediately after some chainsawing to create some additional firewood. Andy had THE adverse weather set up with a combo awning and tarp. An awning is on the short list now, so thanks for that! We stuck it out for as long as we could. 40 mph gusts, thunder/lightning, “ice”, and falling trees. I moved the 4Runner to an open area, and we all started up a game of cards with some drinks to keep us warm before calling it a night.


In the morning, we were met with rain. Camp was packed quickly and we moved down the mountain before conditions worsened. We made it backed to a paved forest road, and opt’d for a small turn out to air up. Heading out of the forest, past the National Forest sign is always a sad feeling, but it reminds me that I’ll be back, and that I haven’t even scratched the surface for the trails, roads and campsites that are out there in the Sierras. To date, over 500 miles tracked off road this year. Many more to travel. Nate and Charlotte said their goodbye’s over the radio and set off south. Andy split off in Oakdale to weigh his beast at a CAT scale in Ripon. And Vincent and I made our way back to the Bay Area. It was a great trip with good friends.


More to come...​
 
  • Like
Reactions: tom and Jethro

MTN4RNR

Rank V
Launch Member

Advocate II

1,750
Bay Area, CA
Member #

0614


The sleeping situation in the 4Runner has been improving, but it needs some further refinement. Next steps will be having a foam pad made to fit for the passenger side of the back that will give me more support than the blow up backpacking pad that I have been using thus far. I also removed the back seat bottoms to gain some extra storage room, and head room when I am sleeping. 2 bolts, and I can throw it back in there when I know I will be having people in the truck. I have been tossing around the idea of removing the driver's side rear seat in it's entirety and building an 'add-on' to the platform that I can attach my water tank to, as well as some other storage. It's a tough configuration because I don't want to end up with most of the additional weight on the driver's side. Hmmmm... Choices... Oh well, stay tuned​
 

ceh527

Rank 0

Contributor I

I've been following you and a few others on T4R.org for a while (lurking), while getting ideas for what to do with my 4R especially since I have the exact same original setup (picked mine up end of August). Good to see you on here as well- small world.
 

tom

Rank V
Founder 500
Launch Member

Enthusiast III

1,523
San Francisco Peninsula
First Name
Tom
Last Name
Owen
Member #

101

Ham/GMRS Callsign
KG6DHD
@MTN4RNR
I've spent the last howeverlong reading through this build/drive/use thread and it's fantastic, thank you for taking such time and detail to share with the OB community!

It looks like you're spending time and resources to find some real gems of camp areas and trails etc... do you ever publish your Gaia tracks? Would love to put some of those photos on a map for reference and possible duplication.

Also, it seems you are in the Bay Area and from some of the images, I'm guessing Peninsula? Same here. Sorry to miss you at there little gathering this past weekend but I'l keep an eye out for your rig in hopes our paths will cross, maybe over a beer one of these days.

Thanks again, Tom
 

MTN4RNR

Rank V
Launch Member

Advocate II

1,750
Bay Area, CA
Member #

0614

I've been following you and a few others on T4R.org for a while (lurking), while getting ideas for what to do with my 4R especially since I have the exact same original setup (picked mine up end of August). Good to see you on here as well- small world.
Small world indeed. I post here, T4R and Expedition Portal. Soon I will hopefully working on my own website to host adventures and build updates! Glad you're lurking and I hope you're enjoying what you see! Good luck!
 

MTN4RNR

Rank V
Launch Member

Advocate II

1,750
Bay Area, CA
Member #

0614

@MTN4RNR
I've spent the last howeverlong reading through this build/drive/use thread and it's fantastic, thank you for taking such time and detail to share with the OB community!

It looks like you're spending time and resources to find some real gems of camp areas and trails etc... do you ever publish your Gaia tracks? Would love to put some of those photos on a map for reference and possible duplication.

Also, it seems you are in the Bay Area and from some of the images, I'm guessing Peninsula? Same here. Sorry to miss you at there little gathering this past weekend but I'l keep an eye out for your rig in hopes our paths will cross, maybe over a beer one of these days.

Thanks again, Tom
Ah, awesome! I am happy that you have read the 'blog' and that you have been enjoying it! It's awesome to hear feedback from people who enjoy my writing and commentary.

I haven't posted them in the past, but that would be a good item to incorporate into the write ups in the future. If you have any specific ones you would like to see, send me a message and I can send you a link directly.

You guessed it! I missed that meet up, photos on social media let me know it was happening WHEN it was happening haha. I am always up for a beer, we should make that happen!

Max
 

MTN4RNR

Rank V
Launch Member

Advocate II

1,750
Bay Area, CA
Member #

0614

Slowly testing the main platform across trips and different gear setups. I am working now on "v1.5" where I have taken out the driver's side rear seat and am extending the platform forward. Aluminum rails will be integrated, and Line-X will happen sometime later when I need to have something else done too (they have minimums and they're expensive). Here's a sneak peak...


MTN4RNR

Rank V
Launch Member

Advocate II

1,750
Bay Area, CA
Member #

0614

With an upcoming trip to Death Valley on the horizon, I had a few big items to knock out this weekend.

I received my new Exped SynMat Mega 12M last week, and I can say that I am looking forward to sleeping on this very much. It fits perfectly in the cargo area being 22" wide and just over 6' long. And at almost 5" thick, it's seriously comfortable. This weekend and the 4 nights we'll be out there will be a great way to test it out.


I have been running my Yaesu FT-60R's for about 8 months now, and I have really enjoyed using them; they have been a solid investment for communication. They do have some shortcomings however. Lack of power, battery restrictions, and it takes up a cup holder. I decided to take the next step and upgrade to a dual bander mobile unit. After a lot of research, I purchased a Kenwood TM-V71A and installed it this weekend. I tested it last night, and the range is awesome. Hitting repeaters 30+ miles away, awesome! I will have a more in depth install with photos coming later after this week.


More to come....
 

MTN4RNR

Rank V
Launch Member

Advocate II

1,750
Bay Area, CA
Member #

0614

Wow. Honestly time has flown, and I have been really busy working on my new website. So much so that I have not been updating all of my forum threads. So here I am, resurrected! Quite a few trips have happened since the last time I posted. Some involving snow, some in the desert sand. They can all be found here: Explore4R - The Adventures

Here's a recap:

Death Valley November 2016


The Christmas Tree Hunt - December 2016


A New Year in the Mountains - January 2017


Big Sur - January 2017


Death Valley - March 2017


Snow Melts and Sierra Campsites - May 2017


Winter Wonderland...In June - June 2017


Sierra Exploring - July 2017


The Eclipse: A Reason to Explore the E. Sierras - August 2017

I will be updating this thread, yet again, as I post new trip reports now that I have gotten my formatting and system dialed in on the website.

Enjoy!​