An M1102 Adventure Story & Build

  • HTML tutorial

Crfracer47

Rank I

Enthusiast I

201
Sonoma County, CA, USA
First Name
Ethan
Last Name
Stockton
Hi all. Well, I'm going to give a build thread the old college try. I've done a couple of different builds (different platforms/categories, etc), but never a build thread on them, so...Here it goes!


The Story


I have always been an outdoors person, having spent a lot of my youth helping on the family cattle ranch, parts of which are completely surrounded by tens of thousands of acres of National Forest. Anything out in nature appealed to me, from backpacking, to snowboarding, camping, hunting, scuba diving, flying, motorcycles, and pretty much everything in between. Motorcycling was always near the top of the list though, and I don't think there has been a single day in the last 25+ years I have not owned at least one.


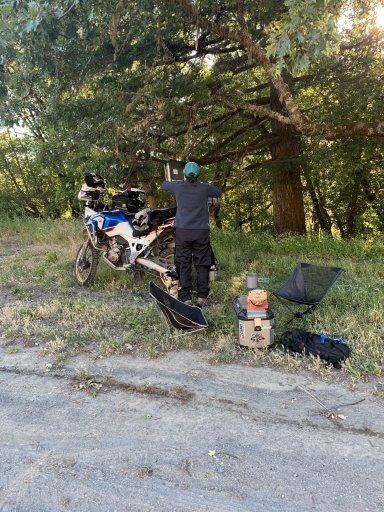
After watching The Long Way Round and (to a lesser extent) The Long Way Down, I got the bug to get into Adventure Motorcycling/Touring. What better way to get out and experience new and exciting (and sometimes old and familiar) places, than to be on a motorcycle. To be out in the elements, feel the cold, the warm, sun, and the rain. To smell the area you are in, and experience the change from one place to another. It was fascinating, exciting, and liberating.


I had the pleasure to take a couple of trips by myself, and then met a beautiful woman who is intelligent, interesting, and interested (which I find equally important), and who also happens to love the outdoors. She had never been on a motorcycle before we met, but that didn't last very long (our second date was a motorcycle ride out to the coast to watch the sun set). A couple months later and we took a weekend long trip from the San Francisco Bay Area, out to Tahoe, up to the Mt. Lassen area, back out to the west side of the state, and (almost) made it back home without any issues (a flat tire a few hours from home found us on the side of the highway waiting for a ride from family.)
IMG_1260.JPG IMG_1261.JPG IMG_1263.JPG


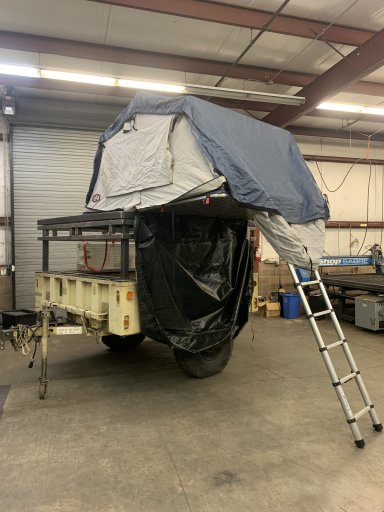
Fast forward a little while and we find ourselves living together and adopting a dog from a couple very good friends who were moving and couldn't take the dog with them (there was never any question where the dog would go if they weren't able to keep him, and it had been discussed long before the situation ever arose.) Well, it's a bit harder to add a 95lb black lab to an already full adventure motorcycle, so it was decided we should get a roof top tent for her Subaru, and I could build a rack for my Ram 2500 that could also carry it.


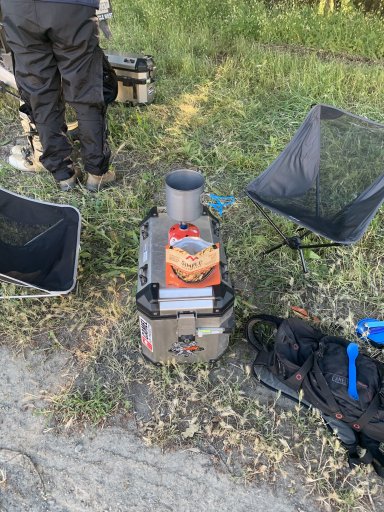
We took a couple of trips with the tent on my truck and it worked out great (so great we have never used the tent on the Subaru.) A few months later and what happens? We get another dog. Extended motorcycle trips are pretty much out of the questions now (but we can still get away for a good long ride now and then), and with the addition of the 2nd dog, a 45lb husky, we find the truck is packed to the gills with everything we want/need even for a long weekend. We were able to do a 2 week road trip up the eastern side of CA, OR, and WA, over into MT, down through ID, UT and NV (just clipped the corner AZ too), and back over to the family ranch outside of Bakersfield, CA. On this trip, we were cramped, to say the least, and even the dogs were having to share the back seat with supplies/personal items.
IMG_0728.JPG IMG_1594.JPGIMG_1616.JPG WLMX8727.JPG
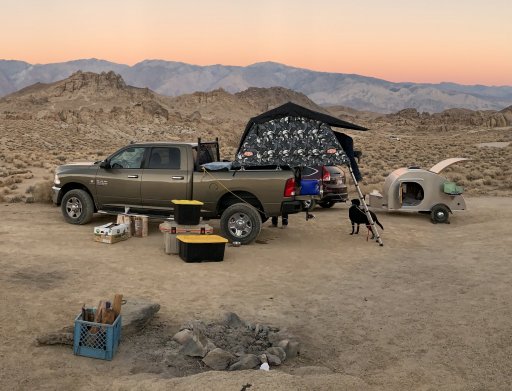
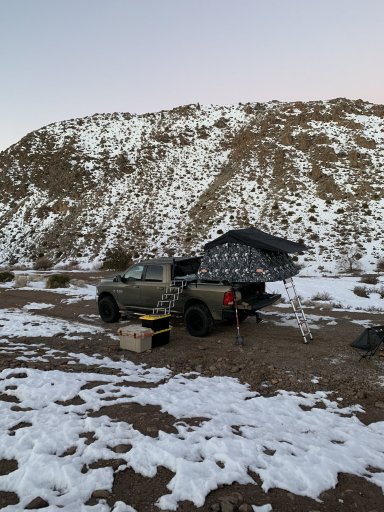
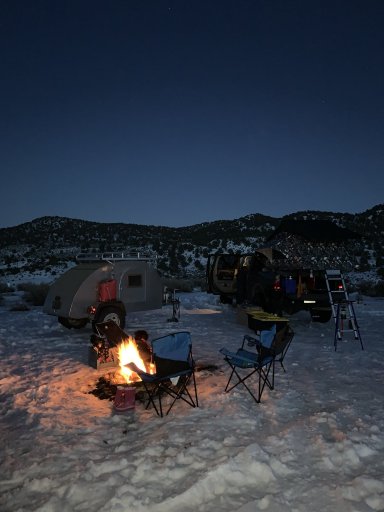
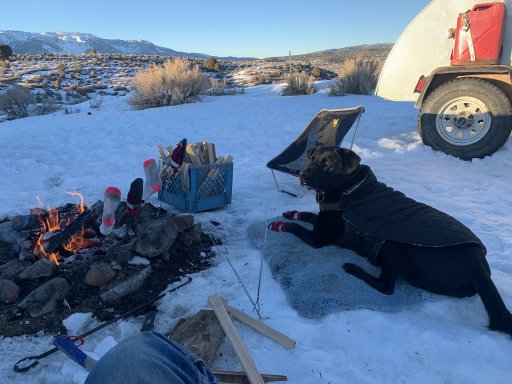
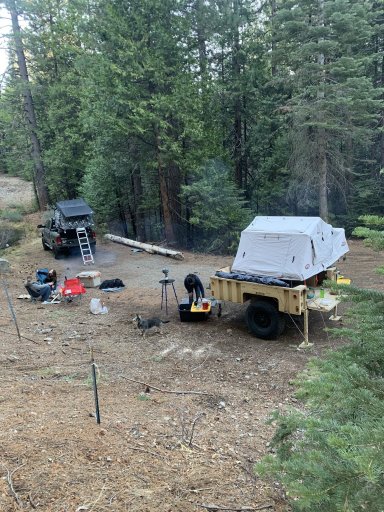
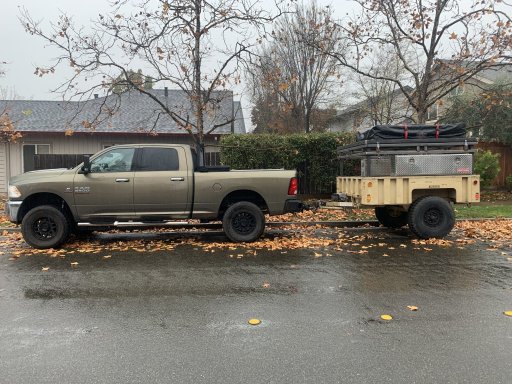
(This is a challenge photo - Find the deployed RTT)


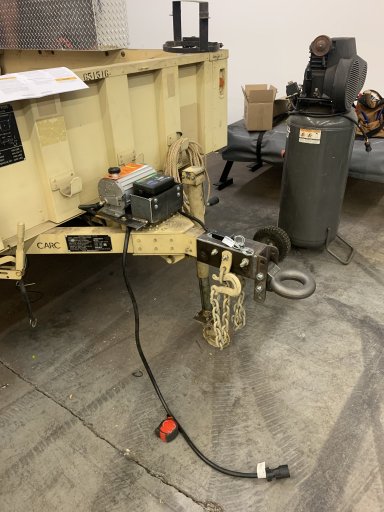
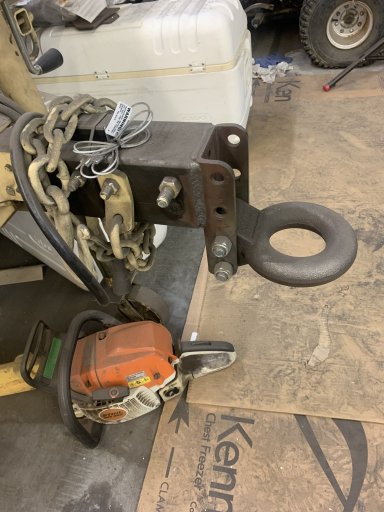
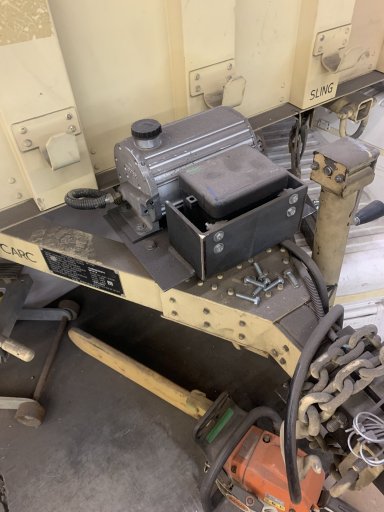
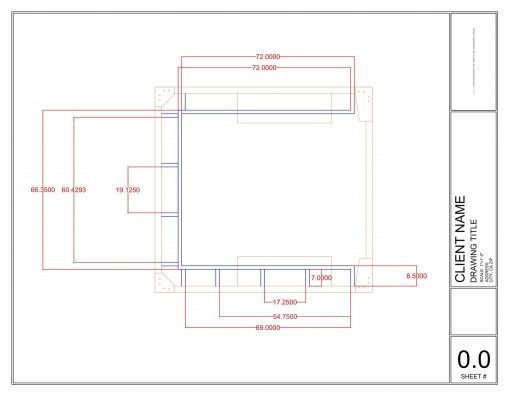
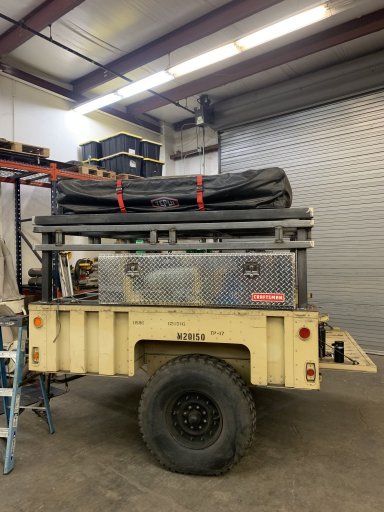
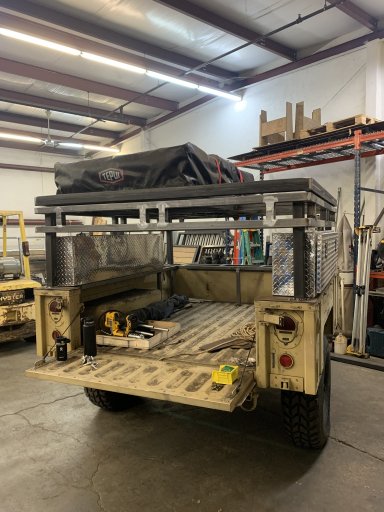
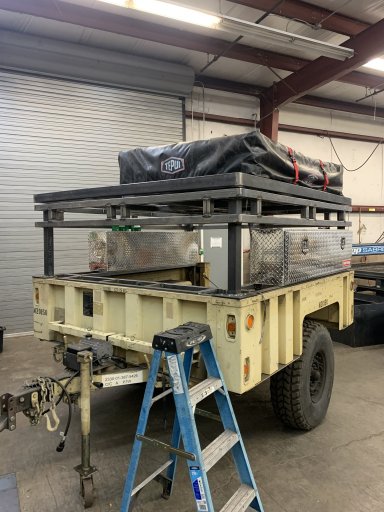
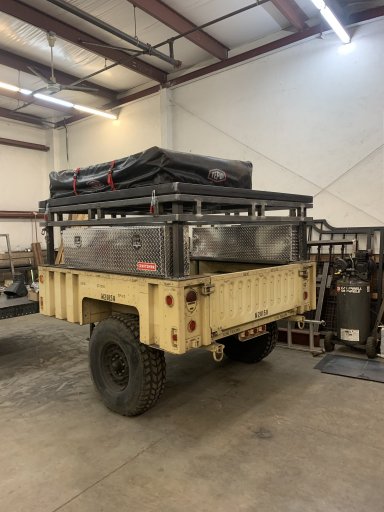
I had seen some videos of people turning the M1101/2 into camping trailers, and thought it could be a fun project (and had been thinking of doing one before the long trip, but not actively trying very hard). Well, the long trip was a bit of a deciding factor, and I resolved to putting more effort into making it a reality. I scoured GovPlanet.com, Expedition.Supply, and any other sites I could find to learn as much as I could about the trailers, buying process, and prices. It just so happened that there was an auction for several M1102s in southern CA right at the end of our trip. I put bids in on the first couple, but they went for well more than I was prepared/willing to spend. Then, on the final one up for auction, I WON! And not at my highest bid either.


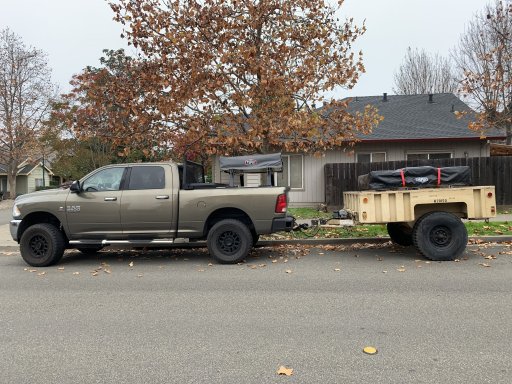
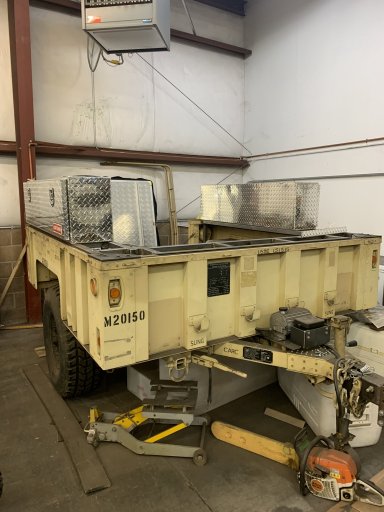
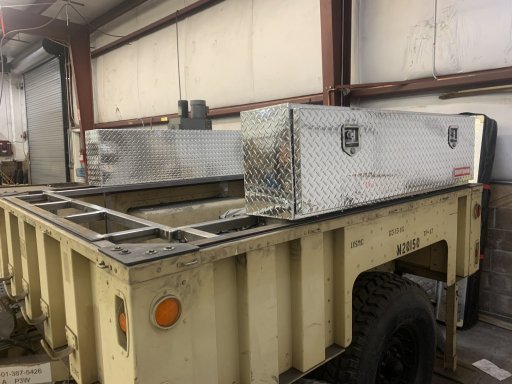
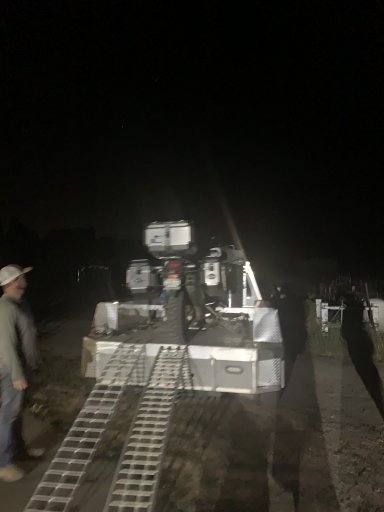
Unfortunately, this meant another 2 days in the truck only a week after getting back from being in it, pretty much all day, for the previous 2 weeks. So, on my next "weekend" (I was in Law Enforcement at the time and worked most traditional weekends, which was actually in my benefit at this time) I hooked up our gooseneck trailer, and drove 8 hours to the outskirts of Barstow, CA. The next morning, I drove out to the auction yard and picked up my new (to me) M1102 trailer. It was actually in better shape than I had anticipated, even though I had thoroughly scoured the photos before bidding. Once I was all loaded up and tied down, it was time to get back on the highway for another 8 hours for the drive home.
IMG_1804.JPG IMG_1805.JPGIMG_1806.JPG IMG_1807.JPG
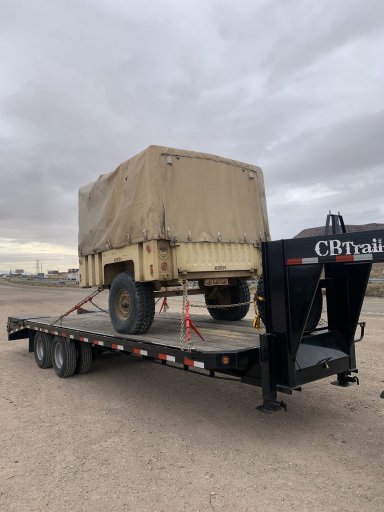
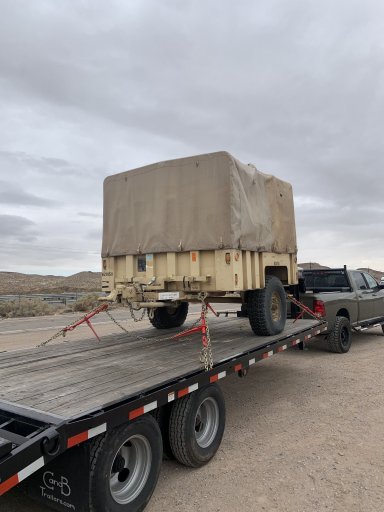
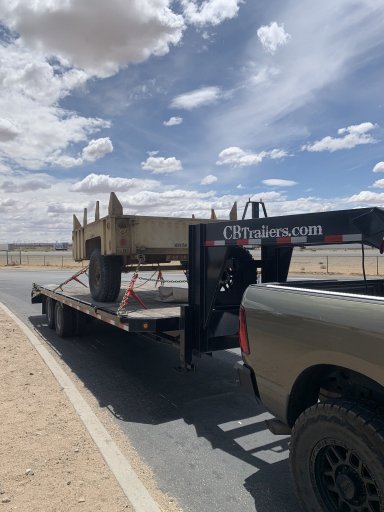
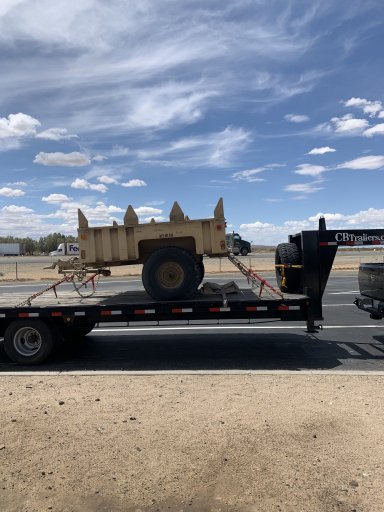
(Had to pull the tarp kit off as it was absolutely killing the fuel economy)


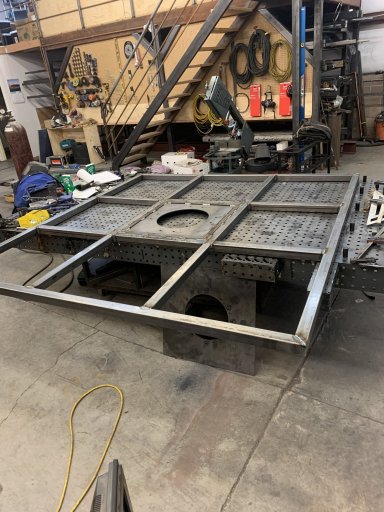
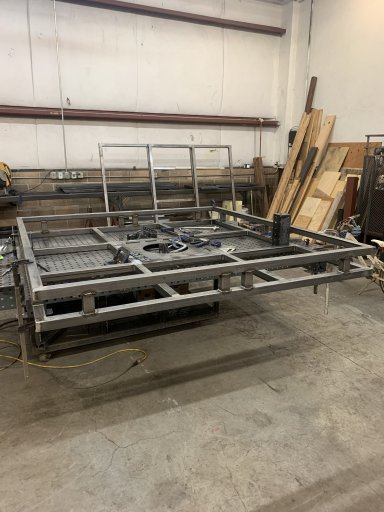
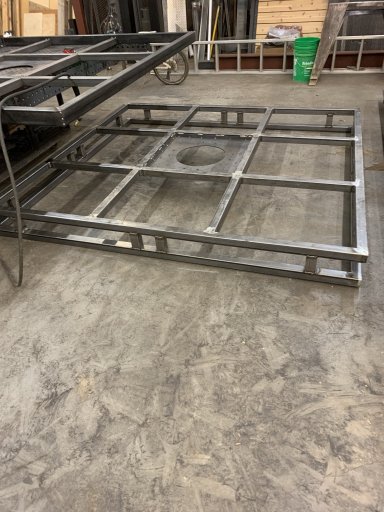
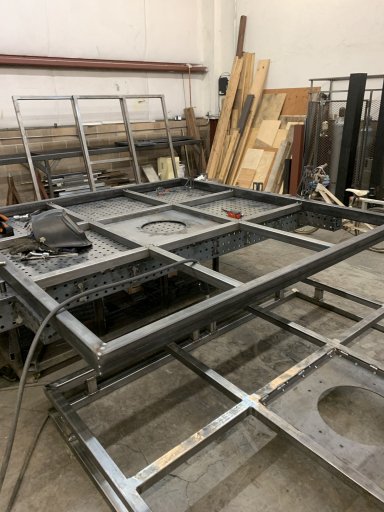
Coming Up Next...The Build
 

Crfracer47

Rank I

Enthusiast I

201
Sonoma County, CA, USA
First Name
Ethan
Last Name
Stockton
Sorry for the delay getting the next installment out. Between the Thanksgiving holiday, and trying to get a fair bit of work on the trailer done for an upcoming (this weekend) trip to the mountains for National Forest Christmas Trees, I just haven't had time to do any writing.
 
  • Like
Reactions: Red_Leaf_Overland

Crfracer47

Rank I

Enthusiast I

201
Sonoma County, CA, USA
First Name
Ethan
Last Name
Stockton
The Design Phase


As with any big project, I began by trying to come up with a mission, what did I want my overlanding trailer to do, and a plan for how to achieve the mission.


There were some things I knew I wanted on my trailer. Having spent a few weeks on the road carrying two 7 gallon water containers, having to be fairly considerate of how we used it, and still having to refill part way through the trip (there were 3 of us and 3 dogs, so we did use a fair bit of water) I was certain I wanted to have enough water to be able to shower, do dishes, cook, make drinks, and so forth. Plenty of pressure and hot water to complement the storage was also needed. Dry (while maybe not 100% waterproof, but close) lockable storage, and good cold food/beverage systems, were a necessity. A system to make access to the cold food/beverage and other containers would be needed too. Finally, a way to mount a RTT (Roof Top Tent for those unfamiliar, though I don’t suspect there are many here unfamiliar with the initialism, you never know).


There were some other items I was contemplating. I wasn’t a huge fan of the surge brake system that the military used. I didn’t care for the issues it could present for backing, and, having done a fair bit of hauling, didn’t like that I couldn’t control it from the cab, whether that be manual activation or sensitivity. I also thought about other hitch systems.


The brake and hitch systems were the first points I wanted to address because they directly, and more immediately, affected towing and usage. I did some research on brake systems and found full electric conversions. Considering the fact this was going to be an overlanding trailer, and water crossings were almost an inevitability, I didn’t like that full electric could fail if they got wet. There was also the solution of an electric over hydraulic system. The biggest issue with these was cost. I did a fair bit of digging around and found a less expensive electric/hydraulic system that still met all the requirements for weight and operation. Unfortunately, when I ordered it, being in the middle of the COVID pandemic and all the supply chain issues that came with that, it was unavailable with no time frame, so I ended up going with a more expensive system, but hey, it’s only money.


Next came the hitch system. Did I want a ball? What about the off-road hitches which could provide full rotation? Or do I just stick with a pintle hitch, but with a little variation of height? I ended up deciding no to a ball because there was the off chance of issues with roll and pitch. The decision between the off-road hitch and sticking with the pintle was a little more challenging. In the end, I just was not convinced the off-road hitch was the best answer. I liked that with the pintle, I could have a dedicated truck side hitch which I could use for other trailers as well, and still have tons of roll, pitch, and yaw flexibility. With the hitch dilemma resolved, I set to finding all the right pieces, which included figuring out the standard tongue height of the M1102, the hitch height on the truck, and doing the math to build a drop lunette ring, and raised pintle system for a flat connection.
IMG_2175.JPG IMG_3252.JPG IMG_3253.JPG


With the hitch and brakes sorted and sourced, it was time to start looking at the other elements of the trailer. I found some specs (I think on Expedition.Supply, maybe somewhere else, but now I don’t remember) for the majority of the interior bed dimensions, and set to laying out some ideas. I found some 26 gallon RV water tanks on eTrailer.com that would comfortably sit between the wheel wells. Also from eTrailer.com, I picked up a Seaflow 3GPM RV/Marine water pump. Finally, I found some Craftsman side mount tool boxes at Lowe’s (I think they may be discontinued now) which were 60” long, 12” deep, and 16” tall, the perfect size to sit on the bed rails and not encroach beyond the wheel wells.


We began looking for a larger RTT than the Tepui Kukenam 3 person tent we already had. We really liked the layout of the Tepui with the skylights and access points, but weren’t too keen on spending the money on another brand new one (especially since the first one we bought was on sale and we were now spoiled on that pricing.) After some scouring of the web, I stumbled upon a Tepui Autana 4 that was only slightly used, had pretty much every possible accessory (including the annex, upgraded 3” thick mattress, upgraded straps, and thermal liner), and for a very reasonable price. So, after an afternoon/evening excursion to the San Francisco East Bay, we had ourselves a tent. We ended up doing a trip to the National Forest last year for Christmas Trees, and used a hasty, make shift rack system for the new tent on the trailer for us, and the original tent on the pick-up for my brother and niece.
BMKI7726.JPG IMG_2188.JPG


With the RTT procured, it was time to design the rack system for mounting everything. I had some ideas in mind, and had seen some video/photos of other builds, and used those a little bit of a starting point. Knowing overland/boondock camping can present some challenges/limitations with every different camp location, I figured being able to easily open the tent to any side of the trailer would be a fantastic feature. I found a 20” 1 ton turntable bearing at VXB.com, and decided to figure out how to incorporate it into the rack.


With the trailer parked in our company fab shop, I took about as many measurements as possible on the trailer and made a drawing of it in AutoCAD. With the base trailer laid out with accurate measurements, I was able to start designing the rack, including locating the toolboxes, so I could see what it was going to look like, and tweak the design as necessary. After several weeks working on the design in the evenings, I came up with a final layout, with dimensions, materials, and cut lists.
M1102 lft side view-Left Side View-1.jpg M1102 lft side view-Front View-1.jpg
M1102 lft side view-Top View-1.jpg M1102 lft side view-Interior Tool Box Support-1.jpg

Now, it was time to start building. Check back soon for the next installment.
 

Foras

Rank IV
Member

Pathfinder II

1,229
Brentwood, CA, USA
First Name
Roger
Last Name
Bonte
Member #

43073

Service Branch
Army
The Design Phase


As with any big project, I began by trying to come up with a mission, what did I want my overlanding trailer to do, and a plan for how to achieve the mission.


There were some things I knew I wanted on my trailer. Having spent a few weeks on the road carrying two 7 gallon water containers, having to be fairly considerate of how we used it, and still having to refill part way through the trip (there were 3 of us and 3 dogs, so we did use a fair bit of water) I was certain I wanted to have enough water to be able to shower, do dishes, cook, make drinks, and so forth. Plenty of pressure and hot water to complement the storage was also needed. Dry (while maybe not 100% waterproof, but close) lockable storage, and good cold food/beverage systems, were a necessity. A system to make access to the cold food/beverage and other containers would be needed too. Finally, a way to mount a RTT (Roof Top Tent for those unfamiliar, though I don’t suspect there are many here unfamiliar with the initialism, you never know).


There were some other items I was contemplating. I wasn’t a huge fan of the surge brake system that the military used. I didn’t care for the issues it could present for backing, and, having done a fair bit of hauling, didn’t like that I couldn’t control it from the cab, whether that be manual activation or sensitivity. I also thought about other hitch systems.


The brake and hitch systems were the first points I wanted to address because they directly, and more immediately, affected towing and usage. I did some research on brake systems and found full electric conversions. Considering the fact this was going to be an overlanding trailer, and water crossings were almost an inevitability, I didn’t like that full electric could fail if they got wet. There was also the solution of an electric over hydraulic system. The biggest issue with these was cost. I did a fair bit of digging around and found a less expensive electric/hydraulic system that still met all the requirements for weight and operation. Unfortunately, when I ordered it, being in the middle of the COVID pandemic and all the supply chain issues that came with that, it was unavailable with no time frame, so I ended up going with a more expensive system, but hey, it’s only money.


Next came the hitch system. Did I want a ball? What about the off-road hitches which could provide full rotation? Or do I just stick with a pintle hitch, but with a little variation of height? I ended up deciding no to a ball because there was the off chance of issues with roll and pitch. The decision between the off-road hitch and sticking with the pintle was a little more challenging. In the end, I just was not convinced the off-road hitch was the best answer. I liked that with the pintle, I could have a dedicated truck side hitch which I could use for other trailers as well, and still have tons of roll, pitch, and yaw flexibility. With the hitch dilemma resolved, I set to finding all the right pieces, which included figuring out the standard tongue height of the M1102, the hitch height on the truck, and doing the math to build a drop lunette ring, and raised pintle system for a flat connection.
View attachment 246037 View attachment 246038 View attachment 246039


With the hitch and brakes sorted and sourced, it was time to start looking at the other elements of the trailer. I found some specs (I think on Expedition.Supply, maybe somewhere else, but now I don’t remember) for the majority of the interior bed dimensions, and set to laying out some ideas. I found some 26 gallon RV water tanks on eTrailer.com that would comfortably sit between the wheel wells. Also from eTrailer.com, I picked up a Seaflow 3GPM RV/Marine water pump. Finally, I found some Craftsman side mount tool boxes at Lowe’s (I think they may be discontinued now) which were 60” long, 12” deep, and 16” tall, the perfect size to sit on the bed rails and not encroach beyond the wheel wells.


We began looking for a larger RTT than the Tepui Kukenam 3 person tent we already had. We really liked the layout of the Tepui with the skylights and access points, but weren’t too keen on spending the money on another brand new one (especially since the first one we bought was on sale and we were now spoiled on that pricing.) After some scouring of the web, I stumbled upon a Tepui Autana 4 that was only slightly used, had pretty much every possible accessory (including the annex, upgraded 3” thick mattress, upgraded straps, and thermal liner), and for a very reasonable price. So, after an afternoon/evening excursion to the San Francisco East Bay, we had ourselves a tent. We ended up doing a trip to the National Forest last year for Christmas Trees, and used a hasty, make shift rack system for the new tent on the trailer for us, and the original tent on the pick-up for my brother and niece.
View attachment 246040 View attachment 246041


With the RTT procured, it was time to design the rack system for mounting everything. I had some ideas in mind, and had seen some video/photos of other builds, and used those a little bit of a starting point. Knowing overland/boondock camping can present some challenges/limitations with every different camp location, I figured being able to easily open the tent to any side of the trailer would be a fantastic feature. I found a 20” 1 ton turntable bearing at VXB.com, and decided to figure out how to incorporate it into the rack.


With the trailer parked in our company fab shop, I took about as many measurements as possible on the trailer and made a drawing of it in AutoCAD. With the base trailer laid out with accurate measurements, I was able to start designing the rack, including locating the toolboxes, so I could see what it was going to look like, and tweak the design as necessary. After several weeks working on the design in the evenings, I came up with a final layout, with dimensions, materials, and cut lists.
View attachment 246042 View attachment 246043
View attachment 246044 View attachment 246045

Now, it was time to start building. Check back soon for the next installment.
I like the truck and I've wanted an M1102 myself. Looking forward to seeing your progress on the trailer.
 
  • Like
Reactions: Red_Leaf_Overland

Crfracer47

Rank I

Enthusiast I

201
Sonoma County, CA, USA
First Name
Ethan
Last Name
Stockton
The Build Phase – Stage 1


With the design set, materials sorted out, a cut list in hand, and a mind open to improvisation as needed, it was time to start building.

My initial plan had been to weld the bedrail caps to the corner brackets and have the inner toolbox supports and upper rack all welded to the bed rails, creating one complete unit. After I had the corner brackets drawn up and cut out on the plasma table (this ended up with several variations of contours to see what I liked/worked best), and the bedrail caps cut to length and mounting holes drilled, I started building the inner toolbox supports.

IMG_3226.JPG IMG_3227.JPG IMG_3256.JPG

IMG_3255.JPG IMG_3257.JPG

With the inner toolbox supports in place, I began thinking about my original plan of having everything be a single unit. After some deliberation and discussion with my brother, I figured it might create too many issues if everything was one piece (too hard to R&R for paint/powder coat, or any future maintenance/modification), and decided to have the inner supports welded to the bedrail caps and the upper rack welded to the corner brackets, but not join the corner brackets and bedrail caps.

Now it was time to begin building the upper rack. I cut all the pieces and set to laying them out on our new (in house built) fixturing table (amazing thing to have for this type of fab work). Just prior to beginning to assemble the upper frame, it crossed my mind that the 2”x2”x.095” tube might be a little spindly (or at the very least look that way.) Fortunately, we had a stick of 2.5”x2.5”x.120” tube on hand. I elected to go this route for the extra strength and beefier look, which later turned out to be completely the right decision. I adjusted a couple of measurements on the original design to maintain some of the symmetry due to the larger legs, but those changes were minimal.

I started with the fixed part of the upper frame.

IMG_3262.JPG IMG_3264.JPG IMG_3265.JPG

Next was the very top frame, the part that would spin, allowing the tent to be opened on either side.

IMG_3266.JPG

Then it was time to add the legs and mount it to the trailer. Getting the legs to be in the right place (height, plumb in all directions, and square to each other) was probably one of the most difficult things to achieve (and I still didn’t get them quite as good as I would have liked, though I really don’t think anyone will notice even if they are standing right next to it and looking for the problems, so I guess I can live with it.)

With the rack set on the trailer, everything was welded into place, and the tent set on/in the rack.

IMG_3275.JPG IMG_3276.JPG IMG_3277.JPGIMG_3280.JPG IMG_3278.JPG IMG_3279.JPG

There was a little bit of a rush to get all this work done as we had planned another trip to the National Forest for Christmas trees again (this is starting to become a yearly tradition it seems, and one that I’m not going to complain about.) After a couple of weeks of really late nights every day, I reached the point the trailer could be used for a weekend. It would still need to be taken apart for painting/powdercoat (haven’t decided which, but leaning towards powdercoat), and some final finishing touches, but it was usable.

A couple days later, and nearly one year to the day (12/03/22 vs 12/04/21), we headed back into the mountains for another Christmas tree (that adventure, and it surely was an adventure, will get it’s own post here soon.)

IMG_3283.JPG
 

Attachments

Contributor III

154
Bay Area, CA, USA
First Name
Andre
Last Name
Benguerel
Ham/GMRS Callsign
WRYR258
Service Branch
USAF - ANG
Hi Ethan,

Awesome build! I am in the design phase with mine and had a question on material selection. What wall thickness tubing did you use? Are you still in Sonoma County? I'm down in Marin and would love a chance to see your trailer IRL one day. TIA
 
  • Like
Reactions: Red_Leaf_Overland