Enthusiast III
- 1,146
- First Name
- Kirk
- Last Name
- Sinclair
- Member #
-
17113
- Ham/GMRS Callsign
- VA3KXS
Quick intro:
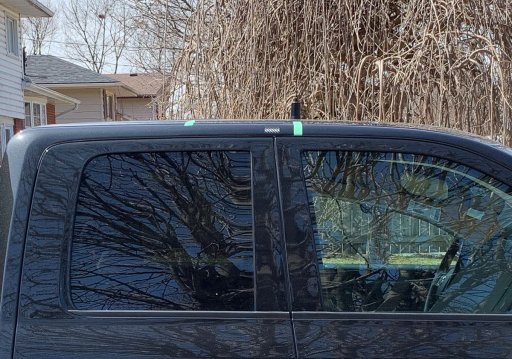
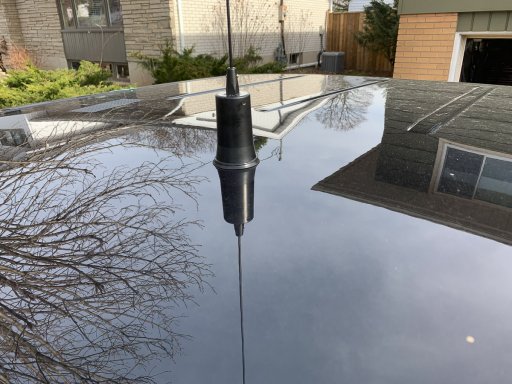
I am a fairly new amateur radio operator, licensed in June of 2018. I played around mostly on HF for the few few months until I acquired a handheld Yaesu VX-7R before Christmas. Around the same time I stumbled across the Overland Bound Weekly Net and realized nets would be a great way to get some use out of the radio and build some communications skills. I started looking around for repeaters and clubs in my area that host regular nets and found a few, one at the same time as my drive to work. The HT didn't work so well in the truck with the stock antenna, so I picked up a Diamond mag-mount 2m/70cm antenna (Diamond Antenna MR77 Dualband Mobile Antenna | Radioworld) which improved things significantly.
Distracted driving laws in Ontario do have an exemption for licensed amateur radio operators, but the device has to be securely attached to the vehicle. I connected a belt clip for the VX-7R to some RAM mounts in the console and used a speaker microphone to comply. I was getting ok signal reports, but the HT picked up quite a bit of QRM and I wasn't always able to reliably get into the repeater hosting the morning net with just 5W. Time to upgrade!
The radio:
The VX-7R has true dual-VFO which I found fairly handy for monitoring one frequency while scanning others, so I wanted the same for a new radio. I was also interested in APRS and having a unit with a remote head. Radioworld in Ontario had the Yaesu FTM-400XDR on sale since before Christmas, and essentially sold-out and on back order the whole time. I checked back regularly and one Friday afternoon saw they had some stock. A quick call put a hold on the only unit they had in inventory and I drove over to Toronto to pick it up on the Saturday. I purchased a remote speaker at the same time (Yaesu MLS-200-M10).
The install:
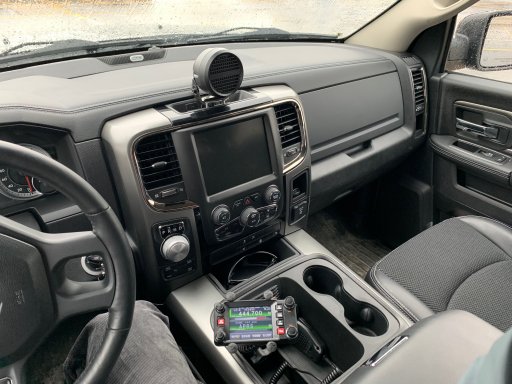
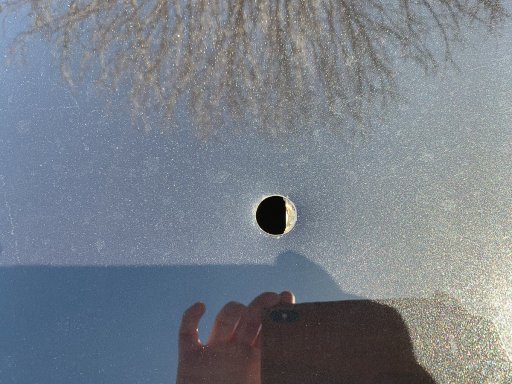
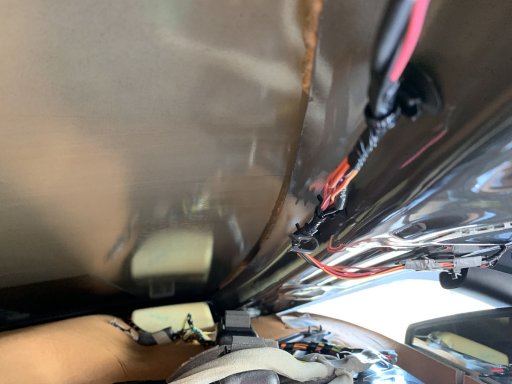
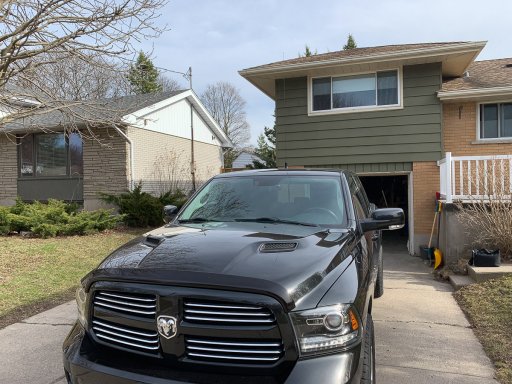
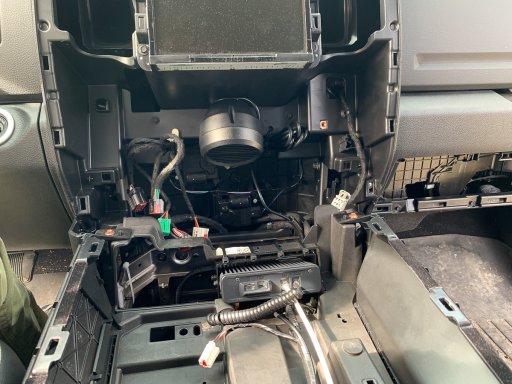
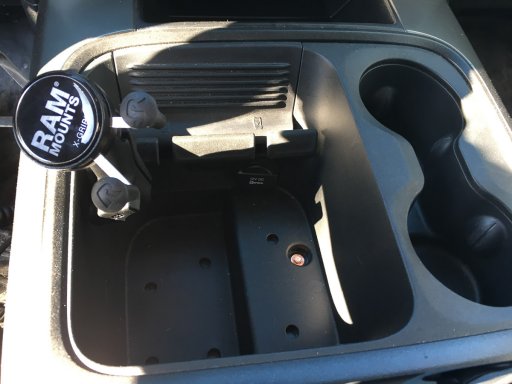
I drive a 2017 RAM 1500 and had to spend quite a bit of time reading forums and watching YouTube videos to get ideas for a clean install. I wanted the body hidden away and protected and I wanted the head unit right at hand so I wasn't reaching a long way to operate the controls. I decided to put the body beneath & behind this console and the head unit on the RAM mount.
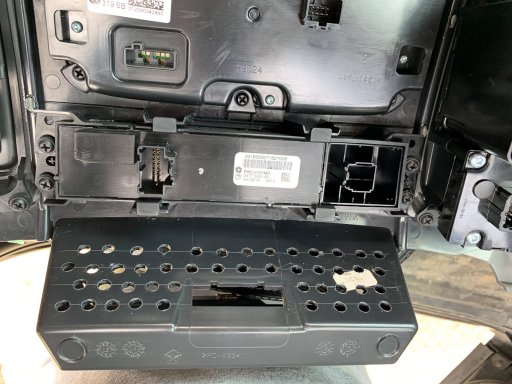
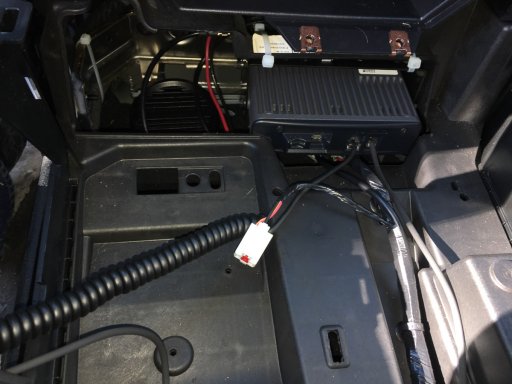
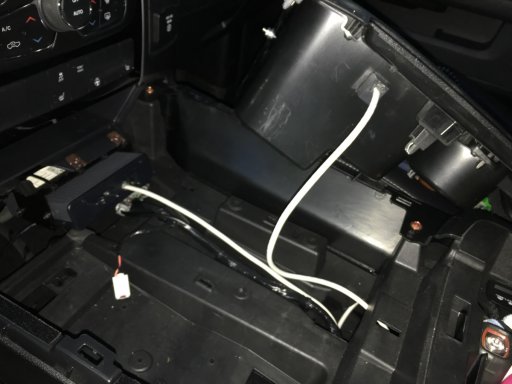
First go around, I put the remote speaker in the console as well. There are a few gaps in the upper console so it seemed like a good idea. I had setup the radio on my desk with the speaker plugged in and it seemed ridiculously loud. You can see it to the left of the base unit in the picture below.
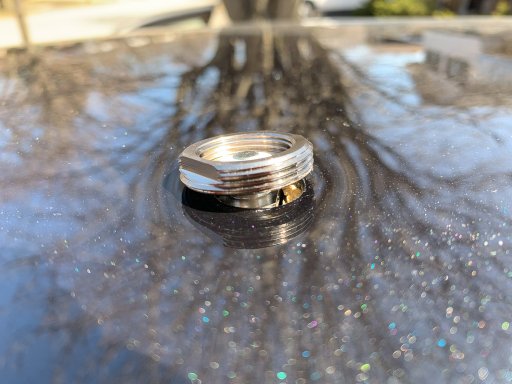
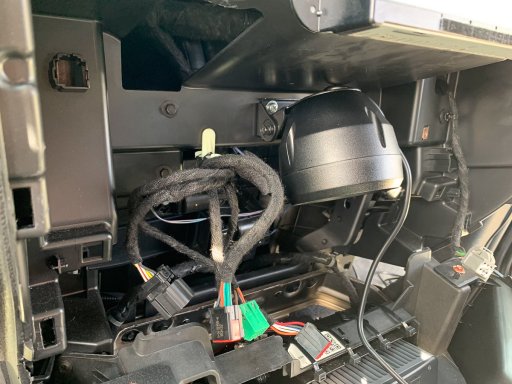
I was in a bit of a hurry so I just ran the mic and head unit cables out the knock-out on the left side of the picture below. The body is just zip-tied to an existing bracket, however you do have to unclip a few factory clips and push them down and out of the way. There isn't a lot of clearance in the rear of the radio so I have a 90' adapter on the UHF input. Power was run using 10 gauge wire over into the driver's foot well and through a plate covering the unused clutch pedal hole. I used a Daystar KU20040BK Black Universal Firewall Boot (available on Amazon) and protected the wires with plastic wire loom. Both the positive and negative wires have 15A fuses, with the positive direct to the battery and the negative to the chassis ground beside the fuse box.
That was version 1.0. I wasn't happy with the cable routing and the speaker wasn't loud enough - I had to run at 75% volume when driving down the highway, so I did it over.
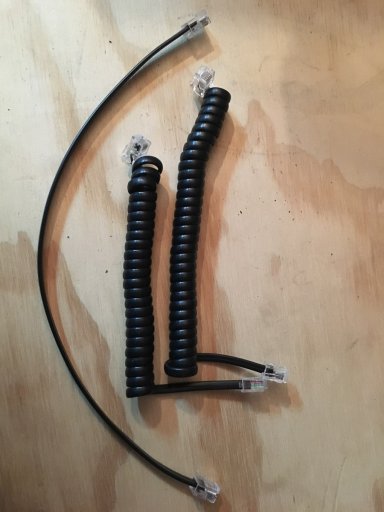
This time I found these RJ-12 inline adapters: https://canada.newark.com/l-com/ecf5046s-bk/rj12-coupler-jack-jack-6pos-cat3/dp/50AC8548 to use as passthru connectors to the console. FYI - the mic cable is a 6-wire RJ-12 connection (straight through). The head unit has a 4-wire RJ-9 connection (also straight through), and since I couldn't find any of the inline adapters for an RJ-9, I had to build some cables. Turns out the curly cable for an old-school telephone handset is a 4-wire RJ-9 cable (but cross-over). Cut it in half and attach RJ-12 connectors using just the middle 4 slots on the RJ-12 (and making sure you wire it as straight through). Now you are able to use it with the RJ-12 inline adapters. You can see the cables I built below (the curly ones on the right). The straight cable on the left is a commercial 6-wire RJ-12 straight cable, but ended up being too short so I made another using CAT5 cable.
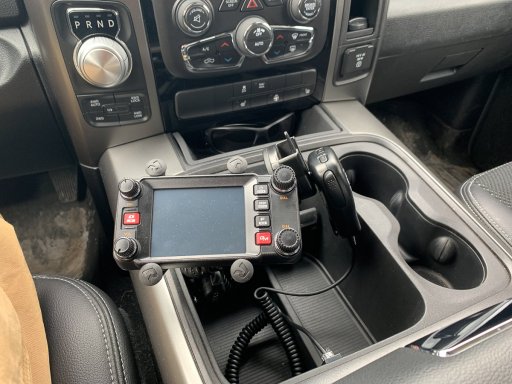
Next onto mounting the passthru adapters. My original thought was to put both at the front edge under the cardholder ledge. I wasn't 100% sure they'd fit given their size and the curve of the bin so I decided to put just the head unit jack there. Due to clearance issues, the only other spot for the mic adapter was in the rear of the bin.
Backside view of the connection for head unit at the front of the bin (black curly wire):
Backside view of the connection for the mic at the back of the bin (white wire):
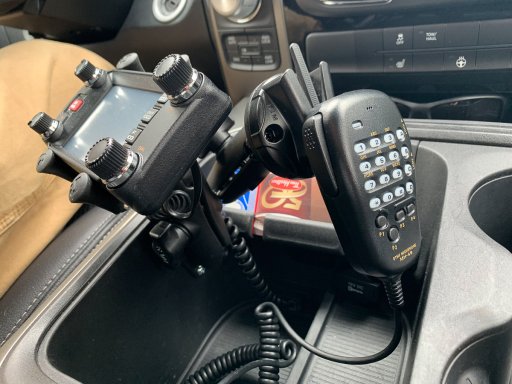
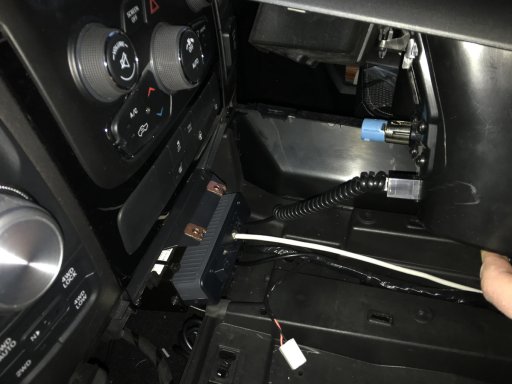
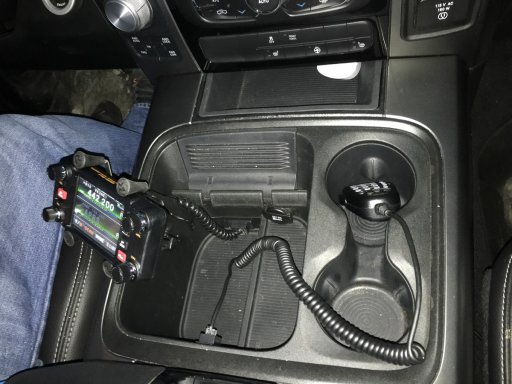
Finished product:
I'm not totally happy with the mic connection at the rear of the bin - it feels like it takes up a lot of the bin space. I may take another stab at putting it at the front and fill the hole in the rear with USB ports or something. I've ordered a few more bits and bobbles for the RAM mount to add another arm and a mic holder. I'll post more pics when those parts are installed.
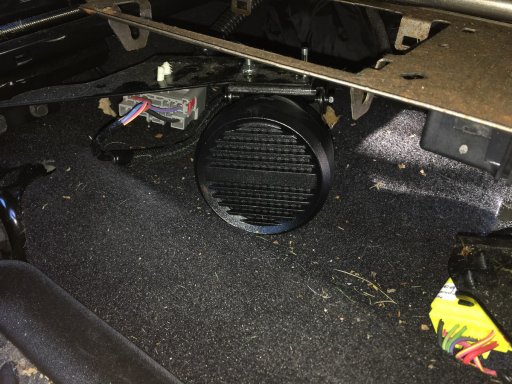
The speaker I moved to under the driver's seat. There is a little plate holding an electrical connection that is strangely much bigger than it needs to be and also has a hole pattern that fits a few of the holes in the speaker stand. Excuse the dirt, it was getting late fast and I just wanted this done.
I've been running this for a week or so, and I'm not sure it's an improvement over the in-console location. It's adequate for sure, but I'm still running at 75% volume on the highway. I've decided to buy a Bayou Goat mount (http://www.bayougoatmounts.com/single-disk-for-the--2013-2018-ram-truck.html) and mount the speaker right above the stereo display screen on the dash. That should improve the sound! I'll also post pics when I've moved it again.
I am a fairly new amateur radio operator, licensed in June of 2018. I played around mostly on HF for the few few months until I acquired a handheld Yaesu VX-7R before Christmas. Around the same time I stumbled across the Overland Bound Weekly Net and realized nets would be a great way to get some use out of the radio and build some communications skills. I started looking around for repeaters and clubs in my area that host regular nets and found a few, one at the same time as my drive to work. The HT didn't work so well in the truck with the stock antenna, so I picked up a Diamond mag-mount 2m/70cm antenna (Diamond Antenna MR77 Dualband Mobile Antenna | Radioworld) which improved things significantly.
Distracted driving laws in Ontario do have an exemption for licensed amateur radio operators, but the device has to be securely attached to the vehicle. I connected a belt clip for the VX-7R to some RAM mounts in the console and used a speaker microphone to comply. I was getting ok signal reports, but the HT picked up quite a bit of QRM and I wasn't always able to reliably get into the repeater hosting the morning net with just 5W. Time to upgrade!
The radio:
The VX-7R has true dual-VFO which I found fairly handy for monitoring one frequency while scanning others, so I wanted the same for a new radio. I was also interested in APRS and having a unit with a remote head. Radioworld in Ontario had the Yaesu FTM-400XDR on sale since before Christmas, and essentially sold-out and on back order the whole time. I checked back regularly and one Friday afternoon saw they had some stock. A quick call put a hold on the only unit they had in inventory and I drove over to Toronto to pick it up on the Saturday. I purchased a remote speaker at the same time (Yaesu MLS-200-M10).
The install:
I drive a 2017 RAM 1500 and had to spend quite a bit of time reading forums and watching YouTube videos to get ideas for a clean install. I wanted the body hidden away and protected and I wanted the head unit right at hand so I wasn't reaching a long way to operate the controls. I decided to put the body beneath & behind this console and the head unit on the RAM mount.
First go around, I put the remote speaker in the console as well. There are a few gaps in the upper console so it seemed like a good idea. I had setup the radio on my desk with the speaker plugged in and it seemed ridiculously loud. You can see it to the left of the base unit in the picture below.
I was in a bit of a hurry so I just ran the mic and head unit cables out the knock-out on the left side of the picture below. The body is just zip-tied to an existing bracket, however you do have to unclip a few factory clips and push them down and out of the way. There isn't a lot of clearance in the rear of the radio so I have a 90' adapter on the UHF input. Power was run using 10 gauge wire over into the driver's foot well and through a plate covering the unused clutch pedal hole. I used a Daystar KU20040BK Black Universal Firewall Boot (available on Amazon) and protected the wires with plastic wire loom. Both the positive and negative wires have 15A fuses, with the positive direct to the battery and the negative to the chassis ground beside the fuse box.
That was version 1.0. I wasn't happy with the cable routing and the speaker wasn't loud enough - I had to run at 75% volume when driving down the highway, so I did it over.
This time I found these RJ-12 inline adapters: https://canada.newark.com/l-com/ecf5046s-bk/rj12-coupler-jack-jack-6pos-cat3/dp/50AC8548 to use as passthru connectors to the console. FYI - the mic cable is a 6-wire RJ-12 connection (straight through). The head unit has a 4-wire RJ-9 connection (also straight through), and since I couldn't find any of the inline adapters for an RJ-9, I had to build some cables. Turns out the curly cable for an old-school telephone handset is a 4-wire RJ-9 cable (but cross-over). Cut it in half and attach RJ-12 connectors using just the middle 4 slots on the RJ-12 (and making sure you wire it as straight through). Now you are able to use it with the RJ-12 inline adapters. You can see the cables I built below (the curly ones on the right). The straight cable on the left is a commercial 6-wire RJ-12 straight cable, but ended up being too short so I made another using CAT5 cable.
Next onto mounting the passthru adapters. My original thought was to put both at the front edge under the cardholder ledge. I wasn't 100% sure they'd fit given their size and the curve of the bin so I decided to put just the head unit jack there. Due to clearance issues, the only other spot for the mic adapter was in the rear of the bin.
Backside view of the connection for head unit at the front of the bin (black curly wire):
Backside view of the connection for the mic at the back of the bin (white wire):
Finished product:
I'm not totally happy with the mic connection at the rear of the bin - it feels like it takes up a lot of the bin space. I may take another stab at putting it at the front and fill the hole in the rear with USB ports or something. I've ordered a few more bits and bobbles for the RAM mount to add another arm and a mic holder. I'll post more pics when those parts are installed.
The speaker I moved to under the driver's seat. There is a little plate holding an electrical connection that is strangely much bigger than it needs to be and also has a hole pattern that fits a few of the holes in the speaker stand. Excuse the dirt, it was getting late fast and I just wanted this done.
I've been running this for a week or so, and I'm not sure it's an improvement over the in-console location. It's adequate for sure, but I'm still running at 75% volume on the highway. I've decided to buy a Bayou Goat mount (http://www.bayougoatmounts.com/single-disk-for-the--2013-2018-ram-truck.html) and mount the speaker right above the stereo display screen on the dash. That should improve the sound! I'll also post pics when I've moved it again.
Last edited: