


Educator I
So after acquiring my Engel Platinum 45 Fridge the next question really was where to mount the fridge and how! It was daunting to see how many options there are for mounting fridges and after spending some time at Expo East 19 and seeing even some new setups it’s exhausting how many possible ways one could mount a Fridge into a Jeep JK. My first concern as any JK owner is damn I don’t want to loose my cubby under the rear cargo area for storage. I keep my hitch and some straps and gear. Secondly I knew I didn’t want to drill through my floors since the Jeep does see it’s fair share of wheeling, water crossings and all around all weather fun so compromising any sheet metal areas was out of the question. The more I looked into it nothing really was the fit I was looking for and what I did like was ridonkulously expensive for a board that screws into my floor boards....the same thing I didn’t want to do. So I sat around and tossed a few ideas around and came up with a board that I would mount to the existing cargo tie downs of the Jeep and had an access hatch to just remove the items in the storage when needed and came up with this 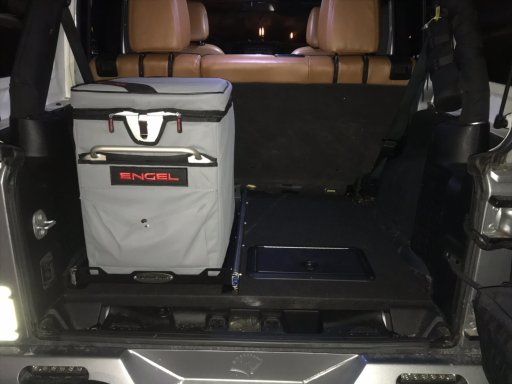
Being in Florida we have a lot of marine manufacturing supply houses so I used up some 3/4 Marine Treated Plywood which is designed for high moisture applications such as hulls on boats and floors and being 3/4 would stand even the heaviest of loads.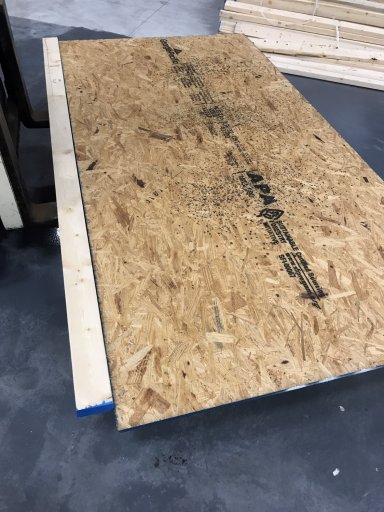
First I started off and got some rough measurements of the cargo area for what would be the primary floor. I measured and made a template I could cut with a jig saw. I wanted the false floor to notch around the rear seat brackets and to have enough surface area there would be no lifting or cracking or sagging under weight. I still wanted to have the factory cubbies for the door and roof hardware removal trays cause let’s face it she’s a Jeep she has a slutty side and loves to go topless and door less so I cut a strip the length of the gap, glued it clamped it and attached it with 1” screws so we knew we had a sturdy joint and what I call the ledge stop I guess.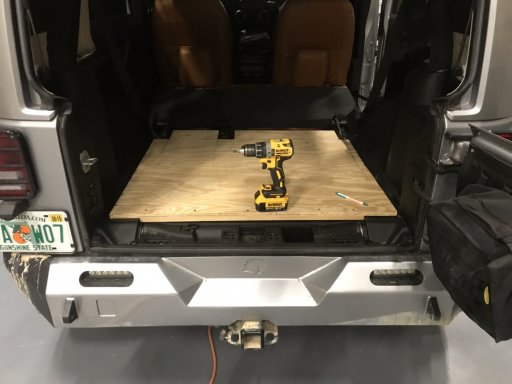
Once I had the shape of the floor that fit almost flush with the plastic panels of the Jeep and left enough room for the fabric to wrap the board and eventually leave no space so crap doesn’t wedge itself down in the cracks and then becomes impossible to clean! After the board was right I drilled out the holes in the exact same location the factory rear cargo tie downs are attached to so we can then use extended same thread pitch bolts to secure our false floor down and not have to drill any unwanted holes into our floor. Once I had that part down it was off to my cargo door. Again being in Florida and having so many marine supply houses it made it easy to find a water tight low profile flush mount door. The outside dims are 9”x15” and only required a 7 1/2 x 13 1/2 cutout to make it functional. So traced out the template and off we went again hacking away un wanted wood to get the door to fit not only flush but level and tight on the opening.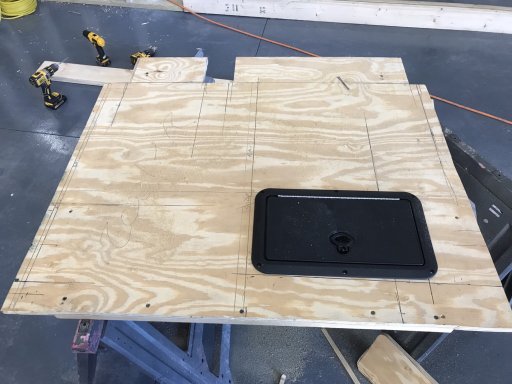
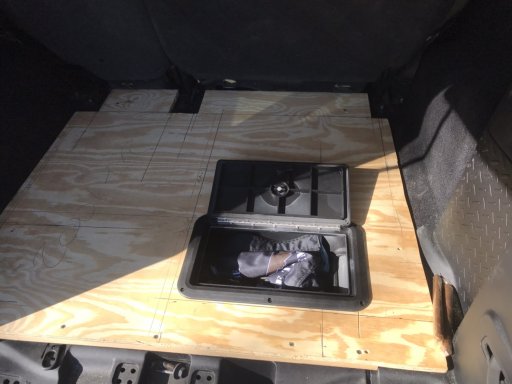
To attach the door to the false floor we used 3/4” screws so there’s no penetration of the screw tip that could later on rip your flesh trying to blindly find something in the storage compartment and also added custom cut CORK rounds (WINE BOTTLE CORK) so any even possible dip or sag would avoid the screw from penetrating out of the wood. Mind you when we’re building shit you gota think of what’s gona happen if you have to use it in the worst of scenarios and that will help you avoid a lot of headaches for improperly engineering or DIY’ing you own project. After all the holes were ore drilled and everything mocked up perfectly it was time to wrap this bad boy and we had just the Perfect thing for it. I used Marine waterproof carpeting which was black and felt almost identical to the factory carpeting. I wanted to keep it black almost factory but modified and fully functional as well. Before wrapping the carpet, I used some waterproof and fire proof black paint and covered every crack, crevice & surface.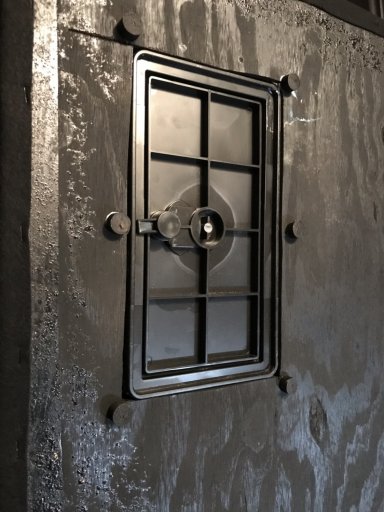
I mainly did it to black out the board for better depth and hiding once the carpeting went on but the added fire protection was free and we had tons of it at work so why not. To secure the carpet I Used a very good quality contact cement and covered the entire board and carpet did the usual upholstery sticky and blade work to get the board wrapped and with no seams looking factory as hell. Any do the overspray of the glue is easily wiped away with MEK (Fiberglas Resin Hardener). I let it air dry for about an hour to set nice and water tight and the adhesive to do its thing and then used longer bolts to mount it right to the floor.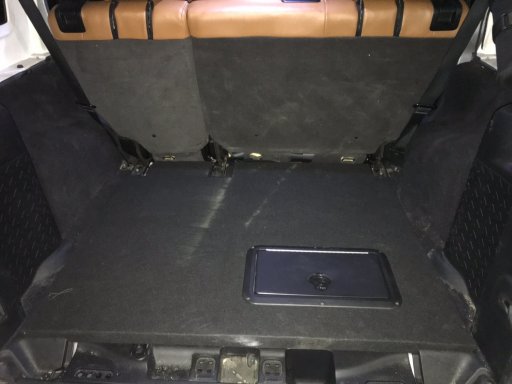 and For the life of me I don’t remember the sizing of the bolts but it was easy. I took them off and ran one sample down to my local Ace Hardware (They Always Have Everything) and got the thread pitch matched up and extended them to 1” bolts. I know they were metric bolts but not sure what size they were. One it was wrapped set the Dobinsons 4x4 full extension 40/50 qt Fridge Slide And bolted it right to the false floor using 1/2 screws.
 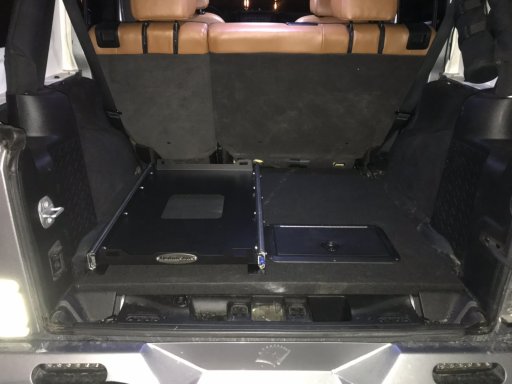 the slide is so solid and so sturdy that even when the fridge is totally loaded it doesn’t flex or bend or have any issues opening or closing and the board doesn’t make a sound or even flex! It was super easy to make if you have the right tools and a little bit of Ingenuity. Total material costs for the project was right around $120 bucks if you have to buy everything from scratch. I was able to use contact cement at work, the tools and hardware but had I had to buy everything your into it roughly $120. The most expensive item was the flush mount marine door, that was $55 but still not bad considering I Built it fully functional and to my exact spec and design and had a lot of fun doing it. Didn’t spend a fortune on it and to be 150% honest not because I built it but because I know what it’s built with....it’s going to stand a lot of beating and abuse from not only the trial but daily wear and tear. I hope you guys like my Fridge Freezer platform with storage. Any feedback or input is greatly appreciated and if anyone wants help I can get you specs and assist you on one of these. Total work time was a couple of hours with all the right tools and not having to make any runs to the hardware store. If you like the post PLEASE hit like and thanks for checking it out!
Being in Florida we have a lot of marine manufacturing supply houses so I used up some 3/4 Marine Treated Plywood which is designed for high moisture applications such as hulls on boats and floors and being 3/4 would stand even the heaviest of loads.
First I started off and got some rough measurements of the cargo area for what would be the primary floor. I measured and made a template I could cut with a jig saw. I wanted the false floor to notch around the rear seat brackets and to have enough surface area there would be no lifting or cracking or sagging under weight. I still wanted to have the factory cubbies for the door and roof hardware removal trays cause let’s face it she’s a Jeep she has a slutty side and loves to go topless and door less so I cut a strip the length of the gap, glued it clamped it and attached it with 1” screws so we knew we had a sturdy joint and what I call the ledge stop I guess.
Once I had the shape of the floor that fit almost flush with the plastic panels of the Jeep and left enough room for the fabric to wrap the board and eventually leave no space so crap doesn’t wedge itself down in the cracks and then becomes impossible to clean! After the board was right I drilled out the holes in the exact same location the factory rear cargo tie downs are attached to so we can then use extended same thread pitch bolts to secure our false floor down and not have to drill any unwanted holes into our floor. Once I had that part down it was off to my cargo door. Again being in Florida and having so many marine supply houses it made it easy to find a water tight low profile flush mount door. The outside dims are 9”x15” and only required a 7 1/2 x 13 1/2 cutout to make it functional. So traced out the template and off we went again hacking away un wanted wood to get the door to fit not only flush but level and tight on the opening.
To attach the door to the false floor we used 3/4” screws so there’s no penetration of the screw tip that could later on rip your flesh trying to blindly find something in the storage compartment and also added custom cut CORK rounds (WINE BOTTLE CORK) so any even possible dip or sag would avoid the screw from penetrating out of the wood. Mind you when we’re building shit you gota think of what’s gona happen if you have to use it in the worst of scenarios and that will help you avoid a lot of headaches for improperly engineering or DIY’ing you own project. After all the holes were ore drilled and everything mocked up perfectly it was time to wrap this bad boy and we had just the Perfect thing for it. I used Marine waterproof carpeting which was black and felt almost identical to the factory carpeting. I wanted to keep it black almost factory but modified and fully functional as well. Before wrapping the carpet, I used some waterproof and fire proof black paint and covered every crack, crevice & surface.
I mainly did it to black out the board for better depth and hiding once the carpeting went on but the added fire protection was free and we had tons of it at work so why not. To secure the carpet I Used a very good quality contact cement and covered the entire board and carpet did the usual upholstery sticky and blade work to get the board wrapped and with no seams looking factory as hell. Any do the overspray of the glue is easily wiped away with MEK (Fiberglas Resin Hardener). I let it air dry for about an hour to set nice and water tight and the adhesive to do its thing and then used longer bolts to mount it right to the floor.
and For the life of me I don’t remember the sizing of the bolts but it was easy. I took them off and ran one sample down to my local Ace Hardware (They Always Have Everything) and got the thread pitch matched up and extended them to 1” bolts. I know they were metric bolts but not sure what size they were. One it was wrapped set the Dobinsons 4x4 full extension 40/50 qt Fridge Slide And bolted it right to the false floor using 1/2 screws. the slide is so solid and so sturdy that even when the fridge is totally loaded it doesn’t flex or bend or have any issues opening or closing and the board doesn’t make a sound or even flex! It was super easy to make if you have the right tools and a little bit of Ingenuity. Total material costs for the project was right around $120 bucks if you have to buy everything from scratch. I was able to use contact cement at work, the tools and hardware but had I had to buy everything your into it roughly $120. The most expensive item was the flush mount marine door, that was $55 but still not bad considering I Built it fully functional and to my exact spec and design and had a lot of fun doing it. Didn’t spend a fortune on it and to be 150% honest not because I built it but because I know what it’s built with....it’s going to stand a lot of beating and abuse from not only the trial but daily wear and tear. I hope you guys like my Fridge Freezer platform with storage. Any feedback or input is greatly appreciated and if anyone wants help I can get you specs and assist you on one of these. Total work time was a couple of hours with all the right tools and not having to make any runs to the hardware store. If you like the post PLEASE hit like and thanks for checking it out!
Last edited:


