Schmitty's 2006 Ford F150 FX4 Build

  • HTML tutorial

Schmitty

Rank IV
Launch Member

Enthusiast III

953
Spokane, WA
First Name
Matt
Last Name
Schmitt
Member #

10794

Introduction

Flashback to 2011, I was still driving the same rig I'd had since high school, a 1997 Ford Explorer Limited, Seafoam Green (barf). Coincidentally, this was my first "overland" vehicle, as I'd road tripped through the Pacific Northwest the previous year, exploring my new home, sleeping in the back of the Explorer. I didn't even know what overlanding was, hell I'd barely ever camped before in my life, but I suppose the idea of it came naturally. I grew up in a family that appreciated our vehicles, you can't get anywhere in the middle of nowhere Midwest without one. And the harsh winters meant good 4x4s were a must. I still have fond memories of my father's Ford Excursion, kinda wish I had one myself now.

But back to 2011, things weren't looking too good for the Explorer. The transmission was all but gone, and it being my only vehicle, was stressing me out a bit. I was commuting to work and still in training to become an air traffic controller, so not making a whole lot and had a lot on my plate. I decided to upgrade to the kind of truck I'd always wanted, knowing I'd be done with training soon and be making a lot more.

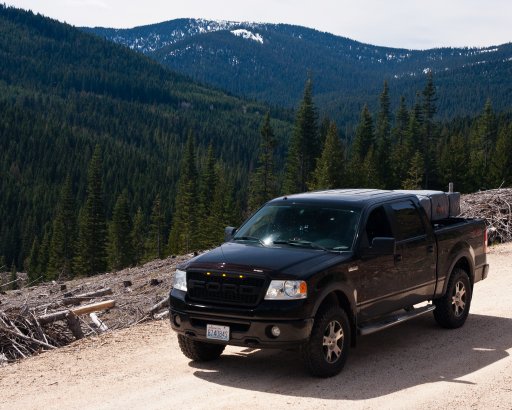
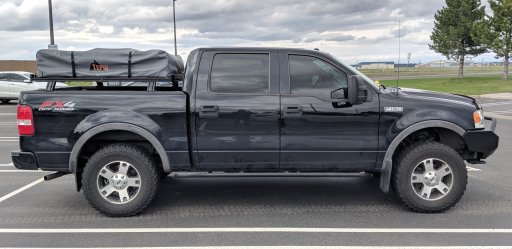
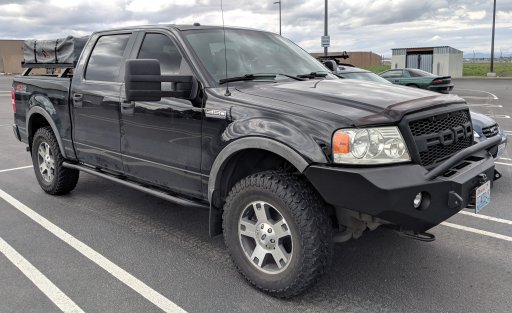
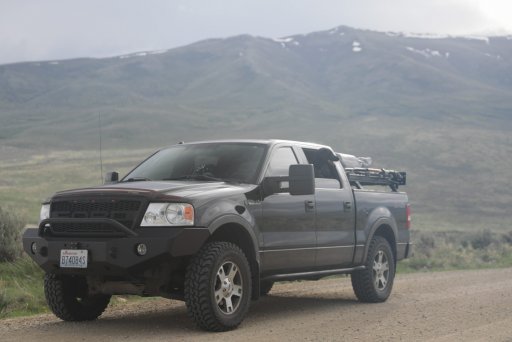
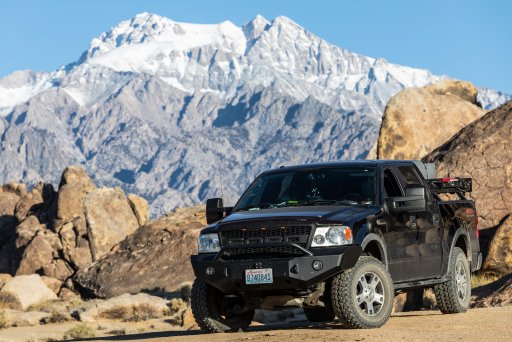
After a lot of looking I got very lucky and found what I considered the perfect truck in Idaho. Enter the F150.


5eGI4GI.jpg

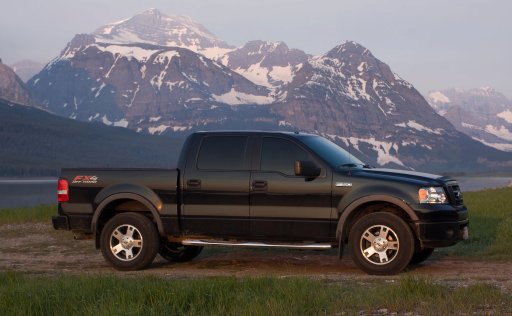
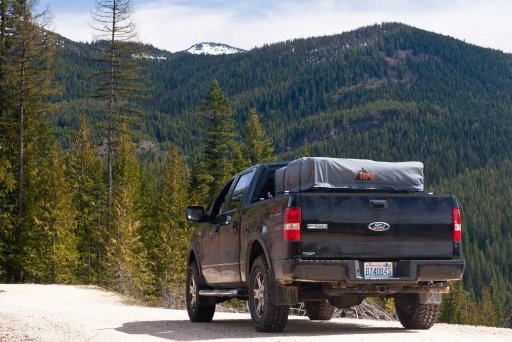
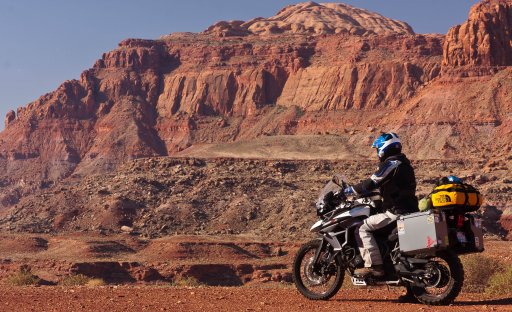
There it is stock, on our first trip in 2011 up to Glacier National Park. And stock it would stay for a long time. Shortly after I got into riding dual sport and adventure motorcycles so a majority of my hobby money went that direction. And not without reward, as I truly got into overland travel thanks to my desire to see the world on two wheels.

vRpFJH1.jpg

RPTaYwJ.jpg

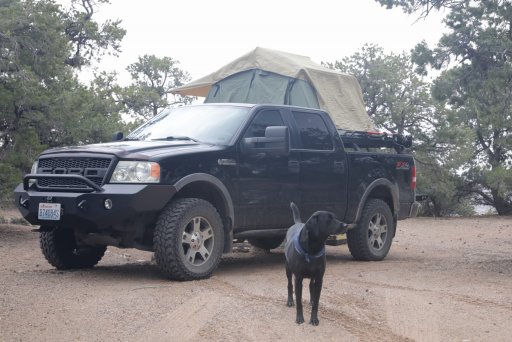
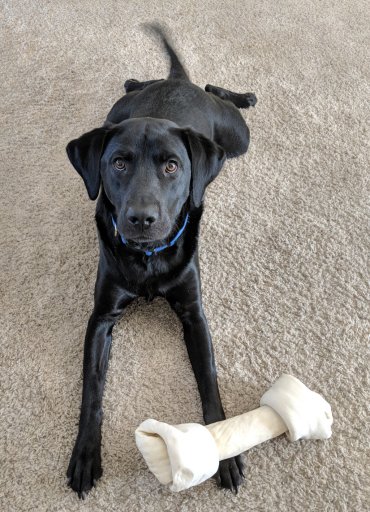
Riding will always be a passion of mine but a small, furry, and adorable wrench found its way into my gears. As much as I love my freedom and independence, leaving behind my best friend on every trip was starting to wear on me. Often after two weeks on the road all I could think about was getting back home to my only family, Indy.

MVIMG_20180329_114914.jpg

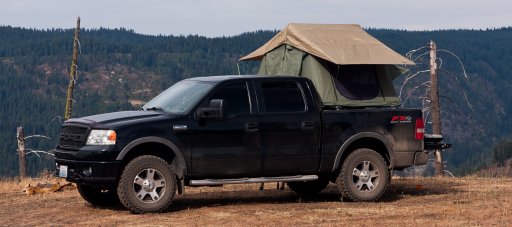
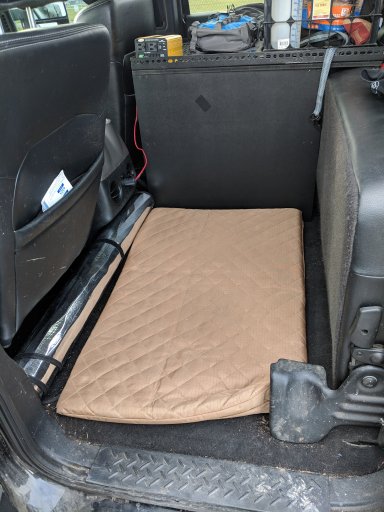
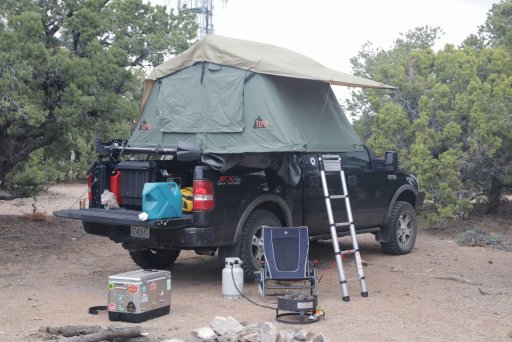
So how do I blend my desire for adventure with my best bud? Well I have this perfectly good, perfectly stock, paid off, F150 just sitting around. Are there better overlanding rigs? Yeah probably. But I already own this one, and I like a challenge, so let's see what we can do with a decade old truck.
 
  • Like
Reactions: Camp_Llama

Schmitty

Rank IV
Launch Member

Enthusiast III

953
Spokane, WA
First Name
Matt
Last Name
Schmitt
Member #

10794

Moving on to 2017. I'm now neck deep in reading up on and about overlanding rigs. I'm drooling over Unimogs and custom frame up builds. I have the sickness. What I do not have is a fortune, or much experience in working with full size vehicles. My focus until now has been motorcycles, much easier and simpler things. So to get started I decide to take it easy. In my mind is a base camp rig, a vehicle that gets us to our trail heads and provides us with a comfortable place to spend the night. Also, in case I decide I don't want to get in too deep, I'm basically just dipping my toes in the water at this point.

First thing I do is put 33" Destination M/T tires on. I thought this was a good choice, and probably would have been a better one if I'd waited for the new versions of the Destinations but unfortunately I didn't. Other than a few muddy spots I've gotten into in the mountains in the spring, for the most part the tires haven't been a great choice. An aggressive set of A/T's would have been a far better choice, or M/T's with better siping. They're pretty terrifying in the winter, no surprise.

Next I threw on a Chinese made Raptor grill copy because my stock one was done for anyway. I really like the blacked out look and it sets the tone for a lot of the "visual" changes I'll be making. I'm very much a form and function kind of guy. I firmly believe in striking a balance between beauty and ability.

The big purchase last year was a Tepui Kukenam tent I got on sale at REI. It was a real blast putting it together and on the truck in the middle of their patio as the entire store watched... I used Inno Rack truck bed racks to mount it over the bed. At the time it seemed like a decent idea, in the long run I can say its a terrible idea and unless you're using 4 cross bars don't bother. I also threw on some towing mirrors at some point because the tent completely blocked my rear view.

Additionally I stocked up on basic base camp gear like a cooler, cooking gear, water jug, etc.

So this is where we ended up...

eYt8Jx6.jpg
VPmhBXD.jpg
eJMBNdh.jpg
h9KpVLX.jpg


For 2017 this setup worked pretty well but moving forward I knew a lot more had to happen. I was hooked and my bank account was going to feel the pain.
 
  • Like
Reactions: Andrew24

Schmitty

Rank IV
Launch Member

Enthusiast III

953
Spokane, WA
First Name
Matt
Last Name
Schmitt
Member #

10794

Moving on to the current build progress in 2018. I've gone full tilt and made a very long (and expensive...) list of upgrades to the truck that I want to achieve what I perceive as a good Overland truck.

Unfortunately the Gen 11 F150 feels a bit like the red headed step child of the line. Often when purusing for parts the entire generation is left out. With the Raptor coming out much later, most companies prefer to focus on the newer model F150s. So this leaves me often trying to make due, make my own, or modify what's available.

To start I put in a rear backup camera to make up for the huge blind spot I was leaving with my tent low on the back. I keep it low like this so it fits in my garage. At the same time I added a Joying Android based head unit to hook the camera up to. This head unit is pretty slick because I can also run Gaia GPS on it for navigation.

LRM_EXPORT_20180407_150201.jpg

LRM_EXPORT_20180407_150118.jpg

I also bought a metric ton of 8020 aluminum extrusion to build myself a custom rack to hold the RTT and other gear. I ended up having the legs machined by 8020 after I realized my little garage shop wasn't up to the task. I'm nearly done with the rack, just need to get the machined parts powder coated to match and get it mounted.

Here's a pic of the assembled rack being test fitted, minus the L brackets that mount it to the bed, which I machined up afterward.

LRM_EXPORT_20180407_172054.jpg

Under construction at Expedition One in Ogden is a custom bumper which will give me a place to mount a Superwinch I've got on order. I like the agressive approach angle on the ExpOne bumper and the light options. If only they could stick to the time frame they quoted me...

LRM_EXPORT_20180407_172424.jpg

At XO Fab out of Enumclaw they're building a custom set of 90" rock sliders which will replace those good awful chrome side steps. Hopefully they'll be in hand in the next few weeks.

I forgot to mention earlier that I put a 2.5" leveling kit on the truck. This is not an optimal setup as it stiffens an already uncomfortably stiff suspension. The plan is to put in an Icon Stage 2 front and rear suspension.

Unfortunately I'm under a time crunch as I've got a 3 week trip coming up which will include a stop at the Overland Expo. Many things I'd like to do, like double battery setup, suspension, and lighting, will have to wait until I get back. I'm already in a nasty crunch to get the bumper and sliders on. I'll go into future plans in a future post.
 
Last edited:
  • Like
Reactions: Road

Schmitty

Rank IV
Launch Member

Enthusiast III

953
Spokane, WA
First Name
Matt
Last Name
Schmitt
Member #

10794

Leveling kit: did you just use coil spring spacers, or did you do a torsion crank/reindex?

James
It's spacers. When I had it put on I hadn't yet realized how into this I was going to get, so was just happy for the extra clearance. Also it was dirt cheap.
 

James Deaton

Rank V

Pathfinder I

That’s what I did on our Expedition. A full spacer kit from Truxxx. I didn’t notice a difference in ride quality at all, and like you said, it was dirt cheap :)

James
 

Schmitty

Rank IV
Launch Member

Enthusiast III

953
Spokane, WA
First Name
Matt
Last Name
Schmitt
Member #

10794

Future plans:

Right now I'm focused on getting the truck ready for my road trip, which means I had to draw a line in the sand in terms of upgrades so I can make sure everything is reliable before I depart. My primary goals are to get the rack finished and mounted, get the bumper in hand and mounted with winch and lighting (lights hooked up to factory fog light circuit for now), get the rock sliders in hand, painted, and welded on, and find a way to stow some extra fuel and propane in the bed. The rest of my prep is putting together my camping, recovery, and first aid gear. All of which seems like way too much right now with just over a month till departure.

After the trip I plan to continue to get the truck to a point at which I would consider it "expedition ready". As this is a long list of many ideas and wants and needs I set up a planning board on Trello to help me out. This is a good resource for organizing your builds and progress that works on computers and phones so you have access to it anywhere.

Here's a rough rundown of what I plan.

-Dual battery setup using the Dirty Parts F150 tray and two group 34 Optimas (looking for input on what the best combo for this is for running aux/house on one and starter/winch on the other) and some form of dual battery system, I'm currently leaning toward the IBS-DBS due to its simplicity and ability to connect the batteries easily.

-Aux fuse block and switches. I'm currently looking at the S-Pod system as I like the physical switches and the all in one setup.

-Icon Stage 2 suspension and a rear add a leaf to increase my payload. I occasionally haul a dual sport on my rear hitch and its been dragging my back end down. In the far future I'm considering getting some Alcan springs made once I have an idea what the final weight of the build is.

-Onboard Air. I still may try to fit this before the trip but I'm not so sure its going to happen. Planning on using the ARB High Output 12v compressor and running a line through the bumper to a quick detach plug.

-Rear camp lighting. I'm going to mount LED wide beam lights on top of the tent rack and have switched lights in the back controlled by a master switch in the cab. No more stumbling in the dark.

-My custom bumper was designed specifically to mount a light bar, so I'll be on the hunt for one once I have the dimensions and electrics set up.

-I'm looking at various options for fitting comms to the truck. Being ATC going with the HAM option is the way I'm leaning, especially since I'm usually solo. Trick is finding an antenna that fits in my garage. I think one mounted on the bumper should work. For CB convoy duty I'll probably just get a handheld.

-At some point after I move out of my current place I'd want to upgrade to 9x18 wheels and put 35" tires on. I'll have to find a new way to mount my spare at this point which brings me to the next item.

-Dual swing out rear bumper. For a while I thought I was going to have to have this custom made because I simply couldn't find one for my rig. After talking to the guys at Expedition One, there was some hinting at one coming for the F150. Although it probably won't be for my model year, I think a couple generations of 150 used the same rear bumper design. So fingers crossed.

-I'd like to design my own set of truck bed drawers for holding a fridge and cooking setup. Currently only exists in my head.

-There's a lot of other ideas I have written down, like fabing up more skid plating for the underside, rotopax mounts for fuel and water on the bottom of the tent rack, modifying the center panel for more gauges and USB charging points, led marker lights on the bumper, modifying the rear camera to be always on so I can use it to see behind on the trail, paint the hood flat black to reduce eye fatigue, and whatever else I can think up which will happen for sure.
 

Schmitty

Rank IV
Launch Member

Enthusiast III

953
Spokane, WA
First Name
Matt
Last Name
Schmitt
Member #

10794

Yesterday was a pretty good day. Looks like the rock sliders were finished ahead of schedule and are on their way already.

Also came home to a new winch waiting for me, if only I had a bumper to put it on, ha!

LRM_EXPORT_20180410_070530.jpg

My Factor 55 link was delivered too, but it's the wrong one. Right color at least. Since the pro link won't work with my set up, back it goes. I reordered the flat link directly from Factor 55 this time, hopefully they can send the right one.

LRM_EXPORT_20180410_070542.jpg

Today I'm dropping the tent rack legs and L brackets off at the powder coaters. Hopefully they can get them finished quickly, I'm eager to get the rack mounted.
 

Schmitty

Rank IV
Launch Member

Enthusiast III

953
Spokane, WA
First Name
Matt
Last Name
Schmitt
Member #

10794

So many deliveries this week... Sorry I wasn't able to get pictures of everything.

My gas firepit and propane tank set up came. I've got an 11lb tank I'm going to mount in the truck bed and run a line for either cooking or the fire pit.

The rack is pretty much complete, just have to mount it to the truck, hopefully today or tomorrow. I might even get to go camping this week if I'm lucky.

Rock sliders came in and I played around with how I want them mounted. Even unpainted they look far better than the chrome steps and actually protect the truck.

LRM_EXPORT_20180418_081724.jpg

LRM_EXPORT_20180418_081801.jpg

Next Friday I'll head up to a friend's place and we'll get them welded on.

Yesterday had a semi truck drop off an impressively large box containing my ExpeditionOne bumper. This was really exciting to finally see in person after waiting 2 1/2 months for it. I can't wait to get this beast mounted.

LRM_EXPORT_20180418_081826.jpg

LRM_EXPORT_20180418_081854.jpg
 

Schmitty

Rank IV
Launch Member

Enthusiast III

953
Spokane, WA
First Name
Matt
Last Name
Schmitt
Member #

10794

After much toiling and knuckle busting, last night I managed to finally finish the rack and get it mounted on the truck. This has been a quite a build that had its design changed many times but I'm very happy with the end result. The best part of this rack is its expandability thanks to the channeled aluminum. I've already got some parts coming to add stuff to the sides and there's plenty of future ideas for what I can do with this rack. For now its just nice to have a solid base for my tent that I feel comfortable taking off the pavement.

LRM_EXPORT_20180419_165154.jpg

After I hauled the tent up there (all by myself, go me) I mounted up an Inno bike rack. I had to trim a bit off the front of the bike rack but it doesn't really effect its use. Its only somewhat sturdy with the bike on it, but its not like I'll be hardcore offroading on my way to the trail. Part of the floppiness is also because I currently have two flat tubes...whoops.

GG6A0052.jpg
Its excited to see all the parts in my garage finally start finding their way onto the truck. Looking forward to getting the bumper on there in the next week.
 

Schmitty

Rank IV
Launch Member

Enthusiast III

953
Spokane, WA
First Name
Matt
Last Name
Schmitt
Member #

10794

"So are you ready for that big trip you're going on?"

Me: Starts to cry and laugh simultaneously.

LRM_EXPORT_20180425_085802.jpg

Getting the new bumper on is turning out to be a bigger project then I realized. Glad I gave myself 3 days to get this done.
 

Schmitty

Rank IV
Launch Member

Enthusiast III

953
Spokane, WA
First Name
Matt
Last Name
Schmitt
Member #

10794

I've made a lot of great progress the last 3 days. Honestly I'm going to need a vacation from my vacation prep...

Got the propane tank mount in the bed. I wanted to be able to remove the entire mount when I wasn't using it, so I used rivet nuts in the front wall of the bed. I'll definitely be using these more in the future, very handy.

LRM_EXPORT_20180428_171301.jpg

Also started making use of the rack's expandability with a quick shovel mount on the back.

LRM_EXPORT_20180428_171327.jpg

Went up to a friend's shop and welded on the rock sliders. I'm really happy with how these came out. It's great have a step to get up to the bed when putting away the tent too.

LRM_EXPORT_20180428_171351.jpg

Overall it's really starting to come together. I'm bummed I don't have the time or money to do everything I want before I head down to the expo, namely a dual battery setup and new wheels and tires, but for now we're doing alright.

LRM_EXPORT_20180428_171500.jpg
LRM_EXPORT_20180428_171430.jpg

Lots of detail work left to do but at least most of the heavy lifting is done.
 

Schmitty

Rank IV
Launch Member

Enthusiast III

953
Spokane, WA
First Name
Matt
Last Name
Schmitt
Member #

10794

Getting down to the nitty gritty now.

I mounted up the Hi Lift on the left side of the rack using a Jeep hood mount. Still looking for a way to secure it.

LRM_EXPORT_20180505_183520.jpg

Also finally got around to putting the badging on and making it official.

LRM_EXPORT_20180505_183543.jpg

A few days ago I decided I needed at least a temporary solution to my organization issues. So I put together a storage shelf for the back passenger side. This will hold tools and recovery gear on the bottom, cook and camp stuff on the middle shelf, and whatever else in milk crates up top.

LRM_EXPORT_20180505_183610.jpg

It's a good temporary fix until I design and build a bed drawer system. I may also remake this unit with aluminum extrusion later.

Here's the other side with the dog's spot. He only likes travelling in the back so he gets what he wants.

LRM_EXPORT_20180505_183559.jpg

All that's left for the most part is buying supplies and organizing. We leave Thursday and will be taking a week to slowly get down to the expo.
 
  • Like
Reactions: Crapitecture

Nathaniel Elliott

Rank I
Launch Member

Traveler II

271
Bowie, MD
Member #

2708

This is awesome, where did you get your rock sliders from? And, have you figured out how you are going to build out your dual battery system? That is on my agenda sooner than later.
 

Schmitty

Rank IV
Launch Member

Enthusiast III

953
Spokane, WA
First Name
Matt
Last Name
Schmitt
Member #

10794

This is awesome, where did you get your rock sliders from? And, have you figured out how you are going to build out your dual battery system? That is on my agenda sooner than later.
Rock sliders are 90" custom jobs from XO Fabrication. They made them up pretty quick.

Dual battery is gonna be 2 optimas connected with IBS DBS. There's a double battery tray out there for F150s, Google should turn it up.
 

Schmitty

Rank IV
Launch Member

Enthusiast III

953
Spokane, WA
First Name
Matt
Last Name
Schmitt
Member #

10794

Currently on the road to the Expo. First night was at City of Rocks. Now we're at Cedar Mountain in Utah. Heading to Moab tomorrow.

LRM_EXPORT_20180511_082244.jpg
20180511171706_GG6A0106.JPG
20180511171736_GG6A0108.JPG
 
  • Like
Reactions: Camp_Llama

Schmitty

Rank IV
Launch Member

Enthusiast III

953
Spokane, WA
First Name
Matt
Last Name
Schmitt
Member #

10794

We're back home from the Expo and I've got two lists. One is all the stuff I'd like to do to the F-150 to get it to the point where its the perfect Expedition rig. The other is a list of all the things I want to do with my next rig, which will be an offroad camper built on a Super Duty.

The problem is both lists involve a fair amount of investment. As much as I'd love to trick out the F-150 I just don't see the long term in it. Its a great weekend warrior, and a good daily, and its nice that I can garage park it. But throwing more money at it when I know the next rig is going to be such a huge investment doesn't really sit right with me.

For now my plan is to leave the F-150 mostly how it is, with maybe a few cheaper upgrades. But full suspension, new wheels and tires, exhaust, etc, will just have to go on the back burner and probably never happen while I save up for the next big thing. I'm hoping to meet up and talk about designing and building a camper shell with IdaCamper if they're still interested in the business.

For now, enjoy my favorite pic from the trip, just after packing up and getting ready to leave the Alabama Hills.

GG6A0463.jpg