Enthusiast II
I have been in the 12V Mobile Electronics industry since 1995. Held positions from being an Installer, Sales, Shop Manager to a Corporate 12V Tech for a Big Box store. My passion has always been in the install bay, working on vehicles and turning wrenches. I have trained so many individuals over the years on proper aftermarket wiring and troubleshooting skills I care to admit. There are basic principles to follow when properly wiring a vehicle to add aftermarket accessories. I'm going to use an install I done recently on a 2019 Honda Talon Side by Side. It came in bare stock and the customer gave me free creative ability to do what I wanted to outfit his UTV. I'm going to focus on just the LED lighting system. You can carry the same thought process over to any vehicle because the same principles carry over.
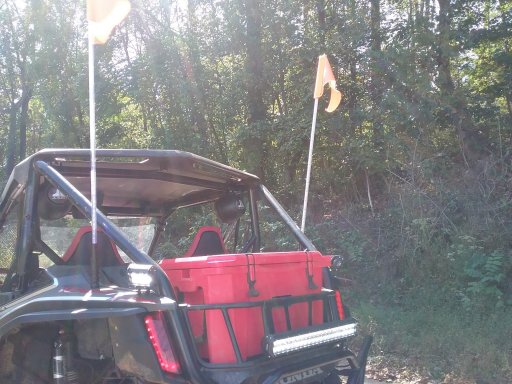
The first point is to establish what you want to install. For this install we knew the need for a roof mounted LED bar was out of the question because the previous Light Bar was ripped completely off running a trail in West Virginia. Mainly due to poor placement and a shady install with cheap brackets. So, we needing to figure out an application to get a lightbar below the roof line with a much beefier bracket setup. We had to use a couple different UTV brackets and modify them because at the time there weren't any brackets made for the 2019 Talon.
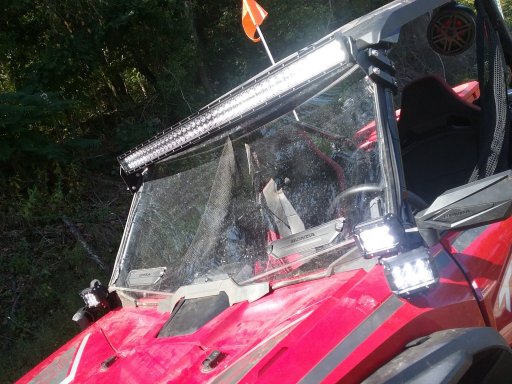
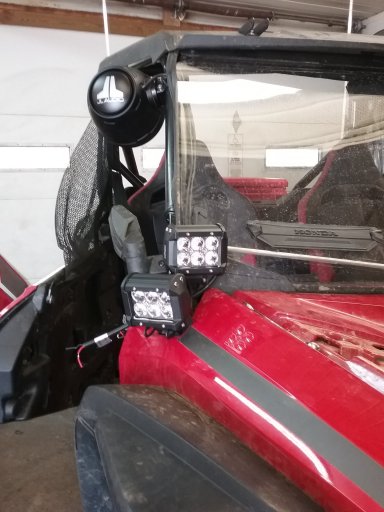
Next the idea was to have front side downward facing rock lights and two other Pods facing towards the front.
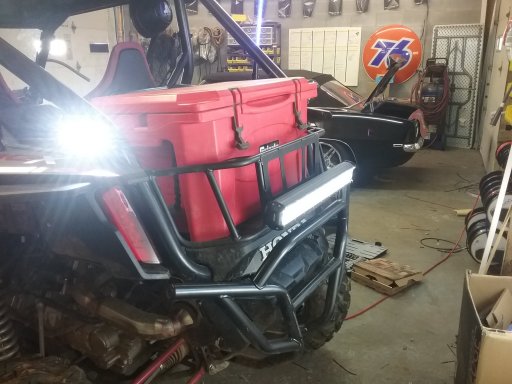
Rear lighting we wanted one main LED pod facing backwards and two up high on the rear fenders shining down as rear rock lights.
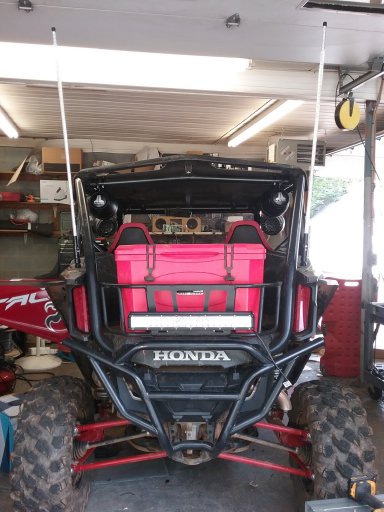
Multicolored LED whips were also installed to provide a visual safety aspect when out on the trails so others would know your presence to avoid crashes.
Once the final decision is made on what to install you have to think placement. Also mentally keep in mind how you want something to look but you also must realize that sometimes placement isn't always going to happen bc of obstructions in the way. Whether in be exterior or interior obstructions, there's always an issue on obstructions you can't see. With that being said the rule of thumb is "Look twice, Drill Once". Always check what's underneath where you want to mount something, be sure you have clearance and depth. Along with being sure you're not gonna tap into a wiring harness, fuel line or anything for that matter. When in doubt and can't clearly see, get an inspection mirror or a scope to check the area. If all is clear and you are ready to mount, be sure you can get a washer and a nut on before you drill. Another thing you don't wanna run into is picking a spot, drilling the hole to mount your LED light and figure out then you can't get your hand or fingers up in there to get a nut started or tighten down. You don't want a hole just because.
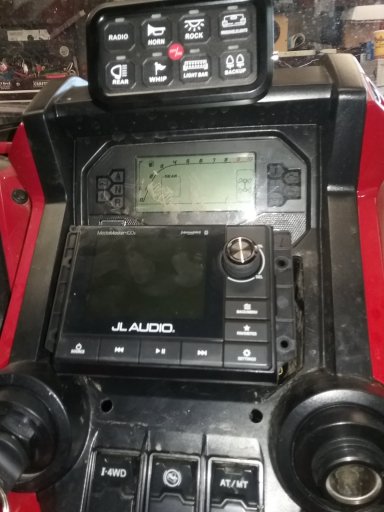
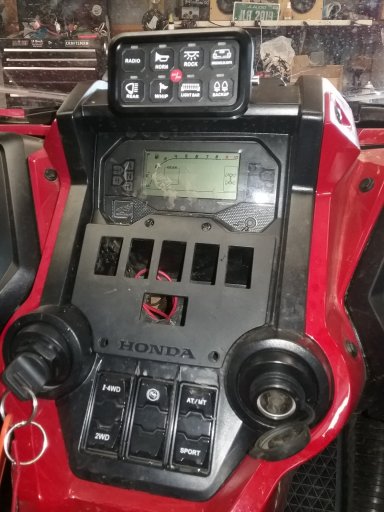
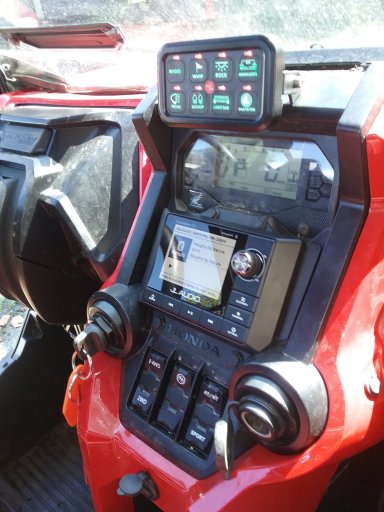
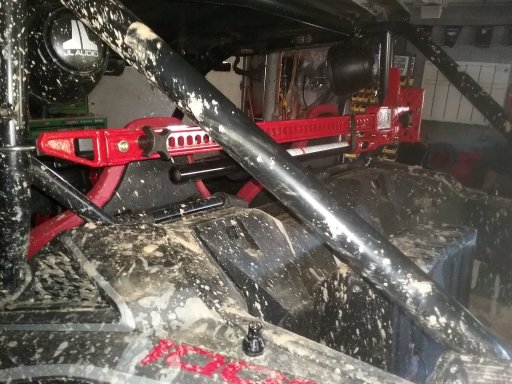
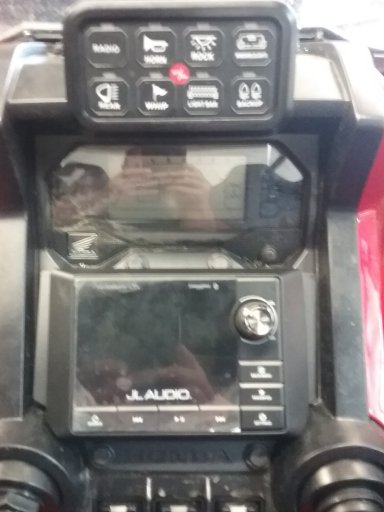
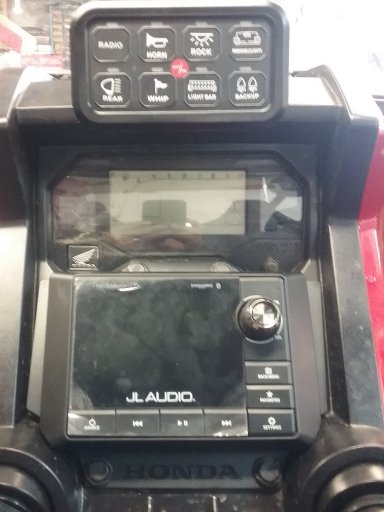
Step 3: Since you have decided what LED lights you are gonna use and have them properly mounted up in the specific location desired. How are you going to operate them? In this case, like most Overlanding Rigs we do, we chose an 8 gang electronic control panel. It's not SwitchPros or SPods, but this version served the purpose on what we needed to do. I decided to mount the control panel right above the Retrofitted JL Audio Media Master I had to "make" fit.
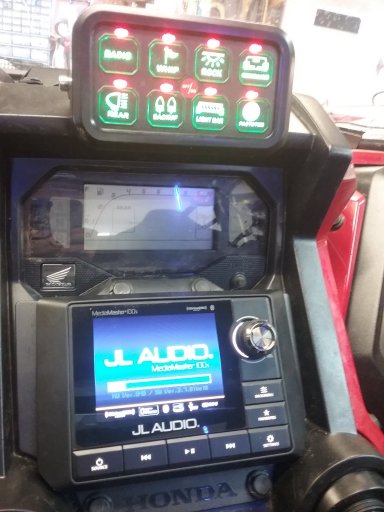
Same process and decision making on mounting your controls. Be sure you have depth and access to behind the panel as you did with the light mounting. Also be sure you aren't gonna drill into anything you don't wanna end up buying or replacing at your expense. This particular electronic control panel also came with an integrated fuse panel that needed to get mounted somewhere that would be easy to get to in case a fuse ever had to be replaced. This unit came with (2) 30 amps, (2) 20 Amps, (2) 10 Amps and (2) 5 Amp fuse locations. I decided to keep this up as high as I could away from the elements, so under the under it went.
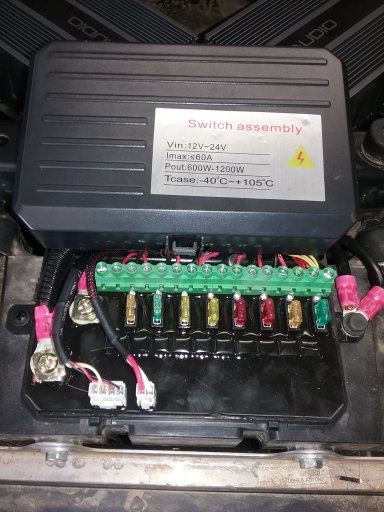
This fused power distribution is intended to be mounted on a metal base and acting as the ground. The spot I chose was plastic so a secondary ground had to be ran and attached to the frame to ground the fuse block. On The Honda Talon the battery is behind the drivers seat accessible up high in front of the right rear tire. An 8 awg power wire was used to get power to the fuse panel. Always fuse the power wire within 12" of the connection at the battery. Depending on your application you need to figure out exactly how much amperage draw to determine fuse size. We used a 40 Amp AGU Glass style fuse and fuse holder since the fuse is located in an enclosed battery box away from the elements or water and mud.
Always route your new wiring with the factory wiring. It makes a clean and seamless install. You will have to remove panels, carpet etc to do so, but you will rest easy knowing that you can perform a professional installation instead of a hack job! Whenever you have wiring exposed to out side elements, use wire loom to protect the wire and also be sure the wire you run doesn't obstruct or come close to moveable parts, isolated from heat sources and away from sharp or direct contact from metal. Over time the wire loom or outta insulation can wear off causing issues. Such as dead shorts, blown fuses and sometimes fire. Always be careful, especially running wires thru firewalls. Use proper grommets, plastic or rubber and properly seal with silicone to restrict water from entering the cab.
When making connections we use solder, tape and heat shrink when exposed to weather. Some use butt connectors, but we feel solder and tape is the best application and connection for long term durability. Once you make all your connections at your lights start running them all, together if possible to your fuse panel. Following the OEM wiring, wire loom where needed and zip ties. You can never use enough zip ties! I usually space mine out about the width of my fist. Wire labeling is always a plus and cuts down on install time when you get to the fuse block. If for some reason a label came off or forgot to label one. You can always use a 12V battery to determine what light is what before making the connection.
Now that you have all the lights mounted, control panel mounted and your fuse block ready to be wired up. Be sure you disconnected the negative terminal from the battery before you start to make connections so nothing shorts out. Once you get all your lights wired up it's time to test. Reconnect the negative battery and turn on your control panel. I wired this setup to only come on when the switch was on, other applications I wired it to be able to power up any time. Now, feeling confident you installed everything correctly, time to fire it up and check!

Good Luck and if I can ever be of any help, please feel free to reach out.
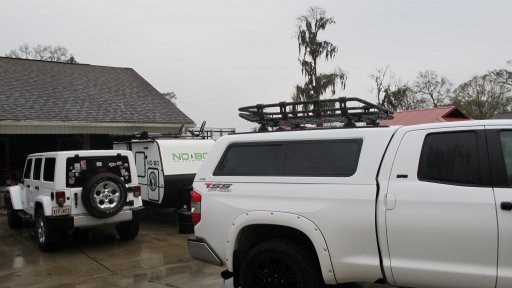
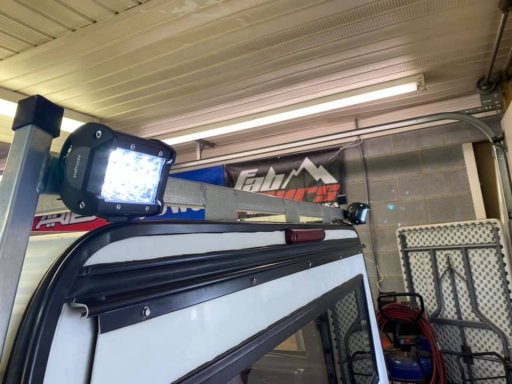
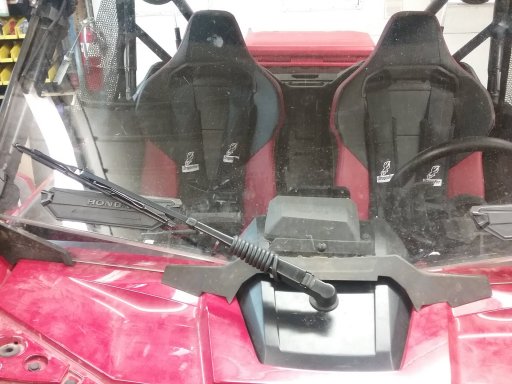
Here are some other pictures of this completed UTV install I done.
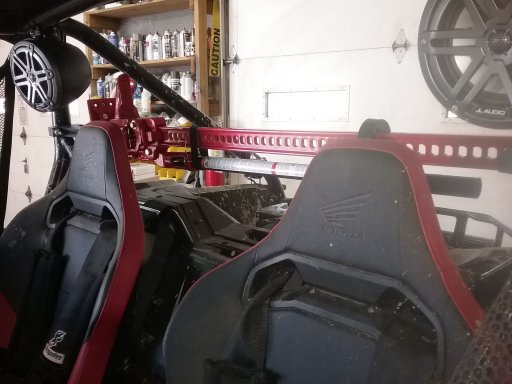

The first point is to establish what you want to install. For this install we knew the need for a roof mounted LED bar was out of the question because the previous Light Bar was ripped completely off running a trail in West Virginia. Mainly due to poor placement and a shady install with cheap brackets. So, we needing to figure out an application to get a lightbar below the roof line with a much beefier bracket setup. We had to use a couple different UTV brackets and modify them because at the time there weren't any brackets made for the 2019 Talon.
Next the idea was to have front side downward facing rock lights and two other Pods facing towards the front.
Rear lighting we wanted one main LED pod facing backwards and two up high on the rear fenders shining down as rear rock lights.
Multicolored LED whips were also installed to provide a visual safety aspect when out on the trails so others would know your presence to avoid crashes.
Once the final decision is made on what to install you have to think placement. Also mentally keep in mind how you want something to look but you also must realize that sometimes placement isn't always going to happen bc of obstructions in the way. Whether in be exterior or interior obstructions, there's always an issue on obstructions you can't see. With that being said the rule of thumb is "Look twice, Drill Once". Always check what's underneath where you want to mount something, be sure you have clearance and depth. Along with being sure you're not gonna tap into a wiring harness, fuel line or anything for that matter. When in doubt and can't clearly see, get an inspection mirror or a scope to check the area. If all is clear and you are ready to mount, be sure you can get a washer and a nut on before you drill. Another thing you don't wanna run into is picking a spot, drilling the hole to mount your LED light and figure out then you can't get your hand or fingers up in there to get a nut started or tighten down. You don't want a hole just because.
Step 3: Since you have decided what LED lights you are gonna use and have them properly mounted up in the specific location desired. How are you going to operate them? In this case, like most Overlanding Rigs we do, we chose an 8 gang electronic control panel. It's not SwitchPros or SPods, but this version served the purpose on what we needed to do. I decided to mount the control panel right above the Retrofitted JL Audio Media Master I had to "make" fit.
Same process and decision making on mounting your controls. Be sure you have depth and access to behind the panel as you did with the light mounting. Also be sure you aren't gonna drill into anything you don't wanna end up buying or replacing at your expense. This particular electronic control panel also came with an integrated fuse panel that needed to get mounted somewhere that would be easy to get to in case a fuse ever had to be replaced. This unit came with (2) 30 amps, (2) 20 Amps, (2) 10 Amps and (2) 5 Amp fuse locations. I decided to keep this up as high as I could away from the elements, so under the under it went.
This fused power distribution is intended to be mounted on a metal base and acting as the ground. The spot I chose was plastic so a secondary ground had to be ran and attached to the frame to ground the fuse block. On The Honda Talon the battery is behind the drivers seat accessible up high in front of the right rear tire. An 8 awg power wire was used to get power to the fuse panel. Always fuse the power wire within 12" of the connection at the battery. Depending on your application you need to figure out exactly how much amperage draw to determine fuse size. We used a 40 Amp AGU Glass style fuse and fuse holder since the fuse is located in an enclosed battery box away from the elements or water and mud.
Always route your new wiring with the factory wiring. It makes a clean and seamless install. You will have to remove panels, carpet etc to do so, but you will rest easy knowing that you can perform a professional installation instead of a hack job! Whenever you have wiring exposed to out side elements, use wire loom to protect the wire and also be sure the wire you run doesn't obstruct or come close to moveable parts, isolated from heat sources and away from sharp or direct contact from metal. Over time the wire loom or outta insulation can wear off causing issues. Such as dead shorts, blown fuses and sometimes fire. Always be careful, especially running wires thru firewalls. Use proper grommets, plastic or rubber and properly seal with silicone to restrict water from entering the cab.
When making connections we use solder, tape and heat shrink when exposed to weather. Some use butt connectors, but we feel solder and tape is the best application and connection for long term durability. Once you make all your connections at your lights start running them all, together if possible to your fuse panel. Following the OEM wiring, wire loom where needed and zip ties. You can never use enough zip ties! I usually space mine out about the width of my fist. Wire labeling is always a plus and cuts down on install time when you get to the fuse block. If for some reason a label came off or forgot to label one. You can always use a 12V battery to determine what light is what before making the connection.
Now that you have all the lights mounted, control panel mounted and your fuse block ready to be wired up. Be sure you disconnected the negative terminal from the battery before you start to make connections so nothing shorts out. Once you get all your lights wired up it's time to test. Reconnect the negative battery and turn on your control panel. I wired this setup to only come on when the switch was on, other applications I wired it to be able to power up any time. Now, feeling confident you installed everything correctly, time to fire it up and check!
Good Luck and if I can ever be of any help, please feel free to reach out.
Here are some other pictures of this completed UTV install I done.
Attachments
-
 359.9 KB Views: 27
 -
 443.1 KB Views: 18