Enthusiast III
I would like to start out by saying I did not name the car that (haha). My jeep club that I was in at the time of purchase was responsible for that. Ok, onto the build...
I am 21 years old and in college, so this is not a high budget build by a long shot. I have, however, managed to get a lot done in my one year of ownership.
So lets start with the basics...
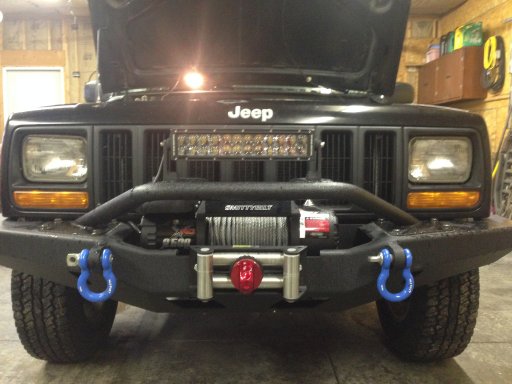
It is a 1997 Jeep Cherokee Sport 4x4
4.0L
AW4 Auto
NP231 Transfer Case
Dana 30 front, Chrysler 8.25 rear
Stock 3:55 gears
No ABS
Purchased with 160,000 miles.
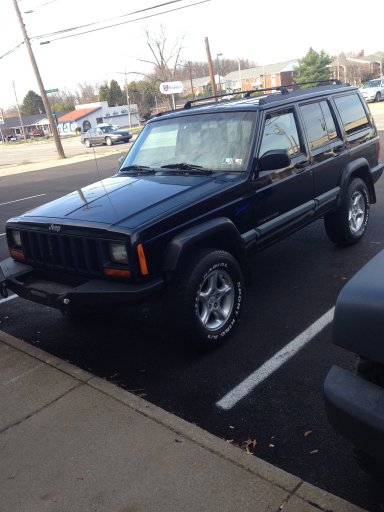
This is the first picture I took of her right after we signed the paperwork.
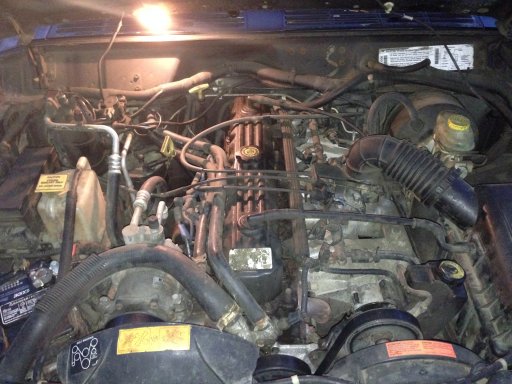
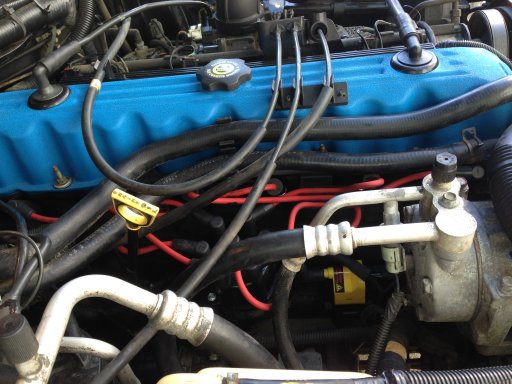
I wanted to include a picture of where I began with the engine bay the day I bought it. I am quite OCD about cleanliness especially in the engine bay so I plan on making quite a bit of changes to this old 4.0 mainly geared towards fuel economy and how efficiently I can make it run with this kind of mileage... and of course I will improve the looks a bit as well.
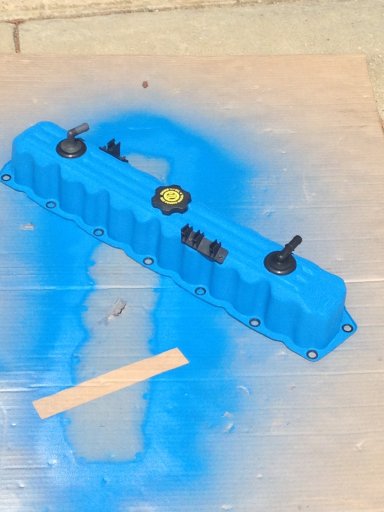
I decided to begin with a valve cover gasket because it would not only allow me to stop a leak but also improve the looks a bit and more importantly inspect the rockers and springs looking for things such as even distribution of oil on top of the rockers. All was well so I decided to try something new and sand and paint the valve cover a professional grade wrinkle blue color.
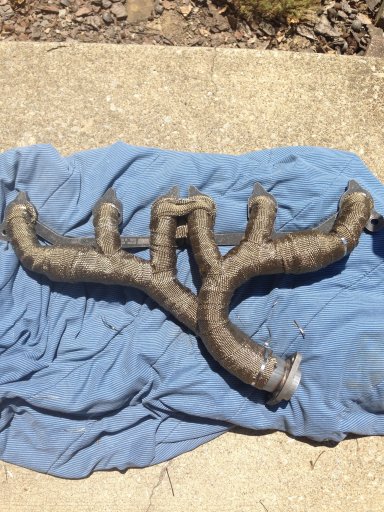
Next up was to tackle the famous cracked stock manifold! I chose a Dorman manifold and decided to wrap it with titanium heat wrap in hopes of stopping heat soak. It functioned great for about 8 months when all of the welds failed on the manifold. I have since moved to an ATP performance header and so far it is working out great!
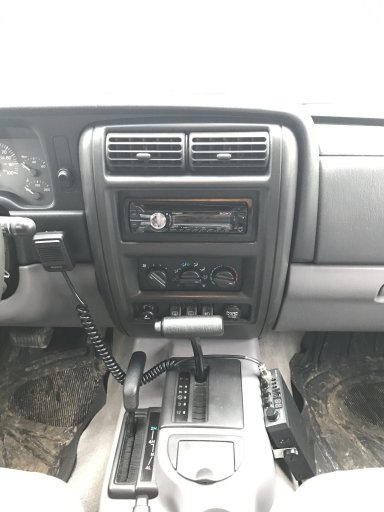
After that I wanted to take a look at the ignition system. So a set of champion plugs, and Accel wires, cap, rotor and super coil were installed.
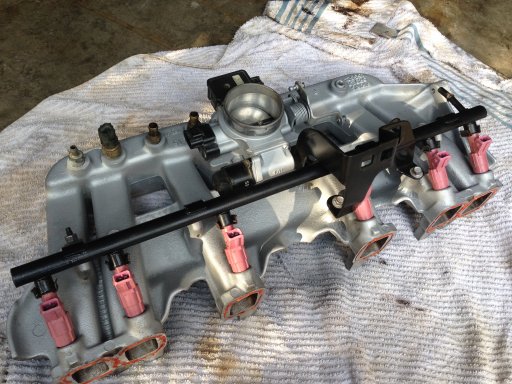
I then decided to put my trust in the forums and give a shot at upgrading my injectors. So with a lot of research on flow rates and such I ended up with Bosch 4-hole injectors out of a Volvo. They are pt. #0280155832 This is one of my favorite mods. I also cleaned the throttle body and intake manifold.
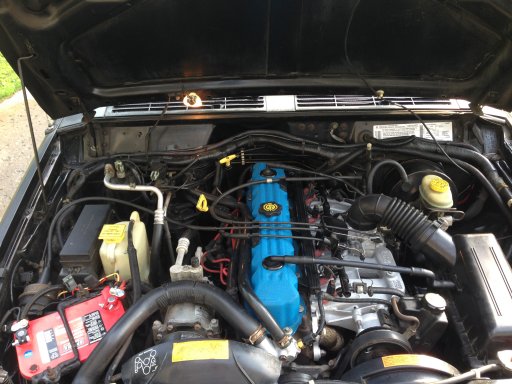
Once an optima red top and K&N air filter were installed the engine bay is finally getting on track! Can you tell I like color?
I am 21 years old and in college, so this is not a high budget build by a long shot. I have, however, managed to get a lot done in my one year of ownership.
So lets start with the basics...
It is a 1997 Jeep Cherokee Sport 4x4
4.0L
AW4 Auto
NP231 Transfer Case
Dana 30 front, Chrysler 8.25 rear
Stock 3:55 gears
No ABS
Purchased with 160,000 miles.
This is the first picture I took of her right after we signed the paperwork.
I wanted to include a picture of where I began with the engine bay the day I bought it. I am quite OCD about cleanliness especially in the engine bay so I plan on making quite a bit of changes to this old 4.0 mainly geared towards fuel economy and how efficiently I can make it run with this kind of mileage... and of course I will improve the looks a bit as well.
I decided to begin with a valve cover gasket because it would not only allow me to stop a leak but also improve the looks a bit and more importantly inspect the rockers and springs looking for things such as even distribution of oil on top of the rockers. All was well so I decided to try something new and sand and paint the valve cover a professional grade wrinkle blue color.
Next up was to tackle the famous cracked stock manifold! I chose a Dorman manifold and decided to wrap it with titanium heat wrap in hopes of stopping heat soak. It functioned great for about 8 months when all of the welds failed on the manifold. I have since moved to an ATP performance header and so far it is working out great!
After that I wanted to take a look at the ignition system. So a set of champion plugs, and Accel wires, cap, rotor and super coil were installed.
I then decided to put my trust in the forums and give a shot at upgrading my injectors. So with a lot of research on flow rates and such I ended up with Bosch 4-hole injectors out of a Volvo. They are pt. #0280155832 This is one of my favorite mods. I also cleaned the throttle body and intake manifold.
Once an optima red top and K&N air filter were installed the engine bay is finally getting on track! Can you tell I like color?
Attachments
-
 1.1 MB Views: 308
 -
 1.7 MB Views: 312
 -
 1.7 MB Views: 309
Last edited: