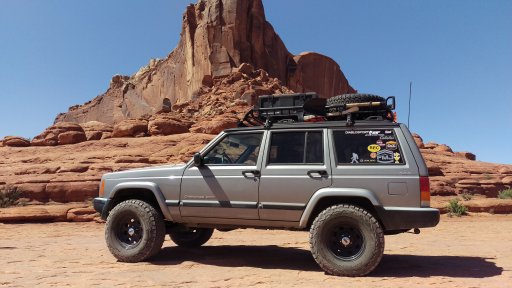
My 2000 Jeep XJ "Adventure Build"

  • HTML tutorial

Vantams

Rank V
Launch Member

Off-Road Ranger I

1,509
Plain City, Utah
First Name
Kory
Last Name
Tams
Member #

4688

Ham/GMRS Callsign
KI7UFV
I bought this bad boy back in February 2017, bone stock. The only thing that had been added to the Jeep was a Lulu Lemon and a University of Utah sticker... which are essentially the same sticker!

My brother also owns a 2000 XJ that he has lifted and modified for overlanding and offroading. Luckily, I was able to get a few secondhand parts from him, such as sway bar quick disconnects and 3.5" lift coil springs.

So, here it is from the start.

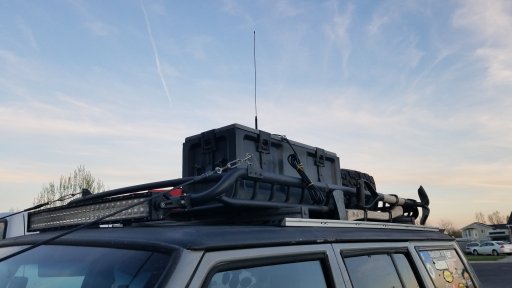
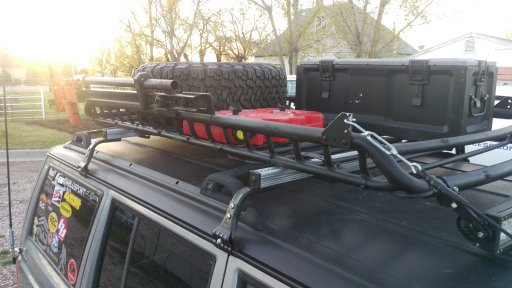
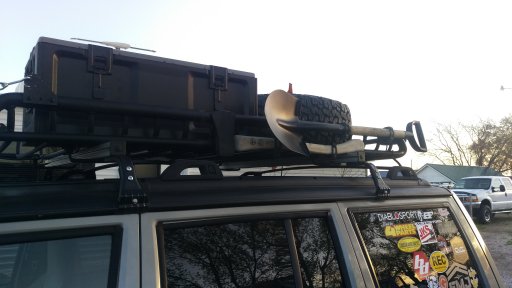
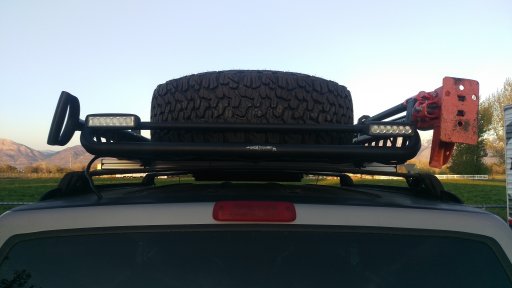
I added a decent Rola Roof Rack with the 18" extension, using Surco Gutter Mounts and some 8020 extrusion, attached two one-gallon Rotopax, Hi-Lift, shovel, axe and spare up there.
IMAG1491.jpg IMAG1488.jpg

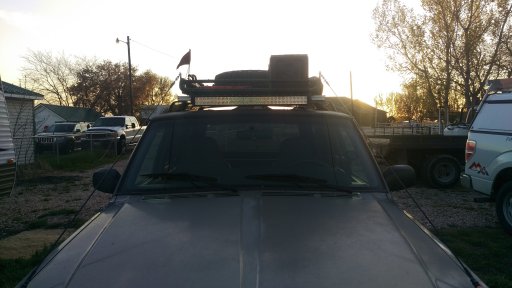
Next, as far as lighting, I added a 32" curved light bar mounted using the tubular mounts in the front of the rack, and two LED floods in the rear of the rack...
IMAG1489.jpgIMAG1487.jpg

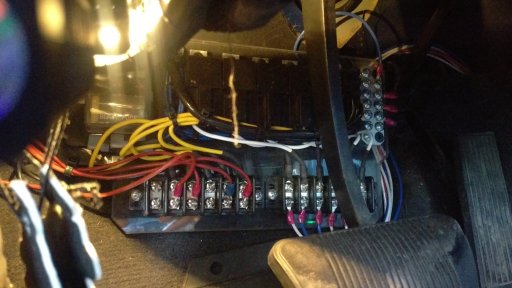
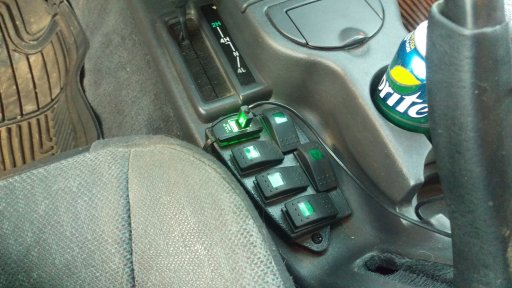
All my electrical components are run through a single Power Panel I built. It is now located on the inside of the firewall, up behind the brake pedal. All switches are mounted to a switch panel I designed and 3D printed to utilize that nice flat spot under the E-brake.
IMAG1500.jpg

IMAG1499.jpg

The USB charge port is a good addition for charging my phone and table for nav's on trips.

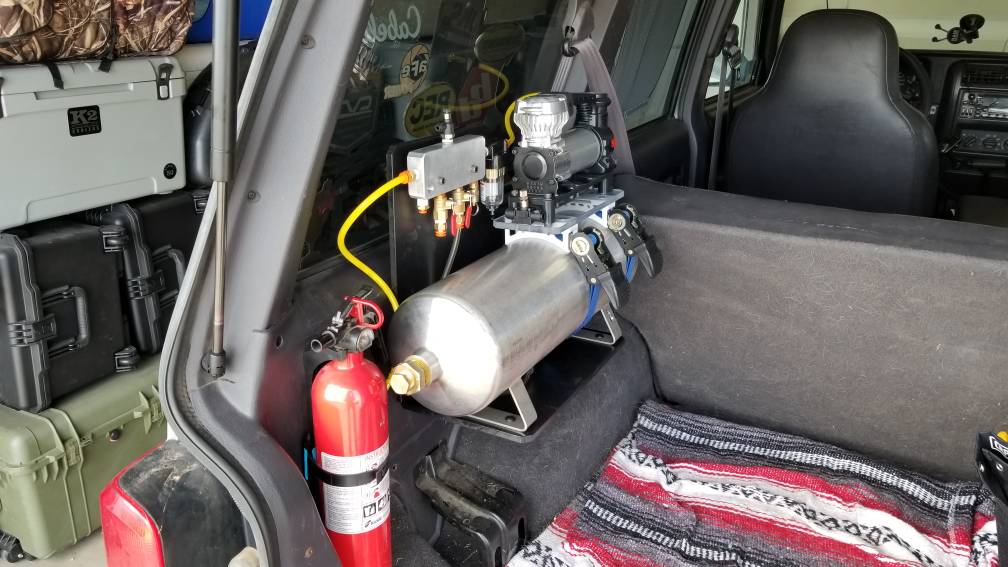
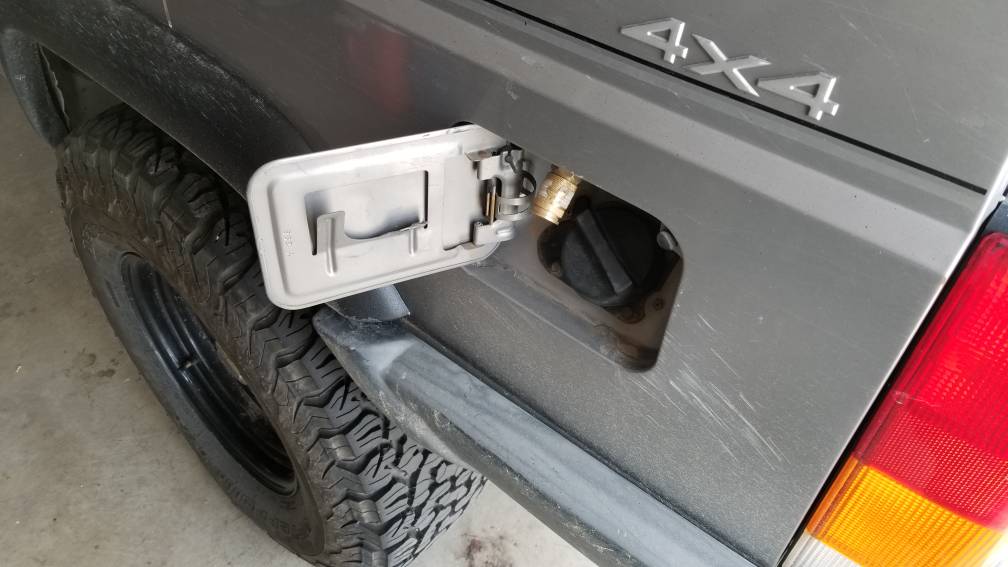
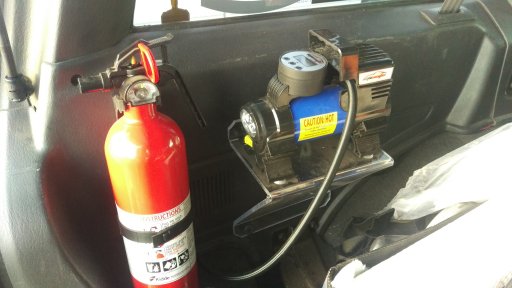
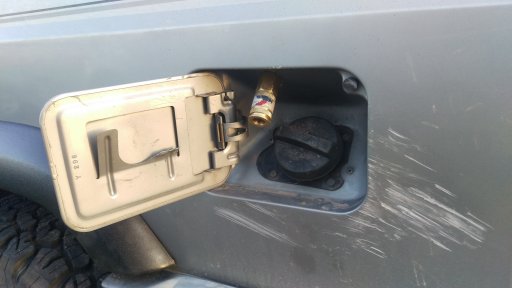
More electronics in the hatch, also wired to the switch panel; my air compressor. I found this little guy on Amazon with about 800 reviews and a very good rating. I was impressed with it during our Moab trip. I aired up from 18 psi to about 32 psi with about 5 minutes per tire (31x10.5x15). I ran the chuck to the fuel cap to keep it out of the dirt and dust as much as possible. I love the location so far.
IMAG1483.jpg

IMAG1485.jpg

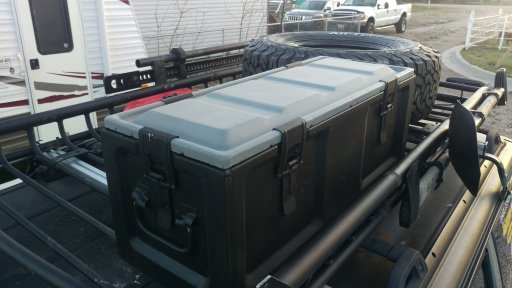
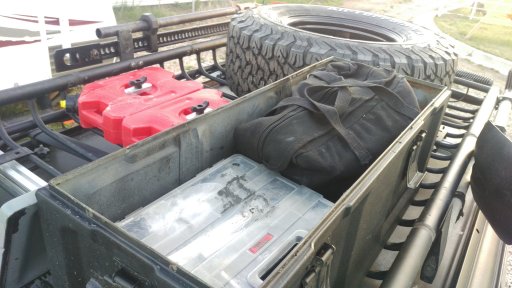
Up on the rack, I have a Rocket Box courtesy of Smith and Edwards here in Farr West, Utah! It's a military surplus container with a watertight seal, mounted by u-bolts to the bars of the rack. In there I keep all my tools and some lubricants and cleaners. You can also see my DIY rotopax mounts using some Home Depot threaded knobs.
IMAG1503.jpg

IMAG1504.jpg

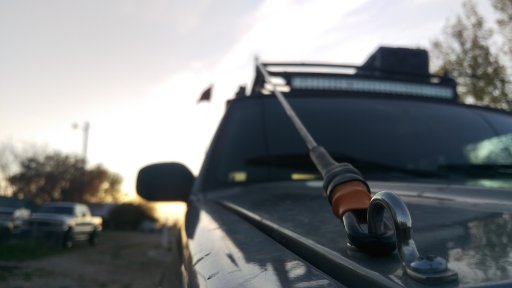
I've added Limb Risers using turnbuckles, cable crimps, .25" coated cable and some durable heat-shrink to clean things up.
IMAG1494.jpg

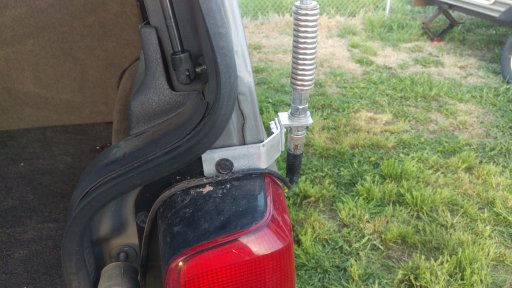
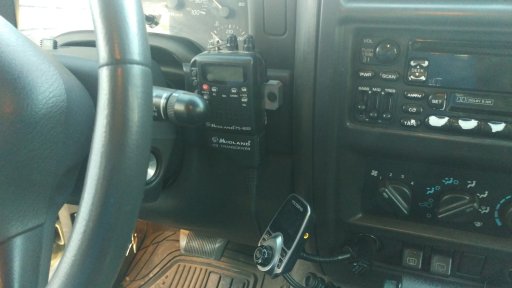
Comms consist of a CB system, using a DIY antenna bracket, mounted to a spring. The actual CB is a handheld unit that clips to a 3D printed part, attached to dash panel behind the wiper lever.
IMAG1482.jpg

IMAG1496.jpg

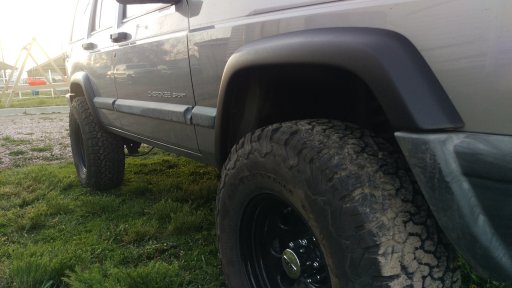
I'm in the process of painting all of my plastic trim using Rustoleum Bed Liner, so far the fenders are done, soon to be all.
IMAG1507.jpg

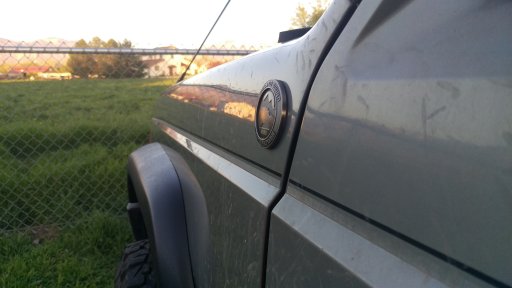
The latest mod is of course the OB Emblem, #4688! I'm stoked to be a part of this awesome community of 'landers!
IMAG1479.jpg
 
Last edited:

Vantams

Rank V
Launch Member

Off-Road Ranger I

1,509
Plain City, Utah
First Name
Kory
Last Name
Tams
Member #

4688

Ham/GMRS Callsign
KI7UFV
There's been no shortage of work between these posts! But throughout this week I wanted to focus on upgrading my On-Board Air Setup... the little Amazon special wasnt cutting it!

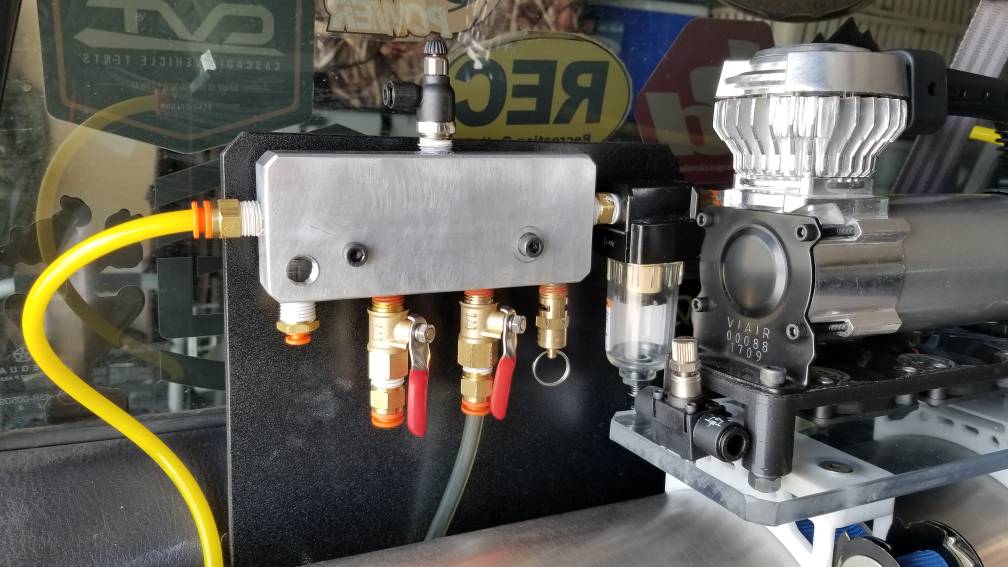
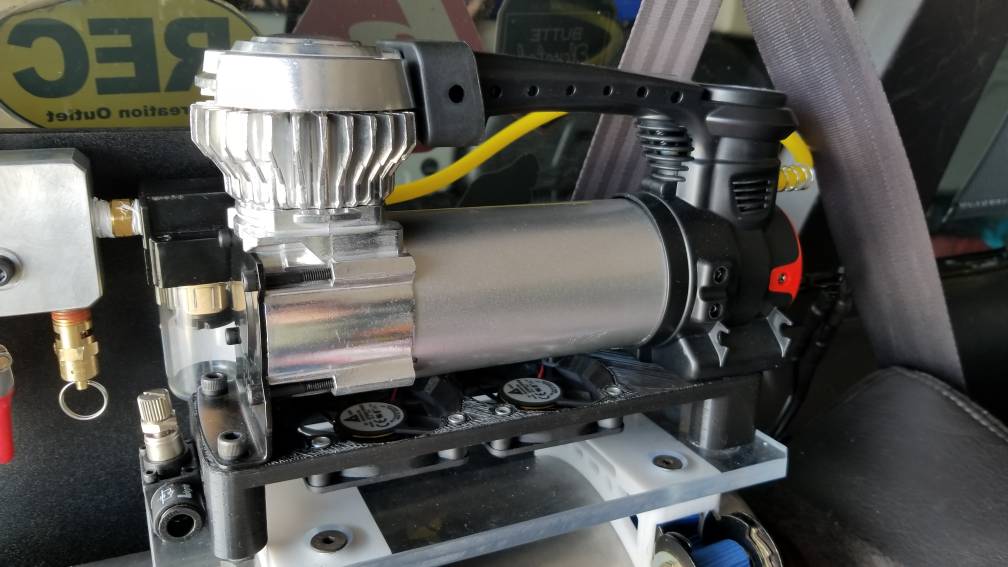
What I've done is mount a Viar 88P, 2 Gallon tank, custom manifold and a 3D printed cooling fan mount onto a nice HDPE Plastic bracket I made.

I then mounted the whole assembly to the steel of the Spare Tire Carrier panel.

It is STOUT!!

Currently I have one port for filling the tank, with shutoff valve, one port for a pressurized water tank in the future, one port for the Gabriel Hijackers on order, one port in the fuel cap for hose connection, and one port for the 115 psi safety valve.

This setup, without using air from the tank, will fill a 31x10.5x15 BFG KO2 from 15 psi to 35 psi in exactly 3 minutes.

With the old blue setup I was near 10 minutes!


Sent from my SM-G950U using Tapatalk
 
Last edited:

Vantams

Rank V
Launch Member

Off-Road Ranger I

1,509
Plain City, Utah
First Name
Kory
Last Name
Tams
Member #

4688

Ham/GMRS Callsign
KI7UFV
I upgraded the communications setup in my Jeep over the last week.

In February I got my HAM Technician license, along with my brother and father.

Being that all three of us have the license and Baofeng UV-82HP's I wanted to get mine all set up for use inside the cab as a mobile unit.

The handheld antenna worked great, but not inside the vehicle.

First, I ordered a few additions for the radio.

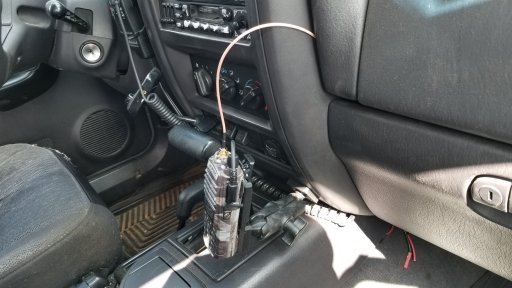
1) A microphone/speaker extension:


2) A magnetic mount antenna for UVF/UHF transmission:


3) A 12V Power pack that attaches to the battery slot on the back of the UV-82HP (yet to be delivered as of this post:


Thanks to an Amazon mixup, I received #1 in place of #3. I orginally never planned on buying a mic/speaker extension, but since they sent it, I decided to keep it. It's sure nice to use instead of reaching down to pick up the whole unit for transmission.

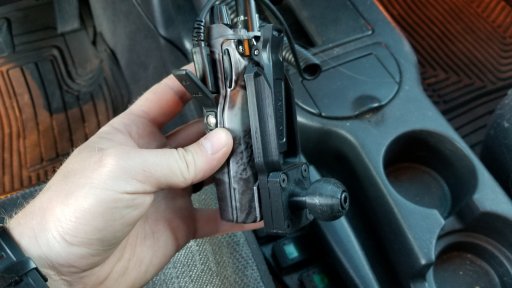
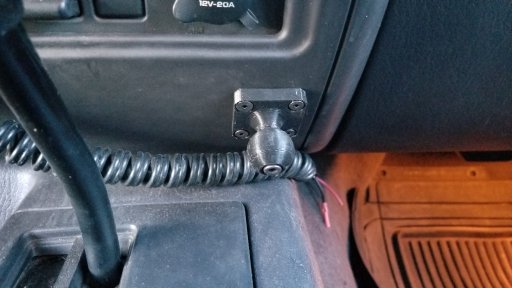
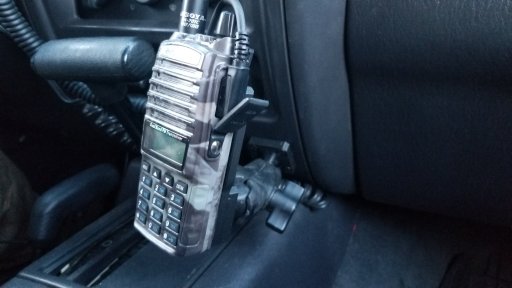
Next, I decided I wanted to mount the radio using RAM mounts, but I decided to 3D print my own mounting solution for the radio body itself, and only use the RAM connecting arm to secure it. Here are the photos of how I mounted it.

20180422_201011.jpg

20180422_200947.jpg

20180422_201153.jpg

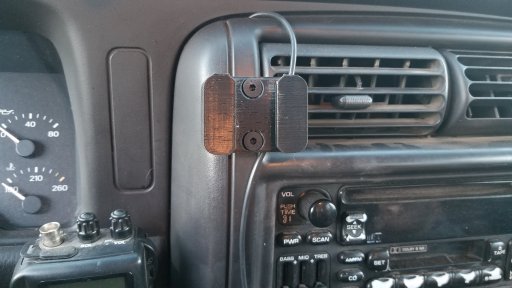
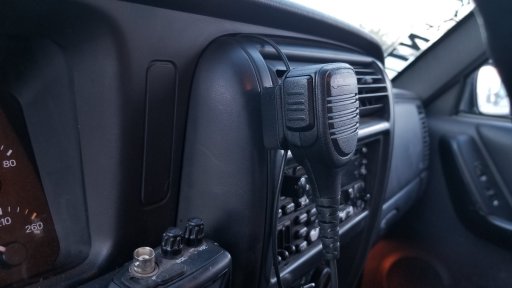
Then, to mount the handheld portion of the mic/speaker extension, I decided to 3D print the holder for it as well, and bolt all of them to the center radio console faceplate. It's durable plastic with plenty of dead space behind it for bolt ends, nuts and washers to secure everything tight!

20180422_200925.jpg
20180422_200940.jpg

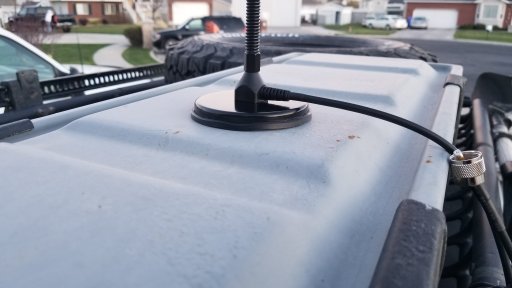
As far as the Mag Mount Antenna, I will have it 90% of the time mounted to the Rocket Box on my rack.

20180422_201241.jpg

20180422_200816.jpg

But, I'll leave enough slack on it to easily take it down and mount to the roof itself, for pulling into the garage or low-hanging limbs on the trail. I haven't decided on the most effective way to route the antenna cable, but for now it runs in through the passenger front door trim and down through the glove box and out to connect to the radio. I may change that with a longer cable and have it enter through the hatch. We'll see.

20180423_110214.jpg

Those leads in the background on the floorboard will be for the 12V batter pack when it gets delivered, hopefully today! I'll get it powered up and HAM to my hearts content!
 
Last edited:

Eurasian

Rank II
Launch Member

Contributor III

327
San Diego, CA
First Name
Tom
Last Name
Spyrou
Member #

10679

If the mag mount is stuck onto a big enough piece of metal then the antenna tuning should be stable between positions on the ham vhf/uhf frequqncies. Those frequencies tune much more easily than CB or HF radio frequencies do, those are very touchy. If you have an SWR meter, you have to make sure it supports VHF/UHF. The CB/HF SWR meters will not likely work on the ham VHF/UHF frequencies.
 
  • Like
Reactions: Vantams

Vantams

Rank V
Launch Member

Off-Road Ranger I

1,509
Plain City, Utah
First Name
Kory
Last Name
Tams
Member #

4688

Ham/GMRS Callsign
KI7UFV
If the mag mount is stuck onto a big enough piece of metal then the antenna tuning should be stable between positions on the ham vhf/uhf frequqncies. Those frequencies tune much more easily than CB or HF radio frequencies do, those are very touchy. If you have an SWR meter, you have to make sure it supports VHF/UHF. The CB/HF SWR meters will not likely work on the ham VHF/UHF frequencies.
So far, I've marked out a spot where the mag will align both on top and lowered down, and I'm able to get decent repeatability as far as my tune when moving from one position to the next.

I may be off by 1/4 each time, but not enough to completely ruin my tune.

I'm happy with it all so far!

Sent from my SM-G950U using Tapatalk
 

Vantams

Rank V
Launch Member

Off-Road Ranger I

1,509
Plain City, Utah
First Name
Kory
Last Name
Tams
Member #

4688

Ham/GMRS Callsign
KI7UFV
Boom!

-USB cables for phone and navs; wired/fused constant 12v!
-Midland 75-822 CB; wired/fused constant 12v!
-Boafeng UV-82HP Radio; wired/fused constant 12v!

Everything can charge and be accessible and usable with the vehicle off.

Nice creature comfort to check off the list!


Sent from my SM-G950U using Tapatalk
 

Vantams

Rank V
Launch Member

Off-Road Ranger I

1,509
Plain City, Utah
First Name
Kory
Last Name
Tams
Member #

4688

Ham/GMRS Callsign
KI7UFV
Nice build so far! Do you have any further plans for the cargo area such as a fridge or drawer system? I've got a 2000 XJ also.
I do actually! I'll begin work on that here in a month or so. I'll cover the entire cargo area with a 4 to 6 inch tall drawer system, possibly three drawers of equal width.

I want a slimmer setup because the pooch rides back there on adventures sometimes and I don't want him too constricted back there.

Itll hold mostly tools, fluids, recovery and air/tire gear.

Sent from my SM-G950U using Tapatalk
 

Vantams

Rank V
Launch Member

Off-Road Ranger I

1,509
Plain City, Utah
First Name
Kory
Last Name
Tams
Member #

4688

Ham/GMRS Callsign
KI7UFV
Nice build so far! Do you have any further plans for the cargo area such as a fridge or drawer system? I've got a 2000 XJ also.
Check out @jamdeeper on Instagram and see what he's done for his rear drawers! Solid stuff with placement for a stove!

Sent from my SM-G950U using Tapatalk
 

jordan04gx

Rank V
Launch Member

Enthusiast III

1,828
Chittenango, NY
First Name
Jordan
Last Name
Moore
Member #

9411

Ham/GMRS Callsign
KD2NFZ
I run a similar digital dashboard on my 96. Especially useful since I have the simplified dash with only fuel/speedometer gauges. Mine is using Torque Pro as the software and a permanently wired OBD2 adapter behind the dash. But yours looks way cooler....what is it?
 

Vantams

Rank V
Launch Member

Off-Road Ranger I

1,509
Plain City, Utah
First Name
Kory
Last Name
Tams
Member #

4688

Ham/GMRS Callsign
KI7UFV
I run a similar digital dashboard on my 96. Especially useful since I have the simplified dash with only fuel/speedometer gauges. Mine is using Torque Pro as the software and a permanently wired OBD2 adapter behind the dash. But yours looks way cooler....what is it?
I run a BAFX Bluetooth OBD2 scanner and an app called Dash Commander on my phone. You type in all your vehicle specs and VIN and it'll read out pretty much everything your computer tells it. It's been a handy little tool!
 
  • Like
Reactions: Sanman