Mitsubishi Outlander Sport light over land build

  • HTML tutorial

Pathfinder I

1,685
Bellingham
I thought I’d make a dedicated thread to the outlander sport build. I didn’t want to fill up the welcome area with updates!

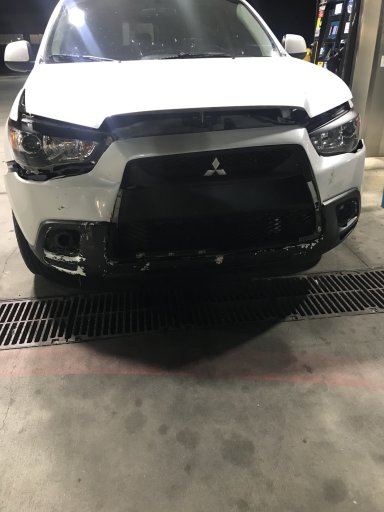
My wife and I have slowly been turning our 2012 Outlander Sport into a light over landing rig. It all happened in April on our way to Austin Texas when we hit a deer off the I-10. It destroyed the front bumper cover, radiator, condenser and bent the front frame ever so slightly, but we made it back home fine luckily... A few months prior I sold my 06 Xterra that was built up with 33’s, bumpers, lights, etc...and really missed having a trail worthy, rugged vehicle! So we said F it and skipped the insurance claim and began cutting and fabricating.

Stock back in 2013
IMG_6668.JPG
First was removing the messed up bumper and fixing the internals!
IMG_7056.JPG

Next up was to build a bumper to at least drive around and still get out on the trails.
IMG_7062.JPG

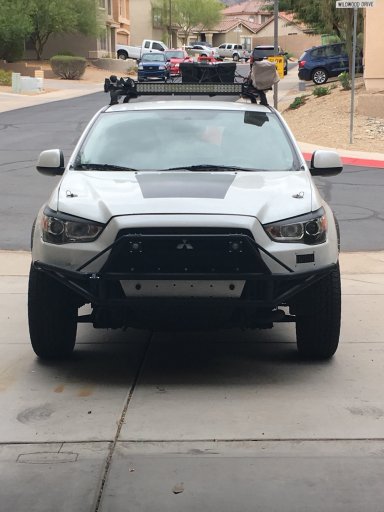
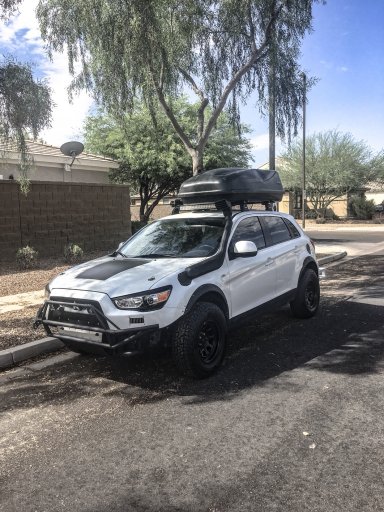
From there we decided to with a light bar, shovel mount and beefed up the bumper some more along with some vinyl work.
IMG_6557.JPG

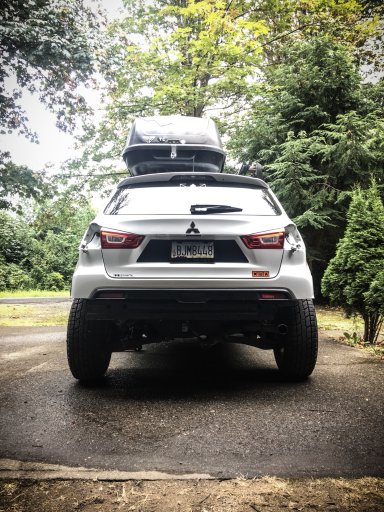
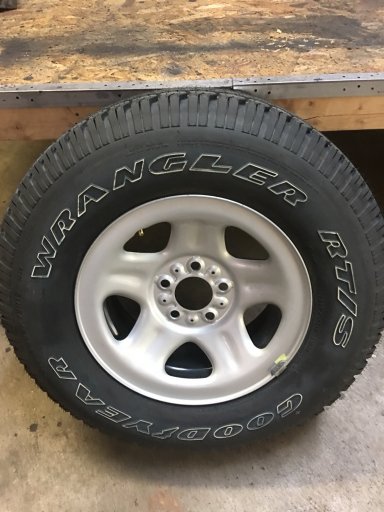
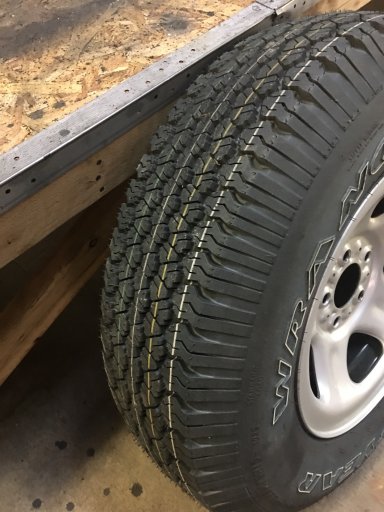
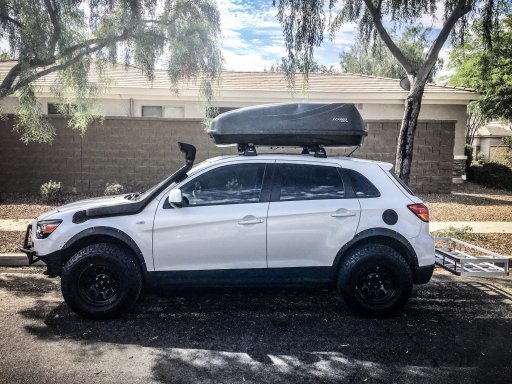
It was then time for new tires and scored a set of 15” American racing rims and 235/75-15’s. The 28.5” tires were needing more room so we decided to cut the fenders and go with some fender flares! That black patch is to cover a big crack from hitting the deer.
IMG_6641.jpg

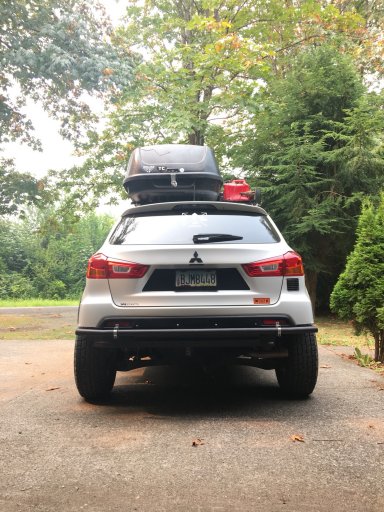
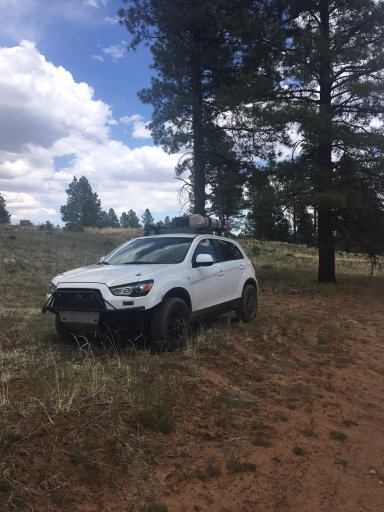
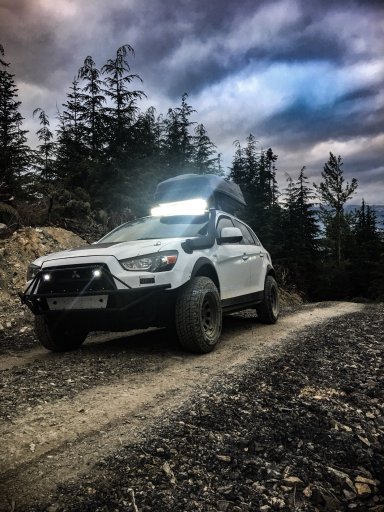
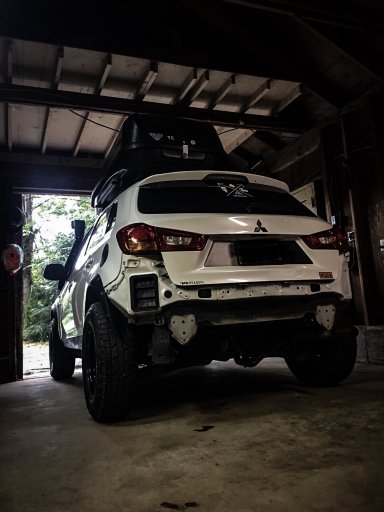
I have always had a obsession for snorkels and of course the outlander sport has NOTHING in terms of off-road parts or much for that matter. So decided to get a cheap-o Jeep snorkel and went to town [emoji1598] along with installing a roof top box for our move back to WA!
IMG_6753.jpg
IMG_6751.jpg

After getting to WA the mods slowed down a bit and did a lot of catching up on being outdoors and camping!
IMG_6814.jpg
IMG_6847.jpg

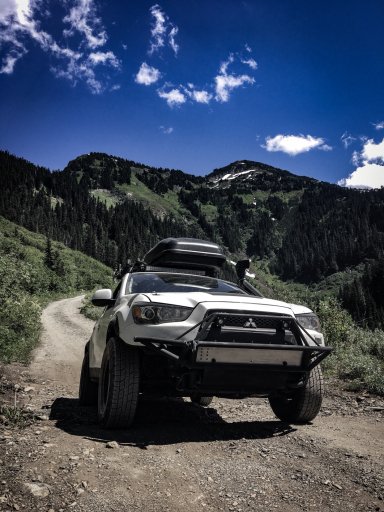
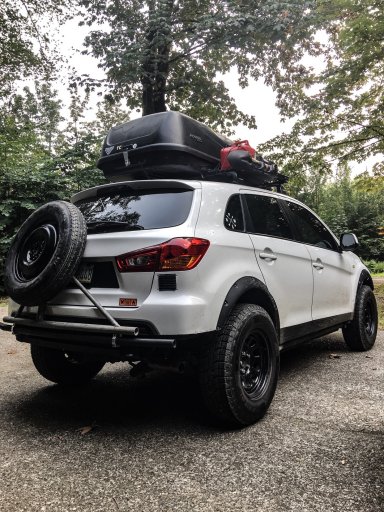
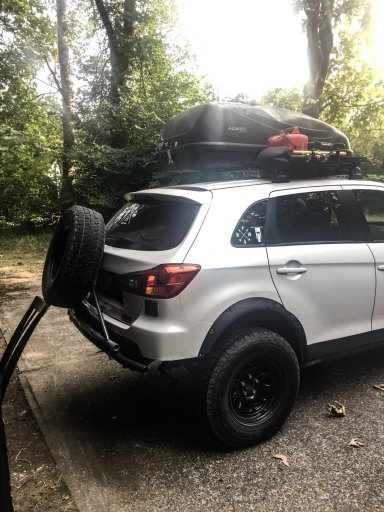
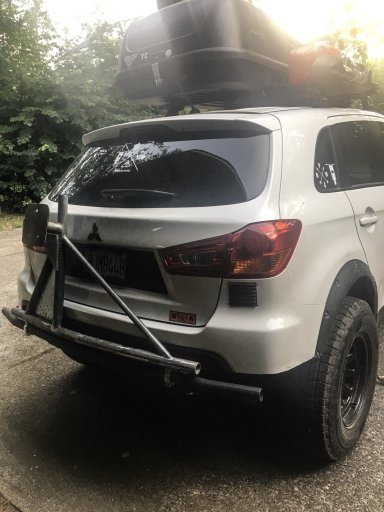
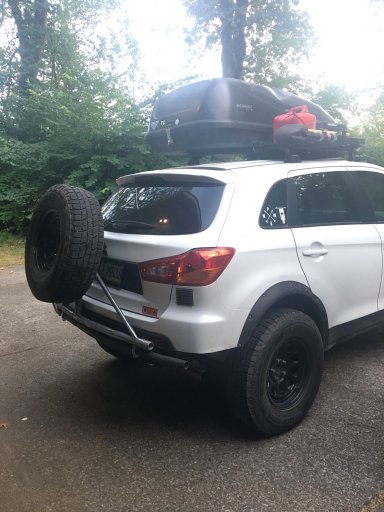
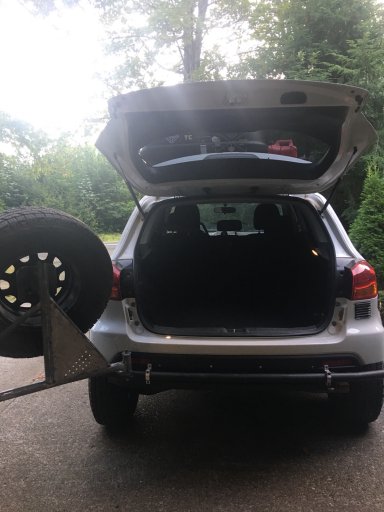
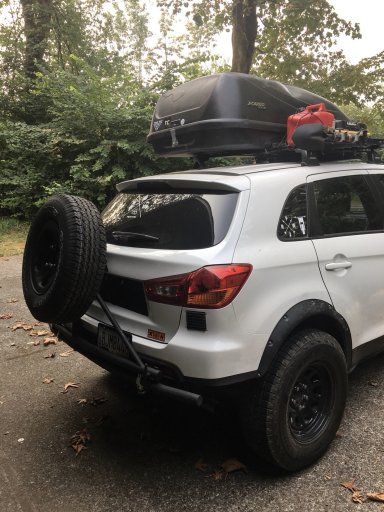
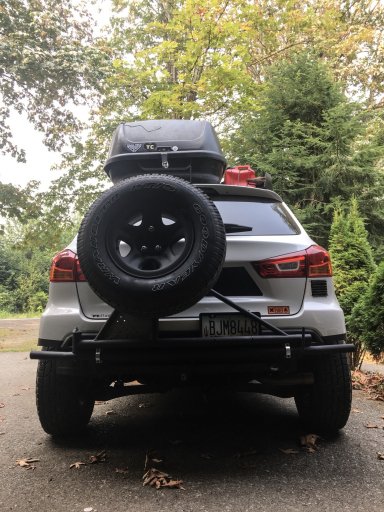
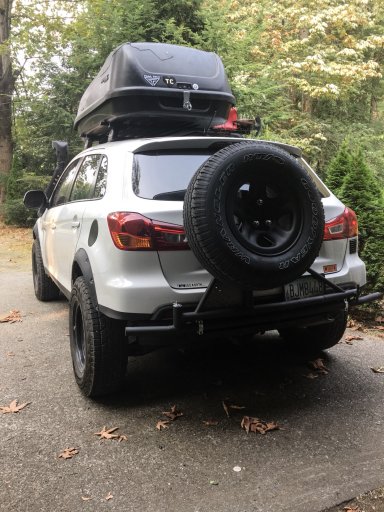
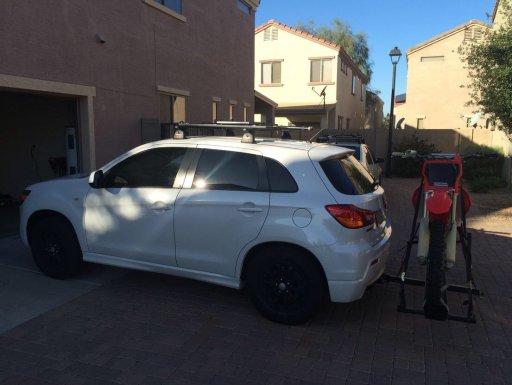
I’ve been after a tire carrier and wanted to hack some more $hit up so chopped the rear bumper and started a tire carrier!
 

Attachments

Pathfinder I

1,685
Bellingham
Carrying on!
Cut bumper cover
IMG_7005.jpg

Start of a rear tube bumper made from 1 3/4” tubing. I also re-did the exhaust and moved it to a side exit instead of a rear exit. I also need to still add a bunch more support pieces for the added weight.
IMG_7022.JPG

And finally where we are today. I still need to order a hinge and matching rim and tire. It will just be bed lined black. I will fab up a big T bolt style latch or get a kit from AtoZ fabrication.
IMG_7042.jpg


The only things left really on the list is to install a 2” lift. Along with some meatier M/T tires or a good All terrain. I want to also get more armor underneath and random small things! I wanted to show too that you don’t need the typical vehicle to explore off-road!
 
Last edited:

Joey83

Rank VI
Launch Member

Influencer II

4,788
Sandnes, Norway
First Name
Joachim
Last Name
Sandven
Member #

2505

Awesome!

I'm kinda in the same boat as my little crossover have no aftermarket/offroad support either.
 
Last edited:

Pathfinder I

1,685
Bellingham
Finally got a full size spare mocked up for welding of the holder arm.
IMG_7066.jpg

Also decided to make my own wheel plate. I have a ton of metal in the shop so cut one out instead of ordering a 50$ piece of metal with some holes in it and welded on a triangular gusset support.
IMG_7076.jpgIMG_7074.jpg

It’s still pretty rough at this point. Going to do another go over on some of the welds and clean up some points. Then I will remove the bumper itself and add a ton of bracing and support to that and get the hinge and latch setup!! Getting close [emoji14]
 

Pathfinder I

1,685
Bellingham
Nice rig, I do like that you fabricate your own accessories. Any plans for the cargo area?
Thanks man! Yeah I’d rather build my own things if I can. Not only to save some money but have something totally unique. Not sure yet what I’ll do with it. Prolly fill it with camping stuff and maybe some spare tools and recovery gear. Or leave it open to save some weight. Since I already had the metal and most things to build it. Total build cost was $50 [emoji6]
 
  • Like
Reactions: MrJonesOverland

Pathfinder I

1,685
Bellingham
Thanks mate!! So got an amazing score from a guy on offer up last night! He had a BRAND NEW Goodyear Wrangler on a spare Jeep wheel which is the same bolt pattern as my Mitsu and the exact same tire size.......for $20!!! Yes, $20.
IMG_7134.JPG
IMG_7135.JPG
I really didn’t want to spend 50-60 on a spare wheel and then another $100 plus on a spare that will just sit so jumped on that quick! Gave it a few coats of wheel paint and bolted it up! Unfortunately I can’t do a 5 wheel rotation with it as it doesn’t match but makes for an amazing spare tire. So, tire carrier complete!! Onto a lift, more lights and other random crap!
IMG_7143.jpg
IMG_7142.jpg
IMG_7141.jpg
 

Pathfinder I

1,685
Bellingham
I started reading this build thinking WTF? This guy is insane. And yet, this is totally awesome! Haha

Nice work!
Haha thanks! It is definitely turning into much more then I ever thought it would. When we initially bought this car never in my mind did I think it would end up like this. But it’s making for a unique little rig and we can’t wait to do more to it! This week a 1.5” lift will be put on giving us a bit more ground clearance and helping the look out [emoji1598]
 

JCWages

Rank V
Launch Member

Pathfinder I

2,271
Grass Valley, CA, USA
First Name
Justin
Last Name
Wages
Member #

18693

Haha thanks! It is definitely turning into much more then I ever thought it would. When we initially bought this car never in my mind did I think it would end up like this. But it’s making for a unique little rig and we can’t wait to do more to it! This week a 1.5” lift will be put on giving us a bit more ground clearance and helping the look out [emoji1598]
Some of the best projects start out this way. Can't wait to see the lift!
 
  • Like
Reactions: MrJonesOverland

JaxxaLuca

Rank 0

Traveler I

Aha! I was wondering what kinda car that was in your avatar, I thought it was a range rover or something, you sure fooled me!
I love the story behind this build and it's looking awesome so far, can't wait to see it with that lift!
Hopefully it'll get to you soon, USPS works in mysterious ways...
 

Pathfinder I

1,685
Bellingham
@JaxxaLuca, Thanks mate! I ordered mine off Amazon and it got to the US crazy fast but is now sitting in UPS customs. It has said “initiating customs clearance” for over a week now, all good though. Still waiting on the new struts to come in too! Glad to hear there’s Luther’s our there with the Tema4x4 lift. Did you get right around 40-45mm (1.5”)’s of lift?
 

JaxxaLuca

Rank 0

Traveler I

@JaxxaLuca, Thanks mate! I ordered mine off Amazon and it got to the US crazy fast but is now sitting in UPS customs. It has said “initiating customs clearance” for over a week now, all good though. Still waiting on the new struts to come in too! Glad to hear there’s Luther’s our there with the Tema4x4 lift. Did you get right around 40-45mm (1.5”)’s of lift?
Yeah I ordered through Ebay and it was the same deal, fast out of Russia, sloooow in the US.
Honestly, I have no idea what the effective lift was for me, but it looked about right (I bought 45mm for the back, and 35mm in the front)

I've had them on for 3 weeks so far, and I am decently surprised it rides exactly as well as it did before installation- and I haven't even taken it to an alignment shop yet, because it still drives perfectly straight! (I think I just got lucky)
My rear wheels might be a few tenths of a degree positive camber, so that will need to be dialed out eventually, but not worth taking it in atm.
I don't know anything about the Mitsubishi's geometry, but hopefully they'll fit perfect for you too. I look forward to your success story!
 
  • Like
Reactions: Overland_Mitsu

Pathfinder I

1,685
Bellingham
Haha nice man, yeah I’ll just have to be patient [emoji58]

That’s good to hear, I had a strut spacer lift on my Xterra for a bit and it felt awesome as well. The one for my outlander is 40mm front and rear. Thanks again for your insight!
 
  • Like
Reactions: JaxxaLuca